More actions
Created page with "__NOTOC__{{survival copy}} {{Missiondetails |Name=The Hard Way, Level 5 |Level= |Type=Encounter |Objective= |Faction=Amarr |Faction1=Amarr |DamageToDeal=EM/Therm |DamageToResi..." |
m Format to "Uniwiki:Mission formatting guidelines". Remove {{survival copy}}. |
||
| (9 intermediate revisions by 4 users not shown) | |||
| Line 1: | Line 1: | ||
<noinclude>{{MissionLinks}}{{NPCTableCSS}} <!-- This article is transcluded into Location Location (Amarr) --> | |||
Part 2 of 5 (Part 1 covered here: [[Location Location (Amarr)]])<br> | |||
</noinclude> | |||
{{Missiondetails | {{Missiondetails | ||
|Name= | |Name= | ||
|Level= | |Level= 5 | ||
|Type=Encounter | |Type= Encounter | ||
|Objective= | |Objective= | ||
|Faction1= Amarr Empire | |||
|Faction1=Amarr | |DamageToDeal1= | ||
| | |DamageToResist1= | ||
| | |WebPoint= All Frigates | ||
|WebPoint=All Frigates | |EWAR= Amarr Energy Neutralizer Sentry IIIs, NOS, Tracking Disrupter | ||
|EWAR= | |ShipSizeLimit= | ||
|ShipSizeLimit= | |ShipSuggestion= (1) Maelstrom w/ Passive Tank and (1) Maelstrom w/ Shield Transporters but recommend more DPS | ||
|ShipSuggestion=(1) Maelstrom w/ Passive Tank and (1) Maelstrom w/ Shield Transporters but recommend more DPS | |Rewards= | ||
|Rewards= | |Extra= Mission requires the player to be able to use a Codebreaker module for hacking | ||
|Extra= | |||
}} | }} | ||
Space type: Deadspace with Gate<br> | |||
Acceleration Gate into Deadspace | |||
=== Single Pocket === | |||
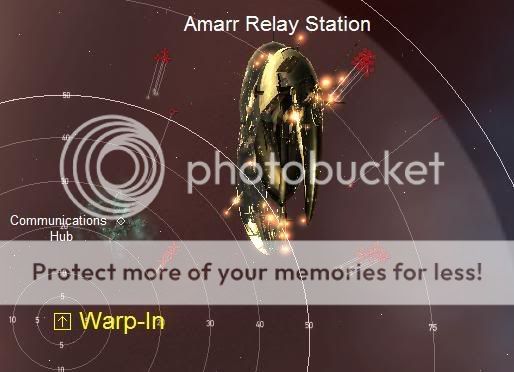
[https://i609.photobucket.com/albums/tt174/climb22033/HardWay5am-1.jpg image] | |||
{{NPCTableHead|Initial Group (25-80km)}} | |||
{{NPCTableRow|Frigate|3|Divine Imperial Napat|note= Orbits at 10km|point= scram|ewar= Web|ewar2= TD}} | |||
{{NPCTableRow|Battlecruiser|3|Imperial Templar Phalanx|note= Orbits at 22km}} | |||
{{NPCTableRow|Battleship|11|Imperial Templar Dominator/Martyr/Ultara*/Judgment**|note= Orbits of 17-49km|trigger= * Ultara triggers reinforcement 1, ** Judgement triggers reinforcement 2}} | |||
{{NPCTableRow|Sentry|4|Cruise Missile Batteries}} | |||
{{NPCTableRow|Sentry|1|Amarr Energy Neutralizers II|ewar= Neut}} | |||
{{NPCTableRow|Sentry|2|Amarr Energy Neutralizer Sentry IIIs|ewar= Neut}} | |||
|} | |||
{{NPCTableHead|Reinforcement 1}} | |||
{{NPCTableRow|Elite Cruiser|6|Divine Imperial Champion/Justicar|note= oOrbits at 14-32km}} | |||
|} | |||
{{NPCTableHead|Reinforcement 2}} | |||
{{NPCTableRow|Battleship|4|Imperial Templar Diviner|note= Orbits at 21km, NOS|ewar= TD|ewar2= Neut|trigger= Triggers reinforcement 3}} | |||
|} | |||
{{NPCTableHead|Reinforcement 3}} | |||
{{NPCTableRow|Battleship|6|Imperial Templar Martyr|note= Orbits at 49km}} | |||
|} | |||
On occasion, additional ships spawn after smaller ships destroyed | On occasion, additional ships spawn after smaller ships destroyed | ||
4 | {{NPCTableHead|Variation spawn}} | ||
5 | {{NPCTableRow|Frigate|4|Divine Imperial Bahir}} | ||
{{NPCTableRow|Destroyer|5|Imperial Templar Caius/Crusader}} | |||
{{NPCTableRow|Battlecruiser|7|Imperial Templar Seer/Justicar/Champion}} | |||
|} | |||
(150,000 | |||
6 | {{NPCTableHead|Amarr Relay Station spawns (150,000 HP)}} | ||
{{NPCTableSeparator|Shield reduced to 70%}} | |||
6 | {{NPCTableRow|Battlecruiser|6|Imperial Templar Phalanx|note= Orbits at 22km}} | ||
{{NPCTableSeparator|Armor reduced to 50%}} | |||
6 | {{NPCTableRow|Battleship|6|Imperial Dominator/Martyr|note= Orbits of 17-44km, NOS|ewar= Neut}} | ||
{{NPCTableSeparator|Structure reduced to 90%}} | |||
6 | {{NPCTableRow|Elite Cruiser|6|Divine Imperial Ambrose/Basil|note= Orbits at 7-19km, NOS|ewar= Neut}} | ||
{{NPCTableSeparator|Structure reduced to 10%}} | |||
{{NPCTableRow|Elite Frigate|6|Divine Imperial Napat|note= Orbits at 10km|point= scram|ewar= Web|ewar2= TD}} | |||
|} | |||
Hack the Communications Hub with a Codebreaker I module to retrieve the ''objective'' | Hack the Communications Hub with a Codebreaker I module to retrieve the ''objective'' | ||
'''Tips:''' | |||
'''Tips:''' | |||
* Use a Passive Tank or plan a capacitor that receives an additional 100 units/s<br> | |||
* Maximum damage dealing of initial group if it gets into range is 2790 hp/s (EM 56%, Therm 44%) | |||
[[Category: | <noinclude> | ||
Part 1 of 5 [[Location Location (Amarr)]] > * > Part 3 of 5 [[Prison Bust]] | |||
{{Missionrelated}} | |||
[[Category:Security missions]] | |||
</noinclude> | |||
Latest revision as of 21:18, 3 December 2022

|
| Missions |
|---|
| Mission Reports |
| Mission Guides |
| Special Missions |
| Helpful Links |
Part 2 of 5 (Part 1 covered here: Location Location (Amarr))
| Level | 5 |
| Type | Encounter |
| Faction | Amarr Empire |
| Best damage to deal | |
| Damage to resist | |
| Warp disruption | All Frigates |
| EWAR | Amarr Energy Neutralizer Sentry IIIs, NOS, Tracking Disrupter |
| Ship suggestion | (1) Maelstrom w/ Passive Tank and (1) Maelstrom w/ Shield Transporters but recommend more DPS |
| Extra | Mission requires the player to be able to use a Codebreaker module for hacking |
Space type: Deadspace with Gate
Acceleration Gate into Deadspace
Single Pocket
Initial Group (25-80km)
| WD | EWAR | L
| ||
|---|---|---|---|---|
| |
3 x Frigate Divine Imperial Napat |
|
|
|
| |
3 x Battlecruiser Imperial Templar Phalanx |
|||
| |
11 x Battleship Imperial Templar Dominator/Martyr/Ultara*/Judgment** |
|||
| |
4 x Sentry Cruise Missile Batteries | |||
| |
1 x Sentry Amarr Energy Neutralizers II | |
||
| |
2 x Sentry Amarr Energy Neutralizer Sentry IIIs | |
||
Reinforcement 1
| WD | EWAR | L
| ||
|---|---|---|---|---|
| |
6 x Elite Cruiser Divine Imperial Champion/Justicar |
|||
Reinforcement 2
| WD | EWAR | L
| ||
|---|---|---|---|---|
| |
4 x Battleship Imperial Templar Diviner |
|
||
Reinforcement 3
| WD | EWAR | L
| ||
|---|---|---|---|---|
| |
6 x Battleship Imperial Templar Martyr |
|||
On occasion, additional ships spawn after smaller ships destroyed
Variation spawn
| WD | EWAR | L
| ||
|---|---|---|---|---|
| |
4 x Frigate Divine Imperial Bahir | |||
| |
5 x Destroyer Imperial Templar Caius/Crusader | |||
| |
7 x Battlecruiser Imperial Templar Seer/Justicar/Champion | |||
Amarr Relay Station spawns (150,000 HP)
| WD | EWAR | L | ||
|---|---|---|---|---|
| Shield reduced to 70% | ||||
| |
6 x Battlecruiser Imperial Templar Phalanx |
|||
| Armor reduced to 50% | ||||
| |
6 x Battleship Imperial Dominator/Martyr |
|
||
| Structure reduced to 90% | ||||
| |
6 x Elite Cruiser Divine Imperial Ambrose/Basil |
|
||
| Structure reduced to 10% | ||||
| |
6 x Elite Frigate Divine Imperial Napat |
|
|
|
Hack the Communications Hub with a Codebreaker I module to retrieve the objective
Tips:
- Use a Passive Tank or plan a capacitor that receives an additional 100 units/s
- Maximum damage dealing of initial group if it gets into range is 2790 hp/s (EM 56%, Therm 44%)
Part 1 of 5 Location Location (Amarr) > * > Part 3 of 5 Prison Bust
| ||||||||||||||