Difference between revisions of "Limited Sleeper Cache"
(→Ship Fittings: remove auto-repeat for analyzers, my t2 analyzers do not have auto-repeat any more) |
|||
| (39 intermediate revisions by 13 users not shown) | |||
| Line 1: | Line 1: | ||
| − | {{ | + | {{main|Sleeper Cache}} |
| − | The '''Limited Sleeper Cache''' is the easiest of the Sleeper Cache | + | {{NPCTableCSS}}The '''Limited Sleeper Cache''' is the easiest of the Sleeper Cache sites. Sleeper Caches are significantly more difficult than normal data or relic sites, and pilots will be risking their ship when trying any of them. However, once familiar with these sites, pilots should be able to run the site without taking any losses. Like all Sleeper Cache sites, the Limited Sleeper Cache requires the use of both Data and Relic Analyzers. Entry is restricted to frigates: exploration frigates are highly recommended in order to make use of their hacking bonuses. |
| − | Limited Sleeper Caches are [[Cosmic Signatures]] that must be located using core scanner probes. They are more difficult to scan down than normal signatures, and require well-developed scanning skills to pinpoint completely. | + | Limited Sleeper Caches are [[Cosmic Signatures]] that must be located using core scanner probes. They are more difficult to scan down than normal signatures, and require well-developed scanning skills to pinpoint completely. It appears the minimum to scan down a Limited Sleeper Cache is 85.8 probe strength (Level IV). |
| − | + | Newcomers to Sleeper Caches should read this vital [[3P38 Sleeper Nexus#Sleeper Caches: A Preamble|preamble]] before continuing further. | |
| − | |||
| − | |||
| − | |||
| − | |||
| − | |||
| − | |||
| − | |||
| − | |||
| − | |||
| − | |||
| − | |||
| − | |||
| − | |||
| − | |||
| − | |||
| − | |||
| − | |||
| − | |||
| − | | | ||
| − | |||
| − | |||
| − | |||
| − | |||
| − | |||
| − | |||
| − | |||
| − | |||
| − | |||
| − | |||
| − | |||
| − | |||
| − | |||
| − | |||
| − | |||
| − | |||
| − | + | {{tocright}} | |
== Quick Guide == | == Quick Guide == | ||
The '''Limited Sleeper Cache''' is the first taste of Sleeper Caches most pilots will encounter. This site poses some risks, but it is not as dangerous as other Sleeper Caches. Although the Limited Cache doesn't usually pay as well as the more difficult sites, it can still be worth running. | The '''Limited Sleeper Cache''' is the first taste of Sleeper Caches most pilots will encounter. This site poses some risks, but it is not as dangerous as other Sleeper Caches. Although the Limited Cache doesn't usually pay as well as the more difficult sites, it can still be worth running. | ||
| − | If the initial Hyperfluct Generator container has been hacked, and the accompanying Spatial Rift has spawned, another pilot has probably already entered the site. Check [https://zkillboard.com/ zKillboard] or another appropriate service for any recent losses. | + | If the initial Hyperfluct Generator container has been hacked, and the accompanying Spatial Rift has spawned, another pilot has probably already entered the site. Check [https://zkillboard.com/ zKillboard] or another appropriate service for any recent losses. Area of Effect damage clouds can be activated: use caution. |
# Hack the entry can. Enter the site. | # Hack the entry can. Enter the site. | ||
| Line 62: | Line 27: | ||
|} | |} | ||
| − | Generally, all these fits have a | + | Generally, all these fits have a [[Mobile_structures|mobile depot]], spare probes, three drones in the drone bay, a hull repairer (armor fits), an armor repairer and a hull repairer (shield fits), and all the kit necessary to handle the encounter in the cargohold. Refitting inside the site, occasionally more than once, is normal and expected. |
If available, logistics ships (a single self-sufficient capacitor-stable Tech I logistics frigate is sufficient) can provide remote repairs to get around the requirements of local repair modules. Even with remote repairs, pilots should maintain a local buffer and resistance module(s) as normal. | If available, logistics ships (a single self-sufficient capacitor-stable Tech I logistics frigate is sufficient) can provide remote repairs to get around the requirements of local repair modules. Even with remote repairs, pilots should maintain a local buffer and resistance module(s) as normal. | ||
| − | An [[Astero]] can be fit identically to the Magnate, though the normal rig configuration (Gravity Capacitor/ | + | An [[Astero]] can be fit identically to the Magnate, though the normal rig configuration (Gravity Capacitor/Explosive Armor Reinforcer/Auxiliary Nano Armor Reinforcer) is good enough because the hull has a bonus to armour resistances. |
| − | Use a Mobile Depot to swap the Relic Analyzer II in place of the cargo scanner once all undesired containers have been identified. These fits are '''not''' sufficient to wander into the Area of Effect (AoE) damage cloud near the wreck alone. Both of these fits can survive a detonation of the Remote Defense Grid Unit or a run-in with a Unstable Plasma Chamber, as long as the pilot does not remain inside the AoE cloud for too long. If you have a buddy with a [[Category:Logistics Frigates|Logistics Frigate]], then the following two fits are appropriate to use for the entire site. | + | Use a Mobile Depot to swap the Relic Analyzer II in place of the cargo scanner once all undesired containers have been identified. These fits are '''not''' sufficient to wander into the Area of Effect (AoE) damage cloud near the wreck alone. Both of these fits can survive a detonation of the Remote Defense Grid Unit or a run-in with a Unstable Plasma Chamber, as long as the pilot does not remain inside the AoE cloud for too long. If you have a buddy with a [[:Category:Logistics Frigates|Logistics Frigate]], then the following two fits are appropriate to use for the entire site. |
| + | |||
| + | It is also possible to complete a limited sleeper cache without any tank at all. This requires good manual piloting skills as wandering into gas cloud or too close to a pressure chamber means instant death. An untanked ship will also die instantly if the defence forcefield generator data hacking is failed and the explosion is triggered. | ||
{{ShipFitting | {{ShipFitting | ||
| Line 87: | Line 54: | ||
| mid4name=5MN Quad LiF Restrained Microwarpdrive | | mid4name=5MN Quad LiF Restrained Microwarpdrive | ||
| mid4typeID=35658 | | mid4typeID=35658 | ||
| − | | mid5name= | + | | mid5name=Compact Multispectrum Shield Hardener |
| mid5typeID=9632 | | mid5typeID=9632 | ||
| − | | rig1name=Small | + | | rig1name=Small EM Shield Reinforcer I |
| rig1typeID=31716 | | rig1typeID=31716 | ||
| − | | rig2name=Small | + | | rig2name=Small Thermal Shield Reinforcer I |
| rig2typeID=31752 | | rig2typeID=31752 | ||
| rig3name=Small Gravity Capacitor Upgrade I | | rig3name=Small Gravity Capacitor Upgrade I | ||
| Line 115: | Line 82: | ||
| warsop=A | | warsop=A | ||
| warsopReason= | | warsopReason= | ||
| − | | version= | + | | version=YC126 1.0 |
| showTOC=Y | | showTOC=Y | ||
| shipDNA=605:11563;1:2048;1:30834;1:8433;1:6131;1:35658;1:9632;1:31716;1:31752;1:31213;1:: | | shipDNA=605:11563;1:2048;1:30834;1:8433;1:6131;1:35658;1:9632;1:31716;1:31752;1:31213;1:: | ||
| Line 128: | Line 95: | ||
| low2name=Damage Control II | | low2name=Damage Control II | ||
| low2typeID=2048 | | low2typeID=2048 | ||
| − | | low3name=Energized | + | | low3name=Multispectrum Energized Membrane II |
| low3typeID=11269 | | low3typeID=11269 | ||
| low4name=Micro Auxiliary Power Core I | | low4name=Micro Auxiliary Power Core I | ||
| Line 140: | Line 107: | ||
| rig1name=Small Gravity Capacitor Upgrade I | | rig1name=Small Gravity Capacitor Upgrade I | ||
| rig1typeID=31213 | | rig1typeID=31213 | ||
| − | | rig2name=Small | + | | rig2name=Small Explosive Armor Reinforcer I |
| rig2typeID=31009 | | rig2typeID=31009 | ||
| rig3name=Small Auxiliary Nano Pump I | | rig3name=Small Auxiliary Nano Pump I | ||
| Line 164: | Line 131: | ||
| warsop=A | | warsop=A | ||
| warsopReason= | | warsopReason= | ||
| − | | version= | + | | version=YC126 1.0 |
| showTOC=Y | | showTOC=Y | ||
| shipDNA=29248:11311;1:2048;1:11269;1:11563;1:6003;1:30834;1:6131;1:31213;1:31009;1:31045;1:: | | shipDNA=29248:11311;1:2048;1:11269;1:11563;1:6003;1:30834;1:6131;1:31213;1:31009;1:31045;1:: | ||
| fleetup= | | fleetup= | ||
}} | }} | ||
| + | |||
| + | For pilots with {{sk|Capacitor Management|V|icon=yes}} and {{sk|Capacitor Systems Operation|V|icon=yes}} (and {{sk|Shield Compensation|IV|icon=yes}} for the Heron), try these fits to skip hacking the Remote Pressure Control Unit entirely, and head directly into the storage depot inside the wreck field. | ||
| + | |||
{| style="background:#350000; border:1px solid #333333; padding:0px;" | {| style="background:#350000; border:1px solid #333333; padding:0px;" | ||
| style="padding:0px;" | [[image:Icon_warning.png|56px|link=]] | | style="padding:0px;" | [[image:Icon_warning.png|56px|link=]] | ||
| − | | style="padding:8px;" | ''A ship must be able to sustain at least 60 Effective Hit Points per second (EHP/sec) for it to survive inside this damage cloud. Capacitor stability is ideal: if the capacitor lasts less than 4 minutes, these fits should not be used | + | | style="padding:8px;" | ''A ship must be able to sustain at least 60 Effective Hit Points per second (EHP/sec) for it to survive inside this damage cloud. Capacitor stability is ideal: if the capacitor lasts less than 4 minutes, these fits should not be used.'' |
| − | |||
| − | |||
|} | |} | ||
| − | |||
| − | |||
| − | |||
{{ShipFitting | {{ShipFitting | ||
| ship=Heron | | ship=Heron | ||
| shipTypeID=605 | | shipTypeID=605 | ||
| − | | fitName=Heron - Limited Sleeper Wreck | + | | fitName=Heron - SC Limited Sleeper Wreck |
| − | | fitID=Heron---Limited-Sleeper-Wreck | + | | fitID=Heron---SC-Limited-Sleeper-Wreck |
| low1name=Damage Control II | | low1name=Damage Control II | ||
| low1typeID=2048 | | low1typeID=2048 | ||
| Line 196: | Line 161: | ||
| mid4name=Small Shield Booster II | | mid4name=Small Shield Booster II | ||
| mid4typeID=400 | | mid4typeID=400 | ||
| − | | mid5name= | + | | mid5name=Stalwart Restrained Shield Boost Amplifier |
| − | | mid5typeID= | + | | mid5typeID=16531 |
| − | | rig1name=Small Capacitor | + | | rig1name=Small Gravity Capacitor Upgrade I |
| − | | rig1typeID= | + | | rig1typeID=31213 |
| − | | rig2name=Small | + | | rig2name=Small Thermal Shield Reinforcer I |
| rig2typeID=31752 | | rig2typeID=31752 | ||
| − | | rig3name=Small | + | | rig3name=Small EM Shield Reinforcer I |
| rig3typeID=31716 | | rig3typeID=31716 | ||
| high1name=open | | high1name=open | ||
| Line 219: | Line 184: | ||
| skills= | | skills= | ||
| showSKILLS=N | | showSKILLS=N | ||
| − | | notes= | + | | notes=Designed to work with low skills.</li><li>Alpha Clones will have to run a Medium F-S9 Compact Shield Extender instead for Power Grid reasons. </li><li>Works with maximum Alpha Clone capacitor skills.</li><li>Always double check capacitor stability with your skills in a fitting tool against this fit before using it. |
| showNOTES=N | | showNOTES=N | ||
| − | | difficulty= | + | | difficulty=0 |
| warsop=A | | warsop=A | ||
| warsopReason= | | warsopReason= | ||
| − | | version= | + | | version=YC126 1.0 |
| showTOC=Y | | showTOC=Y | ||
| − | | shipDNA=605:2048;1:8135;1:30832;1:8433;1:4435;1:400;1: | + | | shipDNA=605:2048;1:8135;1:30832;1:8433;1:4435;1:400;1:16531;1:31213;1:31752;1:31716;1:: |
| fleetup= | | fleetup= | ||
| + | | alphacanuse=N | ||
}}{{ShipFitting | }}{{ShipFitting | ||
| ship=Magnate | | ship=Magnate | ||
| Line 239: | Line 205: | ||
| low3name=200mm Crystalline Carbonide Restrained Plates | | low3name=200mm Crystalline Carbonide Restrained Plates | ||
| low3typeID=11351 | | low3typeID=11351 | ||
| − | | low4name=Energized | + | | low4name=Multispectrum Energized Membrane II |
| low4typeID=11269 | | low4typeID=11269 | ||
| mid1name=1MN Monopropellant Enduring Afterburner | | mid1name=1MN Monopropellant Enduring Afterburner | ||
| Line 251: | Line 217: | ||
| rig2name=Small Auxiliary Nano Pump I | | rig2name=Small Auxiliary Nano Pump I | ||
| rig2typeID=31045 | | rig2typeID=31045 | ||
| − | | rig3name=Small | + | | rig3name=Small Explosive Armor Reinforcer I |
| rig3typeID=31009 | | rig3typeID=31009 | ||
| high1name=open | | high1name=open | ||
| Line 273: | Line 239: | ||
| warsop=A | | warsop=A | ||
| warsopReason= | | warsopReason= | ||
| − | | version= | + | | version=YC126 1.0 |
| showTOC=Y | | showTOC=Y | ||
| shipDNA=29248:1183;1:2048;1:11351;1:11269;1:6003;1:30832;1:4435;1:31045;2:31009;1:: | | shipDNA=29248:1183;1:2048;1:11351;1:11269;1:6003;1:30832;1:4435;1:31045;2:31009;1:: | ||
| Line 279: | Line 245: | ||
}} | }} | ||
| − | [[File:3P38 Limited 7.png|200px|thumb|right|Heron tanking well]]The buffer module is included to more safely tank the slight damage variations from one damage tick to the next, | + | [[File:3P38 Limited 7.png|200px|thumb|right|Heron tanking well]]The buffer module is included to more safely tank the slight damage variations from one damage tick to the next, this property is much more noticeable with armor (see the Polarized logs at the bottom of the page). For pilots who having a hard time with the hack inside the wreck field, the buffer of the shield Heron usually allows it to stabilize around 50% shield capacity. For armor, the buffer allows the pilot some more room for error if needed, particularly if overheating is necessary. |
'''Additional notes for the Magnate:''' | '''Additional notes for the Magnate:''' | ||
| Line 303: | Line 269: | ||
== Walkthrough == | == Walkthrough == | ||
| + | |||
| + | The site consists of a warpin area and one [[deadspace]] pocket. | ||
| + | |||
===Entrance=== | ===Entrance=== | ||
{{MessageBox|On warp in: | {{MessageBox|On warp in: | ||
|This area has been hidden from prying eyes for years. Now the structure responsible for cloaking the site is damaged, finally allowing for a way in. A quick survey indicates this is a storage site, possibly used to store items collected by Sleepers from all over known space. What defenses or dangers lurk inside are uncertain, but the use of both a Data Analyzer and Relic Analyzer are required. The entry gate only allows frigate-sized ships through.}} | |This area has been hidden from prying eyes for years. Now the structure responsible for cloaking the site is damaged, finally allowing for a way in. A quick survey indicates this is a storage site, possibly used to store items collected by Sleepers from all over known space. What defenses or dangers lurk inside are uncertain, but the use of both a Data Analyzer and Relic Analyzer are required. The entry gate only allows frigate-sized ships through.}} | ||
| − | Upon warping to the signature, pilots will land in the entry room. A Hyperfluct Generator will be present. If it has been hacked and a rift is activated, then another pilot has already entered the site. | + | Upon warping to the signature, pilots will land in the entry room. A Hyperfluct Generator will be present. If it has been hacked and a rift is activated, then another pilot has already entered the site. Stealth Bombers cannot take the Spatial Rift and are thus restricted from entry. |
Hack the Hyperfluct Generator.<br /> | Hack the Hyperfluct Generator.<br /> | ||
| Line 318: | Line 287: | ||
===Ransacked Storage Site=== | ===Ransacked Storage Site=== | ||
| + | |||
{{MessageBox|On activating the Strange Rift: | {{MessageBox|On activating the Strange Rift: | ||
|This is a storage site by the looks of it, possibly of Sleeper origin judging by the structures around. It is heavily damaged, as if someone - or something - was frantically and forcefully searching through the site, and quite recently at that. Dangerous gases and volatile materials are all around, so care is required in navigating this hazardous place.}} | |This is a storage site by the looks of it, possibly of Sleeper origin judging by the structures around. It is heavily damaged, as if someone - or something - was frantically and forcefully searching through the site, and quite recently at that. Dangerous gases and volatile materials are all around, so care is required in navigating this hazardous place.}} | ||
| − | If desired, pilots can cargo scan the containers to evaluate the value of the site. Regardless of the its relative value, inexperienced pilots should run the site to gain further experience. | + | The acceleration Spatial Rift takes you to the main pocket. If desired, pilots can cargo scan the containers to evaluate the value of the site. Regardless of the its relative value, inexperienced pilots should run the site to gain further experience. |
| − | + | The main pocket contains: | |
| + | * 6 Depots. These are containers that require relic analyzer and hacking. They contain all the valuables from the site. | ||
| + | ** The depot furthest to left is booby trapped with a force field generator which inhibits access to it. | ||
| + | ** The depot by the wreck is inside a hazardous cloud. | ||
| + | * Remote Pressure Control Unit. Requires data analyzer, temporarily removes hazardous cloud from the wreck. | ||
| + | * Remote Defense Grid Unit (RDGU). Requires data analyzer, removes booby trap from the booby trapped depot. | ||
| + | * Two gas clouds (cyan colored). These deal damage when passed through. | ||
| + | * Two Unstable Plasma Chambers. These act as proximity mines that can explode and deal damage. | ||
| − | + | {{NPCTableHead|Site containers}} | |
| + | {{NPCTableRow|Hackable|4|Mangled Storage Depot|note=Medium difficulty|cargo=Sleeper materials}} | ||
| + | {{NPCTableRow|Hackable|2|Dented Storage Depot|note=Hard difficulty. Positioned in hazardous spots(see above)|cargo=Usually higher-value loot}} | ||
| + | {{NPCTableRow|Hackable|1|Remote Pressure Control Unit|note=Hard difficulty. Failing hack will deal damage}} | ||
| + | {{NPCTableRow|Hackable|1|Remote Defense Grid Unit|note=Hard difficulty. Failing hack deals more damage; may trigger Forcefield}} | ||
| + | |} | ||
| + | {{NPCTableHead|Hazardous objects}} | ||
| + | {{NPCTableRow|Structure|2|Unstable Plasma Chamber(named Plasma Chamber)|trigger=Proximity of ~8 km causes them to explode, deal damage, and create more hazardous clouds.}} | ||
| + | {{NPCTableRow|Structure|1|Large EM Forcefield|trigger=May trigger if Remote Defense Grid Unit hack fails, or if depot nearby is approached.}} | ||
| + | {{NPCTableRow|Gas Cloud|3|Pressure Cloud|note=Deals damage to ships inside it}} | ||
| + | |} | ||
| + | Your objective is to hack the depots and grab the valuables while avoiding death. Four of the depots can be hacked without extra steps but two of them require extra care. You must also fly around carefully to avoid the clouds and plasma chambers unless your ship is able to tank their damage. | ||
| + | |||
| + | If you wish to use mobile depot drop it upon entry to begin its activation timer. | ||
| Line 331: | Line 321: | ||
| style="padding:0px;" | | | style="padding:0px;" | | ||
| style="padding:8px;" | ''The can difficulty does vary slightly each time, because of the way that the random hacking minigame is generated. For comparison: high-sec rookie practice cans (in the Rookie Systems) are 1/10. Regular high sec cans are 3 or 4/10. Low-sec, null-sec, and wormhole space cans are 5 to 8/10, depending on the value of the can, in most cases. Sleeper Cache cans will generally be 6 to 7/10 in difficulty.'' | | style="padding:8px;" | ''The can difficulty does vary slightly each time, because of the way that the random hacking minigame is generated. For comparison: high-sec rookie practice cans (in the Rookie Systems) are 1/10. Regular high sec cans are 3 or 4/10. Low-sec, null-sec, and wormhole space cans are 5 to 8/10, depending on the value of the can, in most cases. Sleeper Cache cans will generally be 6 to 7/10 in difficulty.'' | ||
| − | |} | + | |} |
| + | |||
| + | |||
| + | The first target is the container inside the wreck field. This depot is surrounded by hazardous cloud that deals AOE damage to all ships near it. There are two approaches to dealing with it: | ||
====Method 1: Remote Pressure Control Unit==== | ====Method 1: Remote Pressure Control Unit==== | ||
[[File:3P38 Limited 28.png|200px|thumb|right|Some hacks are not meant to be]] | [[File:3P38 Limited 28.png|200px|thumb|right|Some hacks are not meant to be]] | ||
| + | |||
| + | The hazardous gas cloud surrounding the depot can be removed for a short time by hacking the Remote Pressure Control Unit. The gas cloud will respawn on invisible countdown with periodic updates in local. If done properly this method completely avoids taking damage. | ||
| + | |||
| + | The Area of Effect damage cloud near the wreck does roughly 100 DPS to a standard unmodified resistance profile of a Tech I vessel. Its approximate dimensions, measured from the Storage Depot within, is about 12km in radius. | ||
| + | |||
| + | There is enough time for 2 "standard paced" hacks, 1 "slow" hack, or 3 really fast hack attempts, depending on both the skill of the hacker and luck. Normally, this container is a red hack, which means all the usual Virus Suppressors and Restoration Nodes. The problem with this approach is both the limited timeframe and the incoming damage after the timer is up, especially if the ship is insufficiently tanked. | ||
:1. Refit for the primary site fit shown up above. On a Magnate, a MWD will fit if the plate is downgraded to a 200mm variant. | :1. Refit for the primary site fit shown up above. On a Magnate, a MWD will fit if the plate is downgraded to a 200mm variant. | ||
| Line 342: | Line 341: | ||
:::'''CAN DIFFICULTY: 7/10 DATA <span style="color:red">[RED HACK]</span>'''<br /> | :::'''CAN DIFFICULTY: 7/10 DATA <span style="color:red">[RED HACK]</span>'''<br /> | ||
:::<span style="color:green">SUCCESS:</span> The area of effect damage cloud surrounding the wreck is turned off for two to three minutes.<br /> | :::<span style="color:green">SUCCESS:</span> The area of effect damage cloud surrounding the wreck is turned off for two to three minutes.<br /> | ||
| − | :::<span style="color:red">FAILURE:</span> No specific site penalty, a small amount of damage is absorbed by your ship -- in the test case, 96 damage against a Heron with a MSE, Limited | + | :::<span style="color:red">FAILURE:</span> No specific site penalty, a small amount of damage is absorbed by your ship -- in the test case, 96 damage against a Heron with a MSE, Limited Multispectrum Shield Hardener and Anti-EM/Anti-Thermal rigs. It's not severe enough to warrant any particular concern. |
:3. Immediately apply Keep at Range (2250m) on the Storage Depot inside the wreck cloud, then turn on the Microwarpdrive. Turn it off when you get close enough to it. Lock on if not done so already, and immediately begin hacking it with the Relic Analyzer. | :3. Immediately apply Keep at Range (2250m) on the Storage Depot inside the wreck cloud, then turn on the Microwarpdrive. Turn it off when you get close enough to it. Lock on if not done so already, and immediately begin hacking it with the Relic Analyzer. | ||
:4. <span style="color:red">Watch messages in local:</span> if not successful by the 30 second mark, just align back to the Remote Pressure Control Unit (or straight up/straight down) and burn the Microwarpdrive. Otherwise, loot it and burn out with the Microwarpdrive to a safe direction away, probably best towards the Mobile Depot, which should be near the site warpin beacon. | :4. <span style="color:red">Watch messages in local:</span> if not successful by the 30 second mark, just align back to the Remote Pressure Control Unit (or straight up/straight down) and burn the Microwarpdrive. Otherwise, loot it and burn out with the Microwarpdrive to a safe direction away, probably best towards the Mobile Depot, which should be near the site warpin beacon. | ||
| − | |||
| − | |||
| − | |||
| − | |||
====Method 2: Tanking the Damage Cloud==== | ====Method 2: Tanking the Damage Cloud==== | ||
| Line 363: | Line 358: | ||
# Approach the Storage Depot inside the wreck field. For shield tank, activate it when you are 15km from the container; for armor, activate it as soon as all the shields are gone. | # Approach the Storage Depot inside the wreck field. For shield tank, activate it when you are 15km from the container; for armor, activate it as soon as all the shields are gone. | ||
# Hack the Storage Depot, loot it and go back to the Mobile Depot. | # Hack the Storage Depot, loot it and go back to the Mobile Depot. | ||
| + | # Refit back to the main site running fit. | ||
| − | ===Plasma Chambers=== | + | ===Unstable Plasma Chambers=== |
| − | + | The Unstable Plasma Chambers function a bit like proximity mines. | |
The slower a ship moves, the closer it can pass the Plasma Chambers without causing them to detonate. Thus, indiscriminate use of a Microwarpdrive during this section can be very dangerous. While the activation distance does vary, it is usually between 7-10km, depending on how fast you're going. While blitzing around the top or underside of the site is fine, well away from the hazards, moving slowly (~200 m/sec) while navigating the damage clouds is highly advised. The tactical overlay is very useful for monitoring range while moving. | The slower a ship moves, the closer it can pass the Plasma Chambers without causing them to detonate. Thus, indiscriminate use of a Microwarpdrive during this section can be very dangerous. While the activation distance does vary, it is usually between 7-10km, depending on how fast you're going. While blitzing around the top or underside of the site is fine, well away from the hazards, moving slowly (~200 m/sec) while navigating the damage clouds is highly advised. The tactical overlay is very useful for monitoring range while moving. | ||
| Line 373: | Line 369: | ||
More information about the plasma chambers: | More information about the plasma chambers: | ||
| − | * Moving slowly, such as 100m/sec, pilots are able to approach very closely, | + | * Moving slowly, such as 100m/sec, pilots are able to approach very closely, nearly touching them. |
* Higher speeds, such as 330m/s, the chambers can rupture from a distance of about 7km. | * Higher speeds, such as 330m/s, the chambers can rupture from a distance of about 7km. | ||
* Slow-boating out with a propulsion module, assuming decent 60%-ish resistances, means the ship will sustain about 1200 damage. | * Slow-boating out with a propulsion module, assuming decent 60%-ish resistances, means the ship will sustain about 1200 damage. | ||
| Line 379: | Line 375: | ||
* Flying right through the cloud with a MWD on means the player will only sustain about 350 HP damage (after resists). | * Flying right through the cloud with a MWD on means the player will only sustain about 350 HP damage (after resists). | ||
| − | These figures are a generalization to illustrate of the damage potential of the Plasma Chambers. A fit that can repair indefinitely, such as the ones | + | These figures are a generalization to illustrate of the damage potential of the Plasma Chambers. A fit that can repair indefinitely, such as the ones used for tanking the damage cloud in the ship wreck, won't have trouble inside the AoE clouds. |
===Forcefield Generator=== | ===Forcefield Generator=== | ||
| − | + | Zoom out for a better view of the site, and look for an easy route to access the Remote Defense Grid Unit. On the way, there are AoE damage clouds (similar DPS to the wreck field) and Unstable Plasma Chambers. Note its location. | |
| − | There are | + | To the far left of the site, there is one Storage Depot with an Active Forcefield Generator next to it. When a ship approaches within 10km of the Storage Depot, the Generator will spawn an EM Forcefield, which has a radius of about 14km and, which acts like a large bubble obstacle, preventing any ship from approaching the depot. The other Storage Depots around the site do not have this feature and can be hacked with the Relic Analyzer at any time without any specific concerns aside from AoE damage clouds and Plasma Chambers. For this reason, if the lone Storage Depot to the far left lacks valuable loot, it may be more convenient to simply skip hacking the Remote Defense Grid Unit, and instead just hack the other worthy containers. |
| + | |||
| + | There are three approaches to dealing with the Forcefield: | ||
====Method 1: Prevent Activation==== | ====Method 1: Prevent Activation==== | ||
| Line 394: | Line 392: | ||
::<span style="color:green">SUCCESS:</span> The defensive forcefield generator is disabled near the far left of the site.<br /> | ::<span style="color:green">SUCCESS:</span> The defensive forcefield generator is disabled near the far left of the site.<br /> | ||
::<span style="color:red">FAILURE:</span> There are two possibilities: | ::<span style="color:red">FAILURE:</span> There are two possibilities: | ||
| − | ::# Nothing happens. In this case, the can be hacked repeatedly, but be prepared for (2) on subsequent failures. | + | ::# Nothing happens. In this case, the can be hacked repeatedly, but be prepared for (2) on subsequent failures. An experiment was ran for 1 hour after such a failure and nothing happened. Another experiment left the client running for 13 hours, with nothing resulting from failure of the container. |
| − | ::# The container explodes. A Heron with an | + | ::# The container explodes. A Heron with an EM Shield Reinforcer, Thermal Shield Reinforcer, Medium Azeotropic Restrained Shield Extender, a Limited Multispectrum Shield Hardener and a Damage Control II ate 1225 damage (dropped shields to about 25%), while Keeping at Range (5000m) from the container. After this, the other containers will not have any forcefield generators spawn to inhibit hacking attempts. The container explodes about ten seconds after the hack attempt is failed. |
====Method 2: Destroy the Forcefield==== | ====Method 2: Destroy the Forcefield==== | ||
| − | The Active Forcefield Generator spawns a [http://games.chruker.dk/eve_online/item.php?type_id=13200 Large EM Forcefield]. Destroying the Forcefield is not particularly difficult, but it will require more DPS than the average exploration ship is able to produce. The Forcefield regenerates 150 hp/sec, so overcoming this will require either multiple pilots or a high-damage frigate, | + | The Active Forcefield Generator spawns a [http://games.chruker.dk/eve_online/item.php?type_id=13200 Large EM Forcefield]. Destroying the Forcefield is not particularly difficult, but it will require more DPS than the average exploration ship is able to produce. The Forcefield regenerates 150 hp/sec, so overcoming this will require either multiple pilots or a high-damage assault frigate, a pure-damage fit T1 frigate (Incursus comes to mind), or a all-damage fit [[Taranis]]. Notably, an [[Astero]] is unable to produce the DPS necessary to destroy the Forcefield alone. |
{| class="wikitable" style="margin-left: auto; margin-right: auto; border: none;" | {| class="wikitable" style="margin-left: auto; margin-right: auto; border: none;" | ||
| Line 406: | Line 404: | ||
Shoot the Large EM Forcefield, not the Generator, as the Generator cannot be damaged. The Generator will not spawn another Forcefield after the first is destroyed, so the container will be accessible once the Forcefield is destroyed. | Shoot the Large EM Forcefield, not the Generator, as the Generator cannot be damaged. The Generator will not spawn another Forcefield after the first is destroyed, so the container will be accessible once the Forcefield is destroyed. | ||
| + | |||
| + | ====Method 3: Ignore the Forcefield==== | ||
| + | An exploration frigate fit with a MWD can simply burn straight towards the Dented Storage Depot, completely ignoring the Forcefield and Remote Defense Grid Unit. By the time the Forcefield activates, you will already be inside the sphere and can move around freely as long as you don't exit it. From here, you can hack the can in peace. This allows the can to be hacked with no risk of death from a failed hack, and without any DPS needed. | ||
===Storage Depots=== | ===Storage Depots=== | ||
| Line 413: | Line 414: | ||
::'''CAN DIFFICULTY: 7/10 - 8/10 [YELLOW TO RED HACKS]'''<br /> | ::'''CAN DIFFICULTY: 7/10 - 8/10 [YELLOW TO RED HACKS]'''<br /> | ||
::<span style="color:green">SUCCESS:</span> The loot inside the Storage Depot can be acquired.<br /> | ::<span style="color:green">SUCCESS:</span> The loot inside the Storage Depot can be acquired.<br /> | ||
| − | ::<span style="color:red">FAILURE:</span> No penalty. | + | ::<span style="color:red">FAILURE:</span> No penalty. Unlike normal sites these containers do not self-destruct after multiple fails. |
With all the good containers scooped up, return to the Mobile Depot, refit to the travel fit, pick up the Mobile Depot, and leave the site. | With all the good containers scooped up, return to the Mobile Depot, refit to the travel fit, pick up the Mobile Depot, and leave the site. | ||
| Line 423: | Line 424: | ||
An [[Incursus]] can be used if another pilot messes up the site - it can tank the damage clouds and swaps easily for a 240DPS blaster fit for shooting the EM Forcefield. Hacks are more difficult but not impossible. | An [[Incursus]] can be used if another pilot messes up the site - it can tank the damage clouds and swaps easily for a 240DPS blaster fit for shooting the EM Forcefield. Hacks are more difficult but not impossible. | ||
| − | [[Category: | + | {| class="collapsible collapsed" style="background-color:#0d2710; background-image: linear-gradient(#071709, #0d2710); border: 1px solid #287833; padding:0.2em; width:{{{width|90%}}}" |
| + | ! style="text-align:left" | <span style="color:#44c055">Polarized Damage Logs</span> | ||
| + | |- | ||
| + | | style="font-size:90%; color:#FFFFFF" | {{{1|Here is the detonation of an Unstable Plasma Chamber. The initial 500 damage is the explosion of the chamber itself, the remainder is the AoE damage. Order is most recent at the top. | ||
| + | |||
| + | 13:42:19 Combat <span style="color:red">'''80'''</span> <small>from</small> '''Plasma Cloud'''<small> - Hits</small><br /> | ||
| + | 13:42:18 Combat <span style="color:red">'''90'''</span> <small>from</small> '''Plasma Cloud'''<small> - Hits</small><br /> | ||
| + | 13:42:16 Combat <span style="color:red">'''100'''</span> <small>from</small> '''Plasma Cloud'''<small> - Hits</small><br /> | ||
| + | 13:42:14 Combat <span style="color:red">'''125'''</span> <small>from</small> '''Plasma Cloud'''<small> - Hits</small><br /> | ||
| + | 13:42:14 Combat <span style="color:red">'''100'''</span> <small>from</small> '''Plasma Cloud'''<small> - Hits</small><br /> | ||
| + | 13:42:13 Combat <span style="color:red">'''80'''</span> <small>from</small> '''Plasma Cloud'''<small> - Hits</small><br /> | ||
| + | 13:42:10 Combat <span style="color:red">'''90'''</span> <small>from</small> '''Plasma Cloud'''<small> - Hits</small><br /> | ||
| + | 13:42:07 Combat <span style="color:red">'''125'''</span> <small>from</small> '''Plasma Cloud'''<small> - Hits</small><br /> | ||
| + | 13:42:06 Combat <span style="color:red">'''100'''</span> <small>from</small> '''Plasma Cloud'''<small> - Hits</small><br /> | ||
| + | 13:42:06 Combat <span style="color:red">'''110'''</span> <small>from</small> '''Plasma Cloud'''<small> - Hits</small><br /> | ||
| + | 13:42:04 Combat <span style="color:red">'''80'''</span> <small>from</small> '''Plasma Cloud'''<small> - Hits</small><br /> | ||
| + | 13:42:02 Combat <span style="color:red">'''125'''</span> <small>from</small> '''Plasma Cloud'''<small> - Hits</small><br /> | ||
| + | 13:41:59 Combat <span style="color:red">'''80'''</span> <small>from</small> '''Plasma Cloud'''<small> - Hits</small><br /> | ||
| + | 13:41:58 Combat <span style="color:red">'''90'''</span> <small>from</small> '''Plasma Cloud'''<small> - Hits</small><br /> | ||
| + | 13:41:55 Combat <span style="color:red">'''80'''</span> <small>from</small> '''Plasma Cloud'''<small> - Hits</small><br /> | ||
| + | 13:41:55 Combat <span style="color:red">'''110'''</span> <small>from</small> '''Plasma Cloud'''<small> - Hits</small><br /> | ||
| + | 13:41:53 Combat <span style="color:red">'''90'''</span> <small>from</small> '''Plasma Cloud'''<small> - Hits</small><br /> | ||
| + | 13:41:52 Combat <span style="color:red">'''125'''</span> <small>from</small> '''Plasma Cloud'''<small> - Hits</small><br /> | ||
| + | 13:41:50 Combat <span style="color:red">'''110'''</span> <small>from</small> '''Plasma Cloud'''<small> - Hits</small><br /> | ||
| + | 13:41:49 Combat <span style="color:red">'''80'''</span> <small>from</small> '''Plasma Cloud'''<small> - Hits</small><br /> | ||
| + | 13:41:47 Combat <span style="color:red">'''125'''</span> <small>from</small> '''Plasma Cloud'''<small> - Hits</small><br /> | ||
| + | 13:41:44 Combat <span style="color:red">'''110'''</span> <small>from</small> '''Plasma Cloud'''<small> - Hits</small><br /> | ||
| + | 13:41:39 Combat <span style="color:red">'''80'''</span> <small>from</small> '''Plasma Cloud'''<small> - Hits</small><br /> | ||
| + | 13:41:36 Combat <span style="color:red">'''100'''</span> <small>from</small> '''Plasma Cloud'''<small> - Hits</small><br /> | ||
| + | 13:41:35 Combat <span style="color:red">'''110'''</span> <small>from</small> '''Plasma Cloud'''<small> - Hits</small><br /> | ||
| + | 13:41:34 Combat <span style="color:red">'''80'''</span> <small>from</small> '''Plasma Cloud'''<small> - Hits</small><br /> | ||
| + | 13:41:33 Combat <span style="color:red">'''90'''</span> <small>from</small> '''Plasma Cloud'''<small> - Hits</small><br /> | ||
| + | 13:41:32 Combat <span style="color:red">'''125'''</span> <small>from</small> '''Plasma Cloud'''<small> - Hits</small><br /> | ||
| + | 13:41:31 Combat <span style="color:red">'''100'''</span> <small>from</small> '''Plasma Cloud'''<small> - Hits</small><br /> | ||
| + | 13:41:30 Combat <span style="color:red">'''80'''</span> <small>from</small> '''Plasma Cloud'''<small> - Hits</small><br /> | ||
| + | 13:41:28 Combat <span style="color:red">'''90'''</span> <small>from</small> '''Plasma Cloud'''<small> - Hits</small><br /> | ||
| + | 13:41:25 Combat <span style="color:red">'''110'''</span> <small>from</small> '''Plasma Cloud'''<small> - Hits</small><br /> | ||
| + | 13:41:24 Combat <span style="color:red">'''80'''</span> <small>from</small> '''Plasma Cloud'''<small> - Hits</small><br /> | ||
| + | 13:41:23 Combat <span style="color:red">'''90'''</span> <small>from</small> '''Plasma Cloud'''<small> - Hits</small><br /> | ||
| + | 13:41:21 Combat <span style="color:red">'''100'''</span> <small>from</small> '''Plasma Cloud'''<small> - Hits</small><br /> | ||
| + | 13:41:15 Combat <span style="color:red">'''110'''</span> <small>from</small> '''Plasma Cloud'''<small> - Hits</small><br /> | ||
| + | 13:41:14 Combat <span style="color:red">'''90'''</span> <small>from</small> '''Plasma Cloud'''<small> - Hits</small><br /> | ||
| + | 13:41:11 Combat <span style="color:red">'''100'''</span> <small>from</small> '''Plasma Cloud'''<small> - Hits</small><br /> | ||
| + | 13:41:10 Combat <span style="color:red">'''80'''</span> <small>from</small> '''Plasma Cloud'''<small> - Hits</small><br /> | ||
| + | 13:41:06 Combat <span style="color:red">'''100'''</span> <small>from</small> '''Plasma Cloud'''<small> - Hits</small><br /> | ||
| + | 13:41:04 Combat <span style="color:red">'''80'''</span> <small>from</small> '''Plasma Cloud'''<small> - Hits</small><br /> | ||
| + | 13:41:01 Combat <span style="color:red">'''500'''</span> <small>from</small> '''Plasma Chamber'''<small> - Hits</small><br /> | ||
| + | |||
| + | |||
| + | Here is the damage log of the wreck cloud itself. | ||
| + | |||
| + | 13:45:11 Combat <span style="color:red">'''130'''</span> <small>from</small> '''Pressure Cloud'''<small> - Hits</small><br /> | ||
| + | 13:45:10 Combat <span style="color:red">'''120'''</span> <small>from</small> '''Pressure Cloud'''<small> - Hits</small><br /> | ||
| + | 13:45:07 Combat <span style="color:red">'''70'''</span> <small>from</small> '''Pressure Cloud'''<small> - Hits</small><br /> | ||
| + | 13:45:05 Combat <span style="color:red">'''120'''</span> <small>from</small> '''Pressure Cloud'''<small> - Hits</small><br /> | ||
| + | 13:45:03 Combat <span style="color:red">'''110'''</span> <small>from</small> '''Pressure Cloud'''<small> - Hits</small><br /> | ||
| + | 13:45:02 Combat <span style="color:red">'''70'''</span> <small>from</small> '''Pressure Cloud'''<small> - Hits</small><br /> | ||
| + | 13:44:59 Combat <span style="color:red">'''150'''</span> <small>from</small> '''Pressure Cloud'''<small> - Hits</small><br /> | ||
| + | 13:44:58 Combat <span style="color:red">'''110'''</span> <small>from</small> '''Pressure Cloud'''<small> - Hits</small><br /> | ||
| + | 13:44:57 Combat <span style="color:red">'''70'''</span> <small>from</small> '''Pressure Cloud'''<small> - Hits</small><br /> | ||
| + | 13:44:56 Combat <span style="color:red">'''130'''</span> <small>from</small> '''Pressure Cloud'''<small> - Hits</small><br /> | ||
| + | 13:44:55 Combat <span style="color:red">'''120'''</span> <small>from</small> '''Pressure Cloud'''<small> - Hits</small><br /> | ||
| + | 13:44:53 Combat <span style="color:red">'''110'''</span> <small>from</small> '''Pressure Cloud'''<small> - Hits</small><br /> | ||
| + | 13:44:52 Combat <span style="color:red">'''70'''</span> <small>from</small> '''Pressure Cloud'''<small> - Hits</small><br /> | ||
| + | 13:44:50 Combat <span style="color:red">'''120'''</span> <small>from</small> '''Pressure Cloud'''<small> - Hits</small><br /> | ||
| + | 13:44:47 Combat <span style="color:red">'''70'''</span> <small>from</small> '''Pressure Cloud'''<small> - Hits</small><br /> | ||
| + | 13:44:43 Combat <span style="color:red">'''110'''</span> <small>from</small> '''Pressure Cloud'''<small> - Hits</small><br /> | ||
| + | 13:44:40 Combat <span style="color:red">'''120'''</span> <small>from</small> '''Pressure Cloud'''<small> - Hits</small><br /> | ||
| + | 13:44:38 Combat <span style="color:red">'''110'''</span> <small>from</small> '''Pressure Cloud'''<small> - Hits</small><br /> | ||
| + | 13:44:37 Combat <span style="color:red">'''70'''</span> <small>from</small> '''Pressure Cloud'''<small> - Hits</small><br /> | ||
| + | 13:44:36 Combat <span style="color:red">'''130'''</span> <small>from</small> '''Pressure Cloud'''<small> - Hits</small><br /> | ||
| + | 13:44:29 Combat <span style="color:red">'''150'''</span> <small>from</small> '''Pressure Cloud'''<small> - Hits</small><br /> | ||
| + | 13:44:27 Combat <span style="color:red">'''70'''</span> <small>from</small> '''Pressure Cloud'''<small> - Hits</small><br /> | ||
| + | 13:44:26 Combat <span style="color:red">'''130'''</span> <small>from</small> '''Pressure Cloud'''<small> - Hits</small><br /> | ||
| + | 13:44:25 Combat <span style="color:red">'''120'''</span> <small>from</small> '''Pressure Cloud'''<small> - Hits</small><br /> | ||
| + | 13:44:23 Combat <span style="color:red">'''110'''</span> <small>from</small> '''Pressure Cloud'''<small> - Hits</small><br /> | ||
| + | 13:44:22 Combat <span style="color:red">'''70'''</span> <small>from</small> '''Pressure Cloud'''<small> - Hits</small><br /> | ||
| + | 13:44:20 Combat <span style="color:red">'''120'''</span> <small>from</small> '''Pressure Cloud'''<small> - Hits</small><br /> | ||
| + | 13:44:18 Combat <span style="color:red">'''110'''</span> <small>from</small> '''Pressure Cloud'''<small> - Hits</small><br /> | ||
| + | 13:44:16 Combat <span style="color:red">'''120'''</span> <small>from</small> '''Pressure Cloud'''<small> - Hits</small><br /> | ||
| + | 13:44:13 Combat <span style="color:red">'''110'''</span> <small>from</small> '''Pressure Cloud'''<small> - Hits</small><br /> | ||
| + | 13:44:12 Combat <span style="color:red">'''70'''</span> <small>from</small> '''Pressure Cloud'''<small> - Hits</small><br /> | ||
| + | 13:44:11 Combat <span style="color:red">'''130'''</span> <small>from</small> '''Pressure Cloud'''<small> - Hits</small><br /> | ||
| + | 13:44:07 Combat <span style="color:red">'''70'''</span> <small>from</small> '''Pressure Cloud'''<small> - Hits</small><br /> | ||
| + | 13:44:03 Combat <span style="color:red">'''110'''</span> <small>from</small> '''Pressure Cloud'''<small> - Hits</small><br /> | ||
| + | 13:44:02 Combat <span style="color:red">'''70'''</span> <small>from</small> '''Pressure Cloud'''<small> - Hits</small><br /> | ||
| + | 13:44:00 Combat <span style="color:red">'''120'''</span> <small>from</small> '''Pressure Cloud'''<small> - Hits</small><br /> | ||
| + | 13:43:59 Combat <span style="color:red">'''150'''</span> <small>from</small> '''Pressure Cloud'''<small> - Hits</small><br /> | ||
| + | 13:43:57 Combat <span style="color:red">'''70'''</span> <small>from</small> '''Pressure Cloud'''<small> - Hits</small><br /> | ||
| + | |||
| + | The Remote Pressure Control Unit deals 200 damage every time, as seen here. | ||
| + | |||
| + | 13:47:13 Notify <small>The Remote Pressure Control Unit is too complex for you to gather anything of value.</small><br /> | ||
| + | 13:47:06 Combat <span style="color:red">'''200'''</span> <small>from</small> '''Remote Pressure Control Unit'''<small> - Hits</small><br /> | ||
| + | 13:47:01 Notify <small>The Remote Pressure Control Unit is too complex for you to gather anything of value.</small><br /> | ||
| + | 13:46:55 Combat <span style="color:red">'''200'''</span> <small>from</small> '''Remote Pressure Control Unit'''<small> - Hits</small><br /> | ||
| + | 13:46:49 Notify <small>The Remote Pressure Control Unit is too complex for you to gather anything of value.</small><br /> | ||
| + | 13:46:42 Combat <span style="color:red">'''200'''</span> <small>from</small> '''Remote Pressure Control Unit'''<small> - Hits</small><br /> | ||
| + | }}} | ||
| + | |} | ||
| + | [[Category:Data sites]] | ||
| + | [[Category:Relic sites]] | ||
| + | [[Category:Fittings]] | ||
Latest revision as of 15:12, 3 June 2024
- Main article: Sleeper Cache
The Limited Sleeper Cache is the easiest of the Sleeper Cache sites. Sleeper Caches are significantly more difficult than normal data or relic sites, and pilots will be risking their ship when trying any of them. However, once familiar with these sites, pilots should be able to run the site without taking any losses. Like all Sleeper Cache sites, the Limited Sleeper Cache requires the use of both Data and Relic Analyzers. Entry is restricted to frigates: exploration frigates are highly recommended in order to make use of their hacking bonuses.
Limited Sleeper Caches are Cosmic Signatures that must be located using core scanner probes. They are more difficult to scan down than normal signatures, and require well-developed scanning skills to pinpoint completely. It appears the minimum to scan down a Limited Sleeper Cache is 85.8 probe strength (Level IV).
Newcomers to Sleeper Caches should read this vital preamble before continuing further.
Quick Guide
The Limited Sleeper Cache is the first taste of Sleeper Caches most pilots will encounter. This site poses some risks, but it is not as dangerous as other Sleeper Caches. Although the Limited Cache doesn't usually pay as well as the more difficult sites, it can still be worth running.
If the initial Hyperfluct Generator container has been hacked, and the accompanying Spatial Rift has spawned, another pilot has probably already entered the site. Check zKillboard or another appropriate service for any recent losses. Area of Effect damage clouds can be activated: use caution.
- Hack the entry can. Enter the site.
- Cargo scan all the cans, and evaluate the value thereof.
- If the wreck Storage Depot has good loot inside it, hack the Remote Pressure Control Unit and then extract the loot out of that container. Alternatively, tank it.
- Disable the Remote Defense Grid unit. This only has to be done to disable the Forcefield Generator guarding one specific container. You may try a different approach, detailed below.
- Hack the remaining worthy cans.
Ship Fittings
| Pilots should exercise caution when downgrading or altering these fits. They have been thoroughly tested and verified multiple times to represent the minimum necessary fittings. If, by reason of skill levels or ISK a pilot cannot fit them, it may be advisable not to attempt the site. Hacking modules may be downgraded but site difficulty will increase notably, though pilot skill with the hacking minigame can compensate for Tech 1 modules. Tech 2 Analyzers are strongly recommended. |
Generally, all these fits have a mobile depot, spare probes, three drones in the drone bay, a hull repairer (armor fits), an armor repairer and a hull repairer (shield fits), and all the kit necessary to handle the encounter in the cargohold. Refitting inside the site, occasionally more than once, is normal and expected.
If available, logistics ships (a single self-sufficient capacitor-stable Tech I logistics frigate is sufficient) can provide remote repairs to get around the requirements of local repair modules. Even with remote repairs, pilots should maintain a local buffer and resistance module(s) as normal.
An Astero can be fit identically to the Magnate, though the normal rig configuration (Gravity Capacitor/Explosive Armor Reinforcer/Auxiliary Nano Armor Reinforcer) is good enough because the hull has a bonus to armour resistances.
Use a Mobile Depot to swap the Relic Analyzer II in place of the cargo scanner once all undesired containers have been identified. These fits are not sufficient to wander into the Area of Effect (AoE) damage cloud near the wreck alone. Both of these fits can survive a detonation of the Remote Defense Grid Unit or a run-in with a Unstable Plasma Chamber, as long as the pilot does not remain inside the AoE cloud for too long. If you have a buddy with a Logistics Frigate, then the following two fits are appropriate to use for the entire site.
It is also possible to complete a limited sleeper cache without any tank at all. This requires good manual piloting skills as wandering into gas cloud or too close to a pressure chamber means instant death. An untanked ship will also die instantly if the defence forcefield generator data hacking is failed and the explosion is triggered.
Data Analyzer II
Medium Azeotropic Restrained Shield Extender
Type-E Enduring Cargo Scanner
5MN Quad LiF Restrained Microwarpdrive
Compact Multispectrum Shield Hardener
Micro Auxiliary Power Core I
Damage Control II
Small EM Shield Reinforcer I
Small Thermal Shield Reinforcer I
Small Gravity Capacitor Upgrade I
- The fit to use for a Limited Sleeper Cache, when hacking the Remote Defense Grid Unit.
- Swap the Relic Analyzer in when needed.
- If turning off the damage cloud near the wreck with the Remote Pressure Control Unit, swap the cargo scanner for a Relic Analyzer II.
1MN Monopropellant Enduring Afterburner
Data Analyzer II
Type-E Enduring Cargo Scanner
400mm Crystalline Carbonide Restrained Plates
Damage Control II
Multispectrum Energized Membrane II
Micro Auxiliary Power Core I
Small Gravity Capacitor Upgrade I
Small Explosive Armor Reinforcer I
Small Auxiliary Nano Pump I
- The fit to use for a Limited Sleeper Cache, when hacking the Remote Defense Grid Unit.
- Swap the Relic Analyzer in when needed.
- If turning off the damage cloud near the wreck with the Remote Pressure Control Unit, swap the cargo scanner for a Relic Analyzer II.
For pilots with ![]() Capacitor Management V and
Capacitor Management V and ![]() Capacitor Systems Operation V (and
Capacitor Systems Operation V (and ![]() Shield Compensation IV for the Heron), try these fits to skip hacking the Remote Pressure Control Unit entirely, and head directly into the storage depot inside the wreck field.
Shield Compensation IV for the Heron), try these fits to skip hacking the Remote Pressure Control Unit entirely, and head directly into the storage depot inside the wreck field.
| A ship must be able to sustain at least 60 Effective Hit Points per second (EHP/sec) for it to survive inside this damage cloud. Capacitor stability is ideal: if the capacitor lasts less than 4 minutes, these fits should not be used. |
Relic Analyzer II
Medium Azeotropic Restrained Shield Extender
Eutectic Compact Cap Recharger
Small Shield Booster II
Stalwart Restrained Shield Boost Amplifier
Damage Control II
Type-D Restrained Capacitor Flux Coil
Small Gravity Capacitor Upgrade I
Small Thermal Shield Reinforcer I
Small EM Shield Reinforcer I
- Designed to work with low skills.
- Alpha Clones will have to run a Medium F-S9 Compact Shield Extender instead for Power Grid reasons.
- Works with maximum Alpha Clone capacitor skills.
- Always double check capacitor stability with your skills in a fitting tool against this fit before using it.
1MN Monopropellant Enduring Afterburner
Relic Analyzer II
Eutectic Compact Cap Recharger
Small Armor Repairer II
Damage Control II
200mm Crystalline Carbonide Restrained Plates
Multispectrum Energized Membrane II
Small Auxiliary Nano Pump I
Small Auxiliary Nano Pump I
Small Explosive Armor Reinforcer I
- The Astero is fit pretty much identical to this, or the "standard" rig configuration.
- The addition of a fourth mid slot can be handy, but isn't necessary. The Magnate can be preferable due to its lower cost.
- Swap the Relic Analyzer II in for when the Data hacks are completed. The cargo scanner will have to be offlined for this fit to work (it should be swapped out for a Relic Analyzer II after the intial cargo scan of the site has been conducted anyway).
- This afterburner variant is specifically chosen so pilots do not need to bring two afterburners. It may be advisable to bring a Tech II Micro Auxiliary Power Core.
The buffer module is included to more safely tank the slight damage variations from one damage tick to the next, this property is much more noticeable with armor (see the Polarized logs at the bottom of the page). For pilots who having a hard time with the hack inside the wreck field, the buffer of the shield Heron usually allows it to stabilize around 50% shield capacity. For armor, the buffer allows the pilot some more room for error if needed, particularly if overheating is necessary.
Additional notes for the Magnate:
- With
 Astrometric Rangefinding V, the Small Gravity Capacitor Upgrade I is unnecessary even when scanning down a Superior Sleeper Cache with the Magnate. In this, pilots may substitute two Scan Rangefinding Array I. Otherwise, the Magnate will have the same rigs as shown above. As before, pilots will need
  Capacitor Management V and
  Capacitor Systems Operation V, as well as
  Repair Systems V to match the minimum of 60 EHP/sec to last inside the wreck field. Overheating may be required if armor gets low.
 - Use the afterburner sparingly, only to get to the container and back out a little bit faster. Do not run it continuously - instead, pulse it. Do not run this fit if the ship is not capacitor stable with the afterburner and the analyzer off. The afterburner can be swapped out for another capacitor recharger.
Visual Guide
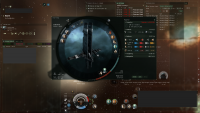
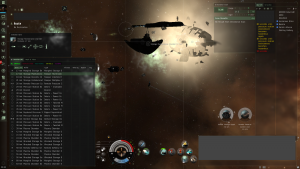
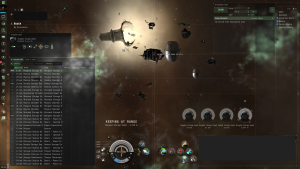
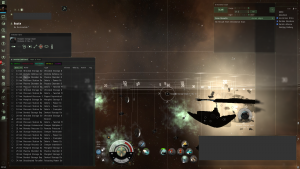
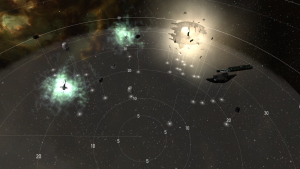
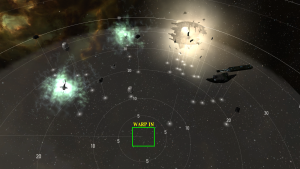
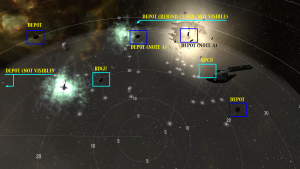
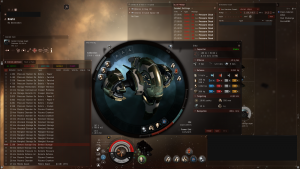
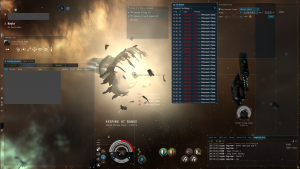
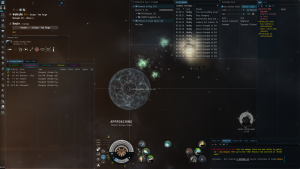
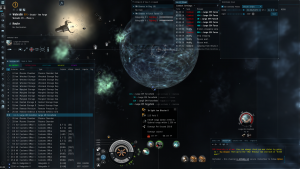
The following images are included to help newcomers get familiar with the basic layout of the site and its hazards:
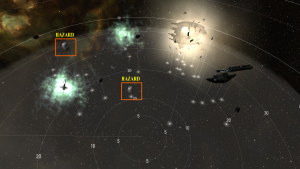
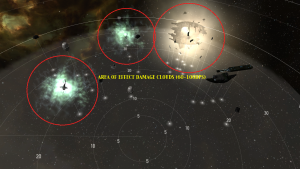
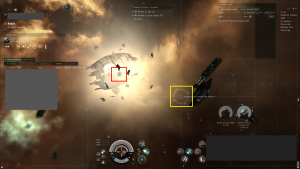
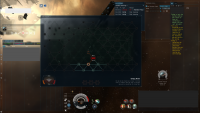
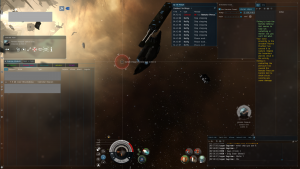
The following images highlight various hazards and objects:
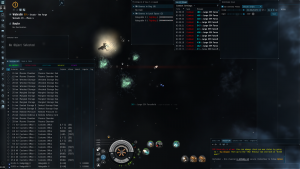
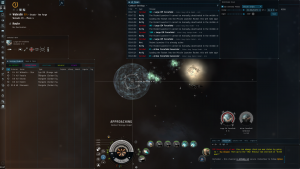
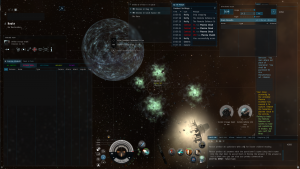
Normally the container inside the wreck and the one just to the left of it (also marked as "NOTE A" the preceding images) are the ones with the most value. Pilots should take care not to wander into the damage proximity of the wreck field when hacking that container.
Walkthrough
The site consists of a warpin area and one deadspace pocket.
Entrance
| On warp in: |
|---|
| This area has been hidden from prying eyes for years. Now the structure responsible for cloaking the site is damaged, finally allowing for a way in. A quick survey indicates this is a storage site, possibly used to store items collected by Sleepers from all over known space. What defenses or dangers lurk inside are uncertain, but the use of both a Data Analyzer and Relic Analyzer are required. The entry gate only allows frigate-sized ships through. |
Upon warping to the signature, pilots will land in the entry room. A Hyperfluct Generator will be present. If it has been hacked and a rift is activated, then another pilot has already entered the site. Stealth Bombers cannot take the Spatial Rift and are thus restricted from entry.
Hack the Hyperfluct Generator.
- CAN DIFFICULTY: 7/10 DATA [RED HACK]
- SUCCESS: A new spatial rift (acceleration gate) is opened to the main area, which is called the Ransacked Storage Site.
- FAILURE: A two-minute timer will begin. If the can is not successfully hacked within that time, the site will despawn.
- CAN DIFFICULTY: 7/10 DATA [RED HACK]
By taking the Spatial Rift, pilots can enter the first room of the site.
Ransacked Storage Site
| On activating the Strange Rift: |
|---|
| This is a storage site by the looks of it, possibly of Sleeper origin judging by the structures around. It is heavily damaged, as if someone - or something - was frantically and forcefully searching through the site, and quite recently at that. Dangerous gases and volatile materials are all around, so care is required in navigating this hazardous place. |
The acceleration Spatial Rift takes you to the main pocket. If desired, pilots can cargo scan the containers to evaluate the value of the site. Regardless of the its relative value, inexperienced pilots should run the site to gain further experience.
The main pocket contains:
- 6 Depots. These are containers that require relic analyzer and hacking. They contain all the valuables from the site.
- The depot furthest to left is booby trapped with a force field generator which inhibits access to it.
- The depot by the wreck is inside a hazardous cloud.
- Remote Pressure Control Unit. Requires data analyzer, temporarily removes hazardous cloud from the wreck.
- Remote Defense Grid Unit (RDGU). Requires data analyzer, removes booby trap from the booby trapped depot.
- Two gas clouds (cyan colored). These deal damage when passed through.
- Two Unstable Plasma Chambers. These act as proximity mines that can explode and deal damage.
| WD | EWAR | L
| ||
|---|---|---|---|---|
| 4 x Mangled Storage Depot |
||||
| 2 x Dented Storage Depot |
||||
| 1 x Remote Pressure Control Unit |
||||
| 1 x Remote Defense Grid Unit |
||||
| WD | EWAR | L
| ||
|---|---|---|---|---|
| 2 x Unstable Plasma Chamber(named Plasma Chamber) |
||||
| 1 x Large EM Forcefield |
||||
| 3 x Pressure Cloud |
||||
Your objective is to hack the depots and grab the valuables while avoiding death. Four of the depots can be hacked without extra steps but two of them require extra care. You must also fly around carefully to avoid the clouds and plasma chambers unless your ship is able to tank their damage.
If you wish to use mobile depot drop it upon entry to begin its activation timer.
| The can difficulty does vary slightly each time, because of the way that the random hacking minigame is generated. For comparison: high-sec rookie practice cans (in the Rookie Systems) are 1/10. Regular high sec cans are 3 or 4/10. Low-sec, null-sec, and wormhole space cans are 5 to 8/10, depending on the value of the can, in most cases. Sleeper Cache cans will generally be 6 to 7/10 in difficulty. |
The first target is the container inside the wreck field. This depot is surrounded by hazardous cloud that deals AOE damage to all ships near it. There are two approaches to dealing with it:
Method 1: Remote Pressure Control Unit
The hazardous gas cloud surrounding the depot can be removed for a short time by hacking the Remote Pressure Control Unit. The gas cloud will respawn on invisible countdown with periodic updates in local. If done properly this method completely avoids taking damage.
The Area of Effect damage cloud near the wreck does roughly 100 DPS to a standard unmodified resistance profile of a Tech I vessel. Its approximate dimensions, measured from the Storage Depot within, is about 12km in radius.
There is enough time for 2 "standard paced" hacks, 1 "slow" hack, or 3 really fast hack attempts, depending on both the skill of the hacker and luck. Normally, this container is a red hack, which means all the usual Virus Suppressors and Restoration Nodes. The problem with this approach is both the limited timeframe and the incoming damage after the timer is up, especially if the ship is insufficiently tanked.
- 1. Refit for the primary site fit shown up above. On a Magnate, a MWD will fit if the plate is downgraded to a 200mm variant.
- 2. Hack the Remote Pressure Control Unit:
- CAN DIFFICULTY: 7/10 DATA [RED HACK]
- SUCCESS: The area of effect damage cloud surrounding the wreck is turned off for two to three minutes.
- FAILURE: No specific site penalty, a small amount of damage is absorbed by your ship -- in the test case, 96 damage against a Heron with a MSE, Limited Multispectrum Shield Hardener and Anti-EM/Anti-Thermal rigs. It's not severe enough to warrant any particular concern.
- CAN DIFFICULTY: 7/10 DATA [RED HACK]
- 3. Immediately apply Keep at Range (2250m) on the Storage Depot inside the wreck cloud, then turn on the Microwarpdrive. Turn it off when you get close enough to it. Lock on if not done so already, and immediately begin hacking it with the Relic Analyzer.
- 4. Watch messages in local: if not successful by the 30 second mark, just align back to the Remote Pressure Control Unit (or straight up/straight down) and burn the Microwarpdrive. Otherwise, loot it and burn out with the Microwarpdrive to a safe direction away, probably best towards the Mobile Depot, which should be near the site warpin beacon.
Method 2: Tanking the Damage Cloud
The second approach is to fit specifically for surviving the area of affect damage cloud. All toxic gas clouds - both the prespawned ones and the ones that are generated upon detonation of an Unstable Plasma Chamber - deal similar amounts of omni damage per second. The advantage of this approach is that the container can be hacked with no time limit, with little risk to the ship before the hack is completed, though this method does require excellent capacitor skills and proper tank skills.
The ship used must be able to rep more than 60 EHP/sec and capacitor stability is a must. The Relic Analyzer does not count in the capacitor stability checks: keep it off in the fitting tool while checking for capacitor stability.
- Refit to the appropriate cap-stable local repair module fit.
- Approach the Storage Depot inside the wreck field. For shield tank, activate it when you are 15km from the container; for armor, activate it as soon as all the shields are gone.
- Hack the Storage Depot, loot it and go back to the Mobile Depot.
- Refit back to the main site running fit.
Unstable Plasma Chambers
The Unstable Plasma Chambers function a bit like proximity mines.
The slower a ship moves, the closer it can pass the Plasma Chambers without causing them to detonate. Thus, indiscriminate use of a Microwarpdrive during this section can be very dangerous. While the activation distance does vary, it is usually between 7-10km, depending on how fast you're going. While blitzing around the top or underside of the site is fine, well away from the hazards, moving slowly (~200 m/sec) while navigating the damage clouds is highly advised. The tactical overlay is very useful for monitoring range while moving.
It is possible to power through the damage clouds if they get tripped accidentally. With a Microwarpdrive active, one will only eat about 700 HP after resists...assuming the ship is immediately powered out of the damage field.
More information about the plasma chambers:
- Moving slowly, such as 100m/sec, pilots are able to approach very closely, nearly touching them.
- Higher speeds, such as 330m/s, the chambers can rupture from a distance of about 7km.
- Slow-boating out with a propulsion module, assuming decent 60%-ish resistances, means the ship will sustain about 1200 damage.
- The area of effect damage measured from the approximate middle of the debris is 9km.
- Flying right through the cloud with a MWD on means the player will only sustain about 350 HP damage (after resists).
These figures are a generalization to illustrate of the damage potential of the Plasma Chambers. A fit that can repair indefinitely, such as the ones used for tanking the damage cloud in the ship wreck, won't have trouble inside the AoE clouds.
Forcefield Generator
Zoom out for a better view of the site, and look for an easy route to access the Remote Defense Grid Unit. On the way, there are AoE damage clouds (similar DPS to the wreck field) and Unstable Plasma Chambers. Note its location.
To the far left of the site, there is one Storage Depot with an Active Forcefield Generator next to it. When a ship approaches within 10km of the Storage Depot, the Generator will spawn an EM Forcefield, which has a radius of about 14km and, which acts like a large bubble obstacle, preventing any ship from approaching the depot. The other Storage Depots around the site do not have this feature and can be hacked with the Relic Analyzer at any time without any specific concerns aside from AoE damage clouds and Plasma Chambers. For this reason, if the lone Storage Depot to the far left lacks valuable loot, it may be more convenient to simply skip hacking the Remote Defense Grid Unit, and instead just hack the other worthy containers.
There are three approaches to dealing with the Forcefield:
Method 1: Prevent Activation
To prevent the Active Forcefield Generator from spawning the EM Forcefield, navigate the ship around the AoE damage clouds and plasma chambers, then hack the the Remote Defense Grid Unit (RDGU):
- CAN DIFFICULTY: 8/10 DATA [RED HACK]
- SUCCESS: The defensive forcefield generator is disabled near the far left of the site.
- FAILURE: There are two possibilities:
- Nothing happens. In this case, the can be hacked repeatedly, but be prepared for (2) on subsequent failures. An experiment was ran for 1 hour after such a failure and nothing happened. Another experiment left the client running for 13 hours, with nothing resulting from failure of the container.
- The container explodes. A Heron with an EM Shield Reinforcer, Thermal Shield Reinforcer, Medium Azeotropic Restrained Shield Extender, a Limited Multispectrum Shield Hardener and a Damage Control II ate 1225 damage (dropped shields to about 25%), while Keeping at Range (5000m) from the container. After this, the other containers will not have any forcefield generators spawn to inhibit hacking attempts. The container explodes about ten seconds after the hack attempt is failed.
- CAN DIFFICULTY: 8/10 DATA [RED HACK]
Method 2: Destroy the Forcefield
The Active Forcefield Generator spawns a Large EM Forcefield. Destroying the Forcefield is not particularly difficult, but it will require more DPS than the average exploration ship is able to produce. The Forcefield regenerates 150 hp/sec, so overcoming this will require either multiple pilots or a high-damage assault frigate, a pure-damage fit T1 frigate (Incursus comes to mind), or a all-damage fit Taranis. Notably, an Astero is unable to produce the DPS necessary to destroy the Forcefield alone.
Shoot the Large EM Forcefield, not the Generator, as the Generator cannot be damaged. The Generator will not spawn another Forcefield after the first is destroyed, so the container will be accessible once the Forcefield is destroyed.
Method 3: Ignore the Forcefield
An exploration frigate fit with a MWD can simply burn straight towards the Dented Storage Depot, completely ignoring the Forcefield and Remote Defense Grid Unit. By the time the Forcefield activates, you will already be inside the sphere and can move around freely as long as you don't exit it. From here, you can hack the can in peace. This allows the can to be hacked with no risk of death from a failed hack, and without any DPS needed.
Storage Depots
Hack the rest of the Storage Depots as desired. Move around the damage clouds, and take things slowly for those unfamiliar with the site:
- CAN DIFFICULTY: 7/10 - 8/10 [YELLOW TO RED HACKS]
- SUCCESS: The loot inside the Storage Depot can be acquired.
- FAILURE: No penalty. Unlike normal sites these containers do not self-destruct after multiple fails.
- CAN DIFFICULTY: 7/10 - 8/10 [YELLOW TO RED HACKS]
With all the good containers scooped up, return to the Mobile Depot, refit to the travel fit, pick up the Mobile Depot, and leave the site.
Notes
A video that can help with some visual understanding of the site can be found here.
An Incursus can be used if another pilot messes up the site - it can tank the damage clouds and swaps easily for a 240DPS blaster fit for shooting the EM Forcefield. Hacks are more difficult but not impossible.
| Polarized Damage Logs |
|---|
| Here is the detonation of an Unstable Plasma Chamber. The initial 500 damage is the explosion of the chamber itself, the remainder is the AoE damage. Order is most recent at the top.
13:42:19 Combat 80 from Plasma Cloud - Hits
13:45:11 Combat 130 from Pressure Cloud - Hits The Remote Pressure Control Unit deals 200 damage every time, as seen here. 13:47:13 Notify The Remote Pressure Control Unit is too complex for you to gather anything of value. |
