Abyssal Deadspace

|
| Triglavian links |
|
|
|---|
| Areas of operation |
| Related topics |
| Community guides |
| Past operations |
Abyssal Deadspace is an area of isolated space. It was added to the game in the Into The Abyss expansion that went live on May 29th 2018. It was further expanded in the Onslaught expansion that was released on the 13th November 2018, and again in the Depths of the Abyss update on the 15th September 2020.
It is accessible only with the use of filaments and even then only limited pockets are accessible for a limited time. The abyssal deadspace is filled with dangerous localized space effects and any ship that ventures away from the stable pocket or stays in for too long will be destroyed by these effects.
Contents
Site Basics


A new type of space can be accessed using filaments obtained from data sites and from abyssal deadspace. Seven tiers of increasing difficulty exists. The Abyss is limited to either:
- A single Tech I, Tech II, Navy Faction or Pirate Faction cruiser
- Up to two destroyers, at the cost of 2 filaments
- Up to three frigates, at the cost of 3 filaments
and is accessed by activating filament(s) in space. When activated, a combat-probable beacon (named Abyssal trace) is created at your entry location that allows others to await your return from the pocket.
Activation can be anywhere in space, as long as the following conditions are satisfied:
- No Gates, Stations or mobile depots at less than 1000 km.
- No other Abyssal trace at less than 1000 km.
An Abyssal Deadspace instance is composed of three pockets. Each pocket must be cleared of enemies for a gate to open to the next pocket. In addition to Triglavians, you may find rogue drones under their command. Drifters (without doomsday and rarely with overshield) may appear as well, accompanied by sleeper drones, engaged in combat with the Triglavians. However, no one will help you. You must fight your way out.
Within the Abyss, in each pocket is a structure called the "Triglavian Bioadaptive Cache" which has a scant 300 hit points and contains some of the loot for that pocket. There are also "Triglavian Extraction Nodes" and "Triglavian Extraction SubNodes" which also contain additional loot.
Extraction nodes and subnodes do not appear in Tier 0 Abyssal Deadspace.
The deadspace instance is stable for only 20 minutes. If you are still in the pocket after 20 minutes your ship and your pod will be immediately destroyed. Essentially, you must clear the three pockets and exit with the allocated time, or you will lose both your ship and your pod. The third pocket gate returns you to the location in space you activated the filament from.
Further site restrictions: you can not be warped to within the Abyss, nor can you warp out of it. You can not cloak nor deploy a mobile depot. There is no local. Core Probes and Combat probes launched will be removed from space shortly after launching and cannot be recovered. The Directional Scanner will not work. The map does not work. At the present moment, if a player is in Abyssal Deadspace when server downtime occurs, the player will return to the solar system they entered from.
Quick recap:
- There are 7 tiers of Abyssal Deadspace combat sites.
- There are 5 different types of weather effects in the sites, each with their own site bonus and weakness.
- The NPCs you face inside the Abyssal Deadspace are random.
- Once you enter an Abyssal Deadspace, a 20 minute timer begins. If the site is not completed within that time limit, you lose your ship and pod.
- Loot is found in Triglavian Bioadaptive Cache (main loot for cruiser sites), Triglavian Biocombinative Cache (main loot for frigate sites), and Triglavian Extraction Nodes and SubNodes. NPCs leave no wrecks to loot or salvage, although cache wrecks can be salvaged for Triglavian materials.
- With the Onslaught expansion, a player-versus-player element was added to Abyssal Deadspace, accessed optionally through a second exit gate (named Triglavian Proving Conduit) in the final room of Tier 3 sites and higher.
- The Onslaught expansion also released 3 player co-op frigate Abyssal Deadspace pockets.
- Note that the Triglavian Proving Conduit has been removed due to the addition of Proving Filaments in the Depths of the Abyss expansion. These filaments will transport a player directly to the Proving Grounds without the need to go through Abyssal Deadspace.

| WARNING: Any ship and capsule should be considered lost the moment a player enters Abyssal Deadspace. The atmosphere is rather unforgiving to inexperienced, ill-equipped or unfamiliar pilots. If your ship is lost inside the site, you will lose your capsule, clone, and implants (if equipped) as well. Do not run Abyssal Deadspace complexes with a ship or with implants that you cannot afford to lose. |
Enviromental Effects
Abyssal deadspace has several enviromental effects that will all apply to both the player ship and to the NPC ships. These effects will neutralize unprepared ships but they can also be taken advantage of. All effects applied to your ship will be shown in same location as EWAR effects. Hover your mouse over the icon to see what effect is applied to your ship.
Weather Effects
Each Abyssal Deadspace instance will have a weather effect that spans over all three pockets of the instance. Five types of environmental weather effects exist affecting both player and NPCs. The type is identified on the info of the filament and can be countered if desired by fitting choices. The name of the filament itself gives clues as to what tier and difficulty it is. A Raging Exotic Filament means that it is a Tier 4 site with Exotic Particle Storm effect. A Fierce Dark Filament is a Tier 3 site with Dark Matter Field effect.
The bonus modifier of the weather is always 50% but the strength of the penalty varies by the level of the instance.
| Level | Filament Name | Filament Appearance | Penalty Amount |
|---|---|---|---|
| 0 | Tranquil |  |
-30% or -50%, random per run |
| 1 | Calm | 
| |
| 2 | Agitated | 
| |
| 3 | Fierce | 
| |
| 4 | Raging |  |
-50% or -70%, random per run |
| 5 | Chaotic | 
| |
| 6 | Cataclysmic | 
|
The level of the filament can also be identified by the number of glowing stripes on the icon.
The five Abyss-wide environmental effects are outlined in this table below:
| Weather Type | Penalty Type (strength defined by level above) | Bonus Provided |
|---|---|---|
| Electrical | ||
| Dark | ||
| Exotic | ||
| Firestorm | ||
| Gamma |
When selecting ship you must consider the weather effect of the instance you are entering. For example using a turret ship or drone boat in dark matter field (range penalty) is very bad idea as you would likely not be able to hit anything.
The weather bonuses and penalties apply to all entities within the abyssal deadspace. This includes your ship, rats, missiles and drones. The environmental effects are stacking penalized.
As the resist penalty will apply to the rats too you should pick your damage type to match the resist weakness. How negative resist bonus is applied to a ship may seem confusing. The easiest way to think of it is that a -50% resist penalty means the ship will take 50% more damage. For more in depth explanation see negative resists on tanking page.
Localized Effects


The pockets will also contain clouds and Triglavian towers that will apply effects to player and NPC ships in their immediate vicinity.
Localized Clouds:
- Filament Cloud (orange): Penalty to Shield Booster boosting (-40%) and reduction to shield booster duration (-40%). If using a conventional (not Ancillary) shield booster, in effect this does not weaken your shield booster, it increases its capacitor cost/second by 66%. If you rely on a shield booster to survive, you should avoid entering these.
- Bioluminescence Cloud (light blue): +300% Signature Radius (4.0x signature radius multiplier). Entering this cloud will make your ship easier target to hit but it will also make all rats easier to hit. If fighting small but accurate enemies like Damaviks, this cloud can actually be helpful to pull enemies through.
- Tachyon Cloud (white): +300% Velocity (x4.0 velocity), -50% Inertia Modifier. Be very careful entering this cloud with an active MWD, as the Inertia reduction will cause you to accelerate very quickly (x4 velocity, x0.5 inertia, x8 acceleration), potentially slingshotting you outside the boundary for a very quick death to the Unstable Abyssal Depths. These clouds will also increase enemy velocities, causing them to either close range very quickly, or suddenly pull away.
| A long, long time ago... |
|---|
| In September, 2020, the Tachyon Cloud was introduced, replacing the older Caustic Cloud. The Caustic Cloud applied a -80% penalty to local and remote Armor Repair modules, making it a death sentence for armor tanked ships. However, the cloud was very rarely seen. |
Triglavian Towers:
- Deviant Automata Suppressor: Damages all missiles, drones, and rogue drone frigates within it area of effect. The larger does about the same damage to drones as a single medium smartbomb; the smaller does more than double that. Flying into the range of this Suppressor can help you take out pirate drones.
- Short-Range Deviant Suppressor will attack all drones, missiles and rogue drone frigates within 15 KM
- Medium-Range Deviant Suppressor will attack all drones, missiles, and rogue drone frigates within 40 KM
- Multibody Tracking Pylon: +60% or +80% tracking to all ships in its area of effect.
Enemies
Abyssal Deadspace contains a wide variety of different hostile NPCs. Each NPC will behave differently and taking the right approach in different situations is important. This page will talk about all the different types of NPCs and their abilities; for an overview of the possible sets of NPCs you can face in an Abyssal room, see the Possible rooms in Abyssal Deadspace page.
Unlike in most other regions of the game, Abyssal Deadspace NPCs have very clear naming patterns, and will have either a prefix or suffix which states what special abilities they have. This makes target prioritization easier, which is extremely important in the Abyss: the general best strategy in most rooms is to start out by killing any EWAR that poses a threat to your ship. Depending on your fit, this can mean Neutralizers, Webs, Tracking/Guidance disruptors or, if the pocket has battleships, Target Painters. You should also pay attention on whether dedicated remote repair ships are on grid; if you can't kill other frigates before repairs land, prioritize killing remote repairs first. After the dangerous EWAR and remote repair ships are dead, you can focus on the damage dealers in your preferred order.
| Rogue Drones | Drifters | Sleepers | Triglavians | Sansha's Nation | CONCORD | Angel Cartel |
|---|---|---|---|---|---|---|
 |
Rogue Drones
Rogue Drones are perhaps the most common type of enemies encountered in Abyssal Deadspace, and come in three sizes: Frigate, Battlecruiser, and Battleship. Rogue Drone Frigates can often be found in rooms containing extremely large groups of them, alongside other larger Rogue Drones, or even alongside ships from other factions. Rogue Drone Battlecruisers are somewhat slow and have very short range (only 2+4km) but have pinpoint tracking within that range and extremely high damage. And the Rogue Drone Battleship (Abyssal Overmind) has extremely long range and damage, and comes in a different variant at each Abyssal Filament level and is discussed further, later in this page.
Rogue Drone Frigates deal either a single type of damage based on their name, or a small amount of omni damage alongside their EWAR. Rogue Drone Frigates are also susceptible to Deviant Automata Suppressor pylons, but if those are not available, can be much more easily fought using Multibody Tracking Pylons or Bioluminescent Clouds. Rogue Drone Battlecruisers also deal only a single type of damage, based on their name. The Rogue Drone Battleship deals Kinetic and Thermal damage, and the Battleship found in Tier 5 and 6 sites also has a Stasis Webifier, which helps counteract its poor tracking.
Rogue Drone Frigate names have the suffix Tessella. Rogue Drone Battlecruiser names have the suffix Tessera.
| Rogue Drone Ship | |
|---|---|
| Name | Weapon |
| Spark | |
| Ember | |
| Strike | |
| Blast | |
| (name) needle | |
| (name) lance | |
| (name) grip | 16pxBattlecruiser, short range but extreme damage |
| Snarecaster | |
| Fogcaster | |
| Gazedimmer | |
| Spotlighter | |
| Fieldweaver | |
| Plateforger | |
Drifters and Seekers
Drifters and seekers are sometimes encountered together but can also appear on their own. They all fire omni-damage turrets and have flat omni-resist profiles.
The key ship in a Drifter room is Karybdis Tyrannos, who flies a Drifter Battleship. This battleship has extremely long range, and will attempt to fly away from your ship(s) at around 300m/s, and drag you to the edge of the abyssal pocket. This can be very irritating, as it forces you to fly all the way back to the exit gate after the battleship finally dies; and during the time spent chasing it, you are vulnerable to its poorly-tracking but hard-hitting turrets. The strength of the battleship varies with the level of the Abyssal filament; higher-level filaments feature more damage and HP. Thankfully, the Drifter Battleship here does not come with either a Doomsday Weapon or any EWAR abilities.
Drifter ships start the fight with heavily damaged shields, armor, and hull. Drifter cruisers all use some form of EWAR in addition to dealing damage, however they also have large signature radii and are thus easy to finish off.
Seeker ships are far more generic than Drifter ships, and while they feature many forms of EWAR they also feature very thin armor.
Note: Drifter Cruisers will all be named Scylla Tyrannos, and so their type must be checked to see their abilities.
| Drifter Cruiser | |
|---|---|
| Cruiser Type | Weapon |
| Entanglement | |
| Nullwarp | |
| Nullcharge | |
| Seeker types | |
|---|---|
| Seeker Name | Weapon |
| Lancer | Generic Damage Dealer |
| Entangler | |
| Spearfisher | |
| Illuminator | |
| Dissipator | |
| Obfuscator | |
| Confuser | |
Sleeper Drones
Every Sleeper drone is equipped with remote repairers so it is best to kill smaller ships first as they die before repairs land. In addition to damage, they will also use webs and energy neutralizers. The Sleeper drone battleship (Lucid Deepwatcher) always spawns in pairs or trios and deals rather high damage, but has very poor tracking and can easily be evaded with a sub-10km orbit.
Sleeper drones fire EM/TH turrets (and the cruisers have irritatingly high tracking and range), and KIN/EX missiles (with poor flight speed and application).
Sleeper Drones all have the Lucid prefix.
| Sleeper Drone Frigates | |
|---|---|
| Name | Weapon |
| Escort | Generic Damage Dealer |
| Aegis | Higher Damage Dealer |
| Warden | |
| Firewatcher | |
| Preserver | |
| Sleeper Drone Cruisers | |
|---|---|
| Name | Weapon |
| Watchman | Generic Damage Dealer |
| Upholder | |
| Sentinel | |
| Sleeper Drone Battleship | |
|---|---|
| Name | Weapon |
| Deepwatcher | |
Triglavian Collective
Triglavian ships can appear in any pocket. They use Entropic Disintegrators to deal high Thermal and Explosive damage. As each ship's damage will slowly increase the longer it stays focused on one target, Triglavian rooms can quickly become DPS or range-control races, to either kill their high-damage ships before they can kill you, or to kill their tackle ships and fly outside their damage. Triglavian Ships almost all feature Remote Armor Repair abilities, and feature the widest range of EWAR of any Abyssal faction.
| Triglavian Ships | |
|---|---|
| Name or Prefix | Ability |
| Damavik | |
| Kikimora | |
| Vedmak | |
| Rodiva | |
| Drekavac | 16px Harder-hitting battlecruiser. Spawns with 28% shield, 68% armor and 11% hull. |
| Leshak | Spawns with low hull and no shields or armor. |
| Prefixes | |
| Striking | Generic Damage Dealer |
| Starving | |
| Harrowing / Shining | |
| Anchoring | |
| Renewing | |
| Blinding | |
| Tangling | |
| Ghosting | |
| Vila Swarmer | Destroy controlling ship first as the drones will deactivate once it gets destroyed, and destroying the drones will take alot off time. |
Sansha's Nation
Sansha's Nation ships feature very long range lasers, and thus must be fought up close. However, fighting them up close can be problematic, as they also bring a wide range of EWAR abilities, including significant energy neutralizers.
All Sansha's Nation ships have the Devoted prefix.
| Sansha's Nation Cruisers | |
|---|---|
| Name | Weapon |
| Knight | |
| Sansha's Nation Frigates | |
|---|---|
| Name | Weapon |
| Hunter | Above Generic (50% More) Damage Dealer |
| Fisher | |
| Priest | |
| Trapper | |
| Smith | |
| Lookout | |
| Herald | |
| Torchbearer | |
CONCORD
CONCORD rooms contain a mix of CONCORD and EDENCOM ship hulls. CONCORD hulls use Thermal or Explosive missiles, while EDENCOM ships use EM-Kinetic Vorton Projectors.
CONCORD rooms are generally feared by many Abyssal runners due to their high damage and heavy application support. The sheer incoming DPS, combined with the multiple Webs and Target Painters, makes passive or active tanking these rooms extremely difficult. Because of this, Marshal rats (especially Drainers) are often targeted first to reduce incoming DPS. And while the EDENCOM ships offer no EWAR, they bring very high alpha damage on very slow fire rates, meaning that the combination of Marshal DPS and EDENCOM alpha can easily and unexpectedly break an Abyssal runner's buffer.
The three saving graces when fighting CONCORD/EDENCOM ships are (1) they cannot land Wrecking Shots, (2) Vorton Projectors will chain their damage to any objects within 10km of your ship, and can thus be exploited into dealing friendly fire damage to other enemy CONCORD/EDENCOM ships, and (3) CONCORD ships are not especially durable, which turns the CONCORD room into a pure DPS race of whether you die first or the Marshals die first.
All CONCORD and EDENCOM ships have the Disparu Troop suffix.
| CONCORD ships | |
|---|---|
| Name | Weapon |
| (prefix) Pacifier | |
| (prefix) Enforcer | |
| (prefix) Marshal | |
| Prefixes | |
| Attacker/Assault | Generic damage dealer |
| Arrester | |
| Marker | |
| Drainer | |
| EDENCOM ships | |
| (no prefix) Skybreaker | 87% |
| (no prefix) Stormbringer | 87% |
| (no prefix) Thunderchild | 77% |
Angel Cartel
Angel Cartel rooms are the bane of fast and evasive ships. Angel Cartel ships have extremely high flight speeds, rather small signature radii, good range, varied damage types, and varied EWAR. The Cynabal is especially problematic, as it features all of these abilities combined in one ship.
All Angel Cartel rats have the Lucifer prefix. Certain ships can also have the Elite prefix, and feature even higher stats than their normal forms.
| Angel Cartel Ships | |
|---|---|
| Name | Weapon |
| (Elite) Cynabal | Heavy damage dealer; high range & tracking |
| Ixion | |
| (Elite) Dramiel | |
| Fury | |
| Echo | |
| Medusa | |
| Burst | |
| Swordspine | |
Damage to deal
The Abyssal Deadspace resist penalties apply to both the player ship and to the NPCs inside Abyssal Deadspace. Due to how resist penalties are calculated this means that damage matching with the penalized resist will effectively receive damage bonus equal to the resist penalty (smaller damage increase if the target has too low resist). So in general you should select your damage to match the weather.
However, in some cases, the natural resist hole of the NPC is equal or even greater than the resist hole caused by the weather. This is especially true in Dark filaments, which have no resist penalty.
Drifter ships, Seeker drones, and Sleeper drones have uniform resists.
Sansha's Nation ships other than the Devoted Night are weak to EM and Thermal and strong against Kinetic and Explosive. The Devoted Knight is weak to EM, then Explosive, and strong against Thermal and Kinetic.
Angel Cartel ships are the opposite of Sansha's Nation: strong against EM and Thermal, weak to Explosive and Kinetic.
CONCORD ships have uniform resists. EDENCOM ships are weak to Thermal and EM.
Triglavian ships are weak to Explosive, then Thermal, and strong against Kinetic and EM. In a -30% Electrical filament, EM resist is equal to Explosive resist.
Rogue drone ships have wildly varying resists. Damaging and EWAR frigates have the same natural resists as a tech 1 hull from some race. Repair frigates have 0 resists. Battlecruisers are slightly weak to EM/EX, and slightly more resistant to TH/KIN.
The Battleship's resistances change at different tiers. With one exception, the Weather-induced hole is greater than any natural resist hole, and should be targeted; however in a Dark Filament, these resistances become relevant. If swapping damage types (i.e. through missile reloads) is possible, it should be done for these battleships. Their Shields are weak to EM damage, and the following chart lists their Armor weaknesses:
| Rogue Drone Battleship | ||
|---|---|---|
| Abyssal Tier | Name | Damage to deal |
| 1 | Photic Abyssal Overmind | |
| 2 | Twilit Abyssal Overmind | |
| 3 | Bathyic Abyssal Overmind | |
| 4 | Hadal Abyssal Overmind | |
| 5 | Benthic Abyssal Overmind | |
| 6 | Endobenthic Abyssal Overmind | |
- ^ The one exception. Very high Kinetic resist. Use Thermal, even in an Exotic Filament.
Abyssal Deadspace Co-op for Frigates and Destroyers
When the Abyss was created, it was an affair to be fought with a single Cruiser. However, later updates allowed the Abyss to be entered with fleets of either three Frigates, or two Destroyers. Entering the Abyss as a fleet of small ships requires Two (for destroyers) or Three (for frigates) of the appropriate filaments, of the same type, in a single ship's cargohold. (And it requires that all interested ships be in the same Fleet together.) The pilot of that ship can then use the filaments and select Activate For Fleet. Doing so will consume the filaments, and rather than pulling the ship into the abyss, it will open a limited-use acceleration gate that leads to the abyss. Fleet members can then activate that acceleration gate and launch themselves into the abyss. The 20-minute timer is shared by all ships in the fleet, and starts counting down when the first of the ships finishes activating the acceleration gate and enters the abyssal pocket. It is not required to actually have more than one ship enter the Abyss, although it is obviously more difficult to run through Abyssal Deadspace alone.
To compensate for the increased Filament consumption and the loot being split across 2 or 3 ships and pilots, the Biocombinative Cache contains significantly more loot than the ordinary Bioadaptive Cache.
Abyssal Deadspace from the outside
- As of August 14th, 2018, the suspect timer given upon exiting T4 and T5 Abyssal Deadspace has been "temporarily" removed.

When you enter the Abyssal Deadspace, you will be removed from local and from directional scanner. You cannot see who is in the system outside the deadspace, and they cannot see who is inside or in what ship. But that does not mean you are safe. Once the filament has been used, a rift appears that can be combat scanned by anyone in the system and can be warped to. It also appears on the directional scanner of anyone who has not filtered it out. This makes it easy for people to camp the exit and shoot whoever comes out.
This means that you have to consider where you use the filament, especially in low security and null security space. But even in high-security space you are not safe. It used to be the case that Tier 4 and 5 filaments would give you suspect timer, but that has been "temporarily" disabled as of August 14th, 2018.
You will be invulnerable for a short time, so be patient if you leave the rift and find yourself being camped. A survival tactic could be to quickly activate a new filament - especially a tier 1-3 filament that you run in order to run down a suspect timer in hisec - but beware, many players have now got wise to this and will anchor a mobile depot which will prevent you activating another filament.
Rewards
Abyssal Deadspace is dangerous, but the rewards can be worthwhile for those who can complete the sites. Abyssal Deadspace is the only source for many valuable items, which are found in the Caches and Extraction Nodes/SubNodes. No wrecks are left behind by any NPCs, all drops come from these two listed cans. Rewards are as follows:
- Mutaplasmids that can be used to change the stats of certain modules. Which mutaplasmids are able to drop depends on the weather selected:
- Gamma sites can drop shield related mutaplasmids - S/M/L Shield Extender, S/M/L/XL Shield Booster
- Dark sites can drop propulsion module mutaplasmids - 1/10/100MN Afterburner, 5/50/500MN Microwarpdrive
- Firestorm sites can drop armor related mutaplasmids - S/M/L Armor Plate, S/M/L Armor Repairer
- Electrical sites can drop capacitor related mutaplasmids - S/M/L Cap Battery, S/M/L Energy Neutralizer, S/M/L Energy Nosferatu
- Exotic sites can drop tackle related mutaplasmids - Stasis Webifier, Warp Disruptor, Warp Scrambler
- All weathers can drop damage module mutaplasmids - Heat Sink, Gyrostabilizer, Magnetic Field Stabilizer, Ballistic Control System, Entropic Radiation Sink
- T6 filaments can drop capital module mutaplasmids - All Capital-sized versions of the modules above, plus Ancillary Shield Booster/Armor Repairer, Heavy Warp Disruptor/Scrambler, and Siege Module
- Precursor ship and weapon skill books, disintegrator specialization skill books
- Blueprint copies required for the production of Triglavian hulls, weapon systems, and ammunition:
- Triglavian ship hulls
- Entropic Disintegrators: Weapons with unique properties and only usable by the Triglavian ships
- Exotic Plasma: Ammunition used by Entropic Disintegrators
- Mutadaptive Remote Armor Repairer: A special remote armor repairer module used by the Triglavian Rodiva and Zarmazd logistics cruisers
- Production materials required for the production of Triglavian hulls, weapon systems, and ammunition:
- Crystalline Isogen-10
- Zero-Point Condensate
- Modules:
- Compact Entropic Radiation Sink - a compact (low-fitting) version of the Entropic Radiation Sink
- Perun Heavy Mutadaptive Remote Armor Repairer - a faction version of the Mutadaptive Remote Armor Repairer
- Triglavian Survey Database: Often referred to as "red loot", this item is an ISK token item similar to Sleeper "blue loot" and Overseer's Personal Effects in that it can be sold to unlimited NPC buy orders for a fixed price, in this case, 100,000 ISK/ea
- Abyssal Filaments: While data hacking sites are the only source for Abyssal Filaments outside of Abyssal Deadspace, and they only provide Calm (Tier 1) filaments, the Bioadaptive/Biocombinative Cache in Abyssal Deadspace can drop filaments of all tiers, allowing us to access the higher tiers of this content. These filaments can also be sold on the open market to other players.
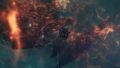
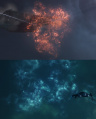
Gallery
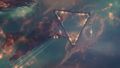
Approaching the Gate in a Electrical Abyss

Slow boating through the impressive entry of the Abyss

Collecting the Loot in the Abyss

Investigating Comets in the Abyss
Valuable Ore in the Abyss

Triglavian Bioadaptive Cache
Abyssal Clouds

Abyssal Filament Traces


