Difference between revisions of "Ratting at NSC"
Hideo Date (talk | contribs) m (→Asteroid Belt) |
|||
| Line 1: | Line 1: | ||
| − | |||
<div style=" margin: 1em 10%; padding: 4px; border: solid 1px #333333; clear:both; background-color: #000000;"> | <div style=" margin: 1em 10%; padding: 4px; border: solid 1px #333333; clear:both; background-color: #000000;"> | ||
{| cellpadding="2" style="background-color: #000000; color: #FFFFFF; width: 100%; text-align:center;" | {| cellpadding="2" style="background-color: #000000; color: #FFFFFF; width: 100%; text-align:center;" | ||
| Line 12: | Line 11: | ||
==Why rat at the NSC?== | ==Why rat at the NSC?== | ||
| − | |||
Hunting and killing pirate NPCs (a.k.a. "rats") at asteroid belts or in combat sites is just one of many ways to earn ISK in EVE. | Hunting and killing pirate NPCs (a.k.a. "rats") at asteroid belts or in combat sites is just one of many ways to earn ISK in EVE. | ||
Since the majority of ISK is gotten through [[Loot#Loot|loot]] drop, and since loot is dropped at random, the reward for ratting is rather irregular. Some days you can be lucky and get hundreds of millions or even billions worth of loot (if you are very lucky), and other days you will only get the standard [[EVE Lexicon#bounty|bounty]] from the rats and the from [[Salvaging|salvage]]. | Since the majority of ISK is gotten through [[Loot#Loot|loot]] drop, and since loot is dropped at random, the reward for ratting is rather irregular. Some days you can be lucky and get hundreds of millions or even billions worth of loot (if you are very lucky), and other days you will only get the standard [[EVE Lexicon#bounty|bounty]] from the rats and the from [[Salvaging|salvage]]. | ||
| − | Still, this is a easy way to earn ISK, and the requirements for doing this can be very low, depending on what kind of ratting you do. | + | Still, this is a easy way to earn ISK, and the requirements for doing this can be very low, depending on what kind of ratting you do. |
| + | |||
| + | Ratting can also be a source of minerals for small scale industry. Large meta modules, such as those dropped by NPC battleships, can be reprocessed for decent quantities of minerals which may be hard to obtain in null sec. For many modules, the reprocessed value is higher than the buy value of the module. | ||
===Types of ratting at the NSC=== | ===Types of ratting at the NSC=== | ||
| − | At the NSC there | + | At the NSC there there mainly two types of ratting to be done: <br> |
Clearing asteroid belts in a system, and hunting down and completing combat sites. | Clearing asteroid belts in a system, and hunting down and completing combat sites. | ||
Combat sites can furthermore be divided up in [[Combat sites#Combat anomalies|combat anomalies]] and [[Combat sites#Cosmic signatures|combat signatures]]. More on these below. | Combat sites can furthermore be divided up in [[Combat sites#Combat anomalies|combat anomalies]] and [[Combat sites#Cosmic signatures|combat signatures]]. More on these below. | ||
| Line 28: | Line 28: | ||
Advantages of doing combat sites: | Advantages of doing combat sites: | ||
| − | * Generally better ISK | + | * Generally better ISK per [[EVE Lexicon#tick|tick]]. |
* More variety in the PvE. | * More variety in the PvE. | ||
While [[Abyssal Deadspace|abyssal]] combat sites are also technically combat sites and can be done at the NSC, they have very different rules and are outside the scope of this article. | While [[Abyssal Deadspace|abyssal]] combat sites are also technically combat sites and can be done at the NSC, they have very different rules and are outside the scope of this article. | ||
| − | == | + | ==Belt Ratting== |
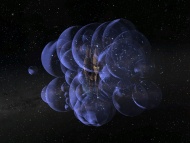
[[File:5-D belt.jpg|240px|thumb|right|The asteroid belts in system 5-DSFH. Clear them from top to bottom, from bottom to top, or whatever other order you want to.]] | [[File:5-D belt.jpg|240px|thumb|right|The asteroid belts in system 5-DSFH. Clear them from top to bottom, from bottom to top, or whatever other order you want to.]] | ||
[[File:Ratting guide basic.jpg|240px|thumb|right|Short guide to chaining belts.]] | [[File:Ratting guide basic.jpg|240px|thumb|right|Short guide to chaining belts.]] | ||
| + | Belt ratting is the act of going from asteroid belt to asteroid belt, killing the pirate NPC ships that are found there, and then go on to the next asteroid belt and doing the same there. This is done to collect the bounty on the ships, as well as trying to get rare spawns and rare loot. | ||
| + | |||
| + | ===Picking a system=== | ||
| + | |||
| + | ====Security Level==== | ||
| + | |||
| + | Ratting in asteroid belts are greatly affected by the [[System security#True security|true-sec]] of the system it is being done in. Both the size of the bounties, as well as the chance of rare spawns, being affected by it, with lower true-sec giving better bounties and higher chance of rare spawns. So one factor in choosing a system to kill rats in is the true-sec of the system. At the NSC, [http://evemaps.dotlan.net/map/Syndicate/5-DSFH#sec 5-DSFH] is the best system to belt rat in since it has a low security level, making it the best system to clear in the pocket. 5-D is also deep in the NSC pocket, and, as such, is slightly safer to be in if you pay attention to intel channels. | ||
| + | |||
| + | ====Dynamic Bounty System==== | ||
| + | |||
| + | Bounty payouts in a system are affected by the Dynamic Bounty System. Player deaths increase the Bounty Risk Modifier, which acts as a multiplier on the base bounty rate for NPC kills in that system. NPC kills slowly cause that modifier to fall. OVer time, the modifier will drift towards a equilibrium rate. At NSC, [http://evemaps.dotlan.net/map/Syndicate/PC9-AY PC9-AY] typically has the highest Bounty Risk Modifier, due to it being the entrance to the NSC pocket, and the site of most PVP engagements. Other systems in the pocket tend to hover around the equilibrium rate, or slightly lower. | ||
| + | |||
| + | ====Belt Counts==== | ||
| + | Rats in asteroid belts respawn after about 20 minutes, so you also want a system that have enough belts so you do not run out of rats to kill. Systems such as AK-QBU and T22-QI, which tend to have fewer belts, aren't as good as system such as PC9-AY or 5-DSFH, which have more belts. | ||
| − | + | ===What to expect=== | |
| − | + | The pirate faction encountered at the NSC is the [[Serpentis]]. They commonly deal Thermal and Kinetic damage, and have lower resists against Kinetic and Thermal damage. Expect to face electronic warfare in the form of sensor damping from Serpentis guardian-type cruisers and battlecruisers. This may reduce your targeting distance drastically, and depending on your sensor skills they can get you to 5,000m or less if they gang up and a few groups spawn several EWAR-equipped ships. Some Serpentis rats also scram. | |
| − | + | You can expect to find battlecruisers as the most common enemy in most systems, with battleships being quite common as well, and destroyers used to "fill in" groups with battleships. Each system will have a few static group spawn types that are the most common, and you will rapidly learn which groups you can expect to see. Rare spawns will sometimes be their own kind of spawn group, but can also occur when an elite spawn replaces a normal ship in a typical group (see below; or, for example, a Shadow Serpentis battleship replacing one of the two high admirals in a group of two high admirals and two destroyers). Elite spawns may widen their bag of tricks beyond damping to webbing, warp scramming, and other EWAR types. | |
| + | |||
| + | Belt ratting is safest done in cruisers like the [[Vexor]]. | ||
| Line 52: | Line 68: | ||
This also means that the special rats, like Shadow Serpentis ships can't spawn, but it will still give more ISK over time. | This also means that the special rats, like Shadow Serpentis ships can't spawn, but it will still give more ISK over time. | ||
| − | + | ===Rare Spawns=== | |
| − | ===Faction Spawns - Shadow Serpentis=== | + | ====Faction Spawns - Shadow Serpentis==== |
Elite versions of the normal rats with the prefix "Shadow" in front of their name. These ships are slightly harder to kill, have a much bigger bounty and drops [[Faction modules#faction|Shadow Serpentis faction modules]]. These can also spawn in combat anomalies. | Elite versions of the normal rats with the prefix "Shadow" in front of their name. These ships are slightly harder to kill, have a much bigger bounty and drops [[Faction modules#faction|Shadow Serpentis faction modules]]. These can also spawn in combat anomalies. | ||
| − | ===Capital Spawns - Serpentis Dreadnoughts=== | + | ====Capital Spawns - Serpentis Dreadnoughts==== |
If you warp to a belt and see a dreadnought there, you should warp out immediately! These ships are very powerful and need coordination to bring down. <br> | If you warp to a belt and see a dreadnought there, you should warp out immediately! These ships are very powerful and need coordination to bring down. <br> | ||
Dreadnoughts and Shadow Serpentis Dreadnoughts are capital pirate ships. These rats hit hard and have a lot of tank, and as such you need a fleet (5+ people) to kill them. Should a dreadnought spawn while you are in a belt, warp off immediately, or face the possibility of it killing your ship. | Dreadnoughts and Shadow Serpentis Dreadnoughts are capital pirate ships. These rats hit hard and have a lot of tank, and as such you need a fleet (5+ people) to kill them. Should a dreadnought spawn while you are in a belt, warp off immediately, or face the possibility of it killing your ship. | ||
| Line 65: | Line 81: | ||
The dreadnoughts can warp off, so be sure to bring warp disruptors or scramblers. | The dreadnoughts can warp off, so be sure to bring warp disruptors or scramblers. | ||
| − | They can also spawn in combat anomalies. | + | They can also spawn in combat anomalies. |
| + | |||
| + | The NSC uses [https://forum.eveuniversity.org/viewtopic.php?f=212&t=120707 Dread Vexors] to kill NPC Dreadnoughts. | ||
| − | ===NPC Hauler Spawns=== | + | ====NPC Hauler Spawns==== |
| − | + | There are NPC freighters that can spawn in belts. These ships can drop more than 100.000.000 ISK in ores, and you want a hauler docked nearby so that you can loot the ores. Remember to bookmark the wreck when you switch into your hauler. <br> | |
NPC hauler spawns are not the same as the NPC mining fleets. | NPC hauler spawns are not the same as the NPC mining fleets. | ||
| Line 77: | Line 95: | ||
While these fleets can be killed solo (usually in T3D), they are best undertaken in a small fleet. | While these fleets can be killed solo (usually in T3D), they are best undertaken in a small fleet. | ||
| − | |||
| − | |||
| − | |||
| − | |||
| − | |||
==Combat Sites== | ==Combat Sites== | ||
{{main|Guide to combat sites}} | {{main|Guide to combat sites}} | ||
| + | {{main|Combat sites}} | ||
[[File:c_ano_sig.jpg|240px|thumb|right|The scanner window, with a combat Anomaly and a combat Signature halfway scanned down.]] | [[File:c_ano_sig.jpg|240px|thumb|right|The scanner window, with a combat Anomaly and a combat Signature halfway scanned down.]] | ||
| Line 103: | Line 117: | ||
** They usually consists of many parts, and expeditions can escalation into new expeditions in new systems. | ** They usually consists of many parts, and expeditions can escalation into new expeditions in new systems. | ||
| − | The [[system security]] (not true-sec) determines what level of sites that spawn, while region determines what pirate faction sites spawn. Since the NSC is located in Syndicate, we get Serpentis pirate spawns, with the | + | The [[system security]] (not true-sec) determines what level of sites that spawn, while region determines what pirate faction sites spawn. Since the NSC is located in Syndicate, we get Serpentis pirate spawns, with the occasional rogue drones combat sites as well. |
At the NSC, there is the possibility of 22 different versions of combat anomalies to spawn. Ranging from Class 4, level 2 sites ([[Serpentis Hidden Den]]), to the Class 10 site ([[Serpentis Sanctum]]). | At the NSC, there is the possibility of 22 different versions of combat anomalies to spawn. Ranging from Class 4, level 2 sites ([[Serpentis Hidden Den]]), to the Class 10 site ([[Serpentis Sanctum]]). | ||
Serpentis combat anomalies are usually worth your time doing, while the rogue drones combat sites are generally of questionable worth. <br> | Serpentis combat anomalies are usually worth your time doing, while the rogue drones combat sites are generally of questionable worth. <br> | ||
Unrated combat sites, DED combat sites and Expeditions are generally more challenging and needs preparations or to be done in a group, but also offers higher rewards. It is important to know that, while higher class of combat anomalies means the site will be harder. The difficulty of Unrated Complexes, DED Complexes or Expeditions does not 100% correlate with Class. CCP haven't been great at balancing these combat sites, so be sure to look them up your first time. | Unrated combat sites, DED combat sites and Expeditions are generally more challenging and needs preparations or to be done in a group, but also offers higher rewards. It is important to know that, while higher class of combat anomalies means the site will be harder. The difficulty of Unrated Complexes, DED Complexes or Expeditions does not 100% correlate with Class. CCP haven't been great at balancing these combat sites, so be sure to look them up your first time. | ||
| − | |||
| − | |||
| − | |||
| − | |||
===Tips=== | ===Tips=== | ||
| Line 118: | Line 128: | ||
'''Combat signatures and Expeditions''' are far more varied, and there for harder to give general advice for. They usually consists of a couple of gated deadspace pockets. This means that hostile players cannot warp directly to you, but have to scan you down and take the gates to reach you. This makes you far harder to catch while running, just remember to keep an eye on the intel. | '''Combat signatures and Expeditions''' are far more varied, and there for harder to give general advice for. They usually consists of a couple of gated deadspace pockets. This means that hostile players cannot warp directly to you, but have to scan you down and take the gates to reach you. This makes you far harder to catch while running, just remember to keep an eye on the intel. | ||
| − | The higher difficulty of combat sites means | + | The higher difficulty of combat sites means that you want better ships than for belt ratting. Consider flying more advanced ships such as the [[Gila]] or [[Praxis]]. |
| − | |||
==How to be safe from other players== | ==How to be safe from other players== | ||
| Line 127: | Line 136: | ||
* Be in [[NSC Standing Fleet|fleet]]. | * Be in [[NSC Standing Fleet|fleet]]. | ||
* Be in the [[Null-Sec Campus#Communication|intel channel]]. | * Be in the [[Null-Sec Campus#Communication|intel channel]]. | ||
| − | * Be on [[Mumble| | + | * Be on [[Mumble|comms]]. |
* Be aware of the geopolitical and warfare situation-- if there's a structure under assault in the system or other major combat op, you can easily find yourself a helpless target of opportunity to a war fleet. | * Be aware of the geopolitical and warfare situation-- if there's a structure under assault in the system or other major combat op, you can easily find yourself a helpless target of opportunity to a war fleet. | ||
* Once you enter a combat site or an asteroid belt, burn away from the warp-in point. The distance a hunter have to travel from the warp-in point to you, can sometimes save you. | * Once you enter a combat site or an asteroid belt, burn away from the warp-in point. The distance a hunter have to travel from the warp-in point to you, can sometimes save you. | ||
| Line 147: | Line 156: | ||
===If you get caught anyways=== | ===If you get caught anyways=== | ||
So you followed the above advice, but got caught anyways? This happens. The most important part is to stay calm. | So you followed the above advice, but got caught anyways? This happens. The most important part is to stay calm. | ||
| − | Being in fleet and on | + | Being in fleet and on comms also allows you to call for help if you should be caught. |
* Calmly call out for help on mumble and in fleet chat. Observe good protocol, call "Break, Break" and be prepared with the following information: | * Calmly call out for help on mumble and in fleet chat. Observe good protocol, call "Break, Break" and be prepared with the following information: | ||
* Describe where you are and what ship caught you. You should give the exact system, or its common short form, and the belt name and number, so help can quickly warp to you. If you are in fleet they have the benefit of "warp to member" which is one excellent reason to be fleeted at all times. | * Describe where you are and what ship caught you. You should give the exact system, or its common short form, and the belt name and number, so help can quickly warp to you. If you are in fleet they have the benefit of "warp to member" which is one excellent reason to be fleeted at all times. | ||
| Line 162: | Line 171: | ||
The NSC is located in [[Serpentis]] space, and the rats you will face while ratting are Serpentis NPCs and sometimes [[Rogue Drones|rogue drones]]. This makes it easy to prepare both the tank of your ship, as well as the type of [[NPC damage types|damage you should deal]]. | The NSC is located in [[Serpentis]] space, and the rats you will face while ratting are Serpentis NPCs and sometimes [[Rogue Drones|rogue drones]]. This makes it easy to prepare both the tank of your ship, as well as the type of [[NPC damage types|damage you should deal]]. | ||
| − | The type of ships used for ratting at the NSC range from beginner ships like the [[Algos]] or the [[Vexor]], to intermediate ships like | + | The type of ships used for ratting at the NSC range from beginner ships like the [[Algos]] or the [[Vexor]], to intermediate ships like the [[Gila]] or the [[Praxis]], and up to very strong ships like the [[Ishtar]] or [[Tengu]], and even the [[Rattlesnake]]. <br> |
These ships are mostly "[[EVE_Lexicon#Drone boat|drone boats]]", that sometimes have secondary weapons as well. The reason for this is the versatility that [[Drones|drones]] brings to PvE. Other popular weapon against Serpentis rats are [[Missiles|missiles]] and [[Turrets#Hybrid turrets|hybrid turrets]]. You want to avoid weapon types like [[Turrets#Energy turrets|Laser turrets]] and [[Turrets#Projectile turrets|projectile turrets]] for PvE at the NSC, their damage type aren't great against the weakness of Serpentis ships. | These ships are mostly "[[EVE_Lexicon#Drone boat|drone boats]]", that sometimes have secondary weapons as well. The reason for this is the versatility that [[Drones|drones]] brings to PvE. Other popular weapon against Serpentis rats are [[Missiles|missiles]] and [[Turrets#Hybrid turrets|hybrid turrets]]. You want to avoid weapon types like [[Turrets#Energy turrets|Laser turrets]] and [[Turrets#Projectile turrets|projectile turrets]] for PvE at the NSC, their damage type aren't great against the weakness of Serpentis ships. | ||
| Line 185: | Line 194: | ||
As you see, against Serpentis rats, you should deal kinetic damage, and needs to tank both thermal and kinetic damage. Against rogue drones, it can vary a bit more, but you can just stay away from the rogue drone combat sites if you are unsure. | As you see, against Serpentis rats, you should deal kinetic damage, and needs to tank both thermal and kinetic damage. Against rogue drones, it can vary a bit more, but you can just stay away from the rogue drone combat sites if you are unsure. | ||
| − | No matter what you fly in and how you fit it. You want to pilot the ship correctly, this means never to fly directly towards NPC battleships as it makes you far to easy to hit. In combat anomalies, drop down your | + | No matter what you fly in and how you fit it. You want to pilot the ship correctly, this means never to fly directly towards NPC battleships as it makes you far to easy to hit. In combat anomalies, drop down your mobile tractor unit and orbit it at about 20 km. In belts and combat signatures, you should manually steer your ship so that you approach the rats to the side. |
| − | |||
| − | |||
| − | |||
| − | |||
| − | |||
| − | |||
| − | |||
| − | |||
| − | |||
| − | |||
| − | |||
| − | |||
| − | |||
| − | |||
| − | |||
| − | |||
| − | |||
| − | |||
| − | |||
| − | |||
| − | |||
| − | |||
| − | |||
| − | |||
| − | |||
| − | |||
| − | |||
| − | |||
| − | |||
| − | |||
| − | |||
| − | |||
| − | |||
| − | |||
| − | |||
| − | |||
| − | |||
| − | |||
| − | |||
| − | |||
| − | |||
| − | |||
| − | |||
| − | |||
| − | |||
| − | |||
| − | |||
| − | |||
| − | |||
| − | |||
| − | |||
| − | |||
| − | |||
| − | |||
| − | |||
| − | |||
| − | |||
| − | |||
| − | |||
| − | |||
| − | |||
| − | |||
| − | |||
| − | |||
| − | |||
| − | |||
| − | |||
| − | |||
| − | |||
| − | |||
| − | |||
| − | |||
| − | |||
| − | |||
| − | |||
| − | |||
| − | |||
| − | |||
| − | |||
| − | |||
| − | |||
| − | |||
| − | |||
| − | |||
| − | |||
| − | |||
| − | |||
| − | |||
| − | |||
| − | |||
| − | |||
| − | |||
| − | |||
| − | |||
| − | |||
| − | |||
| − | |||
| − | |||
| − | |||
| − | |||
| − | |||
| − | |||
| − | |||
| − | |||
| − | |||
| − | |||
| − | |||
| − | |||
| − | |||
| − | |||
| − | |||
| − | |||
| − | |||
| − | |||
| − | |||
| − | |||
| − | |||
| − | |||
| − | |||
| − | |||
| − | |||
| − | |||
| − | |||
| − | |||
| − | |||
| − | |||
| − | |||
| − | |||
| − | |||
| − | |||
| − | |||
| − | |||
| − | |||
| − | |||
| − | |||
| − | |||
| − | |||
| − | |||
| − | |||
| − | |||
| − | |||
| − | |||
| − | |||
| − | |||
| − | |||
| − | |||
| − | |||
| − | |||
| − | |||
| − | |||
| − | |||
| − | |||
| − | |||
| − | |||
| − | |||
| − | |||
| − | |||
| − | |||
| − | |||
| − | |||
| − | |||
| − | |||
| − | |||
| − | |||
| − | |||
| − | |||
| − | |||
| − | |||
| − | |||
Revision as of 17:29, 20 April 2021
 This page is about ratting at the NSC and not about ratting in general. Plenty of what is written here differs in other parts of New Eden. This page is about ratting at the NSC and not about ratting in general. Plenty of what is written here differs in other parts of New Eden.
|
|
| Null Security Staging |
|---|
| General |
| NSC Activities |
| Preparations |
| Campus Services |
| Guides |
| NSC Activities |
Killing pirate NPCs, or ratting as it is also called, is a way to earn ISK in New Eden. At the NSC it is mainly done in asteroid belts or in combat sites. While you face off against NPCs in the same manner as in missions, it is not considered the same. See this page for for more information about running missions at the NSC. Since combat sites can be found by probing, ratting shares a small overlap with exploration, and ratters can benefit greatly by having a ship capable of scanning down signatures.
Contents
Why rat at the NSC?
Hunting and killing pirate NPCs (a.k.a. "rats") at asteroid belts or in combat sites is just one of many ways to earn ISK in EVE. Since the majority of ISK is gotten through loot drop, and since loot is dropped at random, the reward for ratting is rather irregular. Some days you can be lucky and get hundreds of millions or even billions worth of loot (if you are very lucky), and other days you will only get the standard bounty from the rats and the from salvage. Still, this is a easy way to earn ISK, and the requirements for doing this can be very low, depending on what kind of ratting you do.
Ratting can also be a source of minerals for small scale industry. Large meta modules, such as those dropped by NPC battleships, can be reprocessed for decent quantities of minerals which may be hard to obtain in null sec. For many modules, the reprocessed value is higher than the buy value of the module.
Types of ratting at the NSC
At the NSC there there mainly two types of ratting to be done:
Clearing asteroid belts in a system, and hunting down and completing combat sites.
Combat sites can furthermore be divided up in combat anomalies and combat signatures. More on these below.
Advantages of ratting in belts:
- Generally easier.
- Is done in the same system, not so much traveling around.
Advantages of doing combat sites:
- Generally better ISK per tick.
- More variety in the PvE.
While abyssal combat sites are also technically combat sites and can be done at the NSC, they have very different rules and are outside the scope of this article.
Belt Ratting


Belt ratting is the act of going from asteroid belt to asteroid belt, killing the pirate NPC ships that are found there, and then go on to the next asteroid belt and doing the same there. This is done to collect the bounty on the ships, as well as trying to get rare spawns and rare loot.
Picking a system
Security Level
Ratting in asteroid belts are greatly affected by the true-sec of the system it is being done in. Both the size of the bounties, as well as the chance of rare spawns, being affected by it, with lower true-sec giving better bounties and higher chance of rare spawns. So one factor in choosing a system to kill rats in is the true-sec of the system. At the NSC, 5-DSFH is the best system to belt rat in since it has a low security level, making it the best system to clear in the pocket. 5-D is also deep in the NSC pocket, and, as such, is slightly safer to be in if you pay attention to intel channels.
Dynamic Bounty System
Bounty payouts in a system are affected by the Dynamic Bounty System. Player deaths increase the Bounty Risk Modifier, which acts as a multiplier on the base bounty rate for NPC kills in that system. NPC kills slowly cause that modifier to fall. OVer time, the modifier will drift towards a equilibrium rate. At NSC, PC9-AY typically has the highest Bounty Risk Modifier, due to it being the entrance to the NSC pocket, and the site of most PVP engagements. Other systems in the pocket tend to hover around the equilibrium rate, or slightly lower.
Belt Counts
Rats in asteroid belts respawn after about 20 minutes, so you also want a system that have enough belts so you do not run out of rats to kill. Systems such as AK-QBU and T22-QI, which tend to have fewer belts, aren't as good as system such as PC9-AY or 5-DSFH, which have more belts.
What to expect
The pirate faction encountered at the NSC is the Serpentis. They commonly deal Thermal and Kinetic damage, and have lower resists against Kinetic and Thermal damage. Expect to face electronic warfare in the form of sensor damping from Serpentis guardian-type cruisers and battlecruisers. This may reduce your targeting distance drastically, and depending on your sensor skills they can get you to 5,000m or less if they gang up and a few groups spawn several EWAR-equipped ships. Some Serpentis rats also scram.
You can expect to find battlecruisers as the most common enemy in most systems, with battleships being quite common as well, and destroyers used to "fill in" groups with battleships. Each system will have a few static group spawn types that are the most common, and you will rapidly learn which groups you can expect to see. Rare spawns will sometimes be their own kind of spawn group, but can also occur when an elite spawn replaces a normal ship in a typical group (see below; or, for example, a Shadow Serpentis battleship replacing one of the two high admirals in a group of two high admirals and two destroyers). Elite spawns may widen their bag of tricks beyond damping to webbing, warp scramming, and other EWAR types.
Belt ratting is safest done in cruisers like the Vexor.
Clearing vs. Chaining the Asteroid Belts
Should you kill all rats in a belt and clear it completely or should you 'chain' the belt? There is no doubt that chaining the belts gives more ISK over time. Chaining refers to the art of killing battleships over and over for the bounty.
When you partly destroy a group of NPC rats and then leave the belt, the whole group will respawn. This means that you can keep killing battleships over and over for the high bounty. The process can be done if you only kill the rat battleships, when presented by a rat group a group with them, and leaving the smaller ships. While completely clearing the rat group when they contain no rat battleships. This will make it so that all asteroid belts will contain the battleship rat groups and these can keep being exploited.
This also means that the special rats, like Shadow Serpentis ships can't spawn, but it will still give more ISK over time.
Rare Spawns
Faction Spawns - Shadow Serpentis
Elite versions of the normal rats with the prefix "Shadow" in front of their name. These ships are slightly harder to kill, have a much bigger bounty and drops Shadow Serpentis faction modules. These can also spawn in combat anomalies.
Capital Spawns - Serpentis Dreadnoughts
If you warp to a belt and see a dreadnought there, you should warp out immediately! These ships are very powerful and need coordination to bring down.
Dreadnoughts and Shadow Serpentis Dreadnoughts are capital pirate ships. These rats hit hard and have a lot of tank, and as such you need a fleet (5+ people) to kill them. Should a dreadnought spawn while you are in a belt, warp off immediately, or face the possibility of it killing your ship.
- Serpentis Dreadnought: 60.000.000 ISK bounty - no loot
- Shadow Serpentis Dreadnought: 120.000.000 ISK bounty - loot consists of BPC and modules
The dreadnoughts can warp off, so be sure to bring warp disruptors or scramblers.
They can also spawn in combat anomalies.
The NSC uses Dread Vexors to kill NPC Dreadnoughts.
NPC Hauler Spawns
There are NPC freighters that can spawn in belts. These ships can drop more than 100.000.000 ISK in ores, and you want a hauler docked nearby so that you can loot the ores. Remember to bookmark the wreck when you switch into your hauler.
NPC hauler spawns are not the same as the NPC mining fleets.
NPC Mining Fleets
- Main article: NPC Mining Operations
The NPC mining fleets are NPC mining ships and industrial haulers that operating in the asteroid belt. When attacked they will warp off and call in a response fleet to attack whoever aggressed them. The miners and haulers can then be scanned down with combat probes and killed. The response fleet uses advanced A.I. tactics, such as dedicated logi ships to heal incoming damage. The loot is gotten from the haulers, and the response fleet gives no loot of their own.
While these fleets can be killed solo (usually in T3D), they are best undertaken in a small fleet.
Combat Sites
- Main article: Guide to combat sites
- Main article: Combat sites

At the NSC, in addition or instead of ratting in belts, you can also complete combat sites. These sites can be divided anomalies, signatures, escalations and static complexes.
- Cosmic anomalies:
- Visible in probe window without scanner.
- The easiest of the bunch.
- Low chance to either spawning Shadow Serpentis faction rats and Dreadnought capital rats (like in belts).
- Can escalate into DED sites or Expeditions.
- Cosmic signatures:
- Can either be gotten as an escalation from clearing an combat anomaly, or be found in system (where it needs to be scanned down with probes).
- Unrated Complexes has moderate chances for faction spawn and low chance to escalate into a new combat site.
- DED combat sites have guaranteed faction spawn that can drop DED modules and can under some circumstances escalate into a new DED site.
- Expeditions:
- Escalates from anomalies and unrated signatures.
- And as such cannot be found, but must be gotten from other combat sites.
- They usually consists of many parts, and expeditions can escalation into new expeditions in new systems.
The system security (not true-sec) determines what level of sites that spawn, while region determines what pirate faction sites spawn. Since the NSC is located in Syndicate, we get Serpentis pirate spawns, with the occasional rogue drones combat sites as well.
At the NSC, there is the possibility of 22 different versions of combat anomalies to spawn. Ranging from Class 4, level 2 sites (Serpentis Hidden Den), to the Class 10 site (Serpentis Sanctum).
Serpentis combat anomalies are usually worth your time doing, while the rogue drones combat sites are generally of questionable worth.
Unrated combat sites, DED combat sites and Expeditions are generally more challenging and needs preparations or to be done in a group, but also offers higher rewards. It is important to know that, while higher class of combat anomalies means the site will be harder. The difficulty of Unrated Complexes, DED Complexes or Expeditions does not 100% correlate with Class. CCP haven't been great at balancing these combat sites, so be sure to look them up your first time.
Tips
Combat anomalies consists of one ungated pocket, with some rats already there and more spawning in waves when previous ships gets destroyed. To not get overrun, you should look up the wave trigger, and kill that ship last. Once you enter a combat anomaly, burn away form the warp-in and make sure that you don't fly directly towards the rats, as it makes you far to easy to kill. Once you are a bit away form the warp-in, drop down a mobile tractor unit and orbit it at about 20 km. The reason to get away from the warp-in, is so you aren't to close to it if hostile players warps to it. The mobile tractor unit are not a must, but it makes looting and salvaging wrecks far easier. Just remember to bookmark it in case you have to run.
Combat signatures and Expeditions are far more varied, and there for harder to give general advice for. They usually consists of a couple of gated deadspace pockets. This means that hostile players cannot warp directly to you, but have to scan you down and take the gates to reach you. This makes you far harder to catch while running, just remember to keep an eye on the intel.
The higher difficulty of combat sites means that you want better ships than for belt ratting. Consider flying more advanced ships such as the Gila or Praxis.
How to be safe from other players
The NSC is located in null security space and players can therefore kill other players without repercussions. Ships used for PvE are often expensive, and hunting these ships can be a fun and sometimes even lucrative endeavor for players. It is therefore vital for anyone ratting at the NSC to stay safe. There are a number of precautions a member of the NSC can take to greatly increase their chance of survival:
- Be in fleet.
- Be in the intel channel.
- Be on comms.
- Be aware of the geopolitical and warfare situation-- if there's a structure under assault in the system or other major combat op, you can easily find yourself a helpless target of opportunity to a war fleet.
- Once you enter a combat site or an asteroid belt, burn away from the warp-in point. The distance a hunter have to travel from the warp-in point to you, can sometimes save you.
- Keep an eye on local to see if neutral or hostile player enters your system.
- Use D-Scan to check for ships and probes.
- Create and use safespot bookmarks.
- And stay aligned to these safe spots, if there are unknown players in system.
The idea is to be in fleet, in the intel channel and on coms, so that the player doing PvE activities can be warned in advance if there are hostile players in the neighbouring systems.
This way, you can go to a safe spot or dock up in stations or structures before the hunter enters system.
Since Cruisers and especially battleships are slow to align and enter warp, it can sometimes be to late to escape when the hunter enters your system, so a warning in advance can sometimes save your ship.
Also, by being in fleet, etc., you can also warn other members of the NSC and thereby helping them survive.
If you see this on your D-Scan, it is time to dock up.

If you get caught anyways
So you followed the above advice, but got caught anyways? This happens. The most important part is to stay calm. Being in fleet and on comms also allows you to call for help if you should be caught.
- Calmly call out for help on mumble and in fleet chat. Observe good protocol, call "Break, Break" and be prepared with the following information:
- Describe where you are and what ship caught you. You should give the exact system, or its common short form, and the belt name and number, so help can quickly warp to you. If you are in fleet they have the benefit of "warp to member" which is one excellent reason to be fleeted at all times.
- Stay aligned, so that you can warp off if the hunter loses point or scram.
- Direct your attacks on the hunter. You may drive them off, and at the very least giving them something to worry about may save your pod by forcing them to pay attention to their own modules and flying and not just hover over the lock target button for when your pod is targetable.
- If there are help coming, wait for it and tell them if the situation should change.
- Thank your rescuer!
Hopefully you didn't lose your ship. Stay docked and wait for the intel on when hunter leave the pocket.
Unfortunately even with these precautions, you still sometimes will lose ships. In these situations, it is important to go through the process and see what you have learned, so that you don't make the same mistakes again.
Preparing your ship
The NSC is located in Serpentis space, and the rats you will face while ratting are Serpentis NPCs and sometimes rogue drones. This makes it easy to prepare both the tank of your ship, as well as the type of damage you should deal.
The type of ships used for ratting at the NSC range from beginner ships like the Algos or the Vexor, to intermediate ships like the Gila or the Praxis, and up to very strong ships like the Ishtar or Tengu, and even the Rattlesnake.
These ships are mostly "drone boats", that sometimes have secondary weapons as well. The reason for this is the versatility that drones brings to PvE. Other popular weapon against Serpentis rats are missiles and hybrid turrets. You want to avoid weapon types like Laser turrets and projectile turrets for PvE at the NSC, their damage type aren't great against the weakness of Serpentis ships.
Below you will find a table with what kind for damage your ship should deal out, and what your ship should resist:
| Faction | Damage to deal | Damage to resist | Electronic Warfare |
|---|---|---|---|
| Serpentis | Kinetic / Thermal | Thermal (55%) / Kinetic (45%) | Sensor Dampener |
| Rogue Drones | EM/Thermal | (varies) |
As you see, against Serpentis rats, you should deal kinetic damage, and needs to tank both thermal and kinetic damage. Against rogue drones, it can vary a bit more, but you can just stay away from the rogue drone combat sites if you are unsure. No matter what you fly in and how you fit it. You want to pilot the ship correctly, this means never to fly directly towards NPC battleships as it makes you far to easy to hit. In combat anomalies, drop down your mobile tractor unit and orbit it at about 20 km. In belts and combat signatures, you should manually steer your ship so that you approach the rats to the side.