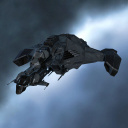
Rail Moas
Contents
Rail Moas
| You would be forgiven for thinking that Rail Moas would be another Caldari Sniper doctrine, in the tradition of Longbow Cormorants, or Rail Feroxes. However the Moa lacks any range bonus, unlike the other two ships, making the Rail Moa more of a mid-range brawling ship than a pure sniper
While the Moa can be fitted with Blasters as a pure close range brawler, its relatively low speed, and lack of range projection in this form makes it relatively unimpressive versus alternatives such as Thoraxes or Omens. Fitting Rails however allows the Moa some flexibility in range, while still benefitting from its good tank and damage bonus |
Implementation
The Rail Moa does its best damage at around 10-15km, with Antimatter ammunition. The twist for the Rail Moa though is that by loading T2 Spike ammunition, it can also project equally good damage out to 40-50km. T1 fit variants can match the range with Tungsten or Iron ammunition, however the falloff in damage is significant for T1 fitted ships
This flexibility makes Rail Moas a solid T1 Cruiser option for Null Sec combat, where range control can be difficult, and the flexibility to engage at long range is arguably more important than having the good tracking to deal with small ships, which will be a less frequent opponent in this space. In comparison to BLAP Caracals, which are the closest comparable for this style of fighting, the Moa carries a heavier tank, and more sustained (and instantly applied) damage, versus the Caracals’ high burst damage, and excellent application to small ships, but long reload times between clips
The Moa, like most T1 Cruisers, struggles for capacitor stability with a MWD fitted. While some fleets will fit an Afterburner to avoid this issue, this is usually a tactic used for fixed objective fights, and is less useful for roaming fleets where the speed to reposition on-grid and escape bubbles is very useful. Instead, a capacitor booster can be fitted in the mid slots to address the capacitor issues. This does detract from your shield tank, however the Moa’s innate tank bonus means that even with this compromise, its tank remains one of the best in its class, at around 42k EHP when overheated
The tactics for the Rail Moas are largely an extrapolation from that of Good Omens. When facing larger, or equally sized opponents such as Battlecruisers, you will want to fight at relatively close range, aim to use your higher damage, better tracking Antimatter ammunition, and take advantage of your mid-range to switch targets within a large fleet very quickly and easily, to break Logistics reps, or to target logistics ships themselves. Depending on the size of ship you are engaging, you may wish to try and get under their guns, or to maximize your own damage application by minimising transversal
Be aware that ships such as Feroxes or Harbingers will easily out DPS you at longer ranges, or simply out-range you entirely if allowed to, and therefore if they pull range, you should be looking to disengage, or at the least, reposition
Against smaller sized ships such as Frigates or Destroyers, where tracking could be a concern, or against rarer fleets of brawling fit battlecruisers, the Moas will most often burn away from an opponent, to minimize transversal, force them to chase you, and allow you to apply your medium guns from range
In either situation, the fleet will want to be anchored on a single anchor or the FC in order to ensure the fleet stays together, and remains at the preferred range for the engagement
The Moas do not carry any tackle of their own, due to the lack of mid slot space, plus the tendency of the doctrine to fight on the edge of tackle range. This means you rely on Interceptors, and Interdictors to prevent an opposing ship or fleet from leaving the grid. Once again, this makes Rail Moas optimal in Null Sec, while in Low Sec the lack of bubble mechanics means this fleet may struggle to catch opponents
Fleet Composition and Fits
Mainline DD
T2 Guns are strongly preferred due to the excellent damage which Spike gives you at long range. T1 fits lose a lot of DPS at the longer ranges when using Thorium or Iron ammunition, reducing your flexibility slightly
Logistics
Given you are, or should be, anchored on one ship when fighting, cap chaining Logi such as Ospreys can work well here, and in general, are more forgiving of low skills than independent Logi such as Scimitars. Either can work, however Uni FCs may wish to call for Osprey Logi to fit with the BLAP Skillplan which many pilots will have trained
Support Ships
Your primary scouts and tackle remain Interceptors as always. However due to this being an almost exclusively Null Sec doctrine, and given the tactics noted above, it would be frankly negligent to not have at least 2 Interdictors with the fleet. Sabres are (as usual) your best bet, due to the combination of speed, shield tank, and low signature radius Your second best support ship (after a Sabre) is a Command Destroyer. The MJFG helps with fleet repositioning, and the command bursts can increase tank, or decrease signature radius, amplifying the existing strengths of the doctrine. The Bifrost offers better flexibility of Command Bursts, with a useful bonus to Skirmish boosts as well as the standard Shield boosts, while the Stork generally carries a larger DPS threat. There is little to choose from, however if you already have sufficient DPS in fleet, the Bifrost is probably marginally more suitable Finally, as tracking is a constant concern for this doctrine, webbing ships can be very useful to maximize damage application. The Hyena is your best option here, as it can hold a decent shield tank, compared to an Ashimmu. A Huginn would also be viable, but is a considerable cost investment compared to the rest of the fleet
