Right to Rule/Chapter 2: Spiderweb Politics
Half of the missions in this chapter are in the Nishah solar system, and only one is outside the Gebem constellation.
Contents
Mission 6 - Aralin Jick
| Type | Travel |
| Objective | Report to Aralin Jick (4 jumps) |
| Rewards | 1,000,000 + time bonus |
| Mission briefing |
|---|
| We need to get to the bottom of this. Those Amarr ships came from somewhere and someone.
I can't do the legwork myself. My MIO clearance can open a lot of doors, but there's too much red tape for me to jump through. You, however, can do what I can't. You can break this thing wide open. You need to talk to someone with both a knowledge of the Sansha and local connections. Luckily, I have just such a contact: Aralin Jick. |
Begin the second chapter by reporting to your new agent in Nishah VII - Moon 5 - Kor-Azor Family Treasury. This mission can be accepted remotely.
Mission 7 - Background Check
| Type | Encounter |
| Objective | Destroy enemy ships |
| Faction | Sansha's Nation |
| Best damage to deal | |
| Damage to resist | |
| Warp disruption | Elite frigates |
| Rewards | 1,000,000 + time bonus |
| Mission briefing |
|---|
| Sansha's Nation is targeting Touraj Miyan. Why? Miyan is a fool, yes, but the Sansha are unlikely to care about an ineffectual noble. The other Holders, however, are sharks. They can smell weakness. Miyan already lost about half of his domains back in YC 110. The Holders are just circling, waiting for their chance to take another bite.
If it wasn't for the efforts of Lord Miyan's staff, he'd be dead already. His current security chief, Riff Hebian, is a smart but skeptical man, and difficult to sway. Head over to Miyan's manor and convince Hebian that the Sansha are targeting Miyan directly. His help and trust would be invaluable. |
| Lord Miyan |
|---|
| Even though many Holder titles extend back thousands of years, the position is a precarious one. Families waxed and waned over the centuries. Most families realize the rule of fools is inevitable; all they can do is hope too much damage isn't done before a proper ruler can ascend again.
House Miyan has ruled much of the Jatari constellation for centuries. Miyan grew to be one of the top Holder houses, rivaling Kor-Azor in local influence. In 109, Lord Miyan died and passed his title to his only son, Touraj Miyan. Touraj is considered a dolt, accused of being more likely to make a pass at subordinate Holders' wives than realize his chief advisor is dipping into senility. Lord Iraj Darabi, a minor but well-respected neighboring Holder, used Touraj's unpopularity and foolishness to his own advantage. In 110, he annexed two of the systems under House Miyan control for himself, sparking a minor conflict between the two Houses. In the end, Darabi's superior commanders and advisors forced Miyan to surrender. So far, Miyan has managed to hold on to his remaining lands. |
Video: [Typhoon June 2021]
Tips:
- Waves are triggered by either attacking or killing previous wave, varies by wave.
- It will help to destroy the waves in the order they spawn. If you form a fleet with yourself, you can tag waves of ships as they appear to keep track of them, but beware that the tags are cleared if you warp out.
- Set drones to passive to avoid accidental triggers.
- Single ungated deadspace pocket. Can warp in at range (if using fleet warp), but cannot warp within the pocket.
- Enemies typically spawn 30-50km from you.
Destroying last ship in wave 6 completes the mission.
| WD | EWAR | L
| ||
|---|---|---|---|---|
| 2 x Elite Cruiser Centum Loyal Mutilator/Hellhound | ||||
| 2 x Battleship Centus Dread Lord/Tyrant | ||||
| WD | EWAR | L
| ||
|---|---|---|---|---|
| 2-3 x Battlecruiser Centatis Devil/Wraith | ||||
| WD | EWAR | L
| ||
|---|---|---|---|---|
| 3 x Elite Frigate Centii Loyal Minion/Servant | ||||
| WD | EWAR | L
| ||
|---|---|---|---|---|
| 2 x Elite Cruiser Centum Loyal Mutilator/Hellhound | ||||
| 3 x Battleship Centus Tyrant | ||||
| WD | EWAR | L
| ||
|---|---|---|---|---|
| 2 x Battlecruiser Centatis Devil/Wraith | ||||
| WD | EWAR | L
| ||
|---|---|---|---|---|
| 1 x Elite Frigate Centii Loyal Servant/Minion | ||||
| WD | EWAR | L
| ||
|---|---|---|---|---|
| 2 x Elite Cruiser Centum Loyal Torturer/Mutilator/Fiend | ||||
| 3 x Battleship Centus Dread Lord/Tyrant | ||||
The last ship destroyed in Wave 6 completes the mission objective.
| WD | EWAR | L
| ||
|---|---|---|---|---|
| 2 x Battlecruiser Centatis Wraith/Devil | ||||
| WD | EWAR | L
| ||
|---|---|---|---|---|
| 2 x Elite Frigate Centii Loyal Minion/Servant | ||||
Mission 8 - Longing Leman
| Type | Encounter |
| Objective | Retrieve the Communications Logs (0.1 m3) |
| Faction | Amarr Empire |
| Ship suggestion | Frigate |
| Extra | Data analyzer needed, no standing loss for ship kills |
| Mission briefing |
|---|
| Touraj Miyan has a lot of people who hate him. They want him dead, want his land, or just want to embarrass him. Some of these people are more powerful than others. It will take a while to investigate them all.
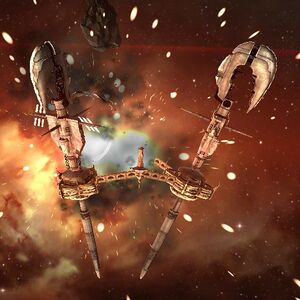
First up is Lady Temari Jariza. Among Holders, she's a nobody. She doesn't even technically own any land holdings, just a small, floating citadel in Amdonen granted to her five-times-great grandfather for exceptional service in putting down a rebellion. Unlike her ancestors, Lady Jariza actually has ambitions. Unfortunately for her, she's not taken very seriously. She's attempted to improve her standing through most of the common channels, ranging from patronage to marriage. She's even tried to court Lord Miyan numerous times, but she has thus far been unsuccessful. It's for this reason that she's on the suspect list. She has motive, but I need to know if she's had the means and opportunity. I need you to hack the encrypted communications array in her territory. This should provide you with logs of all the communications and transactions in recent weeks. Bring these logs back to me. |
Video: [Probe June 2021]
Tips:
- You will need a Data Analyzer module to hack the Encrypted Communications Array. The mission does not provide you with one, so you'll have to get one yourself.
- This is not a combat mission. It is not necessary to destroy any NPC ships, and they seem to not attack you unless you get close.
- This mission can be accepted remotely.
Single ungated pocket. The defenders are 100 km from warpin while the container is 20 km away.
Loot:
Approximately 30M isk in loot and salvage.
| WD | EWAR | L
| ||
|---|---|---|---|---|
| 1 x Encrypted Communications Array | ||||
| WD | EWAR | L
| ||
|---|---|---|---|---|
| 5 x Fighter Outpost Defender (Equite) | ||||
| 4 x Elite Frigate Divine Imperial Imran/Sixtus | ||||
| 6 x Battlecruiser Imperial Templar Phalanx | ||||
| 7 x Battleship Imperial Templar Diviner/Judgement | ||||
Mission 9 - Languishing Lord
| Type | Encounter |
| Ship suggestion | Shuttle |
| Rewards | 1,000,000 + time bonus |
| Extra | No combat |
| Mission briefing |
|---|
| I have a few contacts in Lord Darabi's territory. Maybe something will turn up with this Jariza connection, but I doubt it.
I've learned of a more pressing lead for you. Remember those Amarr ships you ran into? It seems that one Lord Manik has been shopping around for mercenaries. I'm giving you the meeting location I found while innocently perusing Manik's records. There should be a mercenary contact. You're going to find out who they are, and then we're going to wipe them out. I'll have more instructions when you reach the site. |
Video: [Probe June 2021]
You'll be told to fly to an asteroid (about 20k away). Then you watch for a minute, and the mission completes. Do not engage any of the ships that appear. Bring a fast ship like a shuttle or a frigate.
| WD | EWAR | L
| ||
|---|---|---|---|---|
| 1 x Broken Metallic Crystal Asteroid | ||||
| 30 x Veldspar | ||||
Mission objective is completed after Lord Manik and the mercenary leave the area.
Misison 10 - Razing the Outpost
| Mission briefing |
|---|
| I'm sending you the mercenary's coordinates. This should be the base they've been operating out of. Wipe them out. Leave no opportunity to rebuild. |
Video: [Typhoon June 2021]
This mission can be accepted and completed remotely. No standing loss for destroying enemies, sentries, or structures.
Blitz: Clear gates of rats (gates are locked while guarded, missile batteries do not need to be destroyed in order to unlock the gate though) and make best speed to the final room. In the final room orbit structure and eliminate tackle and incoming DPS as needed. Structure damage does not spawn additional waves. Structure kill completes mission.
Tips:
- You can warp to the warp-in at range to avoid being webbed instantly.
- Remember to switch resists modules for this mission or the incoming kinetic damage will hit to your resist hole.
- Kinetic damage is much more important than thermal, both incoming and outgoing.
- The battleships with higher bounty will deal much higher damage than the ones that have lower bounty so you should take them out asap.
Warpin
| WD | EWAR | L
| ||
|---|---|---|---|---|
| 3 x Frigate Mordus Bounty Hunter | ||||
| 3 x Cruiser Mordus Lion | ||||
| 4 x Battleship Mordus Gigamar/Phanti | ||||
| 3 x Sentry Caldari Cruise Missile Battery |
||||
1st pocket
| WD | EWAR | L
| ||
|---|---|---|---|---|
| 6 x Cruiser Mordus Puma/Leopard | ||||
| 4 x Battleship Mordus Gigamar/Phanti/Mammoth | ||||
| 3 x Sentry Caldari Cruise Missile Battery |
||||
2nd pocket
| WD | EWAR | L
| ||
|---|---|---|---|---|
| 2 x Frigate Mordus Bounty Hunter | ||||
| 4 x Cruiser Mordus Bobcat | ||||
| 2 x Battleship Mordus Gigamar |
||||
| 3 x Sentry Caldari Heavy Missile Battery |
||||
| 3 x Sentry Caldari Cruise Missile Battery |
||||
| WD | EWAR | L
| ||
|---|---|---|---|---|
| 2 x Frigate Mordus Bounty Hunter | ||||
| 4 x Cruiser Mordus Leopard | ||||
| 4 x Battleship Mordus Gigamar/Mammoth |
||||
| WD | EWAR | L
| ||
|---|---|---|---|---|
| 4 x Frigate Mordus Bounty Hunter | ||||
| 3 x Cruiser Mordus Lion | ||||
| 8 x Battleship Mordus Gigamar/Phanti/Mammoth | ||||
| WD | EWAR | L
| ||
|---|---|---|---|---|
| The Outpost |
||||
Mission 11 - Ascending Nobles
| Mission briefing |
|---|
| With the destruction of the mercenary camp, Lord Manik is denying he ever had any contact with them. I have a copy of your ship's logs from their meeting, but it may prove difficult to pin him with any conspiracy charges.
Good thing I've got a new lead. Remember Lord Darabi, Miyan's rival and the new target of Jariza's wooing? His daughter, Mina, has been one of my contacts. Mina says she has key information, but she will only tell me in person. This is where the fun part comes in. Daddy Darabi has kept Mina under tight surveillance because of a scandal that happened a few years ago. Thus, we have to stage a kidnapping. This is going to get bloody, but I trust Mina when she says her information is worth it. Fly to the Darabi estate where Mina is being kept and "kidnap" Mina Darabi. Any guards are expendable. |
| Lord Darabi |
|---|
| Rumor has it that Lord Darabi was imprisoned by Karsoth for daring to publicly disagree (albeit slightly) with Karsoth's policies about the Succession. When Empress Sarum returned, Darabi was freed, but rumors persist that he is not in the most stable condition. Mina Darabi drops in an untractorable container so you have to fly all the way to it. |
[Video: [Typhoon June 2021]
The destination is Reteka (7 jumps).
This mission can be requested and accepted remotely.
Tips:
- All spawns start approximately 80k from warp in.
- The Veteran/Elite battleships do very heavy damage if you let them get close (They orbit ~49k and hit hard up to 60k away).
- The elite battleships are very slow (139 m/s). If you keep them at 60+ km tanking won't be hard.
- The green-crewed battleships on the other hand are very weak for battleships.
Single gated deadspace pocket. Once all ships are destroyed the mission object drops near the Amarr chapel.
The last ship destroyed in each group will trigger the next wave.
Room 1
| WD | EWAR | L
| ||
|---|---|---|---|---|
| 5 x Elite Battleship Independent Veteran Abaddon/... | ||||
| 2 x Sentry Amarr Light Missile Battery |
||||
| 2 x Sentry Amarr Cruise Missile Battery |
||||
| WD | EWAR | L
| ||
|---|---|---|---|---|
| 8 x Elite Cruiser Independent Veteran Omen/... |
||||
| WD | EWAR | L
| ||
|---|---|---|---|---|
| 7 x Battleship Independent Green-Crewed Abaddon/... | ||||
| WD | EWAR | L
| ||
|---|---|---|---|---|
| 6 x Battleship Independent Abaddon/... |
||||
| WD | EWAR | L
| ||
|---|---|---|---|---|
| 1 x Amarr Chapel | ||||
Mina Darabi spawns near the Amarr Chapel.
Additional Spawn
If the mission is not completed within 30 minutes after Mina Darabi is collected, the following message will appear:
| Pop-up message: |
|---|
| I know salvaging is fun, but there are several hostile ships inbound. I suggest we retreat now. Mina Darabi is too valuable an informant to lose. |
Approximately 5-10 seconds after that message appears, a new battle group will spawn. There are no bounties and relatively poor salvage from this spawn.
| WD | EWAR | L
| ||
|---|---|---|---|---|
| 6 x Elite Frigate Independent Veteran Crucifier/Inquisitor | ||||
| 6 x Elite Cruiser Independent Veteran Omen/Maller/Augoror | ||||
| 6 x Elite Battleship Independent Veteran Armageddon/... | ||||
This spawn is incredibly strong. It is suggested that pilots bring additional fleet members with logistics. Ships do not award bounties, but may drop faction tags and loot/salvage. Loot is ≈ 7.5M and salvage ≈ 2.5M [2023-12-06]
Mission 12 - Hunting the Hunter
| Mission briefing |
|---|
| Mina has quite a story to tell. Jariza has been courting Lord Darabi for some time. Jariza's been so good at winning Darabi's trust that Mina became suspicious. Mina proved an amazing spy: She's not only traced funds flowing from Darabi to Jariza, but she also found an interesting communication from one Rahsa Teff.
Rahsa Teff is a known felon and former Blood Raider. The MIO lost track of him a year ago. Rumor was another pirate group poached him. It sounds as if the rumor is true. Not only is Rahsa Teff with the Sansha, but you met him already. He's the Sansha commander who kept eluding us. I've traced the source of Rahsa's message. We know where he and the Sansha are located. Let's end this. Eliminate the Sansha base, and capture Rahsa Teff. |
Video: [Typhoon June 2021]
Progress through the rooms and obtain 1 x Rahsa, Sansha Commander (1.0 m3). To unlock the gate in Room 1, destroy the Sansha Battletower.
Blitz: Clear the warpin. In first room kill enough ships for your tank to sustain the incoming DPS. Do not trigger the additional spawns and blow up the structure. Proceed to last room, destroy the commander and grab Rahsa, Sansha Commander from the wreck.
Acceleration Gate Entrance
| WD | EWAR | L
| ||
|---|---|---|---|---|
| 6 x Elite Cruiser Centum Loyal Fiend/Hellhound | ||||
| 3 x Battleship Centus Dark Lord/Dread Lord | ||||
| 6 x Sentry Sansha Heavy Missile Battery |
||||
Room 1
| WD | EWAR | L
| ||
|---|---|---|---|---|
| 3 x Elite Cruiser Centum Loyal Execrator/Slaughterer | ||||
| WD | EWAR | L
| ||
|---|---|---|---|---|
| 3 x Elite Frigate Centii Loyal Plague/Butcher | ||||
| 3 x Battleship Centus Beast Lord/Plague Lord | ||||
| WD | EWAR | L
| ||
|---|---|---|---|---|
| 1 x Acceleration Gate |
||||
| 1 x Sansha Battletower |
||||
Room 2
Destroying Rahsa's Battleship completes the mission objective. Don't forget to grab the commander from the wreck.
| WD | EWAR | L
| ||
|---|---|---|---|---|
| 1 x Battleship Rahsa's Battleship | ||||
| WD | EWAR | L
| ||
|---|---|---|---|---|
| 1 x Rahsa's Habitation Module | ||||
| Message from Rahsa: |
|---|
| Well, you're quite the formidable one, aren't you? I have a proposal for you.
|
Mission 13 - Fate of a Madman
| Type | Branch |
| Objective | Choose your path |
| Mission briefing |
|---|
| So this man, Rahsa Teff, was behind it all. Rahsa Teff was a native to this region and wanted Miyan out. He knew his Sansha buddies were attracting attention, so he used Jariza to pull funds from Darabi. Rahsa then gave the money to Manik to fund his little mercenary gang. Manik's build up was a distraction the whole time, as were the Amarr ships you encountered when chasing Rahsa down.
Now that we have Rahsa Teff in my custody, the question is what to do with him. We could keep him around for more questioning, but I'd just as soon blow him out the airlock. What do you think? Is his life worth it? Interrogation: Catching the Scent >> Silence Rahsa: The Nation's Path >> By the way, I got a message from a Krethar Mann. Seems your efforts have attracted her attention. Can't say I blame her. You did well. You've again proven yourself a stalwart friend of the Empire. Krethar Mann is currently in her ship in Oguser. You may want to try communicating with her remotely. |
- Interrogation: Catching the Scent to work for the Amarr Empire in Chapter 3: The Old Guard. This chapter takes place in high security space and will reward 1x Imperial Navy Modified 'Noble' Implant and Amarr Empire faction standings. The missions are similar combat heavy L4 missions as before in this arc.
- Silence Rahsa: The Nation's Path to work for Sansha's Nation in Chapter 3: Alike Minds. This chapter takes place in low security space and will reward 1x Sansha Modified 'Gnome' Implant and Sansha's Nation faction standing. The missions have much less enemies, mostly frigates. But the missions are in dangerous space.
Previous Chapter: Chapter 1: Interference
Next Chapter: Chapter 3: The Old Guard (Amarr Empire path) or Chapter 3: Alike Minds (Sansha path)

