Difference between revisions of "Superior Sleeper Cache"
| Line 34: | Line 34: | ||
'''Room 1''' (May Start with Room 2 first) '''Solar Power''' | '''Room 1''' (May Start with Room 2 first) '''Solar Power''' | ||
| − | [https://i.gyazo.com/thumb/200/_de374b6d14709696d87cbe619e226ac9.png Entry Message] | + | [https://i.gyazo.com/thumb/200/_de374b6d14709696d87cbe619e226ac9.png Entry Message]<br /> |
| − | |||
| − | <br /> | ||
Solar Room – DO NOT GO NEAR THE Solray Observational Unit until you do the steps below: | Solar Room – DO NOT GO NEAR THE Solray Observational Unit until you do the steps below: | ||
| Line 49: | Line 47: | ||
c. Solray Infrared Alignment Unit | c. Solray Infrared Alignment Unit | ||
| − | https://i.gyazo.com/beeb30cd5bfb533e6428596c268f989d.png | + | [https://i.gyazo.com/beeb30cd5bfb533e6428596c268f989d.png] |
<br /> | <br /> | ||
3) Now use the Relic Analyzer on all the cans and retrieve loot. Very small amounts of damage will be coming from the Solar Power Generator (the disc shaped thing) | 3) Now use the Relic Analyzer on all the cans and retrieve loot. Very small amounts of damage will be coming from the Solar Power Generator (the disc shaped thing) | ||
| − | https://i.gyazo.com/thumb/200/_2560063ae8b6f2b9f4adabeb08f02829.png | + | [https://i.gyazo.com/thumb/200/_2560063ae8b6f2b9f4adabeb08f02829.png] |
| − | https://i.gyazo.com/thumb/200/_3c60b39450ef2286e4afa10c3e05c162.png | + | [https://i.gyazo.com/thumb/200/_3c60b39450ef2286e4afa10c3e05c162.png] |
<br /> | <br /> | ||
| Line 74: | Line 72: | ||
After you succeed the hack 1 or 2 storage depots will appear. SLOW BOAT TO THEM (You are in minefield!) | After you succeed the hack 1 or 2 storage depots will appear. SLOW BOAT TO THEM (You are in minefield!) | ||
| − | https://i.gyazo.com/551816e5dda055c7c6df28bebfacc5a7.png | + | [https://i.gyazo.com/551816e5dda055c7c6df28bebfacc5a7.png] |
After Relic Analyzing the one or two depots that appeared, SLOW BOAT TO THE Strange Rifts in the distance, you will likely hit small mines for the first 50KM. Make sure you have a strong buffer tank to handle the blast. Once you are 50 KM away you can start your microwarp drive burn. | After Relic Analyzing the one or two depots that appeared, SLOW BOAT TO THE Strange Rifts in the distance, you will likely hit small mines for the first 50KM. Make sure you have a strong buffer tank to handle the blast. Once you are 50 KM away you can start your microwarp drive burn. | ||
| Line 81: | Line 79: | ||
7) Take the topmost rift (in the picture below) to get to the next room | 7) Take the topmost rift (in the picture below) to get to the next room | ||
| − | https://i.gyazo.com/d7ea553d4a3c7f61adad8fb41acbf031.png | + | [https://i.gyazo.com/d7ea553d4a3c7f61adad8fb41acbf031.png] |
'''Room 2 – Sentries on Duty''' (this room may come first) | '''Room 2 – Sentries on Duty''' (this room may come first) | ||
| − | https://i.gyazo.com/274a881fa062c43294588f35c080259c.png | + | [https://i.gyazo.com/274a881fa062c43294588f35c080259c.png] |
| − | https://i.gyazo.com/9658561ba379cf614b5b520ba27b4e7e.png | + | [https://i.gyazo.com/9658561ba379cf614b5b520ba27b4e7e.png] |
| − | https://i.gyazo.com/ccb5b2a613deda1d76444c84b07d2a34.png | + | [https://i.gyazo.com/ccb5b2a613deda1d76444c84b07d2a34.png] |
You will be taking Sentry gun damage in this room | You will be taking Sentry gun damage in this room | ||
| Line 97: | Line 95: | ||
This will make one of the sentry guns help you: Rewired Sentry Gun | This will make one of the sentry guns help you: Rewired Sentry Gun | ||
| − | https://i.gyazo.com/0ea28e68c2cd31887835fa2de70c375f.png | + | [https://i.gyazo.com/0ea28e68c2cd31887835fa2de70c375f.png] |
<br /> | <br /> | ||
2) Then immediately burn to the Preservation Unit and Hack it | 2) Then immediately burn to the Preservation Unit and Hack it | ||
| − | https://i.gyazo.com/995a1683ab880ef85d149b3432a42336.png | + | [https://i.gyazo.com/995a1683ab880ef85d149b3432a42336.png] |
<br /> | <br /> | ||
3) This will heal your new friendly sentry gun, now wait until it blows up all the other sentry drones. Do not help. Stay within 500 – 1000 of the Preservation Unit. | 3) This will heal your new friendly sentry gun, now wait until it blows up all the other sentry drones. Do not help. Stay within 500 – 1000 of the Preservation Unit. | ||
| − | https://i.gyazo.com/37763b6f230a1f19c3654b8e1422db89.png | + | [https://i.gyazo.com/37763b6f230a1f19c3654b8e1422db89.png] |
<br /> | <br /> | ||
4) You may now Analyze the cans on field with mostly safety. However DO NOT GET TOO CLOSE TO THE PLASMA CHAMBERS, should you they will blow up and your ship will too. Do not Shoot them. | 4) You may now Analyze the cans on field with mostly safety. However DO NOT GET TOO CLOSE TO THE PLASMA CHAMBERS, should you they will blow up and your ship will too. Do not Shoot them. | ||
| − | https://i.gyazo.com/3dba1f93cb69b4f852eb1a7bcbc49c43.png | + | [https://i.gyazo.com/3dba1f93cb69b4f852eb1a7bcbc49c43.png] |
When you get too close to the plasma chambers this message appears: | When you get too close to the plasma chambers this message appears: | ||
| − | https://i.gyazo.com/b788756e87c79e66fb1b3df27c8efe93.png | + | [https://i.gyazo.com/b788756e87c79e66fb1b3df27c8efe93.png] |
<br /> | <br /> | ||
| Line 130: | Line 128: | ||
'''Room 3 – The Archive''' | '''Room 3 – The Archive''' | ||
| − | https://i.gyazo.com/a422c6acb30a0db85d48ae664e832594.png | + | [https://i.gyazo.com/a422c6acb30a0db85d48ae664e832594.png] |
You are in NO immediate danger on warp in but alwasys watch the local messages closely from here on out | You are in NO immediate danger on warp in but alwasys watch the local messages closely from here on out | ||
| − | https://i.gyazo.com/144ffd6ad5f7432d4b33130547ac76f2.png | + | [https://i.gyazo.com/144ffd6ad5f7432d4b33130547ac76f2.png] |
| − | https://i.gyazo.com/67de834dc4a6dfea13a4c7e9680db07f.png | + | [https://i.gyazo.com/67de834dc4a6dfea13a4c7e9680db07f.png] |
1) Burn with Microwarp drive to the Defense Targeting Augmentation Unit and hack it. | 1) Burn with Microwarp drive to the Defense Targeting Augmentation Unit and hack it. | ||
| − | https://i.gyazo.com/f488c8bd49b43fc899442dfd0e5b3ccc.png | + | [https://i.gyazo.com/f488c8bd49b43fc899442dfd0e5b3ccc.png] |
Note: From this point forward always be moving or orbiting something. The Sentry guns (which will be spawning shortly) will have a very hard time hitting you. | Note: From this point forward always be moving or orbiting something. The Sentry guns (which will be spawning shortly) will have a very hard time hitting you. | ||
| Line 146: | Line 144: | ||
2) Hack 2 or 3 of the Cerebrum Maintenance Chambers (there is no great rush yet) | 2) Hack 2 or 3 of the Cerebrum Maintenance Chambers (there is no great rush yet) | ||
| − | https://i.gyazo.com/44c45a984e7f1d7af3bf42b60cae34cc.png | + | [https://i.gyazo.com/44c45a984e7f1d7af3bf42b60cae34cc.png] |
This is the kind of thing in the Maintenance Chambers – Loot them | This is the kind of thing in the Maintenance Chambers – Loot them | ||
| − | https://i.gyazo.com/a53072ed43e4b78d95370e822a0efac3.png | + | [https://i.gyazo.com/a53072ed43e4b78d95370e822a0efac3.png] |
<br /> | <br /> | ||
3) Put 3 Oscillation Fluids in the Central Archive Cerebrum. (Putting other things in the Cerebrum will result in an explosion that will blow up your ship. – if you want to experiment be prepared to lose ships) | 3) Put 3 Oscillation Fluids in the Central Archive Cerebrum. (Putting other things in the Cerebrum will result in an explosion that will blow up your ship. – if you want to experiment be prepared to lose ships) | ||
| − | https://i.gyazo.com/f0e193179680b07c15c69e3e821f9608.png | + | [https://i.gyazo.com/f0e193179680b07c15c69e3e821f9608.png]<br /> |
| + | |||
(This is the message that appears if you only put 2 Oscillation Fluids in the Cerebrum) | (This is the message that appears if you only put 2 Oscillation Fluids in the Cerebrum) | ||
| Line 161: | Line 160: | ||
<br /> | <br /> | ||
| − | 4) The Central Archive will start throwing out containers/depots and vessel rejuvenation batteries | + | 4) The Central Archive will start throwing out containers/depots and vessel rejuvenation batteries<br /> |
| + | |||
From this point forward there will be '''Shockwaves''' that do considerable damage every 30 seconds, a very strongly tanked T3 Proteus with a repper can take about 5-6 sets of the shockwaves (DO NOT RELY on ACTIVE TANK ONLY, Minimum 2 BUFFER MODS recommended). Be aware that if you enter an area that has a cloud around a wreck it will do additional damage to your ship. | From this point forward there will be '''Shockwaves''' that do considerable damage every 30 seconds, a very strongly tanked T3 Proteus with a repper can take about 5-6 sets of the shockwaves (DO NOT RELY on ACTIVE TANK ONLY, Minimum 2 BUFFER MODS recommended). Be aware that if you enter an area that has a cloud around a wreck it will do additional damage to your ship. | ||
| Line 167: | Line 167: | ||
5) Burn to them while scanning them to see which one has the most valuable loot, hack it, loot it, and repeat | 5) Burn to them while scanning them to see which one has the most valuable loot, hack it, loot it, and repeat | ||
| − | Alternate Strategy: Burn to the Vessel rejuvenation battery, hack it, then you can Analyze two nearby cans while being healed by the Vessel rejuvenation battery. | + | Alternate Strategy: Burn to the Vessel rejuvenation battery, hack it, then you can Analyze two nearby cans while being healed by the Vessel rejuvenation battery.<br /> |
| + | |||
| + | |||
| + | 6) This part of the exploration is a calculation on how much more Analyzing and hacking you can do before losing your ship.<br /> | ||
| + | |||
| + | |||
| + | Be aware that after 5 or so waves the shockwaves increase in magnitude and you will see slightly different messages in local. If you aren’t tanking the base shock waves well get out now!<br /> | ||
| + | |||
| − | + | You may warp out and warp back to the site (even though it seems to have despawned from local probe scan, as long as it is within 30 -60 seconds from when you warpout. You can try to go back after healing and try a can or two more but typically the escalated shockwave are still in play.<br /> | |
| − | |||
| − | + | Experimentation around taking out fluid after the first spew or adding other components would be a possible way to get more time in this last room.<br /> | |
| − | |||
| − | At this point I don’t consider this post definitive and welcome the input and experimentation on the last room. | + | At this point I don’t consider this post definitive and welcome the input and experimentation on the last room.<br /> |
Revision as of 03:39, 23 March 2015
Warning this site is difficult and you have a chance of losing your ship
Some Suggestions:
1) Must have Tech 2 Data and Relic analyzers
2) Should be in a Cruiser sized ship at least
3) Need a shield or armor repair module
4) Need large buffer to survive failed hacks in all rooms
5) Use a cargo scanner to save time
6) Microwarp drive
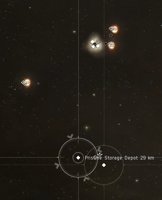
Entry Point on Warp-In
Hyperfluct Generator – Use a Data Analyzer to hack
Failing the hack starts a short timer (30 – 45 seconds for you to attempt a second hack), if you fail again it will explode and you will lose the site with damage to your ship as well
Picture of Entry Point after successful hack
Take the Spatial Rift
Room 1 (May Start with Room 2 first) Solar Power
Solar Room – DO NOT GO NEAR THE Solray Observational Unit until you do the steps below:
1) Hack the Solray Observational Unit – Inside this will be Something like a Radio Ray Modulate, or Infrared or Gamma Ray
2) Place the item you looted in the in the corresponding named Alignment Unit
    a.	Solray Radio Alignment Unit
    b.	Solray Gamma Alignment Unit
    c.	Solray Infrared Alignment Unit
![[1]](https://i.gyazo.com/beeb30cd5bfb533e6428596c268f989d.png)
3) Now use the Relic Analyzer on all the cans and retrieve loot. Very small amounts of damage will be coming from the Solar Power Generator (the disc shaped thing)
![[2]](https://i.gyazo.com/thumb/200/_2560063ae8b6f2b9f4adabeb08f02829.png)
![[3]](https://i.gyazo.com/thumb/200/_3c60b39450ef2286e4afa10c3e05c162.png)
4) Take the right Most Rift in the first picture above, this will warp you to the Rift with the Remote Reroute Unit
Hack the Remote Reroute Unit.
5) Take the nearby rift back to the other rifts
6) Take the right Most rift, this will lead to a secret room.
7) Secret Room
  YOU ARE NOW IN A MINEROOM!  Do not make any sudden moves!
  Wait 15 - 20 seconds - a Remote Defense Grid Unit will appear – DO NOT TURN ON YOUR MWD, GO SLOWLY
  Hack the Remote Defense Grid Unit – Failure will blow up most ships (VERY DIFFICULT HACK)
  Only the very strongest tanked ships with a lot of buffer and resists will survive the blast.
After you succeed the hack 1 or 2 storage depots will appear. SLOW BOAT TO THEM (You are in minefield!)
![[4]](https://i.gyazo.com/551816e5dda055c7c6df28bebfacc5a7.png)
After Relic Analyzing the one or two depots that appeared, SLOW BOAT TO THE Strange Rifts in the distance, you will likely hit small mines for the first 50KM. Make sure you have a strong buffer tank to handle the blast. Once you are 50 KM away you can start your microwarp drive burn.
7) Take the topmost rift (in the picture below) to get to the next room
![[5]](https://i.gyazo.com/d7ea553d4a3c7f61adad8fb41acbf031.png)
Room 2 – Sentries on Duty (this room may come first)
![[6]](https://i.gyazo.com/274a881fa062c43294588f35c080259c.png)
![[7]](https://i.gyazo.com/9658561ba379cf614b5b520ba27b4e7e.png)
![[8]](https://i.gyazo.com/ccb5b2a613deda1d76444c84b07d2a34.png)
You will be taking Sentry gun damage in this room
1) Immediately burn to the Remote Defense Grid Unit, Hack it
This will make one of the sentry guns help you: Rewired Sentry Gun
![[9]](https://i.gyazo.com/0ea28e68c2cd31887835fa2de70c375f.png)
2) Then immediately burn to the Preservation Unit and Hack it
![[10]](https://i.gyazo.com/995a1683ab880ef85d149b3432a42336.png)
3) This will heal your new friendly sentry gun, now wait until it blows up all the other sentry drones. Do not help. Stay within 500 – 1000 of the Preservation Unit.
![[11]](https://i.gyazo.com/37763b6f230a1f19c3654b8e1422db89.png)
4) You may now Analyze the cans on field with mostly safety. However DO NOT GET TOO CLOSE TO THE PLASMA CHAMBERS, should you they will blow up and your ship will too. Do not Shoot them.
![[12]](https://i.gyazo.com/3dba1f93cb69b4f852eb1a7bcbc49c43.png)
When you get too close to the plasma chambers this message appears:
![[13]](https://i.gyazo.com/b788756e87c79e66fb1b3df27c8efe93.png)
5) Lastly hack the Hyperfluct Generator, if you are lucky it will spawn a new rift close by (skip to step 7)
6) If you are not lucky but did manage to hack the Generator, you will need to hack the Vessel Rejuvenation Battery (stay close to it) and then upon success immediately shoot one of the Plasma Chambers. The scary blast will destroy most ships if you have NOT hacked the Rejuvenation battery. (makes a great tarp)
7) Enter the Rift
Room 3 – The Archive
![[14]](https://i.gyazo.com/a422c6acb30a0db85d48ae664e832594.png)
You are in NO immediate danger on warp in but alwasys watch the local messages closely from here on out
![[15]](https://i.gyazo.com/144ffd6ad5f7432d4b33130547ac76f2.png)
![[16]](https://i.gyazo.com/67de834dc4a6dfea13a4c7e9680db07f.png)
1) Burn with Microwarp drive to the Defense Targeting Augmentation Unit and hack it.
![[17]](https://i.gyazo.com/f488c8bd49b43fc899442dfd0e5b3ccc.png)
Note: From this point forward always be moving or orbiting something. The Sentry guns (which will be spawning shortly) will have a very hard time hitting you.
2) Hack 2 or 3 of the Cerebrum Maintenance Chambers (there is no great rush yet)
![[18]](https://i.gyazo.com/44c45a984e7f1d7af3bf42b60cae34cc.png)
This is the kind of thing in the Maintenance Chambers – Loot them
![[19]](https://i.gyazo.com/a53072ed43e4b78d95370e822a0efac3.png)
3) Put 3 Oscillation Fluids in the Central Archive Cerebrum. (Putting other things in the Cerebrum will result in an explosion that will blow up your ship. – if you want to experiment be prepared to lose ships)
![[20]](https://i.gyazo.com/f0e193179680b07c15c69e3e821f9608.png)
(This is the message that appears if you only put 2 Oscillation Fluids in the Cerebrum)
Now things will start going fast.
4) The Central Archive will start throwing out containers/depots and vessel rejuvenation batteries
From this point forward there will be Shockwaves that do considerable damage every 30 seconds, a very strongly tanked T3 Proteus with a repper can take about 5-6 sets of the shockwaves (DO NOT RELY on ACTIVE TANK ONLY, Minimum 2 BUFFER MODS recommended). Be aware that if you enter an area that has a cloud around a wreck it will do additional damage to your ship.
5) Burn to them while scanning them to see which one has the most valuable loot, hack it, loot it, and repeat
Alternate Strategy: Burn to the Vessel rejuvenation battery, hack it, then you can Analyze two nearby cans while being healed by the Vessel rejuvenation battery.
6) This part of the exploration is a calculation on how much more Analyzing and hacking you can do before losing your ship.
Be aware that after 5 or so waves the shockwaves increase in magnitude and you will see slightly different messages in local. If you aren’t tanking the base shock waves well get out now!
You may warp out and warp back to the site (even though it seems to have despawned from local probe scan, as long as it is within 30 -60 seconds from when you warpout. You can try to go back after healing and try a can or two more but typically the escalated shockwave are still in play.
Experimentation around taking out fluid after the first spew or adding other components would be a possible way to get more time in this last room.
At this point I don’t consider this post definitive and welcome the input and experimentation on the last room.