More actions
m Removed empty header |
m Reverted edit by Rika Nipah Nanodesu (talk) to last revision by Leto Freir Tag: Rollback |
||
| (14 intermediate revisions by 11 users not shown) | |||
| Line 1: | Line 1: | ||
''' | '''Strongholds''' are [[Guristas Pirates]] and [[Blood Raider]] fleet staging structures in [[Gallente]], [[Caldari]], [[Amarr Empire|Amarr]] and [[Minmatar Republic|Minmatar]] High and Low Security systems. | ||
The | The Stronghold fleets will: | ||
* Launch [[NPC Mining Operations]] | * Launch [[NPC Mining Operations]] into asteroid belts which makes mining difficult | ||
* Attack [[Upwell structures]] | * Attack [[Upwell structures]] and [[Player-owned starbases]] | ||
== The Structure == | == The Structure == | ||
In the Agency window, systems with | In the Agency window, systems with Strongholds currently show icons with the pirate logo when a player has chosen the Pirate Strongholds filter: it is further sub-filtered by the player's current region, although ones in neighboring regions can be shown as well. Guristas Pirate Strongholds are found in Gurista and Serpentis space: Blood Raider Strongholds are found in Minmatar and Amarr space. Search radius is capped to a 5 jump radius of current system. If a Stronghold was just spawned in system the Encounters tab will only illuminate when you are in the system. For each day the Stronghold exists it can be detected one jump further until it reaches the 5 jump radius. If the jumps are further than that it is due to how your routing settings are set. | ||
The structure itself has close to 3.000.000 hit points of structure. It does not offer any services to players, is in low-power mode, has no resistances in structure, and has no tethering abilities. There are two kinds of models: Gurista Pirates, which is fit with two heavy energy neutralizers, a stasis webifier (modified to reach to 300km), a multispectral ECM jammer, and two signal amplifiers. The Blood Raiders have a similar fit except they use a sensor dampener in place of the ECM jammer. If a player is able to survive on grid, the structure will eventually cap itself out after roughly 10-12 minutes. Advanced users can use [[https://zkillboard.com/group/1924/ zKillboard]] to grab the typeIDs to look up the profile in-game. | The structure itself has close to 3.000.000 hit points of structure. It does not offer any services to players, is in low-power mode, has no resistances in structure, and has no tethering abilities. There are two kinds of models: Gurista Pirates, which is fit with two heavy energy neutralizers, a stasis webifier (modified to reach to 300km), a multispectral ECM jammer, and two signal amplifiers. The Blood Raiders have a similar fit except they use a sensor dampener in place of the ECM jammer. If a player is able to survive on grid, the structure will eventually cap itself out after roughly 10-12 minutes. Advanced users can use [[https://zkillboard.com/group/1924/ zKillboard]] to grab the typeIDs to look up the profile in-game. | ||
| Line 13: | Line 13: | ||
== The NPCs == | == The NPCs == | ||
There are four specific types of diamond (♦) NPCs which are part of PvE content within EVE Online: | |||
* NPC Mining Corporation miners and their response fleets<br /> | |||
* Roaming pirate frigate forces which loiter in belts and shoot at player structures<br /> | |||
* Pirate NPC mining forces with their response fleets<br /> | |||
* Strongholds and their NPC reinforcement fleets (somewhat similar to the ♦ Sotiyo forces)<br /> | |||
Specifically, the Pirate NPC mining forces do have a hauler that warps to the | Specifically, the Pirate NPC mining forces do have a hauler that warps to the Pirate Strongholds to unload cargo. If the hauler warps on grid to the Stronghold while a player force is just showing up, the hauler can call its own reinforcement fleet, separate from the Stronghold's reinforcement fleet (and the fits that both forces use are different in most cases), which can overwhelm the capsuleer fleet. The miners also have this ability if one were to warp into the asteroid belt they happen to be in. | ||
While the other types of diamond NPCs are interesting topics in themselves, the focus of this article is on the | When a player group comes on grid with the Stronghold, The Structure itself has a detection range of about 375km where it is waiting for a capsuleer to pass through before summoning a response based on the class of ship that has warped in as well as how many warped in at the same time. This being said three Battleships warping in as a fleet often times will pull a rather large response compared to warping each one in separately with a little time passed between the warp ins. | ||
When the Pirate Stronghold is destroyed, the pirate siege of the system (which includes the roaming pirate frigate group and the pirate mining fleet) is terminated immediately and they vacate the system. | |||
While the other types of diamond NPCs are interesting topics in themselves, the focus of this article is on the Strongholds themselves. When the Strongholds first came out, the response fleet numbers and composition was roughly equal to what the capsuleers brought: the number of frigates (tackle), cruisers (damage, logistics and electronic warfare) and battleships (damage) varied from spawn to spawn. The first solo attempts used Vexor Navy Issues with a specific fit to tank their exact damage (EM and Thermal for Blood Raiders, Thermal for Guristas) with a second refit to a 500MN battleship sized Microwarpdrive to kite around the structure. In those days there would usually be 4-5 vessels, usually cruisers that would spawn, and once those were destroyed the structure itself was wide open to attack, aside from its EWAR and energy neutralizing capabilities. It was possible in those days to kite around the NPCs, forcing them to continuously "bounce" to attempt to get in operational range, yet because of the 500MN Microwarpdrive's speed made it impossible for the NPCs to catch up. This is no longer possible because the structure can stasis webify a target out to 300km, the edge of the lock range for subcapital vessels. | |||
Nowadays, a single player warping to the structure can expect 2-3 battleships with a few frigates, or a few frigates with the rest in randomly called cruisers, roughly adding up to about 10 vessels in total (such as 7 Omens and 2 Cruors). Responses to fleets warped to the structure are still in the dark as the response composition. (Capitals, at the time of writing, do not trigger NPC capital responses.) NPCs killed do not respawn; curiously however, they can be sent remote assistance (such as shield repairs) from capsuleers. They do have capacitors like conventional player ships however certain elements like afterburners and shield hardeners cannot be turned off: tackle modules, however, can be. | Nowadays, a single player warping to the structure can expect 2-3 battleships with a few frigates, or a few frigates with the rest in randomly called cruisers, roughly adding up to about 10 vessels in total (such as 7 Omens and 2 Cruors). Responses to fleets warped to the structure are still in the dark as the response composition. (Capitals, at the time of writing, do not trigger NPC capital responses.) NPCs killed do not respawn; curiously however, they can be sent remote assistance (such as shield repairs) from capsuleers. They do have capacitors like conventional player ships however certain elements like afterburners and shield hardeners cannot be turned off: tackle modules, however, can be. | ||
| Line 30: | Line 33: | ||
The new diamond NPC vessels can be combat probed and hunted with the directional scanner. This can be invaluable for operational purposes to position ships in a strategic fashion. | The new diamond NPC vessels can be combat probed and hunted with the directional scanner. This can be invaluable for operational purposes to position ships in a strategic fashion. | ||
== Strategy == | == Strategy == | ||
Previous headings explained strategies that worked in former iterations of the | Previous headings explained strategies that worked in former iterations of the Stronghold structure system. This one will aim to be updated, hopefully, for current viable strategies. | ||
Solo operations survive off extremely high resists against the hostile damage type: against Guristas, the aim is 94% Thermal resistances, and against Blood Raider NPCs, the goal is over 90%, ideally at least 92% against both EM and Thermal damage. Fleets of players attempting these structures should also aim for the same levels. | Solo operations survive off extremely high resists against the hostile damage type: against Guristas, the aim is 94% Thermal resistances, and against Blood Raider NPCs, the goal is over 90%, ideally at least 92% against both EM and Thermal damage. Fleets of players attempting these structures should also aim for the same levels. | ||
| Line 42: | Line 43: | ||
The structure itself has a 500 HP/sec damage requirement to prevent it from repairing itself. Aim for 600 DPS solo to account for damage variations. | The structure itself has a 500 HP/sec damage requirement to prevent it from repairing itself. Aim for 600 DPS solo to account for damage variations. | ||
The current trend is Remote Rep Dominixes with Micro Jump Drives for escape for a fleet setup of 3 people or more. Remote Rep (often called simply RR) doctrines don't scale very well with numbers and | The current trend is Remote Rep Dominixes with Micro Jump Drives for escape for a fleet setup of 3 people or more. Remote Rep (often called simply RR) doctrines don't scale very well with numbers and require high levels of pilot skill and skill points to work effectively. They also suffer from range projection problems so a player that drifts out of repair range could easily die. Players must understand cap chains and how to work with people who have been jammed or neuted out entirely. A single Nestor can be fit identically to the Dominixes and allows for combat refitting after the structure has capped itself out and hostile forces have been eradicated. | ||
Solo operations are rather pilot intensive and require competence in combat refitting (and knowing which fits to use at any one time) with experience in higher end PvE content. | |||
== [New] Current Strategies as a Group: == | |||
=== '''Up to Battlecruisers:''' === | |||
'''Applicable to:''' Guristas and Blood Raider Strongholds | |||
'''Recommended Ships:''' Triglavian hulls (Vedmak / Ikitursa preferred) | |||
Triglavian ships are ideal due to their strong single-target damage, high tracking, spool-up mechanics, remote repair (RR) range, and capacitor efficiency. While all Triglavian hulls are viable, the '''Vedmak''' is the most cost-effective for this operation. | |||
==== '''Fitting Tips: [https://eveworkbench.com/fit/53670156-6480-4389-af79-0f50fa9546fc Example fit for Guristas Strongholds]''' ==== | |||
* Use an '''afterburner''' on all ships. | |||
* Fill '''low slots with hardeners''' appropriate to the faction you’re facing. For example, against Guristas, fit 2'''x Thermal Armor Hardeners'''. | |||
* Depending on fleet size and ship type, you'll need at least '''3–4 pilots''' for RR and '''a transport ship''' (e.g., '''Squall''') to manage the large volume of Upwell modules. | |||
==== '''Fleet Setup and Execution:''' ==== | |||
# A fleet member warps to the Stronghold in a '''capsule''' and creates '''two bookmarks''': | |||
#* One ~2,000km from the Stronghold (used for safe warps later). | |||
#* One '''at least 400km away''', used as the main engagement point. ''Note: Failing to create these bookmarks can result in ship losses.'' | |||
# The fleet warps to the 400km bookmark and waits for the '''response fleet to spawn and ping''' to their location. This keeps the main fleet clear of heavy EWAR. | |||
# Engage and destroy the reinforcement fleet in the following target priority: | |||
#* '''Tackle:''' Condor, Cruor | |||
#* '''Logistics:''' Osprey, Augoror | |||
#* '''DPS:''' Caracal, Raven / Omen, Apocalypse | |||
#* '''EWAR:''' Gila, Scorpion / Ashimmu, Arbitrator, Bhaalgorn Maintain '''orbit around an object''' (e.g., a jetcan) to reduce incoming damage, and use '''RR''' to support targeted allies. | |||
# Once the reinforcement fleet is down: | |||
#* Warp to the Stronghold. | |||
#* Deploy a '''Mobile Depot''' and '''refit''' for maximum damage. | |||
#** For Vedmak: 4x Entropic Radiation Sink II, 2x Drone Damage Amplifier II. | |||
#* Be alert for any mining hauler activity. If a hauler warps in or undocks and triggers a second reinforcement fleet, '''immediately warp out'''—this wave is likely fatal to your fleet. | |||
'''Estimated Time per Stronghold:''' 30–45 minutes | |||
'''Skill Requirements:''' Basic fleet mechanics (focus fire, RR) | |||
'''Tips:''' Assign a target caller and a designated RR coordinator for smoother execution.<blockquote>'''Note:''' The 2,000km bookmark can be used to bring in additional pilots who lack Triglavian ship skills. At that distance, they will not trigger additional spawns but will still receive payout. Any Frigate is recommended for this.</blockquote> | |||
=== '''Battleships (Blood Raider Strongholds Only)''' === | |||
'''''Do NOT attempt this on Guristas Strongholds – you will lose your ships.''''' | |||
'''Recommended Ship:''' Leshak (Triglavian Battleship) - [https://eveworkbench.com/fit/847badb3-3d31-4771-9e71-13a127670ef5 Example fit] | |||
The '''Leshak''' is optimal for Blood Raider Strongholds due to its high spool-up DPS and standard Triglavian advantages. You’ll need a '''minimum of 2''', but '''3 Leshaks''' are recommended if you're new to the strategy for more RR and better survivability. | |||
==== '''Fitting Essentials:''' ==== | |||
* '''High EM/Thermal resistances''' (min. 90% on both) | |||
* '''3x Large Capacitor Batteries''' (to counter Energy Neutralization) | |||
* '''Large Micro Jump Drive (MJD)''' (to escape warp disrupts) | |||
* '''2x Large RR and 2x Large Remote Capacitor Transmitters''' | |||
==== '''Execution:''' ==== | |||
# All Leshaks warp to the Stronghold at 0km. | |||
# Upon landing: | |||
#* Lock the Stronghold and other Leshaks. | |||
#* Begin firing on the Stronghold. | |||
#* Start '''Remote Repair and Capacitor Transfers''': | |||
#** Assign 1/1 to each fleet member if using 3 Leshak | |||
#* Launch drones to clear reinforcement waves while continuing to spool damage on the Stronghold. | |||
# If logistics ships make it impossible to destroy the reinforcement fleet, continue attacking the Stronghold until it is destroyed. Upon destruction: | |||
#* Align out. | |||
#* Use the '''MJD''' to jump 100km. | |||
#* Warp off before enemy NPCs “ping” back and re-tackle you. | |||
'''Estimated Time per Stronghold:''' 10–20 minutes | |||
'''Profit Potential:''' Up to 800 million ISK/hour (with 3 accounts and pre-scouted route) | |||
Notes: | |||
* Corvettes do cause the spawn of additional reinforcements of mostly a single frigate while a fleet is on grid and will be shot if on grid for longer then a few sec. | |||
* Mobile hardware such as Mobile Depots, Tractors or Jump Drives are not attacked and do not have the minimum distance limitations to the structure itself. | |||
== Reward == | == Reward == | ||
Each fleet member '''on-grid''', '''in a ship*''', and '''not cloaked''' at the moment the Stronghold is destroyed will receive approximately '''25 million ISK'''. | |||
* The payout '''scales with fleet size''', increasing up to 30 million ISK at around '''10 members'''. | |||
* Beyond '''10 members''', the reward per player '''begins to decrease'''. | |||
* A maximum of '''40 fleet members''' can receive the payout. | |||
== Possible Loot == | |||
* Tech 1 Upwell structure modules | * Tech 1 Upwell structure modules | ||
* Faction Upwell structure modules | * Faction Upwell structure modules | ||
* Blueprint Copy: Dark Blood Standup Heavy Energy Neutralizer or a Dread Guristas Standup Variable Spectrum ECM | * Blueprint Copy*: Dark Blood Standup Heavy Energy Neutralizer or a Dread Guristas Standup Variable Spectrum ECM | ||
Notes: | |||
* BPC Loot Appears as a 400,000 m<sup>3</sup> strong box, so a freighter will be needed to scoop it up. | |||
** alltough the bpc drops are quite rare (jan 2025) | |||
* All ships are eligible for rewards, except shuttles and corvettes. | |||
== Image Gallery == | == Image Gallery == | ||
<div style="display: flex; flex-wrap: wrap;> | |||
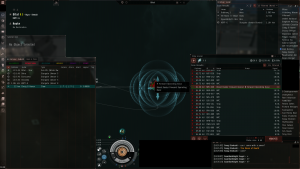
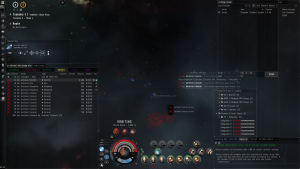
<div>[[File:3R72_FOB_1.png|thumb|The first Stronghold to be destroyed, probing it down]]</div> | |||
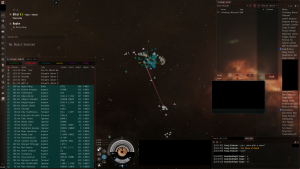
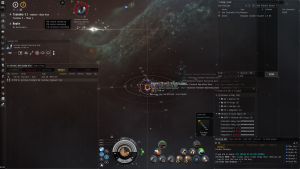
<div>[[File:3R72_FOB_2.png|thumb|On-Grid with the first Stronghold: note distance to Star]]</div> | |||
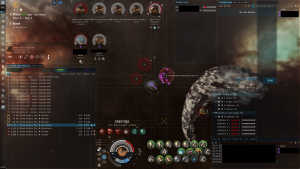
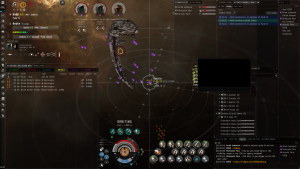
<div>[[File:3R72_FOB_3.png|thumb|Very first Guristas Stronghold. 1.5b lost ([https://www.reddit.com/r/Eve/comments/78s6ke/an_epilogue_of_the_new_pirate_fobs/ AAR])]]</div> | |||
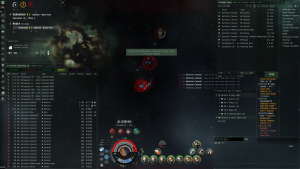
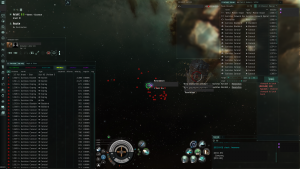
<div>[[File:3R72_FOB_4.png|thumb|Singularity, the early RR Battleships. Different response(1)]]</div> | |||
<div>[[File:3R72_FOB_5.png|thumb|The Escalating Fleet Comp model (Arms Race update)]]</div> | |||
<div>[[File:3R72_FOB_6.png|thumb|Attempting the first solo attempt in Feb 2018 release]]</div> | |||
<div>[[File:3R72_FOB_7.png|thumb|First solo kill since December 5th release]]</div> | |||
<div>[[File:3R72_FOB_8.png|thumb|The first E-UNI successful Stronghold kill with RR Dominixes]]</div> | |||
<div>[[File:3R72_FOB_9.png|thumb|(Singularity) Response to a Dreadnought on field]]</div> | |||
<div>[[File:3R72_FOB_10.png|thumb|(Singularity) Response to a Carrier and Force Auxiliary Carrier]]</div> | |||
</div> | |||
(1) In those days the NPC reinforcement fleet used the same ships and setup as the NPC miner response fleets. Nowadays they use different setups. | (1) In those days the NPC reinforcement fleet used the same ships and setup as the NPC miner response fleets. Nowadays they use different setups. | ||
==Patch History== | == Patch History == | ||
{{expansion past| | {{expansion past| | ||
'''Lifeblood 1.0 Expansion - 2017-10-24''' ([https://www.eveonline.com/article/patch-notes-for-eve-online-lifeblood Lifeblood 1.0 expansion]) | '''Lifeblood 1.0 Expansion - 2017-10-24''' ([https://www.eveonline.com/article/patch-notes-for-eve-online-lifeblood Lifeblood 1.0 expansion]) | ||
| Line 81: | Line 167: | ||
'''Arms Race 1.6 - 2018-02-13''' ([https://www.eveonline.com/article/p435cx/patch-notes-for-february-2018-release-1-0 Arms Race 1.6]) | '''Arms Race 1.6 - 2018-02-13''' ([https://www.eveonline.com/article/p435cx/patch-notes-for-february-2018-release-1-0 Arms Race 1.6]) | ||
* Response Fleet size limit introduced | * Response Fleet size limit introduced | ||
'''Havoc Expansion 21.06 - 2023-11-14''' ([https://www.eveonline.com/news/view/havoc-expansion-notes Havoc: Expansion Notes]) | |||
* Renamed from Forward Operating Bases to Strongholds (unlisted change) | |||
}} | }} | ||
== External links == | |||
* [https://www.youtube.com/watch?v=aPA8Ya0efCE Gurista FOB Playthrough (Highsec, Dualbox)] by JPNS (Youtube, 2023) | |||
[[Category:PvE]] | [[Category:PvE]] | ||
Latest revision as of 23:34, 4 September 2025
Strongholds are Guristas Pirates and Blood Raider fleet staging structures in Gallente, Caldari, Amarr and Minmatar High and Low Security systems.
The Stronghold fleets will:
- Launch NPC Mining Operations into asteroid belts which makes mining difficult
- Attack Upwell structures and Player-owned starbases
The Structure
In the Agency window, systems with Strongholds currently show icons with the pirate logo when a player has chosen the Pirate Strongholds filter: it is further sub-filtered by the player's current region, although ones in neighboring regions can be shown as well. Guristas Pirate Strongholds are found in Gurista and Serpentis space: Blood Raider Strongholds are found in Minmatar and Amarr space. Search radius is capped to a 5 jump radius of current system. If a Stronghold was just spawned in system the Encounters tab will only illuminate when you are in the system. For each day the Stronghold exists it can be detected one jump further until it reaches the 5 jump radius. If the jumps are further than that it is due to how your routing settings are set.
The structure itself has close to 3.000.000 hit points of structure. It does not offer any services to players, is in low-power mode, has no resistances in structure, and has no tethering abilities. There are two kinds of models: Gurista Pirates, which is fit with two heavy energy neutralizers, a stasis webifier (modified to reach to 300km), a multispectral ECM jammer, and two signal amplifiers. The Blood Raiders have a similar fit except they use a sensor dampener in place of the ECM jammer. If a player is able to survive on grid, the structure will eventually cap itself out after roughly 10-12 minutes. Advanced users can use [zKillboard] to grab the typeIDs to look up the profile in-game.
New Diamond NPCS (♦ prefixes) respond with player presence on grid.
The NPCs
There are four specific types of diamond (♦) NPCs which are part of PvE content within EVE Online:
- NPC Mining Corporation miners and their response fleets
- Roaming pirate frigate forces which loiter in belts and shoot at player structures
- Pirate NPC mining forces with their response fleets
- Strongholds and their NPC reinforcement fleets (somewhat similar to the ♦ Sotiyo forces)
Specifically, the Pirate NPC mining forces do have a hauler that warps to the Pirate Strongholds to unload cargo. If the hauler warps on grid to the Stronghold while a player force is just showing up, the hauler can call its own reinforcement fleet, separate from the Stronghold's reinforcement fleet (and the fits that both forces use are different in most cases), which can overwhelm the capsuleer fleet. The miners also have this ability if one were to warp into the asteroid belt they happen to be in.
When a player group comes on grid with the Stronghold, The Structure itself has a detection range of about 375km where it is waiting for a capsuleer to pass through before summoning a response based on the class of ship that has warped in as well as how many warped in at the same time. This being said three Battleships warping in as a fleet often times will pull a rather large response compared to warping each one in separately with a little time passed between the warp ins.
When the Pirate Stronghold is destroyed, the pirate siege of the system (which includes the roaming pirate frigate group and the pirate mining fleet) is terminated immediately and they vacate the system.
While the other types of diamond NPCs are interesting topics in themselves, the focus of this article is on the Strongholds themselves. When the Strongholds first came out, the response fleet numbers and composition was roughly equal to what the capsuleers brought: the number of frigates (tackle), cruisers (damage, logistics and electronic warfare) and battleships (damage) varied from spawn to spawn. The first solo attempts used Vexor Navy Issues with a specific fit to tank their exact damage (EM and Thermal for Blood Raiders, Thermal for Guristas) with a second refit to a 500MN battleship sized Microwarpdrive to kite around the structure. In those days there would usually be 4-5 vessels, usually cruisers that would spawn, and once those were destroyed the structure itself was wide open to attack, aside from its EWAR and energy neutralizing capabilities. It was possible in those days to kite around the NPCs, forcing them to continuously "bounce" to attempt to get in operational range, yet because of the 500MN Microwarpdrive's speed made it impossible for the NPCs to catch up. This is no longer possible because the structure can stasis webify a target out to 300km, the edge of the lock range for subcapital vessels.
Nowadays, a single player warping to the structure can expect 2-3 battleships with a few frigates, or a few frigates with the rest in randomly called cruisers, roughly adding up to about 10 vessels in total (such as 7 Omens and 2 Cruors). Responses to fleets warped to the structure are still in the dark as the response composition. (Capitals, at the time of writing, do not trigger NPC capital responses.) NPCs killed do not respawn; curiously however, they can be sent remote assistance (such as shield repairs) from capsuleers. They do have capacitors like conventional player ships however certain elements like afterburners and shield hardeners cannot be turned off: tackle modules, however, can be.
As the diamond NPCs are concerned, they can warp around to arbitrary points around the structure, anywhere on grid, to "bounce" to within a few kilometers of their intended engagement range (which contrasts the miner NPC response fleets, which do not have the warp ability as of this writing). They use capsuleer fits of varying quality. The frigates have Microwarpdrives backed with Warp Disruptors and Stasis Webifiers; the cruisers and battleships use Afterburners.
The new diamond NPC vessels can be combat probed and hunted with the directional scanner. This can be invaluable for operational purposes to position ships in a strategic fashion.
Strategy
Previous headings explained strategies that worked in former iterations of the Stronghold structure system. This one will aim to be updated, hopefully, for current viable strategies.
Solo operations survive off extremely high resists against the hostile damage type: against Guristas, the aim is 94% Thermal resistances, and against Blood Raider NPCs, the goal is over 90%, ideally at least 92% against both EM and Thermal damage. Fleets of players attempting these structures should also aim for the same levels.
Drone ships are preferred because of ECM on Gurista sites, and energy neutralizing on Blood Raider sites. Armor is also preferred because the Reactive Armor Hardener's resistances are calculated differently (just like the Damage Control module) than other modules on the vessel, though it does stack against the Damage Control and thusly it's easier to get the resistance levels required for this job.
The structure itself has a 500 HP/sec damage requirement to prevent it from repairing itself. Aim for 600 DPS solo to account for damage variations.
The current trend is Remote Rep Dominixes with Micro Jump Drives for escape for a fleet setup of 3 people or more. Remote Rep (often called simply RR) doctrines don't scale very well with numbers and require high levels of pilot skill and skill points to work effectively. They also suffer from range projection problems so a player that drifts out of repair range could easily die. Players must understand cap chains and how to work with people who have been jammed or neuted out entirely. A single Nestor can be fit identically to the Dominixes and allows for combat refitting after the structure has capped itself out and hostile forces have been eradicated.
Solo operations are rather pilot intensive and require competence in combat refitting (and knowing which fits to use at any one time) with experience in higher end PvE content.
[New] Current Strategies as a Group:
Up to Battlecruisers:
Applicable to: Guristas and Blood Raider Strongholds
Recommended Ships: Triglavian hulls (Vedmak / Ikitursa preferred)
Triglavian ships are ideal due to their strong single-target damage, high tracking, spool-up mechanics, remote repair (RR) range, and capacitor efficiency. While all Triglavian hulls are viable, the Vedmak is the most cost-effective for this operation.
Fitting Tips: Example fit for Guristas Strongholds
- Use an afterburner on all ships.
- Fill low slots with hardeners appropriate to the faction you’re facing. For example, against Guristas, fit 2x Thermal Armor Hardeners.
- Depending on fleet size and ship type, you'll need at least 3–4 pilots for RR and a transport ship (e.g., Squall) to manage the large volume of Upwell modules.
Fleet Setup and Execution:
- A fleet member warps to the Stronghold in a capsule and creates two bookmarks:
- One ~2,000km from the Stronghold (used for safe warps later).
- One at least 400km away, used as the main engagement point. Note: Failing to create these bookmarks can result in ship losses.
- The fleet warps to the 400km bookmark and waits for the response fleet to spawn and ping to their location. This keeps the main fleet clear of heavy EWAR.
- Engage and destroy the reinforcement fleet in the following target priority:
- Tackle: Condor, Cruor
- Logistics: Osprey, Augoror
- DPS: Caracal, Raven / Omen, Apocalypse
- EWAR: Gila, Scorpion / Ashimmu, Arbitrator, Bhaalgorn Maintain orbit around an object (e.g., a jetcan) to reduce incoming damage, and use RR to support targeted allies.
- Once the reinforcement fleet is down:
- Warp to the Stronghold.
- Deploy a Mobile Depot and refit for maximum damage.
- For Vedmak: 4x Entropic Radiation Sink II, 2x Drone Damage Amplifier II.
- Be alert for any mining hauler activity. If a hauler warps in or undocks and triggers a second reinforcement fleet, immediately warp out—this wave is likely fatal to your fleet.
Estimated Time per Stronghold: 30–45 minutes
Skill Requirements: Basic fleet mechanics (focus fire, RR)
Tips: Assign a target caller and a designated RR coordinator for smoother execution.
Note: The 2,000km bookmark can be used to bring in additional pilots who lack Triglavian ship skills. At that distance, they will not trigger additional spawns but will still receive payout. Any Frigate is recommended for this.
Battleships (Blood Raider Strongholds Only)
Do NOT attempt this on Guristas Strongholds – you will lose your ships.
Recommended Ship: Leshak (Triglavian Battleship) - Example fit
The Leshak is optimal for Blood Raider Strongholds due to its high spool-up DPS and standard Triglavian advantages. You’ll need a minimum of 2, but 3 Leshaks are recommended if you're new to the strategy for more RR and better survivability.
Fitting Essentials:
- High EM/Thermal resistances (min. 90% on both)
- 3x Large Capacitor Batteries (to counter Energy Neutralization)
- Large Micro Jump Drive (MJD) (to escape warp disrupts)
- 2x Large RR and 2x Large Remote Capacitor Transmitters
Execution:
- All Leshaks warp to the Stronghold at 0km.
- Upon landing:
- Lock the Stronghold and other Leshaks.
- Begin firing on the Stronghold.
- Start Remote Repair and Capacitor Transfers:
- Assign 1/1 to each fleet member if using 3 Leshak
- Launch drones to clear reinforcement waves while continuing to spool damage on the Stronghold.
- If logistics ships make it impossible to destroy the reinforcement fleet, continue attacking the Stronghold until it is destroyed. Upon destruction:
- Align out.
- Use the MJD to jump 100km.
- Warp off before enemy NPCs “ping” back and re-tackle you.
Estimated Time per Stronghold: 10–20 minutes
Profit Potential: Up to 800 million ISK/hour (with 3 accounts and pre-scouted route)
Notes:
- Corvettes do cause the spawn of additional reinforcements of mostly a single frigate while a fleet is on grid and will be shot if on grid for longer then a few sec.
- Mobile hardware such as Mobile Depots, Tractors or Jump Drives are not attacked and do not have the minimum distance limitations to the structure itself.
Reward
Each fleet member on-grid, in a ship*, and not cloaked at the moment the Stronghold is destroyed will receive approximately 25 million ISK.
- The payout scales with fleet size, increasing up to 30 million ISK at around 10 members.
- Beyond 10 members, the reward per player begins to decrease.
- A maximum of 40 fleet members can receive the payout.
Possible Loot
- Tech 1 Upwell structure modules
- Faction Upwell structure modules
- Blueprint Copy*: Dark Blood Standup Heavy Energy Neutralizer or a Dread Guristas Standup Variable Spectrum ECM
Notes:
- BPC Loot Appears as a 400,000 m3 strong box, so a freighter will be needed to scoop it up.
- alltough the bpc drops are quite rare (jan 2025)
- All ships are eligible for rewards, except shuttles and corvettes.
Image Gallery
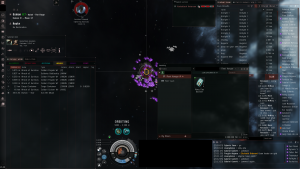
(1) In those days the NPC reinforcement fleet used the same ships and setup as the NPC miner response fleets. Nowadays they use different setups.
Patch History
| A long, long time ago... |
|---|
|
Lifeblood 1.0 Expansion - 2017-10-24 (Lifeblood 1.0 expansion)
Arms Race 1.0 - 2017-12-5 (Arms Race 1.0)
Arms Race 1.6 - 2018-02-13 (Arms Race 1.6)
Havoc Expansion 21.06 - 2023-11-14 (Havoc: Expansion Notes)
|
External links
- Gurista FOB Playthrough (Highsec, Dualbox) by JPNS (Youtube, 2023)

