Reason: Major PI changes & new resources/structures with Equinox patch.

|
| Planetary Industry |
|---|
| Introduction to PI |
| The Basics |
| Advanced |
| Other Resources |
Planetary Industry (PI) (previously called Planetary Interaction or Planetary Production (PP)), is a type of Industry that allows pilots to create industrial colonies on just about any planet in the EVE universe. We will use the two terms and the corresponding abbreviations interchangeably for now.
The aim of this is producing goods from raw materials extracted from the planet. Planetary Industry can produce a range of commodities which can be used in blueprints to create POS Structures and Fuel Blocks, Sovereignty structures, Boosters, Nanite Repair Paste, and T2 components.
Introduction
To engage in Planetary Industry, pilots need to purchase the correct Command Center for their chosen planet from the market. There are eight types of Command Centers (one for each type of planet). Once the correct Command Center is placed on a planet other facilities such as extractors and processors may be placed. As the correct Command Center needs to be deployed before beginning any extraction, it is good to survey and select your chosen planet(s) prior to purchase.
Once raw materials have been collected, they can be processed on-planet or on a planet dedicated to manufacturing into basic or advanced goods, taken off-planet for station-based processing into a variety of products used in space, or sold. Material is removed from a planet either by launches from the Command Center or through a planetary Customs Office that charges a tax. Material can be brought down to a planet only through the Customs Office, at a reduced taxation rate.
Selling the materials and/or goods provides a source of income to players who invest in the necessary skills. You can keep a colony running with a little attention once a day, more often if you want to optimize, or less often if you'd just like to coast along and check on your assets once in a while.
Currently the facilities on the planet are invulnerable, however you may indirectly compete with others for nearby resources. Retrieving the valuable products from planets is another matter altogether, as pilots experience the typical risks of transporting valuables.
Planetary Industry can be performed in all areas of space (highsec, lowsec, NPC 0.0 space, sovereign 0.0 space, and wormhole space). A small number of systems are not available for colonization due to high traffic or storyline reasons. The list of restricted systems is:
|
|
|
Also, Planetary Industry is not available in Shattered systems.
Quick Start Videos
The following videos explain the basics of Planetary Industry. For more details you should consult the Setting up a planetary colony page.
CCP made an older video Planetary Interaction Tutorial (post-Incursion, April 2011).
An even older E-UNI Planetary Interaction Quick Start Guide (pre-Incursion, May 2010).
A transition guide for players adapting to the changes in Incursion is here: The New Incursion Planetary Interaction Tutorial (January 2011).
Some more advanced video guides are also available:
- Single-Planet P3 Production - note that with Incursion it is no longer possible to do 'perfect' P3 production on any planet, as no command center can support four ECU's and the factories needed to achieve continuous P3 production. However the video is still helpful as it gives an excellent overview of setting up from start to final production.
- POS Fuel Production Guide
Skills

None of the skills related to PI are technically required to try it out. However, you'll be limited to a single Command Center (and thus a single planet) of the lowest quality until you do some initial training. Additionally, unless you want to place your extractors blind, you'll want to train Remote Sensing to at least level I. Thus, you're most likely to get the best use out of training that first, then Interplanetary Consolidation and Command Center Upgrades.
Click each skill link for more details
- (Planet Management) Interplanetary Consolidation - Increases the number of planets you can install command centers on up to 6
- (Planet Management) Command Center Upgrades - Allows you to use better quality command centers. This in turn allow you to increase the number of installations on the planet.
- (Planet Management) Remote Sensing - Allows a player to scan planets remotely. Each skill level increases the distance at which it's possible to scan. Requires level 1 to scan at all, so train to level 1 before starting PI.
- (Planet Management) Planetology - Increases the resolution when scanning planets for resources. This is visible in the number of gradient bands displayed on the planet's surface when scanning for a resource.
- (Planet Management) Advanced Planetology - Increases the precision when scanning planets for resources. Note that Planetology allows you to see more details while Advanced Planetology allows you to have a more accurate idea of where the resources are located. See the skills page for more info.
- (Trade) Customs Code Expertise - Reduces the NPC tax rate of Player Owned Customs Offices (POCOs) in high sec. It does NOT, however, have any effect on tax rates with NPC customs offices either inside or outside of high sec.
Planets

- Main article: Planets
Planets come in all sorts of shapes and sizes and accordingly provide different materials. Each planet provides five resources, but a few unique resources each only exist on a single planet type. The unique resources include Autotrophs (![]() Temperate planets), Felsic Magma (
Temperate planets), Felsic Magma (![]() Lava planets), and Reactive Gas (
Lava planets), and Reactive Gas (![]() Gas planets).
Gas planets).
At first, you are limited to a single planet, so ideally you need to initially figure out what you're interested in harvesting and/or producing, pick the planet most appropriate for that activity, and then look for an example with the right resources in abundance. Note that planets in lower security systems are richer overall -- see Identifying valuable planets for some analysis. While you can colonize planets in unclaimed or NPC nullsec (even wormhole space!) you cannot colonize planets in territory claimed by an alliance other than your own.

To look for a planet you can use several different methods. You can fly to planets and click them, or be lazy and just select the planets from your overview. The Atlas can help you pick other systems, but it takes a few clicks to get anywhere. Either way, you'll want to use the "View in planet mode" option and get yourself a nice up-close view.
You can also select planets from several other different views -- via your MapBrowser F11, for example. You can see a planet's overall resource abundance (and admire its visual appeal!) from anywhere, but the planet must be within your Remote Sensing skill range for you to perform a Scan operation for a specific resource (i.e. show its "heat" map). You can manage a planet you've already colonized from anywhere.
Resources and Products
- Main article: Planetary Commodities
The items involved in Planetary Industry are known as Resources (extracted from Planets) and Products (produced from Resources or other Products on planets)
Resources are considered Tier Zero (R0), at least in the context of this guide, and each level of processing increases the tier by one. You thus get Tier 1 products (P1) produced by Resources (R0), Tier 2 Products (P2) produced by combining two different P1s, and so on. Processing items from one tier to the next happens in a Processor on the surface of a planet, and each tier requires a different amount of different items. Processing can then be summarized as such, one level of processing is needed per column:
| Resources (R0) | Tier 1 Products (P1) | Tier 2 Products (P2) | Tier 3 Products (P3) | Tier 4 Products (P4) |
The actual Product combinations are performed as per "schematics" that are instructions for a Processor. Each schematic takes one to three items of varying tiers and quantities. You do not need to extract all the Resources you need on the same planet, nor process them to Tier 4. At any point, you can supplement your "Colonies" from the market or sell your goods there.
Aside from leading to higher tiers of planetary Products, some PI goods can be used for T2 blueprints, Starbase / Sov structures, nanite paste, or POS fuel. For more information on the involved items, see Planetary Commodities. To find out how to get started looking for your initial Resources, read on!
Planetary Buildings
- Main article: Planetary buildings
To extract and produce resources and products you need buildings! Buildings match the planet they are constructed on, but players only need to worry about selecting the right type of command center, the rest are built in place on the planet and thus always of the right type. Each building beyond the Command Center costs a set amount of Powergrid (PG) and CPU. At a glance, the following structures exist:
| Type | Description |
|---|---|
| Command Centers | The first building you must construct, deployed from orbit (or technically anywhere undocked in the system). Only a basic command center can be bought from the market. Command centers can be upgraded post-construction. Upgrades range from basic to elite, providing more CPU and Powergrid per level. Command Centers can store a small amount of material (500 m3) and offer a simple rocket-launch mechanism allowing the shipping of materials to orbit. |
| Extractor Control Units | Extractor Control Units (ECUs) allow the installation of extraction programs and the building of extraction heads. To make use of the extraction programs, you must select the resource type for all heads, a duration for the program (up to 14 days), and a route for the raw material to follow once extracted, lest it be lost. Additionally, you must manually initiate the extraction of a particular "seam" of the resource and submit your action before extraction begins. |
| Extractor Heads | Extraction of resources is done by extractor heads that are installable via the ECUs. The heads can be placed within the ECUs area and can be moved via drag and drop to resource hot-spots for a greater extraction amount. |
| Processors | These come in three different types, Basic (used to transform raw materials (P0) to processed materials (P1)), Advanced (used to either transform processed materials (P1) in refined commodities (P2) OR refined commodities (P2) in specialized commodities (P3)), and High Tech (used to transform specialized commodities (P3) in advanced commodities (P4)). The latter can only be built on barren or temperate planets. |
| Storage Facilities | About as simple as a planetary building goes, these hulks simply store materials or goods, potentially as part of a larger logistics system. |
| Launchpad | A building dedicated to moving materials and goods to and from the planet. This building operates in a similar way to the rocket launch function of the Command Center, but it benefits from its connection to a Cargo Link in orbit above the planet. From there, the owner can import and export goods, albeit at great expense. |
| Planetary Links | These can be thought of as railroads, connecting different structures. In addition to their construction (which has a base cost plus a distance cost), routes have to be defined using the links to route specific products across your planetary network. They have a finite capacity in m3 per hour and can be upgraded. |
Setting Up a New Colony
For more details including a step-by-step pictorial guide of setting up a colony, see Setting up a planetary colony
Planet Scanning

After you've familiarized yourself a bit with planets and resources, you'll probably want to extract one from the other. Finding a planet that is simply abundant in a resource you want is only the first step. Now you need to find out where on the planet you'll want to place your stuff. To get started, get yourself into Planet Mode and make sure you're on the "Scan" tab. You should see the five available resources, a "NO FILTER" bar, and a colorful "heat" bar. Click any one resource and you'll get a heat map showing where on the planet that resource is abundant.
The colored bar will allow you to modify the contrast of the heat map - as very rich or very poor resources may completely white out or appear invisible if your contrast is off. There are two triangles on the contrast bar. The left one will set the minimum resource abundance you want on the map (if you move it right poorer areas will disappear), and the right one will determine how rich a resource have to be to show as white (if you move it left poorer resources will show more distinctly). Ideally, you'll want a balance where you can see where the richer parts of the planet are. Remember that the colors are relative to the contrast bar setting - two white spots for the same resource on different planets with different contrast bar settings are not equal!
You can leave a resource highlighted as you shift to the "Build" tab so you can more easily place an extractor on a rich spot (the white spot on this screenshot). To remove the heat overlay click the "NO FILTER" bar.
Deploying a Command Center

To get started on building stuff you need to first deploy a Command Center (CC) of the right type on your target planet.
Consider which resources you're targeting and where they are, placing your CC at some ideal spot near them (that is, if you plan to use it to export products instead of a Launchpad. The CC doesn't need to be connected to anything for you to build other structures). You'll usually end up placing your CC on the edge of one resource type (or a "pair" of resources that usually hang out together) with another resource type growing in intensity the further it gets from the white "peak" of the first. Whether or not resources are grouped, opposed to each other, live in bands, etc, depends on the planet type. See Planet for more details.
With the Build menu up, select the "Command Centers" menu and CCs of the specific size will light up, ready to be placed. If all are greyed out, make sure you put the CC in your cargo hold, that you are undocked, and that you are not at your colony cap (Interplanetary Consolidation skill). Drop the CC in the target spot and after it is placed be sure to click the "Submit" button that now appears in the UI to your left. Almost nothing in Planetary Industry is finalized until you click "Submit" and you can group some orders before submitting them (you might get a timer if you keep hitting Submit after every tiny change).
After your CC has been deployed and you have submitted changes, further build options will become available. There seems to be a bug whereby sometimes these new options remain greyed out and are not selectable after deploying your CC. If this happens, simply leave planetary industry mode (click "exit") and then go back into it. Build options should now appear correctly allowing you to continue building your colony.
You can upgrade your CC as needed once placed, up to your maximum Command Center Upgrades skill level.
Surveying with an Extractor Control Unit

Placing other buildings is just like placing a CC, though you'll want to keep consulting your Scan tab to make sure you get the Extractor Control Unit in an area that can reach out to rich spots. After you've placed an Extractor Control Unit (ECU), you have to Survey, which is distinct from Scanning. Surveying shows the actual numeric amounts of a single resource that can be extracted in a single spot under an Extractor Head. To perform a survey, simply select an Extractor and click the left-most button, highlighted in this screenshot.
You will be presented with another window (in the bottom half of the screenshot). First, select the type of resource you wish to extract. Then, move the "Extractor Area Size" slider until you have the desired program duration (how often you will have to come back to resurvey your extractors (ranges from 1 hour to 14 days)). Click on the first "Extractor Head Units" circle to create an Extractor Head. You can now move this new Extractor Head around within the radius of influence of the Extraction Control Unit (the grey circle you saw when placing the ECU) and watch the graph of extraction amount to see where a good deposit appears. Extractor Control Units can have up to 10 Extractor Heads. Each additional head consumes an amount of CPU (110) and Powergrid (550). The Extraction Area Size/Duration is a trade-off of varying total amount, cycle time (doubles at 25 hours (1d1h) to 30 min, 50 hours (2d2h) to 1hr, 4d4h to 2hr, 8d8h to 4hr.), per-cycle yield, and management requirements. If you have ample time to check on your Extractors often you can get a higher yield over shorter periods. If you do not want to check very often you can instead select long-term deposits so you won't need to babysit your extractors.
After you select a deposit of your choice be sure to hit the "Install" button. This will forward you to the Product menu (second button on the ECU Window), from where you can route your extracted Resource somewhere. Keep in mind that when the cycle runs it course, you can rescan in the same place (with the same extractor) to begin the cycle again (or you can change the resource and move your Extractor Heads around again). But before you can route, you must link!
Here is a video that shows how Extractor Heads are deployed (YouTube)
When you return to refresh your extraction programs, you may notice that the actual amount of materials extracted may be different (usually less) than the amount you expected. This inaccuracy may be mitigated by training Planetology and Advanced Planetology, but even at high skill levels the difference can be significant. To further reduce the inaccuracy, after you move your extractor heads and click start, DO NOT submit yet. Instead, click on the "Install Program" button again, and look at the updated extraction amount. If this is very different from what you expected, stop the program, move the heads, and try again until you have what you need.
Links and Routes

Links are used to connect buildings together so you can route materials around. Buildings cost money, Links do not. Both cost Powergrid and CPU, and the longer your links, the more PG and CPU they cost, limiting you from building other more interesting stuff. So short and few links are best, but sometimes you'll have to connect out to reach distant Extractors. The Planet Radius plays a significant role in PG cost of links so be mindful of this when placing them.
There are multiple ways to get started making links, CTRL -clicking any building being the easiest. After your Link is started simply click (without CTRL) your target structure and your Link is ready to build next you hit "Submit". You do not need to connect every building to every other building, nor do you even need to start from or include your CC at all (generally a Launchpad is superior). Routes will connect through multiple "hops" (intervening structures) up to six links away. So you can make a few central "highway" links to connect distant clusters to each other.
After a Link is planned (no need to hit "Submit" yet) you can finally make Routes! For a simple example you could route the Extractor to the CC in the screenshot, and then the CC to the Processor. Having started extracting earlier and installed a Schematic in the Processor you should be fully ready to Route next. Click the Extractor and go to the Products sub menu (this is where you'll be dropped off after Installing a Deposit, so it helps to prepare all your buildings and links before starting any Extractors), click the available Resource, select "Create Route", pick the CC, and hit "Create Route" again to finalize.
At this point, your Extractor will route its output to your CC, where it'll build up until routed during production until the CC is full or the Extractor finishes its deposit. You'll want to click the main "Submit" button now to allow the Extractor to start working. Again, you might be tempted to route straight to the Processor, but resist! You'll waste precious material that way!
Next, click its Products sub menu and route from there to the Processor. Now when your processor is ready for more it will pull the resource for production, once you submit your changes. But wait! Lastly make a route the same way from the Processor back to your CC (or other storage). Like the extractor if it isn't stored it is lost. Finally hit "Submit" again and congratulations, you now have a working colony!
For more information on Links and Routing see Intraplanetary Logistics. To learn about what to do next, keep reading!
Links resource usage
The scale of the infrastructure increases linearly with the radius of the planet. As such, the distance between two factories also increases linearly. After experimental testing:
- The Minimum Link distance (ml) on a planet of radius r is : ml(r) = 0,012008578×r (with ml and r in km). This the minimal distance between the center of two pins.
- The PG cost of a link of distance l is : p(l) = 10+0.15×l
- The CPU cost of a link of distance l is : c(l) = 15+0.2×l
Links usage of a plan
We can then express the links of a planetary installation independently of the planet size, as the couple (n,k) with
- n the number of started links and
- k the ratio of total length compared to minimum length, .
n is the number of real links, while k is the number of minimal size segments the links run over.
- if the infrastructures are only a launchpad and 6 high-tech production plants (HP), with the launchpad in the middle, we have 6 links and total 6 minimal segments
- if we add 12 HP around the 6 existing
- if we link them directly to the launchpad, half of them will require 2 segments (those just after another HP) and the other half will require segments. Therefore the total number of links (n) is 18, the total length (k) is minimal segments.
- if we link them to the closest HP, then we add one minimal segment per new HP, total length is 18 so n=k=18.
Plan consumption per planet
Once this is done, we have the cost of links on a planet depending on those values and r the radius of that planet
- PG cost p(r,n,k) = 10×n+0,001801287×r×k
- CPU cost c(r,n,k) = 15×n+0,002401716×r×k
Then we can add the (constant) pins usage to those values.
Industry

You now know how to get started with building stuff, and how to find and extract Resources. Good progress! Now we get to truly kick the industrial process into gear.
The first step after extracting Resources is turning them into the first tier of Products - P1. Consult Planetary Commodities to find out what P1 item the resources you are extracting turn into, and then place a Basic Processor somewhere near your Extractor or some sort of storage - your CC has enough storage capacity for a starting colony. You can move your stuff straight from an Extractor to a Processor, but risk losing any "overflow" of material that backs up while the Processor is working. So always try to use storage first.
Anyway, that's the next step, not yet! So get your Basic Processor built and look at the menu highlighted in the screenie - Schematics! For the displayed Processor we've selected and submitted an order for Bacteria, which takes 3000 units of Micro Organisms and turns them into 20 units of Bacteria. You must have a schematic selected to be able to route a Resource to your Processor, and only the exact ingredient(s) needed will be routable there.
Beyond turning Resources into P1 look at the Planetary Commodities page again for more combinations including those for Advanced Industry Facilities and High Tech Production Plants.
Colony Management

- Main article: Colony management
Now that you have built your first colony, you're on your way! After training Interplanetary Consolidation you can have multiple colonies, one per skill level, plus the initial one, and you may have to find them among the 67k planets in EVE again. Your current colony worlds can be found in the Science and Industry Tab, from which you can enter planet mode for each.
Producing the higher tier products on a single planet narrows down to where each P3 can only be produced from scratch (in other words, without importing goods) on a single planet type. P4 items all need multiple planet types, from two to five. This is where you need to start thinking about how deep you'd like to get into Planetary Industry. Look around for some blue or red pills and start talking about rabbit holes. Of course, a primary motivator is the title of the next section. For more information on how to deal with getting goods between colonies, see Interplanetary Logistics.
In short, to build one unit of a P4 item you have to deal with two planets at least, launching your lower tier Products into orbit via a CC or Launchpad, then importing them via a Customs Office on another planet for further processing. You have to repeat this process multiple times for some P4s. Likely, your extra efforts(i.e. transporting materials between planets) devoted into this process will make the more involved products more profitable. But this depends. You need to carefully consider many factors, like the tax for every transportation, the market price for the components and the final product, the time consumed(Time is money, you should know) and so on. It's recommended that you do some calculation before you decide to produce any kind of products.
With the new ECUs in Incursion it is no longer possible to do "perfect" P3 production on any planet—that is, continuously producing a P3 item at maximum output. You can extract one resource at a time, but no CC can support four ECUs and the factories needed to achieve continuous P3 production. This means if you are looking to maximize production, P3 production will always require at least 2 planets.
Profit!

Assuming you'd just like to get on with it and make some money, we can certainly do that! Anything you make with PI can be sold on the market, though it is difficult to say what is going to be the most profitable. At a minimum, it seems reasonable to recommend processing your Resources into P1 goods before trying to sell them, as doing so shrinks the volume they take up to about 25% of the original. Even better would be going for P2 for another drop to 25% of the original, or a tiny 6.25% total of the volume in plain Resources.
As mentioned above, it's usual to import and export items, but you need to pay taxes for both processes. The tax rates are preset at the planet's Customs Office and vary among systems with different security status.
Base Costs
Commodities cost a percentage of a set taxable value per unit to export or import, based on the commodity's tier in the industry chain.
| Commodity level | Base Cost (ISK) |
| R0 | 5 |
| P1 | 400 |
| P2 | 7,200 |
| P3 | 60,000 |
| P4 | 1,200,000 |
However, due to the above taxable values being per unit, and because of the compression that occurs as the PI product is refined to higher tiers, some tiers are cheaper to export/import than others:
- A 30-minute Basic Industrial Facility cycle uses 3,000 units of R0 to make 20 units of P1, for taxable values of (3,000*5=) 15,000 ISK before vs. (20*400=) 8,000 ISK after, a 47% reduction in taxable value, in addition to the volume being reduced to about 25% of the original.
- A 1-hour P1 to P2 cycle uses a total of (2*40=) 80 units of P1 to make 5 units of P2, for taxable values of (80*400=) 32,000 ISK before vs. (5*7,200 =) 36,000 ISK after, an increase of 12.5% during this cycle but still a net reduction from R0. Due to planetary colony CPU/PG restrictions, production of P3 or higher products on a single planet isn't possible, so you'll have to export at this stage at the latest, usually. Volume compression is still about 4-fold, from 30.4m³ to 7.5m³.
- A 1-hour P2 to P3 cycle uses 20 or 30 units of P2 to make 3 units of P3, for taxable values of (20*7,200=) 144,000 ISK / (30*7,200=) 216,000 ISK before vs. (3*60,000=) 180,000 ISK after, i.e. either an increase of 25% or a decrease of 16.7%. Volume reduction is to 60% or 40% respectively.
- Finally, a P3 to P4 cycle uses either:
- a total of 18 units (3 different types) of P3 to produce 1 unit of P4, for taxable values of (18*60,000=) 1,080,000 ISK before vs. 1,200,000 ISK after, or
- a total of 12 units (2 different types of P3 and 40 units of P1 to produce 1 unit of P4, for taxable values of (12*60,000+40*400=) 736,000 ISK before vs. 1,200,000 ISK after
- volume change is 108m³ or 87.2m³ respectively to 100m³, so not very significant.
Note that if you want to produce P3 or P4, you have to pay the potentially higher (relative to the previous stage) taxes, but this information should help you decide e.g. which Planetary Industry products to make at higher-tax locations.
However, perhaps the most important lesson of the above taxable value calculations is that even with a purely resource-extracting planet, refining from R0 to P1 is worth it not just for the significantly reduced hauling needs, but also for significantly lower taxes. When producing up to the P2 stage, producing 1 type of P2 per planet and only exporting at that stage is probably the cheapest option overall, compared to also having to buy both an export and import tax on the P1. However, when producing P3 or higher goods, where you always need to import something in any case, one should consider whether it might be feasible to export at the P1 stage on the initial resource production planets (or buy P1 from the market) and import the P1 to be refined to higher-tier goods.
High Sec
High-sec Player-Owned Customs Offices(POCO) have a 10% NPC tax rate, in addition to the tax rate set by the POCO owner, which can vary according to your standings towards the owning corp. Corporations who own Customs Offices can charge as much as they please.
The NPC portion of the tax rate can be reduced by the Customs Code Expertise skill added with Rubicon.
The tax rate show in the description of a specific high-sec Customs Office is equal to:
Low Sec, Null Sec, and Wormhole Space
NPC-owned Customs Offices outside of high-sec (if any remain, which is unlikely) charge 17%. That rate cannot be reduced (The skill Customs Code Expertise does not affect this). For Player-Owned Customs Offices outside of high-sec, there is no NPC tax component, so the whole tax rate is exactly what the owning corp sets it at. Again, Customs Code Expertise does not affect these rates.
Import/Export formulas
Transport: Two options
You have two options for getting goods off your planet, either launching a simple (and small) rocket from your CC or placing a Launchpad on your colony (rather expensive) and using it to interact with an orbiting Customs Office.
Launchpad
A Launchpad has the greater cost up front but is generally superior to Command Centre launches.
A Launchpad exports to an orbiting Customs Office and the export taxes may be less than the Command Centre export tax (in High Sec the Command Centre export tax is 15% - 1.5 times the NPC tax rate) depending on the Customs Office tax rate. A Launchpad can also launch far larger amounts and is the only way to import items onto a planet. Command Centre launches also have a cooldown period.
Keep in mind that you are charged 50% of the export tax to import items from the Customs Office to your Launchpad. Consider the costs carefully before setting up a multi-planet production chain. Players can own High Sec Customs Offices and set any tax rate they wish, if you have a large factory system making Level 4 items and need to import and export this also needs to be kept in mind.
Command Center
Sometimes your Customs Office may be camped by pirates or you are simply unwilling to pay the dramatic tax (like 80% or more). And when you start doing PI, the high requirement of a Launchpad may make you unwilling to build one because it reduces the CPU (3,600tf per launchpad) available for production facilities. At this time you can use your Command Center to get your commodities off your planet. The screen capture here shows the easier option - a launch prepared from your CC, accessed via the rocket-looking icon. Simply click the items in your storage to add them to the pending launch and when you're happy click the nice "Go for launch" button (not to be mistaken for the more yummy "Go for lunch" button) and the contents of the launch will end up in a jet can orbiting the planet at a random spot. You get an entry in your planetary production window under launches for its location. This location can be warped to pick up the items. There is also a timer when the timer ends your production is lost - don't worry too much, it can last several days before pickup!
After you pick up your items you can simply go sell them on the market like you would anything else. Easy money! The hard part is picking what Commodity to focus on.
FAQ
- Q: Can I colonize planets in wormholes?
- A: Yes you can.
- Q: Can I attack another player's colony?
- A: No.
- Q: Can an alpha account participate in PI?
- A: No. Previously, an Alpha clone could technically plant a single Command Center, which could not be upgraded beyond level 0 and so had almost no CPU/PWG space with which to place production facilities and had no way of getting products off planet as you had to be Omega to launch from a Command Center. As of January 2022, this has been removed.
- Q: Where do the products go when I launch them from the Command Center?
- A: The Command Center (CC) creates a special bookmark in space for the products. The bookmark can be found in your journal, under the "Planetary Launches" tab. You can warp to it like a normal bookmark.
- Q: Can you deploy, manage or collect resources while cloaked?
- A: You can scan, deploy a CC, manage your colony, and launch items from a CC without decloaking. You cannot access the Customs Office or prepare a transfer from a Launchpad while cloaked. Additionally, you can not transfer items to a ship while cloaked.
- Q: Can you deploy, manage or collect resources from a freighter?
- A: You can deploy CCs and manage your colonies from a freighter, and you can transfer items to and from a Customs Office. As of the Retribution Patch, you can pick up materials launched into orbit from the CC (because a Planetary Launch Container behaves like a jetcan). An industrial ship (such as the Epithal) may be a more appropriate ship for planetary transport tasks, as these ships are cheaper and faster than freighters, in addition since march 2022 the Epithal has a specific bay for up to 6 command center.
- Q: Is Planetary Industry limited to system security status?
- A: No. A few special systems are off-limits due to high traffic or storyline reasons, but all other systems are available, including systems in wormhole space and sovereign nullsec. (Prior to the Hyperion Patch, planets in sovereign null could only be colonized by the alliance holding sovereignty.)
- Q: Can you remotely access colonies?
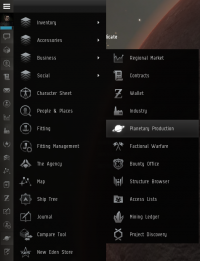
Location of the Planetary Colonies icon in the Neocom menu.

- A: Yes. They can be accessed through the Planetary Colonies icon in the Business folder of the Neocom Menu. (The icon can be dragged onto the main Neocom bar for easy access.) Then, double-click on the colony you want to view. The only limitation of accessing a colony remotely is that you can't scan it unless it's within your Remote Sensing range.
Term list
The following terms are defined here in an attempt to make them widely used and not ambiguous with similar terms within the context of Planetary Industry. Note that some terms defined here may have alternative meanings outside of PI - such as Scan, which outside PI can refer to your ship's scanning abilities, unrelated to planets.
- Planet Mode
- the view you enter to interact with a planet
- Scan
- the act of searching a planet for a particular resource (brings up a heat map)
- Survey
- the act of locating deposits available to an extractor
- Deposit
- a "seam" of minerals or other resources that is exploitable by an extractor
- Resources
- the various raw materials you can extract from planets.
- Products
- actual items manufactured from Resources or other Products (tier 1 and beyond)
- Commodities
- - any PI material (Resources + Products)
- Tiers (P0, P1, etc)
- - raw materials (resources) are 0, then each level beyond that is a new set of products taking one manufacturing process per level
Tips
- Starting off small can help, check the local region for prices and make enough to cover your costs. Building large installations that cost a lot to start with can place you worse off. With something as new and as detailed as PI, playing it safe is usually your best bet.
- Planets may be managed from anywhere using the science and industry tool and clicking on the Planets tab.
- To open the planet over view from anywhere Press F11 and in the side panel you can use the bottom window to select planet view by right clicking the menu box in the left corner.
- By switching solar systems or regions in the above boxes you can scan planets in regions as far as your abilities allow.
- In the solar system box you can use show info under each solar system and look at orbital bodies to get a list of planet type rather than look at them one at a time. You can also view planet directly from the list.
- You can deploy Command Centers while docked, but you must be in the same system as the planet, and the command center must be in your ship's hold.
- https://www.eve-icsc.com/jumptools/jumpplanner.php use this link you calculate LY range to see what systems will be in range based on your Remote Sensing skill level. It will help with planning.
- Until you click the "submit" button, no actual changes are made to your colony. This allows you to experiment with different setups without committing to them (for example arranging buildings and links to make best use of the available powergrid and CPU). If you do not want to make your changes, simply click "cancel" and the colony will revert back to how it was.
- Double-clicking various structures makes starting or adjusting production much faster. When you doubleclick factory it opens the schematics list, doubleclicking a schematic of your choosing opens the routing screen where you can doubleclick the product to enable the create route function and finally doubleclick the destination to create the route. Doubleclicking a silo opens also the routing screen.
- At schematics selection screen you can press the first letter of the schematic you are looking for to instantly move the selection window to the products starting with the letter you just pressed (need to click on the window first to activate the function).
Power Efficient Harvesting

You will want to maximize efficiency to maximize your profits. The layout of your facilities will help save power grid through optimization of your planetary links. This image represents an efficient method of resource harvesting, with some industry facilities.
On this Gas planet, 2 extractors feed into warehouses which buffer excess resources for basic industry facilities. 4 basic industry facilities produce water and electrolytes, which are then stored in the launchpad until 2 advanced industry facilities produce coolant. The coolant will eventually fill the launchpad, ready to fuel a POS or be shipped to an industry intensive planet in Organic Mortar Applicators.
Having several basic harvesting planets and a few high sec industrial planets, a pilot can make valuable goods that are space efficient, increasing the isk you make for the haul you take.
Using Poor Worlds (High Security Space)

Some people find the clicking excessive in PI while others aren't impressed with the income they can gain using local resources. There is another way to utilize PI for reasonable income.
For example of the solution I offer the Factory World.
Using 20 Advanced Processors and 2 Launchpads it processes 28,800 total (2 or more varieties) P1 tier commodities into P2 tier commodities in 18 hours. It is as click intensive as fueling a POS.
A quick spreadsheet or hand written notes about the sell/buy prices of the commodities in question are required for profit, the equation looks like:
Advanced Processors can also be used to produce P3 products from P1 and P2 commodities. For these, the calculations become somewhat more complicated, because the taxes vary depending on whether the ingredients are P1 or P2.
Planetary Industry During War (Uni only!)
There are things you can still do with planets while the Uni is at war:
- Day-to-Day Management: Resurvey your extractors, route products in your colony
- Build/tear-down non-Command Center structures
- Launch containers from your CC if you want, if you have no other storage (they'll last 5 days in orbit - difficult but maybe not impossible to pick up via alt + directional scanner, but certainly silly high effort to income)
- Decommission your entire colony
- For extended war periods, you may want to consider adding additional storage to planets.
These are things you can do while the Uni is at war but you must take extreme precautions with:
- Deploy Command Center on a new planet
- Export/Import to/from orbital Customs Centers (requires you to be in space in the same system)
- Pick up launch containers (yourself)
- Fly to within (skill-based) light years to scan for deposits
Consider Creating a Planetary Industry Alt.
War targets love to watch for lone Unistas who are vulnerable and solo doing activities such as PI in space. Take all precautions and don't risk an embarrassing industrial or other ship loss. Make sure you conduct these activities when war targets are not active or at least active near where you are doing PI activities. Use alts whenever possible.
Note that if you have the skill to fly a blockade runner and you take the time to bookmark a tactical at 200 km or so from your Custom Center, it is possible to do PI fairly safely. Simply fly cloaked to your tactical, use d-scan to make sure no one is nearby, and if clear warp to the Custom Center. You must be uncloaked to access the Custom Center, but you can move stuff between the surface and the Custom Center even when cloaked provided you are in the same system.
References
PI was introduced in May 2010 with the Tyrannis expansion and received some UI changes and a new name in 2018 with the Into The Abyss expansion.