More actions
Duke Bosch (talk | contribs) Created page with "== Bookmarking Probes in Space == You can bookmark probes if they are on your overview. (assuming your brackets are set to show them) This is useful for making bookmarks on gr..." |
No edit summary |
||
| (2 intermediate revisions by one other user not shown) | |||
| Line 1: | Line 1: | ||
[[File:Probe overview.png|thumb|probes in overview and space to bookmark them]] | |||
You can bookmark probes if they are on your overview. (assuming your brackets are set to show them) | You can [[bookmark]] probes if they are on your [[overview]]. (assuming your brackets are set to show them) | ||
This is useful for making bookmarks on grid quickly. | This is useful for making bookmarks on grid quickly. | ||
Set your probe scan range to 0.25 AU and click center on my location in the scan window. | Set your probe scan range to 0.25 AU and click center on my location in the scan window. | ||
Then hover your mouse in the system map (F9) where you see your probes on the map. | Then hover your mouse in the system map ({{Button|F9}}) where you see your probes on the map. | ||
If you now press and hold | If you now press and hold {{Button|ctrl}} you'll see arrow to 'zoom in' with your probes. | ||
{{Clear}} | |||
[[File:Probes shift.png|thumb|'zooming in' probes with ctrl]] | [[File:Probes shift.png|thumb|'zooming in' probes with ctrl]] | ||
While holding down {{Button|ctrl}}, scroll down with your mouse wheel to move them closer together. | |||
While holding down ctrl, scroll down with your mouse wheel to move them closer together. | |||
Now hit analyse to move the probes to this location. If you've scrolled down far enough all of them should show on grid. | Now hit analyse to move the probes to this location. If you've scrolled down far enough all of them should show on grid. | ||
If they don't, adjust by scrolling down even more. If they are | If they don't, adjust by scrolling down even more. If they are too close, scroll up. | ||
{{Clear}} | |||
[[File:Probes cardinal.png|thumb|Probes moved to a cardinal grid with shift]] | |||
You can also move the probes to cardinal locations. | You can also move the probes to cardinal locations. | ||
Set the probe size to 32 AU scan range and press and hold shift. This allow you to drag around the probes to a grid such as in the image on the right. | Set the probe size to 32 AU scan range and press and hold {{Button|shift}}. This allow you to drag around the probes to a grid such as in the image on the right. | ||
Set the probe range to 0.25 AU and start scrolling in again while holding shift on your system map. | Set the probe range to 0.25 AU and start scrolling in again while holding shift on your system map. | ||
| Line 24: | Line 22: | ||
[[File:Probes ongrid cardindal.png|thumb|Probes on grid in cardinal locations. (ignore the other bookmark)]] | [[File:Probes ongrid cardindal.png|thumb|Probes on grid in cardinal locations. (ignore the other bookmark)]] | ||
{{Clear}} | |||
[[File:Save formation.png|thumb|Save the custom formation for your probe positions]] | |||
Once you like the locations of the probes, save it as a custom formation with the button on your scan window. | |||
Now when ever you are somewhere where you want a perch, you can launch probes. Hit center on my position, your custom formation and analyze. They'll be ongrid where you can bookmark them for perches. | |||
[[Category:Exploration]] | |||
[[Category:User Interface]] | |||
Latest revision as of 14:15, 12 March 2025
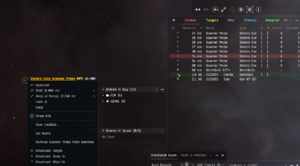
You can bookmark probes if they are on your overview. (assuming your brackets are set to show them) This is useful for making bookmarks on grid quickly.
Set your probe scan range to 0.25 AU and click center on my location in the scan window.
Then hover your mouse in the system map (F9) where you see your probes on the map.
If you now press and hold ctrl you'll see arrow to 'zoom in' with your probes.
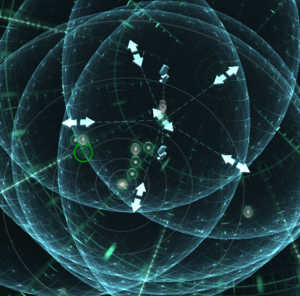
While holding down ctrl, scroll down with your mouse wheel to move them closer together. Now hit analyse to move the probes to this location. If you've scrolled down far enough all of them should show on grid. If they don't, adjust by scrolling down even more. If they are too close, scroll up.
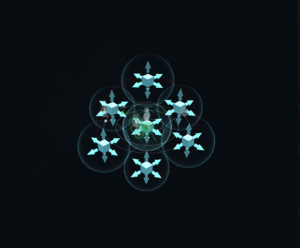
You can also move the probes to cardinal locations. Set the probe size to 32 AU scan range and press and hold shift. This allow you to drag around the probes to a grid such as in the image on the right.
Set the probe range to 0.25 AU and start scrolling in again while holding shift on your system map.
Hit analyze and if you've scrolled in far enough, the probes will get on grid on the 6 cardinal positions.
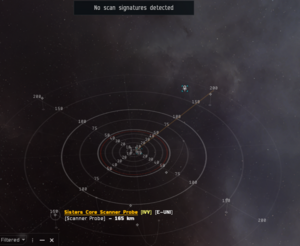
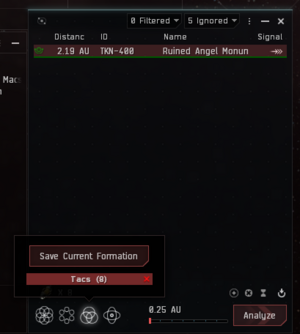
Once you like the locations of the probes, save it as a custom formation with the button on your scan window.
Now when ever you are somewhere where you want a perch, you can launch probes. Hit center on my position, your custom formation and analyze. They'll be ongrid where you can bookmark them for perches.
