Jeb hataska (talk | contribs) No edit summary |
Deandra Laan (talk | contribs) |
||
| (6 intermediate revisions by one other user not shown) | |||
| Line 1: | Line 1: | ||
==Amarr Epic Arc - Right to Rule== | |||
I did not find the missions in this arc to be any more challenging than normal L4 security missions. I completed the arc in a {{Ship|Dominix}} with the fit posted below. | |||
* Tracking disruption isn't a problem at all since primary damage is from drones. | |||
* ''Cowardly Commander'' stage 2 was the only time where incoming damage was greater than my sustained tank, but I was able to reduce incoming damage before I got to half armor, without overheating. I did not warp out at all during the arc. | |||
* The biggest threat to me was neuting, so I always destroyed neuting towers first. The Amarr Energy Neutralizer Sentry III in ''Panic Response'' was tough: It emptied my capacitor before I destroyed it, but fortunately my armor buffer was large enough that I finished it off without getting too close to structure. Harkan's Behemoth in the final mission did not neut very much, so with a little bit of pulsing on the armor repper, and not using my guns all the time, I was fine. I left the warp scramming frigates alone since my tank was holding. | |||
{{{{#if:{{{guide|}}}|ShipGuide|}}Fittings | |||
|name=Dominix, Amarr Epic Arc | |||
< | |high= | ||
Dual 250mm Prototype Gauss Gun<br> | |||
Dual 250mm Prototype Gauss Gun<br> | |||
Dual 250mm Prototype Gauss Gun<br> | |||
Dual 250mm Prototype Gauss Gun<br> | |||
Dual 250mm Prototype Gauss Gun<br> | |||
Drone Link Augmentor I | |||
|mid= | |||
Omnidirectional Tracking Link I<br> | |||
Omnidirectional Tracking Link I<br> | |||
Cap Recharger II<br> | |||
Cap Recharger II<br> | |||
Cap Recharger II | |||
|low= | |||
Large Armor Repairer II<br> | |||
Armor EM Hardener II<br> | |||
Armor EM Hardener II<br> | |||
Armor Thermic Hardener II<br> | |||
Armor Thermic Hardener II<br> | |||
Damage Control II<br> | |||
Energized Adaptive Nano Membrane II | |||
|charges= | |||
Iridium Charge L | |||
|drones= | |||
Hobgoblin II x5<br> | |||
Hammerhead II x5<br> | |||
Curator II x5<br> | |||
Garde II x5 | |||
|rigs= | |||
Large Capacitor Control Circuit I<br> | |||
Large Capacitor Control Circuit I<br> | |||
Large Sentry Damage Augmentor I | |||
|recommended1= | |||
|notes= | |||
* With good support skills, this fit can be made cap-stable with a tank of 720 HP/s against Sansha's Nation. With Gallente Battleship IV and excellent drone skills, Curator II's do about 375 DPS with a 74km optimal--just inside of drone control range. | |||
* For Razing the Outpost, replace the EM hardeners with kinetic hardeners, and the Curators with Wardens. | |||
}} | |||
=Working on Gallente Epic Arc= | |||
<blockquote> | <blockquote> | ||
''"For over a century the mighty Amarr Empire has been at an uneasy peace with the enigmatic Sansha's Nation. But the Sansha are pushing further into Amarr space without warning or explanation. Ministry of Internal Order agent Kandus Sandar enlists you to be his primary investigator, to uncover plots and annihilate threats as only a capsuleer can."'' | ''"For over a century the mighty Amarr Empire has been at an uneasy peace with the enigmatic Sansha's Nation. But the Sansha are pushing further into Amarr space without warning or explanation. Ministry of Internal Order agent Kandus Sandar enlists you to be his primary investigator, to uncover plots and annihilate threats as only a capsuleer can."'' | ||
</blockquote> | </blockquote> | ||
==Requirements== | |||
To start the Gallente Epic Arc you must have standings of 5.0 or higher with either Impetus corporation or the Gallente Federation faction. You should be comfortable with level 4 missions before attempting this arc, because these missions are more difficult. | |||
= | ==Rewards== | ||
At the end of this Epic Mission Arc you will decide whether to cooperate with the Gallente Federation or with The Syndicate. The Federation will award you | |||
*+10% Gallente Federation faction standing (12.5% at Social V) | |||
*1 x Black Eagle Drone Link Augmentor | |||
The Syndicate will award you | |||
*+10% Syndicate faction standing (12.5% at Social V) | |||
*1 x Syndicate Cloaking Device | |||
After you complete the arc, be sure to check that you have received the faction standing increase, because there have been many cases of people not receiving the increase. If your standing has not changed, file a petition. It may help to include a link to [http://www.eveonline.com/ingameboard.asp?a=topic&threadID=1548420&page=1#10 CCP Dropbear's forum post]. | |||
==Enemies== | |||
You will face mostly Minmatar and Syndicate ships, so you should be prepared to tank your ship against Explosive, Kinetic, and/or Thermal damage. | |||
You will incur standings losses with The Syndicate during combat, but not with any other faction. After one completion of this arc with the high security path and Safe Return conclusion, the following faction standing changes toward The Syndicate were observed: | |||
* -3.0% for destroying the station in Intaki Chase (avoidable by taking the low security path) | |||
* -3.0% for destroying the fuel depot in Little Fingers (optional but shortens the following mission) | |||
* -3.0% for destroying the station in Studio I (required) | |||
* about 20 losses of 0.025% or smaller for ship kills (can be partially mitigated by taking low security missions, blitzing where possible, and doing high dps since only one ship kill is counted per 10-15 minutes) | |||
Of course, all of the above losses can be avoided by having a friend or alt do the combat for you. | |||
==Other Comments== | |||
Rewards are listed using Negotiation III, but even so the bonuses will vary. | |||
= | This is meant to be a guide, not a comprehensive reference. See EVE-Survival's [http://eve-survival.org/wikka.php?wakka=MissionReportsEpicArc Epic Arc Mission Reports] and Jowan Datloran's [http://lorebook.eve-inspiracy.com/index.php?option=com_content&view=article&id=1:cosmos-epicarc-guides&catid=1:cosmos-epicarc-guides&Itemid=2 Epic Arc Guides] for more. Also [http://wiki.eveonline.com/en/wiki/Syndication EVElopedia]. | ||
=The Missions= | =The Missions= | ||
{| | {| | ||
|- | |- | ||
| valign="top" | | | valign="top" | Syndication is started by speaking with Roineron Aviviere. You can accept remotely or go to the beacon in the Dodixie system. ("Beacons" and "Agents in Space" must be visible on the overview.) | ||
| valign="top" | [[Image:Karde Romu. | | valign="top" | [[Image:Karde Romu.jpg|thumb|right|128px]] | ||
|} | |} | ||
== | ===Impetus=== | ||
{| | {| | ||
|- | |- | ||
| valign="top" | [[Image:Kandus Sandar. | | valign="top" | [[Image:Kandus Sandar.jpg|thumb|left|192px]] | ||
| valign="top" | | | valign="top" | Type: Courier | ||
Destination: Tolle (4 jumps) | |||
Reward: | Reward: ? + ? (Bonus) | ||
Summary: Travel to the | Standing Increase: +6.5102% Impetus corporation at Social III | ||
Summary: Travel to Gian Parele at the Impetus Tolle Studio beacon in Tolle. | |||
|} | |} | ||
==Chapter 1: | |||
==Chapter 1: ?== | |||
This chapter takes place in the ? constellation. Remember that most missions can be completed - and the next accepted - remotely, minimizing travel time. | |||
===The Tolle Scar=== | |||
{| | {| | ||
|- | |- | ||
| valign="top" | [[Image: | | valign="top" | [[Image:Amarr_epic_02.jpg|thumb|left|192px]] | ||
| valign="top" | | | valign="top" | Type: Encounter (Rogue Drones) | ||
Reward: ? + ? (Bonus) | |||
Standing Increase: +6.5102% Impetus corporation at Social III | |||
Summary: Destroy all enemy ships | Summary: Destroy all enemy ships. | ||
*No | *Pocket 1: Rogue drones spawn and auto-aggro as you approach within 20km of acceleration gate. No unusual drone aggro. Single group: 6x frigates/destroyers, 6x cruisers/battlecruisers, 2x battleships | ||
* | *Pocket 2: All rogue drones present and auto-aggro upon arrival after activating pocket 1 gate. No unusual drone aggro. Single group: 5x frigates/destroyers, 6x cruisers/battlecruisers, 7x battleships | ||
* | *Loot: About 1000m3 of refinables, and typically lousy (for drones) salvage. Two drone structures drop no loot. | ||
|} | |} | ||
===Priority One=== | |||
{| | {| | ||
|- | |- | ||
| valign="top" | [[Image: | | valign="top" | [[Image:Amarr_epic_03.jpg|thumb|left|192px]] | ||
| valign="top" | | | valign="top" | Type: Encounter (Minmatar Republic) | ||
Reward: 1,000,000 + 1,340,000 (Bonus) | |||
Standing Increase: +6.5102% Impetus Corporation at Social III | |||
Summary: Destroy all enemy ships. | Summary: Destroy all enemy ships and salvage the shuttle wreck. | ||
* | *Pocket 1: No enemies. Proceed through acceleration gate 46km away. | ||
*Pocket 2: Arrive 42km from next gate. Single spawn appears during approach, all at a range of 12-20km. 6x frigates/cruisers, 4x cruisers/battlecruisers, 3x battleships. Multiple frigates target paint your ship, so take them out quickly as they significantly increase incoming DPS. The gate is not locked and can be used even if there are enemies in the pocket. | |||
*Pocket 3: 2x frigates/destroyers, 5x cruiser/battlecruisers, 3 battleships at a distance of 23km-37km from arrival point. No aggro. Shuttle wreck 49km away needs to be salvaged for mission completion. Not sure if frigates have any special attacks, I killed them first. DPS in this pocket is fairly heavy, I had to warp out once in an omni-tanked Machariel with a Gist-X large shield booster. The cruisers were surprisingly tough to damage, tanked about as well as the battleships, so should probably kill the BS first. You can salvage the shuttle before all the enemies are destroyed. | |||
*Loot: Not much, about 350m3, but lots of Republic Fleet insignias: Commander II, High Captain I, Private III and Midshipman II and III. | |||
|} | |} | ||
===Raging Sansha=== | |||
{| | {| | ||
|- | |- | ||
| valign="top" | [[Image: | | valign="top" | [[Image:Amarr_epic_04.jpg|thumb|left|192px]] | ||
| valign="top" | | | valign="top" | Type: Encounter (Sansha's Nation) | ||
Type: Encounter (Sansha's Nation) | |||
Reward: 1,000,000 + 1,330,000 (Bonus | Reward: 1,000,000 + 1,330,000 (Bonus) | ||
Summary: Destroy all enemy ships. | Summary: Destroy all enemy ships. | ||
| Line 107: | Line 156: | ||
|} | |} | ||
===Cowardly Commander=== | |||
{| | {| | ||
|- | |- | ||
| valign="top" | [[Image: | | valign="top" | [[Image:Amarr_epic_05.jpg|thumb|left|192px]] | ||
| valign="top" | | | valign="top" | Type: Encounter (Sansha's Nation, Amarr Empire) | ||
Reward: 1,000,000 + 1,290,000 (Bonus) | |||
Reward: 1,000,000 + 1,290,000 (Bonus | |||
Summary: Destroy all enemy ships. | Summary: Destroy all enemy ships. | ||
*Deadspace entry | *Deadspace entry | ||
**A single reinforcement wave is triggered by destroying all initial ships. | **A single reinforcement wave is triggered by destroying all initial ships. | ||
*Deadspace stage 1 | *Deadspace stage 1 | ||
| Line 126: | Line 173: | ||
**55k to acceleration gate | **55k to acceleration gate | ||
*Deadspace stage 2 | *Deadspace stage 2 | ||
**Initial DPS here could be the heaviest initial DPS in the arc. You land only about 20k from the frigates so you may get some scramming. Be prepared to overheat your tanking modules if necessary. | |||
**One neutralizer tower | **One neutralizer tower | ||
**Two reinforcement waves are triggered: One by destroying all initial cruisers, the other by destroying all initial battlecruisers. | **Two reinforcement waves are triggered: One by destroying all initial cruisers, the other by destroying all initial battlecruisers. | ||
*Deadspace stage 3 (Amarr Empire) | *Deadspace stage 3 (Amarr Empire) | ||
**Two reinforcement waves are triggered: The first by destroying any Imperial Dominator battleship among the initial guards, the second by destroying | **Two reinforcement waves are triggered: The first by destroying any Imperial Dominator battleship among the initial guards, and the second by destroying the Imperial Templar Dominator battleships from the first wave. | ||
|} | |} | ||
==Chapter 2: Spiderweb Politics== | ==Chapter 2: Spiderweb Politics== | ||
Half the missions in this chapter are in the Nishah solar system, and only one is outside the Gebem constellation. | |||
===Aralin Jick=== | |||
{| | {| | ||
|- | |- | ||
| valign="top" | [[Image:Aralin Jick. | | valign="top" | [[Image:Aralin Jick.jpg|thumb|left|192px]] | ||
| valign="top" | | | valign="top" | Type: Courier | ||
Destination: Nishah (4 jumps) | Destination: Nishah (4 jumps) | ||
Reward: 1,000,000 + 1,110,000 (Bonus) | |||
Summary: Travel to Nishah, the second mission hub. | |||
Summary: Travel to Nishah the second mission hub. | |||
|} | |} | ||
===Background Check=== | |||
{| | {| | ||
|- | |- | ||
| valign="top" | [[Image: | | valign="top" | [[Image:Amarr_epic_07.jpg|thumb|left|192px]] | ||
| valign="top" | | | valign="top" | Type: Encounter (Sansha's Nation) | ||
Reward: 1,000,000 + 1,260,000 (Bonus) | |||
Reward: 1,000,000 + 1,260,000 (Bonus | |||
Summary: Destroy all enemy ships. | Summary: Destroy all enemy ships. | ||
*There are 8 waves, spawning when various other waves are damaged or destroyed. | *There are 8 waves, spawning when various other waves are damaged or destroyed. | ||
* | *It will help to destroy the waves in the order they spawn. If you form a fleet with yourself, you can tag waves of ships as they appear to keep track of them. | ||
|} | |} | ||
===Longing Leman=== | |||
{| | {| | ||
|- | |- | ||
| valign="top" | [[Image: | | valign="top" | [[Image:Amarr_epic_08.jpg|thumb|left|192px]] | ||
| valign="top" | | | valign="top" | Type: Encounter (no combat) | ||
Type: Encounter ( | |||
Reward: 1,000,000 + 1,810,000 (Bonus | Reward: 1,000,000 + 1,810,000 (Bonus) | ||
Summary: Retrieve the Communications Logs (0.1 m3) | Summary: Retrieve the Communications Logs (0.1 m3) | ||
*You need a Codebreaker module to hack the Encrypted Communications Array. | *You need a Codebreaker module to hack the Encrypted Communications Array. | ||
*Enemies are 90k away. | *Enemies (Amarr Empire) are 90k away. If you keep your distance, they won't attack. | ||
|} | |} | ||
===Languishing Lord=== | |||
{| | {| | ||
|- | |- | ||
| valign="top" | [[Image: | | valign="top" | [[Image:Amarr_epic_09.jpg|thumb|left|192px]] | ||
| valign="top" | | | valign="top" | Type: Encounter (no combat) | ||
Type: Encounter (no combat) | |||
Reward: 1,000,000 + 577,000 (Bonus | Reward: 1,000,000 + 577,000 (Bonus) | ||
Summary: No combat. | Summary: No combat. | ||
*You'll be told to fly to a structure (about 20k away). Then you watch for a minute, and the mission completes. Do not engage any of the ships. | *You'll be told to fly to a structure (about 20k away). Then you watch for a minute, and the mission completes. Do not engage any of the ships that appear. | ||
|} | |} | ||
===Razing the Outpost=== | |||
{| | {| | ||
|- | |- | ||
| valign="top" | [[Image: | | valign="top" | [[Image:Amarr_epic_10.jpg|thumb|left|192px]] | ||
| valign="top" | | | valign="top" | Type: Encounter (Mercenaries - Mordus ships) | ||
Type: Encounter (Mercenaries - | |||
Reward: 1,000,000 + 1,850,000 (Bonus | Reward: 1,000,000 + 1,850,000 (Bonus) | ||
Summary: Destroy all enemy ships and The Outpost. | Summary: Destroy all enemy ships and The Outpost. | ||
* | *Switch your tank to Kinetic/Thermal, and your damage to Kinetic (Thermal secondary) if possible. | ||
*Deadspace entry point | *Deadspace entry point: Straightforward. | ||
*Deadspace stage 1: Straightforward. | |||
*Deadspace stage 1 | |||
*Deadspace stage 2 | *Deadspace stage 2 | ||
**Destruction of all initial battleships triggers a reinforcement wave. | **Destruction of all initial battleships triggers a reinforcement wave. | ||
| Line 216: | Line 252: | ||
|} | |} | ||
===Ascending Nobles=== | |||
{| | {| | ||
|- | |- | ||
| valign="top" | [[Image: | | valign="top" | [[Image:Amarr_epic_11.jpg|thumb|left|192px]] | ||
| valign="top" | | | valign="top" | Type: Encounter (Mercenaries - Amarr ships) | ||
Destination: Reteka (7 jumps) | Destination: Reteka (7 jumps) | ||
Reward: 1,000,000 + 1,820,000 (Bonus) | |||
Reward: 1,000,000 + 1,820,000 (Bonus | |||
Summary: Destroy enemy ships, then loot Mina Darabi near the Amarr Chapel. | Summary: Destroy enemy ships, then loot Mina Darabi near the Amarr Chapel. | ||
| Line 230: | Line 266: | ||
*The Veteran battleships do heavy damage if you let them get close (They orbit ~49k). | *The Veteran battleships do heavy damage if you let them get close (They orbit ~49k). | ||
*Destroying all initial ships triggers a wave of Veteran cruisers that will quickly approach and hit you with tracking disruption, and with neuting when they get to ~30k. | *Destroying all initial ships triggers a wave of Veteran cruisers that will quickly approach and hit you with tracking disruption, and with neuting when they get to ~30k. | ||
*Destroying the cruisers triggers a wave of Green-Crewed battleships. | *Destroying the cruisers triggers a wave of Green-Crewed battleships. Perhaps these do some damage up close, but if you destroy them before they get much closer than 30k, you shouldn't take any damage at all. | ||
*Destroying the Green-Crewed battleships triggers another wave of battleships. | *Destroying the Green-Crewed battleships triggers another wave of battleships. | ||
*Waiting around too long after looting Mina Darabi apparently triggers another wave with extreme damage. | *Waiting around too long after looting Mina Darabi apparently triggers another wave with extreme damage. However, it is possible that you could come back and salvage in a Noctis before completing the mission and still not see this wave. | ||
|} | |} | ||
===Hunting the Hunter=== | |||
{| | {| | ||
|- | |- | ||
| valign="top" | [[Image: | | valign="top" | [[Image:Amarr_epic_12.jpg|thumb|left|192px]] | ||
| valign="top" | | | valign="top" | Type: Encounter (Sansha's Nation) | ||
Reward: 1,000,000 + 1,910,000 (Bonus) | |||
Summary: Progress through the rooms and obtain 1 x Rahsa, Sansha Commander (1.0 m3). | |||
*Deadspace entry: Straightforward. | |||
*Deadspace stage 1 | |||
* | **One neutralizer tower | ||
**Destroying all Centus Dread Lord and Centus Tyrant battleships triggers a small reinforcement wave. | |||
**Destroying all Centatis Daemon and Devil battlecruisers also triggers a small reinforcement wave. | |||
**You must destroy the Sansha Battletower structure to use the gate. | |||
*Deadspace stage 2: Destroy the battleship and loot Rahsa from it. | |||
|} | |} | ||
===Fate of a Madman=== | |||
{| | {| | ||
|- | |- | ||
| valign="top" | [[Image:Aralin Jick. | | valign="top" | [[Image:Aralin Jick.jpg|thumb|left|192px]] | ||
| valign="top" | | | valign="top" | Type: Branch | ||
Type: Branch | |||
Reward: 18,000 + 13,000 | Reward: 18,000 + 13,000 | ||
Summary: You must choose your path. | Summary: You must choose your path. | ||
*Choose ''Interrogation: Catching the Scent'' to work for the Amarr Empire. | *Choose ''Interrogation: Catching the Scent'' to work for the Amarr Empire. This guide follows this choice. | ||
*Choose ''Silence Rahsa: The Nation's Path'' to work for Sansha's Nation. | *Choose ''Silence Rahsa: The Nation's Path'' to work for Sansha's Nation. | ||
|} | |} | ||
==Chapter 3: The Old Guard== | ==Chapter 3: The Old Guard== | ||
===Catching the Scent=== | |||
{| | {| | ||
|- | |- | ||
| valign="top" | [[Image: | | valign="top" | [[Image:Amarr_epic_13.jpg|thumb|left|192px]] | ||
| valign="top" | | | valign="top" | Type: Encounter (Sansha's Nation) | ||
Type: Encounter (Sansha's Nation) | |||
Reward: 1,000,000 + 1,610,000 (Bonus | Reward: 1,000,000 + 1,610,000 (Bonus) | ||
Summary: Destroy all enemy ships and loot 1 Sansha Command Signal Receiver (1.0 m3) | Summary: Destroy all enemy ships and loot 1 Sansha Command Signal Receiver (1.0 m3) | ||
*There are a total of six reinforcement waves in two sets of three waves each. Destroying all initial cruisers triggers the first set, while destroying all initial battleships triggers the second set. Within each set, each wave is triggered by destruction of the previous wave. | *There are a total of six reinforcement waves in two sets of three waves each. Destroying all initial cruisers triggers the first set, while destroying all initial battleships triggers the second set. Within each set, each wave is triggered by destruction of the previous wave. | ||
*The item | *The item can drop from either set of waves. (Battleship set may be more likely?) | ||
|} | |} | ||
===Falling into Place=== | |||
{| | {| | ||
|- | |- | ||
| valign="top" | [[Image: | | valign="top" | [[Image:Amarr_epic_14.jpg|thumb|left|192px]] | ||
| valign="top" | | | valign="top" | Type: Encounter (Mercenaries - Amarr ships) | ||
Destination: Shaha (13 jumps) | Destination: Shaha (13 jumps) | ||
Reward: 1,000,000 + 1,890,000 (Bonus) | |||
Reward: 1,000,000 + 1,890,000 (Bonus | |||
Summary: Place the Homemade Sansha Beacon (1.0 m3) in the Linked Broadcast Array Hub, and destroy the ships that spawn. | Summary: Place the Homemade Sansha Beacon (1.0 m3) in the Linked Broadcast Array Hub, and destroy the ships that spawn. | ||
|} | |} | ||
===Making an Arrest=== | |||
{| | {| | ||
|- | |- | ||
| valign="top" | [[Image: | | valign="top" | [[Image:Amarr_epic_15.jpg|thumb|left|192px]] | ||
| valign="top" | | | valign="top" | Type: Encounter (no combat) | ||
Destination: about 13 jumps, back closer to Nishah | |||
Reward: 1,000,000 + 838,000 (Bonus | Reward: 1,000,000 + 838,000 (Bonus) | ||
Summary: Travel to destination, and watch the explosion. | Summary: Travel to destination, and watch the explosion. | ||
*If you get a Low Sec destination, there's no combat so you can travel in a shuttle. | |||
''Destinations Seen: Masanuh, Jeni, Sehmy | |||
|} | |} | ||
===An Unfortunate End=== | |||
{| | {| | ||
|- | |- | ||
| valign="top" | [[Image:Riff Hebian. | | valign="top" | [[Image:Riff Hebian.jpg|thumb|left|192px]] | ||
| valign="top" | | | valign="top" | Type: Courier | ||
Destination: Palas (about 6 jumps) | |||
Reward: 1,000,000 + 668,000 (Bonus | Reward: 1,000,000 + 668,000 (Bonus) | ||
Summary: Travel | Summary: Travel - no cargo. | ||
*You should probably take your combat ship for the next mission. | |||
|} | |} | ||
===Panic Response=== | |||
{| | {| | ||
|- | |- | ||
| valign="top" | [[Image: | | valign="top" | [[Image:Amarr_epic_17.jpg|thumb|left|192px]] | ||
| valign="top" | | | valign="top" | Type: Encounter (Sansha's Nation) | ||
Reward: 1,000,000 + 1,000,000 (Bonus) | |||
Reward: 1,000,000 + 1,000,000 (Bonus | |||
Summary: Destroy the Amarr Energy Neutralizer Sentry III. | Summary: Destroy the Amarr Energy Neutralizer Sentry III. | ||
*There are some initial guards. After a minute, several towers appear. | |||
*Enemy ships will warp off when the Neutralizer Sentry is destroyed. | *Enemy ships will warp off when the Neutralizer Sentry is destroyed. | ||
* | *Incoming damage is low, but the Neutralizer Sentry has a lot of HP and neuts pretty effectively. If you have an active tank and your dps isn't really high, consider fitting a cap booster so you'll be able to warp out if your capacitor is drained. | ||
|} | |} | ||
===The Right to Rule=== | |||
{| | {| | ||
|- | |- | ||
| valign="top" | [[Image: | | valign="top" | [[Image:Amarr_epic_18.jpg|thumb|left|192px]] | ||
| valign="top" | | | valign="top" | Type: Encounter (Sansha's Nation) | ||
Destination: Choga (4 jumps) | Destination: Choga (4 jumps) | ||
Reward: 1x Imperial Navy Modified 'Noble' Implant + 1,720,000 (Bonus) | |||
Reward: 1x Imperial Navy Modified 'Noble' Implant + 1,720,000 (Bonus | |||
Summary: Progress through the rooms, and destroy Harkan's Behemoth. | Summary: Progress through the rooms, and destroy Harkan's Behemoth. | ||
| Line 350: | Line 391: | ||
*Last room | *Last room | ||
**As you damage Harkan's Behemoth, reinforcement waves will spawn. Destroy these waves as they appear, and then return to Harkan's Behemoth. | **As you damage Harkan's Behemoth, reinforcement waves will spawn. Destroy these waves as they appear, and then return to Harkan's Behemoth. | ||
**Harkan's Behemoth will neut you. | **Harkan's Behemoth will neut you. If active tanked, pulse your repper a bit to keep from draining your capacitor. | ||
**Shortly after you arrive, two or three battlecruisers will appear. If you attack them, they'll be replaced by a pair of web/scramming frigates. If you attack those, they'll be replaced by another assortment of ships, and then back to the battlecruisers, and so on, looping through those three compositions. This loops 4 or 5 times. | **Shortly after you arrive, two or three battlecruisers will appear. If you attack them, they'll be replaced by a pair of web/scramming frigates. If you attack those, they'll be replaced by another assortment of ships, and then back to the battlecruisers, and so on, looping through those three compositions. This loops 4 or 5 times. You could choose to ignore the frigates since their dps is tiny, but remember they do warp scramble you. | ||
**Mission completes when Harkan's Behemoth is destroyed. | **Mission completes when Harkan's Behemoth is destroyed. | ||
|} | |} | ||
==External Links/Guides== | |||
[http://eve-survival.org/wikka.php?wakka=RightToRule4p1 EVE-Survival] | |||
[http://wiki.eveonline.com/en/wiki/Right_to_Rule EVElopedia] | |||
[http://lorebook.eve-inspiracy.com/index.php?option=com_content&view=article&id=1:cosmos-epicarc-guides&catid=1:cosmos-epicarc-guides&Itemid=2 Jowan Datloran's Epic Arc Guides] | |||
Latest revision as of 18:57, 17 February 2024
Amarr Epic Arc - Right to Rule
I did not find the missions in this arc to be any more challenging than normal L4 security missions. I completed the arc in a
Dominix
|
Dominix
Standard Battleships Dominix Class
|
with the fit posted below.
- Tracking disruption isn't a problem at all since primary damage is from drones.
- Cowardly Commander stage 2 was the only time where incoming damage was greater than my sustained tank, but I was able to reduce incoming damage before I got to half armor, without overheating. I did not warp out at all during the arc.
- The biggest threat to me was neuting, so I always destroyed neuting towers first. The Amarr Energy Neutralizer Sentry III in Panic Response was tough: It emptied my capacitor before I destroyed it, but fortunately my armor buffer was large enough that I finished it off without getting too close to structure. Harkan's Behemoth in the final mission did not neut very much, so with a little bit of pulsing on the armor repper, and not using my guns all the time, I was fine. I left the warp scramming frigates alone since my tank was holding.
Working on Gallente Epic Arc
"For over a century the mighty Amarr Empire has been at an uneasy peace with the enigmatic Sansha's Nation. But the Sansha are pushing further into Amarr space without warning or explanation. Ministry of Internal Order agent Kandus Sandar enlists you to be his primary investigator, to uncover plots and annihilate threats as only a capsuleer can."
Requirements
To start the Gallente Epic Arc you must have standings of 5.0 or higher with either Impetus corporation or the Gallente Federation faction. You should be comfortable with level 4 missions before attempting this arc, because these missions are more difficult.
Rewards
At the end of this Epic Mission Arc you will decide whether to cooperate with the Gallente Federation or with The Syndicate. The Federation will award you
- +10% Gallente Federation faction standing (12.5% at Social V)
- 1 x Black Eagle Drone Link Augmentor
The Syndicate will award you
- +10% Syndicate faction standing (12.5% at Social V)
- 1 x Syndicate Cloaking Device
After you complete the arc, be sure to check that you have received the faction standing increase, because there have been many cases of people not receiving the increase. If your standing has not changed, file a petition. It may help to include a link to CCP Dropbear's forum post.
Enemies
You will face mostly Minmatar and Syndicate ships, so you should be prepared to tank your ship against Explosive, Kinetic, and/or Thermal damage.
You will incur standings losses with The Syndicate during combat, but not with any other faction. After one completion of this arc with the high security path and Safe Return conclusion, the following faction standing changes toward The Syndicate were observed:
- -3.0% for destroying the station in Intaki Chase (avoidable by taking the low security path)
- -3.0% for destroying the fuel depot in Little Fingers (optional but shortens the following mission)
- -3.0% for destroying the station in Studio I (required)
- about 20 losses of 0.025% or smaller for ship kills (can be partially mitigated by taking low security missions, blitzing where possible, and doing high dps since only one ship kill is counted per 10-15 minutes)
Of course, all of the above losses can be avoided by having a friend or alt do the combat for you.
Other Comments
Rewards are listed using Negotiation III, but even so the bonuses will vary.
This is meant to be a guide, not a comprehensive reference. See EVE-Survival's Epic Arc Mission Reports and Jowan Datloran's Epic Arc Guides for more. Also EVElopedia.
The Missions
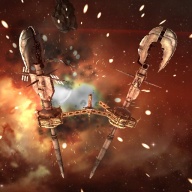
| Syndication is started by speaking with Roineron Aviviere. You can accept remotely or go to the beacon in the Dodixie system. ("Beacons" and "Agents in Space" must be visible on the overview.) |  |
Impetus
Chapter 1: ?
This chapter takes place in the ? constellation. Remember that most missions can be completed - and the next accepted - remotely, minimizing travel time.
The Tolle Scar
Priority One
Raging Sansha
Cowardly Commander
Chapter 2: Spiderweb Politics
Half the missions in this chapter are in the Nishah solar system, and only one is outside the Gebem constellation.
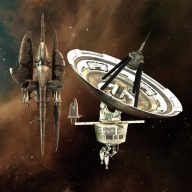
Aralin Jick
 |
Type: Courier
Destination: Nishah (4 jumps) Reward: 1,000,000 + 1,110,000 (Bonus) Summary: Travel to Nishah, the second mission hub. |
Background Check
Longing Leman
Languishing Lord
Razing the Outpost
Ascending Nobles
Hunting the Hunter
Fate of a Madman
Chapter 3: The Old Guard
Catching the Scent
Falling into Place
Making an Arrest
An Unfortunate End
 |
Type: Courier
Destination: Palas (about 6 jumps) Reward: 1,000,000 + 668,000 (Bonus) Summary: Travel - no cargo.
|


