More actions
→Tech I Battlecruisers: Removed most T2 fits due to redundancy and Altered Naming for later changes. |
|||
| Line 295: | Line 295: | ||
{{#ifeq:{{{1|HarbingerShield}}}|HarbingerShield| | {{#ifeq:{{{1|HarbingerShield}}}|HarbingerShield| | ||
{{Fittings | {{Fittings | ||
|name=Harbinger, Shield | |name=Harbinger, Shield Vanguard | ||
|high= | |high= | ||
Heavy Modulated Pulse Energy Beam I<br> | Heavy Modulated Pulse Energy Beam I<br> | ||
| Line 340: | Line 340: | ||
**Controlled Bursts II | **Controlled Bursts II | ||
*Heavy Anode Particle Stream I may be used instead. | *Heavy Anode Particle Stream I may be used instead. | ||
*To upgrade to T2 Lasers, a Medium Algid Energy Administrations Unit I is needed. Also bring Scorch M crystals if using T2 Lasers. | |||
*A Caldari Navy Large Shield Extender may be used. Pilots with higher fitting skills can use the Large Shield Extender II. | *A Caldari Navy Large Shield Extender may be used. Pilots with higher fitting skills can use the Large Shield Extender II. | ||
}} | }} | ||
}} | }} | ||
| Line 391: | Line 351: | ||
{{#ifeq:{{{1|DrakeShield}}}|DrakeShield| | {{#ifeq:{{{1|DrakeShield}}}|DrakeShield| | ||
{{Fittings | {{Fittings | ||
|name=Drake, Shield Incursion | |name=Drake, Shield Incursion | ||
|high= | |high= | ||
'Arbalest' Heavy Missile Launcher<br> | 'Arbalest' Heavy Missile Launcher<br> | ||
| Line 432: | Line 392: | ||
*The Auto Targeting System can be removed if the pilot cannot lock 9 or more targets. | *The Auto Targeting System can be removed if the pilot cannot lock 9 or more targets. | ||
}}{{Fittings | }}{{Fittings | ||
|name=Drake, Shield | |name=Drake, Shield Vanguard T2 | ||
|high= | |high= | ||
Heavy Missile Launcher II<br> | Heavy Missile Launcher II<br> | ||
| Line 466: | Line 426: | ||
|recommended3= | |recommended3= | ||
|notes= | |notes= | ||
*This fit does not have enough Tank for larger Incursion sites. | |||
*This fit requires the following skills in addition to the Incursion requirements: | *This fit requires the following skills in addition to the Incursion requirements: | ||
**Electronics V | **Electronics V | ||
| Line 486: | Line 447: | ||
{{#ifeq:{{{1|BrutixShield}}}|BrutixShield| | {{#ifeq:{{{1|BrutixShield}}}|BrutixShield| | ||
{{Fittings | {{Fittings | ||
|name=Brutix, Shield Incursion | |name=Brutix, Shield Incursion | ||
|high= | |high= | ||
Modal Neutron Particle Accelerator I<br> | Modal Neutron Particle Accelerator I<br> | ||
| Line 522: | Line 483: | ||
|recommended3= | |recommended3= | ||
|notes= | |notes= | ||
* | *It is highly recommend that a Pilot use T2 Blasters and Null M ammo. | ||
*Use the ammo which maximizes the damage-falloff tradeoff for your own skills. | *Use the ammo which maximizes the damage-falloff tradeoff for your own skills. | ||
}} | }} | ||
}} | }} | ||
| Line 566: | Line 493: | ||
{{#ifeq:{{{1|MyrmidonShield}}}|MyrmidonShield| | {{#ifeq:{{{1|MyrmidonShield}}}|MyrmidonShield| | ||
{{Fittings | {{Fittings | ||
|name=Myrmidon, Shield Incursion | |name=Myrmidon, Shield Incursion | ||
|high= | |high= | ||
425mm Medium 'Scout' AutoCannon I <br> | 425mm Medium 'Scout' AutoCannon I <br> | ||
| Line 602: | Line 529: | ||
|recommended3= | |recommended3= | ||
|notes= | |notes= | ||
*Might be viable now due to Drone Damage Amplifiers. | *Might be more viable now due to Drone Damage Amplifiers. | ||
*Upgrade Drones and Guns to T2 as skills allow. | |||
* | |||
}} | }} | ||
}} | }} | ||
| Line 650: | Line 540: | ||
{{#ifeq:{{{1|HurricaneShield}}}|HurricaneShield| | {{#ifeq:{{{1|HurricaneShield}}}|HurricaneShield| | ||
{{Fittings | {{Fittings | ||
|name=Hurricane, Shield Incursion | |name=Hurricane, Shield Incursion | ||
|high= | |high= | ||
425mm Medium 'Scout' AutoCannon I <br> | 425mm Medium 'Scout' AutoCannon I <br> | ||
| Line 693: | Line 583: | ||
**Engineering V | **Engineering V | ||
*Pilots with lower fitting skills can use the Meta 4 Rapid Light Missile launcher in one of the high slots. | *Pilots with lower fitting skills can use the Meta 4 Rapid Light Missile launcher in one of the high slots. | ||
*Upgrade to Tech II Guns as skills allow. | |||
* | |||
}} | }} | ||
}}<noinclude> | }}<noinclude> | ||
Revision as of 22:42, 14 June 2012
Template:Work in Progress
(Page should be finalized by the end of June 2012.)
Incursions are fleet based PvE sites where the only enemies are Sansha’s Nation ships. The AI for these NPCs use some of the most advanced tactics seen in game, including many forms of EWAR. Further, all enemies have both high damage output and high resistances. This means that it is very easy to lose a ship if unprepared. But with a proper fit one should have no trouble getting into a EVE Uni Incursion fleet.
This page contains the basic requirements for an Vanguard site fitting, a basic Vanguard fitting guide, and numerous sample fits for damage dealer ships. If you are looking for fittings for Logistics Ships, or other site type fitting, please refer to the appropriate guide: (Until the other DD sites are built, this guide provides many fundamentals, though some of the specific recommendations many not be applicable.)
- Assault Fitting (To be Created)
- Headquarters Fitting (To be Created)
- Logistics Fitting (Under Construction)
Requirements
When entering an incursion fleet the Fleet Commander (FC) will ask to see your current fit. This section will detail the bare minimums all FCs are looking for. Note that having these does not guarantee entrance. Some FCs might want more, though most EVE Uni FCs will not.
The Sansha’s Nation ships deal high amounts of Omni (all types) damage. The key to surviving this is having high resists and a large buffer. Shield & armor repair modules and shield regeneration rate do not matter as the alpha damage is simply too high for a single ship to tank without help. Logistic ships are used in all incursions and provide the healing. All the damage dealers must do is survive long enough for a Logistic ship to heal them. The objective of these requirements is to ensure survivability as losing a ship is far worse than completing sites slowly due to low damage output.
All ships should have above 70% resists for all damage types of their tank type. So an Armor Tanked ship needs above 70% resists in Armor EM, Thermal, Kinetic, and Explosive resistances and a Shield Tanked ship needs above 70% resists in Shield EM, Thermal, Kinetic, and Explosive resistances. Also the ship needs a large buffer of hit points (HP) to survive initial hits, before Logistics are able to assist. The main trade off is between EHP and Signature Radius. The chart on this site provides good guidelines. Don't take it too literally though, as having a big buffer in the tank stat is also required.
To achieve these tanking requirements, combat pilots should at least field a Tech 1 Battlecruiser with mostly Tech 2 Tank modules. Bigger or more advanced ships, e.g. Battleships, Navy or Pirate ships as well as Tech 2 ships, are a preferred addition due to their added defensive and offensive capabilities. Support roles, such as Logistics, require the apropriate Tech 2 Cruiser as a bare minimum, but they should only be flown by experienced players. Smaller hulls, like Frigates and Destroyers, (as well as Tech 1 Cruisers) won't withstand most attacks and are in general not recommended nor accepted. Although you are not required to have a Full Tech 2 Tank in UNI run Incursion fleets, it's usually highly recommended and in most public fleets simply mandatory.
With these facts in mind the minimum requirements are:
- For combat pilots:
- Battlecruisers I
- Proper skills to fit a full array of apropriate weapons for the ship's hull.
- For Logistics pilots (not recommended for pilots new to Incursions):
- Logistics IV
- Proper skills to run the maximum number of Shield Transporters or Remote Armor Repairers indefinitely.
- For Armor Tanks:
- For Shield Tanks:
These skills will allow a pilot to fit Tech 2 Resistance and buffer modules. As a side note, it is actually faster to train the shield skills as Hull Upgrades V takes over 9 days by itself. While training both Shield Upgrades and Tactical Shield Manipulation from 0 to IV takes just over 6 days. Though Armor fits are easier to dual purpose into PvP, which is very relevant when the UNI is at War. Please refer to the WSOP for details.
Most Incursion ships also fit Tech II Weapon Upgrade modules and some FCs might require them. The skill needed to fit them is Weapon Upgrades IV and it is extremely useful as it not only unlocks these modules, but because it reduces the CPU requirements of Turrets and Missile Launchers as well. All the fittings on this page will assume the pilot has this skill trained to at least level IV.
Also note that Tech II weapons are strongly recommended for Incursions. The increased damage output and ability to use Tech II ammunition is very relevant, although using standard or Faction ammunition is perfectly fine. While a new pilot is not required to have these for their first Incursion, training towards them is expected.
Vanguard Requirements
The previous requirements hold for all Incursion sites. This section will talk about fitting concerns specific to Vanguards.
All enemies in Vanguards are Frigate or Cruiser sized and have high velocities. Further the majority of enemies orbit in the 10km to 20km range, with one notable exception with orbits at 60km to 70km. This means weapons should be optimized for hitting small, fast targets which orbit close. This makes missiles not ideal due to explosion velocity and travel time. Guns should be of the close range type, Blasters, Beam Lasers, and Autocannons, and should have tracking above .1 radians per second. Further this makes EWAR modules like Stasis Webifiers and Target Painters extra valuable due to the difference in ship sizes as most pilots will be in Battlecruisers or Battleships. Finally, there is little room in fleets for dedicated support ships besides Logistics ships due to damage output needs and low fleet cap for maximum payout.
Basic Incursion Fitting Walkthrough
This walkthrough will help a new pilot put together a solid fit for a first Incursion and explain the logic for the fits below. It is recommended that pilots be familiar with EVE Uni's Fitting Guidelines before reading the rest of this guide. If a pilot has any questions while fitting asking for help on mumble or the in-game chat channels is encouraged.
Hull
The first and probably most important decision is to pick the hull to use. New pilots need to make the choice between BCs and BSs. While BSs have a slightly longer training time by a week or more, the benefits are very high. The improvement in damage of BSs over BCs is large, to the extent that a low skill Tech I BS can out damage a full skill Tech II BC. Further BS have bigger tanks, more utility slots making them more versatile, and more Power Grid and CPU making fitting them easier. It is highly recommended, and most FCs expect, that even if a pilot starts with a BC the pilot is training for a BS instead of a full Tech II fit BC due to all the reasons just mentioned.
BCs are fine starter Incursion ships for EVE University Incursion fleets, but will not be accepted by most public fleets. In general, FCs are looking for utility then damage from BCs because BSs deal far more damage. For BCs, most Tier 2 hulls are recommended. In particular, the Drake, Harbinger, and Hurricane. The Tier 1 hulls tend to simply be worse version of the Tier 2 hull. Though this is not universally the case. The Tier 3 BC hulls are hard to fit for Incursions due to small base tanks and using Large Guns. While they can be useful to highly skilled pilots the Tier 3 BSs should be avoided by new pilots.
For BSs Tier 3 hulls tend to be the best due to higher stats, but this is not universal. Missile hulls like the Raven are not usable in Vanguards due to poor damage against frigates and cruisers.
Shield Hulls
Shield Modules are mid-slot modules, meaning that any ship fitting an Incursion Shield tank needs a lot of mid-slots. The advantage of running a shield tank is higher damage and tracking due to having free low slots. The downside is it is harder to fit utility modules as the most useful are mid-slot modules.
Battlecruisers
- Harbinger 2nd best Weapon Damage, versatile weapon system, good drone bay, hard fitting requirements
- Hurricane Best damage, 1-2x ET, Small signature resolution, small drone bay
- Drake 2-3 Mid-utility, longest range, best Tank, small drone bay, 2nd lowest primary weapon damage
- Brutix Good damage when T2 fit, Poor T1 fit, good drone bay, worst tank
- Myrmidon Best drones, 1 utility mid-slot, Lowest primary weapon damage, worst tank
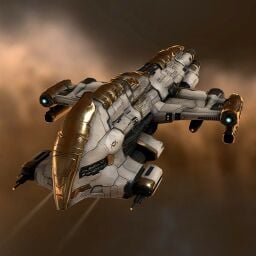
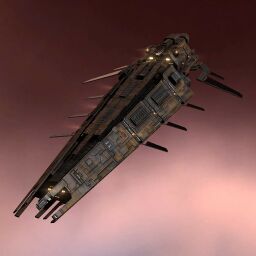
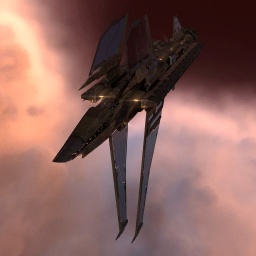
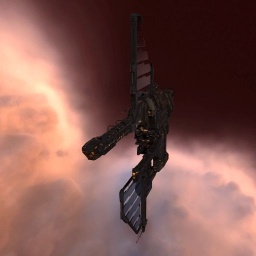
The Harbinger is a good damage dealing hull for Incursion BCs. This hull has the 2nd highest primary weapon damage for all the T1 fits and this can be augmented due to a large drone bay. Also the Harbinger's damage is flexible due to using lasers. This also means the Harbinger is the only Battlecruiser which can carry a stack of Lyavite. The biggest downside of this weapon system is capacitor use, and lack of capacitor stability when T2 fit. The drone bay can fit two full flights of light drones, allowing one of Light Shield Maintenance Bots and one of Hobgoblins. The biggest downside is the tight fitting requirements, leading to a slightly weaker than average tank.
The Hurricane has the best primary weapon damage capabilities of the BCs, but limited range due to using projectile turrets. It is the only hull that can fit an Energy Transfer or second weapon system; the former making it a Logistics pilot's best friend. The drone bay is of an odd size allowing 6 light or 1 medium and 4 light drones. The Hurricane is relatively easy to fit, and has a low signature resolution, giving it a good tank.
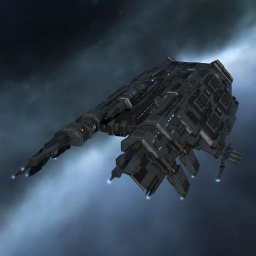
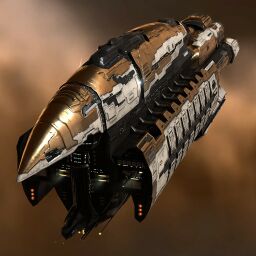
The Drake has the best tank of any BC that runs incursions. Further it has the best damage projection of any hull option. It is expected that Drake pilots can hit the Maras in OTAs and NMCs. This requires a range of over 60km. To achieve this a Drake pilot should have a III and a IV between Missile Projection and Missile Bombardment. Further the Drake has 6 mid slots, the most of any BC. This means that Drake pilots are expected to equip and use both Stasis Webifiers and Target Painters. Initially the pilot can only equip 2 due to needing 2x Adaptive Invulnerability Field II's, but at Battlecruisers IV only one is necessary, so 3 should be fitted. 2 Webs and 1 TP are recommended.
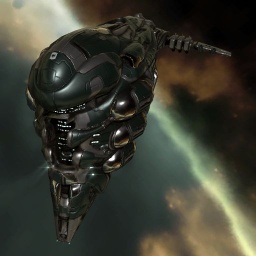
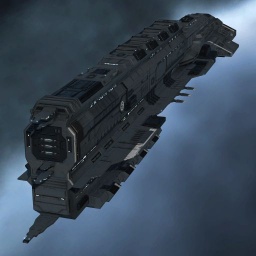
The Brutix is the surprise of the BS hulls. It is the only Tier 1 hull that can be fit well and is better than it's Tier 2 counterpart the Myrmidon. This fit has decent damage for a BC, but only when using the Tech II Null ammo. When using Tech I ammo and guns, this hull is lackluster. Being a Gallente ship, there is a good sized drone bay allowing for both a flight of Hobgoblins and Light Shield Maintenance Bots. The biggest weakness of the hull is it has the worst shield tank due to large base signature resolution and low base shield HP, a weakness shared with the Myrmidon. Overall it is recommended a Gallente pilot go for a Megathron instead of trying to make the Brutix work with T2 guns.
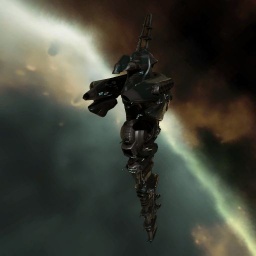
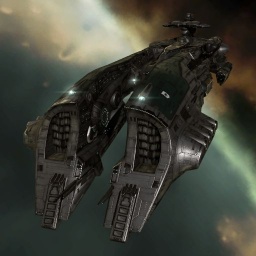
The Myrmidon is the weakest of the Tier 2 BC hulls. It receives no direct damage bonus and so has extremely poor primary weapon damage. This hull compensates by giving large bonuses to drone damage which splits the damage skill requirements for this ship. The drone bay is enormous. Allowing 2 full flights of Hobgoblins and Medium Shield Maintenance Bots. Also this ship has 5 mid-slots allowing a Federation Navy Stasis Webifier to be fit. These two factors make the Myrmidon more of a support ship like the Drake, but with less useful supports. To top it off it has the worst shield tank due to large base signature resolution and low base shield HP, a weakness shared with the Brutix.
While the Ferox has different offensive bonuses to the Drake and provides Caldari pilots with a possible Hybrid Turret platform, it should be avoided in Incursions. The problem is the even a T2 fitted Ferox cannot keep up with the damage output of a T1 fit Harbinger or Hurricane. Hence a T1 fit Ferox is out of the question and any pilot with the ability to fit a T2 Ferox should be thinking about other hulls, such as the Rokh or the Brutix.
Battleships
None of the Amarr BSs are well suited for Shield Incursions. Further, none of the BSs will be able to bring Mid Slot utility modules when shield tanked, unlike most other BSs. Looking at the individual ships, the Armageddon does not have enough Mid Slots to be shield tanked. Both the Abaddon and Apocalypse have capacitor problems, but are usable. The Abaddon cannot fit a full wrack of lasers as it needs at ET to have its capacitor last for longer than a few minutes. Unfortunately, the Apocalypse can't fit a full wrack of T2 lasers without a CPU Rig or implant. Finally, the damage is lacking compared to a Minmatar projectile BS.
The only Caldari BS suitable for Vanguards is the Rokh. Both the Raven and Scorpion use large missiles which are very ineffective against frigates and cruisers. The Rokh's bonuses are not the best for damage, but it has a very good tank. Further a Pilot with BS V has the option to swap an Invulnerability field for another utility module.
All the Gallente BSs have bonuses to Hybrid Turret damage. The Megathron is preferred because it also has a bonus to tracking speed, which is very relevant against frigates. The Hyperion's bonus to armor repair is irrelevant in Incursions as there are always Logistics ships, but it does have the potential for a better Shield tank than the Megathron due to higher base shield HP and an extra mid slot. The Dominix is also sub-optimal because it has the fewest turret points, it has low base shield HP, and it relies on Drones for most of its damage.
For the Minmatar the Maelstrom deals more damage than the Tempest until a pilot has Minmatar Battleship V. (At this point the pilot should consider the Tempest Fleet Issue.) In addition the Maelstrom has 6 mid slots instead of 5, making it easier to fit a shield tank and utility modules.
Armor Hulls
(Under Construction)
Battlecruisers
Battleships
The Gallente have two options for Armor Fleets, the Megathron and the Hyperion. The Hyperion has better tank, paper DPS, and Scan resolution. While the Megathron has better tracking speed, longer range, bigger drone bay, and can fit an ET. Both are viable, with the Megathron being a bit more popular. The Dominix is not good choice due to Drones being its primary damage source.
For the Minmatar the Tempest is the best Armor hull. The extra low slot over the Maelstrom allows the Tempest to fit an damage module giving it better damage.
Advanced Hulls
- Faction
- Pirate
- Command Ships
- Marauders
- Tech III
Tank
The goal for an Incursion tank is above 70% resists for all types and above 50,000 EHP for a BC when all modules are active. Refer to link above for other ships. It is best to get the resists up, and then add to EHP. The first module on an Incursion ship should be a Damage Control Unit II. This provides bonuses to all resists for Shield, Armor, and Hull when active. Essentially every fit uses one of these. Next use rigs and active hardeners to even out resistances. For a shield ship this usually means an EM Ward Field II and a Medium Anti-Thermal Screen Reinforcer I rig. Finally add modules which boost all resistances until one is over 70% for all. For a shield ship this usually means adding 2 Adaptive Invulnerability Field II. (Note, only one Damage Control Unit can be active at a time, hence adding more than one to your ship will not help.) Some ships might only need one if you have high enough skills, like the Drake, but this is a good place to start.
Once resistances are above 70%, it is time to add to EHP. There are two ways to do this one is through rigs and the other is modules. Which a pilot goes with in the end depends on how they balance with other considerations, such as damage, speed, and signature radius. A good way to start is to add the rigs and then use modules to top it off. Again using the shield example, 2 Medium Core Defense Shield Extenders and a Large Shield Extender II suffice. Once a pilot is comfortable with a ship and has improved skills, tweaking these modules is acceptable, keeping in mind the general principles mentioned above.
Shield Modules & Rigs
- Damage Control II
- Adaptive Invulnerability Field II
- EM Ward Field II
- EM Ward Amplifier II (Lower CPU requirement, requires EM Shield Compensation IV to have high enough resists)
- Medium/Large Anti-Thermal Screen Reinforcer I
- Large Shield Extender II
- Caldari Navy Large Shield Extender (Lower CPU requirement)
- Large F-S9 Regolith Shield Induction (Lower CPU requirement & cheap, but lower shield bonus)
- Medium/Large Core Defense Field Extender I
The list above is not comprehensive, but includes most basic modules and rigs. Some alternatives are included for tighter fits.
Armor Modules & Rigs
- Damage Control II
- Armor Explosive Hardener II
- Energized Explosive Membrane II (Requires Explosive Armor Compensation I, higher recommended)
- Large Anti-Thermic Pump I
- Large Anti-Kinetic Pump I
- Large Trimark Armor Pump I
- Energized Adaptive Nano Membrane II (Requires Kinetic Armor Compensation IV & Thermic Armor Compensation IV)
- 1600mm Reinforced Rolled Tungsten Plates I
Weapons
The weapons fitted should match any bonuses the ship hull gives. For example the Hurricane gives a bonus to projectile turrets damage and rate of fire. So Artillery Cannons or Autocannons should be fit to a Hurricane. When fitting fill as many high slots with the boosted weapon system. The Hurricane has 8 high slots and 6 turret hard ports, so should fit 6 projectile turrets. Weapon size should be picked to maximize damage to ships orbiting between 10km & 20km. Further, weapons effective against Frigates are preferred as most NPCs in Vanguard sites are Frigates. Therefore, statistics like explosion radius and signature resolution should be taken into account when choosing. Also most Sansha ships are very fast so gun ships should aim for tracking above .1 radians per second.
Tech II weapons are preferred, but take time to train. For BCs this is not too long, so FCs requiring only Tech 2 BCs is not unreasonable. When using Tech I guns stick to as high a Meta level as possible. Meta 4 is preferred, but Meta 3 might have a better value for its cost. Don’t go below Meta 2 if possible. Also, don’t mix Meta levels, so the cycle times stay in synch. Don’t fit a secondary weapon system yet. The Hurricane has 2 open high slots with a full set of turrets and 3 launcher hard ports. Wait for the utility section to consider fitting a secondary weapon system.
Hybrid Turrets
Medium Hybrid turrets are one of the worst weapon systems for Incursions. Blasters lack range and Railguns lack DPS. Only the Tech 2 Blasters are really viable and should be loaded with T2 Null ammo.
Lasers
Lasers have fast ammo switching and Tech II have access to Scorch Crystals. This combination allows laser battleships to take out Niarjas on approach and reach Maras easily. The restriction to only EM and Thermal damage isn't an issue since Sansha omni-tank. Capacitor use is a consideration and good support skills help a lot. Many ships also fit Nosferatus to improve capacitor regeneration. Crystals are also convenient to carry and you have room for a stack of Lyavite.
Projectile Turrets
Projectile Turrets don't use capacitor, leaving it free for Tanking and Utility modules. The downside is a lack of fast switching and relying on falloff to deal damage at range. Projectile turrets have a massive falloff range, allowing them a decent reach.
Missiles
Missiles are at a slight disadvantage to gun based weapon systems due to flight time. Further most ships fit Heavy Missiles or larger, which are not suited for hitting frigates due to large explosion radius. The strength of missiles lies in their range compared to Vanguard gun fits. This allows missile boats to kill targets that are otherwise out of reach. Missile boats must be able to hit a target over 60km (over 70km preferred) for Vanguard fleets. This requires a III and a IV between Missile Projection and Missile Bombardment. Due to these factors Battlecruisers using missiles must fit Heavy Missile Launchers, if missiles are the hull's primary weapons system. Rapid Light Missile Launchers are acceptable as a secondary system, due to being geared towards frigates.
Weapon Upgrades
- Ballistic Control Unit II (Missile)
- Gyrostabilizer II (Projectile)
- Heat Sink II (Laser)
- Magnetic Field Stabilizer II (Hybrid)
- Tracking Enhancer II (Gun)
- Drone Damage Amplifier II (Drones)
Next fill all remaining low slots with weapon upgrade modules for the hull's primary weapon system. These might need to be removed later due to fitting skills, but try to fit them first before adding fitting modules. Again Tech II versions are preferred. Only Weapon Upgrades IV is required, which is always a useful skill as it reduces weapon fitting requirements as well. All shield ships should fit at least 2 damage modules. Further all gun ships should fit at least 1 damage and 1 tracking modules regardless of tank type.
Utility Modules
Now that the basics are covered, any free slots can be devoted to utility modules. The fits thing to check is fitting requirements. If there is any difficulty, fitting modules can be added, but this should be avoided at all costs. The biggest exception is using rigs to help fit Tech II Weapon systems as the increased damage is worth a rig slot. A good rule of thumb is if the fit requires more than one fitting module, the pilot is not ready to fly that ship.
Also Capacitor stability needs to be checked at this point. Being stable is preferred. If that is not possible using capacitor modules aim for 15+ minutes of capacitor time. That way a pilot should be able to do a Vanguard site without running out of Capacitor. Note that running out of Capacitor is one of the worst things that can happen as this shuts down all defensive modules. These resistance modules are key to a pilot’s survival in an Incursion. Without them running there is a high likelihood of losing one’s ship.
It is often beneficial to bring multiple possible utility modules if a pilot's ships has options. This way a pilot can quickly adjust the fit based on the needs of the current fleet.
Medium Slots
If there are any open Medium slots after fitting the tank and capacitor modules the following utility modules can be considered:
- Federation Navy Stasis Webifier
- Phased Weapon Navigation Array Generation Extron
- Tracking Computer
- Tracking Speed Script
- Optimal Range Script
- Sensor Booster
- Scan Resolution Script
Stasis Webbifiers (Webs) reduce the speed of the webbed ship. This decreases tracking issues and explosion velocity problems. Remeber that Incursions are a fleet activity so using Webs and Target Pinters helps the entire fleet. The Tech I and Tech II versions are not really that useful in Incursions due to the range at which ships orbit, 10-20km. So very rarely will a standard Web be useful. That is why it is recommended to by the expensive faction version for the extra 4km. Though this could run almost as much as the hull+rigs, it is worth while investment as it will be used more frequently. If price is an issue fit the Target Painters before the Web.
Target Painters increase the signature resolution of the painted ships. This makes bigger weapons do more damage. 1-2 Meta 4 Target Painters are useful on most Ships. These have the longest range of all the utility modules. Also the relevant support skills for TPs should be trained to maximize bonuses:
Tracking Computers can be useful on Gun ships by boosting optimal range and tracking speed. A pilot should consider fitting a Web first though. Both because it helps the entire fleets and the effect of a web on tracking is higher than that of a Tracking Computer. Good practice is to bring both and switch in the event of too many or too few Webs in fleet. Also the effects of a Tracking Computer can be enhanced by scripts. Note that due to stacking penalties, when using two or more Tracking Computers, it is best to load one with each script if a pilot wants both effects. This is especially key for Armor Tanked ships.
Sensor Boosters can be used on ships with poor scan resolution to improve locking time. The resolution bonus can be further increased by loading Scan Resolution Scripts. Because of the poor can resolutions on BSs the Sensor Booster is always fit on them.
High Slots
Pilots should try to fit the following modules into empty high slots:
- Large 'Regard' Power Power Projector
- Large S95a Partial Shield Transporter\Large 'Solace' Remote Bulwark Reconstruction
- Medium Diminishing Power System Drain I
- Secondary Weapon System
- Auto Targeting System
- Warfare Link
The first thing that a pilot should try an fit into an empty high slot is a Large 'Regard' Power Power Projector. This only requires Energy Emission Systems I. An Energy Transfer (ET) provides added safety to the fleet in the event that there is a problem with the Logistics ET chain, such as a Logistics Pilot disconnecting. Also, this allows fleets to run with only one Basilisk or Guardian in fleet which makes assembling a fleet easier. An Incursion runner should fit 1-2 of these if possible. The Tech II versions are not needed. Medium ETs do not transfer enough capacitor to be useful.
Next a pilot should consider a single Large S95a Partial Shield Transporter or Large 'Solace' Remote Bulwark Reconstruction. This requires Shield Emission Systems I or Remote Armor Repair Systems I respectively. Again this is another safety module. A bit less useful than an ET as any ship running one will run out of Capacitor quickly. This can be used as a temporary stopgap in the event of an emergency though. Medium sized repair modules do not transfer enough shield to be useful.
A Medium Diminishing Power System Drain I is useful for Laser ships to improve capacitor stability. This requires Energy Emission Systems III but has easier fitting requirements than ETs. They work by transferring capacitor from the target ship to you. Unfortunately NPCs never run out of Capacitor. The Meta 4 is best due to same range and transfer amount as the Tech II, but easier fitting requirements.
Only after looking at the safety modules should a pilot consider a second weapon system. While this does provide additional DPS, it has high skill requirements due to an addition set of support skills. Hence the DPS increase will not be that great, and the pilot will run into mixed cycle time issues.
Another module that bears mention is the Auto Targeting System. The Tech I versions have almost no fitting requirements. Activating this module causes the ship to automatically lock available targets, reducing the clicks required, and provides additional locked targets. The drawbacks are additional targets are only useful with high skills to enable the extra locks. Also ships need to be killed in order in Incursions, so losing control over targeting order is very problematic.
The final modules to mention are the Warfare Links. These are advanced modules which most pilots don't use. Only the Command Ships and properly configured Strategic Cruisers should consider fitting these modules.
Rigs
Any rig slots not devoted to the Tank or Capacitor stability should have weapon rigs fitted. The goal is to improve DPS, either directly through higher damage amount or rate of fire, or indirectly through improving things like tracking or explosion radius. For missiles, Rigor Rigs are strictly better than Flare Rigs as they don't suffer stacking penalties.
Drones
- Light/Medium Shield/Armor Maintenance Bot I/II
- Hobgoblin I/II
- (Sentry Drone)
- Mining Drone I/II
Drones are very helpful in an incursion site and even a new pilot's drones are useful as most targets are Frigates. A pilot should strive for Drones V to command a full flight. Most new pilots will bring Hobgoblin I's as these have the highest DPS of the light drones and all Sansha are Omni-Tanked. Next a pilot should look to have Light & Medium Shield/Armor Maintenance Bot I's. These provide an additional layer of safety in the event of Logistics problems. Finally a pilot should get Hobgoblin II's for additional damage, with sentry drones also an option for larger ships. Pilots should always fit a full flight of one type before adding drones of a second type to the drone bay. So if there are only 25m^3 in the drone bay either fit Hobgoblin I's or Light Maintenance Bot I's, not a mix. On ships with bigger bays, fit full flights of different drones, including the Medium Maintenance Bot I's if drone bandwidth is at least 50m^3.
The Mining Drones are generally not fitted and are very low priority. They should only be considered on ships with ample drone bays after all other drones are loaded. They can be useful in Nation Mining Colonies if the fleet forgot to bring 255 Lyavite to complete the site.
Ammunition
Ammunition should be Tech II or Faction due to the increased damage. Pilots with only Tech I weapon systems should use faction ammo. Pilots with Tech II guns should consider Tech II ammo as each type has it's own unique advantages and disadvantages. Remember the most Vanguard NPCs orbit in the 10-20km range, with only Maras orbiting above 60km. Also, Sansha are omni-tanked so damage type does not matter.
Hybrid Charges
The Tech I hybrid charges are the worst for incursions due to the gun options. A pilot should fit whichever charge balances the damage-optimal range tradeoff best for the pilot's skills. Null Tech II ammo is the best given its damage and range.
Laser Crystals
Crystals give laser pilots many options due to quick switching times. It is recommended that a pilot bring an assortment to see which work best. Of particular note, Multifrequency crystals falloff encompasses most orbits and has the highest damage of all the Tech I crystals, hence these are recommended. Scorch crystals are recommended for Tech II pilots to pick off new waves. Conflagration drains the capacitor too fast to be of use.
Projectile Ammo
Since most Vanguard sites have the enemy closing range quickly, having ammo that can hit hard at short range is ideal. The -50% range ammo (EMP, Fusion, and Phased Plasma) also have the best damage output. Since the Sansha are omni-tanked and all three of those ammo types have the same total damage, any can be used effectively (get the cheapest). However, having some long-range ammo (+60% range: Carbonized Lead, Nuclear, Proton--again, they're equivalent total-damage-wise) in your hold can also be helpful for the few more distant targets (since projectile turrets have very good range already), so pack a variety.
Neither type of Tech II ammo provides much benefit for the switching times of a Projectile ship and are not recommended.
Missiles
Missile ships should use whichever damage type the hull bonuses, usually Kinetic. Hence Scourge ammo is most popular. For Vanguards Faction Missiles are the best. The high damage Tech II has too large an explosion radius to make up for the increased damage. The precision ammo loses too much flight time and damage for the bonus to explosion radius.
Testing a Fit
The best way to test an Incursion fit is to try to solo a Scout site. These sites have no warp disrupting ships, so warping out when in danger is always possible. Attempting a Scout site solo will allow a pilot to judge the size of the tank and damage output. An Incursion fit should have no trouble finishing a Scout site solo. It is recommended new pilots test their fits to get a feel for Incursions before joining a fleet.
Travel Fitting
One problem with Incursions is their location is random, so travel is usually required to get to a site. Prices tend to be inflated in regions with Incursions due to the increased demand of the Incursion runners. So it is recommended that a pilot bring in all supplies needed. The best way to do this is fit Expanded Cargohold II's in all the ship's low slots. Then use Cargo Containers to further expand carrying capacity. A pilot should bring all modules required to fit, with some extra for alternative fittings. Like both ETs and Missile Launchers for a Hurricane, so a pilot can quickly change fittings if the FC asks for it. Some pilots also bring mission running fittings, so they can do something if there is no Incursion fleet running. Extra Maintenance Bots and Hobgoblins should also be packed. Both because Sansha ships will target drones and so a pilot can adjust the drone bay based on what the FC wants. Ships with large cargoholds should bring stacks of Lyavite, as some sites require it. Finally all remaining space should be devoted to extra ammunition.
Implants
Table might be out of date due to name changes.
| Type of Bonuses | Model name | Slot 6 | Slot 7 | Slot 8 | Slot 9 | Slot 10 |
|---|---|---|---|---|---|---|
| Projectile Turret | 'Gunslinger' | SX: Small damage | AX: Tracking (All) | MX: Medium damage | CX: Damage (All) | LX: Large damage |
| Energy Turret | 'Lancer' | Alpha: Small damage | Beta: Capacitor use (All) | Gamma: Medium damage | Delta: Rate of Fire (All) | Epsilon: Large damage |
| Hybrid Turret | 'Deadeye' beginning with "ZG" | ZGS: Small damage | ZGC: Falloff (All) | ZGM: Medium damage | ZGA: Optimal Range (All) | ZGL: Large damage |
| (Non-Racial) Turret CPU | 'Gnome' | KZA: CPU need (All) | ||||
| Unguided Missiles | 'Snapshot' | ZMT: Torpedo damage | ZME: Heavy Assault missile damage | ZMR: Rocket damage | ||
| Guided Missiles | 'Snapshot' and 'Deadeye' | ZMU: Cruise Missile damage | ZMH: heavy Missile damage | ZMA: Explosion radius | ZMN: Light missile damage | |
| Defender Missiles | 'Snapshot' | ZMD: Missile Velocity | ||||
| F.o.F. Missiles | 'Snapshot' | ZMF: Explosion radius | ||||
| All Missiles | 'Deadeye' | ZMC or ZML: Flight Time or Velocity | ZMS: Explosion Velocity | ZMM: Rate of Fire |
Shamelessly copied from: [1]
Sample Shield Fits
(Under Construction, goal is to have a fit for at least one T1 BCs & BSs per race, then a T2 fit for all other appropriate ships)
T2 fits only posted if significantly different than T1 fits.
Be sure to read the notes for all fits for relevant skill requirements.
Tech I Battlecruisers

RELATED UNI-WIKI REFERENCES
|
S H I P B O N U S E S
Amarr Battlecruiser bonuses (per skill level): Right from its very appearance on a battlefield, the Harbinger proclaims its status as a massive weapon, a laser burning through the heart of the ungodly. Everything about it exhibits this focused intent, from the lights on its nose and wings that root out the infidels, to the large number of turreted high slots that serve to destroy them. Should any heathens be left alive after the Harbinger's initial assault, its drones will take care of them. |

RELATED UNI-WIKI REFERENCES
|
S H I P B O N U S E S
Caldari Battlecruiser bonuses (per skill level): Of the meticulous craftsmanship the Caldari are renowned for, the Drake was born. It was found beneath such a ship to rely on anything other than the time-honored combat tradition of missile fire, while the inclusion of sufficient CPU capabilities for decent electronic warfare goes without saying. |
Template:FittingsTemplate:Fittings

RELATED UNI-WIKI REFERENCES
|
S H I P B O N U S E S
Gallente Battlecruiser bonuses (per skill level): One of the most ferocious war vessels to ever spring from Gallente starship design, the Brutix is a behemoth in every sense of the word. When this hard-hitting monster appears, the battlefield takes notice. |

RELATED UNI-WIKI REFERENCES
|
S H I P B O N U S E S
Gallente Battlecruiser bonuses (per skill level): Worried that their hot-shot pilots would burn brightly in their eagerness to engage the enemy, the Federation Navy created a ship that encourages caution over foolhardiness. A hardier version of its counterpart, the Myrmidon is a ship designed to persist in battle. Its numerous medium and high slots allow it to slowly bulldoze its way through the opposition, while its massive drone space ensures that no enemy is left unscathed. |

RELATED UNI-WIKI REFERENCES
|
S H I P B O N U S E S
Minmatar Battlecruiser bonuses (per skill level): The force with which this ship hits is more than sufficient to leave a trail of shattered enemies, floating around like so much lifeless debris. An adaptable vessel, it has enough turret hardpoints for a full-scale assault while remaining versatile enough to allow for plenty of missile fire, and has both sufficient speed to outrun its enemies and sufficient capacitor charge to outlast them. |
Tech I Battleships

RELATED UNI-WIKI REFERENCES
|
S H I P B O N U S E S
Amarr Battleship bonuses (per skill level): The Abaddon class ship is a celestial tool of destruction. It is designed to enter combat from the outset, targeting enemies at range and firing salvo after salvo at them, and to remain intact on the battlefield until every heretic in sight has been torn to shreds. |
Template:FittingsTemplate:Fittings

RELATED UNI-WIKI REFERENCES
|
S H I P B O N U S E S
Caldari Battleship bonuses (per skill level): Having long suffered the lack of an adequate hybrid platform, the Caldari State's capsule pilots found themselves rejoicing as the Rokh's design specs were released. A fleet vessel if ever there was one, this far-reaching and durable beast is expected to see a great deal of service on battlefields near and far. |
Template:FittingsTemplate:Fittings

RELATED UNI-WIKI REFERENCES
|
S H I P B O N U S E S
Gallente Battleship bonuses (per skill level): The Megathron has established itself as one of the most feared and respected battleships around. Since its first appearance almost two decades ago it has seen considerable service in the troublesome regions on the outskirts of the Federation, helping to expand and defend Gallentean influence there. |
Template:FittingsTemplate:Fittings

RELATED UNI-WIKI REFERENCES
|
S H I P B O N U S E S
Minmatar Battleship bonuses (per skill level): With the Maelstrom, versatility is the name of the game. Its defensive capabilities make it ideally suited for small raid groups or solo work, while its 8 turret hardpoints present opportunities for untold carnage on the fleet battlefield. |
Template:FittingsTemplate:Fittings
Tech II & III Hulls
(Under Construction)
Faction Hulls
(Under Construction)
Sample Armor Fits
Tech I Battlecruisers
(Under Construction)
Tech I Battleships

RELATED UNI-WIKI REFERENCES
|
S H I P B O N U S E S
Minmatar Battleship bonuses (per skill level): The Tempest is one of the Republic Fleet's key vessels; a versatile gunship proficient at long-range bombardment and capable of dishing out specialized types of damage with great effectiveness. A well-rounded squadron of Tempests has been proven time and time again to be an invaluable wild card in a fleet battle, one which opponents should ignore at their own peril. |
Template:FittingsTemplate:Fittings
Tech II & III Hulls
(Under Construction)
Faction Hulls
(Under Construction)
Legacy fits
The fits in Incursion Fitting do not necessarily conform to this guide. They will be removed after appropriate fits have been added.
Helpful Links
- Incursion fitting advice: http://incursions.nexsoft.de/
- Basic incursion ship fits for shield and armor: http://forum.eveuniversity.org/viewtopic.php?f=128&t=46156

