More actions
m →Cheap: Adjusting for the Surgical Strike patch. |
m →Optimal: Adjusting for the Surgical Strike patch. |
||
| Line 141: | Line 141: | ||
== Optimal == | == Optimal == | ||
{{quote|... gives you maximum damage and will free up | {{quote|... gives you maximum damage and will free up one extra midslot.}} | ||
If you're willing to spend a little bit more on your favourite cash-cow ship, you can take it one step further with one of the more costly deadspace hardeners. The [[Incursion fitting principles#Electromagnetic rig|advanced electromagnetic rig setup]] from the '''fitting principles''' page gives you maximum damage and will free up | If you're willing to spend a little bit more on your favourite cash-cow ship, you can take it one step further with one of the more costly deadspace hardeners. The [[Incursion fitting principles#Electromagnetic rig|advanced electromagnetic rig setup]] from the '''fitting principles''' page gives you maximum damage and will free up an extra midslot. | ||
Here's an example of a '''Vindicator''' fit according to that principle. | Here's an example of a '''Vindicator''' fit according to that principle. | ||
| Line 153: | Line 153: | ||
| low1name=Damage Control II | | low1name=Damage Control II | ||
| low1typeID=2048 | | low1typeID=2048 | ||
| mid1name=Pithum B-Type Adaptive Invulnerability | | mid1name=Pithum B-Type Adaptive Invulnerability Shield Hardener | ||
| mid1typeID=4348 | | mid1typeID=4348 | ||
| mid2name=Adaptive Invulnerability Shield Hardener II | |||
| mid2typeID=2281 | |||
| rig1name=Large Anti-EM Screen Reinforcer I | | rig1name=Large Anti-EM Screen Reinforcer I | ||
| rig1typeID=26076 | | rig1typeID=26076 | ||
| Line 165: | Line 167: | ||
| low6name=open | | low6name=open | ||
| low7name=open | | low7name=open | ||
| mid3name=open | | mid3name=open | ||
| mid4name=open | | mid4name=open | ||
| Line 178: | Line 179: | ||
| high8name=open | | high8name=open | ||
| rig3name=open | | rig3name=open | ||
| skills= | | skills= | ||
| showSKILLS=N | | showSKILLS=N | ||
| notes=With a cheap setup you'd use up 3 midslots for tank, | | notes=With a cheap setup you'd use up 3 midslots for tank, this only uses two, giving you one extra midslot for [[Incursion fitting principles#Utility modules|utility modules]].</li><li>Increasing the tank for this fit is a bit limited, but you can either add a normal {{co|coral|Adaptive Invulnerability Shield Hardener II}} module for assaults, or if you want to solidify your tank for headquarters, a second {{co|coral|Pithum B-Type Adaptive Invulnerability Shield Hardener}}. | ||
| showNOTES=Y | | showNOTES=Y | ||
| difficulty=0 | | difficulty=0 | ||
| version= | | version=April 2020 | ||
| showTOC=N | | showTOC=N | ||
| shipDNA=17740:2048;1:4348;1:26076;1:26394;1:: | | shipDNA=17740:2048;1:4348;1:2281;1:26076;1:26394;1:: | ||
| fleetup= | | fleetup= | ||
}} | }} | ||
Revision as of 13:34, 15 April 2020

|
| Incursion links |
|---|
| General |
| Advanced |
| EVE University |
| Preparations |
| Fittings |
| Guides |
Planning ahead
Unless you are already heavily invested into a certain race or weapon system, it might be a good idea to think of which logistics ship, strategic cruiser or pirate faction battleship you'll want in the end, rather than what your first incursion ship should be. Don't worry too much about it though, as the race specific ship and weapon skills you train for the minimum skills only amount to a little over five days worth of training. So changing your mind along the way wouldn't be much of a detour.
Depending on the race, training for strategic cruisers will make quite some progress towards being able to fly logistics as well, or the other way around if your goal is to fly logistics. That said, most strategic cruisers pale in comparison to the pirate faction battleships who remain the epitome of incursion boats.
Synergy
You should also consider secondary value of whatever you train, perhaps you can find an end-of-the-line ship that not only furthers your goals for incursions but other goals as well given the skills you'll end up training for it. If you already know that you like smaller ships, or have plans for diving into a wormhole in the future, it would make much more sense training into a strategic cruiser than a pirate faction battleship.
So take some time to consider which racial ship line, what racial weapons would benefit you doing missions, exploration, PvP or whatever else you'd like to do in EVE.
Ship progression
Progression varies a little between the roles of logistics and damage dealers, but is somewhat straight forward with easily identified high-end ships to aim for.
Logistics
While there's little in terms of progression for logistics, it's worth mentioning that it can be highly advantageous to train into both the Scimitar and the Basilisk. Progression is mostly based on skills once you can fly these two ships, most notably Logistics Cruisers V that opens up for a lot of options.
Scimitar
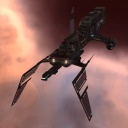 |
The Scimitar
|
Basilisk
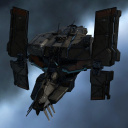 |
The Basilisk
|
Pirate faction battleships
The Machariel, Nightmare and Vindicator hulls are preferred for incursions due to a combination of higher base stats, better bonuses and better slot layouts.
Some of these have a natural progression, like the Maelstrom pilot only needing Gallente Battleship to move into a Machariel and a Hyperion pilot only needing to train Minmatar Battleship to get into the Vindicator. Left a bit on the side is the Rokh with a low priority synergy with the Nightmare given the Caldari Battleship skill and a slightly stronger synergy with the Vindicator given that they both use the Large Hybrid Turret skill for their guns.
Training up a racial battleship skill from scratch to III takes less than four days and training a new racial turret skill to III is about a day and a half, so even if some of these ships have natural progression; don't feel like you're a slave to your initial choice of ship or weaponry.
Nightmare
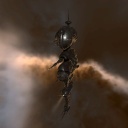 |
The Nightmare
|
Machariel
 |
The Machariel
|
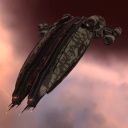
Vindicator
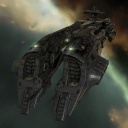 |
The Vindicator
|
- ^ a b c d Gallente Battleship and Minmatar Battleship are shared between both the Machariel and the Vindicator, so if you like flying multiple hulls you'd have the ship skills covered and you'd only need to train a new racial turret skill.
Command Ships and Strategic Cruisers
| “ | These ships are not ships you train into for for the sake of doing incursions as a damage dealer ... | ” |
Cruiser-sized hulls like Command Ships and Strategic Cruisers are less powerful with their weaker medium weaponry and sometimes low number of utility midslots. A lot of these ships also have some issues with range projection, even when using long range weapons. Unlike regular tech one battleships, they also focus on skills that make little to no headway towards the more powerful pirate faction battleships.
Given their lower dps potential, these ships also require very high skills (near max) and tech two guns to be able to perform. These ships are not ships you train into for the sake of doing incursions, with the exception of the ongrid booster role, but used as an alternative if you can't fly battleships and you happen to have these trained high already.
Ill-suited for public communities
Almost all communities shun these two ship classes (with the exception of command ships for ongrid boosting). Instead they favour having their members temporarily go into the tech one battleships, until they can afford to upgrade to the more powerful pirate faction battleships. Any other ship class is just a waste of time and effort better put into getting them skilled and ready in the appropriate high-end ships they desire, since people make enough ISK to upgrade to a proper pirate faction ship after just a handful of hours worth of running.
Accepted in the EVE University Incursion Community
In the EVE University Incursion Community we have no real reason to casually bar these ships as regular damage dealers, since properly fitted with long range medium turrets they can often perform similar to or slightly better than our tech one minimum fits. They can also be used effectively for Nation Consolidation Network assault sites. Since we have some members who spend the majority of their time in other campuses flying smaller ships, this allows us to include more people into our community.
While we accept them, they are still not recommended for the majority of players as they require very high skills and tech two weapons to perform. They should only be used for very specific reasons when other alternatives are much less desirable.
Fit progression
For the most part, fit progression is really only relevant for high-end ships like the three pirate faction battleships mentioned above. Logistics ships use pretty much the same rigs, changing only a few modules based on their desired fit. Remember that upgrading from a regular battleship to a pirate faction battleship alone is a big upgrade and the best use of your ISK for the initial upgrade.
See upgrade priorities for more information and remember that your options are highly limited by your choice of rigs. That choice also heavily influences the amount of ISK you need to front to make the fit work. The examples below will use the more common setups, so will not include specialized fits such as the warp speed variant.
Cheap
If you're not entirely sure how you want to fit your ship in the end, the same principle that we follow to fit our minimum fits can be applied to pirate faction ships as well. Practically you can fit a Vindicator more or less the same way you'd fit a Hyperion. The same goes for fitting a Machariel similar to how you fit a Maelstrom.
Here's an example of a Nightmare fit according to our principles, with only a minor change to rigs since their increased stats make shield extender rigs superfluous.
Adaptive Invulnerability Shield Hardener II
Adaptive Invulnerability Shield Hardener II
Anti-EM Shield Hardener II
Damage Control II
Large Anti-Thermal Screen Reinforcer I
Large Energy Burst Aerator II


- The Nightmare is often the only decent entry-ship for Amarr pilots.
- Even using the standard setup the ship sports plenty of midslots allowing for a high number of utility modules, four to be exact.
Optimal
| “ | ... gives you maximum damage and will free up one extra midslot. | ” |
If you're willing to spend a little bit more on your favourite cash-cow ship, you can take it one step further with one of the more costly deadspace hardeners. The advanced electromagnetic rig setup from the fitting principles page gives you maximum damage and will free up an extra midslot.
Here's an example of a Vindicator fit according to that principle.
| This fit changes the rig to a |
Pithum B-Type Adaptive Invulnerability Shield Hardener
Adaptive Invulnerability Shield Hardener II
Damage Control II
Large Anti-EM Screen Reinforcer I
Large Hybrid Burst Aerator II


- With a cheap setup you'd use up 3 midslots for tank, this only uses two, giving you one extra midslot for utility modules.
- Increasing the tank for this fit is a bit limited, but you can either add a normal Adaptive Invulnerability Shield Hardener II module for assaults, or if you want to solidify your tank for headquarters, a second Pithum B-Type Adaptive Invulnerability Shield Hardener.
Skill progression
For the most part skill progression is as simple as just topping off the minimum skills you needed to get ready and perhaps train a couple of new skills to be able to use a different set of drones or a situational module. There are however some differences between skill progression for logistics and damage dealers.
Logistics
Progression for logistics is practically an intertwined mess of both fit and skill progression, as skills like Logistics Cruisers V and all the support skills all play a vital role. The more powerful tech two remote shield boosters require better fitting skills and utility modules require more cap, at the same time you want to use less fitting modules to free up room for even more utility modules while still keeping a good enough tank.
See minimum and recommended skills for a list of specific skills to train early on to quickly move into the recommended and advanced logistics fits.
| Implants
It's possible to change the priority or shorten the train early on by using implants to improve your capacitor regeneration or fitting room. This is because logistics have relatively small capacitor capacity and even small changes can often make or break a fit. See recommended implants for more information. |
Damage dealers
Most of the progression in terms of skill for damage dealers surrounds gunnery and drones, but also to some extent capacitor management and fitting skills. Skill progression for damage dealers are completely disjointed and separate from ship progression due to the fact that you'll perform better in a pirate faction than you would in a tech one hull no matter what your skills are. So as your skills improve you'll progress the same regardless if it's in a fancy ship or your old but trustworthy tech one battleship; You simply upgrade when your skills allow you to.
See minimum and recommended skills for a list of specific skills to train early on.
| Tech two weapons
As soon as you have the skills for it, toss away those old meta turrets and replace them with your tech two turrets of choice. All ships, tech one battleships as well as pirate faction battleships benefit greatly from the much more powerful tech two turrets (and their advanced ammunition). | |
| Improved drone skills
There are several drone-related skills to help improve your performance. First training into medium drones and improving drone control range, then general drone support and specialization skills. Later on you might train heavy drones for headquarter sites or sentry drones for vanguard sites. | |
| Capacitor management
Some skills improved basic capacitor regeneration, others reduce capacitor usage instead. Some ships will have little to no issues with cap, while others are much more subject to it and require very high skills. Implants play a small role in this as well, so your mileage will vary here depending on your skills, ship, fit and implants. | |
| Fitting skills
Long range weapons and propulsion modules in particular put a lot of strain on your power grid while tech two weapons and damage upgrades require a lot of CPU. This is not an issue early on, but as you move into assaults and headquarters, you might need to train skills that reduce the power grid and CPU requirements as well as improving the base output of your ship. |