More actions
No edit summary |
No edit summary |
||
| Line 12: | Line 12: | ||
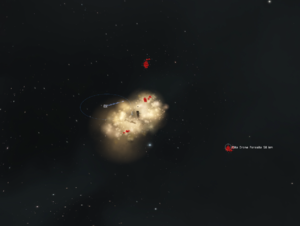
=== Room 1/4 === | === Room 1/4 === | ||
{{NPCTableHead|Room 1}} | {{NPCTableHead|Room 1/4}} | ||
{{NPCTableRow|Frigate|1|Barracuda Alvi}} | {{NPCTableRow|Frigate|1|Barracuda Alvi}} | ||
{{NPCTableRow|Frigate|1|Raider Alvi}} | {{NPCTableRow|Frigate|1|Raider Alvi}} | ||
| Line 35: | Line 35: | ||
|} | |} | ||
{| style="margin: 1em; max-width: 600px;" class="wikitable {{#ifeq:{{{collapsed|yes}}}|yes|mw-collapsible mw-collapsed|}}" | |||
! style="font-size:0.9em; background-color:#000000; padding: 0.25em 0.5em;font-weight:normal;text-align:left" | {{{1|Positions}}} | |||
|- | |||
| style="background-color:#222222; padding: 1em;" | {{{2|Gate is locked til all rats are dead}}} | |||
|} | |||
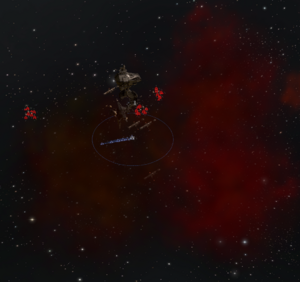
=== Room 2/4 === | === Room 2/4 === | ||
{{NPCTableHead|Room | {{NPCTableHead|Room 2/4}} | ||
{{NPCTableRow|Frigate|3|Decimator Alvi}} | {{NPCTableRow|Frigate|3|Decimator Alvi}} | ||
{{NPCTableRow|Frigate|2|Silverfish Alvi}} | {{NPCTableRow|Frigate|2|Silverfish Alvi}} | ||
| Line 51: | Line 55: | ||
{{NPCTableRow|Battleship|1|Alvus Controller}} | {{NPCTableRow|Battleship|1|Alvus Controller}} | ||
{{NPCTableRow|Battleship|1|Swarm Preserver Alvus}} | {{NPCTableRow|Battleship|1|Swarm Preserver Alvus}} | ||
{{NPCTableRow|Acceleration Gate|1|Acceleration Gate}} | |||
|} | |} | ||
[[File:Cadaveer Reef Room 2.png|thumb]] | [[File:Cadaveer Reef Room 2.png|thumb]] | ||
{| style="margin: 1em; max-width: 600px;" class="wikitable {{#ifeq:{{{collapsed|yes}}}|yes|mw-collapsible mw-collapsed|}}" | {| style="margin: 1em; max-width: 600px;" class="wikitable {{#ifeq:{{{collapsed|yes}}}|yes|mw-collapsible mw-collapsed|}}" | ||
| Line 62: | Line 66: | ||
|} | |} | ||
Gate is locked til all rats are dead | {| style="margin: 1em; max-width: 600px;" class="wikitable {{#ifeq:{{{collapsed|yes}}}|yes|mw-collapsible mw-collapsed|}}" | ||
! style="font-size:0.9em; background-color:#000000; padding: 0.25em 0.5em;font-weight:normal;text-align:left" | {{{1|Gatelock}}} | |||
|- | |||
| style="background-color:#222222; padding: 1em;" | {{{2|Gate is locked til all rats are dead}}} | |||
|} | |||
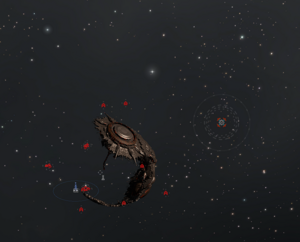
=== Room 3/4 === | === Room 3/4 === | ||
On warp in- Extreme caution is advised when venturing into this deadspace area. The drones inhabiting this pocket have managed to salvage an enormous amount of metal to build a massive headquarter structure. | {| style="margin: 1em; max-width: 600px;" class="wikitable {{#ifeq:{{{collapsed|yes}}}|yes|mw-collapsible mw-collapsed|}}" | ||
! style="font-size:0.9em; background-color:#000000; padding: 0.25em 0.5em;font-weight:normal;text-align:left" | {{{1|On warp in:}}} | |||
|- | |||
| style="background-color:#222222; padding: 1em;" | {{{2|Extreme caution is advised when venturing into this deadspace area. The drones inhabiting this pocket have managed to salvage an enormous amount of metal to build a massive headquarter structure.}}} | |||
|} | |||
{{NPCTableHead|Room 3/4}} | |||
{{NPCTableRow|Frigate|5|Devilfish Alvi}} | |||
{{NPCTableRow|Frigate|2|Silverfish Alvi}} | |||
{{NPCTableRow|Frigate|2|Strain Decimator Alvi}} | |||
{{NPCTableRow|Battlecruiser|3|Crippler Alvatis}} | |||
{{NPCTableRow|Battleship|1|Anti-Stabilizer Drone|drop=2x Drone Modified Passcard|Point=web}} | |||
{{NPCTableRow|Battleship|1|Supreme Alvus Parasite}} | |||
{{NPCTableRow|Battleship|2|Alvus Controller}} | |||
{{NPCTableRow|Sentry|3|Drone Sentry}} | |||
{{NPCTableRow|Acceleration Gate|1|Acceleration Gate}} | |||
|} | |||
[[File:Cadaveer Reef Room 3.png|thumb]] | [[File:Cadaveer Reef Room 3.png|thumb]] | ||
| Line 77: | Line 103: | ||
|} | |} | ||
{| style="margin: 1em; max-width: 600px;" class="wikitable {{#ifeq:{{{collapsed|yes}}}|yes|mw-collapsible mw-collapsed|}}" | |||
! style="font-size:0.9em; background-color:#000000; padding: 0.25em 0.5em;font-weight:normal;text-align:left" | {{{1|Gatelock}}} | |||
|- | |||
| style="background-color:#222222; padding: 1em;" | {{{2|Gate is locked til all rats are dead, does require a drone modified passcard to use the gate}}} | |||
|} | |||
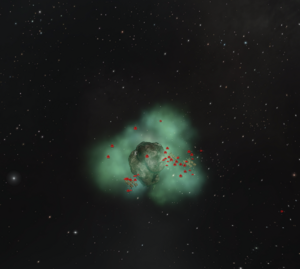
=== Room 4/4 === | === Room 4/4 === | ||
{{NPCTableHead|Room 4/4}} | |||
{{NPCTableRow|Frigate|15|Akkeshu's Fighter (7xDemolisher, 8xDestructor)}} | |||
{{NPCTableRow|Frigate|2|Akkeshu's Wingman}} | |||
{{NPCTableRow|Cruiser|15|Akkeshu's Guardian (3x Abolisher, 12x Dire Pithum Eraser}} | |||
{{NPCTableRow|Battlecruiser|5|Akkeshu's Bombarder }} | |||
{{NPCTableRow|Battleship|1|Akkeshu Kuaran|drop= 1x Akkeshu Karuan's DNA, 1000x Guristas Tungsten Charge L*}} | |||
{{NPCTableRow|Sentry|3|Akkeshu's Missile Battery}} | |||
|} | |||
[[File:Cadaveer Reef Room 4.png|thumb]] | |||
{| style="margin: 1em; max-width: 600px;" class="wikitable {{#ifeq:{{{collapsed|yes}}}|yes|mw-collapsible mw-collapsed|}}" | |||
! style="font-size:0.9em; background-color:#000000; padding: 0.25em 0.5em;font-weight:normal;text-align:left" | {{{1|Additional Loot information}}} | |||
|- | |||
| style="background-color:#222222; padding: 1em;" | {{{2|As Akkeshu Kuruan is listed as a faction commander, and he dropped 1k ammo, possible he can drop DG modules, would need to be tested more}}} | |||
|} | |||
{| style="margin: 1em; max-width: 600px;" class="wikitable {{#ifeq:{{{collapsed|yes}}}|yes|mw-collapsible mw-collapsed|}}" | {| style="margin: 1em; max-width: 600px;" class="wikitable {{#ifeq:{{{collapsed|yes}}}|yes|mw-collapsible mw-collapsed|}}" | ||
| Line 90: | Line 132: | ||
| style="background-color:#222222; padding: 1em;" | {{{2|[[File:Cadaveer Reef Room 4 Placement.png|thumb]]}}} | | style="background-color:#222222; padding: 1em;" | {{{2|[[File:Cadaveer Reef Room 4 Placement.png|thumb]]}}} | ||
|} | |} | ||
Revision as of 12:22, 4 November 2020
Not a static, despawned once boss died TO BE COMPLETED!
Warp In
| On Warp in: |
|---|
| Cadaver Reef is an infamous hotspot of Rogue Drone activity, but better known for its abundance of human carcasses. Many a pilot has lost his ship, and his life, from trying to navigate through this rubble-strewn graveyard. A great battle was waged here decades ago, between two powerful Guristas officers, Akkeshu and Rakka, and their fleets. Legend has it that Akkeshu hid incredibly valuable treasure inside one of the pockets of this deadspace area, which was not found in the aftermath of the battle. Even today adventurous Guristas pilots sometimes venture into Cadaver Reef to search for the lost treasure. Few come out alive, and so far no confirmed reports exist of anyone discovering the treasure, which most rebuff as being nothing more than an old-wives tale. |
Room 1/4
Room 1/4
| Positions |
|---|
 |
| Positions |
|---|
| Gate is locked til all rats are dead |
Room 2/4
Room 2/4
| Positions |
|---|
 |
| Gatelock |
|---|
| Gate is locked til all rats are dead |
Room 3/4
| On warp in: |
|---|
| Extreme caution is advised when venturing into this deadspace area. The drones inhabiting this pocket have managed to salvage an enormous amount of metal to build a massive headquarter structure. |
Room 3/4
| Positions |
|---|
 |
| Gatelock |
|---|
| Gate is locked til all rats are dead, does require a drone modified passcard to use the gate |
Room 4/4
Room 4/4
| Additional Loot information |
|---|
| As Akkeshu Kuruan is listed as a faction commander, and he dropped 1k ammo, possible he can drop DG modules, would need to be tested more |
| Positions |
|---|
 |
