When a player joins a fleet, they will have access to a new window called the Fleet interface. This window provides a huge amount of valuable information.
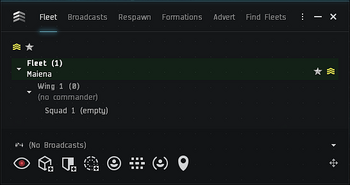
The main fleet window has six tabs: Fleet, Broadcasts, Respawn, Formations, Advert and Find Fleets.
Fleet Window
Fleet Options
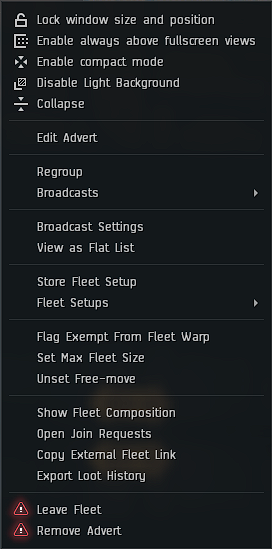
Clicking the three dots in the top right of the fleet window brings up the options:
- Edit Advert: This allows the Fleet Commander to edit a Fleet Advert (see below).
- Regroup: Makes all members the commander has control over move towards him at full speed.
- Broadcasts: Another way to make broadcasts (as well as the buttons along the bottom of the fleet window).
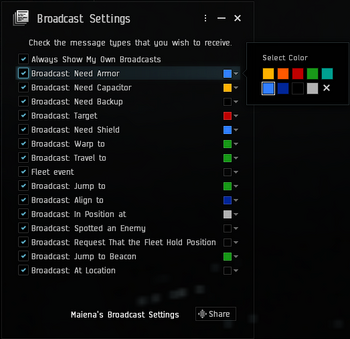
- Broadcast Settings: Opens the broadcast settings window. See Broadcast settings.
- View as Flat List/Hierarchy: Switches between the list of fleet members being displayed as a flat list and a hierarchy.
- Store Fleet Setup: Allows the Fleet Commander to store the fleet setup for future reference. Note that all wings must have unique names.
- Fleet Setups: Changes the fleet setup to the stored setup.
- Flag Exempt From Fleet Warp: Marks you as not following in a fleet warp (this is useful for scouts who may not be following the rest of the fleet).
- Set Max Fleet Size: This allows the Fleet Commander to set the maximum size of the fleet (between 1 and 256).
- Set/Unset Free-move: This switches the fleet between members being able to move themselves to a different position (free move) and members being fixed in the position they are placed in.
- Show Fleet Composition: Opens the Fleet Composition Window. See Fleet composition.
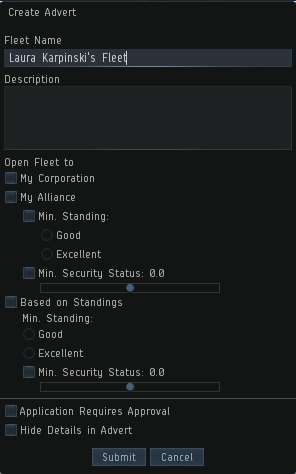
- Create Advert: This allows the Fleet Commander to create a Fleet Advert.
- Open Join Requests: This allows the Fleet Commander to see a list of people who have requested to join the fleet, but who have not been approved yet.
- Copy External Fleet Link: Create an ESI link to your fleet.
- Export Loot History: Exports the Loot History to your Fleetlogs folder on your computer.
- Leave Fleet: Drops you from the fleet.
- Remove Advert: Removes an open advert.
Fleet
Broadcast
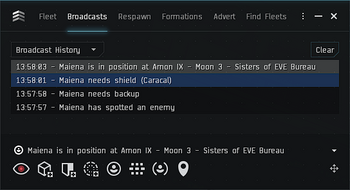 |
The Broadcast tab has four history filters, which you can switch between at the drop down list in the top left:
|
Respawn
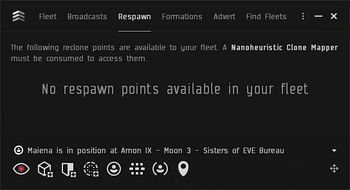 |
In the Respawn tab you can select a respawn location when your capsule gets destroyed. It is only available if you consumed a Nanoheuristic Clone Mapper and if a Tactical Capsuleer Recloner is installed in a Supercarrier. |
Formations
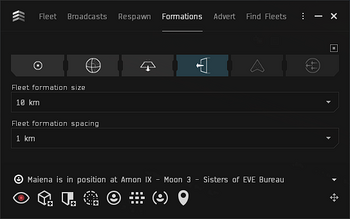 |
In the Formations tab you can choose the formation and size of your fleet ships when they warp from a commander. |
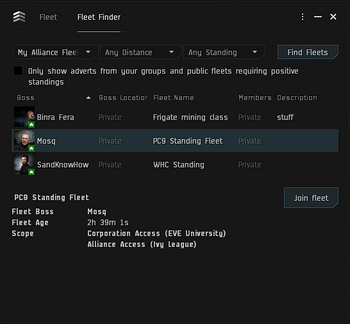
Find Fleets
Working with the Fleet Window
Fleet advert
|
|
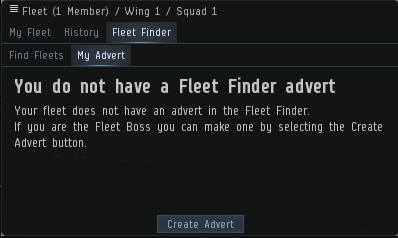
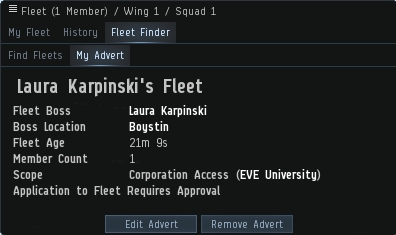
Here you can see the difference between having an advert and not having an advert. You can make an advert by clicking the Create Advert button.
Your fleet advert will display as below:
Broadcasting
- Enemy Spotted: You can click this one if you see an enemy. This is not generally used in EVE University fleets. Broadcasts to the whole fleet.
- Need Armour: Click this button if you need your armor to be repaired. Broadcasts to fleet members on grid with you.
- Need Shield: Click this button if you need your shield to be repaired. Broadcasts to fleet members on grid with you.
- Need Capacitor: Click this button if your Capacitor is running low and you require a refill. Broadcasts to fleet members on grid with you.
- In Position: This broadcast can be used when the Fleet Commander has asked you to do a specific task or go to a specific place and you have reached your goal. Broadcasts to the whole fleet.
- Need Backup: This broadcast can be used when you are getting attacked and you need other people to help you.Broadcasts to the whole fleet.
- Hold Position: This broadcast can used if you need to stay on your current location. Broadcasts to the whole fleet.
- Location: This puts your current location on the broadcast list. Broadcasts to the whole fleet.
- Who will receive the broadcast: - This button has three options, and is limited to the broadcast range above.:
- My group Broadcasts to members below you in the fleet hierarchy. This means the Fleet Commander will broadcast to everyone, the Wing Commander will broadcast to everyone in his wing, the Squad Commander will broadcast to everyone in the squad and squad members will broadcast to everyone else in the squad.
- Everyone Broadcasts to everyone in the fleet.
- Superiors Broadcasts to your direct superiors. For example, if you are in Squad 1 of Wing one only the Fleet Commander, the Wing Commander of Wing 1 and the Squad Commander of Squad 1 will get this broadcast.
Broadcasting your location
When you broadcast your location the players receiving your broadcast will see a notification with your location. They can right click the broadcast to open up several options:
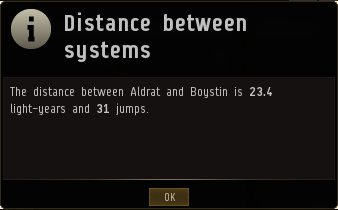
If they right click on the broadcast and click on Show Distance, they will see a pop up with the distance between them and the location, in both number of jumps (calculated by the shortest route) and in light-years.
Broadcast settings
In this window you can select whether you want to receive certain broadcasts. For example, you may want to turn off the Need Armor if you aren't in a logistics ship.
You can also change the background color for each type of broadcast to make them easier to spot in the History tab.
Fleet composition
The Fleet Composition window will give you some extra information on your fleet members. Only people in command positions have access to this screen and you can only see your subordinates. This means a Squad Commander will only see his squad, a Wing Commander his wing and the Fleet Commander and the Fleet Boss will see the entire fleet.
- Name: Shows the name of the pilot in the fleet.
- Location: Shows where the pilot is located.
- Ship type: Shows what ship the pilot is flying.
- Ship group: Shows what ship group the pilot's ship belongs to.
- Fleet role: Shows the role in the fleet. i.e. Squad Member, Squad Commander, Wing Commander or Fleet Commander.
- Fleet skills: Shows what leaderships skills the pilot has. The first number is Fleet Command, the second is Wing Command and the third is Leadership.
- Fleet Position: Shows the pilot's current position in the fleet.
Fleet Watch Lists
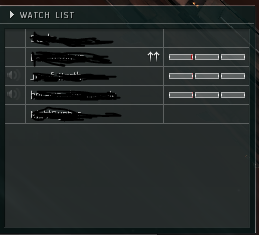
The Fleet Watch List has multiple purposes. For Squad Commanders, it helps them see whether their squad members are near their current location in space. For logistics ships, it helps them to see who needs to be repaired and to lock pilots easily. For others, it allows you to quickly warp to a member.
The Fleet Watch List allows a maximum of 100 pilots at any one time. You can add to the Watch List several ways. One method is to use the My Fleet window in hierarchy view, right click a fleet member, and select "Add to Watch List." Another method is right click on the character's portrait, drop down and select fleet, and then add to watch list. A third method is the "x up" approach, when a pilot types an "x" in Fleet chat, right click that pilot's name, go to Fleet in the pop-up menu, then "Add to Watch List". It is good practice to add the Fleet Commander, Wing Commander, Squad Commander and any scouts to your watch list, together with anyone else the Fleet Commanders instructs you to add.
If you want to add an entire squad to your watch list, right click the Squad Commander and select "Add Squad Members to Watch List." All Squad Commanders are encouraged to have their squad on their watch list.
To use the watch list for warp purposes, right click on the name in the watch list, and you can select on of two options:
- Warp to: Warps you to 0 in the last known position of the ship the person is flying - be sure to never warp to 0 to a scout, as this will uncloak them if they are cloaked)
- Warp to X km: Allows you to select the distance (10km being the shortest you should ever warp to a cloaked scout).
When pilots on your watch list are on grid with you and are not cloaked, you will see three bars to the right of their names. The first bar is the health of their ships' shields. The second bar shows armor health, and the third bar shows structure health. If you do not see these bars, the pilot is either off grid from you or cloaked.
Formations
You can learn the skills Fleet Formations and Fleet Coordination to create specific formations after fleet warps. Skill levels in Fleet Formations gives you more options in formation types and Fleet Coordination increases the possible size of those formations. There are six possible formations, described with ingame tooltips:
- Point Formation: Arranges ships in random positions within a tight sphere. (this formation requires no skills)
- Sphere Formation: Arranges ships randomly within a large sphere and respects size configurations made by the commander.
- Plane Formation: Arranges ships in a flat square and respects size and spacing configurations made by the commander. 1)
- Wall Formation: Arranges ships in a vertical square and respects size and spacing configurations made by the commander. 1)
- Arrow Formation: Arranges ships in a forward facing wedge and respects size and spacing configurations made by the commander. 1)
- Relative Formation: Maintains the position of ships in fleet when the warp was initiated, relative to the commander initiating warp. Relative formation has a range of 200km and will not warp members outside that distance.
Sphere, Plane, Wall and Arrow formations can have the following size options: 10, 20, 30, 40, 50 or 100 km.
Plane, Wall and Arrow formations can also have the following spacing options: 1, 2, 3, 4, 5 or 10 km. They also have this note: If the fleet is too large for the formation, given the selected size and spacing, some ships will take up positions nearby.

