Overheating
Overloading (sometimes also called overheating) a module allows you to get more output from it for a short time. As the name suggests, overloading isn't something you can do indefinitely. Eventually you will burn your module out, making it inoperable.
However, if used with care or in an emergency, the benefit gained from an overloaded module could be the difference between losing your ship and killing your enemy. Good pilots know when the risk is worth the possible reward.
Overloading -- and kowing how and when to overload -- is a very important skill in small fleet and solo PvP.
Overloading in Dominon
With the arrival of the Dominion expansion (in December 2009) the skill requirements for overloading have dropped significantly bringing them, for the first time, within the reach of relatively new players (and therefore more of Eve University's pilots).
The skill required to be able to overload your modules is called Thermodynamics.
Thermodynamics requires :
- Engineering at level 5,
- Energy Management at level 3 (instead of 5)
- Science at level 4
The big change here is the lowering of the required level of Energy Management down from 5 to 3, making it much faster to train. Engineering level 5 is still quite a time sink, but is highly recommended for new pilots for other reasons: the final extra five percent of powergrid makes it easier to maximise fittings on any ship.
Controlling Overloading
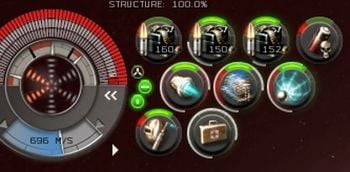
You can begin overloading a specific module by clicking the green light at the top of the module button. You can turn it off the same way -- note, though, that it won't turn on or off until the next cycle begins. Alternatively you can right click the module and choose to overload it.
In some circumstances, you may need to overload many modules as fast as possible. You can choose to overload an entire rack (all the highslots, all the mid slots, or all the low slots) via the small buttons to the left of each rack.
The effects of overloading vary depending on the module. Most weapons will generate more damage (in the region of 15%). Tackling modules like webifiers get more range (about 20%). Propulsion devices like Afterburners boost your speed even more (roughly 50% more). With such benefits, it is easy to see that overloading is very powerful in the right circumstances.
Not all modules can be overloaded - cloaking devices and damage controls can't, for example.

Heat
Modules that are overloaded generate heat. This heat builds up relatively quickly over time, and causes damage to the module, and any module next to it in the same rack. Heat damage is what limits the use of overloading and has to be balanced between the need for the extra boost, and the risk of losing the module entirely.
Every module has a certain amount of health (visible in the repair shop or when you compare multiple mods from the variant tab on the info screen) and overloading does a set amount of damage, found in the attributes tab of the info window for the module. When the amount of heat damage is greater than the module health, the module will cease working until it is repaired in a station.
Two modules overloaded, and next to each other in the same rack will damage each other as well as themselves, causing them to burn out that much faster. Care has to be taken whilst fitting a ship to try and fit modules that are likely to be overloaded away from each other.
Note that whether or not modules are 'next to each other' is determined on the fitting screen, and not the location of the buttons on your screen in space. Moving the buttons around has no effect on heat transfer.
Some people fit offlined modules inbetween modules they plan on overloading to act as a 'heat sink' and limit the transfer of heat. Of course this means a slot isn't being fully used, and could be a waste. A balance has to be established depending on the situation.
Repairing Heat damage
If a module has been damaged by heat, but not destroyed, then in-space repairs can be made using Nanite repair paste. This isn't excessively expensive, however the costs can add up if you use it alot. As a rough rule of thumb, 1 minute, and 1 unit of paste repairs 10 points of heat damage. Several skills can be trained to speed up repair time, and reduce the amount of paste required. If a module is destroyed (burntout) then it can't be repaired with Nanite paste. The module isn't useable whilst it is being repaired.