Difference between revisions of "User:Syn xadi/Sandbox"
From EVE University Wiki
m (→Notes) |
m (→Examples) |
||
| Line 461: | Line 461: | ||
#recommended3=third column | #recommended3=third column | ||
#notes=notes for the fitting, please use the * tag to separate multiple lines (for readability) | #notes=notes for the fitting, please use the * tag to separate multiple lines (for readability) | ||
| − | |||
| − | |||
| − | |||
| − | |||
| − | |||
| − | |||
| − | |||
| − | |||
| − | |||
| − | |||
| − | |||
| − | |||
| − | |||
| − | |||
| − | |||
| − | |||
| − | |||
| − | |||
| − | |||
| − | |||
| − | |||
| − | |||
| − | |||
| − | |||
| − | |||
| − | |||
| − | |||
| − | |||
| − | |||
| − | |||
| − | |||
| − | |||
| − | |||
| − | |||
| − | |||
| − | |||
| − | |||
| − | |||
| − | |||
| − | |||
| − | |||
| − | |||
| − | |||
| − | |||
| − | |||
==Expression Test== | ==Expression Test== | ||
{{#expr:2+2}} | {{#expr:2+2}} | ||
Revision as of 18:28, 29 April 2012
Contents
Div Test 1
Div Test 2
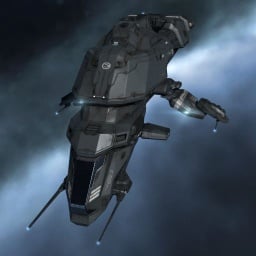
Tengu
Cruiser - Strategic Cruiser
The Condor is the Caldari T1 scout ship, useful for quick transport of small cargo and some level 1 missions.
Ship Bonuses :
Caldari Strategic Cruiser Skill Bonus: 5% Reduction in the amount of heat damage absorbed by modules per level.
Caldari Strategic Cruiser Skill Bonus: 5% Reduction in the amount of heat damage absorbed by modules per level.
Div Test 3
| Freshman. |
Div Test 4
| Freshman. |
Class Linking
| ||||||||||
Fitting Test
|
FITTINGS
|
|
Usage Guide
- Copy the codes below to your article
{{Fittings
|name=
|high=
|mid=
|low=
|charges=
|drones=
|rigs=
|recommended1=
|recommended2=
|recommended3=
|notes=
}}
- Fill out the appropriate parameter values (see parameter list below), if you feel the fitting does not need the information given by that parameter, leave them empty and do not erase the parameter line!. For example, if the fitting does not need the recommended skills information, leave the recommended1, recommended2, recommended3 lines as it is, do not erase anything, just leave them empty.
- If the parameter value contains multiple lines, separate the lines with <br> tag, for example, if you want to have the high slot filled with three Heavy Missile Launcher II, you should write them on the high parameter like this:
{{Fittings
|name=
|high=Heavy Missile Launcher II<br>Heavy Missile Launcher II<br>Heavy Missile Launcher II
|mid=
|low=
|charges=
|drones=
|rigs=
|recommended1=
|recommended2=
|recommended3=
|notes=
}}
- dont do it like this
{{Fittings
|name=
|high=Heavy Missile Launcher II
Heavy Missile Launcher II
Heavy Missile Launcher II <-- the template won't recognize the line breaks
|mid=
|low=
- nor this
{{Fittings
|name=
|high=Heavy Missile Launcher II<br>
Heavy Missile Launcher II<br>
Heavy Missile Launcher II<br>  <-- we don't need the extra <br>
|mid=
|low=
- also, not like this
{{Fittings
|name=
|high=3x Heavy Missile Launcher II <-- people won't be able to import them to EFT/EveMon
|mid=
|low=
- The notes parameter requires a bit of attention so the wiki can render it properly and to improve readability. Use the * tag to separate multiple lines. Press <enter> or <return> after the = sign on the notes parameter and write the notes on a new line so the * tag stays on the leftmost of the editor (no spacing or indentation before the * tag), like this :
|recommended2=
|recommended3=
|notes=
*This setup is [http://forum.eveuniversity.org/viewtopic.php?p=35587#p35587 Kelduum Revaan's T1 Ultimate Drake Tank Setup].
*Training plan for use with [[Evemon_and_EFT|EVEmon]] can be found [[Media:Drake_t1_with_drones.xml|here]] (right click, save link as).
*It is recommended to fit a [[Full_T2_Tank#Shield_Tank|T2 shield tank]] as soon as possible.
*Training [[Missile_Launchers#Missile_Support_Skills|missile support skills]] will increase DPS output.
*Training [[Drones#Skills|drone support skills]] will increase drone effectiveness.
}}
- If you happen to write multiple fits, or there is another fitting for the ship you want to post the fitting for, do not add any space or linebreaks (<enter> or <return>) after or before the fitting brackets. If you put a space or breaks after a fit on the same ship, the template won't stack it sideways (horizontally), so it would be hard for readers to compare the fittings. Below is how to post a correct two or more fitting of the same ship :
{{Fittings
|name=Fitting #1 of X ship
|high=
|mid=
|low=
|charges=
|drones=
|rigs=
|recommended1=
|recommended2=
|recommended3=
|notes=
}}{{Fittings               <-- notice that there's no space nor breaks on these two fittings
|name=Fitting #2 of X ship
|high=
|mid=
|low=
|charges=
|drones=
|rigs=
|recommended1=
|recommended2=
|recommended3=
|notes=
}}
- Parameter List :
- name=the name of the fitting
- high=modules for the high slot
- mid=modules for the middle slot
- low=modules for the low slot
- charges=charges used for the fitting
- drones=drones used for the fitting
- rigs=rigs used for the ship on the fitting
- recommended1=first column of list of minimum recommended skills to use the fitting effectively
- recommended2=second column
- recommended3=third column
- notes=notes for the fitting, please use the * tag to separate multiple lines (for readability)
Expression Test
4
