|
|
| (77 intermediate revisions by 2 users not shown) |
| Line 1: |
Line 1: |
| == Standard setup ==
| | {| |
| Below is a standard setup for your tank in our fleets. These fits are probably considered overtanked by many public communities and they are in fact overtanked for the most part. There are several reasons for it, mainly it is for safety, to give us a larger buffer and more leeway to save ships if things go wrong. We are not as concerned about pushing for efficiency above safety.
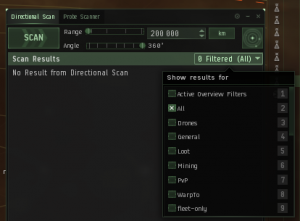
| | | valign="top" | [[image:Incursions scout filters.png|thumb|Foo ...]] |
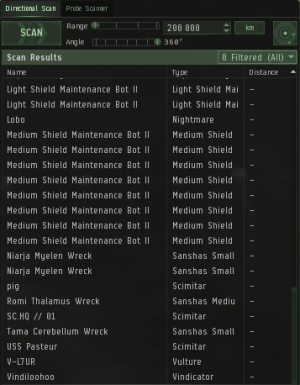
| | | | valign="top" | [[image:Incursions scout site taken.png |thumb|Foo ...]] |
| We also recommend fits that are flexible in terms of being able to do vanguards, assaults and even headquarter sites with the same ship. So some seemingly superfluous rigs are there to enable the ships to just swap out a few midslots and go from vanguards to headquarter sites.
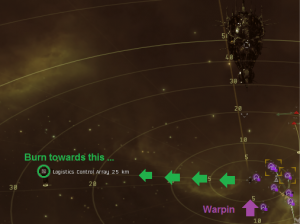
| | | valign="top" | [[image:Incursions hacker array.png|thumb|Foo ...]] |
| {| class="wikitable" style="font-size:90%; text-align:left; padding:0px; border-collapse:collapse;" | | | valign="top" | [[image:Incursions scout site clear.png |thumb|Foo ...]] |
| |- | |
| ! style="background:#222222;" | Slots
| |
| ! style="background:#222222;" | Regular ships
| |
| ! style="background:#222222;" | Navy / Fleet Issue
| |
| ! style="background:#222222;" | Advanced
| |
| |- valign="top"
| |
| | nowrap style="text-align:center; background:#111111;" | [[image:icon mid slot.png|24px]]
| |
| | nowrap style="vertical-align:middle;" | [[Image:icon_hardener_adaptive_ii.png|24px|Adaptive Invulnerability Field II]] Adaptive Invulnerability Field II<br>
| |
| [[Image:icon_hardener_adaptive_ii.png|24px|Adaptive Invulnerability Field II]] Adaptive Invulnerability Field II<br>
| |
| [[Image:icon_hardener_em_ii.png|24px|EM Ward Field II]] EM Ward Field II
| |
| | nowrap style="vertical-align:middle;" | [[Image:icon_hardener_adaptive_deadspace.png|24px|Pithum C-Type Adaptive Invulnerability Field]] Pithum C-Type Adaptive Invuln ...<br>
| |
| [[Image:icon_hardener_adaptive_ii.png|24px|Adaptive Invulnerability Field II]] Adaptive Invulnerability Field II<br>
| |
| [[image:icon mid slot.png|24px]] Freed up mid slot
| |
| |- valign="top" | |
| | nowrap style="text-align:center; background:#111111;" | [[image:icon low slot.png|24px]]
| |
| | nowrap | [[image:module icon damage control tech2.png|24px]] Damage Control II
| |
| | nowrap | [[image:icon low slot.png|24px]] Freed up low slot
| |
| | nowrap | [[image:icon low slot.png|24px]] Freed up low slot
| |
| |- valign="top" | |
| | nowrap style="text-align:center; background:#111111;" | [[image:icon rigs.png|24px]]
| |
| | nowrap | [[image:module icon shield rig tech1.png|24px|Large Core Defense Field Extender I]] Core Defense Field Extender I<br>
| |
| [[image:module icon shield rig tech1.png|24px|Large Core Defense Field Extender I]] Core Defense Field Extender I<br>
| |
| [[image:module icon shield rig tech1.png|24px|Large Anti-Thermal Screen Reinforcer I]] Anti-Thermal Screen Reinforcer I
| |
| | nowrap | [[image:module icon shield rig tech1.png|24px|Large Core Defense Field Extender I]] Core Defense Field Extender I<br>
| |
| [[image:module icon shield rig tech2.png|24px|Large Anti-Thermal Screen Reinforcer II]] Anti-Thermal Screen Reinforcer II<br>
| |
| [[image:icon rigs.png|24px]] Freed up rig slot
| |
| | nowrap | [[image:module icon shield rig tech2.png|24px|Large Core Defense Field Extender II]] Core Defense Field Extender II<br>
| |
| [[image:module icon shield rig tech2.png|24px|Large Anti-EM Screen Reinforcer II]] Anti-EM Screen Reinforcer II<br>
| |
| [[image:icon rigs.png|24px]] Freed up rig slot
| |
| |- valign="top" | |
| ! style="text-align:center; background:#111111;" | Resists
| |
| ! nowrap style="background:#222222;" | [[Image:icon_resist_em.png|24px|Electromagnetic resistance]]75,9%[[Image:icon_resist_therm.png|24px|Thermal resistance]]70%[[Image:icon_resist_kin.png|24px|Kinetic resistance]]72,8%[[Image:icon_resist_exp.png|24px|Explosive resistance]]77,4%
| |
| ! nowrap style="background:#222222;" | [[Image:icon_resist_em.png|24px|Electromagnetic resistance]]72,4%[[Image:icon_resist_therm.png|24px|Thermal resistance]]68,1%[[Image:icon_resist_kin.png|24px|Kinetic resistance]]69%[[Image:icon_resist_exp.png|24px|Explosive resistance]]74,1%
| |
| ! nowrap style="background:#222222;" | [[Image:icon_resist_em.png|24px|Electromagnetic resistance]]65,8%[[Image:icon_resist_therm.png|24px|Thermal resistance]]64,9%[[Image:icon_resist_kin.png|24px|Kinetic resistance]]73,7%[[Image:icon_resist_exp.png|24px|Explosive resistance]]78,1%
| |
| |- valign="top"
| |
| ! style="text-align:center; vertical-align:middle; background:#200000; padding:0px;" | [[image:icon overheating.png|24px]]
| |
| ! nowrap style="background:#200000;" | [[Image:icon_resist_em.png|24px|Electromagnetic resistance]]83,8%[[Image:icon_resist_therm.png|24px|Thermal resistance]]74,5%[[Image:icon_resist_kin.png|24px|Kinetic resistance]]76,9%[[Image:icon_resist_exp.png|24px|Explosive resistance]]80,8%
| |
| ! nowrap style="background:#200000;" | [[Image:icon_resist_em.png|24px|Electromagnetic resistance]]81,4%[[Image:icon_resist_therm.png|24px|Thermal resistance]]71,8%[[Image:icon_resist_kin.png|24px|Kinetic resistance]]73,6%[[Image:icon_resist_exp.png|24px|Explosive resistance]]78%
| |
| ! nowrap style="background:#200000;" | [[Image:icon_resist_em.png|24px|Electromagnetic resistance]]71,8%[[Image:icon_resist_therm.png|24px|Thermal resistance]]71,8%[[Image:icon_resist_kin.png|24px|Kinetic resistance]]78,9%[[Image:icon_resist_exp.png|24px|Explosive resistance]]82,4%
| |
| |- valign="top"
| |
| ! style="text-align:center; background:#111111;" | Reason
| |
| | This fit is intentionally overtanked. It's supposed to be a fit you can run even before you get all your support skills to V, before you've maxed out skills like '''Shield Management''' and gotten a decent buffer on your ship.
| |
| | |
| On ships like the [[Rokh]] with shield resist bonuses, you can safely remove one invulnerability field or the damage control and still have good resists.
| |
| | '''Navy''' and '''Fleet Issue''' ships have much higher base stats than regular ships, so they rarely need the extender rigs to boost their shield hp buffer. Some will still have one, for more flexibility when doing Assaults or Headquarter sites.
| |
| | |
| This variant could be adopted to normal ships as well, unless they have very low base hit points.
| |
| | The upgrade to a deadspace hardener means you can free up a valuable midslot. The tech two anti-EM rig is there to bring the EM up to par, whilst the tech two extender rig is merely there because you're using the rig anyway (and blowing up your signature) so making it a tech two rig is simply to give the most out of it.
| |
| |- valign="top"
| |
| ! style="background:#111111;" | Price
| |
| ! style="background:#002000;" | Cheap
| |
| ! style="background:#000020;" | Affordable
| |
| ! style="background:#200000;" | Costly
| |
| |}
| |
| === Interchangeable fits ===
| |
| As mentioned above, our fits are mostly interchangeable so that we can shift focus from vanguards to assaults or higher by changing a few modules. So here are the major differences in what you need added to your fits as you move up the site sizes.
| |
| {| class="wikitable" style="font-size:90%; text-align:left; padding:0px; border-collapse:collapse;"
| |
| |- valign="top"
| |
| ! style="background:#222222;" | Slots
| |
| ! style="background:#222222;" | Assaults
| |
| ! style="background:#222222;" | Headquarters
| |
| ! style="background:#222222;" | Motherships
| |
| |- valign="top"
| |
| | nowrap style="text-align:center; background:#111111;" | [[image:icon mid slot.png|24px]]
| |
| | nowrap | [[image:Module icon shield extender tech2.png|24px|Large Shield Extender II]] Large Shield Extender II
| |
| | nowrap | [[image:Module icon shield extender tech2.png|24px|Large Shield Extender II]] Large Shield Extender II<br>[[image:Module icon em ward amplifier tech2.png|24px|EM Ward Amplifier II]] EM Ward Amplifier II<br>[[image:Module icon afterburner tech1.png|24px|Afterburner]] Experimental 100MN Afterburner I | |
| | nowrap | [[image:Module icon shield extender tech2.png|24px|Large Shield Extender II]] Large Shield Extender II<br>[[image:Module icon shield extender tech2.png|24px|Large Shield Extender II]] Large Shield Extender II<br>[[image:Module icon em ward amplifier tech2.png|24px|EM Ward Amplifier II]] EM Ward Amplifier II<br>[[image:Module icon afterburner tech1.png|24px|Afterburner]] Experimental 100MN Afterburner I
| |
| |- valign="top"
| |
| | nowrap style="text-align:center; background:#111111;" | [[image:icon low slot.png|24px]]
| |
| | nowrap | [[image:module icon damage control tech2.png|24px]] Damage Control II
| |
| | nowrap | [[image:module icon damage control tech2.png|24px]] Damage Control II
| |
| | nowrap | [[image:module icon damage control tech2.png|24px]] Damage Control II
| |
| |- valign="top"
| |
| ! style="text-align:center; background:#111111;" | Reason
| |
| | The significantly higher alpha in assault sites warrants adding another shield extender to your ship.
| |
| | |
| Most ships simply swap out one of their webs for the large shield extender.
| |
| | For headquarter sites the need to move is greater, as well as the need to mitigate damage, which is why most headquarter sites requires you to fit an afterburner as well.
| |
| | |
| You also swap out the '''EM Ward Field''' for an '''EM Ward Amplifier''', which is weaker but will remain in effect even if you get completely neuted out.
| |
| | For mothership sites the need to move about is less, but the need to move in order to mitigate damage is still there. The neuting thread also remains.
| |
| | |
| The increased alpha from the mothership's bombers warrants adding yet another shield extender to survive the initial volley of the bombers.
| |
| |} | | |} |


