More actions
No edit summary |
No edit summary |
||
| Line 7: | Line 7: | ||
== Setup == | == Setup == | ||
Download from | Download from [https://obsproject.com/]. Read [https://obsproject.com/wiki/OBS-Studio-Quickstart] for a quick start guide. | ||
| Line 31: | Line 31: | ||
===== Video Source ===== | ===== Video Source ===== | ||
The most important input will be the game screen. Since we dont want to record our desktop we have to tell OBS to only capture windows that belong to the EVE client, so | The most important input will be the game screen. Since we dont want to record our desktop we have to tell OBS to only capture windows that belong to the EVE client, so click the '+'-sign to add a new source and select "Game Capture". Name it and select OK; a new option screen will pop up. | ||
| Line 43: | Line 43: | ||
===== | ===== Audio Source ===== | ||
This is the part that can be a bit tricky to set up, depending on the system. Windows does not allow for audio routing like Linux does, so is by default limited to a single input and output source. That means that if the game and mumble audio is to be captured, all of the system audio needs to be included. This can be solved by installing audio routing software like [https://www.vb-audio.com/Voicemeeter/banana.htm VOICEMEETER] | |||
Revision as of 23:34, 14 May 2020
OBS
OBS is a professional recording and streaming software.
Setup
Download from [1]. Read [2] for a quick start guide.
Windows 10
Creating a Scene
A scene is a collection of input streams and resources that make up what you want to record. Add a scene to the list by clicking on the '+'-sign in the "Scenes" window. Name it appropriately so you know what is being displayed here.
Adding Sources
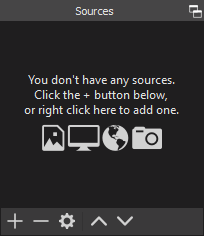
Now we have to add the things that need to be capturered under the "sources" window.
Video Source
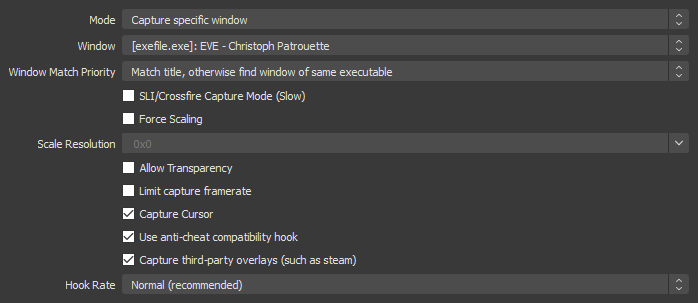
The most important input will be the game screen. Since we dont want to record our desktop we have to tell OBS to only capture windows that belong to the EVE client, so click the '+'-sign to add a new source and select "Game Capture". Name it and select OK; a new option screen will pop up.
We are going to assume that the game is played in windowed fullscreen mode, which would allow for easy multiboxing and switching between applications over multiple screens. Other modes would work similarly with these settings. It is important that the game is actually running with the desired character so OBS can save the selection and differentiate between additional multiple characters logged in. Chose "exefile.exe" as the EVE game client with the desired name of the character at the end. Chose "Match title, otherwise find window of same executable" for a graceful fallback if the initially selected character is not online and you still want to record with a different one. It is important to activate "Capture third-party overlays (such as steam)" to record the mumble overlay and see who is speaking in the video. This can help immensely with the analysis of combat scenes and their communication situation.
Audio Source
This is the part that can be a bit tricky to set up, depending on the system. Windows does not allow for audio routing like Linux does, so is by default limited to a single input and output source. That means that if the game and mumble audio is to be captured, all of the system audio needs to be included. This can be solved by installing audio routing software like VOICEMEETER
Recoding Settings
Seperate audio


