Difference between revisions of "Archive:WHC Mapper"
| Line 22: | Line 22: | ||
==Signatures== | ==Signatures== | ||
| − | Click | + | To add a new signature: |
| + | *Click on the "Signatures" tab | ||
| + | *Fill in the "ID", "Type" and "Info" fields and click "Add Sig" | ||
| + | |||
| + | To edit an existing signature: | ||
| + | *Click the pencil icon in the "Actions" column and edit the "ID", "Type" or "Info" fields and click "Save Sig" | ||
| + | |||
| + | To delete an existing signature: | ||
| + | *Click the delete icon (circle with a slash through it) in the "Actions" column | ||
| + | |||
===Mass Adding Signatures=== | ===Mass Adding Signatures=== | ||
#Drop probes so that they cover the whole system (deep space or combat probes are useful for this) | #Drop probes so that they cover the whole system (deep space or combat probes are useful for this) | ||
| Line 29: | Line 38: | ||
#Press Ctrl-A to select all results | #Press Ctrl-A to select all results | ||
#Press Ctrl-C to copy | #Press Ctrl-C to copy | ||
| − | #Click the tiny arrow next to "Add Signature" on the mapper | + | #Click the tiny arrow next to "Add Signature" on the mapper |
#Press Ctrl-V to paste all sigs | #Press Ctrl-V to paste all sigs | ||
Revision as of 20:21, 2 June 2014
Registration and Logging In
Location is: https://euni.evewspace.com/. Registration Code is in the WHC.E-uni welcome mail.
To register, simply click the "Register" button and fill the fields. Your name should be exactly the same as your in-game name, otherwise you'll keep getting booted from the mapper.
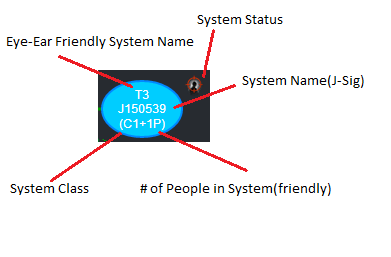
What does it all mean?
Adding a System
- Click on the system it's added to
- Click "Add System"
- Enter the details of the system/WH:
- System: J-Number or system name for k-space systems (this field fills in automatically with the name of they system you're currently in but you can edit it if needed)
- Friendly Name: The short name we use (WHC Mapping Scheme)
- Time Status: End of life means less than 4 hours ("reaching the end of its natural lifetime")
- Mass Status: Normal (not yet significantly disrupted), Fist shrink (stability reduced), critical (verge of collapse)
- Type: WH id (eg K162) in the pre-existing system
- Type: WH id in the new system
- Bubbled: Check one/both of these if the hole is bubbled on one/both sides
(Note that one of the type fields will always be K162)
Signatures
To add a new signature:
- Click on the "Signatures" tab
- Fill in the "ID", "Type" and "Info" fields and click "Add Sig"
To edit an existing signature:
- Click the pencil icon in the "Actions" column and edit the "ID", "Type" or "Info" fields and click "Save Sig"
To delete an existing signature:
- Click the delete icon (circle with a slash through it) in the "Actions" column
Mass Adding Signatures
- Drop probes so that they cover the whole system (deep space or combat probes are useful for this)
- Use a filter that shows only Cosmic Signatures (we don't want anomalies, ships, or structures in the mapper)
- Highlight a scan result
- Press Ctrl-A to select all results
- Press Ctrl-C to copy
- Click the tiny arrow next to "Add Signature" on the mapper
- Press Ctrl-V to paste all sigs
Adding new POS intel to the mapper
Auto mode
- The easiest way to add a new POS is in "Auto" mode. To do this, you need to be on grid with the POS
- Fill in the POS details
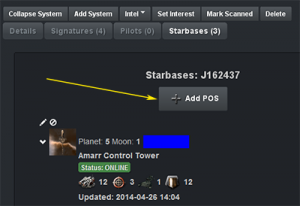
- Make sure that you are in the right system in the mapper and click the plus button in the "Starbases" tab - see image 1 on right
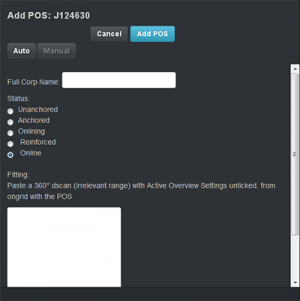
- See image 2 on right for the following steps
- The Auto/Manual selection should be on "Auto" by default - leave it at that
- Fill in the "Full Corp Name":
- Show info on the control tower, then click on the corp icon to show info on the corp that owns it
- Drag the corp icon from the show info window into any chat window input box (this will place the corp name into the box) and simply copy/paste that corp name into the "Full Corp Name" field (you can then delete it from the input box)
- You can also just type in the corp name yourself but using the two steps above can be easier (for some people) and more accurate
- Select the "Status" - we usually only add "Online" POSes but there is no rule against adding in-active (anchored) POSes
- In the "Fitting" window, paste a 360 degree d-scan (irrelevant range - as long it covers the POS and nearby moon) with "Active Overview Settings" un-ticked
- Click the blue "Add POS" button and you're done
Manual mode
- Sometimes you may get an error trying to add a POS in Auto mode, at which point you can add it manually. If this happens, it would be helpful if you file a bug report. Please include all the details you entered.
- Fill in the POS details
- Click the "Manual" button
- Fill in the "Full Corp Name" as above
- Also fill in the other info - not shown in the image - (Planet, Moon, Tower Name, Tower Type)
- Select the "Status" as above
- Fill in the "Fitting" as above but make sure you also tick the "Parse as D-Scan Paste" checkbox at the bottom (not shown in the image)
- Click the blue "Add POS" button and you're done
Editing a Connection
- Click on the WH id (eg K162; doesn't matter which direction)
- Change time/shrink etc.
- Click save
System destinations
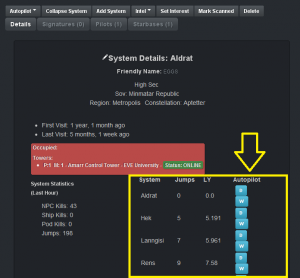
When you click on a k-space connection on the mapper:
- You will see the system details
- Under the details, you will notice seeing popular trade hubs along with E-Uni HQ.
Clicking on the "D" button will set destination while clicking on the "W" will set a waypoint. Which is super handy if you went on a roam and want to make it back to a certain connection.
You can add personal k-space destinations by:
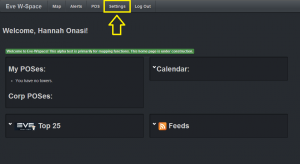
- Bringing up the mapper
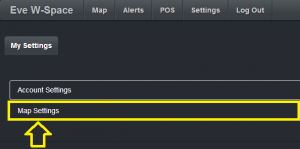
- Clicking on "Settings" tab
- Click on "Map settings"
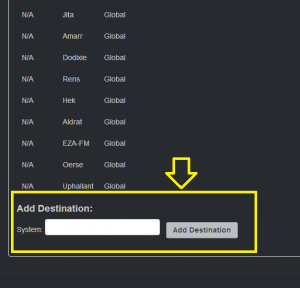
- After all the global mapper destinations you will see that you can add a k-space system for personal uses.
This will allow you to set custom personal destinations that will tell you how many jumps it will take from the current k-space connection you have clicked on. Don't worry about revealing your super secret system as only you will be able to see it. Setting global destinations requires admin rights.
