More actions
No edit summary |
No edit summary |
||
| Line 9: | Line 9: | ||
{|class=wikitable style="width: 900px;background:#111111;text-align:center" | {|class=wikitable style="width: 900px;background:#111111;text-align:center" | ||
|- | |- | ||
|[[File:Connection to c1.jpg| | |[[File:Connection to c1.jpg|350px|border]] | ||
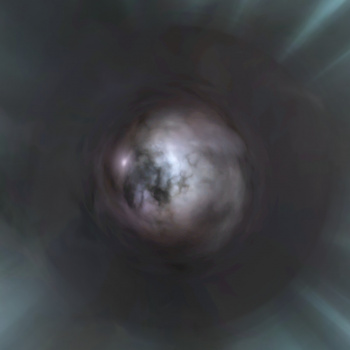
Wormholes leading to class 1 systems have grayish clouds with some black spots and some blue and cyan details. A wormhole leading to C1 system may look similar to a wormhole leading to C2 or C3 system, the most notable difference is lack of any notable detail. | |Wormholes leading to class 1 systems have grayish clouds with some black spots and some blue and cyan details. A wormhole leading to C1 system may look similar to a wormhole leading to C2 or C3 system, the most notable difference is lack of any notable detail. | ||
|- | |- | ||
|[[File:Connection to c2.jpg| | |[[File:Connection to c2.jpg|350px|border]] | ||
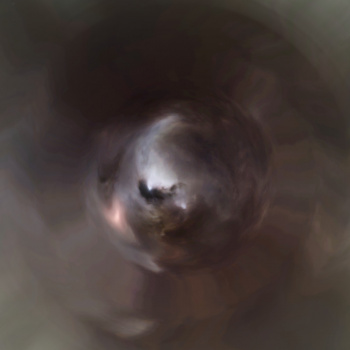
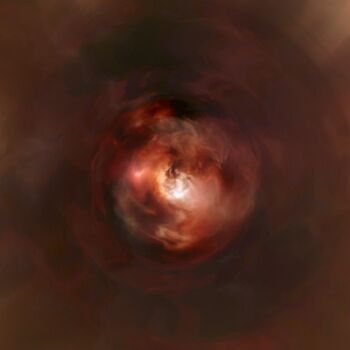
Wormholes leading to class 2 have a brownish hue with some gray clouds. The most notable feature of this skybox is the black spot in the light gray cloud. | |Wormholes leading to class 2 have a brownish hue with some gray clouds. The most notable feature of this skybox is the black spot in the light gray cloud. | ||
|- | |- | ||
|[[File:Connection to c3.jpg| | |[[File:Connection to c3.jpg|350px|border]] | ||
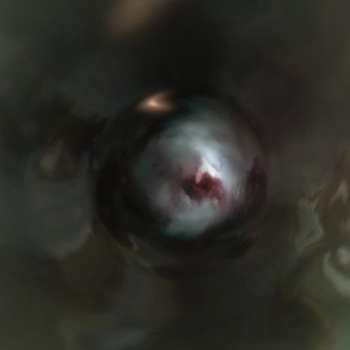
Wormholes leading to class 3 have again grayish clouds. The distinct red cloud easy to identify mark of a C3 connection. | |Wormholes leading to class 3 have again grayish clouds. The distinct red cloud easy to identify mark of a C3 connection. | ||
|- | |- | ||
|[[File:Connection to c4.jpg| | |[[File:Connection to c4.jpg|350px|border]] | ||
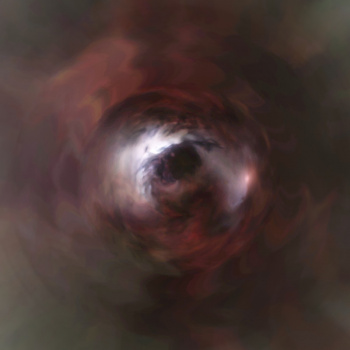
Wormholes leading to class 4 are mainly dark red with one bright white cloud and some distincth black spots. | |Wormholes leading to class 4 are mainly dark red with one bright white cloud and some distincth black spots. | ||
|- | |- | ||
|[[File:Connection to c5.jpg| | |[[File:Connection to c5.jpg|350px|border]] | ||
Wormholes leading to class 5 are again dark red but with some brown hues mixed in. The white cloud is not as bright as it in C3 connection. | |Wormholes leading to class 5 are again dark red but with some brown hues mixed in. The white cloud is not as bright as it in C3 connection. | ||
|- | |- | ||
|[[File:Connection to c6.jpg| | |[[File:Connection to c6.jpg|350px|border]] | ||
Wormholes leading to class 6 are bright orange. | |Wormholes leading to class 6 are bright orange. | ||
|} | |} | ||
| Line 37: | Line 36: | ||
[[image:Connection to solitude.jpg|thumb|The green color indicates the wormholel eading into a Gallente region. An experienced pilot can also identify various objects visible to make a more accurate estimation on the target system, in this particular image Cloud Ring is clearly visible. The region on the other side of the wormhole is Solitude.]] | [[image:Connection to solitude.jpg|thumb|The green color indicates the wormholel eading into a Gallente region. An experienced pilot can also identify various objects visible to make a more accurate estimation on the target system, in this particular image Cloud Ring is clearly visible. The region on the other side of the wormhole is Solitude.]] | ||
Wormholes leading to K-Space also take the skybox of the region on the other side. A red K-Space wormhole will most likely take you to a Minmatar region, yellow k-space connection to Amarr region, blue k-space wormhole to Caldari region and green k-space connection to Gallente region. Null regions are mostly black with smaller colored clouds. | Wormholes leading to K-Space also take the skybox of the region on the other side. A red K-Space wormhole will most likely take you to a Minmatar region, yellow k-space connection to Amarr region, blue k-space wormhole to Caldari region and green k-space connection to Gallente region. Null regions are mostly black with smaller colored clouds. | ||
{{clear}} | |||
==Wormhole mass restriction== | ==Wormhole mass restriction== | ||
| Line 45: | Line 43: | ||
The color of the flare around a wormhole will tell you the maximum mass of ships that can go through. | The color of the flare around a wormhole will tell you the maximum mass of ships that can go through. | ||
{| class= | |||
{|class=wikitable style="width: 900px;background:#111111;text-align:center" | |||
|- | |- | ||
|[[File:owc_flare-frigate_960.jpg| | |[[File:owc_flare-frigate_960.jpg|350px|border]] | ||
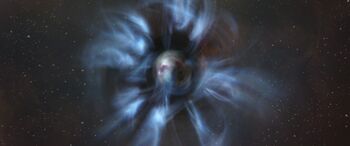
|A royal blue aurora indicates wormholes that only allow frigate-mass ships (5,000,000 kg). This is the most important one to recognise as it will allow scouting frigate to pass through but deny the main fleet from jumping. | |||
|- | |- | ||
|[[File:owc_flare-small_960.jpg| | |[[File:owc_flare-small_960.jpg|350px|border]] | ||
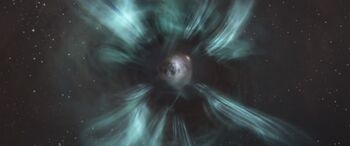
|A wormhole with a teal aurora allows medium sized ships, including cruisers, battlecruisers and industrials, to pass through (20,000,000 kg). | |||
|- | |- | ||
|[[File:owc_flare-medium_960.jpg| | |[[File:owc_flare-medium_960.jpg|350px|border]] | ||
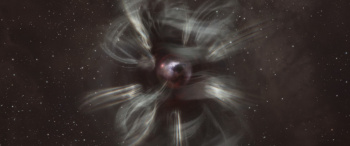
|A turquoise aurora highlights a wormhole that allows every ship below capital hulls to pass through (300,000,000 kg). | |||
|- | |- | ||
|[[File:owc_flare-massive_960.jpg|350px|border]] | |||
|A yellow aurora indicates wormholes that freighters and capitals can transit (1,000,000,000 kg, 1,350,000,000 kg or 1,800,000,000 kg). | |||
|} | |} | ||
Revision as of 19:45, 12 February 2018
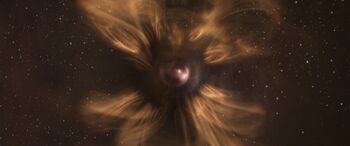
The visuals of a wormhole gives you information on the wormhole and on the target system without need to jump through. The outline corresponds to jump mass limit and the center contains the skybox of the destination system. The wobbling animation tells the lifetime left anad the visual size of the whole wormhole tells how much mass is left.
Showing info on the wormhole will also tell you less accurate info on the destination system, mass limit and time left.
Wormhole skybox
The center eye of a wormhole will always take the skybox of the destination system This can be used to see what what class wormhole system it leads to or what region it leads to.
Leading to known space
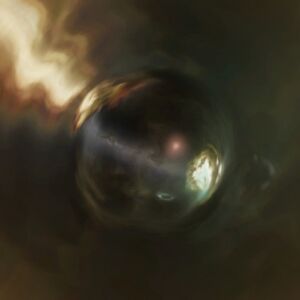
Wormholes leading to K-Space also take the skybox of the region on the other side. A red K-Space wormhole will most likely take you to a Minmatar region, yellow k-space connection to Amarr region, blue k-space wormhole to Caldari region and green k-space connection to Gallente region. Null regions are mostly black with smaller colored clouds.
Wormhole mass restriction
Wormholes come with mass restrictions. Wormholes not only allow certain amounts of mass through them in their lifetime, but they also have mass restrictions for each particular transfer.
The color of the flare around a wormhole will tell you the maximum mass of ships that can go through.
Wormhole connection permutations
All possible permutations for wormhole classes of 1-6. Wormhole colors

