More actions
Elan Vital (talk | contribs) →Pre-fleet: Deleted this section. |
Elan Vital (talk | contribs) →Bombing techniques: Deleted section |
||
| Line 208: | Line 208: | ||
* Failing to move away (or "starburst") away from a landing area, causing fleetmates to uncloak as they land | * Failing to move away (or "starburst") away from a landing area, causing fleetmates to uncloak as they land | ||
* Not warping off quickly enough after being targeted by an enemy (within three seconds) | * Not warping off quickly enough after being targeted by an enemy (within three seconds) | ||
==See Also== | ==See Also== | ||
Revision as of 17:43, 21 April 2023
Stealth bombers, often abbreviated as "bombers", represent a captivating subclass of frigates in EVE Online. Equipped with cloaking devices, these vessels can traverse star systems without being detected by directional scanners or combat probes. When flying solo, stealth bombers excel at surveillance and intelligence gathering.
In addition to cloaked scouting and reconnaissance, stealth bombers can support fleets with on-grid electronic warfare and damage capabilities. These agile vessels can silently approach targets and unveil themselves at a strategically chosen moment to unleash potent torpedoes and bombs. As one of New Eden's most formidable T2 frigates, stealth bombers boast considerable firepower, but they also exhibit fragility and a slow base warp time.
This combination of attributes makes every uncloaked moment for stealth bombers a high-stakes encounter, both for the pilots and their adversaries. To effectively command these powerful ships, pilots must remain acutely aware of their vulnerabilities and exercise caution.
Stealth Bombers
Stealth bombers are specialized vessels that can warp while cloaked and lack sensor recalibration delays, enabling them to lock targets immediately after decloaking. Equipped with battleship-sized torpedo launchers and bomb launchers, they can deploy area-of-effect weapons exclusively in nullsec or wormhole space. Stealth bombers deliver exceptional alpha strike damage, but their fragility makes them vulnerable to swift destruction if they sustain damage. Consequently, bomber pilots often launch a few salvos or a single bomb before warping away and recloaking. In well-coordinated groups, stealth bombers pose a significant threat to large ships, including capital vessels, particularly in nullsec.
Each stealth bomber has a Covert Ops-based damage bonus for bombs (5% per level) and torpedoes (15% per level) reflecting its empire's associated damage type.
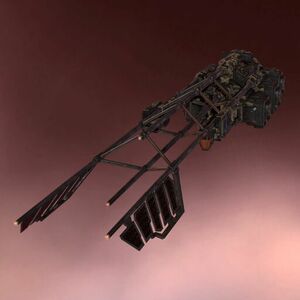
 Purifier The Purifier has the lowest CPU, making it harder to fit. With bonuses for EM torpedoes and bombs, it is effective against shielded targets
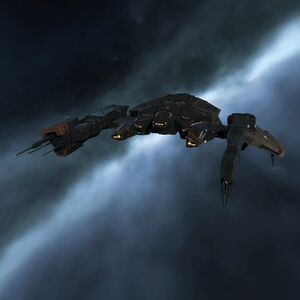
 Manticore Bonused for Kinetic torpedoes and bombs, the Manticore is the easiest stealth bomber to fit due to its high CPU.
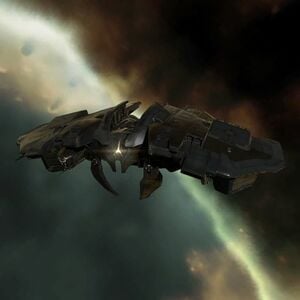
 Nemesis With bonuses for Thermal torpedoes and bombs, the Nemesis is the middle of the pack and a solid pick for most situations. Like the Manticore, its four mid slots offer some extra utility.
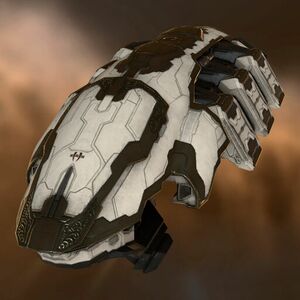
 Hound The Hound has the best base time to warp of the stealth bombers. Its bonuses for Explosive torpedoes and bombs make it effective against armored targets
Stealth Bombers all have the following bonuses, regardless of Empire:
- 75% bonus to torpedo velocity
- 50% bonus to torpedo flight time
- 99.65% bonus reduction in Torpedo Launcher powergrid needs
- 50.00% bonus reduction in Cloak CPU useage
- 100.00% bonus targeting delay after decloaking
| Hound | Manticore | Nemesis | Purifier |
|---|---|---|---|
 |
 |
 |
 |
Torpedoes
Torpedos are slow flying, hard-hitting, long-range missiles launched by torpedo launchers. Launchers are massive compared to typical frigate-sized weapon systems and are designed for extended bombardments of hard targets like battleships and stations. Torpedo launcher magazines have a large capacity, which is offset by their slow firing rate, long flight times, and their trouble targeting and applying damage to small, fast ships. To prevent the obvious exploit of launching torpedoes and then warping out before the torpedoes connect, if a ship enters warp, all torpedoes in-flight vanish immediately. This means that, especially at long range, bombers on a torpedo run must stay on grid until all of their fired torpedoes have landed, to avoid losing damage. The balance between the stealth bomber's fragility and need to stay on grid is part of the inherent challenge of flying these hulls.
Each torpedo type corresponds to a specific damage type in EVE. Inferno, Mjolnir, Nova, and Scourge apply thermal, EM, explosive, and kinetic damage, in that order. Each torpedo inflicts only one type of damage, but all torpedoes deal the same amount of damage. Stealth bombers are bonused for their empire's damage type, so only one type of torpedo is carried in a given bomber's hold.
Bombs
Bombs are untargeted, area-of-effect (AoE) weapons fired by bomb launchers, with stealth bombers being the sole ships capable of equipping them. The use of bombs is prohibited in empire space, restricting their deployment to nullsec or wormhole space outside deadspace pockets.
When skillfully employed, bombs can effectively damage or destroy groups of clustered ships, making them ideal for hit-and-run attacks on unsuspecting foes.
Essentially, bombs are missiles that deal AoE damage of a specific type. Launched from the front of a stealth bomber, they travel in a straight line for 30 km at 3 km/s for 10 seconds before detonating. Bombs do not require a target lock, and their direction depends on the stealth bomber's orientation upon activating the bomb launcher. To successfully utilize these high-damage weapons, pilots must master timing, direction, and skill to align the stealth bomber with a target, approach, uncloak, launch a bomb at 30 km, and evade capture.
Bombs are separated into two categories.
- Damage Bombs: Unguided weapons delivering 5,800 points of thermal, EM, explosive and kinetic damage with a 400m explosion radius.
- Utility Bombs: Bombs inflicting a small amount of omni-damage alongside an EWAR effect.
- Void bombs neutralize 1,800 GJ of energy from the affected ships' capacitors.
- Focused Void Bombs: Similar to regular Void Bombs, but neutralize 15,000 GJ of energy in a much smaller area of effect. They are only effective against capital-sized ships.
- Lockbreaker bombs emit an Electronic Counter Measure (ECM) burst of 12.5 strength to all sensor types.
Fitting
Essential Modules
Given the limited fitting space on stealth bombers, it is crucial to discuss the indispensable modules for an effective fit:
- Covert Ops Cloaking Device II: As the foundation of stealth bomber piloting, this cloaking device is essential. A stealth bomber without a cloak is a non-starter; if you cannot fit a Covert Ops cloak, you should not fly a stealth bomber.
- Torpedo launchers/bomb launchers: Stealth bombers are the sole ships capable of mounting bomb launchers and the only sub-battleship vessels that can fit torpedo launchers. With bonuses for both, they are mandatory fits.
- Ballistic Control System (BCS) modules: BCS modules significantly boost torpedo damage and rate of fire, but demand substantial CPU fitting space.
- Propulsion Module (afterburner/microwarp drive): Due to their slow base velocity (275m/s - 310m/s), stealth bombers require propulsion modules.
After the essentials, there will be some flexibility.
- Depending on skills and fit, pilots may equip a high slot with a bomb launcher or probe launcher in addition to their torpedo launchers.
- EWAR modules, such as target painters, remote sensor dampeners, warp disruptors, and warp scramblers, are commonly used in available mid-slots following the propulsion module.
- If a fit is too tight, a Co-processor may occupy a low slot instead of an additional Ballistic Control System.
Rigs
Rig choices depend on a pilot's skills and fitting requirements. Missile launching rigs, such as the Warhead Calefaction Catalyst (boosts torpedo damage) and the Warhead Rigor Catalyst (decreases missile explosion radius for increased effectiveness against smaller targets), are popular. However, they also increase CPU usage for each launcher, complicating fitting on already challenging bomber hulls.
The Processor Overclocking Unit, which increases ship CPU output at the cost of slower shield regeneration, is also useful for stealth bombers. As stealth bomber tactics prioritize escape over combat, the shield regeneration penalty is acceptable. With these rigs fitting Tech 2 Torpedo launchers and other standard modules, including the Bomb Launcher, is possible.
Astronautic rigs like Low Friction Nozzle Joints and Poly-Carbon Engine Housing, which enhance ship agility and speed, are also utilized on bombers for swift alignment and grid escape when deploying bombs. The trade-off is reduced armor, making the bomber more fragile, but increasing the likelihood of escape.
Modules that are not recommended
Sensor boosters, shield extenders, and inertial stabilizers are not recommended for stealth bombers. These modules increase signature radius or hinder the primary mission which is delivering damage after decloaking at the pilot's preferred time and location, while aligning out or aligning out immediately after bomb release.
Skills
Minimum skills
To fly a stealth bomber:
- Racial Frigate V
- Electronics Upgrades V
- Spaceship Command III
- Covert Ops I
- CPU Management II
- Power Grid Management II
To operate a covert ops cloaking device module:
- Cloaking IV
To operate a torpedo Launcher module:
- Torpedoes I
- Missile Launcher Operation IV
- Heavy Missiles III
- Light Missiles III
To launch bombs:
- Missile Bombardment IV
- Bomb Deployment I
Suggested skills
The following skills aim to enhance the bomber's strengths, reduce CPU and power consumption, and contribute to its survivability.
- Acceleration Control III
- Astronautics Rigging II
- Capacitor Management III
- CPU Management V
- Electronic Warfare II
- Energy Grid Upgrades III
- Evasive Maneuvering III
- Jury Rigging III
- Launcher Rigging II
- Long Range Targeting III
- Mechanics IV
- Navigation III
- Power Grid Management V
- Sensor Linking II
- Shield Management III
- Shield Operation III
- Signature Analysis III
- Spaceship Command IV
- Target Management III
- Target Painting II
- Warp Drive Operation III
In addition, increasing these relevant missile, bomb, and spaceship command skills to V has significant impact
- Bomb Deployment V
- Covert Ops V
- Missile Bombardment V
- Missile Projection V
- Rapid Launch V
- Target Navigation Prediction V
- Warhead Upgrades V
Different Roles of Stealth Bombers
Stealth bombers find their place in various roles across different types of space, seamlessly integrating with fleets.
Black Ops
Stealth bombers can effectively participate in black ops operations involving all cloaky ships.
- Recon identifies and tackles a target in System A.
- The rest of the gang, waiting in a neighboring system or wormhole, or using a black ops battleship's covert jump portal, jumps to the target system.
- In this role, bombers are usually optimized for torpedoes instead of bombs.
Bomber Wing
Stealth bombers can support a large fleet. A sizable bomber force operates independently from the main fleet, often as a separate in-game fleet under their own bomber FC. In non-empire space, bombers can execute bombing runs on enemy fleets to destroy, weaken, or distract them, providing support for the main fleet. Bombers in this role are typically equipped with bombs.
Bomb Squadron
A bomb squadron typically consists of seven bombers, all launching the same type of bomb and ideally using the same type of bomber hull. Coordinating multiple bomb launches increases complexity, making the FC's skill crucial. Multiple bomber wings can execute bomb runs on a single target.
Torpedo Damage Dealer
Applicable in Wormspace, Nullspace, Low-security, and High-security space, Bombers can be employed in frigate gangs to deliver a powerful punch against larger targets. EVE University roams may occasionally encounter large signature targets, where torpedoes can inflict significant damage. Even against small signature targets, torpedoes contribute to overall damage.
- Carry a primary torpedo loadout.
- Operate independently of fleet movement.
- Engage targets of opportunity.
- When attached to a high or low-security roaming fleet, bombers often swap bomb launchers for torpedo launchers. In this role, bombers function like cloaked EWAR ships: they warp in at range, align out, choose a target, uncloak, apply EWAR, activate torpedoes, and warp out when targeted. If left undisturbed, a bomber's torpedoes can deal substantial damage to ships with large signature radii (battlecruisers and battleships). However, frequent targeting and warping away considerably reduces inflicted damage.
Fleet Scout
A bomber within a fleet can serve as a scout, reporting target movements and intelligence to the FC.
- Scout ahead or behind the main body.
- Evade gate camps and enemy fleets.
- Remain cloaked at a safe distance from stargates and deadspace sites, reporting target activity.
- Position undetected behind target ships to provide a tactical fleet warp-in.
Tips
Bombing Tips
Bombing runs are a unique capability only possessed by Stealth Bombers. Successfully launching bombs at some unsuspecting group of ships may create great destruction and chaos. There are some essential tips for making bombing runs successful attacks.
- Run Away As soon as your bomb is released, warp away. With few exceptions, stealth bombers do not remain on grid post-bomb release. Uncloak, bombs away, then run away.
- Reload: As soon as practical after launching your bomb reload your bomb launcher. Many escape points are far enough away that you are able to uncloak, and complete a 10 second reload prior to landing. A fully loaded stealth bomber has more utility than a half empty launcher. Plus, it frees up space in cargo for more bombs or even loot if your run was wildly successful.
- Shotgun away and recloak For making your getaway, you and your fleet will be warping to a pre-planned escape point. If everyone successfully cloaked upon warping away from the bomb run, then everyone will land cloaked without issue. However, if any of the other stealth bombers land uncloaked or became uncloaked during warp, shotgun away from where you landed with the goal of putting at least 2,500 meters between you and your fleet mates. Recloak once you have a safe distance. Remember, ABC: Always Be Cloaked
- Reset: After reaching your escape point the bomber leader may have you reset at an observation point. Being reloaded, recloaked, and ready-to-go may give your squadron the opportunity to restrike a target.
Targets
Stealth bomber torpedoes are highly effective against larger targets such as battlecruisers and battleships due to EVE's missile mechanics. As the ship's signature radius approaches the explosion size, more damage is inflicted. Conversely, smaller ships take considerably less damage from torpedoes. For instance, a torpedo's 400-meter explosion deals minimal damage to cruiser-sized ships and smaller.
Target painters play a crucial role in stealth bomber fleets because of this. Applying just three target painters to a Vexor Navy Issue cruiser, for example, increases its signature radius from 135m to 234m, significantly improving torpedo damage application. When a target-painted ship activates a microwarpdrive, the 500% signature radius bloom, combined with target painting, results in a substantial increase in damage inflicted on that ship.
It is generally advisable to avoid engaging frigates and destroyers. Despite target painting and signature bloom, these smaller ships pose a greater threat to bombers.
Threats to Stealth Bombers
- Interceptors/Fast Tackle Frigates: With their on-grid speed, these ships can close a 50km gap between you and the battle in just a few seconds. Keep your overview sorted by range, and when you notice someone quickly ascending the list, it's time to warp away, cloak, and re-engage from a different angle.
- Sniper ships: Tornado, Naga, Oracle, Apocalypse, Zealot, or any ships fitted for long-range attacks can pose a threat. They only need to hit you once, and even if you have a sensor dampener fitted, it won't be effective enough to protect you from their attacks.
- Drones: If a target's drones continue to attack you after jamming their locks, you'll be unable to cloak. Even if the target is destroyed, their drones can still prevent you from cloaking by keeping you locked. The key is to avoid being locked in the first place.
- Heavy Assault Cruisers (HACs) / Faction Cruisers: Ships like Vagabonds, Dramiels, and Cynabals are designed to destroy frigates. These vessels have speed, range, drones, and deal significant damage. If they're on the field, stay cloaked until they're eliminated or closely monitor them for signs they're coming after you.
Basic fleet tactics
*Remain cloaked at all times. Do not break cloak until ready to fire.
- Make sure your fleet commander knows he/she has a bomber in fleet. Do this before the fleet undocks.
"This is Joe Spaceman checking in. I have a Purifier with Dread Gurista Mjolnir torpedoes and 4 Focus Void Bombs. Where do you want me?" Check that the FC is happy to have bombers along, and find out if they want to use you in a specific way. If the FC cannot use your bomber, you can still travel with the fleet, but travel out-of-fleet and remain in Mumble comms. The worst thing a bomber can do to the fleet is 1)accidentally launch a bomb into the fleet in non-Empire space, 2)lose a bomber in a situation that was avoidable and cause negative isk efficiency to the fleet, the fleet commander's after-action report, and the university standing.
- Travel ahead or behind the fleet. Do your best to travel just behind or in front of the fleet (sort of a -1 or -0.5). Showing up after the battle is in full swing for a surgical strike is where bombers really shine. Your goal isn't to be the first thing they see, but the last. This tactic gives the target no chance of finding a bomber in an attacking fleet, the target's overview is already filled with flashing yellow targets and has already locked and targeted its maximum number of targets. A bomber uncloaking after the target has locked onto five fleetmates will stand a greater chance of launching torpedoes and surviving than a bomber uncloaking and landing on grid with the fleet.
- Land on grid at range and move to the side. After landing at the battle grid, double click in space in a direction perpendicular to the direction you approached from before realigning. This will keep fleetmates who show up a few moments after you from decloaking you if they arrive on grid on the same line.
- Move into optimal firing range and ALWAYS ALIGN OUT before decloaking. Be on the field as close to the beginning of the battle as possible, in comfortable torpedo optimal range (around 40-50km) and aligned to a celestial (for advanced pilots, align to a bookmark ~200km from the fight, if at a gate). Wait for the battle to start. Waiting gives the target time to lock its maximum number of attacking ships.
- Pre-load modules. While cloaked, some of the bombers modules cannot be pre-activated. Be ready to mash all the hotkeys at once after decloaking. Every second of lag counts against the bomber.
- Decloak, lock target, launch torpedoes. Decloak after the battle starts and the desired targets are otherwise over-occupied. Attack whatever ship your FC calls primary. Only decloak if you are ALIGNED OUT, ready to lock, and attack immediately. Once you get a lock, activate all of your torpedo modules and wait for impact.
- Launch two salvos, wait for impact, cloak. You cannot re-cloak immediately. Generally firing around 2 salvos while getting ready to either re-cloak or warp out is ideal. However, if there is an abundance of blue force ewar on the field, you may consider staying to unleash the pain. When your second salvo launches, wait for impact. If your ship cloaks during any torpedo flight time, those torpedoes will not impact the target. Re-cloak and wait for your launcher cycle to finish. You can cloak while your modules are active; they will automatically shut off.
- Warp to the close-to-the-fight bookmark or celestial if you are targeted and taking damage.
- Decloak and repeat. Your torpedoes will NOT hit if you 1)re-cloak within 3 seconds of them hitting the target, 2)warp away within before the torpedoes hit the target.
Rookie mistakes
New Stealth Bomber pilots will probably make these mistakes at least once:
- Warping directly to a battle
- Warping to 0 at a stargate or acceleration gate
- Accidentally uncloaking friendly bombers
- Failing to align before decloaking
- Failing to move away (or "starburst") away from a landing area, causing fleetmates to uncloak as they land
- Not warping off quickly enough after being targeted by an enemy (within three seconds)
See Also
External links
- Hallan Turrek's stealth bomber guide discusses these ships from a non-University perspective.
- More recent guide by Lioso
- WingspanTT's Official Torpedo Delivery: Stealth Bomber Handbook for Enterprising Pilots
