More actions
m Adding |
m Formatting. |
||
| Line 1: | Line 1: | ||
This article is a basic guide on how to get started to stream EVE and EVE University related content on Twitch. More comprehensive guides on how to utilise the tools mentioned within this guide are widely available across the internet and there are a multitude of different tools that could be used instead of the ones suggested here. | |||
= Streaming via EVE University’s Twitch account = | == Streaming via EVE University’s Twitch account == | ||
To stream via the EVE University’s Twitch accounts, you will require the EVE Uni’s Twitch Stream Key. The key will be made available to you via the [[EVE_University_Management|CEO of EVE University]] and will regularly be reset to avoid any complications. | To stream via the EVE University’s Twitch accounts, you will require the EVE Uni’s Twitch Stream Key. The key will be made available to you via the [[EVE_University_Management|CEO of EVE University]] and will regularly be reset to avoid any complications. | ||
If you are planning to become a longer-term streamer of classes or other content via EVE Uni’s Twitch account, please discuss this with the respective Managers | If you are planning to become a longer-term streamer of classes or other content via EVE Uni’s Twitch account, please discuss this with the respective Managers i.e. [[Communications_Department|Communications]], [[Teaching_Department|Teaching]] etc. | ||
= Streaming using OBS - A simple guide = | == Streaming using OBS - A simple guide == | ||
The most widely used tool for streaming via Twitch is [https://obsproject.com/ Open Broadcaster Software - OBS]. While a lot of the settings are somewhat self-explanatory, it can be challenging to get started. The following guide provides you with some basic advice on how to set up your stream via OBS. | The most widely used tool for streaming via Twitch is [https://obsproject.com/ Open Broadcaster Software - OBS]. While a lot of the settings are somewhat self-explanatory, it can be challenging to get started. The following guide provides you with some basic advice on how to set up your stream via OBS. | ||
== Scenes == | === Scenes === | ||
[[File:OBS scenes simple.png|thumb | [[File:OBS scenes simple.png|thumb|Example of several basic scenes in OBS]] | ||
One of the strengths of streaming via OBS is that you can set up multiple scenes. Imagine those as virtual screens which you can easily switch in between. The most common ones for streaming content such as a class would be: | One of the strengths of streaming via OBS is that you can set up multiple scenes. Imagine those as virtual screens which you can easily switch in between. The most common ones for streaming content such as a class would be: | ||
| Line 18: | Line 18: | ||
* Outro screen - when finishing up your stream, provide a graphic thanking the viewers and provide any relevant info e.g. EVE Uni logo, Partner logo, invitation to join future classes etc. | * Outro screen - when finishing up your stream, provide a graphic thanking the viewers and provide any relevant info e.g. EVE Uni logo, Partner logo, invitation to join future classes etc. | ||
[[File:OBS - Hotkeys.png|thumb|left|Set up Hotkeys to switch between scenes.]] | |||
It is easy to assign hotkeys to each scene to make for a smoother transition between the scenes. This comes in particularly handy when switching between slides and the EVE client. | It is easy to assign hotkeys to each scene to make for a smoother transition between the scenes. This comes in particularly handy when switching between slides and the EVE client. | ||
{{Clear}} | |||
Some ideas for additional scenes: | Some ideas for additional scenes: | ||
* Be right back scene - if you need to take a break and want to let your viewers know that you will be right back. | * Be right back scene - if you need to take a break and want to let your viewers know that you will be right back. | ||
* Browser/Desktop scene - great for showing UniWiki pages or other content on a dedicated desktop screen. These scenes pose the highest risk of accidentally showing parts of your computer you do not mean to share with the stream. It is therefore only recommended to use browser or full desktop scenes if you are well aware of how to avoid infringing on your own privacy. | * Browser/Desktop scene - great for showing UniWiki pages or other content on a dedicated desktop screen. These scenes pose the highest risk of accidentally showing parts of your computer you do not mean to share with the stream. It is therefore only recommended to use browser or full desktop scenes if you are well aware of how to avoid infringing on your own privacy. | ||
== Adding elements/sources to scenes == | === Adding elements/sources to scenes === | ||
[[File:StreamingExample1.png|thumb|Example of Introductory Scene with multiple elements]] | |||
Each scene consists of one or more sources. | Each scene consists of one or more sources. | ||
| Line 45: | Line 44: | ||
Use Alt + drag to crop your sources. | Use Alt + drag to crop your sources. | ||
=== Audio === | |||
[[File:Audi advanced.png|thumb|Advanced Audio Settings to adapt microphone noise]] | |||
== Audio == | |||
[[File:Audi advanced.png|thumb | |||
OBS makes it easy to pick up (or mute) both your microphone as well as your Desktop audio. | OBS makes it easy to pick up (or mute) both your microphone as well as your Desktop audio. | ||
| Line 59: | Line 54: | ||
In case you are having issues with a lot of background noise, OBS allows you to use in-built ''Filters'' to add noise-suppression to make your voice clearer. | In case you are having issues with a lot of background noise, OBS allows you to use in-built ''Filters'' to add noise-suppression to make your voice clearer. | ||
== Camera == | [[File:Audio filter noiseSuppression.png|thumb|left|Example of Noise Suppression filters applied to microphone.]] | ||
{{Clear}} | |||
=== Camera === | |||
[[File:Twitch Guide - video camera.png|thumb|200px|Who is this?]] | [[File:Twitch Guide - video camera.png|thumb|200px|Who is this?]] | ||
While totally optional, adding a camera aka. adding a face to the name, can increase engagement significantly. It allows viewers to feel like they are actually interacting with the content creator, by seeing their reactions and being able to "look them in the eyes"<br> | While totally optional, adding a camera aka. adding a face to the name, can increase engagement significantly. It allows viewers to feel like they are actually interacting with the content creator, by seeing their reactions and being able to "look them in the eyes"<br> | ||
| Line 80: | Line 74: | ||
== Streaming Resources == | == Streaming Resources == | ||
=== EVE University Streaming graphics === | === EVE University Streaming graphics === | ||
==== EVE University related graphics ==== | ==== EVE University related graphics ==== | ||
For Logos and other EVE University related graphics, please consult the [[UniWiki:EVE_University_Graphics|EVE Uni Graphics library]]. | For Logos and other EVE University related graphics, please consult the [[UniWiki:EVE_University_Graphics|EVE Uni Graphics library]]. | ||
==== Plug-and-Play Frames ==== | ==== Plug-and-Play Frames ==== | ||
<gallery> | <gallery showfilename=yes mode=packed> | ||
Twitch Slide Starting Soon.jpg|Intro slide before the stream starts | Twitch Slide Starting Soon.jpg|Intro slide before the stream starts | ||
Twitch Slide welcome.jpg|Slide when the stream starts | Twitch Slide welcome.jpg|Slide when the stream starts | ||
| Line 94: | Line 86: | ||
Twitch Slide thanks.jpg|Slide for the end of the stream | Twitch Slide thanks.jpg|Slide for the end of the stream | ||
</gallery> | </gallery> | ||
==== Single Objects ==== | ==== Single Objects ==== | ||
<gallery> | <gallery showfilename=yes mode=packed> | ||
Obs frame-empty.png|OBS empty frame | Obs frame-empty.png|OBS empty frame | ||
Obs frame v2.png|OBS empty frame with space for avatar or logo | Obs frame v2.png|OBS empty frame with space for avatar or logo | ||
| Line 107: | Line 100: | ||
=== EVE Partner Program graphics === | === EVE Partner Program graphics === | ||
{{Note|The Partner Program graphics are only to be used when you stream on behalf of EVE University.}} | {{Note|The Partner Program graphics are only to be used when you stream on behalf of EVE University.}} | ||
<gallery> | <gallery showfilename=yes mode=packed> | ||
EventsCover 800x450 Partner.jpg|800x450 Partner JPG | EventsCover 800x450 Partner.jpg|800x450 Partner JPG | ||
Image 445x500 Partner.jpg|800x450 Partner JPG | Image 445x500 Partner.jpg|800x450 Partner JPG | ||
Revision as of 12:18, 9 October 2023
This article is a basic guide on how to get started to stream EVE and EVE University related content on Twitch. More comprehensive guides on how to utilise the tools mentioned within this guide are widely available across the internet and there are a multitude of different tools that could be used instead of the ones suggested here.
Streaming via EVE University’s Twitch account
To stream via the EVE University’s Twitch accounts, you will require the EVE Uni’s Twitch Stream Key. The key will be made available to you via the CEO of EVE University and will regularly be reset to avoid any complications. If you are planning to become a longer-term streamer of classes or other content via EVE Uni’s Twitch account, please discuss this with the respective Managers i.e. Communications, Teaching etc.
Streaming using OBS - A simple guide
The most widely used tool for streaming via Twitch is Open Broadcaster Software - OBS. While a lot of the settings are somewhat self-explanatory, it can be challenging to get started. The following guide provides you with some basic advice on how to set up your stream via OBS.
Scenes

One of the strengths of streaming via OBS is that you can set up multiple scenes. Imagine those as virtual screens which you can easily switch in between. The most common ones for streaming content such as a class would be:
- Introduction screen - A scene you will show before starting the actual class/content to provide the viewers with some basic context on what’s to come.
- Slides - The most important part of each lecture-style class from e.g. the CORE classes.
- EVE Client - in case you want to show anything ingame, share your EVE client as a separate scene.
- Outro screen - when finishing up your stream, provide a graphic thanking the viewers and provide any relevant info e.g. EVE Uni logo, Partner logo, invitation to join future classes etc.

It is easy to assign hotkeys to each scene to make for a smoother transition between the scenes. This comes in particularly handy when switching between slides and the EVE client.
Some ideas for additional scenes:
- Be right back scene - if you need to take a break and want to let your viewers know that you will be right back.
- Browser/Desktop scene - great for showing UniWiki pages or other content on a dedicated desktop screen. These scenes pose the highest risk of accidentally showing parts of your computer you do not mean to share with the stream. It is therefore only recommended to use browser or full desktop scenes if you are well aware of how to avoid infringing on your own privacy.
Adding elements/sources to scenes

Each scene consists of one or more sources.
Find following an overview of some recommended sources for each of the abovementioned scenes:
- Introduction screen - Stream overlay (png image), EVE Uni Logo (png image), Partner logo (png image), class title (text), time when the class starts (text), information about the teacher e.g. ingame avatar and name (image and text).
- Alternatively, you can add a single introduction graphic that is more limited in scope but lets you avoid having to add individual sources.
- Slides - Stream overlay (png image), slides (Window capture - select your PDF or PPT).
- EVE Client - Game Client (Game Capture - select your EVE client).
- Outro screen - Stream overlay (png image), EVE Uni Logo (png image), Partner logo (png image).
Note that the sources at the top of the list will be in the front of your display and sources in the bottom of the list in the background.
To enhance branding and allow you to individualize your scenes, you can add different elements to each scene. We are providing you with some basic elements at the end of this guide.
You can move elements around by simple drag-and-drop and increase/decrease their size by dragging individual corners/sides. Use Alt + drag to crop your sources.
Audio

OBS makes it easy to pick up (or mute) both your microphone as well as your Desktop audio.
It is recommended that your microphone audio is within the Yellow part of the audio metre. Use the settings to adjust the input volume if it is too high/low.
If you are planning to play music e.g. as background music during your Intro, make sure the music is copyright-free and DMCA safe. There are plenty of free resources around the internet (or on your favourite music platforms like Spotify) providing you with such music.
In case you are having issues with a lot of background noise, OBS allows you to use in-built Filters to add noise-suppression to make your voice clearer.

Camera

While totally optional, adding a camera aka. adding a face to the name, can increase engagement significantly. It allows viewers to feel like they are actually interacting with the content creator, by seeing their reactions and being able to "look them in the eyes"
See how you are wondering who this person on the left is?
Hint: It's a screen grab from someone an official Twitch streaming guide.
OBS makes it very easy to pick up any camera device.
Simply add a Video Capture Device as a source and select your webcam.
If you are using your webcam microphone, add it individually as an Audio Input Device.
Tip: Add your camera in either the bottom left of bottom right of your screen as an extension to your regular content. Make sure the camera does not overlap with important content. If you use a slide-deck, make sure you adapt it before you stream to ensure none of the content overlaps with your camera.
Streaming Resources
EVE University Streaming graphics
For Logos and other EVE University related graphics, please consult the EVE Uni Graphics library.
Plug-and-Play Frames
-
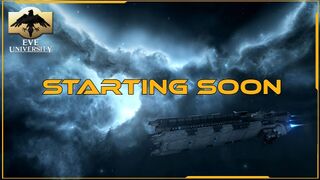 Twitch Slide Starting Soon.jpg Intro slide before the stream starts
 -
 Twitch Slide welcome.jpg Slide when the stream starts
 -
 Twitch Slide stand by.jpg Slide when setting things up
 -
 Twitch Slide short break.jpg Slide for breaks during streaming
 -
 Twitch Slide thanks.jpg Slide for the end of the stream


Single Objects
-
 Obs frame-empty.png OBS empty frame
 -
 Obs frame v2.png OBS empty frame with space for avatar or logo
 -
 E-UNI.png EVE-Uni logo
 -
 Twitch Slide clean background.jpg Background clean
 -
 Twitch Slide frame and logo.jpg Background with frame and logo
 -
 Twitch Slide frame.jpg Background with just frame
 -
 Twitch Slide logo.jpg Background with just logo


EVE Partner Program graphics
| The Partner Program graphics are only to be used when you stream on behalf of EVE University. |
-
 EventsCover 800x450 Partner.jpg 800x450 Partner JPG
 -
 Image 445x500 Partner.jpg 800x450 Partner JPG
 -
 SpecialAnnouncement 616x258 Partner.jpg 616x258 Partner JPG
 -
 PartnerBadge.png Partner Badge horizontal transparent
 -
 PartnerBadge2.png Partner Badge horizontal transparent


