More actions
m Grammar |
Changed fittings to use the new template. |
||
| Line 90: | Line 90: | ||
==Fitting== | ==Fitting== | ||
{{:Caldari Basic Ship and Skill Guide|Cormorant}} | {{:Caldari Basic Ship and Skill Guide|Cormorant}} | ||
| | {{ShipFitting| | ||
Small Anti-EM Screen Reinforcer I | ship=Cormorant| | ||
Small Anti-EM Screen Reinforcer I | shipTypeID=16238| | ||
Small Anti-Thermal Screen Reinforcer I | fitName=L2 Blitzing| | ||
fitID=L2-Blitzing| | |||
| | high1name=125mm Prototype Gauss Gun| | ||
| | high1typeID=10694| | ||
high2name=125mm Prototype Gauss Gun| | |||
|notes= | high2typeID=10694| | ||
high3name=125mm Prototype Gauss Gun| | |||
high3typeID=10694| | |||
high4name=125mm Prototype Gauss Gun| | |||
high4typeID=10694| | |||
high5name=125mm Prototype Gauss Gun| | |||
high5typeID=10694| | |||
high6name=125mm Prototype Gauss Gun| | |||
}} | high6typeID=10694| | ||
high7name=125mm Prototype Gauss Gun| | |||
high7typeID=10694| | |||
high8name=Salvager I| | |||
high8typeID=25861| | |||
mid1name=1MN Afterburner II| | |||
mid1typeID=438| | |||
mid2name=Small Azeotropic Ward Salubrity I| | |||
mid2typeID=8427| | |||
mid3name=Small Shield Booster II| | |||
mid3typeID=400| | |||
low1name=Magnetic Field Stabilizer II| | |||
low1typeID=10190| | |||
low2name=open| | |||
charge1name=Antimatter Charge S x1| | |||
charge1typeID=222| | |||
charge2name=open| | |||
charge3name=open| | |||
charge4name=open| | |||
charge5name=open| | |||
rig1name=Small Anti-EM Screen Reinforcer I| | |||
rig1typeID=31716| | |||
rig2name=Small Anti-EM Screen Reinforcer I| | |||
rig2typeID=31716| | |||
rig3name=Small Anti-Thermal Screen Reinforcer I| | |||
rig3typeID=31752| | |||
difficulty=1| | |||
warsop=Y| | |||
warsopReason=| | |||
version=PRE-RET 1.0| | |||
shipDNA=16238:10694;7:25861;1:400;1:438;1:8427;1:10190;1:31716;2:31752;1:222;1::| | |||
skills=| | |||
notes=This is a relatively low-skill boat meant to blitz level 1 and 2 missions. T2 mods can be replaced by lower meta.</li><li>Separate your guns into two or three groups to target different frigates.</li><li>Cheap rigs and a small buffer allows you to assess the situation and survive nasty surprises.</li><li>Speed tank with the afterburner and keep at range. Pulse the shield booster.</li><li>Damage Control can be used in place of Magnetic Field Stabilizer in missions requiring more tank (i.e. those involving missile cruisers).</li><li>Salvager is only there due to limited fitting; it should rarely be used in missions. Rocket launcher can be used in its place given better fitting skills, but avoid engagements within rocket launcher range.</li><li>High fitting skills including Engineering V, Electronics V, Weapon Upgrades V, and Advanced Weapon Upgrades IV will allow for an upgrade to T2 guns (requires removal of utility high slot).}} | |||
==Tactics== | ==Tactics== | ||
Revision as of 21:03, 23 February 2013
Fittings: Slot layout changed

High Amount of High Slots
HIGHLIGHTS
RELATED UNI-WIKI REFERENCES
|
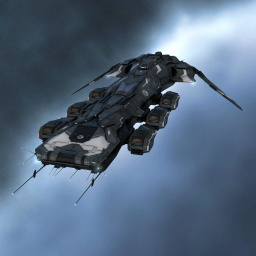
The Cormorant is the only State-produced space vessel whose design has come from a third party. Rumors abound, of course, but the designer's identity has remained a tightly-kept secret in the State's inner circle. SHIP BONUSES
Destroyer Skill Bonus:
Ship Attributes
|
This ship will be released with the Retribution expansion on December 4th. Please do not refer to this article until the expansion has been deployed.
Summary
The Cormorant is the Caldari T1 destroyer. Its bonuses favor railguns, but it can be blaster fit if you like. The Cormorant has many mid slots, which allows tackle gear and/or a shield tank. Of note is that the Cormorant's hull bonus to optimal range and the destroyer role bonus to optimal range gives it a spectacular range increase for railguns, such that it can be used as a poor man's anti-frigate sniper. Besides this niche role though the Cormorant has little use in PvP. The Cormorant is however a very capable level 1 mission runner, but lacks the tank for most level 2s.
Skills
Further information about additional or recommended skills to pilot Cormorant for a specific or its common role(s) can be written here.
Fitting
This guide provides general information and recommendations for T1 ships of a single player faction.
For more advanced and in-depth information on specific ships refer to EVE ships. This guide simply gathers the characteristics and overview of racial lineups in an easy to browse format for the very new player.
The Caldari State is one of the four playable factions and has a unique and distinct line of ships.
 Caldari State Characteristics
| Tank Type: | |
| Main Weapon Systems: | |
| Electronic Warfare: |
General Traits
The following characteristics are generally shared across most or all Caldari ships:
- Shield tanking. Caldari ships are designed to be shield tanked. They generally have more medium slots (so as to fit shield modules) and fewer low slots. Some Caldari ships, such as the Merlin, Drake, and Rokh, have bonuses to shield resistances. Many Caldari ships can mount a range of types of shield tank—buffer, active, or passive—depending on the situation. In some limited circumstances, some Caldari ships mount armor tanks (an EWAR ship can armor tank using its low slots to free up mid slots for more EWAR), but shield tanking is usually the order of the day.
- Missiles. Of the four factions, Caldari are most closely identified with using missiles. A line of Caldari ships have missile bonuses: examples include the Kestrel, Corax, Caracal, Drake, and Raven. Sometimes these bonuses boost missiles' range, as well as their damage.
- Missiles don't use capacitor to fire, have good ranges, and always hit if they catch up with their target. Unlike lasers and hybrid turrets, missile launchers have selectable damage types, and unlike projectile turrets, the damage selection is easy and simple.
- On the other hand, missile damage takes a while to arrive (as the missile must travel to its target), which can be a weakness in PvP; very fast ships can outrun missiles. Medium and large missiles often have particular trouble applying their damage to smaller targets. And to balance out the highly selectable damage, reloading a missile launcher takes a long time.
- Hybrid Turrets. Other Caldari ships have bonuses for hybrid turrets. Hybrid turrets use some capacitor energy to fire, like lasers, but they are less cap-hungry than lasers; they use physical ammunition, like projectile guns, but they have a shorter reload time (5 seconds). Different ammunition types offer trade-offs between range, damage, and capacitor load, but all hybrid turret ammunition deals a mixture of kinetic and thermal damage.
- Close-ranged blasters track very well and have very high potential DPS, but have short ranges even compared to the other short-ranged turrets (autocannon and pulse lasers).
- Long-ranged railguns lack the alpha damage of artillery but can achieve extraordinarily long ranges. Some Caldari ships are particularly well-suited to sniping at long range with railguns.
- ECM jamming. The Caldari racial EWAR specialty is ECM ("electronic countermeasures"). ECM is an especially powerful form of EWAR: it does not suffer from stacking penalties, unlike the other three main types of EWAR, and it can completely remove a target's ability to attack anything other than the ECM-jamming ship itself. In the larger ECM ships, it can also have a very long range. The Caldari are the only faction to have a T1 battleship with dedicated EWAR bonuses, the Scorpion. The main drawbacks of ECM are that it is chance-based, and can fail repeatedly if you're unlucky and that any ship using it is usually a primary target because it is widely feared.
- Fragility. The flipside of the extremely strong shields on Caldari ships is somewhat more fragile armour and hull hitpoints.
- Smaller dronebays. Caldari ships tend to have smaller dronebays and more limited drone bandwidth for their size and class: Caldari pilots begin to have access to enough drone space to launch a full flight of light drones when they get into battlecruisers, while Gallente ships, by contrast, offer this capacity as early as the
 Tristan—a T1 frigate.
If there is a broader hallmark of Caldari ships, it is perhaps range. Both Caldari missile ships and Caldari hybrid turret ships often have bonuses that help them fight at long range. Caldari ships can still fight effectively at close range, and a torpedo Raven or blaster Rokh is a dangerous opponent, but they can outshine other factions at long or very long ranges.
Notable uses
PvE
The fact that missiles allow players complete control over which damage type they deal, permitting precise targeting of NPCs' weak points, combined with the very long range missiles can achieve on some Caldari hulls, make Caldari missile ships popular for PvE combat. A typical progression for mission running might be the Kestrel and Corax for Level 1 missions, the Caracal for L2s, the Drake for L3s, and the Raven for L4s. The Drake can mount a famously effective low-management passive shield tank. The missile, shield, and ship command skills trained for PvE combat in Caldari missile ships are one half of the skills necessary to do well in Guristas ships, the ![]() Worm,
Worm, ![]() Gila, and
Gila, and ![]() Rattlesnake, and Guristas ships are popular for high-end PvE such as lucrative nullsec ratting and mid-tier Abyssal Deadspace runs.
Rattlesnake, and Guristas ships are popular for high-end PvE such as lucrative nullsec ratting and mid-tier Abyssal Deadspace runs.
The Cormorant, with its many high slots, makes a good basic salvaging ship.
PvP
T1 Caldari ships find various popular niches in PvP combat. The Merlin and Kestrel can do well in faction warfare frigate fights, and the Merlin's toughness and potential DPS at short ranges can make gangs of them a danger to much larger, more expensive targets. The Caracal can contribute usefully to a fast-moving gang with mid-range damage and good damage against small ships if fitted with Rapid Light Missile Launchers; the skills used in a Caracal prepare a character for a kiting-fitted ![]() Osprey Navy Issue, a popular ship for solo and small gang PvP, and for the advanced Tech 2
Osprey Navy Issue, a popular ship for solo and small gang PvP, and for the advanced Tech 2 ![]() Cerberus, which is used in some popular fleet compositions. Caldari hybrid turret ships are often prized for their range. The Ferox, for instance, can be made the backbone of a sniping fleet. The Osprey is a good T1 remote-shield-boost ship if several Ospreys can group up (the ship is designed for team use), and this role prepares pilots for the extremely powerful
Cerberus, which is used in some popular fleet compositions. Caldari hybrid turret ships are often prized for their range. The Ferox, for instance, can be made the backbone of a sniping fleet. The Osprey is a good T1 remote-shield-boost ship if several Ospreys can group up (the ship is designed for team use), and this role prepares pilots for the extremely powerful ![]() Basilisk.
Basilisk.
Both the small Griffin frigate and the medium-sized Blackbird cruiser are highly valued gang and fleet ships, as their ECM abilities offer a potentially huge battlefield impact in cheap, expendable hulls: ECM jams on opposing logistics ships, tackle, or EWAR can swing a battle, and jams on opposing damage dealers can tip the DPS race in the right direction. The Scorpion sees some use, but its larger size, more limited agility and speed, and greater cost send ECM pilots to the smaller ECM ships more often.
Skills
Caldari ships share many core skills with the ships of the other three main factions. Very new pilots should consider EVE University's Short Skill Plan; relatively new pilots should consider the 14 skills which affect every ship, the fitting skills which make it easier to fit modules onto ships, and the support skills which underpin much of your ship's performance.
That said, there are some considerations that are specific to Caldari ships. Pilots using Caldari ships will want to polish their skills in using missiles, gunnery, and the use of shields. Given Caldari strengths at range, Missile Bombardment, Missile Projection, Sharpshooter,Trajectory Analysis and Long Range Targeting might be higher priorities for pilots flying these ships. Though hybrid turrets are not as capacitor hungry as lasers, pilots using Caldari turret ships will want good capacitor skills and Controlled Bursts.
Caldari ships tend to have small dronebays for their size and class, and pilots flying Caldari ships will be able to leave drone skills until a little later than Gallente pilots would. However, once you train in battlecruisers and battleships, you will want a full flight of drones and adequate drone support skills.
Ships
Here are the Caldari T1 ships. Please follow the links to the specific pages of the ship database for more details and particular fits.
Corvette
Little more than slower, armed shuttles, corvettes (or "noobships") are the basic frigates that new pilots start with. You can acquire a new corvette at no cost (together with a civilian weapon, a civilian mining laser, and one unit of Tritanium) by clicking on the "Board my corvette" button available in the station menu when you're docked up. On their own, corvettes are useful for little other than basic errand-running, though since the ship is free a corvette can be spawned as a makeshift small station container when no other containers are available.

RELATED UNI-WIKI REFERENCES
|
S H I P B O N U S E S
Role Bonus: The Caldari Ibis corvette is a small but stout vessel that fits admirably well as a cargo hauler or small-scale miner. Its reliability makes it a good choice for novice ship captains. |
An Ibis can be used for the first few tutorial missions, although upgrading to a frigate as soon as it’s offered during the military tutorial is recommended.
Frigate
Frigates are small fast ships, used mostly for level 1 missions or for tackling and electronic warfare roles in PvP.

RELATED UNI-WIKI REFERENCES
|
S H I P B O N U S E S
Caldari Frigate bonuses (per skill level): In YC114 each major empire faction, having been embroiled in a harrowing, extensive, long-term war, recognized the growing need for support and logistics functionality in their vessels during the kind of protracted interstellar warfare that might otherwise prove exhausting for its participants. In the Caldari State, this led to the redesign and redeployment of the Bantam. |
The Bantam's role was changed from that of mining frigate to logistics frigate in the Retribution patch.

RELATED UNI-WIKI REFERENCES
|
S H I P B O N U S E S
Caldari Frigate bonuses (per skill level): The Condor is fast and agile. It has limited cargo space so it's not very suitable for trading or mining. It is best used as an assault vessel in a hit-and-run type of operations. |
The Condor is a fast Caldari frigate. It can be used for level 1 missions and also as a tackler in PvP encounters.

RELATED UNI-WIKI REFERENCES
|
S H I P B O N U S E S
Caldari Frigate bonuses (per skill level): The Griffin is much used by the Caldari Navy as a support vessel in combat squadrons, using its impressive array of electronic gadgetry to disrupt the operation of target ships, making them easy prey for traditional combat vessels. |
The Griffin is an Electronic Counter Measure frigate, often seen in E-UNI fleets offering Electronic Warfare support. ECM is touted as the most useful form of Electronic Warfare as it operates by breaking enemy target locks and preventing them from re-acquiring targets for 20 secs. This has the potential to greatly reduce the amount of damage being directed at your fleet, prevent enemies from using Remote Repair modules on each other, or breaking Warp Disruption, allowing an escape. For new players interested in trying out ECM the Griffin is the ideal starting place on your way up to the Blackbird and eventually the Scorpion. Expect to lose them a lot though, as ECM boats are often called primary by enemy commanders.

RELATED UNI-WIKI REFERENCES
|
S H I P B O N U S E S
Caldari Frigate bonuses (per skill level): The Heron has good computer and electronic systems, giving it the option of participating in electronic warfare. But it has relatively poor defenses and limited weaponry, so it's more commonly used for scouting and exploration. |
The Heron is the T1 Caldari probe scanning frigate and a good exploration starter ship. It is useful for probing down exploration sites and wormholes, though it is weak in combat so you should switch to a tougher ship to do any sites you find.

RELATED UNI-WIKI REFERENCES
|
S H I P B O N U S E S
Caldari Frigate bonuses (per skill level): The Kestrel is a heavy missile boat with one of the most sophisticated sensor arrays around. Interestingly enough, it has been used by both the Caldari Navy and several wealthy trade corporations as a cargo-hauling vessel. It is one of few trading vessels with good punching power, making it ideal for solo trade-runs in dangerous areas. The Kestrel was designed so that it could take up to four missile launchers but as a result it can not be equipped with turret weapons nor with mining lasers. |
The Kestrel is a commonly flown frigate in New Eden, both for PvP and PvE. With its four standard launchers, it is an excellent choice for level 1 missions and static complexes up to DED 2. It can be comfortably flown with fairly low skills, primarily due to its ability to 'Range Tank'. i.e.; stay at sufficient range to eliminate or mitigate a great deal of incoming damage. Furthermore, missile systems make for ideal starter weapons as they do not require capacitor energy (so reducing the need for good capacitor skills) and their damage is not affected by such factors as tracking, optimal ranges, and falloff.

RELATED UNI-WIKI REFERENCES
|
S H I P B O N U S E S
Caldari Frigate bonuses (per skill level): The Merlin is the most powerful combat frigate of the Caldari. Its role has evolved through the years, and while its defenses have always remained exceptionally strong for a Caldari vessel, its offensive capabilities have evolved from versatile, jack-of-all-trades attack patterns into focused and deadly gunfire tactics. The Merlin's primary aim is to have its turrets punch holes in opponents' hulls. |
The Merlin is a capable Caldari frigate, commonly used in PvP. It has overall higher damage and survivability than other comparable racial frigates. The four mid-slots make the Merlin useful as a tackler and its use of turrets makes it a relatively quick train.
Destroyer
Destroyers are ships slightly larger than frigates. They use the same sized modules as frigates but have more high slots. They are often used in PvE for level 1 missions. They are rarely used in PvP, as their DPS is not impressive without high skills, although they can sometimes fill the role of anti-interceptor.

RELATED UNI-WIKI REFERENCES
|
S H I P B O N U S E S
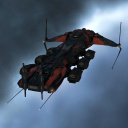
Caldari Destroyer bonuses (per skill level): The Corax adheres to the well-established Caldari design philosophy that there is strength in numbers, and that the messages sent to an enemy should be strong and unequivocal. This applies equally to peace talks as it does to actual engagements on the battlefield - there should be no doubt in the strength of Caldari spirit, nor in the fact that when one blow has been struck, others are going to follow. |
The Corax was introduced in the Retribution expansion. An alternative to the Cormorant's hybrid turret weapon preference, it offers new pilots the opportunity to follow the missile centric play style of the Kestrel and, later, the Caracal, without being forced to train into the gunnery skills of the Cormorant. The Corax's fragile tank lends itself well to a sniping style of combat, one that uses the ship's nimble body to keep it at ranges larger than 20Km. In PVE, by keeping targets at range, the Corax should have no problem running most level 1 and level 2 missions. The same philosophy works for PVP where the Corax can kite most ships with relative ease.

RELATED UNI-WIKI REFERENCES
|
S H I P B O N U S E S
Destroyer Skill Bonus: The Cormorant is the only State-produced space vessel whose design has come from a third party. Rumors abound, of course, but the designer's identity has remained a tightly-kept secret in the State's inner circle. |
The Cormorant has eight high slots, making it a good starting vessel to use for salvaging wrecks. Due to its small size, it can move speedily across deadspaces, but also has enough cargo space to hold the salvage you collect. When it is used in PvE as a combat ship (Level 1 missions and the Sisters of EVE storyline arc) it is strongly recommended that a 'kiting' technique is used, meaning that the capsuleer should keep his range from the NPC ships. In PvP it suffers from a comparatively large signature radius, making it easier to hit with bigger weapons, which can be problematic with the frigate sized tank of the Cormorant.
Cruiser
Cruisers are EVE's medium-sized ships.

RELATED UNI-WIKI REFERENCES
|
S H I P B O N U S E S
Caldari Cruiser bonuses (per skill level): The Blackbird is a small high-tech cruiser newly employed by the Caldari Navy. Commonly seen in fleet battles or acting as wingman, it is not intended for head-on slugfests, but rather delicate tactical situations. |
The Blackbird makes a formidable EWAR ship and is generally used as such.

RELATED UNI-WIKI REFERENCES
|
S H I P B O N U S E S
Caldari Cruiser bonuses (per skill level): The Caracal is a powerful vessel that specializes in missile deployment. It has excellent shield defenses, but poor armor plating. Its missile arsenal, when fully stocked, is capable of making a piece-meal of almost anyone. |
The Caracal is arguably the most effective Caldari cruiser for PvE. It receives strong bonuses to increase the range of its missiles, as well as a rate of fire bonus for missiles. It can fit an effective shield tank and keep opponents at bay while dealing damage to them from afar. It has no bonus for a specific damage type, so can match the missile type to the NPC.
The Caracal is also very popular for PvP, for example as a dedicated frigate-hunter as its Rapid Light Missile Launchers can deal a huge amount of DPS to frigates. With higher fitting skills it is also possible to equip it with a full rack of Heavy Missile Launchers and achieve ranges in excess of 130km.

RELATED UNI-WIKI REFERENCES
EXTERNAL LINKS
|
S H I P B O N U S E S
Caldari Cruiser bonuses (per skill level): The Moa was designed as an all-out combat ship, and its heavy armament allows the Moa to tackle almost anything that floats in space. In contrast to its nemesis the Thorax, the Moa is most effective at long range where its railguns can rain death upon foes. |
With the retribution patch, the Moa now has a bonus to hybrid damage as well as the usual shield resistance, rather than the previous range bonus. This means the Moa is now more suited to being a pure brawler rather than a sniper. With the extra damage, the Moa is quite suitable for PvE, and could also serve as a PvP brawler.

RELATED UNI-WIKI REFERENCES
|
S H I P B O N U S E S
Caldari Cruiser bonuses (per skill level): In YC114 each major empire faction, having been embroiled in a harrowing, extensive, long-term war, recognized the growing need for support and logistics functionality in their vessels during the kind of protracted interstellar warfare that might otherwise prove exhausting for its participants. Both Frigate and Cruiser-class ships were put under the microscope, and in the Caldari State the outcome of the re-evaluation process led, among other developments, to a redesign and redeployment of the Osprey. |
The Osprey was changed in the Retribution patch to a full logistics cruiser. It is a t1 version of the more capable Basilisk but is by no means ineffective. It is one of the two Shield logistics ships, and because of its bonus to Energy Transfer works best when paired with other Ospreys or Basilisks.
Battlecruiser
Battlecruisers are sometimes considered a more powerful version of Destroyer class ships. They fit the same sized weapons as Cruisers except for the Attack Battlecruisers which fit Battleship sized weapons, and are more widely used as a damage dealing ship than Destroyers.

RELATED UNI-WIKI REFERENCES
|
S H I P B O N U S E S
Caldari Battlecruiser bonuses (per skill level): Of the meticulous craftsmanship the Caldari are renowned for, the Drake was born. It was found beneath such a ship to rely on anything other than the time-honored combat tradition of missile fire, while the inclusion of sufficient CPU capabilities for decent electronic warfare goes without saying. |
The Drake is an incredibly strong PvE ship due to its shield resistance which gives it an impressive tank. Unfortunately, it also features slow speed and relatively low DPS for a battlecruiser. Although it was at some time one of the most popular ships for PvP, due to ship balancing it is now only occasionally used PvP, typically as bait. It is however still very effective in PvE because of its tank and range and its ease of use, especially with a passive tank.

RELATED UNI-WIKI REFERENCES
|
S H I P B O N U S E S
Caldari Battlecruiser bonuses (per skill level): Designed as much to look like a killing machine as to be one, the Ferox will strike fear into the heart of anyone unlucky enough to get caught in its crosshairs. With the potential for sizable armament as well as tremendous electronic warfare capability, this versatile gunboat is at home in a great number of scenarios. |
The Ferox is a versatile battlecruiser capable of a strong passive or active shield tank and of over 125km optimal range with railguns or heavy kinetic and thermal damage with blasters. It is a popular fleet PvP ship and part of some Nullsec fleet doctrines.

RELATED UNI-WIKI REFERENCES
|
S H I P B O N U S E S
Caldari Battlecruiser bonuses (per skill level): The Naga was designed in YC 109 by Corporate Police Force as an anti-Guristas ship, sacrificing the usual robust Caldari Navy standards in favor of supporting battleship-class weaponry. It was rejected by Hyasyoda management for being overspecialized. |
The Naga is the Caldari attack battlecruiser. While requiring a bit more training than the Drake and Ferox, it can fit battleship sized guns while retaining the agility and tank of a battlecruiser. It can be effectively fit with long or short range turrets but is rarely seen in PvP as pure sniper configurations are not effective with current doctrines.
Battleship
Battleships are the biggest combat ships in the game before Capital-class ships. Battleships usually mount large sized weaponry and are mostly used as a damage dealing combat ships in EVE, although there are several Battleships that have a different role, such as the Scorpion.

RELATED UNI-WIKI REFERENCES
|
S H I P B O N U S E S
Caldari Battleship bonuses (per skill level): The Raven is the powerhouse of the Caldari Navy. With its myriad launcher slots and powerful shields, few ships can rival it in strength or majesty. |
The Raven is possibly the most used PvE ship for Level 4 missions as it has good range when fitted with Cruise Launchers (in addition to the usual effectiveness of selectable damage type from missiles) and can sport a good active shield tank (either cap-stable with a Large Shield Booster or an X-Large Shield Booster for non-cap-stable 'pulsing'). Its drawbacks are a small drone bay, usually filled with one flight of light drones and one flight of medium drones. In addition, it is a very slow ship, as most Caldari boats are.
For PvP, it can be fitted with Torpedo Launchers to get good close range DPS or with Cruise missile Launchers for sniping distances.

RELATED UNI-WIKI REFERENCES
|
S H I P B O N U S E S
Caldari Battleship bonuses (per skill level): Having long suffered the lack of an adequate hybrid platform, the Caldari State's capsule pilots found themselves rejoicing as the Rokh's design specs were released. A fleet vessel if ever there was one, this far-reaching and durable beast is expected to see a great deal of service on battlefields near and far. |
The Rokh is a solid shield-tanked hybrid turret platform. Although it doesn't have the raw damage bonuses found on the Megathron and Hyperion, its optimal bonus sometimes helps it deal with more applied DPS when fitted with blasters. When rail-fitted it can achieve tremendous optimal ranges -- even, uselessly, beyond the hard 300km targeting range limit. Although it can be used for PvE, most Caldari mission-runners prefer missiles' flexibility and ease of use. It does have a role as one of the entry options for new pilots who want to join Incursions.

RELATED UNI-WIKI REFERENCES
|
S H I P B O N U S E S
Caldari Battleship bonuses (per skill level): The first Scorpion-class battleship was launched only a couple of years ago, and those that have been built are considered to be prototypes. Little is known of its capabilities, but what has been garnered suggests that the Scorpion is crammed to the brink with sophisticated hi-tech equipment that few can match. |
The Scorpion is the Caldari ECM Battleship. With its 8 mid-slots, it is capable of fitting up to 8 jammers/bursts, making it the ECM weapons platform of choice. In order to free up mid-slots, some pilots choose to rely on a weak armour buffer tank in its four low-slots, while others fit shield modules for survivability and use their low slots to enhance their jammers.
Haulers
Caldari haulers tend to have the highest base cargo but as they don't have many low slots they cannot expand their cargo as well as other factions.

RELATED UNI-WIKI REFERENCES
|
S H I P B O N U S E S
Caldari Hauler bonuses (per skill level): The Badger-class hauler is the main cargo-carrier for the Caldari State, particularly in long, arduous trade-runs. Its huge size and comfortable armament makes it perfectly equipped for those tasks, although the Caldari seldom let it roam alone. |
The Badger is the basic Caldari hauler ship. It's useful to train to use a Caldari hauler in order to haul ore from your jetcans to the station, or for filling with mission loot to haul to a trade hub in order to sell for larger profit margins. Level 3 courier missions will likely need a ship the size of a Badger to complete them.

RELATED UNI-WIKI REFERENCES
|
S H I P B O N U S E S
Caldari Hauler bonuses (per skill level): The Tayra, an evolution of the old Badger Mark II hauler, focuses entirely on reaching the highest potential capacity that Caldari engineers can manage in a standard cargo carrier. |
The Tayra (formerly called the Badger Mark II) has a cargo hold considerably larger than the Badger's. However, it is marginally slower at subwarp speeds, is less tanky, has less fitting room and takes longer to turn. In general, though, the larger cargo hold offsets the disadvantages and so training Caldari Hauler to III to fly this ship is definitely worth it, particularly if you constantly find yourself filling the Badger's hold.
Missile Tips
- Main article: Missiles
For each type of missile launcher, there are four types of missile, and each type deals one of the four damage types. You can tell the damage type from the flavor word in the missile's name:
- "Mjolnir": EM damage
- "Inferno": thermal damage
- "Scourge": kinetic damage
- "Nova": explosive damage
In PvE combat, you can look up what your target NPCs' weakest damage resistance is, and target that. In PvP, you should bring a range of damage types and (where possible) select the appropriate damage before engaging.
A missile's range is its flight time multiplied by its velocity. You can check missile ranges easily by turning on the tactical overlay and hovering your cursor over the module button for your missile launcher(s): doing this will display the range as a red zone on the overlay, centered on your ship.
Unlike turret weapons, missiles take time to travel to their target. They also struggle to apply their damage to targets smaller than their own size: medium-sized missiles don't apply damage well to frigates, and large missiles don't apply damage well to cruisers. When missiles aren't going to apply damage well, you can try using small drones to scrape small targets off you.
Hybrid Turret Ammo Tips
- Main article: Hybrid Ammo
Different kinds of hybrid turret ammunition carry different trade-offs in range, capacitor use, and damage. Antimatter requires the most capacitor, has the shortest range, and does the most damage. Lead requires the least capacitor, has no range modifier, and does middling damage. Iron has the longest range and the least damage.
In PvE combat, pilots could consider carrying 3 types of ammo, and switch when required. By default, close range (Antimatter or Plutonium) ammo should be used. If you are taking too much damage at close range, switch to medium range (Lead or Thorium) or long range (Iron or Tungsten) ammo, and fire from further away.
For PvP, faction Antimatter ammunition and T2 Null are used for brawling with blasters, while sniping railguns often use T2 Spike ammo.
Related Links
- Basic skills and Support skills - Training support skills is a key step towards flying a ship well. Read up on support skills here.
- Fitting Guidelines - Some general guidelines for fitting ships.
- Fitting Modules and Rigs Guide - A list of rigs and module types with short descriptions.
- NPC damage types and NPC Ship Attributes - To see which resists to use and damage types to deal against NPC rats.
- Creating an Alt Hauler - Having an alt hauler can be useful for shopping trips during wartime, if you are living in highsec.
L2 Blitzing
125mm Prototype Gauss Gun
125mm Prototype Gauss Gun
125mm Prototype Gauss Gun
125mm Prototype Gauss Gun
125mm Prototype Gauss Gun
125mm Prototype Gauss Gun
125mm Prototype Gauss Gun
Salvager I
1MN Afterburner II
Small Azeotropic Ward Salubrity I
Small Shield Booster II
Magnetic Field Stabilizer II
Small Anti-EM Screen Reinforcer I
Small Anti-EM Screen Reinforcer I
Small Anti-Thermal Screen Reinforcer I
Antimatter Charge S x1


- This is a relatively low-skill boat meant to blitz level 1 and 2 missions. T2 mods can be replaced by lower meta.
- Separate your guns into two or three groups to target different frigates.
- Cheap rigs and a small buffer allows you to assess the situation and survive nasty surprises.
- Speed tank with the afterburner and keep at range. Pulse the shield booster.
- Damage Control can be used in place of Magnetic Field Stabilizer in missions requiring more tank (i.e. those involving missile cruisers).
- Salvager is only there due to limited fitting; it should rarely be used in missions. Rocket launcher can be used in its place given better fitting skills, but avoid engagements within rocket launcher range.
- High fitting skills including Engineering V, Electronics V, Weapon Upgrades V, and Advanced Weapon Upgrades IV will allow for an upgrade to T2 guns (requires removal of utility high slot).
Tactics
No sub-article about Cormorant roles or piloting tactics. You can write them here.
Notes
This vessel qualifies for the University Ship Replacement, PYOS, BYOM, and Mining Loaner Fleet programs.


