|
|
| (80 intermediate revisions by 2 users not shown) |
| Line 1: |
Line 1: |
| − | | + | {| |
| − | = Universal shield fits =
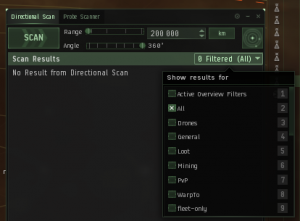
| + | | valign="top" | [[image:Incursions scout filters.png|thumb|Foo ...]] |
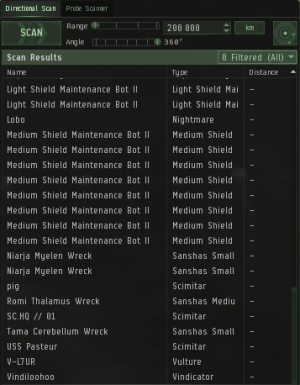
| − | {| class="wikitable" style="font-size:85%; text-align:left; padding:2px; border-collapse:collapse;" | + | | valign="top" | [[image:Incursions scout site taken.png |thumb|Foo ...]] |
| − | |-
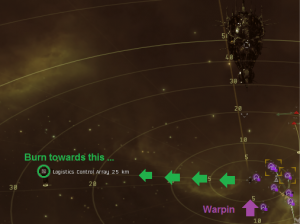
| + | | valign="top" | [[image:Incursions hacker array.png|thumb|Foo ...]] |
| − | ! style="background:#222222;" | Slots
| + | | valign="top" | [[image:Incursions scout site clear.png |thumb|Foo ...]] |
| − | ! style="background:#222222;" | Regular ships
| |
| − | ! style="background:#222222;" | Navy / Fleet Issue
| |
| − | ! style="background:#222222;" | Advanced
| |
| − | |- valign="top" | |
| − | ! style="background:#111111;" | Price
| |
| − | ! style="background:#002000;" | Cheap
| |
| − | ! style="background:#000020;" | Affordable
| |
| − | ! style="background:#200000;" | Costly
| |
| − | |- valign="top"
| |
| − | | nowrap style="text-align:center; background:#111111;" | [[image:icon mid slot.png|32px]]
| |
| − | | nowrap |
| |
| − | http://image.eveonline.com/Type/2281_32.png Adaptive Invulnerability Field II<br>
| |
| − | http://image.eveonline.com/Type/2281_32.png Adaptive Invulnerability Field II<br>
| |
| − | http://image.eveonline.com/Type/2301_32.png EM Ward Field II
| |
| − | | nowrap |
| |
| − | http://image.eveonline.com/Type/2281_32.png Adaptive Invulnerability Field II<br>
| |
| − | http://image.eveonline.com/Type/2281_32.png Adaptive Invulnerability Field II<br>
| |
| − | http://image.eveonline.com/Type/2301_32.png EM Ward Field II
| |
| − | | nowrap | | |
| − | http://image.eveonline.com/Type/4349_32.png Pithum C-Type Adaptive Invulnerability Field<br>
| |
| − | http://image.eveonline.com/Type/2281_32.png Adaptive Invulnerability Field II<br>
| |
| − | [[image:icon mid slot.png|32px]] Freed up mid slot
| |
| − | |- valign="top" | |
| − | | nowrap style="text-align:center; background:#111111;" | [[image:icon low slot.png|32px]]
| |
| − | | nowrap | http://image.eveonline.com/Type/2301_32.png Damage Control II | |
| − | | nowrap | [[image:icon low slot.png|32px]] Freed up low slot
| |
| − | | nowrap | [[image:icon low slot.png|32px]] Freed up low slot
| |
| − | |- valign="top" | |
| − | | nowrap style="text-align:center; background:#111111;" | [[image:icon rigs.png|32px]]
| |
| − | | nowrap |
| |
| − | http://image.eveonline.com/Type/26088_32.png Large Core Defense Field Extender I<br>
| |
| − | http://image.eveonline.com/Type/26088_32.png Large Core Defense Field Extender I<br>
| |
| − | http://image.eveonline.com/Type/26082_32.png Large Anti-Thermal Screen Reinforcer I
| |
| − | | nowrap |
| |
| − | http://image.eveonline.com/Type/26088_32.png Large Core Defense Field Extender I<br>
| |
| − | http://image.eveonline.com/Type/26442_32.png Large Anti-Thermal Screen Reinforcer II<br>
| |
| − | [[image:icon rigs.png|32px]] Freed up rig slot
| |
| − | | nowrap |
| |
| − | http://image.eveonline.com/Type/26448_32.png Large Core Defense Field Extender II<br>
| |
| − | http://image.eveonline.com/Type/26436_32.png Large Anti-EM Screen Reinforcer II<br>
| |
| − | [[image:icon rigs.png|32px]] Freed up rig slot | |
| − | |- valign="top"
| |
| − | ! style="text-align:center; background:#111111;" | Resist profile
| |
| − | ! nowrap style="background:#222222;" |
| |
| − | [[Image:icon_resist_em.png|32px|Electromagnetic resistance]]75,9%
| |
| − | [[Image:icon_resist_therm.png|32px|Thermal resistance]]70%
| |
| − | [[Image:icon_resist_kin.png|32px|Kinetic resistance]]72,8%
| |
| − | [[Image:icon_resist_exp.png|32px|Explosive resistance]]77,4%
| |
| − | ! nowrap style="background:#222222;" |
| |
| − | [[Image:icon_resist_em.png|32px|Electromagnetic resistance]]72,4%
| |
| − | [[Image:icon_resist_therm.png|32px|Thermal resistance]]68,1%
| |
| − | [[Image:icon_resist_kin.png|32px|Kinetic resistance]]69%
| |
| − | [[Image:icon_resist_exp.png|32px|Explosive resistance]]74,1%
| |
| − | ! nowrap style="background:#222222;" |
| |
| − | [[Image:icon_resist_em.png|32px|Electromagnetic resistance]]65,8%
| |
| − | [[Image:icon_resist_therm.png|32px|Thermal resistance]]64,9%
| |
| − | [[Image:icon_resist_kin.png|32px|Kinetic resistance]]73,7%
| |
| − | [[Image:icon_resist_exp.png|32px|Explosive resistance]]78,1%
| |
| − | |- valign="top" | |
| − | ! style="text-align:center; vertical-align:middle; background:#200000; padding:1px;" | [[image:icon overheating.png|32px]]
| |
| − | ! nowrap style="background:#200000;" |
| |
| − | [[Image:icon_resist_em.png|32px|Electromagnetic resistance]]83,8%
| |
| − | [[Image:icon_resist_therm.png|32px|Thermal resistance]]74,5%
| |
| − | [[Image:icon_resist_kin.png|32px|Kinetic resistance]]76,9%
| |
| − | [[Image:icon_resist_exp.png|32px|Explosive resistance]]80,8%
| |
| − | ! nowrap style="background:#200000;" |
| |
| − | [[Image:icon_resist_em.png|32px|Electromagnetic resistance]]81,4%
| |
| − | [[Image:icon_resist_therm.png|32px|Thermal resistance]]71,8%
| |
| − | [[Image:icon_resist_kin.png|32px|Kinetic resistance]]73,6%
| |
| − | [[Image:icon_resist_exp.png|32px|Explosive resistance]]78%
| |
| − | ! nowrap style="background:#200000;" |
| |
| − | [[Image:icon_resist_em.png|32px|Electromagnetic resistance]]71,8%
| |
| − | [[Image:icon_resist_therm.png|32px|Thermal resistance]]71,8%
| |
| − | [[Image:icon_resist_kin.png|32px|Kinetic resistance]]78,9%
| |
| − | [[Image:icon_resist_exp.png|32px|Explosive resistance]]82,4%
| |
| − | |- valign="top"
| |
| − | ! style="text-align:center; background:#111111;" | Reasoning
| |
| − | | This is the basic fit, which is often a little overtanked but that is the intention. It's supposed to be a fit you can run even before you get all your support skills to V, before you've maxed out skills like '''Shield Management''' and gotten a decent buffer on your ship.
| |
| − | | '''Navy''' and '''Fleet Issue''' ships have much higher base stats than regular ships, so they rarely need the extender rigs to boost their shield hp buffer. Some will still have one, for more flexibility when doing Assaults or Headquarter sites.
| |
| − | | |
| − | This variant could be adopted to normal ships as well, but then you'd need to retain the extra extender rig.
| |
| − | | The upgrade to a deadspace hardener means you can free up a valuable midslot. The tech two anti-EM rig is there to bring the EM up to par, whilst the tech two extender rig is merely there because you're using the rig anyway (and blowing up your signature) so making it a tech two rig is simply to give the most out of it.
| |
| − | | |
| − | Due to the more balanced resist-profile, you can comfortably drop the Damage Control from the lows in favour of another module.
| |
| | |} | | |} |


