|
|
| (46 intermediate revisions by 2 users not shown) |
| Line 1: |
Line 1: |
| − | <!-- {{incursions_sites}} -->
| |
| − | = Objectives =
| |
| − | ===== Force required =====
| |
| − | {{incursion sites|headquarters}}
| |
| − | ===== Military information =====
| |
| | {| | | {| |
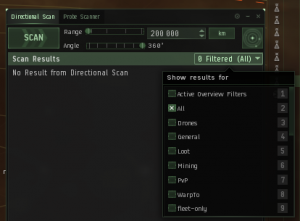
| − | | valign="middle" | [[image:incursions_sansha_transmission.png]] | + | | valign="top" | [[image:Incursions scout filters.png|thumb|Foo ...]] |
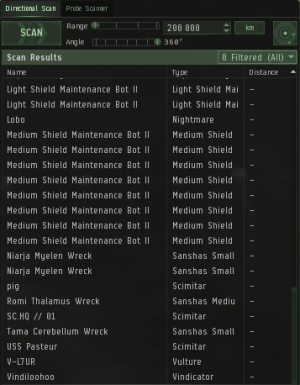
| − | | valign="middle" | Your objective is to secure a path to True Power's Mobile HQ and then destroy it. You will need to pass through three layers of security before you will arrive at the station. Sansha commanders will attempt to reinforce the area en-masse if you give them time to, so be sure to bring pilots to breach their defenses quickly. | + | | valign="top" | [[image:Incursions scout site taken.png |thumb|Foo ...]] |
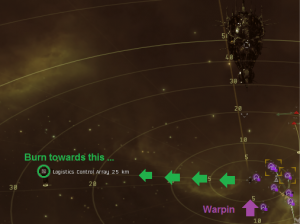
| | + | | valign="top" | [[image:Incursions hacker array.png|thumb|Foo ...]] |
| | + | | valign="top" | [[image:Incursions scout site clear.png |thumb|Foo ...]] |
| | |} | | |} |
| − | ===== Background information =====
| |
| − | True Power, the leading corporation within Sansha's Nation, has acquired the means to establish provisional headquarters in areas of their choosing. The exact nature of these operations or how such large complexes are established so quickly remains unknown. The use of mobile nano-factories is strongly suspected, and would help account for the rapidity of setup. It is also possible that rogue drone technology, or even worker drones themselves, are for some reason assisting in the rapid deployment of these battle stations, although this remains unconfirmed.
| |
| − |
| |
| − | The strategic value of these outposts is significant. Nation can re-equip local fighting forces at a moment's notice, transmit instructions and battle reports along secure lines, and rally retreating Nation forces that have been ejected from other strongholds, which are always in close proximity to the larger headquarters for this reason.
| |
| − |
| |
| − | ''Synopsis from ISHAEKA-0081. DED Special Operations.''<br>''Authorized for Capsuleer dissemination.''
| |
| − | = Enemies =
| |
| − | Below is a list of enemies that spawn in this site. See [[Sansha's Manual]] for a full list of the incursion rats.
| |
| − | {{incursion rats|Start}}
| |
| − | {{incursion rats|Antem Neo}}
| |
| − | {{incursion rats|Arnon Epithalamus}}
| |
| − | {{incursion rats|Auga Hypophysis}}
| |
| − | {{incursion rats|Deltole Tegmentum}}
| |
| − | {{incursion rats|Eystur Rhomben}}
| |
| − | {{incursion rats|Intaki Colliculus}}
| |
| − | {{incursion rats|Mara Paleo}}
| |
| − | {{incursion rats|Ostingele Tectum}}
| |
| − | {{incursion rats|Outuni Mesen}}
| |
| − | {{incursion rats|Romi Thalamus}}
| |
| − | {{incursion rats|Schmaeel Medulla}}
| |
| − | {{incursion rats|Tama Cerebellum}}
| |
| − | {{incursion rats|Vylade Dien}}
| |
| − | {{incursion rats|Yulai Crus Cerebi}}
| |
| − | {{incursion rats|End}}
| |
| − | == Priorities ==
| |
| − | This is a generic kill order that works no matter what fleet you're running. Certain special doctrines or fleet compositions could change some things in order to optimize their fleet efficiency, so this isn't necessarily the only kill order, but it works.
| |
| − |
| |
| − | As a general rule of thumb, if you cannot shoot the highest priority target due to low damage projection, move on to the next target you can actually hit. Just remember to switch back to a higher priority target if it moves into range later on.
| |
| − | {| class="wikitable" style="font-size:90%;"
| |
| − | |-
| |
| − | ! style="background:#333333;" nowrap colspan="2" rowspan="2" | #
| |
| − | ! style="background:#333333;" nowrap colspan="3" | Targets for the entire fleet
| |
| − | ! style="background:#333333; vertical-align:middle; text-align:center" rowspan="2" nowrap | Reason
| |
| − | |-
| |
| − | ! style="background:#222222;" nowrap | Regular targets<small> <ref>These targets are usually larger, cruisers or battleships and suitable for ships with good damage projection, lower tracking, like battleships with large guns.</ref></small>
| |
| − | ! style="background:#222222;" nowrap | Sniper targets<small> <ref>Sniper targets are enemies that stay up to 150km away, requiring you to have increased locking range and extreme damage projection. Once you run out of sniper targets, change to short range ammo and follow regular targets.</ref></small>
| |
| − | ! style="background:#222222;" nowrap | Small targets<small> <ref>Smaller targets, like frigates or extremely fast or small cruisers. Ideally the primary targets for '''strategic cruisers''', [[Vindicator]]s or the [[Roles in Incursions#Dronebunny|dronebunny]] as a last resort.</ref></small>
| |
| − | |- style="vertical-align:top;"
| |
| − | | nowrap | 1
| |
| − | | style="background:Red;" width="1" |
| |
| − | | style="text-align:center; padding:5px;" colspan="2" nowrap | '''Arnon Epithalamus''' {{icon|jamming|24|Jamming}}<br>'''Outuni Mesen'''<small> <ref>The threat of the '''Outuni''' comes from it being within neuting range. If you're confident that your fleet can take it out before it comes within neuting range, you can forego this ship in favour of other ships, as long as you make sure it's dead before it reached neuting range.</ref></small> {{icon|point|24|Warp disrupting}}{{icon|neut|24|Energy neutralizing}}{{icon|web|24|Webbing}}
| |
| − | | style="padding:5px;" nowrap | '''Schmaeel Medulla''' {{icon|point|24|Warp disrupting}}{{icon|web|24|Webbing}}{{icon|neut|24|Energy neutralizing}}
| |
| − | | style="padding:5px;" | The '''Arnons''' because they jam and the '''Outunis''' due to heavy neuts (also warp disrupts and web).
| |
| − |
| |
| − | The '''Schmaeels''' because they web and warp disrupts.
| |
| − | |- style="vertical-align:text-top;"
| |
| − | | nowrap | 2
| |
| − | | style="background:OrangeRed;" width="1" |
| |
| − | | style="padding:5px;" nowrap | '''Auga Hypophysis''' {{icon|point|24|Warp disrupting}}{{icon|web|24|Webbing}}<br>'''Deltole Tegmentum''' {{icon|point|24|Warp disrupting}}{{icon|neut|24|Energy neutralizing}}{{icon|tp|24|Target painting}}<br>'''Vylade Dien'''<small> <ref>The '''Vylade''' is technically not much of a threat. The more Sansha on the grid the higher the priority to kill it, as it'll make all ships capable of taking more damage. But with less ships on grid that aspect becomes more or less trivial. It can still be prioritized before the '''Deltole''' for the battleship-side if you want to kill it before it moves too far out (its preferred orbit is 120 km).</ref></small> {{icon|warfare links|24|Siege Warfare links}}
| |
| − | | style="padding:5px;" nowrap | '''Mara Paleo'''<small> <ref>The '''Mara''' can often be ignored in favour of other ships in the last room due to superior firepower of the fleet, but a higher priority for the cruiser-side due to having less damage while split up.</ref></small> {{icon|shield transporter|24|Remote shield booster}}
| |
| − | | style="padding:5px;" nowrap | '''Tama Cerebellum''' {{icon|point|24|Warp disrupting}}
| |
| − | | style="padding:5px;" | '''Augas''' before '''Deltoles''' as they die rapidly and also web, then '''Vylades''' because they boost resists.
| |
| − |
| |
| − | The '''Maras''' because they remote repair.
| |
| − |
| |
| − | '''Tamas''' due to their high damage and warp disruption.
| |
| − | |- style="vertical-align:top;"
| |
| − | | nowrap | 3
| |
| − | | style="background:Green;" width="1" |
| |
| − | | style="padding:5px;" nowrap | '''Intaki Colliculus'''{{icon|st|24|Remote shield booster}}<br>'''Ostingele Tectum'''<br>'''Romi Thalamus'''
| |
| − | | style="padding:5px;" nowrap | '''Yulai Crus Cerebi'''<br>'''Antem Neo'''
| |
| − | | style="padding:5px;" nowrap | '''Eystur Rhomben'''
| |
| − | | style="padding:5px;" | '''Intakis''' because they are logistics then '''Ostingeles''' before '''Romis''' as they are easier to hit and do more damage.
| |
| − |
| |
| − | '''Yulais''' before '''Antems''' as they are easier to hit and do more damage.
| |
| − |
| |
| − | '''Eysturs''' pose no specific threat.
| |
| − | |}
| |
| − | <small><references/></small>
| |
| − |
| |
| − | == Triggers ==
| |
| − | The '''acceleration gates''' in the first and second pocket of this site will only unlock<small> <ref name="respawn">Technically it will despawn and respawn as a proper interactive object. If you're approaching it when it respawns you'll continue straight ahead and if you're orbiting it when it respawns you'll start running off into the distance.</ref></small> once all the Sansha in the pocket have been killed.
| |
| − |
| |
| − | In the third and last pocket the '''True Power Mobile Headquarters (Sansha's Battletower LCO)''' will be a regular object in space until you've killed off the first wave, the second wave (triggered by the last Ostingele in the first wave) and the third wave (triggered by the last Ostingele in the second wave). Then it will unlock<small> <ref name="respawn"></ref></small> into the proper '''True Power Mobile Headquarters (Reinforced Nation Outpost)''' that you need to summarily blow up.
| |
| − |
| |
| − | The destruction of the '''True Power Mobile Headquarters''' will end the site.
| |
| − |
| |
| − | <small><references/></small>
| |
| − | == Special requirements ==
| |
| − | There are no special requirements for this site.
| |
| − |
| |
| − | = Hints & tips =
| |
| − | * Tag one of the '''Ostingele Tectums''' of each wave in the last room as '''J''' (juliet) to manage the triggers. Kill everything but the last Ostingele before finishing it off, that way you will not risk spawning too many ships at once.
| |
| − | * Remember to pulse your propulsion module or turn it off as soon as you're in position, to preserve cap.
| |
| − | * Keep an extra eye on your capacitor if the '''Outuni Mesen''' ever gets within neuting range.
| |
| − | * It doesn't hurt to remind people to move towards the gates in the first few rooms, switch to the fleet member tab or look at brackets in space to catch people who forget to move.
| |
| − | [[Category:Incursions|Headquarter sites]]
| |


