|
|
| (42 intermediate revisions by 2 users not shown) |
| Line 1: |
Line 1: |
| − | = Fitting your ship for travel =
| + | {| |
| − | There are three fundamentally different ways of fitting your ship for travel; '''Speed''', '''tank''' or '''safety'''.
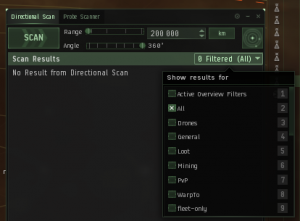
| + | | valign="top" | [[image:Incursions scout filters.png|thumb|Foo ...]] |
| − | == Fitting for increased travel speed ==
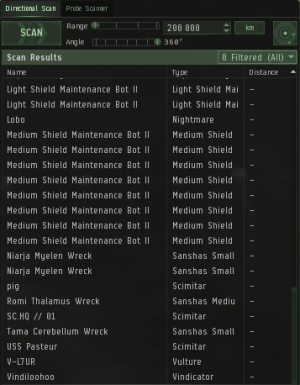
| + | | valign="top" | [[image:Incursions scout site taken.png |thumb|Foo ...]] |
| − | If your only concern is to get to your destination as fast as possible, not having any war targets or pirates to worry about nor carrying too many expensive modules, you can focus exclusively on cutting down the align time and increasing warp speed.
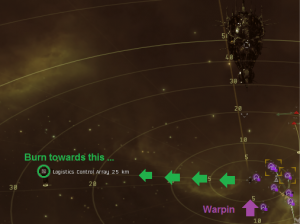
| + | | valign="top" | [[image:Incursions hacker array.png|thumb|Foo ...]] |
| − | | + | | valign="top" | [[image:Incursions scout site clear.png |thumb|Foo ...]] |
| − | Usually increasing warp speed tends to cut down on travel time the most, since you spend more time in warp than you do aligning. So if you're forced to choose between the two, it tends to be more beneficial to focus slightly more on increasing warp speed than reducing align time. Within reason of course, most of the time you can accomplish both. Depending on the ship you're moving, re-rigging your ship might not be a practical option and then the modules suggested will be your focus, as you can easily refit your lows, mids and highs before and after moving.
| |
| − | | |
| − | ==== Reducing align time ====
| |
| − | While there are several modules that reduce inertia, some are stronger than others, leaving you with this module and rig.
| |
| − | {| class="wikitable" | |
| − | | style="background-color:#111111; padding:0px;" | [[image:icon_low_slot.png|32px|Low slot]] | |
| − | | style="background-color:#111111; padding:0px;" | https://image.eveonline.com/Type/1405_32.png | |
| − | | style="background-color:#222222; padding:3px;" | {{co|coral|Inertia Stabilizers II}} (-20% inertia modifier, +11% signature) | |
| − | |- | |
| − | | style="background-color:#111111; padding:0px;" | [[image:icon_rigs.png|32px|Rig slot]]
| |
| − | | style="background-color:#111111; padding-top:0px; padding:0px;" | [[image:module_icon_propulsion_rig_tech2.png|32px|link=]] | |
| − | | style="background-color:#222222; padding:4px;" | {{co|coral|Low Friction Nozzle Joints II}} (-14% inertia modifier, -10% armour hp)
| |
| | |} | | |} |
| − | ==== Increasing warp speed ====
| |
| − | There are three low slot modules and one rig that increases warp speed. The modules increase warp speed by raising the base AU/s warp speed by a fixed number, while the rig has a normal percentage bonus.
| |
| − | {| class="wikitable"
| |
| − | | style="background-color:#111111; padding:0px;" | [[image:icon_low_slot.png|32px|Low slot]]
| |
| − | | style="background-color:#111111; padding:0px;" | https://image.eveonline.com/Type/33981_32.png
| |
| − | | style="background-color:#222222; padding:3px;" | {{co|coral|Limited Hyperspatial Accelerator}} (+0,2 AU/s, {{co|lightgreen|cheap}})
| |
| − | |-
| |
| − | | style="background-color:#111111; padding:0px;" | [[image:icon_low_slot.png|32px|Low slot]]
| |
| − | | style="background-color:#111111; padding:0px;" | https://image.eveonline.com/Type/33981_32.png
| |
| − | | style="background-color:#222222; padding:3px;" | {{co|coral|Experimental Hyperspatial Accelerator}} (+0,25 AU/s, {{co|lightblue|affordable}})
| |
| − | |-
| |
| − | | style="background-color:#111111; padding:0px;" | [[image:icon_low_slot.png|32px|Low slot]]
| |
| − | | style="background-color:#111111; padding:0px;" | https://image.eveonline.com/Type/33981_32.png
| |
| − | | style="background-color:#222222; padding:3px;" | {{co|coral|Prototype Hyperspatial Accelerator}} (+0,3 AU/s, {{co|crimson|costly}})
| |
| − | |-
| |
| − | | style="background-color:#111111; padding:0px;" | [[image:icon_rigs.png|32px|Rig slot]]
| |
| − | | style="background-color:#111111; padding-top:0px; padding:0px;" | [[image:module_icon_propulsion_rig_tech2.png|32px|link=]]
| |
| − | | style="background-color:#222222; padding:4px;" | {{co|coral|Hyperspatial Velocity Optimizer II}} (+25% warp speed, +10% signature)
| |
| − | |}
| |
| − | == Fitting enough tank not to be worth ganking ==
| |
| − | If you're in high security space and not at war, the only real threat to your ship is suicide gankers. To remedy this, you can up your tank to the point where it's not worth ganking you for profit. This will drastically reduce the chance of someone bothering to destroy your ship.
| |
| − |
| |
| − | Below are some examples of suitable modules to further your fitting goals.
| |
| − |
| |
| − | ==== Improving your hull tank ====
| |
| − | Perhaps one of the easiest and least skill intensive ways to buff your tank is to simply add a '''Damage Control II''' and try to increase your structure points as much as you can. The skill requirements for that is fairly easy, requiring only {{sk|Mechanics|III|mult=yes}} and {{sk|Hull Upgrades|IV|mult=yes}} for the damage control. Further increasing '''mechanics''' will increase the overall efficiency of the buff, since it increases your structure points by 5% per level.
| |
| − | {| class="wikitable"
| |
| − | | style="background-color:#111111; padding:0px;" | [[image:icon_low_slot.png|32px|Low slot]]
| |
| − | | style="background-color:#111111; padding:0px;" | [[image:module_icon_damage_control_tech2.png|32px|link=]]
| |
| − | | style="background-color:#222222; padding:3px;" | {{co|coral|Damage Control II}} (60% overall structure resists)
| |
| − | |-
| |
| − | | style="background-color:#111111; padding:0px;" | [[image:icon_low_slot.png|32px|Low slot]]
| |
| − | | style="background-color:#111111; padding-top:0px; padding:0px;" | http://image.eveonline.com/Type/1335_32.png
| |
| − | | style="background-color:#222222; padding:4px;" | {{co|coral|Reinforced Bulkhead II}} (+25% structure hp, -11% cargo capacity, +5% agility)
| |
| − | |-
| |
| − | | style="background-color:#111111; padding:0px;" | [[image:icon_rigs.png|32px|Rig slot]]
| |
| − | | style="background-color:#111111; padding-top:0px; padding:0px;" | http://image.eveonline.com/Type/33900_32.png
| |
| − | | style="background-color:#222222; padding:4px;" | {{co|coral|Transverse Bulkhead II}} (+25% structure hp, -10% cargo capacity)
| |
| − | |}
| |
| − |
| |
| − | ==== Improving your armour tank ====
| |
| − | Fitting an armour tank can be a little bit more skill intensive, especially a passive resist setup since the efficiency of passive resist modules rely heavily on the armour compensation skills such as {{sk|EM Armor Compensation|mult=yes}}, {{sk|Thermic Armor Compensation|mult=yes}}, {{sk|Kinetic Armor Compensation|mult=yes}} and {{sk|Explosive Armor Compensation|mult=yes}}. A setup with active hardeners would potentially give you higher resists, but would take up too many modules leaving scarcely few slots for actual armour plates.
| |
| − |
| |
| − | As such it might not be something you'll be doing as a young capsuleer, but for people with high armour support skills flying certain ships (with more armour than structure hp) it might be slightly stronger than the structure approach mentioned above.
| |
| − | {| class="wikitable"
| |
| − | | style="background-color:#111111; padding:0px;" | [[image:icon_low_slot.png|32px|Low slot]]
| |
| − | | style="background-color:#111111; padding:0px;" | [[image:module_icon_damage_control_tech2.png|32px|link=]]
| |
| − | | style="background-color:#222222; padding:3px;" | {{co|coral|Damage Control II}} (60% overall structure resists)
| |
| − | |-
| |
| − | | style="background-color:#111111; padding:0px;" | [[image:icon_low_slot.png|32px|Low slot]]
| |
| − | | style="background-color:#111111; padding-top:0px; padding:0px;" | https://image.eveonline.com/Type/11269_32.png
| |
| − | | style="background-color:#222222; padding:4px;" | {{co|coral|Energized Adaptive Nano Membrane II}} (+25% overall armour resists)
| |
| − | |-
| |
| − | | style="background-color:#111111; padding:0px;" | [[image:icon_low_slot.png|32px|Low slot]]
| |
| − | | style="background-color:#111111; padding-top:0px; padding:0px;" | https://image.eveonline.com/Type/20353_32.png
| |
| − | | style="background-color:#222222; padding:4px;" | {{co|coral|1600mm Steel Plates II}} (+4,800 base armour hp)
| |
| − | |-
| |
| − | | style="background-color:#111111; padding:0px;" | [[image:icon_rigs.png|32px|Rig slot]]
| |
| − | | style="background-color:#111111; padding-top:0px; padding:0px;" | https://image.eveonline.com/Type/26302_32.png
| |
| − | | style="background-color:#222222; padding:4px;" | {{co|coral|Trimark Armor Pump II}} (+20% armour hp, -10% speed)
| |
| − | |}
| |
| − | ==== Improving your shield tank ====
| |
| − | The skills to use a proper tech two shield tank isn't quite as skill intensive as armour, requiring just {{sk|Shield Upgrades|IV|mult=yes}} and {{sk|Tactical Shield Manipulation|IV|mult=yes}}. Since there aren't any passive omni tanked shield modules, you need to use an active invulnerability field. You can fit for anti-gank by using an invulnerability field as well as thermic and kinetic hardener, since the strongest gankers are gallente. Use the rest of the midslots for as many shield extenders as possible and an afterburner/microwarpdrive to cut then align time down (see below).
| |
| − | {| class="wikitable"
| |
| − | | style="background-color:#111111; padding:0px;" | [[image:icon_mid_slot.png|32px|Mid slot]]
| |
| − | | style="background-color:#111111; padding:0px;" | https://image.eveonline.com/Type/2281_32.png
| |
| − | | style="background-color:#222222; padding:3px;" | {{co|coral|Adaptive Invulnerability Field II}} (30% overall shield resists)
| |
| − | |-
| |
| − | | style="background-color:#111111; padding:0px;" | [[image:icon_mid_slot.png|32px|Mid slot]]
| |
| − | | style="background-color:#111111; padding-top:0px; padding:0px;" | https://image.eveonline.com/Type/2303_32.png
| |
| − | | style="background-color:#222222; padding:4px;" | {{co|coral|Thermic Dissipation Field II}} (+55% thermic shield resists)
| |
| − | |-
| |
| − | | style="background-color:#111111; padding:0px;" | [[image:icon_mid_slot.png|32px|Mid slot]]
| |
| − | | style="background-color:#111111; padding-top:0px; padding:0px;" | https://image.eveonline.com/Type/2299_32.png
| |
| − | | style="background-color:#222222; padding:4px;" | {{co|coral|Kinetic Deflection Field II}} (+55% kinetic shield resists)
| |
| − | |-
| |
| − | | style="background-color:#111111; padding:0px;" | [[image:icon_mid_slot.png|32px|Mid slot]]
| |
| − | | style="background-color:#111111; padding-top:0px; padding:0px;" | https://image.eveonline.com/Type/3841_32.png
| |
| − | | style="background-color:#222222; padding:4px;" | {{co|coral|Large Shield Extender II}} (+2,625 base shield hp)
| |
| − | |-
| |
| − | | style="background-color:#111111; padding:0px;" | [[image:icon_rigs.png|32px|Rig slot]]
| |
| − | | style="background-color:#111111; padding-top:0px; padding:0px;" | https://image.eveonline.com/Type/26302_32.png
| |
| − | | style="background-color:#222222; padding:4px;" | {{co|coral|Core Defense Field Extender II}} (+20% shield hp, +10% signature)
| |
| − | |}
| |
| − | ==== Reducing inflated align times ====
| |
| − | A lot of tanking modules increase your align time, making you turn and handle like a brick with align times pushing 15+ seconds. One way to mitigate this is to fit either a '''microwarpdrive''' (cycles in 10 seconds) or an '''afterburner''' (cycles as fast as 7,5 seconds). By pulsing the module once (activating it and then immediately deactivating it), you can align in 7,5 - 10 seconds flat as long as you start your align from a standstill (like after you've jumped through a gate).
| |
| − |
| |
| − | == Fitting for safe travel in hostile space ==
| |
| − | This method relies fitting an '''Improved Cloaking Device II''' and a '''microwarpdrive''' to allow you to be cloaked while aligning, minimizing the time you're actually visible on grid. This is commonly referred to as the '''MWD + cloak trick''', see [https://www.youtube.com/watch?v=bVi1CWcbSUE Seamus Donohue's video] for more information.
| |
| − |
| |
| − | In order to use the microwarpdrive and cloak you'll need to train {{sk|High Speed Maneuvering|III|mult=yes}} and {{sk|Cloaking|III|mult=yes}} and use the appropriately sized microwarpdrive for your ship class. Frigates use the 5MN-variant, cruisers the 50MN-variant and battleships the 500MN-variant. Since there are no 5,000MN-variants, certain ships like [[Orca]]s and [[Bowhead]]s (and other capital ships) can only fit "undersized" 500MN Microwarpdrives. As such they are limited to using them only as a means to align in 10 seconds flat (see above). They cannot combine their microwarpdrive with a cloak to do this trick, as they will simply not be able to accelerate fast enough.
| |
| − |
| |
| − | The main risk of this method is messing up the cloak and getting locked before you manage to get your cloak up, which would make it impossible for you to cloak up. It's also possible for people to burn towards your location and decloak you before you've managed to align. Having a '''Warp Core Stabilizer I''' or two might save you from a line enemy with just a long point, but for that to be useful you'll need to be able to warp away before anyone else shows up with a second or third point, or a scram.
| |
| − |
| |
| − | = Using dedicated ships for moving around =
| |
| − | If you're not bound to a specific ship but can setup dedicated ships for flying back and forth in the universe, you got plenty of options that can be either faster, safer, more convenient or just cheaper. This is very convenient if you have ships staged in two or more different regions or areas in space, as hopping into a shuttle or an interceptor will quickly and effortlessly allow you to move between them.
| |
| − |
| |
| − | Below are a few examples of ships that can be used.
| |
| − |
| |
| − | == Shuttles ==
| |
| − | Shuttles are dirt cheap and are often ignored by most in high security space. This can be a cheap option for new players to move around even if they are at war. Even if they are caught, as long as they don't have too many expensive implants, they potentially risk but a shuttle and a pod. This option is slightly less useful in low and null security space, due to its paper tank and the ease of simply smartbombing you as you approach the gate ... picking off both you and your pod in one fell swoop. Shuttles aren't always available at decent prices as well, but can easily be stockpiled or even built if you regularly need to use them.
| |
| − |
| |
| − | Getting the shuttle to less than two second align time only requires {{sk|Navigation|II|mult=yes}} and {{sk|Evasive Maneuvering|III|mult=yes}}.
| |
| − | {| class="wikitable"
| |
| − | | style="background-color:#111111; padding:0px;" | [[image:Gallente_Shuttle.jpg|128px|Gallente Shuttle]]
| |
| − | | style="background-color:#222222;" | {{icon|point|24|Warp speed}} 5 AU/s warp speed.<br>{{icon|inertia|24|Align time}} < 2 sec align time<br>{{icon|hull|24|Effective hit points}} Up to 786 effective hit points.<br>{{icon|velocity|24|Velocity}} Up to 625 m/s speed<br>{{icon|capacity|24|Cargo capacity}} 10 m3 cargo capacity.
| |
| − | |}
| |
| − | For the rich, using the [[Leopard]] you'll improve warp speed to{{icon|point|24|Warp speed}}'''20 AU/s''' warp speed, significantly improving your mileage.
| |
| − |
| |
| − | == Interceptors ==
| |
| − | A very common method of travelling is to use an interceptor fit to align in less than two seconds, with hyperspatial rigs to improve its already impressive warp speed. With a proper fit you can even tank it enough to survive a few smartbombs, making it a favourite for capsuleers moving vast distances, especially in low- and null security space. Below is an example of a [[Raptor]] fitted for fast travel.
| |
| − | {{ShipFitting
| |
| − | | ship=Raptor
| |
| − | | shipTypeID=11178
| |
| − | | fitName=Travelceptor (MWD)
| |
| − | | fitID=Travelceptor-(MWD)
| |
| − | | low1name=Inertial Stabilizers II
| |
| − | | low1typeID=1405
| |
| − | | low2name=Inertial Stabilizers II
| |
| − | | low2typeID=1405
| |
| − | | low3name=Inertial Stabilizers II
| |
| − | | low3typeID=1405
| |
| − | | mid1name=5MN Microwarpdrive II
| |
| − | | mid1typeID=440
| |
| − | | mid2name=Medium Shield Extender II
| |
| − | | mid2typeID=3831
| |
| − | | mid3name=Small Shield Extender II
| |
| − | | mid3typeID=380
| |
| − | | mid4name=EM Ward Amplifier II
| |
| − | | mid4typeID=2553
| |
| − | | rig1name=Small Hyperspatial Velocity Optimizer II
| |
| − | | rig1typeID=31165
| |
| − | | rig2name=Small Hyperspatial Velocity Optimizer II
| |
| − | | rig2typeID=31165
| |
| − | | high1name=open
| |
| − | | high2name=open
| |
| − | | high3name=open
| |
| − | | charge1name=open
| |
| − | | charge2name=open
| |
| − | | charge3name=open
| |
| − | | charge4name=open
| |
| − | | charge5name=open
| |
| − | | skills=
| |
| − | | showSKILLS=N
| |
| − | | notes='''Relevant information:'''</li>{{icon|point|24|Warp speed}} 12,2 AU/s warp speed.<br>{{icon|inertia|24|Align time}} < 2 sec align time<br>{{icon|hull|24|Effective hit points}} 6,955 effective hit points.<br>{{icon|velocity|24|Velocity}} 3,764 m/s speed<br>{{icon|capacity|24|Cargo capacity}} 92 m3 cargo capacity<li>You can even remove the microwarpdrive, downgrade the small shield extender to a meta extender and add a second medium shield extender for additional tank. That would remove the flexibility of quickly burning out of range or back to the gate however.
| |
| − | | showNOTES=Y
| |
| − | | difficulty=1
| |
| − | | warsop=A
| |
| − | | warsopReason=
| |
| − | | version=Aegis
| |
| − | | showTOC=N
| |
| − | | shipDNA=11178:1405;3:440;1:3831;1:380;1:2553;1:31165;2::
| |
| − | }}
| |
| − | == Covert Ops ==
| |
| − | Ships capable of fitting the '''Covert Ops Cloaking Device II''' module<small> <ref>Astero, Blockade Runner, Covert Ops, Etana, Prospect, Force Recon, Stealth Bomber, Strategic Cruiser, Stratios, Victorieux Luxury Yacht.</ref></small> can be very effective in moving about in hostile space, such as low-, null- and wormhole space. Their ability to remain cloaked at all times, assuming you don't let anything get too close, will allow them to safely scout out gates for gate camp as well as letting them use covert cynosural fields.
| |
| − |
| |
| − | Regular covert ops ships are often favoured for travel via wormholes, given the fickle nature of wormholes, the value of remaining unseen and the ability to scan down a new ''"door"'' should the old one close on you.
| |
| − | {| class="wikitable"
| |
| − | | style="background-color:#111111; padding:0px;" | [[image:Buzzard.jpg|112px|Buzzard]]
| |
| − | | style="background-color:#222222; padding:4px;" | {{icon|point|24|Warp speed}} 3 - 12 AU/s warp speed.<br><small><ul>'''Cruisers''' warp at 3 - 3,3 AU/s</ul><ul>'''Strategic Cruisers''' warp at 3 - 4,9 AU/s</ul><ul>'''Astero''' warps at 5 AU/s</ul><ul>'''Covert Ops''' warps at 8 AU/s</ul></small>
| |
| − | |}
| |
| − | <small><references/></small>
| |


