|
|
| (5 intermediate revisions by 2 users not shown) |
| Line 2: |
Line 2: |
| | | | |
| | In this thread, I will pass on some of my knowledge and experiences which I have laboriously explored and mapped out. Specifically, I will have posts to this thread which will entail the following topics in some detail: | | In this thread, I will pass on some of my knowledge and experiences which I have laboriously explored and mapped out. Specifically, I will have posts to this thread which will entail the following topics in some detail: |
| | + | * [[#Ghost_Sites|Ghost sites]] |
| | + | * [[#Sleeper_Caches:_A_Preamble|A preamble about Sleeper Caches]] |
| | + | * [[#Limited_Sleeper_Cache|Limited Sleeper Caches]] |
| | + | * [[#Standard_Sleeper_Cache|Standard Sleeper Caches]] |
| | + | * [[#Superior_Sleeper_Cache|Superior Sleeper Caches]] |
| | + | * [[#General_Exploration_Ramblings|General exploration tips]] |
| | | | |
| − | * [http://wiki.eveuniversity.org/3P38_Sleeper_Nexus#Ghost_Sites Ghost sites]
| |
| − | * [http://wiki.eveuniversity.org/3P38_Sleeper_Nexus#Sleeper_Caches:_A_Preamble A preamble about Sleeper Caches]
| |
| − | * [http://wiki.eveuniversity.org/3P38_Sleeper_Nexus#Limited_Sleeper_Cache Limited Sleeper Caches]
| |
| − | * [http://wiki.eveuniversity.org/3P38_Sleeper_Nexus#Standard_Sleeper_Cache Standard Sleeper Caches]
| |
| − | * [http://wiki.eveuniversity.org/3P38_Sleeper_Nexus#Superior_Sleeper_Cache Superior Sleeper Caches]
| |
| − | * [http://wiki.eveuniversity.org/3P38_Sleeper_Nexus#General_Exploration_Ramblings General exploration tips]
| |
| | I'm not one to explain or elaborate on my own personal resume or length of tenure of a particular subject, as I firmly believe that neither of those two factors is exclusively indicative of competence. Instead I will rely on my peers and superiors to judge if I am considered an authority on the subject, so in that respect, I am open to good, solid commentary about my methods, techniques or procedures. For that matter, with some exceptions, the details explained here are not "the way" but "a way" of doing it. | | I'm not one to explain or elaborate on my own personal resume or length of tenure of a particular subject, as I firmly believe that neither of those two factors is exclusively indicative of competence. Instead I will rely on my peers and superiors to judge if I am considered an authority on the subject, so in that respect, I am open to good, solid commentary about my methods, techniques or procedures. For that matter, with some exceptions, the details explained here are not "the way" but "a way" of doing it. |
| | | | |
| | == Ghost Sites == | | == Ghost Sites == |
| − | [[File:3P38 Ghost 1.png|200px|thumb|right|Message generated from initiating warp to a Ghost Site]]A rather convenient upgrade from the regular data or relic sites you get in low, null or wormhole space, these sites are rather dangerous. You can, however, be assured there will not be any cloaked interdictors lurking in the site. | + | [[File:3P38 Ghost 1.png|thumb|200px|Message generated from initiating warp to a Ghost Site]]A rather convenient upgrade from the regular data or relic sites you get in low, null or wormhole space, these sites are rather dangerous. You can, however, be assured there will not be any cloaked interdictors lurking in the site. |
| | | | |
| | There are four classes of so-called "Ghost Sites", for lack of a better term, in order of ascending difficulty: | | There are four classes of so-called "Ghost Sites", for lack of a better term, in order of ascending difficulty: |
| − |
| |
| | * [http://games.chruker.dk/eve_online/site_view.php?id=348 Besieged Covert Research Facility] | | * [http://games.chruker.dk/eve_online/site_view.php?id=348 Besieged Covert Research Facility] |
| | * [http://games.chruker.dk/eve_online/site_view.php?id=353 Lesser ''faction'' Covert Research Facility] | | * [http://games.chruker.dk/eve_online/site_view.php?id=353 Lesser ''faction'' Covert Research Facility] |
| Line 31: |
Line 30: |
| | | | |
| | Additionally, the higher the site rating, the more NPC pirate rats show up (when they do), the more damage they do, and the more damage a container does when it detonates. Site containers explode when they are shot at by the NPC pirates (which they do) or when a hack is failed. Thus, the specific dangers to these sites are: | | Additionally, the higher the site rating, the more NPC pirate rats show up (when they do), the more damage they do, and the more damage a container does when it detonates. Site containers explode when they are shot at by the NPC pirates (which they do) or when a hack is failed. Thus, the specific dangers to these sites are: |
| − |
| |
| | * Limited time frame | | * Limited time frame |
| | * High damage received upon failure of a container | | * High damage received upon failure of a container |
| Line 37: |
Line 35: |
| | | | |
| | Let us discuss the merits of each point I mentioned here: | | Let us discuss the merits of each point I mentioned here: |
| − |
| |
| | * ''Limited time frame'': Ghost sites are all about speed and efficiency. The less time you spend moving around the site, the faster you hack, and a couple of other parameters are critical towards success. The use of a Data Analyzer II is strongly recommended, because it has a higher base virus strength, which means hacking is faster and safer. | | * ''Limited time frame'': Ghost sites are all about speed and efficiency. The less time you spend moving around the site, the faster you hack, and a couple of other parameters are critical towards success. The use of a Data Analyzer II is strongly recommended, because it has a higher base virus strength, which means hacking is faster and safer. |
| | * ''High damage received upon failure of a container'': The Lesser grade Covert Research Facilities (i.e. Lesser Serpentis Covert Research Facility) can be handled with a Tech I exploration frigate, such a Heron with a medium shield extender, a damage control and an active explosive hardener. That vessel however, can only eat one detonation, and should the pilot not evade the damage of the NPC rats, probably won't be able to survive if he does not escape immediately. The higher rated sites, such as the Standard Guristas Covert Research Facility, should be done with a different ship. | | * ''High damage received upon failure of a container'': The Lesser grade Covert Research Facilities (i.e. Lesser Serpentis Covert Research Facility) can be handled with a Tech I exploration frigate, such a Heron with a medium shield extender, a damage control and an active explosive hardener. That vessel however, can only eat one detonation, and should the pilot not evade the damage of the NPC rats, probably won't be able to survive if he does not escape immediately. The higher rated sites, such as the Standard Guristas Covert Research Facility, should be done with a different ship. |
| Line 49: |
Line 46: |
| | * Fit for tanking any damage that you may receive, from failure of a container | | * Fit for tanking any damage that you may receive, from failure of a container |
| | * Fit for the lowest cost, based on the assumption that failure is expected (usually just a MWD and an analyzer, with nothing else equipped) | | * Fit for the lowest cost, based on the assumption that failure is expected (usually just a MWD and an analyzer, with nothing else equipped) |
| − | * Bringing a friend to hack the other containers. Having recently lost a Merlin to an Improved Serpentis Covert Research Facility because of rats, if you want to tank the rats (a Scythe with reppers staggered was not enough to sustain the DPS) then use a Moa. Overheated staggered cruiser reppers might be able to allow a teammate to tank the damage of 8 NPC rats that show up long enough for the rats to warp off, but not if you're using a frigate: it just doesn't have the buffer to take it. Last resort? Use a pair of Ospreys in a 2 Medium / 1 Large / 2 Capacitor Transmitter configuration. Have the logistics warp at range to the site, about 30km. May need to overheat the remote repairers.<br /> | + | * Bringing a friend to hack the other containers, to ensure more coverage of containers. |
| | | | |
| | {| class="wikitable" style="margin-left: auto; margin-right: auto; border: none;" | | {| class="wikitable" style="margin-left: auto; margin-right: auto; border: none;" |
| Line 69: |
Line 66: |
| | # Having identified the next container I want to hack, I approach it for one or two Microwarpdrive cycles. Highsec sites will have green-blue cores, lowsec on upwards will be either blue-green, yellow or red, though red is usually the can with the good stuff in a null or Wh grade site. The site timer is close to running out by now. | | # Having identified the next container I want to hack, I approach it for one or two Microwarpdrive cycles. Highsec sites will have green-blue cores, lowsec on upwards will be either blue-green, yellow or red, though red is usually the can with the good stuff in a null or Wh grade site. The site timer is close to running out by now. |
| | # I hack the other container: if time permits (it usually does not) I might get another hack off. Normally I only hack two containers then GTFO. | | # I hack the other container: if time permits (it usually does not) I might get another hack off. Normally I only hack two containers then GTFO. |
| − | # Warp off anywhere. I then refit at my mobile depot and continue on.<br /> | + | # Warp off anywhere. I then refit at my mobile depot and continue on. |
| − | <br />
| + | |
| | + | |
| | Let's move down the list of things I discussed in my order of operation for these sites, for which I will elaborate further. | | Let's move down the list of things I discussed in my order of operation for these sites, for which I will elaborate further. |
| | | | |
| Line 82: |
Line 80: |
| | | ship=Heron | | | ship=Heron |
| | | shipTypeID=605 | | | shipTypeID=605 |
| − | | fitName=Heron - Ghost Site Survivor | + | | fitName=Heron - Shield MWD Ghost Site Runner |
| − | | fitID=Heron---Ghost-Site-Survivor | + | | fitID=Heron---Shield-MWD-Ghost-Site-Runner |
| − | | low1name=Micro Auxiliary Power Core I | + | | low1name=Damage Control II |
| − | | low1typeID=11563 | + | | low1typeID=2048 |
| − | | low2name=Damage Control II | + | | low2name=Micro Auxiliary Power Core I |
| − | | low2typeID=2048 | + | | low2typeID=11563 |
| − | | mid1name=Data Analyzer II | + | | mid1name=5MN Quad LiF Restrained Microwarpdrive |
| − | | mid1typeID=30834 | + | | mid1typeID=35658 |
| − | | mid2name=Medium Azeotropic Restrained Shield Extender | + | | mid2name=Data Analyzer II |
| − | | mid2typeID=8433 | + | | mid2typeID=30834 |
| − | | mid3name=5MN Quad LiF Restrained Microwarpdrive | + | | mid3name=Medium Shield Extender II |
| − | | mid3typeID=35658 | + | | mid3typeID=3831 |
| − | | mid4name=Type-E Enduring Cargo Scanner | + | | mid4name=Explosive Deflection Field II |
| − | | mid4typeID=6131 | + | | mid4typeID=2297 |
| − | | mid5name=Limited Explosive Deflection Field I
| + | | mid5name=Type-E Enduring Cargo Scanner |
| − | | mid5typeID=9646
| + | | mid5typeID=6131 |
| − | | rig1name=Small Gravity Capacitor Upgrade I | + | | rig1name=Small Anti-EM Screen Reinforcer I |
| − | | rig1typeID=31213 | + | | rig1typeID=31716 |
| − | | rig2name=Small Anti-EM Screen Reinforcer I | + | | rig2name=Small Anti-Thermal Screen Reinforcer I |
| − | | rig2typeID=31716 | + | | rig2typeID=31752 |
| − | | rig3name=Small Anti-Thermal Screen Reinforcer I | + | | rig3name=Small Gravity Capacitor Upgrade I |
| − | | rig3typeID=31752 | + | | rig3typeID=31213 |
| | | high1name=open | | | high1name=open |
| | | high2name=open | | | high2name=open |
| Line 119: |
Line 117: |
| | | skills= | | | skills= |
| | | showSKILLS=N | | | showSKILLS=N |
| − | | notes=Only suitable for high security space sites.</li><li>Can survive one high-security space container detonation. </li><li>Cannot tank rats if they are close. </li><li>Rigs are based on the author's choice of rigs for running Sleeper Caches: they do not particularly matter for this application. | + | | notes=Assumes Shield Upgrades V. If you only have Shield Upgrades IV, then run a Compact MWD. </li><li></li><li>Rigs are retained from the ones used for Sleeper Caches. |
| | | showNOTES=N | | | showNOTES=N |
| − | | difficulty=0 | + | | difficulty=1 |
| | | warsop=A | | | warsop=A |
| | | warsopReason= | | | warsopReason= |
| − | | version=YC118 1.0 | + | | version=LATEST |
| | | showTOC=Y | | | showTOC=Y |
| − | | shipDNA=605:11563;1:2048;1:30834;1:8433;1:35658;1:6131;1:9646;1:31213;1:31716;1:31752;1:: | + | | shipDNA=605:2048;1:11563;1:35658;1:30834;1:3831;1:2297;1:6131;1:31716;1:31752;1:31213;1:: |
| | | fleetup= | | | fleetup= |
| | + | | alphacanuse=N |
| | }}{{ShipFitting | | }}{{ShipFitting |
| − | | ship=Merlin | + | | ship=Heron |
| − | | shipTypeID=603 | + | | shipTypeID=605 |
| − | | fitName=Merlin - Ghost Site Runner | + | | fitName=Heron - Shield MWD Ghost Site Runner - Dedicated |
| − | | fitID=Merlin---Ghost-Site-Runner | + | | fitID=Heron---Shield-MWD-Ghost-Site-Runner---Dedicated |
| | | low1name=Damage Control II | | | low1name=Damage Control II |
| | | low1typeID=2048 | | | low1typeID=2048 |
| − | | low2name=Type-D Restrained Overdrive Injector | + | | low2name=Micro Auxiliary Power Core I |
| − | | low2typeID=5631 | + | | low2typeID=11563 |
| − | | low3name=Type-D Restrained Nanofiber Structure | + | | mid1name=5MN Quad LiF Restrained Microwarpdrive |
| − | | low3typeID=5599
| + | | mid1typeID=35658 |
| − | | mid1name=Medium Shield Extender II
| |
| − | | mid1typeID=3831 | |
| | | mid2name=Data Analyzer II | | | mid2name=Data Analyzer II |
| | | mid2typeID=30834 | | | mid2typeID=30834 |
| − | | mid3name=5MN Quad LiF Restrained Microwarpdrive | + | | mid3name=Medium Shield Extender II |
| − | | mid3typeID=35658 | + | | mid3typeID=3831 |
| | | mid4name=Explosive Deflection Field II | | | mid4name=Explosive Deflection Field II |
| | | mid4typeID=2297 | | | mid4typeID=2297 |
| | + | | mid5name=Type-E Enduring Cargo Scanner |
| | + | | mid5typeID=6131 |
| | | rig1name=Small Core Defense Field Extender I | | | rig1name=Small Core Defense Field Extender I |
| | | rig1typeID=31788 | | | rig1typeID=31788 |
| | | rig2name=Small Core Defense Field Extender I | | | rig2name=Small Core Defense Field Extender I |
| | | rig2typeID=31788 | | | rig2typeID=31788 |
| − | | rig3name=Small Anti-Explosive Screen Reinforcer I | + | | rig3name=Small Gravity Capacitor Upgrade I |
| − | | rig3typeID=31728 | + | | rig3typeID=31213 |
| | | high1name=open | | | high1name=open |
| | | high2name=open | | | high2name=open |
| Line 161: |
Line 160: |
| | | charge4name=open | | | charge4name=open |
| | | charge5name=open | | | charge5name=open |
| | + | | drone1name=open |
| | + | | drone2name=open |
| | + | | drone3name=open |
| | + | | drone4name=open |
| | + | | drone5name=open |
| | | skills= | | | skills= |
| | | showSKILLS=N | | | showSKILLS=N |
| − | | notes=Rated to survive three explosions of null-sec rated Ghost Sites (Improved). </li><li>Will not tank rats, and remote repairs from one Scythe or similar will not be sufficient to tank the rats. Warp off instead. </li><li>24.4K EHP against explosive damage, 22.7K EHP in shields. | + | | notes=Assumes Shield Upgrades V. If you only have Shield Upgrades IV, then run a Compact MWD. </li><li></li><li>These rigs are refined to be used specifically for a Ghost Site Runner Heron. With Shield Management V, you can eat a Superior Ghost site detonation with the hardener cold, but it should be overloaded anyways. |
| | | showNOTES=N | | | showNOTES=N |
| − | | difficulty=0 | + | | difficulty=1 |
| | | warsop=A | | | warsop=A |
| | | warsopReason= | | | warsopReason= |
| − | | version=YC118 1.0 | + | | version=LATEST |
| | | showTOC=Y | | | showTOC=Y |
| − | | shipDNA=603:2048;1:5631;1:5599;1:3831;1:30834;1:35658;1:2297;1:31788;2:31728;1:: | + | | shipDNA=605:2048;1:11563;1:35658;1:30834;1:3831;1:2297;1:6131;1:31788;2:31213;1:: |
| | | fleetup= | | | fleetup= |
| | + | | alphacanuse=N |
| | }} | | }} |
| − | :Now for the Standard, Improved, and Superior Covert Research Facilities, or if I really don't feel like losing a Heron, I recommend the Merlin, as shown. Because the containers deal exclusively Explosive damage, it's important to be tanked to that specific damage type. This vessel, with my present skills (Shield Management to IV) has 21808 explosive damage EHP, for a net total of 23499 EHP against explosive damage. Having tested this vessel on the test server in an Improved rated Ghost site, it has survived two deliberate failures (with the explosive hardener overloaded) and could probably eat a third.
| |
| | | | |
| − | :Remember to overload your explosive hardener if you know you will fail the container. | + | : Because the containers deal exclusively Explosive damage, it's important to be tanked to that specific damage type. Normally, warp into the site with the hardener cold, then overload it once you are nearing the end of the first hack. Continue running it overheated until you complete the site or warp off. |
| | | | |
| | {| style="background:#350000; border:1px solid #333333; padding:0px;" | | {| style="background:#350000; border:1px solid #333333; padding:0px;" |
| Line 350: |
Line 354: |
| | From there, the R.A.M. stuff isn't worth bothering with, the Meta modules or weapons are usually worthless, and the BPCs are sometimes useless too, in this case they were. Selling the BPCs can be problematic depending on the item. Polarized Torpedo Launcher BPCs sell for bank though, because they're one of the few Polarized weapons that people actually use. The Electric Conduit and the Talocan Molecule are some examples of some "fluff" that is the reason you should always bring a cargo scanner with you to make sure you don't hack a can only to get 1 Limited Light Ion Blaster I out of, or 100 R.A.M. junk. | | From there, the R.A.M. stuff isn't worth bothering with, the Meta modules or weapons are usually worthless, and the BPCs are sometimes useless too, in this case they were. Selling the BPCs can be problematic depending on the item. Polarized Torpedo Launcher BPCs sell for bank though, because they're one of the few Polarized weapons that people actually use. The Electric Conduit and the Talocan Molecule are some examples of some "fluff" that is the reason you should always bring a cargo scanner with you to make sure you don't hack a can only to get 1 Limited Light Ion Blaster I out of, or 100 R.A.M. junk. |
| | | | |
| − | [[File:3P38 Limited 11.png|200px|thumb|right|Shiny module that costs too much to bother with]]The so-called Blue Loot items are typically sold to NPC buy orders at most stations. Head to a normal trade hub (there is one place 1 jump from Jita, Amarr EFA, ...may need to make a jump or two away to get the proper price) and check that the icon on the right of the sale has a white (=) to indicate that you're getting full value. You can expect to make anywhere from 10 to 300 million ISK off of blue loot depending on the site: Standard and Superior Sleeper sites tend to have more blue loot. | + | [[File:3P38 Limited 11.png|200px|thumb|Shiny module that costs too much to bother with]]The so-called Blue Loot items are typically sold to NPC buy orders at most stations. Head to a normal trade hub (there is one place 1 jump from Jita, Amarr EFA, ...may need to make a jump or two away to get the proper price) and check that the icon on the right of the sale has a white (=) to indicate that you're getting full value. You can expect to make anywhere from 10 to 300 million ISK off of blue loot depending on the site: Standard and Superior Sleeper sites tend to have more blue loot. |
| | | | |
| | Don't get too excited about storyline modules. That 500MN Digital Booster Rockets blueprint is deceptive. It doesn't have a officer-grade price tags, but it's still fairly expensive, and it doesn't even have the benefits of the deadspace X-Type 500MN Microwarpdrives. The reason why they are so expensive on the market is that COSMOS items are required to build them. There are 4 COSMOS "sectors", one in each empire space, and those COSMOS missions can only be run once per character: <small>([https://forums.eveonline.com/default.aspx?g=posts&m=1887088 ''Source''])</small> | | Don't get too excited about storyline modules. That 500MN Digital Booster Rockets blueprint is deceptive. It doesn't have a officer-grade price tags, but it's still fairly expensive, and it doesn't even have the benefits of the deadspace X-Type 500MN Microwarpdrives. The reason why they are so expensive on the market is that COSMOS items are required to build them. There are 4 COSMOS "sectors", one in each empire space, and those COSMOS missions can only be run once per character: <small>([https://forums.eveonline.com/default.aspx?g=posts&m=1887088 ''Source''])</small> |
| | | | |
| − | {{ quote |'''COSMOS item sourcing'''<br /> | + | {{Quote |'''COSMOS item sourcing''' |
| | + | |
| | Those items can be found in each of the four races COSMOS mission areas. They are used primarily in the production of storyline bpc items, such the Medium Canyon Shield Extender, and others like it. At last recollection, you can find Talocan relics in Caldari space, Takmahl relics in Amarr space, Yan Jung relics in Gallente space, and Sleeper relics in Minmatar space. You can also find the corresponding technology skill book in each of the COSMOS constellation plexes. | | Those items can be found in each of the four races COSMOS mission areas. They are used primarily in the production of storyline bpc items, such the Medium Canyon Shield Extender, and others like it. At last recollection, you can find Talocan relics in Caldari space, Takmahl relics in Amarr space, Yan Jung relics in Gallente space, and Sleeper relics in Minmatar space. You can also find the corresponding technology skill book in each of the COSMOS constellation plexes. |
| | }} | | }} |
| Line 548: |
Line 553: |
| | | | |
| | == Superior Sleeper Cache == | | == Superior Sleeper Cache == |
| − | Of all the hacking sites, this one by name asserts itself as the most difficult and challenging. Actually, it's not an impenetrable fortress as some might presume, but it does make a good candidate for an [https://zkillboard.com/kill/55829802/ easy] and [https://zkillboard.com/kill/58178878/ costly lossmail] if you are looking for one, and a rather amusing ambush site at that, too. If you're diddling around in the Archive Room, there is a chance that you may just trip the alarm in the Turret room (if not done so already) to shake down visitors.
| + | {{main|Superior Sleeper Cache}} |
| − | | + | The '''Superior Sleeper Cache''' is a [[Cosmic Signature]] that can be found in known space using core scanner probes. The Superior Sleeper Cache is the most difficult of the Sleeper Cache sites, and is possibly the most difficult site that can be found via [[exploration]] that does no explicitly require combat. Pilots will be risking their ship when trying this or any other Sleep Cache. However, once familiar with these sites, pilots should be able to run the site without taking any damage. Like all Sleeper Cache sites, the Superior Sleeper Cache requires the use of both Data and Relic Analyzers. While ships up to battleships can enter this site, an exploration frigate is highly recommended in order to make use of their hacking bonuses. |
| − | Like the Standard Sleeper Cache, which I am operating under the assumption you read that guide first, which you should, there are a number of points where you can lose your ship rather handily, but coming prepared and informed, your personal risk is actually rather low. Obviously that does change a bit if you are in dangerous space, but otherwise, given the difficulty of scanning one of these sites down, you can operate with some degree of safety.
| |
| − | | |
| − | I said scanning, and I may as well get that out of the way first. You need a probe strength of at least 103-ish to scan one of these sites down. 102 probe strength is definitely very close but not enough. I can scan one down with a tight cube formation with 104 probe strength. If you don't know how to see your probe strength, just press ALT + F to bring up the fitting window, and hover over the probe launcher. Look for the "Show Charge Info" icon and click it. Under the Attributes tab, you should see "Base Sensor Strength", and there is your probe strength there. If someone is already there, you could switch to combat probes and give him a visit or "share" the loot, if you know what that means. I try to respect the concept of site ownership, however if people abandon the site, I'll usually finish it.
| |
| − | | |
| − | As far as ships go, your choices have been explained suitably in the Preamble. I used a Heron for all my attempts, and it worked just fine, with the conditions being that it is not suitable for:
| |
| − | | |
| − | * Checking if the Alarm has been activated in the Sentries on Duty room
| |
| − | * Running the Archive Room
| |
| − | * The Mine Room is possible, but should you fail, you will lose your ship
| |
| − | | |
| − | Otherwise, the Heron or Magnate are perfectly suitable vessels.
| |
| | | | |
| − | {| style="background:#350000; border:1px solid #333333; padding:0px;"
| + | Superior Sleeper Caches are incredibly difficult to scan down compared to most other signatures found in known space, and both excellent scanning skills as well as equipment are required to pinpoint the site completely. |
| − | | style="padding:0px;" | [[image:Icon_warning.png|56px|link=]]
| |
| − | | style="padding:8px;" | ''These are proven fits. Alteration may result in failure of site completion.''
| |
| − | |}
| |
| − | | |
| − | There is one fit that you will need for the Solray room, but that will be explained in a bit. Otherwise, the fits are pretty generic.
| |
| − | | |
| − | This is the fit I normally use for the Solray Room after the Power Terminal has been stabilized.
| |
| − | | |
| − | {{ShipFitting
| |
| − | | ship=Heron
| |
| − | | shipTypeID=605
| |
| − | | fitName=Heron - Solray Room Fit
| |
| − | | fitID=Heron---Solray-Room-Fit
| |
| − | | low1name=Damage Control II
| |
| − | | low1typeID=2048
| |
| − | | low2name=Type-D Restrained Capacitor Flux Coil
| |
| − | | low2typeID=8135
| |
| − | | mid1name=Relic Analyzer II
| |
| − | | mid1typeID=30832
| |
| − | | mid2name=1MN Monopropellant Enduring Afterburner
| |
| − | | mid2typeID=6003
| |
| − | | mid3name=Small Shield Booster II
| |
| − | | mid3typeID=400
| |
| − | | mid4name=5a Prototype Shield Support I
| |
| − | | mid4typeID=16531
| |
| − | | mid5name=Eutectic Compact Cap Recharger
| |
| − | | mid5typeID=4435
| |
| − | | rig1name=Small Anti-Thermal Screen Reinforcer I
| |
| − | | rig1typeID=31752
| |
| − | | rig2name=Small Anti-EM Screen Reinforcer I
| |
| − | | rig2typeID=31716
| |
| − | | rig3name=Small Gravity Capacitor Upgrade I
| |
| − | | rig3typeID=31213
| |
| − | | high1name=open
| |
| − | | high2name=open
| |
| − | | high3name=open
| |
| − | | charge1name=open
| |
| − | | charge2name=open
| |
| − | | charge3name=open
| |
| − | | charge4name=open
| |
| − | | charge5name=open
| |
| − | | drone1name=open
| |
| − | | drone2name=open
| |
| − | | drone3name=open
| |
| − | | drone4name=open
| |
| − | | drone5name=open
| |
| − | | skills=
| |
| − | | showSKILLS=N
| |
| − | | notes=As long as you have Capacitor Systems Operation and Capacitor Management to II, you may simply swap the capacitor recharger for a Small Compact Pb-Acid Cap Battery, but the Afterburner will have to be used only when needed. </li><li>As long as the fit can sustain about 40 EHP/sec (EFT/Pyfa figures) indefinitely, it's good enough. </li><li>Also make sure the Analyzer(s) are set to Auto Repeat OFF. </li><li>Cargo scan the containers before you use this fit to identify which ones are junk and which ones are not (use a fleet of yourself to allow tagging of containers)
| |
| − | | showNOTES=N
| |
| − | | difficulty=1
| |
| − | | warsop=D
| |
| − | | warsopReason=
| |
| − | | version=YC118 1.0
| |
| − | | showTOC=Y
| |
| − | | shipDNA=605:2048;1:8135;1:30832;1:6003;1:400;1:16531;1:4435;1:31752;1:31716;1:31213;1::
| |
| − | | fleetup=
| |
| − | }}{{ShipFitting
| |
| − | | ship=Magnate
| |
| − | | shipTypeID=29248
| |
| − | | fitName=Magnate - SolRay Room
| |
| − | | fitID=Magnate---SolRay-Room
| |
| − | | low1name=Small Armor Repairer II
| |
| − | | low1typeID=1183
| |
| − | | low2name=Damage Control II
| |
| − | | low2typeID=2048
| |
| − | | low3name=Type-D Restrained Capacitor Power Relay
| |
| − | | low3typeID=8175
| |
| − | | low4name=Experimental Energized Adaptive Nano Membrane I
| |
| − | | low4typeID=16389
| |
| − | | mid1name=1MN Monopropellant Enduring Afterburner
| |
| − | | mid1typeID=6003
| |
| − | | mid2name=Relic Analyzer II
| |
| − | | mid2typeID=30832
| |
| − | | mid3name=Eutectic Compact Cap Recharger
| |
| − | | mid3typeID=4435
| |
| − | | rig1name=Small Gravity Capacitor Upgrade I
| |
| − | | rig1typeID=31213
| |
| − | | rig2name=Small Auxiliary Nano Pump I
| |
| − | | rig2typeID=31045
| |
| − | | rig3name=Small Anti-Explosive Pump I
| |
| − | | rig3typeID=31009
| |
| − | | high3name=open
| |
| − | | charge1name=open
| |
| − | | charge2name=open
| |
| − | | charge3name=open
| |
| − | | charge4name=open
| |
| − | | charge5name=open
| |
| − | | drone1name=open
| |
| − | | drone2name=open
| |
| − | | drone3name=open
| |
| − | | drone4name=open
| |
| − | | drone5name=open
| |
| − | | skills=
| |
| − | | showSKILLS=N
| |
| − | | notes=You may need to swap the afterburner for a Small Compact Pb-Acid Cap Battery to achieve capacitor stability.
| |
| − | | showNOTES=N
| |
| − | | difficulty=1
| |
| − | | warsop=D
| |
| − | | warsopReason=
| |
| − | | version=YC118 1.0
| |
| − | | showTOC=Y
| |
| − | | shipDNA=29248:1183;1:2048;1:8175;1:16389;1:6003;1:30832;1:4435;1:4258;1:11577;1:31213;1:31045;1:31009;1::
| |
| − | | fleetup=
| |
| − | }}
| |
| − | | |
| − | Otherwise, to run the Sentries on Duty room (Turret Room), I use this:
| |
| − | | |
| − | {{ShipFitting
| |
| − | | ship=Heron
| |
| − | | shipTypeID=605
| |
| − | | fitName=Heron - Std. Sleeper Cache Site Run
| |
| − | | fitID=Heron---Std.-Sleeper-Cache-Site-Run
| |
| − | | low1name=Damage Control II
| |
| − | | low1typeID=2048
| |
| − | | low2name=Micro Auxiliary Power Core I
| |
| − | | low2typeID=11563
| |
| − | | mid1name=Data Analyzer II
| |
| − | | mid1typeID=30834
| |
| − | | mid2name=5MN Quad LiF Restrained Microwarpdrive
| |
| − | | mid2typeID=35658
| |
| − | | mid3name=Medium Azeotropic Restrained Shield Extender
| |
| − | | mid3typeID=8433
| |
| − | | mid4name=Relic Analyzer II
| |
| − | | mid4typeID=30832
| |
| − | | mid5name=Type-E Enduring Cargo Scanner
| |
| − | | mid5typeID=6131
| |
| − | | rig1name=Small Anti-EM Screen Reinforcer I
| |
| − | | rig1typeID=31716
| |
| − | | rig2name=Small Anti-Thermal Screen Reinforcer I
| |
| − | | rig2typeID=31752
| |
| − | | rig3name=Small Gravity Capacitor Upgrade I
| |
| − | | rig3typeID=31213
| |
| − | | high1name=open
| |
| − | | high2name=open
| |
| − | | high3name=open
| |
| − | | charge1name=open
| |
| − | | charge2name=open
| |
| − | | charge3name=open
| |
| − | | charge4name=open
| |
| − | | charge5name=open
| |
| − | | drone1name=open
| |
| − | | drone2name=open
| |
| − | | drone3name=open
| |
| − | | drone4name=open
| |
| − | | drone5name=open
| |
| − | | skills=
| |
| − | | showSKILLS=N
| |
| − | | notes=
| |
| − | | showNOTES=N
| |
| − | | difficulty=1
| |
| − | | warsop=D
| |
| − | | warsopReason=
| |
| − | | version=YC118 1.0
| |
| − | | showTOC=Y
| |
| − | | shipDNA=605:2048;1:11563;1:30834;1:35658;1:8433;1:30832;1:6131;1:31716;1:31752;1:31213;1::
| |
| − | | fleetup=
| |
| − | }}{{ShipFitting
| |
| − | | ship=Magnate
| |
| − | | shipTypeID=29248
| |
| − | | fitName=Magnate - Std. Sleeper Cache Site Run
| |
| − | | fitID=Magnate---Std.-Sleeper-Cache-Site-Run
| |
| − | | low1name=Damage Control II
| |
| − | | low1typeID=2048
| |
| − | | low2name=Small Armor Repairer II
| |
| − | | low2typeID=1183
| |
| − | | low3name=200mm Crystalline Carbonide Restrained Plates
| |
| − | | low3typeID=11351
| |
| − | | low4name=Micro Auxiliary Power Core I
| |
| − | | low4typeID=11563
| |
| − | | mid1name=Relic Analyzer II
| |
| − | | mid1typeID=30832
| |
| − | | mid2name=Data Analyzer II
| |
| − | | mid2typeID=30834
| |
| − | | mid3name=5MN Quad LiF Restrained Microwarpdrive
| |
| − | | mid3typeID=35658
| |
| − | | rig1name=Small Gravity Capacitor Upgrade I
| |
| − | | rig1typeID=31213
| |
| − | | rig2name=Small Auxiliary Nano Pump I
| |
| − | | rig2typeID=31045
| |
| − | | rig3name=Small Anti-Explosive Pump I
| |
| − | | rig3typeID=31009
| |
| − | | high1name=open
| |
| − | | high2name=open
| |
| − | | high3name=open
| |
| − | | charge1name=open
| |
| − | | charge2name=open
| |
| − | | charge3name=open
| |
| − | | charge4name=open
| |
| − | | charge5name=open
| |
| − | | drone1name=open
| |
| − | | drone2name=open
| |
| − | | drone3name=open
| |
| − | | drone4name=open
| |
| − | | drone5name=open
| |
| − | | skills=
| |
| − | | showSKILLS=N
| |
| − | | notes=
| |
| − | | showNOTES=N
| |
| − | | difficulty=1
| |
| − | | warsop=D
| |
| − | | warsopReason=
| |
| − | | version=YC118 1.0
| |
| − | | showTOC=Y
| |
| − | | shipDNA=29248:2048;1:1183;1:11351;1:11563;1:30832;1:30834;1:35658;1:31213;1:31045;1:31009;1::
| |
| − | | fleetup=
| |
| − | }}
| |
| − | | |
| − | Nothing particularly fancy. Use a cargo scanner if possible after the two Data hacks are done in the Solray Room. It pays to use a Small Secure Container (anchor it and set a password!) more so with the Magnate than the Heron. Just leave the Secure Container in the Solray Room and bookmark it, stuff the loot and shiny cloaks and probe launchers inside it, then bring the Mobile Depot with you into the Turret Room to refit for the Cargo Scanner after the data hacks are finished.
| |
| − | | |
| − | We will now continue with the rest of the process of walking through the site. I won't go over shiny T3 or battleship fits for the Archive Room because that will be discussed later in more generic terms and details.
| |
| − | | |
| − | Let's get to the procedure layout:
| |
| − | | |
| − | ==== <span style="color:blue">PHASE 1: ENTRY</span> ====
| |
| − | 1. Scan down the site.<br />
| |
| − | 2. Hack the entry container. Enter the site.<br />
| |
| − | 3. If you land in the Turret Room, take the nearby Spatial Rift to enter the Solray Power Plant. If you're already in the Solray room, proceed to #4.<br />
| |
| − | 4. If you land on the farther side of the site, near the Remote Reroute Unit, then take the nearby rift. You may incur some damage as you warp through the Solray Unaligned Power Terminal. Always run the Solray room first.<br />
| |
| − | | |
| − | ==== <span style="color:blue">PHASE 2: SOLRAY POWER PLANT</span> ====
| |
| − | 5. Hack the Solray Observational Unit. Open container, and observe the "disc" it grants you. It can either be Infrared, Gamma or X-ray. There are three containers in this room, and you place the "disc" into the container which matches the name of the disc.<br />
| |
| − | 6. Having aligned the Solray Power Terminal, you'll take considerably less damage in its presence. Approach the container in between the two rifts near the Solray Observational Unit. Drop your Mobile Depot there, while it is working, hack the Storage Depot. Loot it. Refit to your capacitor stable local repairer fit.<br />
| |
| − | 7. Approach the Solray Power Terminal and hack all containers. You could cargo scan them first while the Mobile Depot is up, if you desire, to skip unworthy containers.<br />
| |
| − | 8. Refit back to your generic fit. Bring a Microwarpdrive. Drop all loot and unneeded modules in the Mobile Depot. Bookmark it. Leave it there for now.<br />
| |
| − | 9. If you're in a frigate or cruiser that has less than 70,000 EHP of omni-resists, then skip Phase 3 and proceed to Phase 4. Take the Spatial Rift near the Gamma Ray container into the Turret Room. Otherwise, take the rift near the Solray Observational Unit.<br />
| |
| − | | |
| − | ==== <span style="color:blue">PHASE 3: MINE ROOM</span> ====
| |
| − | 10. DO NOT ATTEMPT THIS ROOM WITH LESS THAN 70,000 EHP.<br />
| |
| − | 11. In the Solray room, hack the Remote Reroute Unit. Take the Rift nearby to head back to the Rift near the Solray Observational Unit. Take the rift near that object (the Infrared Alignment Unit container is nearby).<br />
| |
| − | 12. You may incur some damage upon entering. That is fine. Move around a bit in the same direction slowly (no MWD) until a Remote Defense Grid Unit spawns. Hack it.<br />
| |
| − | 13. If successful, hack the nearby Storage Depots. Align back to the Solray Room, visible in the distance (or warp out and back in immediately) and burn the Microwarpdrive or Micro Jump Drive. Continue on to Phase 4.<br />
| |
| − | | |
| − | ==== <span style="color:blue">PHASE 4: SENTRIES ON DUTY</span> ====
| |
| − | 14. Upon entering, look for the nearby Remote Defense Grid Unit. Select Keep at Range (5000m) on it. Start hacking it. '''WARNING:''' Failure could mean the loss of your vessel. Warp out if so and do not re-enter without a stiff active tank or solid remote repairs with a strong local buffer.<br />
| |
| − | 15. Upon successful hack, immediately burn with the Microwarpdrive to the right towards the Sentry Repair Station. You have enough time for about 2 hack attempts. Hack it. Wait for all Sentry Towers to be eradicated.<br />
| |
| − | 16. Hack all loot containers at your lesiure. Do not approach the Plasma Chambers nearby. Use Keep at Range (2250m) for the can closest to those chambers: and approach slowly with no propulsion module active. '''WARNING: Do not aggress the Plasma Chambers unless specifically instructed to do so. They have enough power to wipe a battleship clean off the field.'''<br />
| |
| − | 17. If you are in a frigate or any cruiser/battleship that cannot handle extreme Damage Per Second (DPS) then you have completed the site. Go back to your Mobile Depot, refit to travel fit, collect all loot, pick up the Mobile Depot, and proceed on. Otherwise, continue to Phase 5.<br />
| |
| − | | |
| − | ==== <span style="color:blue">PHASE 5: ARCHIVE ROOM</span> ====
| |
| − | 18. For this site, it's good prudence to drop all loot and unneeded modules in a Small Secure Container or nearby station. Make sure to bookmark the can: containers cannot be scanned down with combat probes. A safe spot works nicely. Bring the mobile depot.<br />
| |
| − | 19. You will need a T3 crusier or Nestor to handle this room, with at least 2000 EHP/sec active reps and a good 50K EHP of buffer, minimum. You must be able to repair considerable damage and be able to tank a lot of damage. Frigates need not apply, although a super tanked cruiser (Maller or Prophecy comes to mind) with proper use of the Vessel Rejuvenation Batteries could probably hold out for a bit. Eject loot as you get it if that is the case.<br />
| |
| − | 20. Starting from the Turret Room, hack the Hyperfluct Generator. If it is successful, take the rift.<br />
| |
| − | 21. If not, then Keep at Range (5000m) from the Vessel Rejuvenation Battery. Lock up one of the Plasma Chambers. Hack the Vessel Rejuvenation Battery, make sure you are within its protection cloud (and wait two seconds after the hack is completed) and then IMMEDIATELY THERAFTER aggress one of the Plasma Chambers. Then immediately proceed back to the revived Hyperfluct Generator. You have just sixty seconds before the alarm is sounded, which will spawn 16 new Sentry Towers. Hack it quickly. Take the rift.<br />
| |
| − | 22. There are a number of damage clouds in this area. Be mindful of that. Approach the Archive Cerebrum Chambers. A propulsion module helps: straight in from the beacon is fine for now. Don't hack any of them yet.<br />
| |
| − | 23. Hack the Remote Targeting Defense Augmentation Unit. Take your time and try not to fail that one. A Pristine Storage Depot may spawn nearby. Hack it and loot it.<br />
| |
| − | 24. Start hacking the Cerebrum Maintenance Chambers. You will need three (3) Intravenous Oscillation Fluid objects. Failure of these hacks may trigger additional Sentry Towers. You may elect to shoot them: I recommend light drones and Light Neutron Blasters (they have a 50m signature radius).<br />
| |
| − | 25. Ensure everything is ready, that ship is fit properly and prepared.<br />
| |
| − | 26. Approach the Central Archive Cerebrum. Place only the 3 Intravenous Oscillation Fluid objects inside it.<br />
| |
| − | 27. At this point, start watching the messages in Local more intently. Storage Depots will begin to spawn nearby. Damage from Shockwaves will also commence after a short time, and increase in magnitude. There may be one Depot which is distanced afar from the regular group. You may cargo scan containers to evaluate their worth. When finished (or dead!), warp out of the site, wait for it to despawn. Warp back to any bookmarked containers left inside the site, and continue on.
| |
| − | | |
| − | Right. So with that outline out of the way, let's continue on to the specifics of each room, but before we do that, I'll drop these images to help newcomers understand the site.
| |
| − | | |
| − | {| class="wikitable" style="margin-left: auto; margin-right: auto; border: none;"
| |
| − | |[[File:3P38_Superior_69.png|thumb|none|alt=A|First off: Ships not permitted to enter]]||[[File:3P38_Superior_33.png|thumb|none|alt=A|Overview of the Solray Power Plant]]||[[File:3P38_Superior_57.png|thumb|none|alt=A|Location of Mine Room relative to Solray Room]]||[[File:3P38_Superior_29.png|thumb|none|alt=A|Overview of the Sentries on Duty Room]]||[[File:3P38_Superior_28.png|thumb|none|alt=A|Closer view of the storage depots]]||
| |
| − | |}
| |
| − | {| class="wikitable" style="margin-left: auto; margin-right: auto; border: none;"
| |
| − | |[[File:3P38_Superior_35.png|thumb|none|alt=A|The vaunted Archive Room]]||[[File:3P38_Superior_47.png|thumb|none|alt=A|...and a little further in...]]||[[File:3P38_Superior_48.png|thumb|none|alt=A|All key objects locked up]]||[[File:3P38_Superior_79.png|thumb|none|alt=A|Overview of most objects]]||[[File:3P38_Superior_80.png|thumb|none|alt=A|Shows depot locations and more]]
| |
| − | |}
| |
| − | | |
| − | === PHASE 1: ENTRY ===
| |
| − | Having scanned down the site, warp to the result.
| |
| − | | |
| − | Look for a Hyperfluct Generator can. If a Spatial Rift is already up, then someone is there, or has been there.
| |
| − | | |
| − | {| style="background:#350000; border:1px solid #333333; padding:0px;"
| |
| − | | style="padding:0px;" | [[image:Icon_warning.png|56px|link=]]
| |
| − | | style="padding:8px;" | '''WARNING:'''
| |
| − | ''If the site has already been accessed, quickly check the Directional Scanner in a 1 AU radius to check for wrecks. If there is one at the site, DO NOT ENTER. (Could also check zKillboard.) The Rift in the entry room might send you straight into the Turret Room, which might have had the alarm tripped: unless you have a T3 or Battleship with stiff resistances (an overtanked Maller with two EM and two Thermal hardeners works too), you'll be alpha'd off the field by 16+ Sentry Towers. There is no opportunity to warp out, cloak up, or escape through the nearby rift -- they aggress almost immediately.''
| |
| − | |}
| |
| − | | |
| − | Otherwise, continue on with the hack of the Hyperfluct Generator can:
| |
| − | | |
| − | '''CAN DIFFICULTY: 7/10 [RED HACK]'''<br />
| |
| − | <span style="color:green">SUCCESS:</span> The Spatial Rift is spawned, which leads into either the Sentries on Duty area or the Solray Power Plant. Capsules, Dreadnoughts, Carriers, Supercarriers, Titans, and Freighters cannot take the rift.<br />
| |
| − | <span style="color:red">FAILURE:</span> You have two minutes to attempt a successful hack of this container. If a successful hack is not completed by that time, the site despawns.
| |
| − | | |
| − | Go ahead and take the rift. If you land in the Turret Room, don't panic. Approach and take the nearby Spatial Rift to head to the Solray Power Plant, as the gameplan indicates that is the first room to do first (in case of a catastrophic failure in the Turret Room). Conversely, if you land in the Solray room, there are three places you may land. Look carefully for three containers, and based on which one you landed near, take the appropriate action:
| |
| − | | |
| − | # Solray Gamma Alignment Unit: Stay here for now.
| |
| − | # Solray Infrared Alignment Unit: Approach the Solray Infrared Alignment Unit.
| |
| − | # Solray Radio Alignment Unit: Take the nearby rift which will send your vessel over to the Solray Gamma Alignment Unit zone, although it can also direct you over to near the Infrared Alignment Unit. The destination is random for each site and changes from one site to the next, although it remains consistent in any one site.
| |
| − | | |
| − | === PHASE 2: SOLRAY POWER PLANT ===
| |
| − | Near the Solray Gamma Alignment Unit container, there is a structure named the Solray Observational Unit. This structure, when hacked, allows the hacker to collect a trinket which, when placed in the proper container, reduces the strength of the damage cloud created by the Solray Power Terminal. When warping through the Power Terminal's damage radius, vessels may sustain [http://wiki.eveuniversity.org/File:3P38_Superior_5.png some damage] but it's not too serious to warrant much concern.
| |
| − | | |
| − | {| class="wikitable" style="margin-left: auto; margin-right: auto; border: none;"
| |
| − | |[[File:3P38_Superior_24.png|thumb|none|alt=A|Newb friendly Heron fit doing fine]]||[[File:3P38_Superior_58.png|thumb|none|alt=A|Wrong disc in can: No increased DMG or AoE radius found]]||[[File:3P38_Superior_36.png|thumb|none|alt=A|Typical contents. Cargo scan and tag unworthy containers]]||[[File:3P38_Superior_10.png|thumb|none|alt=A|Dual-rep Stratios barely holding on to Unaligned PT damage]]||[[File:3P38_Superior_26.png|thumb|none|alt=A|Hacking the Observational Unit]]||
| |
| − | |}
| |
| − | | |
| − | Go ahead and hack the Alignment Unit.
| |
| − | | |
| − | {| style="background:#350000; border:1px solid #333333; padding:0px;"
| |
| − | | style="padding:0px;" | [[image:Icon_warning.png|56px|link=]]
| |
| − | | style="padding:8px;" | ''Stay on the side opposite the Solray Power Terminal -- it does about 600 DPS omni-damage without being aligned. If someone has been there before, but you can't tell if the Power Terminal is Aligned, the name is changed for one thing, but also you can inspect the Alignment Unit containers to see if the correct disc was placed inside. Last resort - bring in a cruiser that can tank OR a friendly logistics cruiser in: ~650 EHP/sec or roughly 250 HP/sec is enough.''
| |
| − | |}
| |
| − | | |
| − | '''CAN DIFFICULTY: 7/10 [RED HACK]'''<br />
| |
| − | <span style="color:green">SUCCESS:</span> The hacker is free to open the container and collect the alignment disc.<br />
| |
| − | <span style="color:red">FAILURE:</span> No penalty.
| |
| − | | |
| − | Zoom out of the site until you find the correct jetcan to place the alignment disc. There are three: Infrared, Radio and Gamma Ray Alignment Discs. The Infrared Alignment Disc goes in the Solray Infrared Alignment Unit, the Gamma Ray Alignment Disc goes in the Solray Gamma Alignment Unit, and so on. Collect the disc and burn over to the appropriate container: if it's the Radio Alignment Disc, then take the rift near the Solray Observational Unit to warp over to that container, then take that rift back over to the main area.
| |
| − | | |
| − | With the Solray Power Terminal aligned, it does considerably less area of effect (AoE) damage while a vessel is in its proximity, which is about 14-17km in radius from the object itself.
| |
| − | | |
| − | Drop the mobile depot near the lone (Dented or Mangled) Storage Depot which is between the Solray Gamma Alignment Unit and the Infrared Alignment Unit. If your Relic Analyzer II is equipped, hack it while the mobile depot is setting up. Otherwise, wait near it (do not cloak, lest the site may despawn) and after it is ready, refit into the capacitor stable self-repper fit with a Relic Analyzer II. It may be prudent to cargo scan all nearby containers including the ones inside the Power Terminal's proximity to check for dead-end worthless containers. (I have had Intact Storage Depots that were empty.)
| |
| − | | |
| − | '''CAN DIFFICULTY: VARIES [YELLOW TO RED HACKS]'''<br />
| |
| − | <span style="color:green">SUCCESS:</span> The loot is ready to be looted.<br />
| |
| − | <span style="color:red">FAILURE:</span> No penalty.
| |
| − | | |
| − | With decent 50% resistances to all damage types across the board, the damage cloud does about 15 damage per second. As long as you can repair more than 30 Effective Hit Points (EHP) per second indefinitely, it's perfectly sustainable.
| |
| − | | |
| − | Afterwards, refit back to the generic site running fit with a Microwarpdrive and both Analyzers.
| |
| − | | |
| − | For the frigate pilots, skip the next Phase and go right to Phase 3, below. Tech III Strategic Cruiser and the Nestor battleship may attempt the next step. An overtanked Stratios (2 plates and 2 large shield extenders) should be fine. Frigate pilots should expect to lose their ship.
| |
| − | | |
| − | {| class="collapsible collapsed" style="background-color:#0d2710; background-image: linear-gradient(#071709, #0d2710); border: 1px solid #287833; padding:0.2em; width:{{{width|90%}}}"
| |
| − | ! style="text-align:left" | <span style="color:#44c055">Specifics of the Power Terminal</span>
| |
| − | |-
| |
| − | | style="font-size:90%; color:#FFFFFF" | {{{1|Normally, without being aligned, the Power Terminal area of effect damage cloud does 600 DPS to a regular Tech 1 resistance profile, assuming no hardeners. When suitable hardeners are fitted which provide reasonable 65-ish% resists to all damage types, the DPS is about 150 in total, on a Stratios. The Moa which was used for a certain test of the cloud ate 228 DPS, and that had a 62/59/69/74% resist profile. The area of effect radius is approximately 14km from the Power Terminal unit itself.
| |
| − | | |
| − | Placing the incorrect alignment disc in a container initially announces the message that it has been aligned:
| |
| − | | |
| − | "Using the crystal disc, the alignment is now correct and the Solray Power Terminal is stable."
| |
| − | | |
| − | But shortly thereafter:
| |
| − | | |
| − | "Seems you used the crystal disc incorrectly, the Solray Power Terminal is losing its alignment fast! The solar flare around the Terminal will increase again in approximately 30 seconds."
| |
| − | | |
| − | From my findings, that did not actually happen, and the damage per second remained identical. A disc that has been placed into a container cannot be extracted back out again.}}}
| |
| − | |}
| |
| − | | |
| − | === PHASE 3: MINE ROOM ===
| |
| − | It has been said before that 70,000 EHP is a recommended figure for tank before attempting this room. Sure it can be done with less, but given the stiff penalty for failure, it's not something that is something that can be absorbed by a frigate hull. On the test server, I deliberately failed the primary container with an overtanked Astero with about 13,000 EHP. It didn't last two seconds. If you had ships to lose, then just use the cheapest T1 exploration hull (the virus strength is a requirement) and stick a Medium Azeotropic Restrained Shield Extender, a Damage Control I, perhaps a Limited Adaptive Invulnerability Field I and a Data Analyzer II, with nothing else whatsoever. In that case, do this room AFTER completing the Turret Room. Good luck.
| |
| − | | |
| − | {| class="wikitable" style="margin-left: auto; margin-right: auto; border: none;"
| |
| − | |[[File:3P38_Superior_41.png|thumb|none|alt=A|Taking damage upon entry to the room itself]]||[[File:3P38_Superior_1.png|thumb|none|alt=A|Setting up for a deliberate failure]]||[[File:3P38_Superior_2.png|thumb|none|alt=A|13k EHP Astero didn't stand a chance]]||[[File:3P38_Superior_42.png|thumb|none|alt=A|All the damage in this room from a failure]]||
| |
| − | |}
| |
| − | | |
| − | Anyways, to access this room, take the rift near the Solray Observational Unit. (Note: The Solray Power Terminal must be aligned first for the rift to work properly, even if the Reroute Unit has been hacked.) It leads next to the Solray Radio Alignment Unit. Hack the Remote Reroute Unit:
| |
| − | | |
| − | '''CAN DIFFICULTY: 7/10 [RED HACK]'''<br />
| |
| − | <span style="color:green">SUCCESS:</span> The rift is recalibrated to point towards the Mine Room.<br />
| |
| − | <span style="color:red">FAILURE:</span> No penalty.
| |
| − | | |
| − | What this does is change the direction of the rift near the Solray Observational Unit to point towards the Mine Room instead of near the Radio Alignment Unit. Take the nearby Rift to head back to the main area, then take the rift near the Observational Unit into the Mine Room itself.
| |
| − | | |
| − | Expect to eat about 800 damage upon landing or shortly thereafter from a hidden mine. Upon landing, you should see a Remote Defense Grid Unit. DO NOT activate a Microwarpdrive if you have one equipped as you approach the container. It is approximately 7km off the beacon, some slow manual piloting may be required:
| |
| − | | |
| − | '''CAN DIFFICULTY: 10/10 [RED HACK]'''<br />
| |
| − | <span style="color:green">SUCCESS:</span> A Pristine Storage Depot and possibly one or two lower grade containers are spawned.<br />
| |
| − | <span style="color:red">FAILURE:</span> Expect to take 10000-25000 damage.
| |
| − | | |
| − | Continue by hacking the containers if successful:
| |
| − | | |
| − | '''CAN DIFFICULTY: VARIES [YELLOW TO RED HACKS]'''<br />
| |
| − | <span style="color:green">SUCCESS:</span> The loot is available to be scooped up.<br />
| |
| − | <span style="color:red">FAILURE:</span> No penalty.
| |
| − | | |
| − | When finished, you may Micro Jump Drive back to the main area, burn a Microwarpdrive, or just warp out and warp back in. Continue on to the Turret Room.
| |
| − | | |
| − | {| class="collapsible collapsed" style="background-color:#0d2710; background-image: linear-gradient(#071709, #0d2710); border: 1px solid #287833; padding:0.2em; width:{{{width|90%}}}"
| |
| − | ! style="text-align:left" | <span style="color:#44c055">Mine room damage</span>
| |
| − | |-
| |
| − | | style="font-size:90%; color:#FFFFFF" | {{{1|This room fascinated me for awhile. At least it was easier to figure out than the Archive Room and the intricacies of the Sentries on Duty room.
| |
| − | | |
| − | Upon landing inside the site, even while still in warp, expect to eat 2100-ish damage from a mine, or probably a handful of mines. An Astero with just a Damage Control II, 200mm plate, and an Anti-Explosive rig ate 2135 damage, which put it into 65% structure.
| |
| − | | |
| − | After failure of the Remote Defense Grid Unit, my Maelstrom (don't laugh. I had *just* gotten into my first battleship) ate 11760 damage the AIF overloaded (59/56/67/72 resists). Log:
| |
| − | | |
| − | [ 05:43:10 ] (combat) <span style="color:red">'''560'''</span> <small>from</small> '''Minefield'''<small> - Hits</small><br />
| |
| − | [ 05:43:10 ] (combat) <span style="color:red">'''2100'''</span> <small>from</small> '''Minefield'''<small> - Hits</small><br />
| |
| − | [ 05:43:10 ] (combat) <span style="color:red">'''1260'''</span> <small>from</small> '''Minefield'''<small> - Hits</small><br />
| |
| − | [ 05:43:09 ] (combat) <span style="color:red">'''560'''</span> <small>from</small> '''Minefield'''<small> - Hits</small><br />
| |
| − | [ 05:43:09 ] (combat) <span style="color:red">'''2100'''</span> <small>from</small> '''Minefield'''<small> - Hits</small><br />
| |
| − | [ 05:43:09 ] (combat) <span style="color:red">'''1260'''</span> <small>from</small> '''Minefield'''<small> - Hits</small><br />
| |
| − | [ 05:43:08 ] (combat) <span style="color:red">'''560'''</span> <small>from</small> '''Minefield'''<small> - Hits</small><br />
| |
| − | [ 05:43:08 ] (combat) <span style="color:red">'''2100'''</span> <small>from</small> '''Minefield'''<small> - Hits</small><br />
| |
| − | [ 05:43:08 ] (combat) <span style="color:red">'''1260'''</span> <small>from</small> '''Minefield'''<small> - Hits</small><br />
| |
| − | | |
| − | 11760 damage taken totalized. 560 is a nice number. If 11760 is divided by 560, the answer is 21. 21 mines? Possibly. The damage put the vessel into 62% shields, which was a brick tanked Maelstrom with 79K EHP of shields. Now you know why your Astero got blown up.}}}
| |
| − | |}
| |
| − | | |
| − | === PHASE 4: SENTRIES ON DUTY ===
| |
| − | This room can be definitely challenging, but for frigate pilots, this is where the good stuff generally is. There can also be some spectacular failures here too.<br />
| |
| − | | |
| − | {| style="background:#350000; border:1px solid #333333; padding:0px;"
| |
| − | | style="padding:0px;" | [[image:Icon_warning.png|56px|link=]]
| |
| − | | style="padding:8px;" | '''WARNING:'''
| |
| − | ''1. If the Alarm has been tripped in this room, there can be in excess of 16 Sentry Towers active, and frigates will not stand a chance: there also can be no warning that it has been tripped. Overtanked Mallers and other hardened ships can survive the initial damage and subsequent DPS. If coming from the Solray Room, the message indicating the Alarm has been tripped shows up only after the ship is already in warp!<br />''
| |
| − | ''2. Do not apply any hostile module or weapon onto the Plasma Chamber structures unless specifically instructed to do so. They have enough power to alpha a battleship off the grid ([https://zkillboard.com/related/30005311/201606190200/ or a small fleet]).<br />''
| |
| − | ''3. Do not engage the initial Sentry Towers. Doing so will instantly trip the alarm and spawn the 16 Perimeter Defense sentry towers. The maximum number of Sentry Towers that may be active appears to be 32 (16 Perimeter, 6 initially deployed, and 10 'proximity' ones).''
| |
| − | |}
| |
| − | <br />
| |
| − | | |
| − | Prepare your eyes for a massive overflow of images. All of them are relevant and in some respects, fascinating.
| |
| − | | |
| − | {| class="wikitable" style="margin-left: auto; margin-right: auto; border: none;"
| |
| − | |[[File:3P38_Superior_43.png|thumb|none|alt=A|The warning that the alarm is up only shows AFTER the ship is in warp]]||[[File:3P38_Superior_34.png|thumb|none|alt=A|Another image: Instant aggression, no chance to escape]]||[[File:3P38_Superior_70.png|thumb|none|alt=A|Just "wandering in": activating the Proximity Sentries]]||[[File:3P38_Superior_14.png|thumb|none|alt=A|Aggressing towers instantly triggers alarm]]||[[File:3P38_Superior_18.png|thumb|none|alt=A|Activation radius of Towers indicated to be 120km]]||
| |
| − | |}
| |
| − | | |
| − | {| class="wikitable" style="margin-left: auto; margin-right: auto; border: none;"
| |
| − | |[[File:3P38_Superior_7.png|thumb|none|alt=A|Special Astero fit warping in: First volley...]]||[[File:3P38_Superior_8.png|thumb|none|alt=A|...and second volley...dead]]||[[File:3P38_Superior_4.png|thumb|none|alt=A|All 16 Perimeter Towers visible]]||[[File:3P38_Superior_45.png|thumb|none|alt=A|Proximity towers activated because RDGU not hacked]]||[[File:3P38_Superior_61.png|thumb|none|alt=A|Turning 180 deg, activating MJD to snipe Towers]]||
| |
| − | |}
| |
| − | | |
| − | {| class="wikitable" style="margin-left: auto; margin-right: auto; border: none;"
| |
| − | |[[File:3P38_Superior_62.png|thumb|none|alt=A|Sniping with 1400s. Kind of tricky]]||[[File:3P38_Superior_23.png|thumb|none|alt=A|Hacking the Repair station...didn't save the friendly tower]]||[[File:3P38_Superior_30.png|thumb|none|alt=A|Even with friendly tower down, hostile towers self-damage to death]]||[[File:3P38_Superior_25.png|thumb|none|alt=A|Sucessful hack of the Repair Station completed]]||[[File:3P38_Superior_81.png|thumb|none|alt=A|Using a 829 EHP/sec Maller to forcefully hack away]]||
| |
| − | |}
| |
| − | | |
| − | {| class="wikitable" style="margin-left: auto; margin-right: auto; border: none;"
| |
| − | |[[File:3P38_Superior_82.png|thumb|none|alt=A|It's still rather dangerous, but doable (rec. 950 EHP/sec)]]||[[File:3P38_Superior_83.png|thumb|none|alt=A|After being forced to warp out, Towers not aggressing...???]]||[[File:3P38_Superior_21.png|thumb|none|alt=A|Failure to hack RDGU...]]||[[File:3P38_Superior_20.png|thumb|none|alt=A|...And..Dead!!]]||[[File:3P38_Superior_37.png|thumb|none|alt=A|Successful hack of Hyperfluct Gen., Rift active]]||
| |
| − | |}
| |
| − | | |
| − | [[File:3P38_Superior_12.png|200px|thumb|right|Hacking the repair station early does nothing]]Starting from the Solray Room, leaving the Mobile Depot near the lone Storage Depot, make sure to do three things before this room is attempted:
| |
| − | | |
| − | # Bookmark the location of the Mobile Depot in the Solray Power Plant.
| |
| − | # Drop all loot and unneeded modules into the Mobile Depot.
| |
| − | # Refit into the appropriate fit.
| |
| − | | |
| − | After that, take the Spatial Rift near the Solray Gamma Alignment Unit container. Upon landing, don't worry: the Sentry Towers will not aggress unless a player strays too close to the loot containers. However, all players must play close attention to these instructions.
| |
| − | | |
| − | The Remote Defense Grid Unit in the room has three functions. First, it disables any proximity based Sentry Towers from forming. Secondly, it re-wires a hostile Sentry Tower into a friendly one. Thirdly, it recalibrates the Vessel Rejuvenation Battery into one that can be hacked to configure it to repair the friendly Sentry Tower. If a player simply approaches the Storage Depots and ignores the RDGU procedure, then not only will the 6 initial Towers aggress, but up to 10 additional new Sentry Towers can spawn.
| |
| − | | |
| − | The first order of business then becomes apparent: hack the Remote Defense Grid Unit itself. Take your time on this hack, and try to do it right the first time: there is no rush. It will then aggress the other 5 Sentry Towers, and in turn take damage itself. But it can't sustain the incoming damage for long, so by hacking the Sentry Repair Station, it will provide armor and shield reps to our friendly Tower. (The friendly Tower cannot receive remote repairs from vessels.)
| |
| − | | |
| − | Start by hacking the Remote Defense Grid Unit:
| |
| − | | |
| − | {| style="background:#350000; border:1px solid #333333; padding:0px;"
| |
| − | | style="padding:0px;" | [[image:Icon_warning.png|56px|link=]]
| |
| − | | style="padding:8px;" | '''WARNING:'' '''A present bug in the site seems to indicate that failure of this next hack will spawn the Sentry Towers regardless of whether a successful rehack has been completed. So the countdown to the perimeter Sentries will not be actually canceled, no warning in Local that they are about to spawn, instead you will find 16 Sentry Towers will spawn anyways. In a frigate, warp off the site immediately if you fail the hack. Cruisers and above which can run the Archive Room may choose Plan B.
| |
| − | |}
| |
| − | | |
| − | '''CAN DIFFICULTY: 9/10 [RED HACK]'''<br />
| |
| − | <span style="color:green">SUCCESS:</span> The closest Sentry Tower becomes friendly, and aggresses the other Sentry Towers to blow them up, and will in turn begin taking damage itself from the other Sentry Towers.<br />
| |
| − | <span style="color:red">FAILURE:</span> A timer is generated which will activate the Alarm in 45 seconds. When the 45 second timer is up, the RDGU explodes and there is no other way to proceed without some fairly stiff tanking abilities. At the 45 second timer mark, the site spawns the 16 Perimeter Defense sentry towers, for a total of 22 Sentry Towers. Frigates won't last on field.
| |
| − | | |
| − | [[File:3P38_Superior_44.png|200px|thumb|right|Approximate DPS of all 16 Perimeter Towers (varies)]]For Cruisers and above, there is Plan B.
| |
| − | | |
| − | Continuing on, IMMEDIATELY after hacking this container, active the Microwarpdrive and burn towards the Sentry Repair Station located near the right of your present position. There is enough time for 2 hacks, maybe 3 fast hacks, before the hostile Sentry Towers destroy the friendly Tower:
| |
| − | | |
| − | '''CAN DIFFICULTY: 8/10 [RED HACK]'''<br />
| |
| − | <span style="color:green">SUCCESS:</span> The Station will provide shield and armor repairs to the friendly Rewired Sentry Gun.<br />
| |
| − | <span style="color:red">FAILURE:</span> No penalty, although if a successful hack is not completed before the hostile Sentry Towers destroy the friendly Tower, then some Towers will remain.
| |
| − | | |
| − | At the present time, I have not seen the hostile Towers aggress my vessel after failure to hack the Sentry Repair Station in time. Instead the hostile Towers seemed to keep incurring damage and eventually destruct, even with the Rewired Sentry Gun destroyed. This is another bug of the site itself. Should it be fixed in the future, simply revert to Plan B. ''Do not aggress the Sentry Towers with weaponry: it will instantly trigger the 16 Perimeter Defense Sentry Towers.''
| |
| − | | |
| − | Assuming a successful hack of the Sentry Repair Station, simply sit near the Repair Station and wait for the hostile Towers to be eradicated. There is a rather serious hazard to the north of the warp-in, namely 3 Unstable Plasma Chambers. Getting too close to these could be fatal, and will trip the alarm on top of that. (Hacking the Sentry Repair Station before the RDGU does nothing, although a message appears in Local: "Hacking the repair station has no discernible effects on anything in the vicinity. The station continues to provide repair services to to the nearby sentry guns.")
| |
| − | | |
| − | When all is clear, the loot is there for the taking, and one may loot and hack in peace with (aside from the nearby hazard) no particular danger:
| |
| − | | |
| − | '''CAN DIFFICULTY: 6 - 9/10 [YELLOW to RED HACKS]'''<br />
| |
| − | <span style="color:green">SUCCESS:</span> The loot can be scooped up.<br />
| |
| − | <span style="color:red">FAILURE:</span> No penalty.
| |
| − | | |
| − | Do NOT hack the Hyperfluct Generator container yet.
| |
| − | | |
| − | As you're working on the hacks, avoid using the Microwarpdrive, use Keep at Range (2250m) on the last can near the group of Plasma Chambers, and move slowly, around 100m/sec to avoid triggering the Plasma Chambers. After all worthy containers are hacked, the frigate pilots are done. Take the Spatial Rift to head back to the Solray Room, refit to a travel fit if needed, scoop up any contents inside the Mobile Depot (if it is scooped to the cargohold directly, a jetcan is left behind), pack up the Mobile Depot and depart.
| |
| − | | |
| − | For the T3 Cruisers, Nestor and other similar battleship-level tanked ships, if there was no Mobile Depot left behind anywhere in any other room, you may now proceed to the vaunted Archive Room.
| |
| − | | |
| − | {| class="collapsible collapsed" style="background-color:#0d2710; background-image: linear-gradient(#071709, #0d2710); border: 1px solid #287833; padding:0.2em; width:{{{width|90%}}}"
| |
| − | ! style="text-align:left" | <span style="color:#44c055">About those Plasma Chambers</span>
| |
| − | |-
| |
| − | | style="font-size:90%; color:#FFFFFF" | {{{1|Let's talk about the Plasma Chambers. You can amuse yourself by searching zKillboard for kills by the [https://zkillboard.com/ship/2894/ Invisible Cloud] element. Check for ones with blue loot inside them. Yeap, some guy did something he thought was a good idea...or his tank broke in the Archive Room...Anyways. First I should mention the damage. It's a LOT. First I used an overtanked Maelstrom, fit like this:
| |
| − | | |
| − | {{ShipFitting
| |
| − | | ship=Maelstrom
| |
| − | | shipTypeID=24694
| |
| − | | fitName=Two
| |
| − | | fitID=Two
| |
| − | | low1name=Reinforced Bulkheads II
| |
| − | | low1typeID=1335
| |
| − | | low2name=Reinforced Bulkheads II
| |
| − | | low2typeID=1335
| |
| − | | low3name=Reinforced Bulkheads II
| |
| − | | low3typeID=1335
| |
| − | | low4name=Reinforced Bulkheads II
| |
| − | | low4typeID=1335
| |
| − | | low5name=Damage Control II
| |
| − | | low5typeID=2048
| |
| − | | mid1name=Large Shield Extender II
| |
| − | | mid1typeID=3841
| |
| − | | mid2name=Large Shield Extender II
| |
| − | | mid2typeID=3841
| |
| − | | mid3name=Large Shield Extender II
| |
| − | | mid3typeID=3841
| |
| − | | mid4name=Large Shield Extender II
| |
| − | | mid4typeID=3841
| |
| − | | mid5name=Data Analyzer II
| |
| − | | mid5typeID=30834
| |
| − | | mid6name=Adaptive Invulnerability Field II
| |
| − | | mid6typeID=2281
| |
| − | | rig1name=Large Anti-EM Screen Reinforcer I
| |
| − | | rig1typeID=26076
| |
| − | | rig2name=Large Core Defense Field Extender I
| |
| − | | rig2typeID=26088
| |
| − | | rig3name=Large Core Defense Field Extender I
| |
| − | | rig3typeID=26088
| |
| − | | high1name=open
| |
| − | | high2name=open
| |
| − | | high3name=open
| |
| − | | high4name=open
| |
| − | | high5name=open
| |
| − | | high6name=open
| |
| − | | high7name=open
| |
| − | | high8name=open
| |
| − | | charge1name=open
| |
| − | | charge2name=open
| |
| − | | charge3name=open
| |
| − | | charge4name=open
| |
| − | | charge5name=open
| |
| − | | drone1name=open
| |
| − | | drone2name=open
| |
| − | | drone3name=open
| |
| − | | drone4name=open
| |
| − | | drone5name=open
| |
| − | | skills=
| |
| − | | showSKILLS=N
| |
| − | | notes=
| |
| − | | showNOTES=N
| |
| − | | difficulty=1
| |
| − | | warsop=D
| |
| − | | warsopReason=
| |
| − | | version=YC118 1.0
| |
| − | | showTOC=Y
| |
| − | | shipDNA=24694:1335;4:2048;1:3841;4:30834;1:2281;1:26076;1:26088;2::
| |
| − | | fleetup=
| |
| − | }}
| |
| − | | |
| − | Damage report: 28000 damage flat, with the AIF overloaded, which ate almost all the shields off. I don't know what damage type it is, it could be omni-damage, nobody really knows. In case that wasn't enough, I have a lossmail on the test server of a rather beefy Hyperion in which the killmail shows 53225 damage, and that was with three 1600mm plates! I may have had my Microwarpdrive on, I don't remember.
| |
| − | | |
| − | The explosion radius itself is also big. To test this, I made a line of Atrons from 100km out to 240km. All of them were blown up. This was not conclusive enough, so I found another site after some time. So then inside that one I made another line of Atrons from 240km out to 350km. For that case, only the 240km Atron was popped, but not the one at 250km. So it's probably very safe to say that the detonation radius is 249km, or 250km: the Atron might have been on the raw edge of the line. As for detonating it, any hostile module will work, such as a target painter. Even a gun or missile doesn't have to actually inflict any damage to the Chambers: the mere act of aggression is enough.
| |
| − | }}}
| |
| − | |}
| |
| − | | |
| − | These images below cover the detonation of the Plasma Chambers.
| |
| − | | |
| − | {| class="wikitable" style="margin-left: auto; margin-right: auto; border: none;"
| |
| − | |[[File:3P38_Superior_3.png|thumb|none|alt=A|A humble frigate: Gone]]||[[File:3P38_Superior_15.png|thumb|none|alt=A|Stratios: Dead]]||[[File:3P38_Superior_16.png|thumb|none|alt=A|Stratios lossmail]]||[[File:3P38_Superior_78.png|thumb|none|alt=A|And this triple-plated Hyperion too (MWD was probably on)]]||[[File:3P38_Superior_39.png|thumb|none|alt=A|Buffer-tanked Maelstrom (79K EHP shields)]]||
| |
| − | |}
| |
| − | | |
| − | {| class="wikitable" style="margin-left: auto; margin-right: auto; border: none;"
| |
| − | |[[File:3P38_Superior_19.png|thumb|none|alt=A|Even a frigate is safe if the cloud is active]]||[[File:3P38_Superior_38.png|thumb|none|alt=A|The explosion re-activates the Hyperfluct Generator]]||[[File:3P38_Superior_59.png|thumb|none|alt=A|Making a line of Atrons to 250km]]||[[File:3P38_Superior_60.png|thumb|none|alt=A|From 195km with a Vigil, all Atrons exploded out to 250km]]||[[File:3P38_Superior_71.png|thumb|none|alt=A|Took more Atrons from 250 to 350km]]||
| |
| − | |}
| |
| − | | |
| − | {| class="collapsible collapsed" style="background-color:#0d2710; background-image: linear-gradient(#071709, #0d2710); border: 1px solid #287833; padding:0.2em; width:{{{width|90%}}}"
| |
| − | ! style="text-align:left" | <span style="color:#44c055">Plan B</span>
| |
| − | |-
| |
| − | | style="font-size:90%; color:#FFFFFF" | {{{1|When I said earlier:
| |
| − | | |
| − | "The Remote Defense Grid Unit in the room has three functions. First, it disables any proximity based Sentry Towers from forming."
| |
| − | | |
| − | I didn't say it was untankable. Let's get right to that subject. There are a couple of ships and fits that are viable for the job. First let's talk about what happens.
| |
| − | | |
| − | When a player simply approaches the Storage Depots, measured from the warpin beacon towards the Hyperfluct Generator, the initial Sentry Towers will begin to aggress the player around the 10km mark. Their activation range is about 10-12km or thereabouts at this stage. (This is assuming that the Alarm has not been activated. We will get to that stage in a minute.) As the ship continues, hidden Sentry Towers are activated in predefined spots as the ship moves around the area. They also seem to have a limited aggression range or something. In total, 10 Sentry Towers can be activated by proximity and 6 are from the initial spawn.
| |
| − | | |
| − | So the Plan is to simply tank them. Any cruiser or above class vessel with around 900-1000 EHP/sec repairs against EM and Thermal damage can survive here as long as it is capacitor stable. Armor tanked vessels are the obvious choice because of the default resistance profile of armor, and because the Relic Analyzer II won't interfere with capacitor modules or tank modules in the mid slots, as with shield tanks. That's not to say a nice Tengu or Slepnir is bad, but just that armor is easier.
| |
| − | | |
| − | Choices include any vessel with a bonus to repair amount, resistances, or both (i.e. T2 hulls with the T2 resistance profile). Mallers make a good choice for both low cost and ease of entry; for battlecruisers, Prophecy, Brutix and the Myrmidon are all respectable. Battleships usually have no problem fitting a tank along the suggested lines, so I won't say much there.
| |
| − | | |
| − | Here are the fits:
| |
| − | | |
| − | {{ShipFitting
| |
| − | | ship=Maller
| |
| − | | shipTypeID=624
| |
| − | | fitName=Maller - About Face (Turret Room)
| |
| − | | fitID=Maller---About-Face-(Turret-Room)
| |
| − | | low1name=Medium Armor Repairer II
| |
| − | | low1typeID=3530
| |
| − | | low2name=Medium Armor Repairer II
| |
| − | | low2typeID=3530
| |
| − | | low3name=Armor Thermal Hardener II
| |
| − | | low3typeID=11648
| |
| − | | low4name=Armor Thermal Hardener II
| |
| − | | low4typeID=11648
| |
| − | | low5name=Armor EM Hardener II
| |
| − | | low5typeID=11642
| |
| − | | low6name=Armor EM Hardener II
| |
| − | | low6typeID=11642
| |
| − | | mid1name=Large Cap Battery II
| |
| − | | mid1typeID=3504
| |
| − | | mid2name=Large Cap Battery II
| |
| − | | mid2typeID=3504
| |
| − | | mid3name=Relic Analyzer II
| |
| − | | mid3typeID=30832
| |
| − | | rig1name=Medium Auxiliary Nano Pump I
| |
| − | | rig1typeID=31047
| |
| − | | rig2name=Medium Auxiliary Nano Pump I
| |
| − | | rig2typeID=31047
| |
| − | | rig3name=Medium Anti-Thermal Pump I
| |
| − | | rig3typeID=31035
| |
| − | | high1name=open
| |
| − | | high2name=open
| |
| − | | high3name=open
| |
| − | | high4name=open
| |
| − | | high5name=open
| |
| − | | charge1name=open
| |
| − | | charge2name=open
| |
| − | | charge3name=open
| |
| − | | charge4name=open
| |
| − | | charge5name=open
| |
| − | | drone1name=open
| |
| − | | drone2name=open
| |
| − | | drone3name=open
| |
| − | | drone4name=open
| |
| − | | drone5name=open
| |
| − | | skills=
| |
| − | | showSKILLS=N
| |
| − | | notes=1089 EHP/sec with All V character.
| |
| − | | showNOTES=N
| |
| − | | difficulty=1
| |
| − | | warsop=A
| |
| − | | warsopReason=
| |
| − | | version=YC118 1.0
| |
| − | | showTOC=Y
| |
| − | | shipDNA=624:3530;2:11648;2:11642;2:3504;2:30832;1:31047;2:31035;1::
| |
| − | | fleetup=
| |
| − | }}{{ShipFitting
| |
| − | | ship=Myrmidon
| |
| − | | shipTypeID=24700
| |
| − | | fitName=Myrmidon - To Tank A Few Sentries
| |
| − | | fitID=Myrmidon---To-Tank-A-Few-Sentries
| |
| − | | low1name=Medium Armor Repairer II
| |
| − | | low1typeID=3530
| |
| − | | low2name=Medium Armor Repairer II
| |
| − | | low2typeID=3530
| |
| − | | low3name=Armor Thermal Hardener II
| |
| − | | low3typeID=11648
| |
| − | | low4name=Armor Thermal Hardener II
| |
| − | | low4typeID=11648
| |
| − | | low5name=Armor EM Hardener II
| |
| − | | low5typeID=11642
| |
| − | | low6name=Armor EM Hardener II
| |
| − | | low6typeID=11642
| |
| − | | mid1name=Cap Recharger II
| |
| − | | mid1typeID=2032
| |
| − | | mid2name=Cap Recharger II
| |
| − | | mid2typeID=2032
| |
| − | | mid3name=Large Compact Pb-Acid Cap Battery
| |
| − | | mid3typeID=4871
| |
| − | | mid4name=Large Compact Pb-Acid Cap Battery
| |
| − | | mid4typeID=4871
| |
| − | | mid5name=Relic Analyzer II
| |
| − | | mid5typeID=30832
| |
| − | | rig1name=Medium Nanobot Accelerator I
| |
| − | | rig1typeID=31065
| |
| − | | rig2name=Medium Auxiliary Nano Pump I
| |
| − | | rig2typeID=31047
| |
| − | | rig3name=Medium Auxiliary Nano Pump I
| |
| − | | rig3typeID=31047
| |
| − | | high1name=open
| |
| − | | high2name=open
| |
| − | | high3name=open
| |
| − | | high4name=open
| |
| − | | high5name=open
| |
| − | | charge1name=open
| |
| − | | charge2name=open
| |
| − | | charge3name=open
| |
| − | | charge4name=open
| |
| − | | charge5name=open
| |
| − | | drone1name=open
| |
| − | | drone2name=open
| |
| − | | drone3name=open
| |
| − | | drone4name=open
| |
| − | | drone5name=open
| |
| − | | skills=
| |
| − | | showSKILLS=N
| |
| − | | notes=1273 EHP/sec with All V character.
| |
| − | | showNOTES=N
| |
| − | | difficulty=1
| |
| − | | warsop=A
| |
| − | | warsopReason=
| |
| − | | version=YC118 1.0
| |
| − | | showTOC=Y
| |
| − | | shipDNA=24700:3530;2:11648;2:11642;2:2032;2:4871;2:30832;1:31065;1:31047;2::
| |
| − | | fleetup=
| |
| − | }}{{ShipFitting
| |
| − | | ship=Prophecy
| |
| − | | shipTypeID=16233
| |
| − | | fitName=Prophecy - Sentries on Duty
| |
| − | | fitID=Prophecy---Sentries-on-Duty
| |
| − | | low1name=Armor EM Hardener II
| |
| − | | low1typeID=11642
| |
| − | | low2name=Armor EM Hardener II
| |
| − | | low2typeID=11642
| |
| − | | low3name=Armor Thermal Hardener II
| |
| − | | low3typeID=11648
| |
| − | | low4name=Armor Thermal Hardener II
| |
| − | | low4typeID=11648
| |
| − | | low5name=Medium Armor Repairer II
| |
| − | | low5typeID=3530
| |
| − | | low6name=Medium Armor Repairer II
| |
| − | | low6typeID=3530
| |
| − | | low7name=Capacitor Power Relay II
| |
| − | | low7typeID=1447
| |
| − | | mid1name=10MN Monopropellant Enduring Afterburner
| |
| − | | mid1typeID=6005
| |
| − | | mid2name=Relic Analyzer II
| |
| − | | mid2typeID=30832
| |
| − | | mid3name=Large Cap Battery II
| |
| − | | mid3typeID=3504
| |
| − | | mid4name=Large Compact Pb-Acid Cap Battery
| |
| − | | mid4typeID=4871
| |
| − | | high1name=Armor Command Burst I, Rapid Repair Charge
| |
| − | | high1typeID=42526
| |
| − | | charge1name=Rapid Repair Charge x1
| |
| − | | charge1typeID=42833
| |
| − | | rig1name=Medium Anti-Thermal Pump I
| |
| − | | rig1typeID=31035
| |
| − | | rig2name=Medium Auxiliary Nano Pump I
| |
| − | | rig2typeID=31047
| |
| − | | rig3name=Medium Auxiliary Nano Pump I
| |
| − | | rig3typeID=31047
| |
| − | | high2name=open
| |
| − | | high3name=open
| |
| − | | high4name=open
| |
| − | | high5name=open
| |
| − | | charge2name=open
| |
| − | | charge3name=open
| |
| − | | charge4name=open
| |
| − | | charge5name=open
| |
| − | | drone1name=open
| |
| − | | drone2name=open
| |
| − | | drone3name=open
| |
| − | | drone4name=open
| |
| − | | drone5name=open
| |
| − | | skills=
| |
| − | | showSKILLS=N
| |
| − | | notes=Armor Command Burst charge can also be the Energizing Charge.</li><li>Propulsion module is mostly a bonus. Do not cap yourself out.</li><li>Make sure the Relic Analyzer is set to AUTO-REPEAT OFF.
| |
| − | | showNOTES=N
| |
| − | | difficulty=1
| |
| − | | warsop=A
| |
| − | | warsopReason=
| |
| − | | version=LATEST
| |
| − | | showTOC=Y
| |
| − | | shipDNA=16233:11642;2:11648;2:3530;2:1447;1:6005;1:30832;1:3504;1:4871;1:42526;1:42833;1:31035;1:31047;2::
| |
| − | | fleetup=
| |
| − | | alphacanuse=N
| |
| − | }}
| |
| − | | |
| − | The Brutix I left out -- it's easy to transfer the basic concept over from the other ships. It's simple enough: 90% EM resistance, 90% Thermal resistance, dual reppers, some capacitor mods, and rigs as needed to bring to the minimum of about 900-950 EHP/sec. Pyfa's damage profile editor allows for close examination of other ships and fits for the said purpose.
| |
| − | | |
| − | The basic strategy then is to simply ignore the Remote Defense Grid Unit hack entirely, and hack the Storage Depots out. If the 16 Perimeter Defense Towers are online, then things are quite a bit dicier, and I'm not sure these fits shown can handle that kind of DPS. In that case, there is nothing wrong with using a buffer tank, and bringing in logistics cruisers to solve that problem. However, any fit that can survive the Archive Room indefinitely (excess of 2000 EHP/sec) won't have a problem in that case, and may simply continue on hacking.
| |
| − | | |
| − | For those in doubt as to whether the Alarm is active or not (i.e. if someone else may have tripped it), just swap out the two armor repairers for a pair of 1600mm plates and have a look. There is enough buffer to survive without reps for about five minutes. If the Perimeter towers are not active, but all 10 proximity towers and the initial 6 towers, then the tank should last for about 6.5 minutes. From Pyfa's numbers, it seems one lone Exequror can repair about 2000 EHP/sec onto a plated fit -- consider that. As long as the logistics vessel does not get aggro (just sit near the beacon), it should work out nicely. That does have a benefit in that the standard bait fit overtanked Maller you might have just has to swap out for all EM and Thermal hardeners, as 90% resists are pretty effective at reducing the incoming DPS.
| |
| − | | |
| − | The first time I used a Maller to actively tank the Towers, a certain point came happen where my tank could not hold. (It was repping 829 EHP/sec) I warped out and came back into the site, with heavy heat damage to the modules and hardeners. Upon re-entering the room, I was surprised to see the hostile Sentry Towers shooting...the Storage Depots. A few Towers aggressed, but as the ship crept past the 120km engagement range, the DPS was reduced to the point where shields was regenerating. That may be a useful factoid. ([http://wiki.eveuniversity.org/File:3P38_Superior_83.png Link]) Since that time I have switched to using a Maller for running the entire site -- saves hassle in the Turret Room anyways.
| |
| − | | |
| − | The Perimeter Towers (and the initial Towers if the alarm is tripped) themselves have an activation range of 120km. Beyond this point, they will switch from a red box to a yellow box, but will re-engage if a player approaches within that 120km limit. Because of this, a sniping battleship can be used to clear out the Sentry Towers if desired, however this does take some time. To do this, when landing on the beacon, immediately turn the ship around 180 degrees from the area near the Storage Depots and then hit the Micro Jump Drive. (This allows for the maximum distance jumped from the rest of the Towers: hopefully only three or four Towers will still have active aggression.) Use 1400mm Artillery, Sentry Drones or probably large beam lasers. Then it's a matter of carefully positioning around to make sure the Towers in aggression range are limited so it doesn't break the tank, yet still engaging them within optimal of the battleship. Attack Battlecruisers like Oracles won't work because those cannot fit MJDs.
| |
| − | | |
| − | Lastly: A damage log of ... a lot of Sentry Towers spawned. Should give you a basic idea of what kind of damage we're talking about here.
| |
| − | | |
| − | [ 2016.07.05 23:26:49 ] (combat) <span style="color:red">'''1192'''</span> <small>from</small> '''Wakeful Sentry Tower'''<small> - Penetrates</small><br />
| |
| − | [ 2016.07.05 23:26:49 ] (combat) <span style="color:red">'''53'''</span> <small>from</small> '''Wakeful Sentry Tower'''<small> - Glances Off</small><br />
| |
| − | [ 2016.07.05 23:26:49 ] (combat) <span style="color:red">'''79'''</span> <small>from</small> '''Restless Sentry Tower'''<small> - Hits</small><br />
| |
| − | [ 2016.07.05 23:26:49 ] (combat) <span style="color:red">'''62'''</span> <small>from</small> '''Restless Sentry Tower'''<small> - Glances Off</small><br />
| |
| − | [ 2016.07.05 23:26:49 ] (combat) <span style="color:red">'''104'''</span> <small>from</small> '''Restless Sentry Tower'''<small> - Penetrates</small><br />
| |
| − | [ 2016.07.05 23:26:49 ] (combat) <span style="color:red">'''83'''</span> <small>from</small> '''Restless Sentry Tower'''<small> - Hits</small><br />
| |
| − | [ 2016.07.05 23:26:49 ] (combat) <span style="color:red">'''99'''</span> <small>from</small> '''Wakeful Sentry Tower'''<small> - Smashes</small><br />
| |
| − | [ 2016.07.05 23:26:49 ] (combat) <span style="color:red">'''67'''</span> <small>from</small> '''Wakeful Sentry Tower'''<small> - Hits</small><br />
| |
| − | [ 2016.07.05 23:26:49 ] (combat) <span style="color:red">'''91'''</span> <small>from</small> '''Restless Sentry Tower'''<small> - Penetrates</small><br />
| |
| − | [ 2016.07.05 23:27:04 ] (combat) <span style="color:red">'''65'''</span> <small>from</small> '''Wakeful Sentry Tower'''<small> - Hits</small><br />
| |
| − | [ 2016.07.05 23:27:04 ] (combat) <span style="color:red">'''99'''</span> <small>from</small> '''Wakeful Sentry Tower'''<small> - Smashes</small><br />
| |
| − | [ 2016.07.05 23:27:04 ] (combat) <span style="color:red">'''75'''</span> <small>from</small> '''Restless Sentry Tower'''<small> - Hits</small><br />
| |
| − | [ 2016.07.05 23:27:04 ] (combat) <span style="color:red">'''44'''</span> <small>from</small> '''Wakeful Sentry Tower'''<small> - Glances Off</small><br />
| |
| − | [ 2016.07.05 23:27:04 ] (combat) <span style="color:red">'''60'''</span> <small>from</small> '''Wakeful Sentry Tower'''<small> - Hits</small><br />
| |
| − | [ 2016.07.05 23:27:04 ] (combat) <span style="color:red">'''92'''</span> <small>from</small> '''Restless Sentry Tower'''<small> - Penetrates</small><br />
| |
| − | [ 2016.07.05 23:27:04 ] (combat) <span style="color:red">'''99'''</span> <small>from</small> '''Restless Sentry Tower'''<small> - Penetrates</small><br />
| |
| − | [ 2016.07.05 23:27:04 ] (combat) <span style="color:red">'''107'''</span> <small>from</small> '''Restless Sentry Tower'''<small> - Penetrates</small><br />
| |
| − | [ 2016.07.05 23:27:04 ] (combat) <span style="color:red">'''77'''</span> <small>from</small> '''Restless Sentry Tower'''<small> - Hits</small><br />
| |
| − | [ 2016.07.05 23:27:06 ] (combat) <span style="color:red">'''98'''</span> <small>from</small> '''Restless Sentry Tower'''<small> - Penetrates</small><br />
| |
| − | [ 2016.07.05 23:27:18 ] (combat) <span style="color:red">'''105'''</span> <small>from</small> '''Wakeful Sentry Tower'''<small> - Penetrates</small><br />
| |
| − | [ 2016.07.05 23:27:19 ] (combat) <span style="color:red">'''72'''</span> <small>from</small> '''Wakeful Sentry Tower'''<small> - Hits</small><br />
| |
| − | [ 2016.07.05 23:27:19 ] (combat) <span style="color:red">'''48'''</span> <small>from</small> '''Wakeful Sentry Tower'''<small> - Grazes</small><br />
| |
| − | [ 2016.07.05 23:27:19 ] (combat) <span style="color:red">'''63'''</span> <small>from</small> '''Wakeful Sentry Tower'''<small> - Glances Off</small><br />
| |
| − | [ 2016.07.05 23:27:19 ] (combat) <span style="color:red">'''51'''</span> <small>from</small> '''Wakeful Sentry Tower'''<small> - Grazes</small><br />
| |
| − | [ 2016.07.05 23:27:19 ] (combat) <span style="color:red">'''106'''</span> <small>from</small> '''Restless Sentry Tower'''<small> - Hits</small><br />
| |
| − | [ 2016.07.05 23:27:19 ] (combat) <span style="color:red">'''148'''</span> <small>from</small> '''Restless Sentry Tower'''<small> - Smashes</small><br />
| |
| − | [ 2016.07.05 23:27:19 ] (combat) <span style="color:red">'''159'''</span> <small>from</small> '''Restless Sentry Tower'''<small> - Smashes</small><br />
| |
| − | [ 2016.07.05 23:27:19 ] (combat) <span style="color:red">'''95'''</span> <small>from</small> '''Restless Sentry Tower'''<small> - Hits</small><br />
| |
| − | [ 2016.07.05 23:27:21 ] (combat) <span style="color:red">'''135'''</span> <small>from</small> '''Restless Sentry Tower'''<small> - Penetrates</small><br />
| |
| − | [ 2016.07.05 23:27:33 ] (combat) <span style="color:red">'''96'''</span> <small>from</small> '''Wakeful Sentry Tower'''<small> - Hits</small><br />
| |
| − | [ 2016.07.05 23:27:34 ] (combat) <span style="color:red">'''132'''</span> <small>from</small> '''Wakeful Sentry Tower'''<small> - Penetrates</small><br />
| |
| − | [ 2016.07.05 23:27:34 ] (combat) <span style="color:red">'''57'''</span> <small>from</small> '''Wakeful Sentry Tower'''<small> - Grazes</small><br />
| |
| − | [ 2016.07.05 23:27:34 ] (combat) <span style="color:red">'''111'''</span> <small>from</small> '''Wakeful Sentry Tower'''<small> - Hits</small><br />
| |
| − | [ 2016.07.05 23:27:34 ] (combat) <span style="color:red">'''155'''</span> <small>from</small> '''Wakeful Sentry Tower'''<small> - Smashes</small><br />
| |
| − | [ 2016.07.05 23:27:34 ] (combat) <span style="color:red">'''201'''</span> <small>from</small> '''Restless Sentry Tower'''<small> - Smashes</small><br />
| |
| − | [ 2016.07.05 23:27:34 ] (combat) <span style="color:red">'''160'''</span> <small>from</small> '''Restless Sentry Tower'''<small> - Penetrates</small><br />
| |
| − | [ 2016.07.05 23:27:34 ] (combat) <span style="color:red">'''203'''</span> <small>from</small> '''Restless Sentry Tower'''<small> - Smashes</small><br />
| |
| − | | |
| − | I don't know what ship that is...unfortunately. The Maelstrom was able to tank most of the damage with just one repairer at about 950 EHP/sec. That is 4743 damage taken over 45 seconds, which turns out to 105.4 DPS incurred.}}}
| |
| − | |}
| |
| − | | |
| − | === PHASE 5: THE ARCHIVE ROOM ===
| |
| − | It may be very worthwhile reading this before this room is attempted, and watching a video of someone else running it. It's pretty dangerous.
| |
| − | | |
| − | [[File:3P38_Superior_17.png|200px|thumb|right|First case: Rift Spawns immediately: otherwise, detonation required]]Starting from the Sentries on Duty room, there should be a Hyperfluct Generator container. Hacking it produces two outcomes:
| |
| − | | |
| − | '''CAN DIFFICULTY: 9/10 [RED HACK]'''<br />
| |
| − | <span style="color:green">SUCCESS:</span><br />
| |
| − | First case: A Spatial Rift is generated, which allows immediate access to the Archive Room.<br />
| |
| − | Second case: A Spatial Rift is not generated, so you'll have a harder time. Here's what needs to be done:
| |
| − | | |
| − | # Lock up one of the Unstable Plasma Chambers. Make sure you have some kind of high slot weapon: drones will not work. Even a 125mm Autocannon on a Nestor is enough. Do not shoot it yet.<br />
| |
| − | # Start hacking the Vessel Rejuvenation Battery, but do NOT finish the hack. When you find the core, and are 1-2 clicks away from success, get ready for the next bit below.<br />
| |
| − | <span style="color:red">FAILURE:</span> No penalty.
| |
| − | | |
| − | '''CAN DIFFICULTY: 8/10 [RED HACK]'''<br />
| |
| − | <span style="color:green">SUCCESS:</span> A cloud is generated which approximates the area of healing reps. It evaporates after 10 seconds, so timing is important. The cloud will protect even a frigate from the incredible power of the explosion.<br />
| |
| − | <span style="color:red">FAILURE:</span> No penalty.
| |
| − | | |
| − | Just after you finish the hack, watch Local to see when the message pops up informing of the activation, then quickly shoot a Plasma Chamber. The Vessel Rejuvenation Battery's mad reps will protect you. Quickly turn on the Microwarpdrive over to the now-revived Hyperfluct Generator. There are just 60 seconds to attempt a successful hack before the Perimeter Defense System comes online. When that happens, 16 new Sentry Towers appear. Frigates won't last. Ships that can run the Archive Room fine will be okay to repeat attempts until the Rift is generated.
| |
| − | | |
| − | Assuming the hack goes through in time, take the rift into the Archive Room itself.
| |
| − | | |
| − | Landing in the vaunted Archive Room, it's time to take in the scenery. There is plenty of local attractions which cause hurt: Sentry Towers, damage clouds near various objects (Smoldering Archive Ruins), and then Shockwaves. There are a number of tasks to perform in this room.
| |
| − | | |
| − | Begin by approach the Defense Targeting Augmentation Unit. From the beacon, a straight line approach is fine. Go ahead and hack it. Before we go farther, any failed hacks in this room may spawn additional Sentry Towers. May:
| |
| − | | |
| − | '''CAN DIFFICULTY: 8/10 [RED HACK]'''<br />
| |
| − | <span style="color:green">SUCCESS:</span> The Sentry Towers, which already have atrocious tracking ability, suffer an additional tracking penalty.<br />
| |
| − | <span style="color:red">FAILURE:</span> Standard failure result of any can in this site: May spawn additional Sentry Towers.
| |
| − | | |
| − | A successful hack also has the opportunity to spawn a Pristine Storage Depot nearby. You may hack it and loot it. Proceed on to hacking the Cerebrum Maintenance Chambers. Each functions like a normal data or relic site object: it must be hacked first before it can be opened. Same hacking difficulty and failure results as before, red hacks. For the Central Archive Cerebrum to begin operating, three Cerebrum Oscillation Fluid objects are needed, the other items like the Self-Regulating Machine Gears and what not are just scrap. Therefore, hack enough Cerebrum Maintenance Chambers to get what is required:
| |
| − | | |
| − | '''CAN DIFFICULTY: 8/10 [RED HACK]'''<br />
| |
| − | <span style="color:green">SUCCESS:</span> The contents may be extracted.<br />
| |
| − | <span style="color:red">FAILURE:</span> Additional Sentry Towers may spawn.
| |
| − | | |
| − | I like to shoot the Sentry Towers that lie around the perimeter. As they have a 50m signature radius, Light Neutron Blasters and light drones work good enough. Depending on your fit, their absence can be enough to make sure your tank lasts long enough.
| |
| − | | |
| − | Having 3 Oscillation Fluids (or more) in your cargo hold, go ahead and Open Cargo on the Central Archive Cerebrum.
| |
| − | | |
| − | Place 3 of those Oscillation Fluid items into the Cerebrum; more is not necessary, but 2 won't work either. (The E-UNI wiki says an explosion can occur if foreign material is inserted into the Cerebrum. A test run did not incur such an event.) At this point, a couple of things are initiated: first, the Central Archive Cerebrum will eject Storage Depots of varying grades, and Shockwaves will start coming. The first set are tankable fine in a standard Tech III Strategic Cruiser, though the double massive Shockwaves will most likely be more than most fits and skills can handle. The basic idea then becomes a question of how many cans can be hacked and looted before the incoming damage is more than can be safely tolerated.
| |
| − | | |
| − | Vessel Rejuvenation Batteries will also be ejected from the Cerebrum itself. These are cool. Details are below: they are Data hacks.
| |
| − | | |
| − | Make sure to check for other containers around the area, for those looking to complete the room fully. When finished, warp out. Those who left Mobile Depots in other rooms may need to warp back to collect them and refit for a travel fit.
| |
| − | | |
| − | Congratulations: you have completed the most challenging Sleeper Cache the game has to offer.
| |
| − | | |
| − | {| class="collapsible collapsed" style="background-color:#0d2710; background-image: linear-gradient(#071709, #0d2710); border: 1px solid #287833; padding:0.2em; width:{{{width|90%}}}"
| |
| − | ! style="text-align:left" | <span style="color:#44c055">It's time to get gnarly</span>
| |
| − | |-
| |
| − | | style="font-size:90%; color:#FFFFFF" | {{{1|
| |
| − | Ahem...
| |
| − | | |
| − | You may have heard of the damage of this room, and having explored it on the test server, it's imperative for me to communicate my findings for future reference.
| |
| − | | |
| − | Starting with the Smoldering Archive Ruins. These minor damage clouds line the area around the central Cerebrum. From their center, they seem to have a damage radius of about 4km, although certain clouds may have a larger radius. A damage log:
| |
| − | | |
| − | [ 2016.07.06 00:02:34 ] (combat) <span style="color:red">'''34'''</span> <small>from</small> '''Smoldering Archive Ruins'''<small> - Hits</small><br />
| |
| − | [ 2016.07.06 00:02:34 ] (combat) <span style="color:red">'''37'''</span> <small>from</small> '''Smoldering Archive Ruins'''<small> - Hits</small><br />
| |
| − | [ 2016.07.06 00:02:34 ] (combat) <span style="color:red">'''29'''</span> <small>from</small> '''Smoldering Archive Ruins'''<small> - Hits</small><br />
| |
| − | [ 2016.07.06 00:02:34 ] (combat) <span style="color:red">'''31'''</span> <small>from</small> '''Smoldering Archive Ruins'''<small> - Hits</small><br />
| |
| − | [ 2016.07.06 00:02:35 ] (combat) <span style="color:red">'''31'''</span> <small>from</small> '''Smoldering Archive Ruins'''<small> - Hits</small><br />
| |
| − | [ 2016.07.06 00:02:35 ] (combat) <span style="color:red">'''29'''</span> <small>from</small> '''Smoldering Archive Ruins'''<small> - Hits</small><br />
| |
| − | [ 2016.07.06 00:02:35 ] (combat) <span style="color:red">'''37'''</span> <small>from</small> '''Smoldering Archive Ruins'''<small> - Hits</small><br />
| |
| − | [ 2016.07.06 00:02:35 ] (combat) <span style="color:red">'''34'''</span> <small>from</small> '''Smoldering Archive Ruins'''<small> - Hits</small><br />
| |
| − | [ 2016.07.06 00:02:36 ] (combat) <span style="color:red">'''34'''</span> <small>from</small> '''Smoldering Archive Ruins'''<small> - Hits</small><br />
| |
| − | [ 2016.07.06 00:02:36 ] (combat) <span style="color:red">'''37'''</span> <small>from</small> '''Smoldering Archive Ruins'''<small> - Hits</small><br />
| |
| − | [ 2016.07.06 00:02:36 ] (combat) <span style="color:red">'''29'''</span> <small>from</small> '''Smoldering Archive Ruins'''<small> - Hits</small><br />
| |
| − | [ 2016.07.06 00:02:36 ] (combat) <span style="color:red">'''31'''</span> <small>from</small> '''Smoldering Archive Ruins'''<small> - Hits</small><br />
| |
| − | [ 2016.07.06 00:02:37 ] (combat) <span style="color:red">'''31'''</span> <small>from</small> '''Smoldering Archive Ruins'''<small> - Hits</small><br />
| |
| − | [ 2016.07.06 00:02:37 ] (combat) <span style="color:red">'''29'''</span> <small>from</small> '''Smoldering Archive Ruins'''<small> - Hits</small><br />
| |
| − | [ 2016.07.06 00:02:37 ] (combat) <span style="color:red">'''37'''</span> <small>from</small> '''Smoldering Archive Ruins'''<small> - Hits</small><br />
| |
| − | [ 2016.07.06 00:02:37 ] (combat) <span style="color:red">'''34'''</span> <small>from</small> '''Smoldering Archive Ruins'''<small> - Hits</small><br />
| |
| − | [ 2016.07.06 00:02:38 ] (combat) <span style="color:red">'''146'''</span> <small>from</small> '''Smoldering Archive Ruins'''<small> - Hits</small><br />
| |
| − | [ 2016.07.06 00:02:38 ] (combat) <span style="color:red">'''34'''</span> <small>from</small> '''Smoldering Archive Ruins'''<small> - Hits</small><br />
| |
| − | [ 2016.07.06 00:02:38 ] (combat) <span style="color:red">'''37'''</span> <small>from</small> '''Smoldering Archive Ruins'''<small> - Hits</small><br />
| |
| − | [ 2016.07.06 00:02:38 ] (combat) <span style="color:red">'''29'''</span> <small>from</small> '''Smoldering Archive Ruins'''<small> - Hits</small><br />
| |
| − | [ 2016.07.06 00:02:38 ] (combat) <span style="color:red">'''31'''</span> <small>from</small> '''Smoldering Archive Ruins'''<small> - Hits</small><br />
| |
| − | [ 2016.07.06 00:02:39 ] (combat) <span style="color:red">'''31'''</span> <small>from</small> '''Smoldering Archive Ruins'''<small> - Hits</small><br />
| |
| − | [ 2016.07.06 00:02:39 ] (combat) <span style="color:red">'''29'''</span> <small>from</small> '''Smoldering Archive Ruins'''<small> - Hits</small><br />
| |
| − | [ 2016.07.06 00:02:39 ] (combat) <span style="color:red">'''37'''</span> <small>from</small> '''Smoldering Archive Ruins'''<small> - Hits</small><br />
| |
| − | [ 2016.07.06 00:02:39 ] (combat) <span style="color:red">'''34'''</span> <small>from</small> '''Smoldering Archive Ruins'''<small> - Hits</small><br />
| |
| − | [ 2016.07.06 00:02:40 ] (combat) <span style="color:red">'''34'''</span> <small>from</small> '''Smoldering Archive Ruins'''<small> - Hits</small><br />
| |
| − | [ 2016.07.06 00:02:40 ] (combat) <span style="color:red">'''37'''</span> <small>from</small> '''Smoldering Archive Ruins'''<small> - Hits</small><br />
| |
| − | [ 2016.07.06 00:02:40 ] (combat) <span style="color:red">'''29'''</span> <small>from</small> '''Smoldering Archive Ruins'''<small> - Hits</small><br />
| |
| − | [ 2016.07.06 00:02:40 ] (combat) <span style="color:red">'''31'''</span> <small>from</small> '''Smoldering Archive Ruins'''<small> - Hits</small><br />
| |
| − | | |
| − | 151.6 DPS average there, although 131 seems more about right. That hit for 146 throws the average off. A dual-rep Stratios with roughly 350 EHP/sec lasted about a minute before it failed to repair enough, and exploded.
| |
| − | | |
| − | They can cause borderline tanks to break when the Colossal waves hit.
| |
| − | | |
| − | On to the damage waves. There are four types of waves, and you'll recognize them in Local. "A massive shockwave is approaching the area. ETA is 15 seconds." ...is a single Massive. Two of those timed at the same time is a double massive, three of them at the same time is a triple massive and "A colossal shockwave is approaching the area. ETA is 15 seconds." ...is a colossal wave. Those are the ones that do the most damage, quite a lot actually. A colossal plus a double massive is very intimidating and most tanks will break at the huge DPS overload. The only relief comes from the fact that there is often 15-30 seconds of peacetime between waves, although the period is random; though at least one wave every 20 seconds of some kind of magnitude is expected.
| |
| − | | |
| − | This is the damage log of one massive shockwave.
| |
| − | | |
| − | [ 2016.06.20 07:03:18 ] (combat) <span style="color:red">'''136'''</span> <small>from</small> '''Shockwave'''<small> - Hits</small><br />
| |
| − | [ 2016.06.20 07:03:18 ] (combat) <span style="color:red">'''92'''</span> <small>from</small> '''Shockwave'''<small> - Hits</small><br />
| |
| − | [ 2016.06.20 07:03:18 ] (combat) <span style="color:red">'''110'''</span> <small>from</small> '''Shockwave'''<small> - Hits</small><br />
| |
| − | [ 2016.06.20 07:03:18 ] (combat) <span style="color:red">'''101'''</span> <small>from</small> '''Shockwave'''<small> - Hits</small><br />
| |
| − | [ 2016.06.20 07:03:19 ] (combat) <span style="color:red">'''92'''</span> <small>from</small> '''Shockwave'''<small> - Hits</small><br />
| |
| − | [ 2016.06.20 07:03:19 ] (combat) <span style="color:red">'''101'''</span> <small>from</small> '''Shockwave'''<small> - Hits</small><br />
| |
| − | [ 2016.06.20 07:03:19 ] (combat) <span style="color:red">'''110'''</span> <small>from</small> '''Shockwave'''<small> - Hits</small><br />
| |
| − | [ 2016.06.20 07:03:19 ] (combat) <span style="color:red">'''136'''</span> <small>from</small> '''Shockwave'''<small> - Hits</small><br />
| |
| − | [ 2016.06.20 07:03:19 ] (combat) <span style="color:red">'''136'''</span> <small>from</small> '''Shockwave'''<small> - Hits</small><br />
| |
| − | [ 2016.06.20 07:03:19 ] (combat) <span style="color:red">'''110'''</span> <small>from</small> '''Shockwave'''<small> - Hits</small><br />
| |
| − | [ 2016.06.20 07:03:19 ] (combat) <span style="color:red">'''92'''</span> <small>from</small> '''Shockwave'''<small> - Hits</small><br />
| |
| − | [ 2016.06.20 07:03:19 ] (combat) <span style="color:red">'''101'''</span> <small>from</small> '''Shockwave'''<small> - Hits</small><br />
| |
| − | [ 2016.06.20 07:03:20 ] (combat) <span style="color:red">'''101'''</span> <small>from</small> '''Shockwave'''<small> - Hits</small><br />
| |
| − | [ 2016.06.20 07:03:20 ] (combat) <span style="color:red">'''92'''</span> <small>from</small> '''Shockwave'''<small> - Hits</small><br />
| |
| − | [ 2016.06.20 07:03:20 ] (combat) <span style="color:red">'''110'''</span> <small>from</small> '''Shockwave'''<small> - Hits</small><br />
| |
| − | [ 2016.06.20 07:03:20 ] (combat) <span style="color:red">'''136'''</span> <small>from</small> '''Shockwave'''<small> - Hits</small><br />
| |
| − | [ 2016.06.20 07:03:20 ] (combat) <span style="color:red">'''136'''</span> <small>from</small> '''Shockwave'''<small> - Hits</small><br />
| |
| − | [ 2016.06.20 07:03:20 ] (combat) <span style="color:red">'''110'''</span> <small>from</small> '''Shockwave'''<small> - Hits</small><br />
| |
| − | [ 2016.06.20 07:03:20 ] (combat) <span style="color:red">'''101'''</span> <small>from</small> '''Shockwave'''<small> - Hits</small><br />
| |
| − | [ 2016.06.20 07:03:20 ] (combat) <span style="color:red">'''92'''</span> <small>from</small> '''Shockwave'''<small> - Hits</small><br />
| |
| − | [ 2016.06.20 07:03:21 ] (combat) <span style="color:red">'''92'''</span> <small>from</small> '''Shockwave'''<small> - Hits</small><br />
| |
| − | [ 2016.06.20 07:03:21 ] (combat) <span style="color:red">'''101'''</span> <small>from</small> '''Shockwave'''<small> - Hits</small><br />
| |
| − | [ 2016.06.20 07:03:21 ] (combat) <span style="color:red">'''110'''</span> <small>from</small> '''Shockwave'''<small> - Hits</small><br />
| |
| − | [ 2016.06.20 07:03:21 ] (combat) <span style="color:red">'''136'''</span> <small>from</small> '''Shockwave'''<small> - Hits</small><br />
| |
| − | [ 2016.06.20 07:03:21 ] (combat) <span style="color:red">'''136'''</span> <small>from</small> '''Shockwave'''<small> - Hits</small><br />
| |
| − | [ 2016.06.20 07:03:21 ] (combat) <span style="color:red">'''110'''</span> <small>from</small> '''Shockwave'''<small> - Hits</small><br />
| |
| − | [ 2016.06.20 07:03:21 ] (combat) <span style="color:red">'''92'''</span> <small>from</small> '''Shockwave'''<small> - Hits</small><br />
| |
| − | [ 2016.06.20 07:03:21 ] (combat) <span style="color:red">'''101'''</span> <small>from</small> '''Shockwave'''<small> - Hits</small><br />
| |
| − | [ 2016.06.20 07:03:22 ] (combat) <span style="color:red">'''101'''</span> <small>from</small> '''Shockwave'''<small> - Hits</small><br />
| |
| − | [ 2016.06.20 07:03:22 ] (combat) <span style="color:red">'''92'''</span> <small>from</small> '''Shockwave'''<small> - Hits</small><br />
| |
| − | [ 2016.06.20 07:03:22 ] (combat) <span style="color:red">'''110'''</span> <small>from</small> '''Shockwave'''<small> - Hits</small><br />
| |
| − | [ 2016.06.20 07:03:22 ] (combat) <span style="color:red">'''136'''</span> <small>from</small> '''Shockwave'''<small> - Hits</small><br />
| |
| − | [ 2016.06.20 07:03:22 ] (combat) <span style="color:red">'''136'''</span> <small>from</small> '''Shockwave'''<small> - Hits</small><br />
| |
| − | [ 2016.06.20 07:03:22 ] (combat) <span style="color:red">'''110'''</span> <small>from</small> '''Shockwave'''<small> - Hits</small><br />
| |
| − | [ 2016.06.20 07:03:22 ] (combat) <span style="color:red">'''101'''</span> <small>from</small> '''Shockwave'''<small> - Hits</small><br />
| |
| − | [ 2016.06.20 07:03:22 ] (combat) <span style="color:red">'''92'''</span> <small>from</small> '''Shockwave'''<small> - Hits</small><br />
| |
| − | | |
| − | 4390 damage taken over 5 seconds equals 878 damage per second taken. On the Maelstrom, one X-Large C5-L Emergency Shield Overload repairing 1095 EHP/sec was comfortably sustaining this damage. Two of these simultaneously was not too bad, nothing one repper couldn't fix before the next wave came through. Three definitely needed both shield boosters running.
| |
| − | | |
| − | A colossal wave.
| |
| − | | |
| − | [ 2016.06.20 07:02:58 ] (combat) <span style="color:red">'''181'''</span> <small>from</small> '''Shockwave'''<small> - Hits</small><br />
| |
| − | [ 2016.06.20 07:02:58 ] (combat) <span style="color:red">'''122'''</span> <small>from</small> '''Shockwave'''<small> - Hits</small><br />
| |
| − | [ 2016.06.20 07:02:58 ] (combat) <span style="color:red">'''147'''</span> <small>from</small> '''Shockwave'''<small> - Hits</small><br />
| |
| − | [ 2016.06.20 07:02:58 ] (combat) <span style="color:red">'''135'''</span> <small>from</small> '''Shockwave'''<small> - Hits</small><br />
| |
| − | [ 2016.06.20 07:02:59 ] (combat) <span style="color:red">'''122'''</span> <small>from</small> '''Shockwave'''<small> - Hits</small><br />
| |
| − | [ 2016.06.20 07:02:59 ] (combat) <span style="color:red">'''147'''</span> <small>from</small> '''Shockwave'''<small> - Hits</small><br />
| |
| − | [ 2016.06.20 07:02:59 ] (combat) <span style="color:red">'''135'''</span> <small>from</small> '''Shockwave'''<small> - Hits</small><br />
| |
| − | [ 2016.06.20 07:02:59 ] (combat) <span style="color:red">'''181'''</span> <small>from</small> '''Shockwave'''<small> - Hits</small><br />
| |
| − | [ 2016.06.20 07:03:00 ] (combat) <span style="color:red">'''340'''</span> <small>from</small> '''Shockwave'''<small> - Hits</small><br />
| |
| − | [ 2016.06.20 07:03:00 ] (combat) <span style="color:red">'''230'''</span> <small>from</small> '''Shockwave'''<small> - Hits</small><br />
| |
| − | [ 2016.06.20 07:03:00 ] (combat) <span style="color:red">'''276'''</span> <small>from</small> '''Shockwave'''<small> - Hits</small><br />
| |
| − | [ 2016.06.20 07:03:00 ] (combat) <span style="color:red">'''252'''</span> <small>from</small> '''Shockwave'''<small> - Hits</small><br />
| |
| − | [ 2016.06.20 07:03:00 ] (combat) <span style="color:red">'''181'''</span> <small>from</small> '''Shockwave'''<small> - Hits</small><br />
| |
| − | [ 2016.06.20 07:03:00 ] (combat) <span style="color:red">'''135'''</span> <small>from</small> '''Shockwave'''<small> - Hits</small><br />
| |
| − | [ 2016.06.20 07:03:00 ] (combat) <span style="color:red">'''147'''</span> <small>from</small> '''Shockwave'''<small> - Hits</small><br />
| |
| − | [ 2016.06.20 07:03:00 ] (combat) <span style="color:red">'''122'''</span> <small>from</small> '''Shockwave'''<small> - Hits</small><br />
| |
| − | [ 2016.06.20 07:03:01 ] (combat) <span style="color:red">'''230'''</span> <small>from</small> '''Shockwave'''<small> - Hits</small><br />
| |
| − | [ 2016.06.20 07:03:01 ] (combat) <span style="color:red">'''340'''</span> <small>from</small> '''Shockwave'''<small> - Hits</small><br />
| |
| − | [ 2016.06.20 07:03:01 ] (combat) <span style="color:red">'''252'''</span> <small>from</small> '''Shockwave'''<small> - Hits</small><br />
| |
| − | [ 2016.06.20 07:03:01 ] (combat) <span style="color:red">'''276'''</span> <small>from</small> '''Shockwave'''<small> - Hits</small><br />
| |
| − | [ 2016.06.20 07:03:01 ] (combat) <span style="color:red">'''122'''</span> <small>from</small> '''Shockwave'''<small> - Hits</small><br />
| |
| − | [ 2016.06.20 07:03:01 ] (combat) <span style="color:red">'''147'''</span> <small>from</small> '''Shockwave'''<small> - Hits</small><br />
| |
| − | [ 2016.06.20 07:03:01 ] (combat) <span style="color:red">'''135'''</span> <small>from</small> '''Shockwave'''<small> - Hits</small><br />
| |
| − | [ 2016.06.20 07:03:01 ] (combat) <span style="color:red">'''181'''</span> <small>from</small> '''Shockwave'''<small> - Hits</small><br />
| |
| − | [ 2016.06.20 07:03:02 ] (combat) <span style="color:red">'''408'''</span> <small>from</small> '''Shockwave'''<small> - Hits</small><br />
| |
| − | [ 2016.06.20 07:03:02 ] (combat) <span style="color:red">'''276'''</span> <small>from</small> '''Shockwave'''<small> - Hits</small><br />
| |
| − | [ 2016.06.20 07:03:02 ] (combat) <span style="color:red">'''331'''</span> <small>from</small> '''Shockwave'''<small> - Hits</small><br />
| |
| − | [ 2016.06.20 07:03:02 ] (combat) <span style="color:red">'''303'''</span> <small>from</small> '''Shockwave'''<small> - Hits</small><br />
| |
| − | [ 2016.06.20 07:03:02 ] (combat) <span style="color:red">'''340'''</span> <small>from</small> '''Shockwave'''<small> - Hits</small><br />
| |
| − | [ 2016.06.20 07:03:02 ] (combat) <span style="color:red">'''230'''</span> <small>from</small> '''Shockwave'''<small> - Hits</small><br />
| |
| − | [ 2016.06.20 07:03:02 ] (combat) <span style="color:red">'''276'''</span> <small>from</small> '''Shockwave'''<small> - Hits</small><br />
| |
| − | [ 2016.06.20 07:03:02 ] (combat) <span style="color:red">'''252'''</span> <small>from</small> '''Shockwave'''<small> - Hits</small><br />
| |
| − | [ 2016.06.20 07:03:02 ] (combat) <span style="color:red">'''135'''</span> <small>from</small> '''Shockwave'''<small> - Hits</small><br />
| |
| − | [ 2016.06.20 07:03:02 ] (combat) <span style="color:red">'''147'''</span> <small>from</small> '''Shockwave'''<small> - Hits</small><br />
| |
| − | [ 2016.06.20 07:03:02 ] (combat) <span style="color:red">'''122'''</span> <small>from</small> '''Shockwave'''<small> - Hits</small><br />
| |
| − | [ 2016.06.20 07:03:02 ] (combat) <span style="color:red">'''181'''</span> <small>from</small> '''Shockwave'''<small> - Hits</small><br />
| |
| − | [ 2016.06.20 07:03:03 ] (combat) <span style="color:red">'''303'''</span> <small>from</small> '''Shockwave'''<small> - Hits</small><br />
| |
| − | [ 2016.06.20 07:03:03 ] (combat) <span style="color:red">'''276'''</span> <small>from</small> '''Shockwave'''<small> - Hits</small><br />
| |
| − | [ 2016.06.20 07:03:03 ] (combat) <span style="color:red">'''331'''</span> <small>from</small> '''Shockwave'''<small> - Hits</small><br />
| |
| − | [ 2016.06.20 07:03:03 ] (combat) <span style="color:red">'''408'''</span> <small>from</small> '''Shockwave'''<small> - Hits</small><br />
| |
| − | [ 2016.06.20 07:03:03 ] (combat) <span style="color:red">'''252'''</span> <small>from</small> '''Shockwave'''<small> - Hits</small><br />
| |
| − | [ 2016.06.20 07:03:03 ] (combat) <span style="color:red">'''276'''</span> <small>from</small> '''Shockwave'''<small> - Hits</small><br />
| |
| − | [ 2016.06.20 07:03:03 ] (combat) <span style="color:red">'''230'''</span> <small>from</small> '''Shockwave'''<small> - Hits</small><br />
| |
| − | [ 2016.06.20 07:03:03 ] (combat) <span style="color:red">'''340'''</span> <small>from</small> '''Shockwave'''<small> - Hits</small><br />
| |
| − | [ 2016.06.20 07:03:04 ] (combat) <span style="color:red">'''340'''</span> <small>from</small> '''Shockwave'''<small> - Hits</small><br />
| |
| − | [ 2016.06.20 07:03:04 ] (combat) <span style="color:red">'''408'''</span> <small>from</small> '''Shockwave'''<small> - Hits</small><br />
| |
| − | [ 2016.06.20 07:03:04 ] (combat) <span style="color:red">'''331'''</span> <small>from</small> '''Shockwave'''<small> - Hits</small><br />
| |
| − | [ 2016.06.20 07:03:04 ] (combat) <span style="color:red">'''276'''</span> <small>from</small> '''Shockwave'''<small> - Hits</small><br />
| |
| − | [ 2016.06.20 07:03:04 ] (combat) <span style="color:red">'''303'''</span> <small>from</small> '''Shockwave'''<small> - Hits</small><br />
| |
| − | [ 2016.06.20 07:03:04 ] (combat) <span style="color:red">'''230'''</span> <small>from</small> '''Shockwave'''<small> - Hits</small><br />
| |
| − | [ 2016.06.20 07:03:04 ] (combat) <span style="color:red">'''276'''</span> <small>from</small> '''Shockwave'''<small> - Hits</small><br />
| |
| − | [ 2016.06.20 07:03:04 ] (combat) <span style="color:red">'''252'''</span> <small>from</small> '''Shockwave'''<small> - Hits</small><br />
| |
| − | [ 2016.06.20 07:03:05 ] (combat) <span style="color:red">'''303'''</span> <small>from</small> '''Shockwave'''<small> - Hits</small><br />
| |
| − | [ 2016.06.20 07:03:05 ] (combat) <span style="color:red">'''276'''</span> <small>from</small> '''Shockwave'''<small> - Hits</small><br />
| |
| − | [ 2016.06.20 07:03:05 ] (combat) <span style="color:red">'''331'''</span> <small>from</small> '''Shockwave'''<small> - Hits</small><br />
| |
| − | [ 2016.06.20 07:03:05 ] (combat) <span style="color:red">'''408'''</span> <small>from</small> '''Shockwave'''<small> - Hits</small><br />
| |
| − | [ 2016.06.20 07:03:06 ] (combat) <span style="color:red">'''408'''</span> <small>from</small> '''Shockwave'''<small> - Hits</small><br />
| |
| − | [ 2016.06.20 07:03:06 ] (combat) <span style="color:red">'''331'''</span> <small>from</small> '''Shockwave'''<small> - Hits</small><br />
| |
| − | [ 2016.06.20 07:03:06 ] (combat) <span style="color:red">'''276'''</span> <small>from</small> '''Shockwave'''<small> - Hits</small><br />
| |
| − | [ 2016.06.20 07:03:06 ] (combat) <span style="color:red">'''303'''</span> <small>from</small> '''Shockwave'''<small> - Hits</small><br />
| |
| − | | |
| − | 15005 damage over 9 seconds. 1667 damage per second taken. That's a lot.
| |
| − | | |
| − | My thoughts. First I used a Maelstrom. It was fit with the following:
| |
| − | | |
| − | {{ShipFitting
| |
| − | | ship=Maelstrom
| |
| − | | shipTypeID=24694
| |
| − | | fitName=Maelstrom - Sisi Sup. Tester Active copy 2
| |
| − | | fitID=Maelstrom---Sisi-Sup.-Tester-Active-copy-2
| |
| − | | low1name=Damage Control II
| |
| − | | low1typeID=2048
| |
| − | | low2name=Expanded Cargohold II
| |
| − | | low2typeID=1319
| |
| − | | low3name=Expanded Cargohold II
| |
| − | | low3typeID=1319
| |
| − | | low4name=Expanded Cargohold II
| |
| − | | low4typeID=1319
| |
| − | | low5name=Expanded Cargohold II
| |
| − | | low5typeID=1319
| |
| − | | mid1name=5a Prototype Shield Support I
| |
| − | | mid1typeID=16531
| |
| − | | mid2name=X-Large C5-L Emergency Shield Overload I
| |
| − | | mid2typeID=10888
| |
| − | | mid3name=X-Large C5-L Emergency Shield Overload I
| |
| − | | mid3typeID=10888
| |
| − | | mid4name=Adaptive Invulnerability Field II
| |
| − | | mid4typeID=2281
| |
| − | | mid5name=EM Ward Field II
| |
| − | | mid5typeID=2301
| |
| − | | mid6name=Heavy Capacitor Booster II, Navy Cap Booster 3200
| |
| − | | mid6typeID=3578
| |
| − | | high1name=800mm Heavy 'Scout' Repeating Cannon I, Republic Fleet EMP L
| |
| − | | high1typeID=9327
| |
| − | | charge1name=Republic Fleet EMP L x1
| |
| − | | charge1typeID=21894
| |
| − | | high2name=800mm Heavy 'Scout' Repeating Cannon I, Republic Fleet EMP L
| |
| − | | high2typeID=9327
| |
| − | | high3name=800mm Heavy 'Scout' Repeating Cannon I, Republic Fleet EMP L
| |
| − | | high3typeID=9327
| |
| − | | high4name=800mm Heavy 'Scout' Repeating Cannon I, Republic Fleet EMP L
| |
| − | | high4typeID=9327
| |
| − | | high5name=800mm Heavy 'Scout' Repeating Cannon I, Republic Fleet EMP L
| |
| − | | high5typeID=9327
| |
| − | | high6name=800mm Heavy 'Scout' Repeating Cannon I, Republic Fleet EMP L
| |
| − | | high6typeID=9327
| |
| − | | high7name=800mm Heavy 'Scout' Repeating Cannon I, Republic Fleet EMP L
| |
| − | | high7typeID=9327
| |
| − | | high8name=800mm Heavy 'Scout' Repeating Cannon I, Republic Fleet EMP L
| |
| − | | high8typeID=9327
| |
| − | | rig1name=Large Anti-Thermal Screen Reinforcer II
| |
| − | | rig1typeID=26442
| |
| − | | rig2name=Large Core Defense Operational Solidifier I
| |
| − | | rig2typeID=26086
| |
| − | | rig3name=Large Core Defense Capacitor Safeguard II
| |
| − | | rig3typeID=26444
| |
| − | | drone1name=Hobgoblin II x5
| |
| − | | drone1typeID=2456
| |
| − | | 1name=Navy Cap Booster 3200
| |
| − | | 1typeID=
| |
| − | | charge2name=open
| |
| − | | charge3name=open
| |
| − | | charge4name=open
| |
| − | | charge5name=open
| |
| − | | drone2name=open
| |
| − | | drone3name=open
| |
| − | | drone4name=open
| |
| − | | drone5name=open
| |
| − | | skills=
| |
| − | | showSKILLS=N
| |
| − | | notes=
| |
| − | | showNOTES=N
| |
| − | | difficulty=0
| |
| − | | warsop=A
| |
| − | | warsopReason=
| |
| − | | version=YC118 1.0
| |
| − | | showTOC=Y
| |
| − | | shipDNA=24694:2048;1:1319;4:16531;1:10888;2:2281;1:2301;1:3578;1:9327;8:21894;1:26442;1:26086;1:26444;1:2456;5:;15::
| |
| − | | fleetup=
| |
| − | }}
| |
| − | | |
| − | Because I don't have Cybernetics V right now, I can't use the full implant set, so I just have Mid-Grade Crystal Alpha, Beta, Gamma and Deta, along with an Improved Blue Pill. The Maelstrom could definitely tank the whole colossal wave if everything was overheated, if not, it was very close to breaking past the shields. Careful timing to start the shield boosters exactly when the damage was going to be taken (usually 1 second before is when the boosters would be cycled) and...ehhh it just didn't have enough buffer. Problem with shield extenders is they don't provide the same raw hit points as armor does (a Large Shield Extender II grants 2600 HP, compared to 4800 of the 1600mm Steel Plates II) so it wasn't enough to just have one extra shield extender. The fit has cargo expanders to hold more cap booster charges, and there is no Analyzer because it was only for testing the damage of the site.
| |
| − | | |
| − | Seriously though, because of the extreme tanking requirements here, armor is the way to go. First, armor repairers are more efficient at converting capacitor gigajoules to hitpoints. Secondly, they don't interfere with vital midslots for capacitor mods. Thirdly, buffer modifications work better for the reason stated above. On the downside, shield boosters are easy to oversize, and shield boost amplifiers are cool. But armor is the way to go for this site. So I pulled out a Hyperion, which was fit with dual reppers and three 1600mm plates. While it had enough buffer, it didn't have the capability to fix it fast enough before the next wave. I mean, it was fine for the massives and the double massives, but while it could eat a colossal, it couldn't fix it all up in time. You really need triple reppers on a battleship to get the armor fixed in time for the buffer to work properly to sustain most of the damage of the wave.
| |
| − | | |
| − | The Russian bloke used two fits in his videos. This is his Legion:
| |
| − | | |
| − | {{ShipFitting
| |
| − | | ship=Legion
| |
| − | | shipTypeID=29986
| |
| − | | fitName=Legion - Triple Rep Superior Sleeper Stable
| |
| − | | fitID=Legion---Triple-Rep-Superior-Sleeper-Stable
| |
| − | | low1name=1600mm Steel Plates II
| |
| − | | low1typeID=20353
| |
| − | | low2name=True Sansha Energized Adaptive Nano Membrane
| |
| − | | low2typeID=14072
| |
| − | | low3name=True Sansha Energized Adaptive Nano Membrane
| |
| − | | low3typeID=14072
| |
| − | | low4name=Corpum A-Type Medium Armor Repairer
| |
| − | | low4typeID=19021
| |
| − | | low5name=Corpum A-Type Medium Armor Repairer
| |
| − | | low5typeID=19021
| |
| − | | low6name=Corpum A-Type Medium Armor Repairer
| |
| − | | low6typeID=19021
| |
| − | | mid1name=Relic Analyzer II
| |
| − | | mid1typeID=30832
| |
| − | | mid2name=Dark Blood Cap Recharger
| |
| − | | mid2typeID=14142
| |
| − | | mid3name=Dark Blood Cap Recharger
| |
| − | | mid3typeID=14142
| |
| − | | mid4name=Dark Blood Cap Recharger
| |
| − | | mid4typeID=14142
| |
| − | | rig1name=Medium Auxiliary Nano Pump II
| |
| − | | rig1typeID=31053
| |
| − | | rig2name=Medium Auxiliary Nano Pump I
| |
| − | | rig2typeID=31047
| |
| − | | rig3name=Medium Capacitor Control Circuit II
| |
| − | | rig3typeID=31378
| |
| − | | subsystem1name=Legion Electronics - Emergent Locus Analyzer
| |
| − | | subsystem1typeID=30042
| |
| − | | subsystem2name=Legion Defensive - Nanobot Injector
| |
| − | | subsystem2typeID=29965
| |
| − | | subsystem3name=Legion Engineering - Capacitor Regeneration Matrix
| |
| − | | subsystem3typeID=30173
| |
| − | | subsystem4name=Legion Offensive - Drone Synthesis Projector
| |
| − | | subsystem4typeID=30117
| |
| − | | subsystem5name=Legion Propulsion - Chassis Optimization
| |
| − | | subsystem5typeID=30076
| |
| − | | charge1name=open
| |
| − | | charge2name=open
| |
| − | | charge3name=open
| |
| − | | charge4name=open
| |
| − | | charge5name=open
| |
| − | | skills=
| |
| − | | showSKILLS=N
| |
| − | | notes=
| |
| − | | showNOTES=N
| |
| − | | difficulty=2
| |
| − | | warsop=A
| |
| − | | warsopReason=
| |
| − | | version=YC118 1.0
| |
| − | | showTOC=Y
| |
| − | | shipDNA=29986:20353;1:14072;2:19021;3:30832;1:14142;3:31053;1:31047;1:31378;1:30042;1:29965;1:30173;1:30117;1:30076;1::
| |
| − | | fleetup=
| |
| − | }}
| |
| − | | |
| − | It's a very costly fit, but not too outside the cost margin of most typical shiny-level Tech III cruisers. His video doesn't mention any links: which would have helped a lot: it doesn't look like he used Exile drugs, although I'm expecting a full High-Grade Slave set. The Nestor fit is also viable, that one worked that time because it had so much buffer that it was able to handle the wave, yet still fix it before the next damage wave came in. A Tengu with a battleship-sized shield booster can tank some serious EHP/sec, but buffer does matter to a certain point.
| |
| − | | |
| − | Here's my Maelstrom skirmishing with the Archive Sentry Guns:
| |
| − | | |
| − | [ 2016.06.20 06:41:48 ] (combat) <span style="color:red">'''442'''</span> <small>from</small> '''Impaired Archive Sentry Tower'''<small> - Hits</small><br />
| |
| − | [ 2016.06.20 06:41:48 ] (combat) <span style="color:red">'''587'''</span> <small>from</small> '''Impaired Archive Sentry Tower'''<small> - Penetrates</small><br />
| |
| − | [ 2016.06.20 06:41:48 ] (combat) <span style="color:red">'''334'''</span> <small>from</small> '''Impaired Archive Sentry Tower'''<small> - Grazes</small><br />
| |
| − | [ 2016.06.20 06:41:48 ] (combat) Impaired Archive Sentry Tower misses you completely<br />
| |
| − | [ 2016.06.20 06:41:52 ] (combat) <span style="color:#00FFFF">'''1843'''</span> <small>to</small> '''Impaired Archive Sentry Tower'''<small> - 1400mm 'Scout' Artillery I - Hits</small><br />
| |
| − | [ 2016.06.20 06:42:00 ] (combat) <span style="color:red">'''643'''</span> <small>from</small> '''Impaired Archive Sentry Tower'''<small> - Penetrates</small><br />
| |
| − | [ 2016.06.20 06:42:00 ] (combat) <span style="color:red">'''715'''</span> <small>from</small> '''Impaired Archive Sentry Tower'''<small> - Smashes</small><br />
| |
| − | [ 2016.06.20 06:42:00 ] (combat) Impaired Archive Sentry Tower misses you completely<br />
| |
| − | [ 2016.06.20 06:42:00 ] (combat) <span style="color:red">'''500'''</span> <small>from</small> '''Impaired Archive Sentry Tower'''<small> - Hits</small><br />
| |
| − | [ 2016.06.20 06:42:11 ] (notify) Heavy Capacitor Booster II has run out of charges<br />
| |
| − | [ 2016.06.20 06:42:11 ] (notify) Loading the Capacitor Booster Charge into the Capacitor Booster; this will take approximately 10 seconds.<br />
| |
| − | [ 2016.06.20 06:42:12 ] (combat) <span style="color:red">'''318'''</span> <small>from</small> '''Impaired Archive Sentry Tower'''<small> - Grazes</small><br />
| |
| − | [ 2016.06.20 06:42:12 ] (combat) <span style="color:red">'''527'''</span> <small>from</small> '''Impaired Archive Sentry Tower'''<small> - Hits</small><br />
| |
| − | [ 2016.06.20 06:42:12 ] (combat) Impaired Archive Sentry Tower misses you completely<br />
| |
| − | [ 2016.06.20 06:42:12 ] (combat) <span style="color:red">'''381'''</span> <small>from</small> '''Impaired Archive Sentry Tower'''<small> - Glances Off</small><br />
| |
| − | [ 2016.06.20 06:42:17 ] (combat) <span style="color:#00FFFF">'''2140'''</span> <small>to</small> '''Impaired Archive Sentry Tower'''<small> - 1400mm 'Scout' Artillery I - Penetrates</small><br />
| |
| − | [ 2016.06.20 06:42:24 ] (combat) <span style="color:red">'''422'''</span> <small>from</small> '''Impaired Archive Sentry Tower'''<small> - Hits</small><br />
| |
| − | [ 2016.06.20 06:42:24 ] (combat) <span style="color:red">'''692'''</span> <small>from</small> '''Impaired Archive Sentry Tower'''<small> - Penetrates</small><br />
| |
| − | [ 2016.06.20 06:42:24 ] (combat) <span style="color:red">'''609'''</span> <small>from</small> '''Impaired Archive Sentry Tower'''<small> - Penetrates</small><br />
| |
| − | [ 2016.06.20 06:42:24 ] (combat) <span style="color:red">'''770'''</span> <small>from</small> '''Impaired Archive Sentry Tower'''<small> - Smashes</small><br />
| |
| − | | |
| − | So to put into numbers, a ship with at '''least''' 50K EHP of raw buffer in its chosen tank style (again, armor is the way to go here) and can repair at least 1500 EHP/sec is fine, though 2000-2300 is much better.
| |
| − | | |
| − | {{ShipFitting
| |
| − | | ship=Hyperion
| |
| − | | shipTypeID=24690
| |
| − | | fitName=Hyperion - Sup. will it work?
| |
| − | | fitID=Hyperion---Sup.-will-it-work?
| |
| − | | low1name=1600mm Steel Plates II
| |
| − | | low1typeID=20353
| |
| − | | low2name=1600mm Steel Plates II
| |
| − | | low2typeID=20353
| |
| − | | low3name=Energized Adaptive Nano Membrane II
| |
| − | | low3typeID=11269
| |
| − | | low4name=Energized Adaptive Nano Membrane II
| |
| − | | low4typeID=11269
| |
| − | | low5name=Large Armor Repairer II
| |
| − | | low5typeID=3540
| |
| − | | low6name=Large Armor Repairer II
| |
| − | | low6typeID=3540
| |
| − | | low7name=Large Armor Repairer II
| |
| − | | low7typeID=3540
| |
| − | | mid1name=100MN Monopropellant Enduring Afterburner
| |
| − | | mid1typeID=5955
| |
| − | | mid2name=Relic Analyzer II
| |
| − | | mid2typeID=30832
| |
| − | | mid3name=Large Cap Battery II
| |
| − | | mid3typeID=3504
| |
| − | | mid4name=Large Cap Battery II
| |
| − | | mid4typeID=3504
| |
| − | | mid5name=Heavy Electrochemical Capacitor Booster I, Cap Booster 3200
| |
| − | | mid5typeID=5051
| |
| − | | high1name=Light Neutron Blaster II, Federation Navy Antimatter Charge S
| |
| − | | high1typeID=3178
| |
| − | | charge1name=Federation Navy Antimatter Charge S x1
| |
| − | | charge1typeID=22961
| |
| − | | high2name=Light Neutron Blaster II, Federation Navy Antimatter Charge S
| |
| − | | high2typeID=3178
| |
| − | | high3name=Light Neutron Blaster II, Federation Navy Antimatter Charge S
| |
| − | | high3typeID=3178
| |
| − | | high4name=Light Neutron Blaster II, Federation Navy Antimatter Charge S
| |
| − | | high4typeID=3178
| |
| − | | high5name=Light Neutron Blaster II, Federation Navy Antimatter Charge S
| |
| − | | high5typeID=3178
| |
| − | | high6name=Light Neutron Blaster II, Federation Navy Antimatter Charge S
| |
| − | | high6typeID=3178
| |
| − | | rig1name=Large Auxiliary Nano Pump I
| |
| − | | rig1typeID=25896
| |
| − | | rig2name=Large Auxiliary Nano Pump I
| |
| − | | rig2typeID=25896
| |
| − | | rig3name=Large Nanobot Accelerator I
| |
| − | | rig3typeID=25898
| |
| − | | drone1name=Hobgoblin II x10
| |
| − | | drone1typeID=2456
| |
| − | | 1name=Cap Booster 3200
| |
| − | | 1typeID=
| |
| − | | high7name=open
| |
| − | | charge2name=open
| |
| − | | charge3name=open
| |
| − | | charge4name=open
| |
| − | | charge5name=open
| |
| − | | drone2name=open
| |
| − | | drone3name=open
| |
| − | | drone4name=open
| |
| − | | drone5name=open
| |
| − | | skills=
| |
| − | | showSKILLS=N
| |
| − | | notes=
| |
| − | | showNOTES=N
| |
| − | | difficulty=2
| |
| − | | warsop=A
| |
| − | | warsopReason=
| |
| − | | version=YC118 1.0
| |
| − | | showTOC=Y
| |
| − | | shipDNA=24690:20353;2:11269;2:3540;3:5955;1:30832;1:3504;2:5051;1:3178;6:22961;1:25896;2:25898;1:2456;10:;5::
| |
| − | | fleetup=
| |
| − | }}
| |
| − | | |
| − | That is a probably a workable fit, if you're willing to experiment: I haven't tried it, because I have tired of looking for Caches on the test server. In order for that to work, bring a Deep Space Transport loaded with Cap Booster 3200s and place containers around the area where the Cerebrum Chambers are for the battleship to stock up on. Also bring an Exile booster, a Mobile Depot and a Data Analyzer II.
| |
| − | | |
| − | The Vessel Rejuvenation Batteries are ejected periodically. When they are hacked, they generate a cloud which provides ''serious'' repping power. It was enough for my Hyperion to tank a colossal wave (and more) and not take a lick of damage to my shield. The shield would stay pegged at 100% regardless of the Shockwave damage, and it also fixed armor as well. They last for about 90 seconds before they expire.
| |
| − | | |
| − | And one other thing, which they won't tell you elsewhere: The area of effect damage radius on the shockwaves, measured from the Central Archive Cerebrum, is about 55 to 56km. If you orbit the Cerebrum at 60km, you shouldn't take any damage at all. I ran a battleship in a orbit around the Cerebrum at 60km orbit for about half an hour and didn't take any damage at all.}}}
| |
| − | |}
| |
| − | | |
| − | Pictures. Let's see them.
| |
| − | | |
| − | {| class="wikitable" style="margin-left: auto; margin-right: auto; border: none;"
| |
| − | |[[File:3P38_Superior_63.png|thumb|none|alt=A|Brute-force hacking with a Maller]]||[[File:3P38_Superior_46.png|thumb|none|alt=A|We're here: burning to DTAU]]||[[File:3P38_Superior_72.png|thumb|none|alt=A|Optional step: Shooting sentry towers]]||[[File:3P38_Superior_65.png|thumb|none|alt=A|Time to get to work: all vital objects locked up]]||[[File:3P38_Superior_49.png|thumb|none|alt=A|Failed a hack. Note locations of towers]]||
| |
| − | |}
| |
| − | | |
| − | {| class="wikitable" style="margin-left: auto; margin-right: auto; border: none;"
| |
| − | |[[File:3P38_Superior_50.png|thumb|none|alt=A|Three Intravenous Fluids going in]]||[[File:3P38_Superior_51.png|thumb|none|alt=A|Archive activated. First sets of cans ejected]]||[[File:3P38_Superior_52.png|thumb|none|alt=A|First shockwaves commencing]]||[[File:3P38_Superior_53.png|thumb|none|alt=A|A bit late to shoot towers: also 1400s not so good]]||[[File:3P38_Superior_66.png|thumb|none|alt=A|Approximate damage (from 100% shields) from one Massive Shockwave]]||
| |
| − | |}
| |
| − | | |
| − | {| class="wikitable" style="margin-left: auto; margin-right: auto; border: none;"
| |
| − | |[[File:3P38_Superior_54.png|thumb|none|alt=A|Colossal waves beginning shortly. Man mode activated!]]||[[File:3P38_Superior_67.png|thumb|none|alt=A|Initial alpha even with reppes on pushes the shields down low]]||[[File:3P38_Superior_68.png|thumb|none|alt=A|Damage is brutal]]||[[File:3P38_Superior_64.png|thumb|none|alt=A|Getting close near Smoldering Archive Ruins]]||[[File:3P38_Superior_55.png|thumb|none|alt=A|Weak tanks just don't last]]||
| |
| − | |}
| |
| − | | |
| − | {| class="wikitable" style="margin-left: auto; margin-right: auto; border: none;"
| |
| − | |[[File:3P38_Superior_75.png|thumb|none|alt=A|Hyperion down to half armor from one colossal (didn't last)]]||[[File:3P38_Superior_73.png|thumb|none|alt=A|Let's put some junk in there...]]||[[File:3P38_Superior_74.png|thumb|none|alt=A|No explosion. Okay...for now?]]||[[File:3P38_Superior_76.png|thumb|none|alt=A|Activated a VRB: ''SERIOUS'' repping power (fixed up shields against incoming DPS!)]]||[[File:3P38_Superior_77.png|thumb|none|alt=A|So much power, I am tanking it at 100% in shield]]||
| |
| − | |}
| |
| − | | |
| − | Videos. Everybody loves them. Here is a video of a [https://www.youtube.com/watch?v=UrF66wPVFSY Nestor being used] (note the hack failure in the Mine Room); a [https://www.youtube.com/watch?v=moIhGtVtOpM triple rep Legion] (also shiny); and finally, another [https://www.youtube.com/watch?v=iYjRKHeY-Dk Legion video] where the turret room has all the sentry guns spawned.
| |
| | | | |
| | == General Exploration Ramblings == | | == General Exploration Ramblings == |
| Line 1,880: |
Line 605: |
| | | | |
| | :1. Check that my ship and fit is ready for the task. Entering a wormhole blindly in a Retriever with no probe launcher is asking for trouble. | | :1. Check that my ship and fit is ready for the task. Entering a wormhole blindly in a Retriever with no probe launcher is asking for trouble. |
| − | :2. Look at the Signature ID of the wormhole on my local overview. It might say "Wormhole N110"...okay, I use [http://www.ellatha.com/eve/wormholelist.asp this page] to give me a quick idea of what that ID corresponds to. | + | :2. Look at the Signature ID of the wormhole on my local overview. It might say "Wormhole N110"...okay, I use [https://www.ellatha.com/eve/wormholelist.asp this page] to give me a quick idea of what that ID corresponds to. |
| | :3. Show Info on the wormhole itself. Is it End of Life? I don't go in there. Is it "nearing the verge of collapse"? I don't go in there. | | :3. Show Info on the wormhole itself. Is it End of Life? I don't go in there. Is it "nearing the verge of collapse"? I don't go in there. |
| | :4. I enter the wormhole. | | :4. I enter the wormhole. |
| Line 1,896: |
Line 621: |
| | | | |
| | There is some confusion about the signature ID K162. Here is [http://theexcession.blogspot.com/ some explanation] I dug up: | | There is some confusion about the signature ID K162. Here is [http://theexcession.blogspot.com/ some explanation] I dug up: |
| − | {{ quote |'''K162 appearance only on first jump'''<br /> | + | {{ quote |'''K162 appearance only on first jump''' |
| | | | |
| | A 'K162' is the 'out' end of a wormhole link, and historically has spawned when someone has initiated warp to the 'in' end of a wormhole link. Wormholes that have not been warped to only exist in potential; warping to one end of the link is what actually creates the link between the two systems. | | A 'K162' is the 'out' end of a wormhole link, and historically has spawned when someone has initiated warp to the 'in' end of a wormhole link. Wormholes that have not been warped to only exist in potential; warping to one end of the link is what actually creates the link between the two systems. |
| Line 2,071: |
Line 796: |
| | Now for Cosmic Signatures. Combat sites classified under Cosmic Signatures are sometimes nice because they can shortcut around the raw boredum of green site escalation hunting. As Player versus Environment (PvE) sooner or later turns into a question of efficiency and speed, experience and a good overall setup with the right ship and fit comes in handy, as does knowing the site itself. Googling the site name itself can usually pull up a nice profile of the site which allows a player to evaluate the hazards and proceed as needed. | | Now for Cosmic Signatures. Combat sites classified under Cosmic Signatures are sometimes nice because they can shortcut around the raw boredum of green site escalation hunting. As Player versus Environment (PvE) sooner or later turns into a question of efficiency and speed, experience and a good overall setup with the right ship and fit comes in handy, as does knowing the site itself. Googling the site name itself can usually pull up a nice profile of the site which allows a player to evaluate the hazards and proceed as needed. |
| | | | |
| − | Anyways the combat sites found through scanning can either be raw trash or quite valuable. Looking [http://wiki.eveuniversity.org/Scanning:Scan_Results at this page], it's important to know what sites are even worth running. Let's take Guristas Pirate space, which, for high security space, is confined to The Forge, The Citadel and Lonetrek regions. Those said regions are also relatively highly populated, the number of site runners large, and competition can be fierce. For said high sec space, you'll want to run the Gurista Guerilla Grounds and the Guristas Scout Outpost sites. The Lookout and Hideout sites are just about worthless. The value in these sites comes from the chance for the faction NPC pirate ship to drop goodies worth selling or keeping: in the Gurista Guerilla Grounds sites, the kicker is probably a Pithi A-Type Small Shield Booster, which can sell for about 100 million ISK, and maybe a Worm frigate blueprint copy. (That shield booster is popular on PvE Jackdaws and certain Tengu fits for PvE.) In the Guristas Scout Outpost site, the kicker is would be any decent Pith C-Type deadspace modules and -- a Gila cruiser blueprint copy. | + | Anyways the combat sites found through scanning can either be raw trash or quite valuable. Looking [[Probe scanning#Scan results|at this page]], it's important to know what sites are even worth running. Let's take Guristas Pirate space, which, for high security space, is confined to The Forge, The Citadel and Lonetrek regions. Those said regions are also relatively highly populated, the number of site runners large, and competition can be fierce. For said high sec space, you'll want to run the Gurista Guerilla Grounds and the Guristas Scout Outpost sites. The Lookout and Hideout sites are just about worthless. The value in these sites comes from the chance for the faction NPC pirate ship to drop goodies worth selling or keeping: in the Gurista Guerilla Grounds sites, the kicker is probably a Pithi A-Type Small Shield Booster, which can sell for about 100 million ISK, and maybe a Worm frigate blueprint copy. (That shield booster is popular on PvE Jackdaws and certain Tengu fits for PvE.) In the Guristas Scout Outpost site, the kicker is would be any decent Pith C-Type deadspace modules and -- a Gila cruiser blueprint copy. |
| | | | |
| | Certain quiet low-sec constellations can make good areas to look for these sites too, although looking at that table will give you a good idea of what to expect, and you should look up the site to see if you can effectively run it and if the loot that can drop from those sites is in line with what you're interested in. DED 5/10s and their close equivalents in the Unrated categories can be very dangerous for unprepared and uncapable pilots: a frigate will have a very hard time running the site effectively, for instance. (This is coming from someone who used to run DED 3/10s and 4/10s in a T1 frigate. Still does, on occasion. Used a Breacher to run an escalation into Rancer. Didn't get blown up, either.) | | Certain quiet low-sec constellations can make good areas to look for these sites too, although looking at that table will give you a good idea of what to expect, and you should look up the site to see if you can effectively run it and if the loot that can drop from those sites is in line with what you're interested in. DED 5/10s and their close equivalents in the Unrated categories can be very dangerous for unprepared and uncapable pilots: a frigate will have a very hard time running the site effectively, for instance. (This is coming from someone who used to run DED 3/10s and 4/10s in a T1 frigate. Still does, on occasion. Used a Breacher to run an escalation into Rancer. Didn't get blown up, either.) |
| Line 2,101: |
Line 826: |
| | Shown above is me running a Bantam to provide friendly reps to two others in a C2 Perimeter Transponder Farm. It's not a difficult site to clear out. It's an example of a "Combat Data Site" whereby the hostile NPCs must be eradicated before the hacking containers are unlocked. The contents of said containers increases in value as the class of the wormhole goes up. Bring a cargo scanner to see if they're worth hacking anyways - in those sites we ran, the contents were just about worthless. The value of Sleeper combat sites as mentioned before comes from the Blue Loot and salvage components, though certain Talocan ship wrecks can hold some very valuable components. | | Shown above is me running a Bantam to provide friendly reps to two others in a C2 Perimeter Transponder Farm. It's not a difficult site to clear out. It's an example of a "Combat Data Site" whereby the hostile NPCs must be eradicated before the hacking containers are unlocked. The contents of said containers increases in value as the class of the wormhole goes up. Bring a cargo scanner to see if they're worth hacking anyways - in those sites we ran, the contents were just about worthless. The value of Sleeper combat sites as mentioned before comes from the Blue Loot and salvage components, though certain Talocan ship wrecks can hold some very valuable components. |
| | | | |
| − | In low security space and some nullsec regions, hybrid combat data sites classified as Gas Sites may appear. These are a little bit different than normal, because there is no gas to begin with. Rather the loot comes from what's inside the spawn containers. Bring a cargo scanner to see if there is anything useful inside them first. Neurotoxin Control and Neurotoxin Recovery skillbooks can sell for some nice cash: the rest is just fluff. | + | In low security space and some nullsec regions, hybrid combat data sites classified as Gas Sites may appear. These are a little bit different than normal, because there is no gas to begin with. Rather the loot comes from what's inside the spawn containers. Bring a cargo scanner to see if there is anything useful inside them first. Neurotoxin Control and Neurotoxin Recovery skillbooks can sell for some nice cash: the rest is just fluff. Core Runner Exile Distribution Bases are out and about in the Solitude Region and that's where those Neurotoxin skill books come from: they can be scanned down with a super-tight cube formation with 72 probe strength. Serpentis Chemical Labs may have Gas Cloud Harvesting skill books. |
| | | | |
| | But there's more. Certain containers will be locked until the NPCs guarding it are eliminated. This brings up an interesting problem. As seen above, there are a number of Elite NPCs which are rather annnoying to deal with (i.e. they take a long time to eliminate), although the total DPS of the room isn't that bad as long as you're moving. A [http://wiki.eveuniversity.org/File:3P38_Supplement_10.png dual-rep Myrmidon] tanked perfectly fine, but was low on damage. But if the container are not locked, then there are two approaches: the first is to pull the rats about 100km away from the containers using a frigate with a Microwarpdrive, then warping back to the containers at 0 and hacking away before they slowboat on back. The second approach is to tank them directly -- as shown above, a double Medium Shield Extender Heron was fine enough. The vessel was only in half shield by the time the site was half completed -- if you're nervous, just bring a Scythe in to fix the damage back up again. Orbit the containers to reduce incoming damage considerably: do not sit still. | | But there's more. Certain containers will be locked until the NPCs guarding it are eliminated. This brings up an interesting problem. As seen above, there are a number of Elite NPCs which are rather annnoying to deal with (i.e. they take a long time to eliminate), although the total DPS of the room isn't that bad as long as you're moving. A [http://wiki.eveuniversity.org/File:3P38_Supplement_10.png dual-rep Myrmidon] tanked perfectly fine, but was low on damage. But if the container are not locked, then there are two approaches: the first is to pull the rats about 100km away from the containers using a frigate with a Microwarpdrive, then warping back to the containers at 0 and hacking away before they slowboat on back. The second approach is to tank them directly -- as shown above, a double Medium Shield Extender Heron was fine enough. The vessel was only in half shield by the time the site was half completed -- if you're nervous, just bring a Scythe in to fix the damage back up again. Orbit the containers to reduce incoming damage considerably: do not sit still. |
| Line 2,107: |
Line 832: |
| | === HACKING === | | === HACKING === |
| | Hacking is a learned game, best practiced first in easy high sec sites, then graduating to low, null or wormhole space hacks. Dedicated explorers will appreciate Tech II analyzers above everybody else -- even then, a casual explorer can usually do fine with related skills to IV and good hacking practices, such as learning about the Rule of 6, the "Corner Core" principle and careful avoidance to avoid attacking nodes which do not need to be attacked. | | Hacking is a learned game, best practiced first in easy high sec sites, then graduating to low, null or wormhole space hacks. Dedicated explorers will appreciate Tech II analyzers above everybody else -- even then, a casual explorer can usually do fine with related skills to IV and good hacking practices, such as learning about the Rule of 6, the "Corner Core" principle and careful avoidance to avoid attacking nodes which do not need to be attacked. |
| | + | |
| | + | By the way, Micro Jump Drives can be used to escape from hacks that could produce undesirable results, such as damage explosions (but will not stop the negative effect of the hacking failure). Simply hold the hacking window open and activate the MJD. |
| | | | |
| | The images below will have to be opened individually, however they provide a detailed analysis of how I progress through the hacking game. | | The images below will have to be opened individually, however they provide a detailed analysis of how I progress through the hacking game. |
| Line 2,127: |
Line 854: |
| | | | |
| | === DRONE LANDS DATA SITES === | | === DRONE LANDS DATA SITES === |
| − | [[File:3P38_Supplement_1.png|200px|thumb|right|Basic site layout]]The Drone Lands is a unique area in New Eden for a couple of reasons, but for explorers, the area is definitely different. | + | [[File:3P38_Supplement_1.png|200px|thumb|Basic site layout]]The Drone Lands is a unique area in New Eden for a couple of reasons, but for explorers, the area is definitely different. |
| | | | |
| | First, native pirate named data and relic sites do not spawn there. Rather, in their place, scattered about fairly widely, are Abandoned Research Complexes. These sites are interesting and have some interesting properties about them: | | First, native pirate named data and relic sites do not spawn there. Rather, in their place, scattered about fairly widely, are Abandoned Research Complexes. These sites are interesting and have some interesting properties about them: |
| Line 2,137: |
Line 864: |
| | * The site, after all containers have been hacked, may escalate to another site somewhere else which may drop "good stuff" | | * The site, after all containers have been hacked, may escalate to another site somewhere else which may drop "good stuff" |
| | | | |
| − | [[File:3P38_Supplement_3.png|200px|thumb|right|Failure of a hack]]Refer to [https://www.reddit.com/r/Eve/comments/3z0nci/can_someone_please_explain_augmented_drone_bpcs/ this Reddit post] for details about what regions have what. Basically, the initial site itself will usually have just some drone components and merely 'Integrated' drone blueprint copies, 60 run copies. The R&D Lab container can have a 120 run 'Integrated' or if in "Gallente" space of the Drone Lands, 'Augmented' drone BPCs. Usually it's empty. Although rare, a nice solid blueprint with a healthy number of runs can sell for some serious money -- especially 'Augmented' Infiltrator drones. | + | [[File:3P38_Supplement_3.png|200px|thumb|Failure of a hack]]Refer to [https://www.reddit.com/r/Eve/comments/3z0nci/can_someone_please_explain_augmented_drone_bpcs/ this Reddit post] for details about what regions have what. Basically, the initial site itself will usually have just some drone components and merely 'Integrated' drone blueprint copies, 60 run copies. The R&D Lab container can have a 120 run 'Integrated' or if in "Gallente" space of the Drone Lands, 'Augmented' drone BPCs. Usually it's empty. Although rare, a nice solid blueprint with a healthy number of runs can sell for some serious money -- especially 'Augmented' Infiltrator drones. |
| | | | |
| | It may appear to some that the area is a bubbled nightmare of a place, but really, most of it is barren and most places are not bubbled up much. [http://wiki.eveuniversity.org/File:3P38_Supplement_8.png There are exceptions] of course, but those cases are rather isolated to "Bear Lands" home systems where ratting carriers and what not are used frequently. | | It may appear to some that the area is a bubbled nightmare of a place, but really, most of it is barren and most places are not bubbled up much. [http://wiki.eveuniversity.org/File:3P38_Supplement_8.png There are exceptions] of course, but those cases are rather isolated to "Bear Lands" home systems where ratting carriers and what not are used frequently. |
Among man's more adventurous and exciting, if risky, endeavors that he regular embarks upon, exploration and discovering the unknown are definitely one of his more distinguishing characteristics, among many others. In EVE, exploration remains an interesting pastime or primary activity for many players, and I feel that it is important at this time to begin to chronicle and explain some facets of this particular pursuit. It appears that at some time or another, a few select individuals embark on a similar text wall on this subject -- and with that, here is mine!
In this thread, I will pass on some of my knowledge and experiences which I have laboriously explored and mapped out. Specifically, I will have posts to this thread which will entail the following topics in some detail:
I'm not one to explain or elaborate on my own personal resume or length of tenure of a particular subject, as I firmly believe that neither of those two factors is exclusively indicative of competence. Instead I will rely on my peers and superiors to judge if I am considered an authority on the subject, so in that respect, I am open to good, solid commentary about my methods, techniques or procedures. For that matter, with some exceptions, the details explained here are not "the way" but "a way" of doing it.
Ghost Sites
Message generated from initiating warp to a Ghost Site
A rather convenient upgrade from the regular data or relic sites you get in low, null or wormhole space, these sites are rather dangerous. You can, however, be assured there will not be any cloaked interdictors lurking in the site.
There are four classes of so-called "Ghost Sites", for lack of a better term, in order of ascending difficulty:
In the beginning, these sites had to be scanned down like an ordinary cosmic signature, but then it was changed to a cosmic anomaly, which then got changed back to a cosmic signature recently. There isn't any specific danger inside the site in most cases, however the hazards that are there, are rather harsh.
Besieged Covert Research Facilities are common in low security space and are merely combat sites, and have no particular relationship to our subject here other than the name being analogous to regular Ghost sites.
By name, the Ghost sites are named according to the pirate faction which is associated to that particular system. In the area around Amarr space for instance, they will be named something like Lesser Blood Raider Covert Research Facility, whereas with Minmatar space they will be named something in the order of Lesser Angel Covert Research Facility. The name itself of the site (in respect to the pirate faction name) has a relationship between the pirate faction and the type of implant blueprints one can possibly obtain, along with the type of NPCs that spawn inside the site, but that's pretty much it.
In high security space, on the Lesser grade of Ghost sites will be available, in low security space, the Standard grades are usually the kind that spawns. In null security space the Improved variant is common, but only in wormhole space are the Superior sites present. As for the difference between the sites, the higher the site "rating", the higher the likelihood of good implant BPCs, mobile depot BPCs, mobile tractor unit BPCs, Covert Research Tools (used for making implants) and Shattered Villiard Wheels (also used for implant construction). Lower-grade sites will most likely have Low-Grade or Mid-Grade rated implants, while the higher ones such as the Improved and Superior sites most likely will have the High-Grade blueprints.
Additionally, the higher the site rating, the more NPC pirate rats show up (when they do), the more damage they do, and the more damage a container does when it detonates. Site containers explode when they are shot at by the NPC pirates (which they do) or when a hack is failed. Thus, the specific dangers to these sites are:
- Limited time frame
- High damage received upon failure of a container
- The NPC pirate damage.
Let us discuss the merits of each point I mentioned here:
- Limited time frame: Ghost sites are all about speed and efficiency. The less time you spend moving around the site, the faster you hack, and a couple of other parameters are critical towards success. The use of a Data Analyzer II is strongly recommended, because it has a higher base virus strength, which means hacking is faster and safer.
- High damage received upon failure of a container: The Lesser grade Covert Research Facilities (i.e. Lesser Serpentis Covert Research Facility) can be handled with a Tech I exploration frigate, such a Heron with a medium shield extender, a damage control and an active explosive hardener. That vessel however, can only eat one detonation, and should the pilot not evade the damage of the NPC rats, probably won't be able to survive if he does not escape immediately. The higher rated sites, such as the Standard Guristas Covert Research Facility, should be done with a different ship.
- The NPC pirate damage: They hurt pretty hard if you get caught. In an Improved site, they do healthy cruiser-level DPS. Your best bet is to get out immediately when they spawn.
 Landed, locking up all containers |
 Rats spawned. Exiting site |
 Ate one detonation. Warp disrupted |
 Even nullsec ones aren't too difficult |
|
Practically, there are three ways of running Ghost sites:
- Fit for tanking any damage that you may receive, from failure of a container
- Fit for the lowest cost, based on the assumption that failure is expected (usually just a MWD and an analyzer, with nothing else equipped)
- Bringing a friend to hack the other containers, to ensure more coverage of containers.
 Attempting to attack the rats |
 Using the Merlin. Two deliberate failures |
 Yes. Improved and Superior rats are no joke |
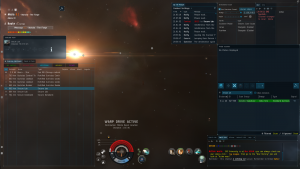 Standard Heron fit, lowsec site. Don't run this fit outside of highsec |
|
Running the Site
With this lovely preamble out of the way, I will then begin to discuss the specifics of these sites, and how I run them. I'm not going to say the way I do it is the "right way", but rather "a way" which I recommend you follow. Let's start with the procedure I use when I do these sites:
- Scan down the site. Decide if I want to run it or not.
- Prepare my ship. For the Lesser rated sites, I use a Heron, the fit of which will be shown later. For the harder ones, I earnestly recommend the Merlin, but the Moa is probably the best for tanking. I don't know how well it does versus a horde of null-sec rats though, yet.
- For my Heron, I strip the ship of drones, cloaks, cargo and everything I don't need. Normally I do this in a safe spot with a mobile depot (refitting and clearing the ship out).
- Warp to a bookmark OR a celestial close to the site. Less than 4 AU is ideal, but I like 2 AU.
- Align to the bookmark made of the site or the scan result. Always align first. Activate the explosive hardener, make sure all my needed kit is online and ready to go. Wait for the capacitor to recharge if necessary. Set the Keep at Range distance to 2250m.
- Warp to the site.
- Select a random container, lock up all containers, choose Keep at Range (2250m) on the container, active the Microwarpdrive for one cycle, which is usually close to putting to me within hacking distance.
- While I am approaching that container, run a cargo scanner on the other containers. If not equipped (Merlin) then don't bother cargo scanning.
- Hack the chosen container, loot it.
- Having identified the next container I want to hack, I approach it for one or two Microwarpdrive cycles. Highsec sites will have green-blue cores, lowsec on upwards will be either blue-green, yellow or red, though red is usually the can with the good stuff in a null or Wh grade site. The site timer is close to running out by now.
- I hack the other container: if time permits (it usually does not) I might get another hack off. Normally I only hack two containers then GTFO.
- Warp off anywhere. I then refit at my mobile depot and continue on.
Let's move down the list of things I discussed in my order of operation for these sites, for which I will elaborate further.
- 1. Scanning down the site. While I'm not exactly aware of the probe strength required to scan down each site, they are not as difficult to scan down as a Superior Sleeper Cache, which requires a probe strength of at least 104. I've scanned down an Improved Serpentis Covert Research Facility with 65.6 probe strength.
- 2. Preparing my ship. Here are the fits I use, and recommend you use. They are cheap, capable and appropiate for the job. If you cannot fit or equip any one of these modules, I do not recommend running the site. The stakes are too high, especially in the harder sites.
- The rigs for the Heron the default ones I use because this vessel is commonly used for running Sleeper Caches. The use of a Tech II Data Analyzer is essential because failure of the container causes it to detonate. For the Lesser grade Ghost sites, this fit can survive one detonation, and no more. If you fail one container, abandon the site and warp off. It's just not worth it to continue.
[Heron, Heron - Shield MWD Ghost Site Runner]
5MN Quad LiF Restrained Microwarpdrive
Data Analyzer II
Medium Shield Extender II
Explosive Deflection Field II
Type-E Enduring Cargo Scanner
Damage Control II
Micro Auxiliary Power Core I
Small Anti-EM Screen Reinforcer I
Small Anti-Thermal Screen Reinforcer I
Small Gravity Capacitor Upgrade I
- Assumes Shield Upgrades V. If you only have Shield Upgrades IV, then run a Compact MWD.
- Rigs are retained from the ones used for Sleeper Caches.
[Heron, Heron - Shield MWD Ghost Site Runner - Dedicated]
5MN Quad LiF Restrained Microwarpdrive
Data Analyzer II
Medium Shield Extender II
Explosive Deflection Field II
Type-E Enduring Cargo Scanner
Damage Control II
Micro Auxiliary Power Core I
Small Core Defense Field Extender I
Small Core Defense Field Extender I
Small Gravity Capacitor Upgrade I
- Assumes Shield Upgrades V. If you only have Shield Upgrades IV, then run a Compact MWD.
- These rigs are refined to be used specifically for a Ghost Site Runner Heron. With Shield Management V, you can eat a Superior Ghost site detonation with the hardener cold, but it should be overloaded anyways.
- Because the containers deal exclusively Explosive damage, it's important to be tanked to that specific damage type. Normally, warp into the site with the hardener cold, then overload it once you are nearing the end of the first hack. Continue running it overheated until you complete the site or warp off.

|
Remember to turn off the Microwarpdrive while hacking. The increase in ship mass means that warping out takes longer, and the increased signature radius means any damage taken from rats will be amplified.
|
- While you could upgrade to a Moa, I would still recommend this vessel because it is faster, does the job fine and is cheaper. If the ship you'd like to use is not here, it's because I don't recommend it. If the fit is not quite to your liking, feel free to change it, although I will also not recommend it. Here is a Moa fit you can use; one for speed, and the Maller is if you'd just like to laugh it off:
[Moa, Moa - Ghost Site Boss]
Adaptive Invulnerability Field II
Large Shield Extender II
Explosive Deflection Field II
50MN Quad LiF Restrained Microwarpdrive
Data Analyzer II
Damage Control II
Overdrive Injector System II
Overdrive Injector System II
Nanofiber Internal Structure II
Medium Anti-EM Screen Reinforcer I
Medium Anti-Thermal Screen Reinforcer I
Medium Core Defense Field Extender I
- 33.5K EHP overall (not overloaded), 68.3K EHP against explosive damage.
- You may elect to insert an armor tank in the lows with a 1600mm plate and hardeners if you are really intent on not loosing the ship to the rats.
- A scout to scan containers and provide the warpins makes this fit a lot more useful rather than soloing it because of its slow speed.
[Maller, Maller - Ghost Sites]
50MN Quad LiF Restrained Microwarpdrive
Data Analyzer II
Type-E Enduring Cargo Scanner
1600mm Steel Plates II
1600mm Steel Plates II
Armor Explosive Hardener II
Energized Adaptive Nano Membrane II
Energized Adaptive Nano Membrane II
Damage Control II
Medium Trimark Armor Pump I
Medium Trimark Armor Pump I
Medium Trimark Armor Pump I
- If, for any reason you cannot fit or equip any one module, then I recommend either skipping the site or going for a cheap-as-dirt barebones fit with just a cheap Microwarpdrive and Analyzer with nothing else on the vessel. Cheap meta overdrive injectors and nanofibers are possible -- they're so cheap because nobody else uses them.
- Moving on...
- 4. Stripping the vessel. This is pretty straightforward. Drop a mobile depot in a safe spot, refit to the proper fit, strip the other goodies like the cloaking device and probe launcher, transfer everything from your cargohold into the mobile depot, double check everything, then proceed to the next step. A station or Citadel works too.
- Of all the ships I have lost in Ghost sites on the main server (3 Herons and 2 Merlins if I am correct) I never lost more than 5 million ISK per ship. As always, the Data Analyzer II never drops...tsk tsk
- 5. Warp to a bookmark or celestial close to the site. This is important because the site timer is initiated when any player initiates a warp to the site (and gets the pop-up message), whether or not they actually landed inside the site. (Ships that warp while cloaked do not activate the timer until they decloak on grid.) Rather than warping 70 AU from across the whole system, and thus burning up half the site timer before you get there, warping to a spot close to the site means you have more time inside the site.
- 6. Align to the site and prepare. Aligning saves time warping to the site; double checking that the explosive hardener is equipped saves ships; capacitor level might make a difference, and double-checking the fit saves the site from being abandoned.
- 7. Nothing to elaborate on here.
- 8. Beginning to run the site. Here is where the particulars really start to matter. Let's pretend that one of the four containers present has something good in it: such as a blueprint for a 'Wetu' Mobile Depot. Cargo scanning can provide a preview of what the site holds: in that respect, picking one at random provides a one in four chance of that one good can being on your way anyways.
- Picking a Keep at Range distance of 2250m is important not only for hacking sites in dangerous space (I like to call it fun space though, because that's what it is) but it also neatly positions the ship so you won't bounce off the container so fast that the hack auto-aborts by reason of the high velocity of the ship pushing itself away from hacking control range. Also, you take more damage from an exploding container, the closer that you are to it.
- Conversely, for those who do not run cargo scanners, just hack at random. Some say the odd named container (i.e. 3x Secure Mainframe and 1x Secure Vault, so the Vault is the odd one out) always has the best loot, but I have not found that to be so.
- Anyways, once on the first container, hack fast, efficiently and accurately. Familiarity with hacking principles and cool speed are essential. On the Lesser and Standard classes, those only have green hacks (blue-green cores); Improved and Superior are yellow cores (but usually only for the one with the good stuff) and can have the usual restoration nodes/virus suppressors.
- 9. Nothing further to elaborate on that was not explained in the previous point.
- 10-11. Ibid.
- 12. Normally, the timer for the site is about two minutes, which can vary quite a bit. The shortest I believe have seen was just over 60 seconds. Two minutes is enough for two fast hacks and a quick high-tail out; three minutes and fifteen seconds is just about enough for four excellent hacks with a close exit time. When the timer runs out, the NPC rats instantly appear at the warp in spot: however there is a short time (about 8 seconds or so) before they start getting nasty.
Therefore, by most estimates, two containers is practically attainable out of these sites: three is better, and four is wondrous. If I get 3 cans hacked out, I simply warp off anywhere quick (except in null if there are bubbles known to be someplace) and then warp back to the mobile depot, refit and continue on the exploration path.
To handle one of these sites like a proper crew, you may use logistics as earlier, or just use the Maller fit and a covert ops pilot, probably in a bomber for the lack of cloak recalibration time. Using a cargo scanner on the bomber, have the cruiser pre-aligned to the site, and initiate warp at the same time as the bomber decloaks. The bomber pilot then quickly locks up all the containers, and being a squad commander position, tags the good container, as usually only one container has the blueprints while the others are just Villard Wheels and Covert Research Tools. All the hacker cruiser has to do then is burn an overheated MWD cycle as he lands, hack out the good can, the burn around to hack whatever he can hack afterwards. The bomber should be clear to warp off as soon as the cargo scans are complete. The bonus is that there is little risk to the bomber pilot at all, the Maller should survive (at 105K EHP with all V) just fine and is ready to be used again for your next cyno hot drop ship or usual bait ship that everybody recognizes.
As shown in an image up above, attacking the rats is possible, though they have very good tank, even for the high security space ones. In the time the Stratios was attacking them, I was able to drop one of them down to low shield, but that was about it, and he warped off anyways even with two warp scramblers and two webs. (Calling all Vindicators and Vigils?) They warp off whether they are warp disrupted or not (bubbles are untested). Obviously the ones in nullsec space, as shown, number more rats than the lower grade sites.
I found a video on YouTube which is fairly good at demonstrating the basics in a more visual form. Through the content of this post, some experience of having run these sites yourself (I recommend a couple high-sec attempts before you do the more dangerous ones), and this video, you should find yourself adequately familiar with the site itself.
Sleeper Caches: A Preamble
These may appear by name to be an intimidating retreat where ships go, and then they don't come back, but in reality, these cosmic indications within EVE Online are actually fairly straightforward. They by default, more difficult versions of the data or relic sites you get normally. There is additional risk involved because of various hazards, but you can get some sizable reward for your trouble should you decide to run one, which after this, I hope to convince you that you should.
I should start off, appropriately, with a list of cautions and advisories:
- Do not attempt these sites without Tech II analyzer modules. This being the Relic Analyzer II and the Data Analyzer II. You can technically get away with just a Data Analyzer II, but without a Relic Analyzer II, you're going to be spending more time inside the site than if you just had it in the first place.
- Your first four to five times inside these sites should not be done with shiny ships, like the Astero or the Stratios. A T3 is also not worth risking in the upper grade of sites.
- Should you run the site completely, you might have some nice gank-worthy (or ambush-worthy if in lowsec/nullsec) cargo in your hold. Exercise the appropriate cautions: gank limits, using blockade runners, a hauling alt, et cetera.
- Do not rush these sites, at least until you're quite familiar with them. Ships get lost on these sites every month because of carelessness.
- There are no Sleeper NPCs inside any Sleeper Cache. The hazards are merely AoE damage and Sentry Towers. Profiles for the guns follow: Vigilant Sentry Tower (the weakest), Wakeful Sentry Tower, and the Restless Sentry Tower (the strongest).
There are three kinds of Sleeper sites: Limited, Standard, and Superior; in this order is their typical difficulty in the same fashion. Unlike regular data and relic sites, Sleeper site loot is held in storage depots, which are accessed with the Relic Analyzer. Site-related functions, such as switching off sentry guns, turning off toxic gas clouds, resetting timers, and so forth are all data hacks which use the Data Analyzer. While failing certain Data hacks can be decidedly unpleasant, nearly all the Relic cans can be failed repeatedly without ill effect. Superior Sleeper sites do have a different mechanic in the Archive Room.
Polarized weapon BPCs, Storyline BPCs, random manufacturing materials (usually worthless in most contexts), skill books, "Blue loot", and random "meta" level weapons and modules is pretty much standard fare as far as loot goes for these sites. The "Blue loot" and the BPCs is where the money is at.
From there, the R.A.M. stuff isn't worth bothering with, the Meta modules or weapons are usually worthless, and the BPCs are sometimes useless too, in this case they were. Selling the BPCs can be problematic depending on the item. Polarized Torpedo Launcher BPCs sell for bank though, because they're one of the few Polarized weapons that people actually use. The Electric Conduit and the Talocan Molecule are some examples of some "fluff" that is the reason you should always bring a cargo scanner with you to make sure you don't hack a can only to get 1 Limited Light Ion Blaster I out of, or 100 R.A.M. junk.
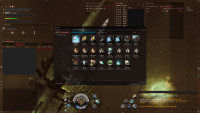
Shiny module that costs too much to bother with
The so-called Blue Loot items are typically sold to NPC buy orders at most stations. Head to a normal trade hub (there is one place 1 jump from Jita, Amarr EFA, ...may need to make a jump or two away to get the proper price) and check that the icon on the right of the sale has a white (=) to indicate that you're getting full value. You can expect to make anywhere from 10 to 300 million ISK off of blue loot depending on the site: Standard and Superior Sleeper sites tend to have more blue loot.
Don't get too excited about storyline modules. That 500MN Digital Booster Rockets blueprint is deceptive. It doesn't have a officer-grade price tags, but it's still fairly expensive, and it doesn't even have the benefits of the deadspace X-Type 500MN Microwarpdrives. The reason why they are so expensive on the market is that COSMOS items are required to build them. There are 4 COSMOS "sectors", one in each empire space, and those COSMOS missions can only be run once per character: (Source)
| “
|
COSMOS item sourcing
Those items can be found in each of the four races COSMOS mission areas. They are used primarily in the production of storyline bpc items, such the Medium Canyon Shield Extender, and others like it. At last recollection, you can find Talocan relics in Caldari space, Takmahl relics in Amarr space, Yan Jung relics in Gallente space, and Sleeper relics in Minmatar space. You can also find the corresponding technology skill book in each of the COSMOS constellation plexes.
|
”
|
Once per character. Also you have to work on your standings, and other things, such as the poor design of the overall COSMOS system, the various annoyances of the system and other factors make these items very expensive indeed, such as Sleeper Profound Research Notes. Most of the time, those storyline modules are trash anyways: 'Censor' Medium Cap Batteries are used by people with really whacky fits on frigates because it's the only medium capacitor battery that can fit on a frigate; the 'Greaves' Medium Armor Repairer is actually fairly good, being the one with the lowest powergrid requirement but still equivalent to the T2 otherwise; the 'Investor' Tracking Disruptor used to be better than the T2 version but that got whacked down awhile back, so it's effectively worthless; and so on. Check the specifications and compare the module in question very carefully to determine if that particular storyline module is really worth it -- more often than not, it's unnecessary, more expensive than a faction module, or just equivalent to a Meta 3 or even Meta 0 module!
Right -- now let's get to the site! First you'll have to scan it down -- and I'll say it's not easy. With extensive scanning experience, you can figure out if it is one without even pulling out the probes. How do you tell if you have a Sleeper site in the system?
- Looking at the signature as you scan it down. If you're at 1 A.U. and it's still only showing Data Site as the classification, you're probably looking at one. That is assuming good scanning skills.
- Normal cosmic signatures almost always spawn within 4 A.U. of a celestial. (Certain signatures like M555 wormhole connections are sometimes out to about 4.5 AU-ish, but never is any regular signature more than 5 A.U.) This can be a moon, stargate, planet, station or the Sun. But Sleeper sites, as I have come to understand, may spawn 5 or more A.U. away from a celestial, though less than 8 A.U.
- As far as I know of, Sleeper sites only spawn in Known Space. If you like real adventurous PvE content like this stuff, you should look at C5 and C6 wormhole "combat data sites" which have a nice Sleeper presence to welcome you. Bring lots of friends.
- Sleeper Caches seem to spawn at a higher rate in NPC empire space versus sovereign nullsec territories. Early in making this Guide I went on a 100-odd jump route through nullsec in the far East and only saw one Standard Sleeper Cache. Never seen one in my hunts through the Drone Lands either.
Payouts. Each site pays out mostly on the factor of blue loot. Limiteds have the least, Standards can be low or high, and Superiors can also be low or moderate.
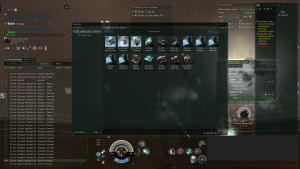 Basic Limited Sleeper Site loot |
|
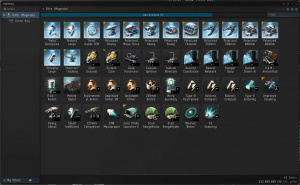 A rather good Standard Sleeper Cache |
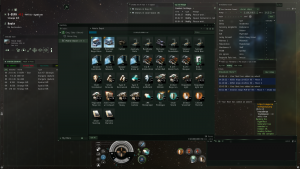 Typical Superior Sleeper Cache |
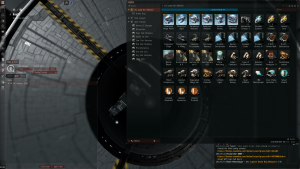 Best Superior so far (minus Mine & Archive Rooms) |
|
Limited Sleeper Caches usually have anywhere from 20-30M in blue loot, although I've seen less than 10M. Standards are typically 40-220M, but normal is usually around 120-ish. (Security status has no bearing on the loot therewith.) Superior Sleeper Caches I can't say too much about because I don't do the Mine Room or the Archive, but for the other two rooms, anywhere from 60 to 300M is typical, with the average usually about 130 to 180-ish.
Before I go anywhere else, I should probably mention probe strength. You can find out your probe strength by pulling up the Fitting Window, usually ALT+F. Hover over your probe launcher, and choose the little (i) that says "Show Charge Info". Go into the Attributes tab of the window that opens and your probe strength is there before you, under "Base Sensor Strength". Pyfa and EFT can also display this information under Show Charge Info of the launcher (EFT) or Charge Stats (Pyfa). As part of the recent Ascension expansion, probe strength is now show directly by hovering over the probe launcher itself.
I have scanned down a Limited Sleeper Cache with 85.8 probe strength. That is with a Tech I frigate and all Tech I equipment. If you have the following:
- Racial Frigate V
- Astrometrics V
- Astrometric Rangefinding IV
- Core Probe Launcher II
- Sisters Core Scanner Probes
- 1 Gravity Capacitor Upgrade I
- 1 Scan Rangefinding Array I
... you should have a probe strength of 107.135, which is enough to scan down a Superior Sleeper Site, the hardest site to scan down, with just a basic Tech I exploration frigate. Findings from multiple Superior Sleeper Caches indicated that 104 probe strength was the minimum. A basic rundown of the minimum probe strength required to scan down each site is listed below: tight cube formations are pretty much required:
- Limited Sleeper Cache: 85.8 (approximate: less most likely won't work)
- Standard Sleeper Cache: 92 (approximate: 91 didn't work)
- Superior Sleeper Cache: 104
Some trick, you say? And why not use a shiny ship? Well, I'm a cheapie, and my reasoning is if I can do it with a Tech I frigate, why not do it with a Tech I frigate? Indeed, you can run all the Sleeper Sites, to a point, with just a Tech I frigate.
First to scan the site. While the Dual Triangle Formation can yield, according to my testing, the strongest strength, it is rather difficult to set up. You may have heard of custom probe formations before, and while scanning Sleeper sites down is an excellent time to work on two formations: a generic cube formation, and a "max strength" cube formation. The cube formation is the easiest formation to make that yields the best scan strength. How did I make mine? Well, awhile back I couldn't scan down a Sleeper Site, but I still found one to set my probe formations up and test them. There's also the Diamond formation, but I find that the cube formation has been the easiest and has worked every time.
Here's some fancy images to show you:
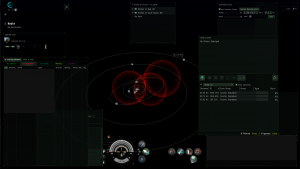 There is a Superior Sleeper Cache here |
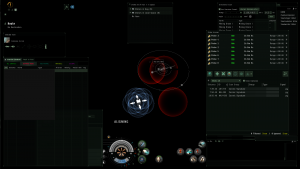 Remember the 4 AU standard |
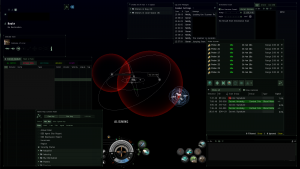 Another obvious Sleeper Cache site |
|
 A site showed with a pure red bubble |
|
Looking at those images above, the one on the far left: There is a Sleeper Cache there, and I can tell without even scanning anything. It's not the one on the far left, nor the one one in the middle. The other images are helpful images that demonstrate what distinguishes a Sleeper Cache from other signatures in the system: if you're at 1 AU and still not even 50% scanned down, it's probably one, particularly if it's more than 4 AU from a celestial.
So when I identify a Sleeper site, I normally start with 4 A.U. regular old default pinpoint formation. As you might imagine, my astrometric skills are somewhat high, so I don't have as much of a problem as back when I was wandering around in wormholes on my trial days. (I actually did hack a relic site or two back then.) I then jump to 1 A.U. size, refine, scan, then .25 A.U. and really make sure I get the location accurate. Once I get that result, I switch it over to the maximum strength cube formation preset, center it up nice, and scan...boom, result. No fancy costly Sisters launchers needed -- why would I buy one of those, when if I lost my ship, that module alone would cost more than three times the total value of my ship? I don't know why people buy those. Too shiny for me.
After you have scanned down the site, you'll want to make sure it's safe to run in the first place. Are there 8 war targets in the system? One of them might break out the combat probes, warp to the first room and join you in a rather interesting partyfest. As they've said before, in nullsec and lowsec (and in w-space, with other players detected in system), you should never hack with unknowns in local. Well, you can, but you are taking a considerable risk. He might have bookmarked the site and is waiting for you to come to him. (The Spatial Rift having been activated before you got inside is a clue that someone has been there before.)
However, Sleeper sites, like most mission sites, have a first room with an acceleration gate (renamed "Spatial Rift" in Sleeper sites). You cannot take an acceleration gate with an active cloaking device. Monitor D-scan with 2 AU range? Your call. Do be advised, Sleeper Caches do eventually get pulled from the probe scanner window after a few relic containers are hacked: in that case, the usual two minute despawn timer is initiated. That said, in low sec and nullsec, always ALWAYS keep an eye on Local and the directional scanner.
Ships -- now's a very good time to start talking about them. There are two Tech I exploration frigates I recommend, and frankly, if it's not listed here, there is a very good set of reasons why it is not.
The Heron is what I normally use for exploration. It is both cheap, capable, works good for combat probing detail, and works well enough for the job. Its slightly longer targeting range (it's not much, but I do like it) and higher top speed (with a MWD, about 300 m/s versus the Magnate) means that combined with the other purposes I use it for, makes it well suited as my default exploration vessel.
The Magnate is the alternative. Its abilities are slightly different than the Heron, but can mount a respectable armor tank, though it doesn't do as much in the DPS department because it has less powergrid than the Heron. I think it's a fine vessel, although I have a much harder time fitting an expanded launcher for high security space drone recovery work, which is part of my regular operations.
The Probe and the Imicus...where do I start: first the Imicus is beyond ugly, and it is beneath me to fly it for that reason alone. But really, these vessels are not suitable for Sleeper Caches because they do not have the slot layouts to handle either the proper shield tank OR armor tank requirements. It would be better to conscript a buddy to run a logistics frigate to help you with repair needs if, by some reason, these vessels are all you have.
The Astero is a fine, capable hull that can do well as a stiff tanky drone boat for PvP, an impromptu site runner or just a basic exploration purpose. The nice thing is the fits that I have created for the Magnate cross directly over to this boat, the not-so nice thing is a lot of the people that fly this vessel or aspire to fly it shouldn't (that included me at some point). There are those who say "well just one good container and your ship is paid for" -- and that is valid argument, but that same "one good container" is a rather huge caveat, leaning heavily on the "if you get out alive" factor. Lose one of these clumsily inside a Standard Sleeper Cache, and you'll know why I recommend the Tech I hulls to newcomers and regular runners.
But don't get me wrong -- I think it is a fine ship, it's just that it doesn't offer any particular advantages I need inside these sites, or for general exploration. Even in nullsec with the usual bubblecamps and in wormhole space with the cloaked Interdictor inside the site (your Magnate with 4 warp core stabilizers won't last with that thing on your tail) I just prefer the basic default frigates -- they are cheaper and work just fine.
The Stratios and Tech III Strategic Cruisers are more in the realm of those who can fly them, generally, but not always, know what they're doing. Would I use one in the future if I had a chance inside a Standard or Superior Sleeper Cache? No. I would be entertained by the prospect of a Stratios hacking out the entirety of the Archive Room with two Guardians, but otherwise, no.
Below is a collapsed box which contains a list of every single item I use (assuming unfitted ship straight from the market) to run Sleeper Caches and general exploration. Players with lower skills (Racial Frigate V, Astrometrics V, Astrometric Rangefinding V) may need additional Rangefinding Arrays to get the scan strength required.
| Heron Buy List
|
- T2 hardeners are optional
- Drones to taste
- T2 capacitor modules (recharger and flux coil) suggested but not required
- AutoCannons or Railguns may be required depending on AWU level
- Scan Rangefinding Arrays may be required, along with a Core Probe Launcher II
- Fit includes all items that my Heron is normally fit with outside of Sleeper Cache operations
Heron
Damage Control II
Micro Auxiliary Power Core I
Photonic Upgraded Co-Processor
Type-D Restrained Capacitor Flux Coil
Data Analyzer II
5MN Quad LiF Restrained Microwarpdrive
Medium Azeotropic Restrained Shield Extender
Relic Analyzer II
Type-E Enduring Cargo Scanner
Limited 'Anointed' EM Ward Field
Limited Thermal Dissipation Field I
1MN Monopropellant Enduring Afterburner
Small Shield Booster II
5a Prototype Shield Support I
Eutectic Compact Cap Recharger
Adaptive Invulnerability Field II
Limited Adaptive Invulnerability Field I
Limited Explosive Deflection Field I
Small Anti-EM Screen Reinforcer I
Small Anti-Thermal Screen Reinforcer I
Small Gravity Capacitor Upgrade I
Light Electron Blaster II x2
Expanded Probe Launcher I
Improved Cloaking Device II
Sisters Core Scanner Probe x8
Core Scanner Probe I x16
Combat Scanner Probe I x16
Antimatter Charge S x2000
'Integrated' Acolyte x3
Mobile Depot x1
|
| Magnate Buy List
|
- T2 ENAM is suggested but not required
- Meta cap recharger not required if only carrying the T2 versions
- T2 AutoCannons recommended if possible (but not required)
- Scan Rangefinding Arrays may be required
- An Auxiliary Nano Pump rig is suggested to hold in the cargo (with a spare Gravity Capacitor rig)
- A meta 4 or T2 small hull repairer is suggested
- Drones to taste
Magnate
Damage Control II
Armor EM Hardener II
Armor Thermal Hardener II
Armor Explosive Hardener II
Small Armor Repairer II
200mm Crystalline Carbonide Restrained Plates
Micro Auxiliary Power Core I
Energized EM Membrane II
Energized Thermal Membrane II
Type-D Restrained Capacitor Power Relay
Experimental Energized Adaptive Nano Membrane I
400mm Rolled Tungsten Compact Plates
Micro Auxiliary Power Core II
Relic Analyzer II
Data Analyzer II
Type-E Enduring Cargo Scanner
5MN Quad LiF Restrained Microwarpdrive
1MN Monopropellant Enduring Afterburner
Cap Recharger II x2
Eutectic Compact Cap Recharger
Small Gravity Capacitor Upgrade I
Small Auxiliary Nano Pump I
Small Anti-Explosive Pump I
125mm Light Gallium Machine Gun x2
Core Probe Launcher II
Improved Cloaking Device II
Sisters Core Scanner Probe x8
Core Scanner Probe x16
Phased Plasma S x2000
'Integrated' Acolyte x3
Mobile Depot x1
|
Other pointers before I get started on the posts for each site:
- Don't forget to make sure all the hacking analyzers are set to Auto-Repeat Off. Otherwise they will needlessly continue to cycle, wasting capacitor.
- A squad commander of a fleet can tag items with various characters in the alphabet or numerical indications, and this is one of the ways I identify cans that should not be hacked because of lack of sufficient value in them. A fleet of 1 member is fine.
- I can't think of anything to put here for now, so I'll just ... draw a blank.
Read on for posts on each individual site.
Limited Sleeper Cache
- Main article: Limited Sleeper Cache
The Limited Sleeper Cache is the easiest of the Sleeper Cache Sites. Sleeper Cache sites are significantly more difficult than normal data or relic sites, and pilots will be risking their ship when trying any of them. However, once familiar with these sites, pilots should be able to run the site without taking any damage. Like all Sleeper Cache sites, the Limited Sleeper Cache requires the use of both Data and Relic Analyzers. Entry is restricted to frigates, and an exploration frigate is highly recommended in order to make use of their hacking bonuses.
Limited Sleeper Caches are Cosmic Signatures that must be located using core scanner probes. They are more difficult to scan down than normal signatures, and require well-developed scanning skills to pinpoint completely.
Standard Sleeper Cache
- Main article: Standard Sleeper Cache
The Standard Sleeper Cache is a Cosmic Signature that can be found in all areas of known space using core scanner probes. The Standard Sleeper Cache represents the medium difficulty among Sleeper Caches. Sleeper Caches are significantly more difficult than normal data or relic sites, and pilots will be risking their ship when trying any of them. However, once familiar with these sites, pilots should be able to run the site without taking any damage. Like all Sleeper Cache sites, the Standard Sleeper Cache requires the use of both Data and Relic Analyzers. While ships up to battleships can enter this site, an exploration frigate is highly recommended in order to make use of their hacking bonuses.
Standard Sleeper Caches are much more difficult to scan down than normal signatures, and require well-developed scanning skills to pinpoint completely.
Superior Sleeper Cache
- Main article: Superior Sleeper Cache
The Superior Sleeper Cache is a Cosmic Signature that can be found in known space using core scanner probes. The Superior Sleeper Cache is the most difficult of the Sleeper Cache sites, and is possibly the most difficult site that can be found via exploration that does no explicitly require combat. Pilots will be risking their ship when trying this or any other Sleep Cache. However, once familiar with these sites, pilots should be able to run the site without taking any damage. Like all Sleeper Cache sites, the Superior Sleeper Cache requires the use of both Data and Relic Analyzers. While ships up to battleships can enter this site, an exploration frigate is highly recommended in order to make use of their hacking bonuses.
Superior Sleeper Caches are incredibly difficult to scan down compared to most other signatures found in known space, and both excellent scanning skills as well as equipment are required to pinpoint the site completely.
General Exploration Ramblings
When a newcomer to the harsh, brutal world of EVE Online enters the door, he often finds himself in the Exploration avenue of job descriptions. Everybody has to do it to a certain capacity, whether it's hunting deadspace modules, running Sleeper Caches, running wormholes, it's pretty much the same core concept. In this post I'll chronicle some of my findings and knowledge: I'm not going to be an expert, but I've done a little bit of it.
I first started exploring wormholes and just general exploration while I was still in trial period. I'm not the most experienced explorer or knowledgeable about wormhole life though. There are other players with greater levels of experience.
|
 The early days: Hey look what I can do! |
 Oh that's what a POS is. Okay |
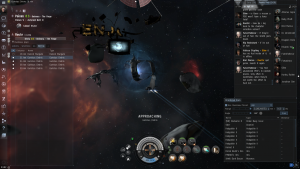 Living the dream. That was a long time ago |
 Scanned down an Astero in a Limited. Nope |
|
In those images, that was the first wormhole I went into, and discovered what a POS was. The last one was when I desperately wanted to run a Limited Sleeper Cache, but couldn't scan it down, so I had to combat probe the Astero inside it. That...was long time ago.
I also want to get these images down somewhere, so here they are...
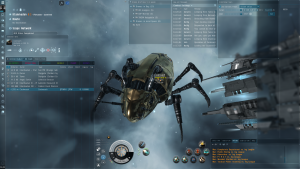 FC can't fly, please instruct? |
 I don't live there so I guess I don't get it |
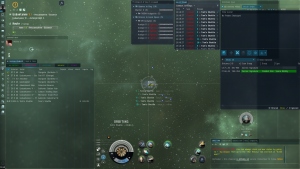 'Ol Tom's Shuttle (invulnerable, semi-hard to scan) |
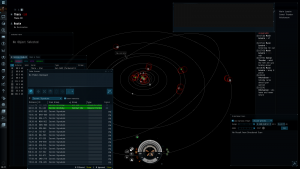 The largest system in EVE |
|
Thera is a gateway wormhole system that has many links to Known-space systems and is good for diving into deep nullsec to explore. Try to make it back before the wormhole collapses. Have a look at this useful Reddit post about living in Thera. By the way: the largest warp from one side of Thera to the other is about 370 AU. Otherwise (as I'm told) the largest system in EVE is 9-266Q in Venal and the smallest is OM-24X in Etherium Reach.
SCANNING
Scanning is one of the core tasks required in exploration. At some point, everybody has to do it, and for those who live in wormholes, it's part of the daily activities. For a video, the first one I watched which gave me an idea of how to scan was this video. Bear in mind that it is made for the old Odyssey map interface, which is what I presently use and will use until the new one is refined into a more efficient interface. The concept of scanning is the same.
I could elaborate on all the specifics I know about scanning, but instead I will talk about matters that I have not seen in other guides.
By default, when scanning for basic cosmic signatures in a system with a large number of signatures, sort the signatures by ID. Work from the topmost signature down to the bottom. The reason for this is if you have two scanners working at the same time, using a out-of-game mapper tool to keep track of signatures. One works from the bottom, and another works from the top. Normally, if there are only 3-4 signatures in the system, 4 AU is a good starting probe size because ordinary signatures spawn within 4 AU of a celestial, although recently that has been slightly edged out a bit but I have yet to see an ordinary one past 5 AU. Sleeper caches almost always are at least 5 AU from a celestial, but not more than 8 AU. Therefore, if one signature bubble is near a distant celestial, just put a pinpoint formation at 4 AU around the celestial and press the scan button.
Formations are a rarely discussed subject. In pre-Odessey days, where probes had to be launched individually (launching the probes didn't launch all 8) and positioned manually each time (there were no such thing as pre-formed formations), the 7 probe diamond formation was very popular. It basically looks like a giant 3D + (plus), with one probe in the north, one in the west, another in the south, east, one up high, one down low and finally one in the middle. With 8 probes, just put the 8th one near the middle, but just off-centered a bit.
Besides the pinpoint formation, the cube formation is one that I use a lot for Sleeper caches and when scanning harder signatures with unbonused ships, such as bombers in wormholes. The cube formation gets its name from its basic foundation block, a cube, with one probe on each corner of an imaginary 3D cube. Make one that is pre-fixed at 4 AU probe size, another at 0.5 AU (for combat probes) probe size and finally another one for maximum scan strength. The cube formation is the easiest custom formation to make that can extract the maximum possible strength from any one given set of probes: to make a 0.25 maximum scan strength probe formation for Sleeper caches, just find a Sleeper cache first. (If your skills are very high, downgrade the probes or even the ship until the maximum probe strength is at the minimum or close to it. Limited: 85.8-ish. Standard: 92. Superior: 104.) Start with the 0.5 AU probe size, reduce the probe size to 0.25 AU, then fine tune the formation until the cube shape is perfect and equidistant between all the probes. Using the signature of the Sleeper cache as a reference, center the new 0.25 AU cube formation exactly in the middle of the signature dot. Reduce the probe distances with the ALT key (new mapper uses a different key. I don't use the new mapper, as it is unusable for my purposes) just a small amount, then scan again. Repeat the distance reduction and scan procedure, taking your time and using small increments each time until the probe scanner shows the maximum possible strength you can get out of it. Save the formation.
|
 Tight cube formation for scanning Sleeper Caches |
|
|
Above are pictured three basic formations. As mentioned before, the 7 probe Diamond formation was extremely popular before the Odyssey expansion, particularly since it took less time to launch 7 probes over 8, and most of the time the 8th probe didn't help much. The 8th probe, if used, is placed offset from the middle one. The cube formation is highly recommended to save as a formation. (Also that was when the only way to find out if any signatures were in the system at all was to scan for them first with a spread formation or a Deep Space Scanner Probe.)
Other formations include blanket formations (used for stealthy combat probing stuff), the Dual Triangle Formation (too difficult to make for the value, especially compared to the cube formation) and specialized combat probe formations meant for specific systems so that the probes are positioned in a specific way to cover the whole system without actually having a probe show upon the directional scanner. That's about all I know about formations: pro scanners are usually very tight-lipped about their secrets. Even I have to refrain from too much elaboration on the technique of scanning a ship down with just one scan run. That technique has gotten a little bit easier with the new directional scanner cone feature of the new probe scanner, but the old-fashioned way does work faster because the old probe scanner interface is easier to use when combat probing, particularly under heavy pressure. It can also be more accurate, but that is mostly a factor of distance. (Gee that was cryptic enough)
 That's a lot of signatures for a highsec system |
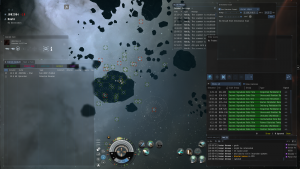 Shattered Whs are exploration havens |
 Scanning: Sort by ID, then start from top & work down... |
 ...and bookmark the ones you want to run with |
 Two Dot Pattern (see below) |
|
The "Two Dot Pattern" is a frequent occurrence to scanners. Referring to the image above, the observer can note that the probe "center" is near one of the dots, yet the signature was not resolved adequately. When this happens, it must be the other red dot -- because if the signature was closer to where the probes are concentrated, it wouldn't have shown two dots.
Whenever I enter a new wormhole system, I try to follow a certain protocol. Although my procedure below is not fully established, and there is probably a couple of other things that can be tweaked about it, it works well enough. Let's just say I have no idea what this wormhole signature in the system is, and I've landed at the wormhole entrance.
- 1. Check that my ship and fit is ready for the task. Entering a wormhole blindly in a Retriever with no probe launcher is asking for trouble.
- 2. Look at the Signature ID of the wormhole on my local overview. It might say "Wormhole N110"...okay, I use this page to give me a quick idea of what that ID corresponds to.
- 3. Show Info on the wormhole itself. Is it End of Life? I don't go in there. Is it "nearing the verge of collapse"? I don't go in there.
- 4. I enter the wormhole.
- 5. I look at my local overview. Are there 30 ships surrounding the hole? Well, guess I'm not doing much here. Am I in a bubble? Are there a bunch of wrecks on the hole? If it looks bad, I just bounce back into the previous system.
- 6. Bookmark the exit wormhole. Don't bother naming it: time is of the essence.
- 7. I use my directional scanner to look for: Ships, Probes, active Force Fields, Citadels, Wrecks, Mobile Depots and Tractor Units, Drones, and bubbles. If all is clear, I proceed to the next step.
- A system with a Fortizar, two Austrahus citadels and a moonlocked system has a 100% chance of a corporation living there. A bunch of Sleeper Medium Wrecks on Dscan indicates that someone is ratting or has been ratting in the past two hours. An Elite Gallente Frigate Wreck on Dscan means someone got blown up recently in a frigate. Drones out mean the same: someone is there or has been there recently. Three Control Towers, but only one Force Field indicate that two towers are offline, but one is online. A Mobile Depot and a couple of Freight Containers out in space means that someone is living there, to a certain extent (most common in Shattered wormholes). If there are 16 Mobile Warp Disruptors, someone has been doing something relatively important recently. And so on.
- At this time I also pull up the probe scanner window if it's not already up. If there are just two or three cosmic signatures in the system (and interpreting the same for the cosmic anomalies), then I know that someone either lives here, or has been here somewhat recently, as wormholes that have not have been "cleaned out" usually have a dozen or more signatures. (CREST used to provide information for NPC kills in the same way as known space. That has been removed. That would be another point of intelligence.) Looking up the system in this site can provide useful intelligence on the possible wormhole connections.
- 8. I look up the J-Number in zKillboard. If it has been quiet for a week or so, it's probably okay. Probably. If there have been 50 kills in the last hour, ... I'm backing out. I may also elect to check something like this to see what the likely statics are, system effects, and so forth.
- 9. If I am in a Covert Ops ship, I may elect to scoot around the system cloaked to look around at any POSs or Citadels, or move to areas where my initial Directional Scanner range was not sufficient. Should I need to launch core probes, I'll do it right after I recloak, then quickly yank the probes way off my map so they're off the directional scanner.
- 10. If I intend to run any sites, it's usually prudent to check the other wormhole connections for: critical holes (someone has either been rolling them or brought a bunch of ship mass through recently); where they lead to and other information on the neighboring wormholes. Running a couple of combat sites in a Rattlesnake without scouting the neighboring systems for a nasty T3 gang is asking for trouble.
- 11. The best way to know how to live or operate somewhat safely in wormholes is to hunt in them yourself (you'll know the ways of the trade) and working with other knowledgeable players who are familiar with the methods.
There is some confusion about the signature ID K162. Here is some explanation I dug up:
| “
|
K162 appearance only on first jump
A 'K162' is the 'out' end of a wormhole link, and historically has spawned when someone has initiated warp to the 'in' end of a wormhole link. Wormholes that have not been warped to only exist in potential; warping to one end of the link is what actually creates the link between the two systems.
This is an extremely significant change with two obvious ramifications.
The first is that people inside the system that is being connected to will have significantly less warning that there is an inbound wormhole. Beforehand they had the length of a ship warp to the 'in' side of a wormhole during which the 'out' signature was visible but before anyone had jumped through. Post-Hyperion, the link will only appear after a ship jumps. This tips the scale significantly towards the hunters in wormhole space, particularly in higher-class wormholes where capital ships in siege or triage mode are frequently used in site-running.
The second is that pilots will be able to find out what an outbound link is before opening it. Currently you need to be on grid with a wormhole to verify where it leads - but being on grid with it means that you have warped to it, which means it is activated. After the Hyperion release, if you find that it is not a link you want to have active, for instance a wandering wormhole to higher-class space, you can just not jump through it, and the far end of the link will never spawn. This has the ability to significantly reduce the interconnectedness of wormhole space and counterbalance the increased number of wandering / random wormhole links.
|
”
|
Learning how to use the directional scanner to locate targets and pinpoint areas to combat probe are essential techniques to learn as a scanner. A good place to start is searching for drones in high security space, especially congested areas. Two Vespa IIs buried in a huge cloud of red dots -- practice digging them out of the flock. It also makes for good incomes, or collections...
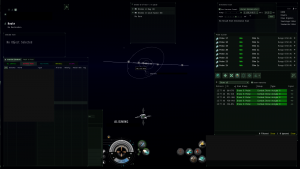 Finding drones in useful safe spots |
|
 Hauls like this gets me hooked |
|
GAS MINING
Among the more profitable and low entry barrier jobs in EVE is gas cloud harvesting. At this writing, C5 and C6 capital escalations got whacked pretty hard, so a number of C5 and C6 wormhole corporations have shuffled over to other places, or have disintegrated into various bits. This means that running gas sites in the aforementioned holes should be somewhat safer...but that is more of a factor of "reduced ambush possibility" rather than "safe". Instrumental and Vital Core Reservoirs can be very profitable. Indeed, the first load of C5 gas I pulled out, which corresponded to a full load of a Venture, paid for the 24 million ISK skillbook and the fully fit hull. Anything after that is raw profit, and to date I haven't lost any of my Ventures.
Gas mining is easy to get into. Because Gas Cloud Harvesting is a 1x multiplier skill, it only takes about 5 days to max to Level V, which really isn't much training time and is worthwhile. The other skill to train is Mining Frigate: level IV is good enough for most cases. After that, just fitting, navigation and scanning skills are all that's left.
The Prospect is the boss of mining in dangerous space. It has a large number of good features. A low signature, which can be used for gnarly "sig tanking" NPC pirates; a similar concept can be used in K-space with mining lasers. The ability to fit a covert operations cloaking device. A good tank is easy to fit. It has a larger cargohold and a larger ore hold than the Venture. Two schools of doctrine concern the ship, the first is no medium shield extender (or double small shield extenders) or a medium shield extender.
Here is a good, stable, viable fit:
[Prospect, Prospect - Default]
Gas Cloud Harvester II
Gas Cloud Harvester II
Covert Ops Cloaking Device II
5MN Microwarpdrive II
Adaptive Invulnerability Field II
Medium Shield Extender II
'Stoic' Core Equalizer I
'Stoic' Core Equalizer I
Damage Control II
Nanofiber Internal Structure II
Small Low Friction Nozzle Joints I
Small Gravity Capacitor Upgrade I
Core Scanner Probe I x16
- Bring T2 or Scoped Mining Lasers in the hold, along with a probe launcher and small armor and hull repair modules with the Mobile Depot.
- Always keep the cloak. Swap out one of the lasers or harvestors for the probe launcher if needed.
Now the Venture is a little bit easier to get into. Most people get into amusing skirmishes about how to equip their Ventures. I must say mine is not exactly the norm, and I will explain every element of it for that reason. Here is my fit:
[Venture, Venture - Proper Gas Collector]
Gas Cloud Harvester II
Gas Cloud Harvester II
Improved Cloaking Device II
5MN Quad LiF Restrained Microwarpdrive
Medium Azeotropic Restrained Shield Extender
Small C5-L Emergency Shield Overload I
IFFA Compact Damage Control
Small Gravity Capacitor Upgrade I
Small Low Friction Nozzle Joints I
Small Cargohold Optimization I
Hornet EC-300 x2
Core Scanner Probe I x16
- Always keep the cloak. Swap out one of the lasers or harvestors for the probe launcher if needed.
- Shield booster is for cap dumping, not fixing damage.
- Low slot may be changed to suite: an extra warp core stabilizer, damage control, nanofiber or inertial stabilizer are all common and viable.
Alright. Module by module:
- 1. Low slots: The damage control is mainly by preference. A warp core stabilizer, a nanofiber internal structure, or an inertial stabilizer are all good options for the low slot. IFFAs are pretty expensive as of right now so I would probably switch to a nanofiber.
- 2. Mid slots: Microwarpdrive is obvious. Crashing a gate, burning to the next cloud, cloak plus Microwarpdrive trick, or other purposes. Shield extender: Some buffer. Shield booster: This is for dumping capacitor to land short of a long distant warp to check the exit for bubbles and gatecampers. Sure you can use Control + space, but if you top capacitor skills, Warp Drive Operation IV (as I do) and a system just wide enough for that to not work very well, then it can be extremely difficult to execute. A shield booster however, is reliable and predictable. Because this ship cannot warp while cloaked off-angle to a bubble which may be "dirty", the only way to be safe is to cap-dump to see if one is there. An example is shown in this image of a larger wormhole: the principle also applies to known-space system where a constellation or regional gate is (as usual) isolate from the cluster of planets or otherwise off directional scanner range of an easily accessed bounce spot.
- I choose the shield booster if I'm in a fleet, where there has not been tacticals on the wormhole exits and safe spots shared. If I'm by myself, and did all that above in a covert ops vessel, I use a meta Adaptive Invulnerability Field. Some people also like to put ECCM arrays (the old days) or a sensor booster with a ECCM script (nowadays) to make themselves harder to scan down with combat probes. For that I have but one answer: A cloak.
- Other options have included: A survey scanner, which is useless for solo, as the Sleepers will show up before you'll mine all of it out. It's only good on fleet ops, and of those participants, only one is needed that the FC can call for a quantity check every now and then.
- 3. High slots: Gas Cloud Harvesters can be replaced to suit the skills or job required. For mining in dangerous space, I prefer the EP-S Gaussian Scoped Mining Laser because I can remain aligned longer by reason of the extended laser range. Always leave the cloak fitted.
- 4. Rigs: One to make it slightly more efficient at scanning, the second for increased agility, and the third (which is unique about my fit) allows a Mobile Depot with a probe launcher and 16 core probes to be carried in the hold, which is otherwise not possible.
- 5. Cargo: For scanning, or in case of an emergency, warp to a safe spot. Drop the mobile depot, orbit it at 5000m. Cloak and wait for the depot to anchor. When it has finished, drop one of the mining lasers or harvesters, and swap in the probe launcher. Scoop everything up, reload the launcher in warp to another safe spot, cloak up and scan an exit. In hostile space, do not drop the Mobile Depot if you see combat probes out or if you know they have a ship that commonly features them. Just sit cloaked in a safe spot and come back in two hours.
This fit is chosen because it's a cheaper version of the Prospect, and because of the Prospect's native cargo size, it doesn't have a problem carrying a mobile depot and probe launcher. But the Venture does, as without the cargo rig, it can't fit the probe launcher in the cargo with the mobile depot. Most people prefer to put shield rigs in the rig slots to increase the tank. But the thing is, if you are caught, you are almost always dead. Okay so there have been a lot of close shaves, but most of those wouldn't have been close shaves if more awareness and discipline was exercised. A Sabre paired with a stealth bomber fitted with two warp scramblers -- you're not going anywhere. No tank modules or rigs you can think of will survive that. So, given that survivability in dire situations is hardly favorable, it only makes sense to be fit for escape and utility. Given that the Venture has low EHP and terrible resistances, it only seems reasonable enough to at least make it more useful.
Once a suitable system is found, checking the killboards for recent kills and checking the directional scanner across the whole system girth is most prudent. A POS on every moon and a Fortizar owned by the same corporation or alliance? No gas mining today: it's bait and they live there. Make tactical bookmarks, cloaked, with a covert ops ship of all the exit holes. Check the other holes, and where they lead to. Only then is it prudent, after such intelligence has been appropriated, to mine gas.
In the Instrumental and Vital Core Reservoirs, which is where the money is at (lesser gas is not really worth going after unless you need it for manufacture), there is a smaller gas cloud and a larger one. Assuming a proper gas fleet of a dozen members or so (the new Command Destroyers make excellent boosters, since there is only one link that works with gas miners, namely the Laser Optimization link to reduce the cycle time), just congregate all members on the smallest cloud. The squad commander, or wing commander, then bookmarks the larger gas cloud, and positions himself so he is just about 151-152km away from the cloud (right click on the bookmark pin and move away slowly until it registers Warp to Location within 0m). Have all members anchor up on the commander. When the smaller gas cloud is finished, just warp all members directly to the next cloud.
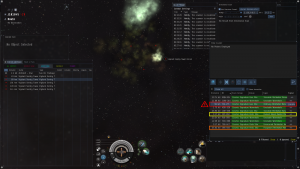 Cautions about gas sites and Wh sites |
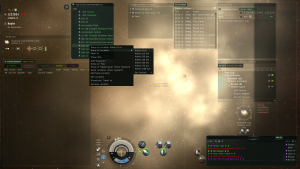 Using the Group window for easy evasion |
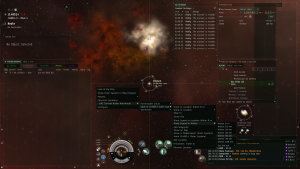 Fleet-based responsibility of the FC |
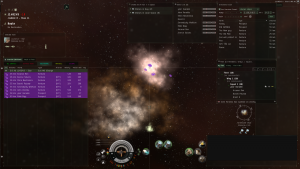 Gas mining works better in a fleet |
|
Make sure to not warp to Ordinary Perimeter Reservoirs in Ventures or Prospects (latter if decloaked by accident). The alpha from 5 Sentry Towers is no joke for frigates. Also, from the image gallery just above, notice how one Relic site is called "Forgotten Perimeter Power..." and that is a clue that it is a combat relic site, NOT an exploration site for Herons and Probes. Compare to the "Ruined Blood Raider Monument"...there's "Blood Raider" in the name, which is a pirate faction, which indicates there are no NPCs in the site. Players however...may be cloaked or off-grid in Combat Recons and may just be watching as well.
Back to gas clouds...
Most folk like to sit very close to the middle of the gas cloud, near the icon of it. This makes the cloaked ships who must creep very close to your ship have to work harder (the gas cloud's object size changes as the gas is mined, apparently) to do their business. Corpses can also work to orbit at, as they are not the same thing as a jetcan, which can be directly warped to.
The site itself has a timer that counts down from the moment an uncloaked ship initiates a warp to the site OR if a ship fitted with a covert operations cloak decloaks inside the site. By default, this timer is fifteen minutes until the Sleepers show up, or could show up. Every minute thereafter has an increased chance of spawning the Sleeper NPCs. Some good wormhole groups like to clear out the Sleepers because some good blue too can drop from them: alternately, use a sniping beam laser Oracle to clear them out. You will need logistics cruisers and respectable DPS ships to clear out the site's battleships if you use conventional PvE or PvP fit vessels.
Ninja mining consists of watching directional scanner persistently until the fifteen minute timer is up, then the FC primes himself by holding open the menu to warp the fleet to either the next site, a safe spot, a tactical on the wormhole, or the wormhole itself so that the very second the Sleeper NPCs spawn, he initiates the warp. This is a good deal because more of the gas is effectively harvested, which means more players are able to profit from the endeavor, and more eyes are available to watch the directional scanner.
The other strategies involve coming back to clear the rats out, and continue the harvesting, or to tank them with a specialized fit like this one. Neither are for the unprepared and requires capable pilots.
COMBAT SITES
A relatively popular and somewhat profitable venture that a lot of individuals in EVE engage in is running combat sites. There are a couple of types and nuances involved here, so I'll explain. This is a variation of "ratting": engaging Non-Player Characters (NPCs): NPCs, computer-controlled-players, or bots in the vernacular of other games. NPC Pirates gets shorted to pirate, so "rat" describes an NPC pirate ship. "Ratting" is the practice of shooting NPC pirate ships.
First, Combat Anomalies are known as "green sites" because when the Probe Scanner window is pulled up, and Combat Anomalies are enabled, they are warpable directly, without the need to scan them down, by any ship. When these sites are run, there is a chance for the site to "escalate", which means that it can either start a short mini-arc (storyline) which entails running to a handful of systems, warping to a site in those systems, shooting some NPCs, and continuing on. Or it can escalate to a higher grade site, which is nice because it is your own personal site, and nobody else has it, neither can they enter unless they combat probe something or someone inside that said site. Escalations are basically like "Part 2" of the site you may have just ran: and certain escalations can be sold to other players. Apparently 50-75% of the going price of the Overseer's Personal Effects of that site is usually considered acceptable starting pricing. Some escalations into dangerous space (such as sovereign nullsec from a high sec green site, as I've had) are best abandoned or sold to the locals. Trust and not getting blown up enroute or back out make for some interesting moments for sure. You definitely don't want an escalation into a key battleground system, such as HED-GP unless you live there.
Typically, a large number of green sites have to be ran for an escalation, which makes them not only boring, but uninteresting for a number of people, but huge amounts of ISK are made every day from anamoly ratting in sov null. Aside from the escalation chance itself, and the chance of a faction NPC spawn (which can drop faction modules, such as Dread Guristas Thermal Dissipation Field), there's not much to them. Green sites get better as the lower the system security status becomes: the best are in sovereign nullsec and wormhole space. Sovereign nullsec is great for running the sites, and a suitable pilot can make good money from the bounties running those sites -- and snatching any cool faction modules from those said sites. Within the classification of green sites and all their variants, some sites are better to run than others in the same system.
In wormhole space, green sites, as all combat sites in wormhole space, have Sleeper NPCs which are nicely souped-up versions of the kind you see in regular Known Space. In higher classes of wormholes they are no joke and are not to be trifled with in inappropriate ships and inexperienced pilots. Sleeper NPCs can drop "blue loot" which is sold to NPC buy orders in Known Space, and the wrecks themselves can (and usually are) salvaged for additional profit. Run a Google search for "Rykki's Guides" for site profiles: it does get updated from time to time, which is nice..
Now for Cosmic Signatures. Combat sites classified under Cosmic Signatures are sometimes nice because they can shortcut around the raw boredum of green site escalation hunting. As Player versus Environment (PvE) sooner or later turns into a question of efficiency and speed, experience and a good overall setup with the right ship and fit comes in handy, as does knowing the site itself. Googling the site name itself can usually pull up a nice profile of the site which allows a player to evaluate the hazards and proceed as needed.
Anyways the combat sites found through scanning can either be raw trash or quite valuable. Looking at this page, it's important to know what sites are even worth running. Let's take Guristas Pirate space, which, for high security space, is confined to The Forge, The Citadel and Lonetrek regions. Those said regions are also relatively highly populated, the number of site runners large, and competition can be fierce. For said high sec space, you'll want to run the Gurista Guerilla Grounds and the Guristas Scout Outpost sites. The Lookout and Hideout sites are just about worthless. The value in these sites comes from the chance for the faction NPC pirate ship to drop goodies worth selling or keeping: in the Gurista Guerilla Grounds sites, the kicker is probably a Pithi A-Type Small Shield Booster, which can sell for about 100 million ISK, and maybe a Worm frigate blueprint copy. (That shield booster is popular on PvE Jackdaws and certain Tengu fits for PvE.) In the Guristas Scout Outpost site, the kicker is would be any decent Pith C-Type deadspace modules and -- a Gila cruiser blueprint copy.
Certain quiet low-sec constellations can make good areas to look for these sites too, although looking at that table will give you a good idea of what to expect, and you should look up the site to see if you can effectively run it and if the loot that can drop from those sites is in line with what you're interested in. DED 5/10s and their close equivalents in the Unrated categories can be very dangerous for unprepared and uncapable pilots: a frigate will have a very hard time running the site effectively, for instance. (This is coming from someone who used to run DED 3/10s and 4/10s in a T1 frigate. Still does, on occasion. Used a Breacher to run an escalation into Rancer. Didn't get blown up, either.)
Running combat sites on an alternate NPC corporation character is the best for highsec and some lowsec operations, as it allows freedom to navigate around areas without fear of war targets. When contesting a site, it's better to not engage the contestant who has gone suspect: he is doing so because he has a good idea what he's doing, and is most likely more than capable of destroying your ship. You may use an MTU to pull the wreck of the faction rat in the last room (if that's the way the site is laid out), but keep in mind that he will not be CONCORD'd for shooting your MTU. One option is to counter-bait him (works best with friends of your own) to kill him instead: a neuting Vexor can work nicely.
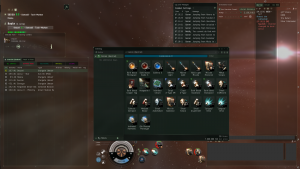 End of escalation loot (meh) |
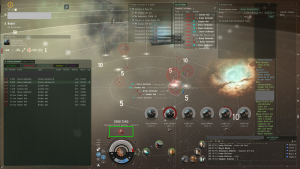 Some sites feature rats with warp disruption |
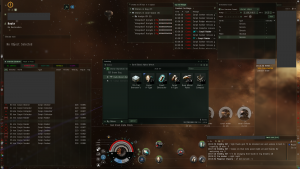 Lovely DED 3/10 loot, good for newbies |
|
|
From these images above come various illustrations of some of the concepts mentioned. As I'm hardly an expert on the matter, and don't do it full time, there are more authoritative persons on the matter. Dedicated ones will make "routes" to optimize their searches, and from there, run every "green site" or cosmic anamoly combat site hoping for an escalation or a faction rat spawn, whilst also scanning down any scannable combat sites as well. Most are tight-lipped about their methods because of competition reasons. Gilas are very popular for a multitude of reasons, however they are not as fast as select Tech III Destroyers like Confessors and Jackdaws with certain sites -- considering that T3Ds are quicker, this sometimes works out quite favorably compared to Gilas and Stratios cruisers.
When looking for exploration based combat sites, remember to avoid systems under active Incursions. Belt rats are replaced with Sansha ships which are useless to shoot at, eat drones quick, and are extremely dangerous with lowsec or nullsec gatecamps. Those gatecamps, particularly under high influence (meaning their affects on capsuleer vessels which reduces resistances, hitpoints and damage to dangerously low levels) can easily make mincemeat of battleships, Tech III cruisers and other respectable ships like Vagabonds and Deimos vessels.
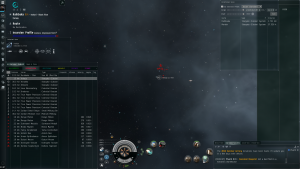 Avoid Sansha gatecamps in low and null space! |
 Avoid mining too: belt rats are replaced |
 Save Incursion sites for future safe spots |
|
But save any useful deep safe spots from them for future needs.
 C2 Perimeter Transponder Farm |
 Cakewalk-grade hacks (with junk for loot) |
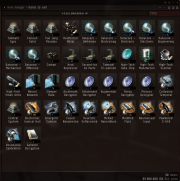 2 Wh Combat sites + 2 Data site loot |
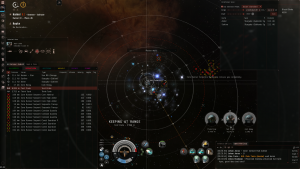 Core Runner Exile Distribution Base |
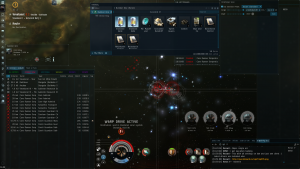 All hacks completed, not dead yet |
|
Shown above is me running a Bantam to provide friendly reps to two others in a C2 Perimeter Transponder Farm. It's not a difficult site to clear out. It's an example of a "Combat Data Site" whereby the hostile NPCs must be eradicated before the hacking containers are unlocked. The contents of said containers increases in value as the class of the wormhole goes up. Bring a cargo scanner to see if they're worth hacking anyways - in those sites we ran, the contents were just about worthless. The value of Sleeper combat sites as mentioned before comes from the Blue Loot and salvage components, though certain Talocan ship wrecks can hold some very valuable components.
In low security space and some nullsec regions, hybrid combat data sites classified as Gas Sites may appear. These are a little bit different than normal, because there is no gas to begin with. Rather the loot comes from what's inside the spawn containers. Bring a cargo scanner to see if there is anything useful inside them first. Neurotoxin Control and Neurotoxin Recovery skillbooks can sell for some nice cash: the rest is just fluff. Core Runner Exile Distribution Bases are out and about in the Solitude Region and that's where those Neurotoxin skill books come from: they can be scanned down with a super-tight cube formation with 72 probe strength. Serpentis Chemical Labs may have Gas Cloud Harvesting skill books.
But there's more. Certain containers will be locked until the NPCs guarding it are eliminated. This brings up an interesting problem. As seen above, there are a number of Elite NPCs which are rather annnoying to deal with (i.e. they take a long time to eliminate), although the total DPS of the room isn't that bad as long as you're moving. A dual-rep Myrmidon tanked perfectly fine, but was low on damage. But if the container are not locked, then there are two approaches: the first is to pull the rats about 100km away from the containers using a frigate with a Microwarpdrive, then warping back to the containers at 0 and hacking away before they slowboat on back. The second approach is to tank them directly -- as shown above, a double Medium Shield Extender Heron was fine enough. The vessel was only in half shield by the time the site was half completed -- if you're nervous, just bring a Scythe in to fix the damage back up again. Orbit the containers to reduce incoming damage considerably: do not sit still.
HACKING
Hacking is a learned game, best practiced first in easy high sec sites, then graduating to low, null or wormhole space hacks. Dedicated explorers will appreciate Tech II analyzers above everybody else -- even then, a casual explorer can usually do fine with related skills to IV and good hacking practices, such as learning about the Rule of 6, the "Corner Core" principle and careful avoidance to avoid attacking nodes which do not need to be attacked.
By the way, Micro Jump Drives can be used to escape from hacks that could produce undesirable results, such as damage explosions (but will not stop the negative effect of the hacking failure). Simply hold the hacking window open and activate the MJD.
The images below will have to be opened individually, however they provide a detailed analysis of how I progress through the hacking game.
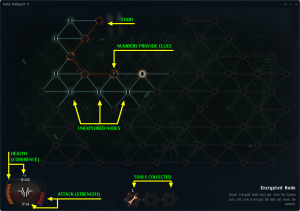 Let's begin on this hacking quest |
|
|
|
|
|
I would earnestly recommend watching this video by Chance because it was very enlightening for me and shows how an experienced hacker works.
 Some hacks aren't even that |
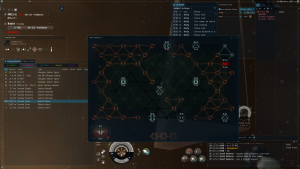 Others aren't really meant to succeed |
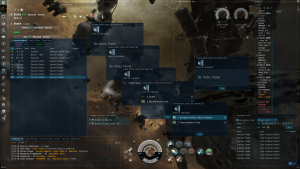 This is why highsec hacking is just for practice |
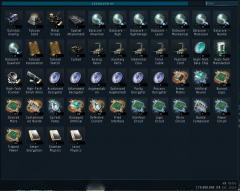 Nullsec Rampage: 6 Data, 2 Relic sites |
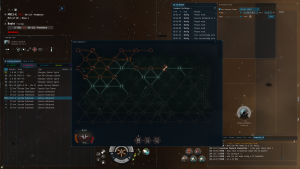 Saving and using tools properly is vital to success |
|
DRONE LANDS DATA SITES
The Drone Lands is a unique area in New Eden for a couple of reasons, but for explorers, the area is definitely different.
First, native pirate named data and relic sites do not spawn there. Rather, in their place, scattered about fairly widely, are Abandoned Research Complexes. These sites are interesting and have some interesting properties about them:
- There are only 3 containers
- There are two High-Security Containers and one Research and Development Laboratories containers (the High-Security containers are blue-green hacks, the R&D cans are usually red hacks)
- Failure of any one container can spawn rats. They don't hurt much, and can be handled in a few minutes even with just a single small pulse laser (ideal) on a covert ops frigate. The rats must be removed before any of the containers can be accessed, even if they've be hacked already
- Generally, the good stuff is found in the R&D Lab container. See below what constitutes "good stuff"
- The site, after all containers have been hacked, may escalate to another site somewhere else which may drop "good stuff"
Refer to this Reddit post for details about what regions have what. Basically, the initial site itself will usually have just some drone components and merely 'Integrated' drone blueprint copies, 60 run copies. The R&D Lab container can have a 120 run 'Integrated' or if in "Gallente" space of the Drone Lands, 'Augmented' drone BPCs. Usually it's empty. Although rare, a nice solid blueprint with a healthy number of runs can sell for some serious money -- especially 'Augmented' Infiltrator drones.
It may appear to some that the area is a bubbled nightmare of a place, but really, most of it is barren and most places are not bubbled up much. There are exceptions of course, but those cases are rather isolated to "Bear Lands" home systems where ratting carriers and what not are used frequently.
The End
That is all. I have more to say and discuss, but for now, I'm finished.


