PLEASE DO NOT EDIT THIS PAGE WITH USELESS CONFUSING GARBAGE THAT I AM TRYING TO AVOID. If you feel something is missing please comment on the forum post located Here. Thank You
Player VS Player Combat
Enclosed within this page I will be trying to cover as much as I possibly can on everything related to PVP from my own experience within EVE including Tip's and Tricks I have learned along the way.
So you have either been mining, missioning, exploring and now you fancy a go at PVP. Well welcome to what hopefully will be a great read to get you started on your track to that first Kill Mail either your own or someone else's is all part of the fun. Most pilots' first experience of PVP is when they accidentally jump into a low sec system and there is a nice little gate camp sitting on the other side and 1 of 2 things happen. You either get a massive adrenaline rush and start panic spamming buttons then end up staring at your corpse wondering what just happened. Or you scream as you were in a brand new shiny ship with your training implants in and throw your monitor out the window. :-)
Seriously though. the people that start panic'ing and get that adrenaline rush normally once they have calmed down think that was awesome and I want to be able to do that and start looking into PVP (Well that's what happened to me any way but that was 6 years ago lol)
So where do you start...................?!!??>>>>>..............
The Initial Stepping Stone
Ok now either the above has happened to you or you're just a blood thirsty crazy person who wants to start blowing everyone up the following section is what I would recommend that you do.
First and foremost the golden rule ONLY FLY A SHIP THAT YOU CAN AFFORD TO LOSE. Like everything in life the more time, effort and Practice that you put into something the better you will become, and remember that you are going to die an awful lot in the beginning but this is the best way to learn. So a nice cheap ship with cheapish modules will save your pocket and will ultimately mean that you can spend more time dying ehm... Practicing PVP, rather than doing the horrendous task of Carebearing to make the isk so you can once again go and get blown up trying for that first Kill.
A couple of fits can be found HERE for you to have a look at, so look at your skills and determine what frigate you're going to jump into low-sec with and shout "Kamakazi", fit it up appropriately and you're on your way to your inevitable death he he he....
I Have This Cheap Suicidal Ship, Now what?
Great you're all set up and ready to go and....................... DIE IN A GLORIOUS BALL OF FIRE! So what do you do now?
Now is about the time you're thinking of going into Rancer and showing them what you're made of, well if you do that you may as well be made out of tissue paper because you're not quite there yet my friend. We still have a lot of ground to cover and some of the finer details to cover BUT!!!! That can wait for a minute or two, now get your ship, look on DOTLAN for the closest Low/Null Sec system go and get the "KAMAKAZI" feeling out of your system. When you end up back in that Clone Vat Bay dripping with that smelly horrible gunk they store these things in. (You would think they would look after these better considering the money that they cost :-) ) We will meet back here..
Ok got that all worked out?? Feeling better now that your wallet has a few more moths flying out when you go to pay for stuff on the market? Great welcome to the world of PVP, lol now lets get back to it.
Living To Fight Another Day
Pod Saver
Before we go into the details on how to PEW PEW we need to figure out how we can stay alive. I'm not talking about keeping your ship that's destined to turn into a firework, I'm talking about your capsule or POD as it is otherwise known. This is where your "POD SAVER" tab on your overview comes in. Hopefully you all have your overview set up to EVE Uni standards if not go here and get it all set up, then come back and you will know what I am trying to explain.
Once you know the game is up and your ship is going to be destroyed you want to be able to get your POD out before whom ever is attacking you gets that too (Especially if you have implants.) The best way I have found to do this is as follows.
Once you know you're dead, for me it's just when I'm about to go into structure on my ship. I instantly click on my POD Saver Tab on my overview which should look similar to this.

Now once you have the pod saver tab up, click on one of the planets. If you look like you're already aligned to one, even better. Once you have clicked on a planet on your overview it will be displayed in your selected item window (This one.)

Now, spam click the WARP TO button. You should instantly warp to your chosen planet as soon as your ship gets destroyed and before anyone can even begin to lock onto your POD.

I've Warped My Pod Away But I'm Being Chased!!
This happens so don't panic! The main thing you need to look at is the top left hand corner of your screen to see if you have an "Aggression Timer." If you have been shooting, applying a Scram, Point or a Stasis Webifier to another capsuleer you will have one of these for 60 seconds from the point in time you were last applying any form of Aggression. Below is what the timers will look like in this situation.

The First red exclamation mark is the "Capsuleer Log-Off Timer".
The Second icon is the "Suspect Timer".
The Third is the "Weapons Timer" and this is the one in this situation that we need to be aware of. A Full description of all the different timers can be found Here On Crimewatch.
In this particular example, out of the original 60 seconds there are 22 seconds left on the timer. Whilst this timer is active you are unable to dock in a station or use a jump gate. If you're being chased this could be a problem, as you need to get to safety as soon as you can, so that you do not lose your pod. So what do you do? The answer is simple you "bounce" and by this I mean warp about from celestial to safes if you have them, until the timer expires so you can dock in a station and grab yourself one of the fantastic noob ships, in order to return to your stockpile of PVP ships that you have.
Can I go Shoot Someone Now?
Preparing For The Fight
Now what do I mean about about preparing? Here I would like you to think about the 6 P's, Prior Planning Prevents Pi$$ Poor Performance
So to summarise thus far you have got a ship fitted and ready to go, now this may sound obvious but you have to learn your fit, covering the following points.
- How far does your point/scram reach?
- What is your Optimal range on your weapons?
- Do you know what preheating your models means?
- Are you fit for Brawling or Kiting, do you know how to fly these different types of fits effectively?
- Brawling Think of this as a fist fight in close exchanging punches. So you have short range guns fit.
- Kiting Think of flying a Kite on a long piece of string. You either have long range guns or rely only on drones for your damage. You are trying to stay out of scram range (9-10k) but inside your point range (19-24k) so you can utilise your Micro Warp Drive to dictate the engagement range.
- More on this will be covered later in the guide and will be linked here.
- Do you know what sort of fights you can take? If not ask yourself twice before engaging a potential target....
- How would I fit his ship?
- Will my fit have a chance if it was fit like that? If the answer is no, Don't Take The Fight.
- Most of these latter aspects will come from experience just use your best judgement at the time. If you have the isk and don't mind losing your ship to find out, give the fight ago. If you lose, try talking to the other pilot and ask him about his fit, you will be surprised how friendly most of the EVE population is.
- Make sure your modules are laid out correctly, (I'll use an image to help explain.)

Ok so looking at the image you can see I have my point set on the F1 Key then my missiles on F2. It is set up like this so once you start to acquire a lock on your target you can activate your modules in order of priority.
- F1, Scram or Point to stop your target getting away.
- F2, Stasis Webifier (If fitted - to stop them trying to burn out of your point/scram range, also to help you dictate the engagement range.)
- F3, Any type of EWAR fitted (ECM, Tracking Disrution, Neut/NOS etc. etc..)
- F4, Weapons. (This maybe anywhere along your F1-F8 keys depending on how much EWAR, webs etc. you have, but leave them till last.)
I feel that it is best to be done in this order and believe it gives you a good Fighting chance. I will cover the rest later on detailing layout to best dissipate heat from overheating etc. but don't worry about that for now.
The Basics on Attacking
So you've been blown up and felt what it is like to die, and experienced the mass panic/excitement that you get the first few times you engage in PVP. You now know the best way of getting your POD out of harm's way once your ship has been destroyed. In this section we will cover the very basics on the aggressive side of the coin. The more detailed descriptions and explanations on all aspects involved in PVP will be either explained later on in this guide or in a link to a wiki that already explains these finer details.
As a general rule all of your defensive modules should be active all the time with the odd exception.
When you find a target and you have decided to engage you need to do a few things.
- Lock It Up.
- Make sure you are within range of your point/scram.
- Activate your offensive modules and overheat when necessary (This will be covered in a different section but to summarise: Overheat your weapons straight away and other modules as needed.) Don't Forget Your Drones.
- Either Orbit your target or Manual pilot depending on situation (Also Covered Later) making sure you are as close to your weapons optimal range not fall-off so you can apply the most damage. (Explanation Here.)
- Activate either your Shield Booster or Armour Repairer (Depending on fit) when needed, also overheat when necessary.
- Cross your fingers.
- Either pick up your loot from your targets wreck then warp off, or remember how to use your pod saver tab.
Right now lets look at these steps in a little bit more detail.....
Locking Your Target
There is so many ways to acquire a lock on your target in EVE, but not all of these are efficient. The following is what I believe to be the best and most efficient way to lock onto your target and I will explain why.
- With your mouse, left click on your target in your overview.
- Spam the left "CTRL" key on your keyboard. (Windows)
- Once you begin to lock your target start activating your modules as described in the preparation section above.
This is not just for PVP situations, it is also in my opinion the best way for locking your target in every situation E.G Logi locking up DD whilst running a incursion site.
Now to explain as to why this is the best way of locking onto your target.
- With your mouse, right clicking the target in your overview, then left clicking on lock target.
- This way is really slow.
- If the target is still Invulnerable you will have to repeat the whole process over again just to lock your target!
- Holding down your CTRL key on your keyboard, then left clicking on the target in your overview.
- If you have not disabled the option, when you keep clicking on your target you will bring up the show info box on them seriously hindering you PVP ability.
- If anyone/anything else shows up on grid and the position of your target in the overview changes you could lock the wrong target. (Actually holding down the CTRL key locks the overview. It will no longer change order when distance changes and new items on the overview are added at the bottom until you release the CTRL key. This is a pretty useful feature when you are waiting for something to land and don't know the distance it will land at. Just keep your CTRL down and hover over the empty slot at the bottom of the overview until it arrives).
- Trying to click on the actual ship in space, also trying to use the Radial Menu!
- I should not even have to explain why this is a bad idea!
Making Sure You Are In Range
Ok so lets take a look at the different types of Warp Disruption Modules, if you have never used the comparison tool This Wiki Will Show You How.
Below is an image of the modules most frequently fitted to our ships. The only ones missing are the Faction/Officer ones as these come with a nice price tag and if you fit them you should already know what they do. :-)

Now lets take a closer look at the comparison table above.
As you can see the Warp Disruptor's have a range of 20KM for all the T1 variants but 24KM for the T2. They also only have a Warp Scramble Strength of One.
The Warp Scrambler's however have a range varying from 7500M to 9000M through out the different Meta Levels. These however have a Warp Scramble Strength of Two. The Warp Scrambler also will stop Micro Warp Drives or MWD's as they are better know from functioning.
So depending on the module you fit, make sure you're in range before you make your intentions clear.
Activating your offensive modules and overheating when necessary
This should be the easy bit but some people still get it wrong. Activating your modules is never the problem as they are either on or off, the problems start when you involve overheating. To overheat you need to have trained
 Thermodynamics
| 3x | |
| 4.5M ISK | |
| IV | |
| Capacitor Management Level III, Power Grid Management Level III, Science Level IV, Power Grid Management Level IV. |
The problems start when you get caught up trying to remember everything that you need to be doing, then forget that you have overheated your modules and burn them out! So keep an eye on the level of heat damage your modules are taking whilst they are overheated, making sure you turn them off before they burn out.
So when should you overheat what? This as with most things in EVE is completely situational, but lets go over a few and I'm sure the rest will fall into place.
- Your Point/Scram Overheat these modules when you need the extra range to apply them to your target, remembering to turn the heat off once you are inside your normal range..
- Your Stasis Webifier Same as above.
- Your Weapons As soon as the fight starts!!
- Your Repper's When you need the extra boost for your repairs.
- Your Hardener's To give you a bit of extra resists if you need them or look like you're going to lose without doing this.
The list goes on and on, but hopefully from the above examples you get the rough idea.
Either Orbit your target or Manual pilot depending on situation
Ok so with this orbiting your target inside your optimals should be easy right? There are however a couple of ways to do this depending on what ship you are flying and how it is fit. So hopefully after reading the bullet points in the section above, you now understand the difference between a Brawling fit or a Kiting fit.
Now with a Brawling fit you will want to be tucked in underneath their guns if possible so orbiting at 500M away will do ok, but let me elaborate on this a little bit. If you are fighting another Brawling fit ship then they will be trying to do the same thing but if your fighting a Kiting fit, a
Imperial Navy Slicer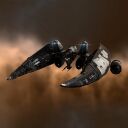
|
Imperial Navy Slicer
Faction Frigates Imperial Navy Slicer Class
|
for example you will have to do things a bit differently. In this situation the only real way (unless you're really lucky or your target is stupid) you are going to win this fight is if you can apply a Scram and a Web to the target. The reason you need the Scram instead of just a Point is to shut off their Micro Warp Drive and the Web to slow them down to something similar to your speed especially if you are armour fit.
Then the Kiting fit is flown completely differently to the brawling fit. You need to stay outside of Scram range and just inside your Point range, now if you just orbit your target they could slingshot onto you. They way I like to fly these is alternating between the Orbit and using the Keep At Range button. So that you stay where you need to be. Also a lot of manual piloting can be needed if your target is trying to slingshot onto you or to break your Point by getting out of range.
Activate either your Shield Booster or Armour Repairer
Unless you want this to be a really short fight and you like the look of your POD, I strongly recommend you do this!! Unless you're Passive Fit of course lol (Different types of fits will be covered later.)
Cross your fingers
Toes, legs and everything you don't need to pilot your ship. :-) Well you need a bit of humour in this guide or you'll fall asleep reading it and trust me QWERTY on your forehead is not a good look lol.
Either pick up your loot from your targets wreck then warp off or remember how to use your pod saver tab.
Well either Congratz or Get your pod into a station, grab a Noob ship, go get another PVP ship for your supplies and do it all over again!! Remembering of course to learn from what just happened.
- Ask yourself did you forget to do anything?
- Was there anything that you needed to change?
- The most important point is What did you learn from that last engagement?
You never stop learning in this game and as long as you learnt something from you last engagement, it's all good.
Jack of All Trades Master of None!
This is a situation that I come across far too often, especially with newer players they want to be able to jump into a Black Op's as soon as possible. They then change their mind over an over and over again and you end up having skills trained all over the place, meaning you can fly a lot of ships but how effective are you at doing this?
I am still working on this page check back soon for more updates Br00ksy (Br00ksy (talk) 00:17, 28 March 2014 (UTC))