More actions
[BOT] Updated as part of the Fitting-cide removal of fittings from the wiki. |
Add some extra details on skills to train to help with cap/rep power |
||
| Line 83: | Line 83: | ||
==Skills== | ==Skills== | ||
The following are some basic skills that will let you run a basic fit on the Bantam: | |||
[[Skills:Shields#Shield_Emission_Systems|Shield Emission Systems]] I <br> | [[Skills:Shields#Shield_Emission_Systems|Shield Emission Systems]] I <br> | ||
[[Skills:Engineering#Energy_Grid_Upgrades|Energy Grid Upgrades]] II <br> | [[Skills:Engineering#Energy_Grid_Upgrades|Energy Grid Upgrades]] II <br> | ||
| Line 88: | Line 91: | ||
[[Skills:Navigation#Afterburner|Afterburner]] I <br> | [[Skills:Navigation#Afterburner|Afterburner]] I <br> | ||
[[Skills:Armor#Hull_Upgrades|Hull Upgrades]] I | [[Skills:Armor#Hull_Upgrades|Hull Upgrades]] I | ||
To be a more effective Bantam pilot: | |||
* The most important single skill is [[Skills:Spaceship_Command#Caldari_Frigate|Caldari Frigate]]. This will both reduce shield booster's capacitor requirements and boost their effectiveness at one. | |||
* Train [[Skills:Shields#Shield_Emission_Systems|Shield Emission Systems]] to III for T2 remote shield boosters or any level to reduce their capacitor requirements. | |||
==Tactics== | ==Tactics== | ||
| Line 96: | Line 104: | ||
:Likewise, as your fleetmates start to take damage, it’s easy to overreact by activating all three repairers at once. Instead, try to activate them gradually, one by one, to see if you can spare capacitor by running just one or two. And if you need to switch targets—say, because the enemy fleet has changed their primary—again, switch gradually. | :Likewise, as your fleetmates start to take damage, it’s easy to overreact by activating all three repairers at once. Instead, try to activate them gradually, one by one, to see if you can spare capacitor by running just one or two. And if you need to switch targets—say, because the enemy fleet has changed their primary—again, switch gradually. | ||
* '''Stay moving, behind your fleetmates.''' One advantage of the Bantam is its small signature radius, which makes the ship difficult to hit. But this is only an advantage if you aren’t sitting still, so always be moving. Given this, you might be tempted to right-click your repair target and “Orbit at…” your optimal range. Keep in mind, though, that this will sometimes send your fragile frigate closer to the enemy than the damage dealers. Better, instead, to manually fly in a ring orbit behind the fleet, so that you keep range and stay out of the action. | * '''Stay moving, behind your fleetmates.''' One advantage of the Bantam is its small signature radius, which makes the ship difficult to hit. But this is only an advantage if you aren’t sitting still, so always be moving. Given this, you might be tempted to right-click your repair target and “Orbit at…” your optimal range. Keep in mind, though, that this will sometimes send your fragile frigate closer to the enemy than the damage dealers. Better, instead, to manually fly in a ring orbit behind the fleet, so that you keep range and stay out of the action. Make sure you stay near other logi pilots in case you need to repair each other - separating logi on either side of your fleet can make logi a target. | ||
==Notes== | ==Notes== | ||
Revision as of 03:58, 7 October 2021

RELATED UNI-WIKI REFERENCES
|
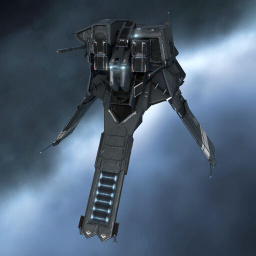
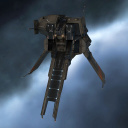
In YC114 each major empire faction, having been embroiled in a harrowing, extensive, long-term war, recognized the growing need for support and logistics functionality in their vessels during the kind of protracted interstellar warfare that might otherwise prove exhausting for its participants. In the Caldari State, this led to the redesign and redeployment of the Bantam. SHIP BONUSES
Caldari Frigate bonuses (per skill level):
Ship Attributes
|
Summary
The Bantam is the Caldari Logistics Frigate; Bantam pilots repair their fleetmates’ ships during battle. The Bantam is bonused for remote shield boosting, which matches the Caldari racial focus on shield tanking. The ship’s bonuses to remote shield booster amount, activation, and range make the underwhelming base stats of small remote shield boosters practically useful. Flying the Bantam is a great first step in learning about Logistics. Bantam pilots often go on train into heavier Tech I logistics cruisers (such as the Caldari Osprey), and then Tech II logistics ships (including the Kirin and Basilisk). But the Bantam is also effective all on its own, especially as a component of frigate or destroyer gangs, where speed is key.
One defining challenge of flying Tech I logistics frigates in general, and the Bantam in particular, is sustaining enough capacitor to run the ship. Remote repair modules are extremely cap-intensive, so the Bantam is typically fit to boost available capacitor—with cap rechargers in mid slots, capacitor control circuit rigs, and, if necessary, “Enduring” remote shield boosters (which consume less cap). Training character skills that increase capacitor will also help. It might seem that fitting the Bantam with an afterburner instead of a microwarpdrive (MWD) could spare some capacitor. But the Bantam needs to keep up with its small-ship fleetmates in order to repair them, so it usually needs an MWD. Pilots fitting the Bantam should use the in-game fitting simulation window, or an out-of-game tool like Pyfa, to match any fit to their specific skills and to gauge the ship’s cap stability. (This also means you may need to swap out modules on any pre-fit Bantam hulls that you purchase on corp contracts, to make them work with your skills.)
Compared to the Minmatar Burst—the other Tech I shield logistics frigate—the Bantam has more tank and more native capacitor, but is quite a bit slower. This makes the Bantam and Burst rough equals, but Omega characters may be asked to cross-train into the Minmatar frigate for specific doctrines.
Skills
The following are some basic skills that will let you run a basic fit on the Bantam:
Shield Emission Systems I
Energy Grid Upgrades II
Shield Upgrades I
Afterburner I
Hull Upgrades I
To be a more effective Bantam pilot:
- The most important single skill is Caldari Frigate. This will both reduce shield booster's capacitor requirements and boost their effectiveness at one.
- Train Shield Emission Systems to III for T2 remote shield boosters or any level to reduce their capacitor requirements.
Tactics
New Bantam pilots should read the Tactics section of the UniWiki’s Logistics guide, and attend a Logistics 101 practical exercise; these will provide some details on how to fly logistics frigates. Some tips on flying the Bantam:
- Watch your capacitor, and activate modules only when needed. As explained above, you may not have enough capacitor to run every module, all the time. When you first land at an engagement, you’ll need to use your MWD to position yourself relative to the fleet. But then, once you are in position, you won’t need your MWD any more. Remember to turn it off!
- Likewise, as your fleetmates start to take damage, it’s easy to overreact by activating all three repairers at once. Instead, try to activate them gradually, one by one, to see if you can spare capacitor by running just one or two. And if you need to switch targets—say, because the enemy fleet has changed their primary—again, switch gradually.
- Stay moving, behind your fleetmates. One advantage of the Bantam is its small signature radius, which makes the ship difficult to hit. But this is only an advantage if you aren’t sitting still, so always be moving. Given this, you might be tempted to right-click your repair target and “Orbit at…” your optimal range. Keep in mind, though, that this will sometimes send your fragile frigate closer to the enemy than the damage dealers. Better, instead, to manually fly in a ring orbit behind the fleet, so that you keep range and stay out of the action. Make sure you stay near other logi pilots in case you need to repair each other - separating logi on either side of your fleet can make logi a target.
Notes
While both Caldari logistics cruisers—the Osprey and the Basilisk—are designed to fly as part of a cap chain, the Bantam frigate is designed to be self-sufficient when it comes to capacitor usage.


