Archive:WHC Mapper
Registration and Logging In
Location is: https://euni.evewspace.com/. Registration Code is in the WHC.E-uni welcome mail.
To register, simply click the "Register" button and fill the fields. Your name should be exactly the same as your in-game name, otherwise you'll keep getting booted from the mapper.
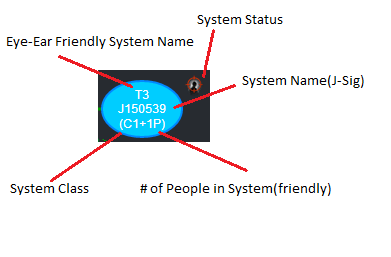
What does it all mean?
Adding a System
- Click on the system it's added to
- Click "Add System"
- Enter the details of the system/WH:
- System: J-Number (system name for kspace systems)
- Friendly Name: The short name we use (see naming systems)
- Time: End of life means less than 4 hours ("reaching the end of its natural lifetime")
- Mass Status: Normal (not yet significantly disrupted), Fist shrink (stability reduced), critical (verge of collapse)
- Type: WH id (eg K162) in the pre-existing system
- Type: WH id in the new system
(Note that one of the type fields will always be K162)
Signatures
Click details on the system and scroll down to find the signatures section. Click the pencil under the actions column next to a signature to edit it or the no entry sign to delete.
Mass Adding Signatures
- Drop probes so that they cover the whole system (deep space or combat probes are useful for this)
- Use a filter that shows only Cosmic Signatures (we don't want anomalies, ships, or structures in the mapper)
- Highlight a scan result
- Press Ctrl-A to select all results
- Press Ctrl-C to copy
- Click the tiny arrow next to "Add Signature" on the mapper File:Mass add.png
- Press Ctrl-V to paste all sigs
Adding new POS intel to the mapper
Auto mode
- The easiest way to add a new POS is in "Auto" mode. To do this, you need to be on grid with the POS
- Fill in the POS details
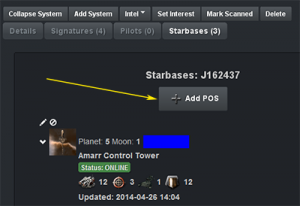
- Make sure that you are in the right system in the mapper and click the plus button in the "Starbases" tab - see image 1 on right
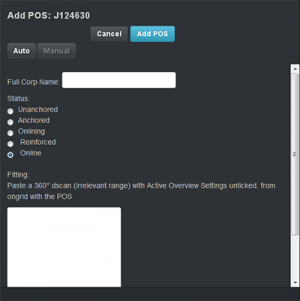
- See image 2 on right for the following steps
- The Auto/Manual selection should be on "Auto" by default - leave it at that
- Fill in the "Full Corp Name":
- Show info on the control tower, then click on the corp icon to show info on the corp that owns it
- Drag the corp icon from the show info window into any chat window input box (this will place the corp name into the box) and simply copy/paste that corp name into the "Full Corp Name" field (you can then delete it from the input box)
- You can also just type in the corp name yourself but using the two steps above can be easier (for some people) and more accurate
- Select the "Status" - we usually only add "Online" POSes but there is no rule against adding in-active (anchored) POSes
- In the "Fitting" window, paste a 360 degree d-scan (irrelevant range - as long it covers the POS and nearby moon) with "Active Overview Settings" un-ticked
- Click the blue "Add POS" button and you're done
Manual mode
- Sometimes you may get an error trying to add a POS in Auto mode, at which point you can add it manually. If this happens, it would be helpful if you file a bug report. Please include all the details you entered.
- Fill in the POS details
- Click the "Manual" button
- Fill in the "Full Corp Name" as above
- Also fill in the other info - not shown in the image - (Planet, Moon, Tower Name, Tower Type)
- Select the "Status" as above
- Fill in the "Fitting" as above but make sure you also tick the "Parse as D-Scan Paste" checkbox at the bottom (not shown in the image)
- Click the blue "Add POS" button and you're done
- Continue d-scanning for ships, wrecks etc. as you go through the above steps!
Assuming that you still have not seen any active pilots in the system, you are ready to drop your probes and start scanning down signatures
Editing a Connection
- Click on the WH id (eg K162; doesn't matter which direction)
- Change time/shrink etc.
- Click save
System destinations
When you click on a k-space connection on the mapper:
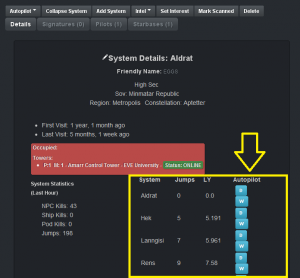
- You will see the system details
- Under the details, you will notice seeing popular trade hubs along with E-Uni HQ.
Clicking on the "D" button will set destination while clicking on the "W" will set a waypoint. Which is super handy if you went on a roam and want to make it back to a certain connection.
You can add personal k-space destinations by:
- Bringing up the mapper
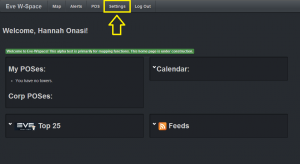
- Clicking on "Settings" tab
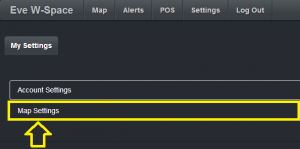
- Click on "Map settings"
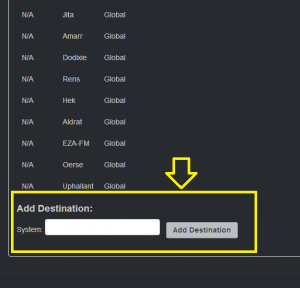
- After all the global mapper destinations you will see that you can add a k-space system for personal uses.
This will allow you to set custom personal destinations that will tell you how many jumps it will take from the current k-space connection you have clicked on. Don't worry about revealing your super secret system as only you will be able to see it. Setting global destinations requires admin rights.
