Difference between revisions of "Contested Kois City"
From EVE University Wiki
(fit mission info into templates) |
|||
| Line 1: | Line 1: | ||
| − | + | {{Missiondetails | |
| − | + | |Name= Contested Kois City | |
| + | |Level= | ||
| + | |Type= | ||
| + | |Objective= | ||
| + | |Faction= | ||
| + | |Faction1= | ||
| + | |Faction2= | ||
| + | |Faction3= | ||
| + | |Faction4= | ||
| + | |DamageToDeal= | ||
| + | |DamageToDeal1= | ||
| + | |DamageToDeal2= | ||
| + | |DamageToDeal3= | ||
| + | |DamageToDeal4= | ||
| + | |DamageToResist= | ||
| + | |DamageToResist1= | ||
| + | |DamageToResist2= | ||
| + | |DamageToResist3= | ||
| + | |DamageToResist4= | ||
| + | |WebPoint= | ||
| + | |EWAR= | ||
| + | |ShipSizeLimit= | ||
| + | |ShipSuggestion= | ||
| + | |Rewards= | ||
| + | |StandingLoss= | ||
| + | |Extra= | ||
| + | }} | ||
| − | + | {{NPCTableHead|Room 1}} | |
| + | {{NPCTableRow|Frigate|3|Taibu State Katana}} | ||
| + | {{NPCTableRow|Frigate|3|Taibu State Nagasa}} | ||
| + | {{NPCTableRow|Frigate|3|Taibu State Tachi}} | ||
| + | {{NPCTableRow|Frigate|4|Taibu State Wakizashi}} | ||
| + | {{NPCTableRow|Destroyer|1|State Shukuro Choji}} | ||
| + | {{NPCTableRow|Destroyer|5|State Tsuba}} | ||
| + | {{NPCTableRow|Cruiser|2|Taibu State Bajo}} | ||
| + | {{NPCTableRow|Cruiser|4|Taibu State Samurai}} | ||
| + | {{NPCTableRow|Battleship|1|State Shukuro Daijo}} | ||
| + | {{NPCTableRow|Battleship|3|State Shukuro Taisho}} | ||
| + | {{NPCTableRow|Agent|1|Oronata Vion|drop=1x The Kois Entry Passcard, 1x Oronata Vion's Insignia}} | ||
| + | {{NPCTableRow|Acceleration Gate|1|Acceleration Gate}} | ||
| + | |} | ||
| − | Agent on grid | + | Note: Agent on grid. When killed, drops The Kois Entry Passcard and Oronata Vion's Insignia. Key is consumed upon use. |
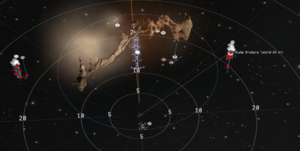
| − | + | [[File:Contested Kois City Warp in Placement.png|thumb|Room 1 - Placement of defenders]] | |
| − | Room 2 | + | {{NPCTableHead|Room 2}} |
| + | {{NPCTableRow|Frigate|2|Taibu State Katana}} | ||
| + | {{NPCTableRow|Frigate|2|Taibu State Shinai}} | ||
| + | {{NPCTableRow|Frigate|4|Taibu State Nagasa}} | ||
| + | {{NPCTableRow|Frigate|4|Taibu State Wakizashi}} | ||
| + | {{NPCTableRow|Cruiser|1|Taibu State Bajo}} | ||
| + | {{NPCTableRow|Cruiser|2|Taibu State Samurai}} | ||
| + | {{NPCTableRow|Battlecruiser|1|State Kanpaku}} | ||
| + | {{NPCTableRow|Battlecruiser|3|State Oni}} | ||
| + | {{NPCTableRow|Battleship|1|State Oshiro}} | ||
| + | {{NPCTableRow|Battleship|1|State Shukuro Daijo}} | ||
| + | {{NPCTableRow|Battleship|1|State Shukuro Taisho}} | ||
| + | {{NPCTableRow|Battleship|1|State Zen}} | ||
| + | {{NPCTableRow|Battleship|2|State Shukuro Tenno}} | ||
| + | {{NPCTableRow|Sentry|2|Caldari Cruise Missile Battery}} | ||
| + | {{NPCTableRow|Sentry|3|Tower Sentry Caldari III}} | ||
| + | {{NPCTableRow|Acceleration Gate|1|Acceleration Gate}} | ||
| + | |} | ||
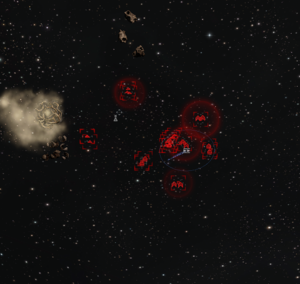
| − | [[File: | + | [[File:Contested Kois City Room 2 Placement.png|thumb|Room 2 - Placement of defenders]] |
| − | + | {{NPCTableHead|Room 3}} | |
| + | {{NPCTableRow|Frigate|1|Taibu State Katana}} | ||
| + | {{NPCTableRow|Frigate|1|Taibu State Wakizashi}} | ||
| + | {{NPCTableRow|Frigate|2|Taibu State Tachi}} | ||
| + | {{NPCTableRow|Destroyer|1|State Shukuro Kamikazi}} | ||
| + | {{NPCTableRow|Destroyer|2|State Shukuro Choji}} | ||
| + | {{NPCTableRow|Destroyer|2|State Tsuba}} | ||
| + | {{NPCTableRow|Battlecruiser|3|State Shukuro Samurai}} | ||
| + | {{NPCTableRow|Battlecruiser|6|State Shukuro Bajo}} | ||
| + | {{NPCTableRow|Battleship|1|State Shukuro Bishamon}} | ||
| + | {{NPCTableRow|Battleship|1|State Shukuro Daijo}} | ||
| + | {{NPCTableRow|Battleship|6|State Shukuro Shogun}} | ||
| + | {{NPCTableRow|Sentry|16|Caldari Cruise Missile Battery}} | ||
| + | {{NPCTableRow|Acceleration Gate|1|Acceleration Gate}} | ||
| + | |} | ||
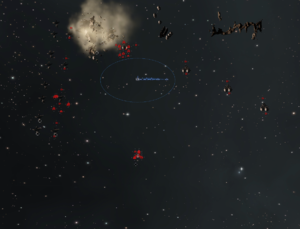
| + | [[File:Contested Kois City Room 3 Placement.png|thumb|Room 3 - Placement of defenders]] | ||
| − | Room 3 | + | {{NPCTableHead|Room 4}} |
| + | {{NPCTableRow|Destroyer|1|State Tsuba}} | ||
| + | {{NPCTableRow|Destroyer|3|State Shukuro Kamikazi}} | ||
| + | {{NPCTableRow|Destroyer|4|State Shukuro Choji}} | ||
| + | {{NPCTableRow|Battlecruiser|1|State Shukuro Samurai}} | ||
| + | {{NPCTableRow|Battlecruiser|5|State Shukuro Bajo}} | ||
| + | {{NPCTableRow|Battleship|12|State Shukuro Shogun}} | ||
| + | {{NPCTableRow|Acceleration Gate|1|Acceleration Gate}} | ||
| + | {{NPCTableRow|Structure|1|Expeditionary Storage Facility|drop=100 commodities, some minerals, some ores, Expeditionary Data}} | ||
| + | |} | ||
| − | + | {{NPCTableHead|Room 5}} | |
| + | {{NPCTableRow|Destroyer|3|State Shukuro Kamikazi}} | ||
| + | {{NPCTableRow|Destroyer|7|State Shukuro Choji}} | ||
| + | {{NPCTableRow|Battlecruiser|3|State Shukuro Samurai}} | ||
| + | {{NPCTableRow|Battlecruiser|7|State Shukuro Bajo}} | ||
| + | {{NPCTableRow|Battleship|12|State Shukuro Shogun}} | ||
| + | {{NPCTableRow|Sentry|6|Caldari Stasis Tower|ewar={{icon|web|24|Stasis webifier}}}} | ||
| + | {{NPCTableRow|Sentry|12|Caldari Cruise Missile Battery}} | ||
| + | {{NPCTableRow|Acceleration Gate|1|Acceleration Gate}} | ||
| + | |} | ||
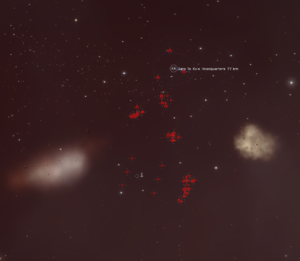
| − | [[File:Contested Kois City Room | + | [[File:Contested Kois City Room 5 Placement.png|thumb|Room 5 - Placement of defenders]] |
| − | Room 4 | + | {{NPCTableHead|Room 6}} |
| + | {{NPCTableRow|Sentry|1|Kois Central Command Station|cargo=1x Caldari Navy Warp Disruptor, 3x Caldari Navy Large Shield Booster}} | ||
| + | {{NPCTableRow|Sentry|2|Caldari Stasis Tower|ewar={{icon|web|24|Stasis webifier}}}} | ||
| + | {{NPCTableSeparator|Waves spawning upon attack on station}} | ||
| + | {{NPCTableRow|Frigate|1|Taibu State Katana}} | ||
| + | {{NPCTableRow|Frigate|4|Taibu State Wakizashi}} | ||
| + | {{NPCTableRow|Cruiser|1|State Shukuro Buke}} | ||
| + | {{NPCTableRow|Cruiser|5|State Shukuro Ashura}} | ||
| + | {{NPCTableRow|Battlecruiser|1|State Shukuro Samurai}} | ||
| + | {{NPCTableRow|Battlecruiser|8|State Shukuro Bajo}} | ||
| + | {{NPCTableRow|Battleship|18|State Shukuro Shogun}} | ||
| + | {{NPCTableSeparator|Wave 2 & 3 - each similar to Wave 1}} | ||
| + | {{NPCTableSeparator|Wave 4}} | ||
| + | {{NPCTableRow|Frigate|1|Taibu State Wakizashi}} | ||
| + | {{NPCTableRow|Cruiser|1|Taibu State Daimyo}} | ||
| + | {{NPCTableRow|Cruiser|2|Taibu State Samurai}} | ||
| + | {{NPCTableRow|Cruiser|3|Taibu State Shugo}} | ||
| + | {{NPCTableRow|Cruiser|6|Taibu State Bajo}} | ||
| + | {{NPCTableRow|Battlecruiser|1|State Shukuro Samurai}} | ||
| + | {{NPCTableRow|Battlecruiser|3|State Shukuro Bajo}} | ||
| + | {{NPCTableRow|Battleship|14|State Shukuro Shogun}} | ||
| + | {{NPCTableRow|Battleship|1|Admiral Aurobe Kois|cargo=1x Zainou 'Deadeye' Trajectory Analysis TA-703, 1x Caldari Navy Warp Scrambler, 1x Caldari Navy 425mm Railgun, 1x Caldari Navy Rapid Heavy Missile Launcher}} | ||
| + | {{NPCTableRow|Sentry|2|Caldari Stasis Tower|ewar={{icon|web|24|Stasis webifier}}}} | ||
| + | {{NPCTableRow|Sentry|4|Siege Blaster Sentry}} | ||
| + | |} | ||
| − | + | Note: Defenders spawn with low shields, full armor, low structure. Ignore enemy ships with zero velocity. | |
| − | + | {{MessageBox|Message in local upon hitting Central Command Station | |
| + | |In a last ditch effort to defend the station, the admiral himself emerges from its hangar bay. | ||
| + | |collapsed=yes}} | ||
| − | + | {{MessageBox|Message in local upon hitting Central Command Station | |
| + | |A powerful wave of energy bursts from the station in all directions, inflicting great damage on all hostile entities in the area. | ||
| + | |collapsed=yes}} | ||
| − | + | {{MessageBox|Message in local upon hitting Central Command Station | |
| + | |The Central Command Station has deployed Station Sentries, along with more Stasis Towers! | ||
| + | |collapsed=yes}} | ||
| − | + | {{MessageBox|Message in local upon hitting Central Command Station | |
| + | |A cloud of highly radioactive particles bursts from the Central Command Station's hull as it is quickly breaking apart. | ||
| + | |collapsed=yes}} | ||
| − | + | <noinclude> | |
| − | + | {{NPCTableCSS}} | |
| − | + | </noinclude> | |
| − | |||
| − | |||
| − | |||
| − | |||
| − | |||
| − | |||
| − | |||
| − | |||
| − | |||
| − | |||
| − | |||
| − | |||
| − | |||
| − | |||
| − | |||
| − | |||
| − | |||
| − | |||
| − | |||
| − | |||
| − | |||
| − | |||
| − | |||
| − | |||
| − | |||
| − | |||
| − | |||
| − | |||
| − | |||
| − | |||
| − | |||
Revision as of 07:58, 31 October 2020
Room 1
Note: Agent on grid. When killed, drops The Kois Entry Passcard and Oronata Vion's Insignia. Key is consumed upon use.
Room 2
Room 3
Room 4
Room 5
Room 6
Note: Defenders spawn with low shields, full armor, low structure. Ignore enemy ships with zero velocity.
| Message in local upon hitting Central Command Station |
|---|
| In a last ditch effort to defend the station, the admiral himself emerges from its hangar bay. |
| Message in local upon hitting Central Command Station |
|---|
| A powerful wave of energy bursts from the station in all directions, inflicting great damage on all hostile entities in the area. |
| Message in local upon hitting Central Command Station |
|---|
| The Central Command Station has deployed Station Sentries, along with more Stasis Towers! |
| Message in local upon hitting Central Command Station |
|---|
| A cloud of highly radioactive particles bursts from the Central Command Station's hull as it is quickly breaking apart. |


