|
|
| (35 intermediate revisions by 10 users not shown) |
| Line 1: |
Line 1: |
| − | {{merge|Pirate forward operating base}}
| + | '''Strongholds''' are [[Guristas Pirates]] and [[Blood Raider]] fleet staging structures in [[Gallente]], [[Caldari]] and [[Amarr Empire|Amarr]] High and Low Security systems. |
| | | | |
| − | '''Forward Operating Bases''' (FOBs) are low-power structures spawned in space by Gurista and Blood Raider NPC pirate forces in high security space as a staging point for their NPC asteroid belt mining forces and as a host structure for updated NPCs that can cause some amount of disruption in any one system. Although these are somewhat related to the lowsec and nullsec ♦ Sotiyos, they use different mechanics and principles. Both use updated ♦ (diamond) non-player character ships which are part of CCP's Artificial Intelligence (AI) revamp for selected environments.
| + | The Stronghold fleets will: |
| | + | * Launch [[NPC Mining Operations]] into asteroid belts which makes mining difficult |
| | + | * Attack [[Upwell structures]] |
| | | | |
| − | == History == | + | == The Structure == |
| − | Forward Operating Bases were first deployed with the [[https://www.eveonline.com/article/patch-notes-for-eve-online-lifeblood Lifeblood 1.0 expansion]] on the 24th of October, 2017. They were further revised in the updates of [[https://www.eveonline.com/article/patch-notes-for-december-2017-release Arms Race 1.0]] release which changed some of the response and structure mechanics, and updated once again in the [[https://www.eveonline.com/article/p435cx/patch-notes-for-february-2018-release-1-0 February 2018 1.0]] release which capped the response fleet in some ways.
| + | In the Agency window, systems with Strongholds currently show icons with the pirate logo when a player has chosen the Pirate Strongholds filter: it is further sub-filtered by the player's current region, although ones in neighboring regions can be shown as well. Guristas Pirate Strongholds are found in Gurista and Serpentis space: Blood Raider Strongholds are found in Minmatar and Amarr space. Search radius is capped to a 5 jump radius of current system. If a Stronghold was just spawned in system the Encounters tab will only illuminate when you are in the system. For each day the Stronghold exists it can be detected one jump further until it reaches the 5 jump radius. If the jumps are further than that it is due to how your routing settings are set. |
| | | | |
| − | In review, the first release (24 October 2017) of the FOBs put structures out in Gurista and Amarr high security regions. In those days players had to hunt down the FOBs in an intensive process by searching around asteroid belts from system to system looking for a clue such as ♦ Guristas Production Venture or ♦ Blood Raider Retriever: there was no other easy clue that there was an FOB in the system. Next, the hunter would launch combat probes and search for structures in deep safes, usually 40-70 AU from the main nexus of planets and star. Finally the Fleet Commander would bring in a fleet with high resists to their damage type (usually armor tanked) and attack the structure. The FOB would spawn a reinforcement fleet to counter the player fleet, roughly matching its power, and then when roughly 30% of the structure's hit points remained, a second reinforcement fleet would spawn. Finally when the structure was dead, NPC pirate miners would evacuate the system.
| + | The structure itself has close to 3.000.000 hit points of structure. It does not offer any services to players, is in low-power mode, has no resistances in structure, and has no tethering abilities. There are two kinds of models: Gurista Pirates, which is fit with two heavy energy neutralizers, a stasis webifier (modified to reach to 300km), a multispectral ECM jammer, and two signal amplifiers. The Blood Raiders have a similar fit except they use a sensor dampener in place of the ECM jammer. If a player is able to survive on grid, the structure will eventually cap itself out after roughly 10-12 minutes. Advanced users can use [[https://zkillboard.com/group/1924/ zKillboard]] to grab the typeIDs to look up the profile in-game. |
| | | | |
| − | With the Arms Race 1.0 release (5 December 2017) an escalating reinforcement model was installed (and Forward Operating Bases can be now found via the Agency window). Then, when a player or fleet warped to the structure, four to five ships (usually cruiser hulls) would spawn. Then, roughly every sixty (60) seconds, new wave of forces would spawn. Kills for the structures plummeted to rock bottom: the solo Vexor Navy Issue with a battleship sized Microwarpdrive concept and the 500MN Cerberus doctrine was also shut down because the structure could now web a player to 300km range. More recently in the February 2018 release (13 February 2018) a limit on the reinforcement fleet response meant that solo runs are doable and more options are available again: the Remote Repair Dominix doctrine (or concept) has emerged as the prevalent choice.
| + | New Diamond NPCS (♦ prefixes) respond with player presence on grid. |
| − | | |
| − | == Specifics ==
| |
| − | === The Structure ===
| |
| − | In the Agency window, systems with FOBs currently show icons with the pirate logo when a player has chosen the Pirate Strongholds filter: it is further sub-filtered by the player's current region, although ones in neighboring regions can be shown as well. Guristas FOBs are found in Gurista and Serpentis space: Blood Raider structures are found in Minmatar and Amarr space. Search radius is capped to a 5 jump radius of current system.
| |
| | | | |
| − | The structure itself has close to 3.000.000 hit points of structure. It does not offer any services to players, is in low-power mode, has no resistances in structure, and has no tethering abilities. There are two kinds of models: Gurista Pirates, which is fit with two heavy energy neutralizers, a stasis webifier (modified to reach to 300km), a multispectral ECM jammer, and two signal amplifiers. The Blood Raiders have a similar fit except they use a sensor dampener in place of the ECM jammer. If a player is able to survive on grid, the structure will eventually cap itself out after roughly 10-12 minutes. Advanced users can use [[https://zkillboard.com/group/1924/ this page]] to grab the typeIDs to look up the profile in-game. | + | == The NPCs == |
| | + | There are four specific types of diamond (♦) NPCs which are part of PvE content within EVE Online: |
| | | | |
| − | New Diamond NPCS (♦ prefixes) respond with player presence on grid.
| + | * NPC Mining Corporation miners and their response fleets<br /> |
| | + | * Roaming pirate frigate forces which loiter in belts and shoot at player structures<br /> |
| | + | * Pirate NPC mining forces with their response fleets<br /> |
| | + | * Strongholds and their NPC reinforcement fleets (somewhat similar to the ♦ Sotiyo forces)<br /> |
| | | | |
| − | === The NPCs ===
| + | Specifically, the Pirate NPC mining forces do have a hauler that warps to the Pirate Strongholds to unload cargo. If the hauler warps on grid to the Stronghold while a player force is just showing up, the hauler can call its own reinforcement fleet, separate from the Stronghold's reinforcement fleet (and the fits that both forces use are different in most cases), which can overwhelm the capsuleer fleet. The miners also have this ability if one were to warp into the asteroid belt they happen to be in. |
| − | At the present writing, there are five specific types of diamond (♦) NPCs which are part of a new revamp of PvE content within EVE Online:
| |
| | | | |
| − | 1) NPC Mining Corporation miners and their response fleets<br />
| + | When a player group comes on grid with the Stronghold, The Structure itself has a detection range of about 375km where it is waiting for a capsuleer to pass through before summoning a response based on the class of ship that has warped in as well as how many warped in at the same time. This being said three Battleships warping in as a fleet often times will pull a rather large response compared to warping each one in separately with a little time passed between the warp ins. |
| − | 2) Resource Wars NPC pirate hostiles<br />
| |
| − | 3) Roaming pirate frigate forces which loiter and shoot at player structures<br />
| |
| − | 4) Pirate NPC mining forces with their response fleets<br />
| |
| − | 5) Forward Operating Bases and their NPC reinforcement fleets (somewhat similar to the ♦ Sotiyo forces)<br />
| |
| | | | |
| − | Specifically, the Pirate NPC mining forces do have a hauler that warps to the Forward Operating Base to unload cargo. If the hauler warps on grid to the FOB while a player force is just showing up, the hauler can call its own reinforcement fleet, separate from the FOB reinforcement fleet (and the fits that both forces use are different in most cases), which can overwhelm the capsuleer fleet. Normally however, when a player group comes on grid with the FOB, the pirate NPC miners will warp off the belt(s) and sit in a safe spot. When the FOB is destroyed, the pirate siege of the system (which includes the roaming pirate frigate group and the pirate mining fleet) is terminated immediately and they vacate the system.
| + | When the Pirate Stronghold is destroyed, the pirate siege of the system (which includes the roaming pirate frigate group and the pirate mining fleet) is terminated immediately and they vacate the system. |
| | | | |
| − | While the other types of diamond NPCs are interesting topics in themselves, the focus of this article is on the FOBs themselves. When the FOBs first came out, the response fleet numbers and composition was roughly equal to what the capsuleers brought: the number of frigates (tackle), cruisers (damage, logistics and electronic warfare) and battleships (damage) varied from spawn to spawn. The first solo attempts used Vexor Navy Issues with a specific fit to tank their exact damage (EM and Thermal for Blood Raiders, Thermal for Guristas) with a second refit to a 500MN battleship sized Microwarpdrive to kite around the structure. In those days there would usually be 4-5 vessels, usually cruisers that would spawn, and once those were destroyed the structure itself was wide open to attack, aside from its EWAR and energy neutralizing capabilities. It was possible in those days to kite around the NPCs, forcing them to continously "bounce" to attempt to get in operational range, yet because of the 500MN Microwarpdrive's speed made it impossible for the NPCs to catch up. This is no longer possible because the structure can stasis webify a target out to 300km, the edge of the lock range for subcapital vessels. | + | While the other types of diamond NPCs are interesting topics in themselves, the focus of this article is on the Strongholds themselves. When the Strongholds first came out, the response fleet numbers and composition was roughly equal to what the capsuleers brought: the number of frigates (tackle), cruisers (damage, logistics and electronic warfare) and battleships (damage) varied from spawn to spawn. The first solo attempts used Vexor Navy Issues with a specific fit to tank their exact damage (EM and Thermal for Blood Raiders, Thermal for Guristas) with a second refit to a 500MN battleship sized Microwarpdrive to kite around the structure. In those days there would usually be 4-5 vessels, usually cruisers that would spawn, and once those were destroyed the structure itself was wide open to attack, aside from its EWAR and energy neutralizing capabilities. It was possible in those days to kite around the NPCs, forcing them to continuously "bounce" to attempt to get in operational range, yet because of the 500MN Microwarpdrive's speed made it impossible for the NPCs to catch up. This is no longer possible because the structure can stasis webify a target out to 300km, the edge of the lock range for subcapital vessels. |
| | | | |
| | Nowadays, a single player warping to the structure can expect 2-3 battleships with a few frigates, or a few frigates with the rest in randomly called cruisers, roughly adding up to about 10 vessels in total (such as 7 Omens and 2 Cruors). Responses to fleets warped to the structure are still in the dark as the response composition. (Capitals, at the time of writing, do not trigger NPC capital responses.) NPCs killed do not respawn; curiously however, they can be sent remote assistance (such as shield repairs) from capsuleers. They do have capacitors like conventional player ships however certain elements like afterburners and shield hardeners cannot be turned off: tackle modules, however, can be. | | Nowadays, a single player warping to the structure can expect 2-3 battleships with a few frigates, or a few frigates with the rest in randomly called cruisers, roughly adding up to about 10 vessels in total (such as 7 Omens and 2 Cruors). Responses to fleets warped to the structure are still in the dark as the response composition. (Capitals, at the time of writing, do not trigger NPC capital responses.) NPCs killed do not respawn; curiously however, they can be sent remote assistance (such as shield repairs) from capsuleers. They do have capacitors like conventional player ships however certain elements like afterburners and shield hardeners cannot be turned off: tackle modules, however, can be. |
| Line 37: |
Line 34: |
| | The new diamond NPC vessels can be combat probed and hunted with the directional scanner. This can be invaluable for operational purposes to position ships in a strategic fashion. | | The new diamond NPC vessels can be combat probed and hunted with the directional scanner. This can be invaluable for operational purposes to position ships in a strategic fashion. |
| | | | |
| − | {| class="collapsible collapsed" style="background-color:#0d2710; background-image: linear-gradient(#071709, #0d2710); border: 1px solid #287833; padding:0.2em; width:{{{width|90%}}}"
| + | == Strategy == |
| − | ! style="text-align:left" | <span style="color:#44c055">Forward Operating Base Response Vessel Fits</span>
| + | Previous headings explained strategies that worked in former iterations of the Stronghold structure system. This one will aim to be updated, hopefully, for current viable strategies. |
| − | |-
| + | |
| − | | style="font-size:90%; color:#FFFFFF" | Subject to updates in the future. Module slots empty are intentional and match the vessels in game. Some meta levels are impossible to reference: for instance, the Dread Guristas EM Ward Field has the same resistance percentage of the Tech II version, so the game may be using the Dread Guristas one instead of a Tech II. The numbers will not tell the difference, and they will match the same for comparison or reference purposes. Some fits may have notes for each specific fit.
| + | Solo operations survive off extremely high resists against the hostile damage type: against Guristas, the aim is 94% Thermal resistances, and against Blood Raider NPCs, the goal is over 90%, ideally at least 92% against both EM and Thermal damage. Fleets of players attempting these structures should also aim for the same levels. |
| | + | |
| | + | Drone ships are preferred because of ECM on Gurista sites, and energy neutralizing on Blood Raider sites. Armor is also preferred because the Reactive Armor Hardener's resistances are calculated differently (just like the Damage Control module) than other modules on the vessel, though it does stack against the Damage Control and thusly it's easier to get the resistance levels required for this job. |
| | + | |
| | + | The structure itself has a 500 HP/sec damage requirement to prevent it from repairing itself. Aim for 600 DPS solo to account for damage variations. |
| | + | |
| | + | The current trend is Remote Rep Dominixes with Micro Jump Drives for escape for a fleet setup of 3 people or more. Remote Rep (often called simply RR) doctrines don't scale very well with numbers and required high levels of pilot skill and skill points to work effectively. They also suffer from range projection problems so a player that drifts out of repair range could easily die. Players must understand cap chains and how to work with people who have been jammed or neuted out entirely. A single Nestor can be fit identically to the Dominixes and allows for combat refitting after the structure has capped itself out and hostile forces have been eradicated. |
| | + | |
| | + | Solo operations are rather pilot intensive and require compentence in combat refitting (and knowing which fits to use at any one time) with experience in higher end PvE content. |
| | + | |
| | + | == Reward == |
| | + | |
| | + | Every Fleet member who is on grid with the Stronghold when it is destroyed is awarded 29M ISK. Up to 40 Fleet members can claim the reward. |
| | | | |
| − | <font size="5">Guristas Pirates</font>
| + | You may also be able to loot: |
| | + | * Tech 1 Upwell structure modules |
| | + | * Faction Upwell structure modules |
| | + | * Blueprint Copy*: Dark Blood Standup Heavy Energy Neutralizer or a Dread Guristas Standup Variable Spectrum ECM |
| | | | |
| − | EM Ward Fields could be either Tech II or Dread Guristas. On the Blackbird, the Signal Distortion Amplifiers could be Meta 4. Otherwise, all fits match.
| + | <small>*Note: Appears as a 400,000 m<sup>3</sup> strong box, so a freighter will be needed to scoop it up.</small> |
| − | {{ShipFitting
| |
| − | | ship=Kestrel
| |
| − | | shipTypeID=602
| |
| − | | fitName=Kestrel - NPC Guristas FOB Tackle
| |
| − | | fitID=Kestrel---NPC-Guristas-FOB-Tackle
| |
| − | | low1name=Power Diagnostic System II
| |
| − | | low1typeID=1541
| |
| − | | low2name=Damage Control II
| |
| − | | low2typeID=2048
| |
| − | | mid1name=Medium Shield Extender II
| |
| − | | mid1typeID=3831
| |
| − | | mid2name=5MN Cold-Gas Enduring Microwarpdrive
| |
| − | | mid2typeID=5971
| |
| − | | mid3name=Dread Guristas Stasis Webifier
| |
| − | | mid3typeID=14266
| |
| − | | mid4name=Dread Guristas Warp Disruptor
| |
| − | | mid4typeID=14246
| |
| − | | high1name=Rocket Launcher II, Dread Guristas Inferno Rocket
| |
| − | | high1typeID=10631
| |
| − | | charge1name=Dread Guristas Inferno Rocket x1
| |
| − | | charge1typeID=27317
| |
| − | | high2name=Rocket Launcher II, Dread Guristas Inferno Rocket
| |
| − | | high2typeID=10631
| |
| − | | high3name=Rocket Launcher II, Dread Guristas Inferno Rocket
| |
| − | | high3typeID=10631
| |
| − | | high4name=Rocket Launcher II, Dread Guristas Inferno Rocket
| |
| − | | high4typeID=10631
| |
| − | | rig1name=Small Core Defense Field Extender I
| |
| − | | rig1typeID=31788
| |
| − | | rig2name=Small Core Defense Field Extender I
| |
| − | | rig2typeID=31788
| |
| − | | rig3name=Small Anti-EM Screen Reinforcer II
| |
| − | | rig3typeID=31722
| |
| − | | charge2name=open
| |
| − | | charge3name=open
| |
| − | | charge4name=open
| |
| − | | charge5name=open
| |
| − | | skills=
| |
| − | | showSKILLS=N
| |
| − | | notes=typeID 46382
| |
| − | | showNOTES=N
| |
| − | | difficulty=1
| |
| − | | warsop=D
| |
| − | | warsopReason=
| |
| − | | version=LATEST
| |
| − | | showTOC=Y
| |
| − | | shipDNA=602:1541;1:2048;1:3831;1:5971;1:14266;1:14246;1:10631;4:27317;1:31788;2:31722;1::
| |
| − | | fleetup=
| |
| − | | alphacanuse=N
| |
| − | }}{{ShipFitting
| |
| − | | ship=Caracal
| |
| − | | shipTypeID=621
| |
| − | | fitName=Caracal - NPC Guristas FOB Damage
| |
| − | | fitID=Caracal---NPC-Guristas-FOB-Damage
| |
| − | | low1name=Damage Control II
| |
| − | | low1typeID=2048
| |
| − | | low2name=Ballistic Control System II
| |
| − | | low2typeID=22291
| |
| − | | low3name=Ballistic Control System II
| |
| − | | low3typeID=22291
| |
| − | | mid1name=10MN Afterburner II
| |
| − | | mid1typeID=12058
| |
| − | | mid2name=Missile Guidance Computer II, Missile Range Script
| |
| − | | mid2typeID=35790
| |
| − | | charge1name=Missile Range Script x1
| |
| − | | charge1typeID=35794
| |
| − | | mid3name=EM Ward Field II
| |
| − | | mid3typeID=2301
| |
| − | | mid4name=Large Shield Extender II
| |
| − | | mid4typeID=3841
| |
| − | | mid5name=Large Shield Extender II
| |
| − | | mid5typeID=3841
| |
| − | | high1name=Dread Guristas Heavy Assault Missile Launcher, Dread Guristas Inferno Heavy Assault Missile
| |
| − | | high1typeID=28381
| |
| − | | charge2name=Dread Guristas Inferno Heavy Assault Missile x1
| |
| − | | charge2typeID=27407
| |
| − | | high2name=Dread Guristas Heavy Assault Missile Launcher, Dread Guristas Inferno Heavy Assault Missile
| |
| − | | high2typeID=28381
| |
| − | | high3name=Dread Guristas Heavy Assault Missile Launcher, Dread Guristas Inferno Heavy Assault Missile
| |
| − | | high3typeID=28381
| |
| − | | high4name=Dread Guristas Heavy Assault Missile Launcher, Dread Guristas Inferno Heavy Assault Missile
| |
| − | | high4typeID=28381
| |
| − | | high5name=Dread Guristas Heavy Assault Missile Launcher, Dread Guristas Inferno Heavy Assault Missile
| |
| − | | high5typeID=28381
| |
| − | | rig1name=Medium Core Defense Field Extender I
| |
| − | | rig1typeID=31790
| |
| − | | rig2name=Medium Core Defense Field Extender I
| |
| − | | rig2typeID=31790
| |
| − | | rig3name=Medium Core Defense Field Extender I
| |
| − | | rig3typeID=31790
| |
| − | | low4name=open
| |
| − | | charge3name=open
| |
| − | | charge4name=open
| |
| − | | charge5name=open
| |
| − | | drone1name=open
| |
| − | | drone2name=open
| |
| − | | drone3name=open
| |
| − | | drone4name=open
| |
| − | | drone5name=open
| |
| − | | skills=
| |
| − | | showSKILLS=N
| |
| − | | notes=typeID 46581
| |
| − | | showNOTES=N
| |
| − | | difficulty=1
| |
| − | | warsop=D
| |
| − | | warsopReason=
| |
| − | | version=LATEST
| |
| − | | showTOC=Y
| |
| − | | shipDNA=621:2048;1:22291;2:12058;1:35790;1:35794;1:2301;1:3841;2:28381;5:27407;1:31790;3::
| |
| − | | fleetup=
| |
| − | | alphacanuse=N
| |
| − | }}
| |
| − | {{ShipFitting
| |
| − | | ship=Gila
| |
| − | | shipTypeID=17715
| |
| − | | fitName=Gila - NPC Gurista FOB Damage
| |
| − | | fitID=Gila---NPC-Gurista-FOB-Damage
| |
| − | | low1name=Damage Control II
| |
| − | | low1typeID=2048
| |
| − | | low2name=Dread Guristas Ballistic Control System
| |
| − | | low2typeID=13937
| |
| − | | low3name=Dread Guristas Ballistic Control System
| |
| − | | low3typeID=13937
| |
| − | | mid1name=10MN Afterburner II
| |
| − | | mid1typeID=12058
| |
| − | | mid2name=Dread Guristas Multispectral ECM
| |
| − | | mid2typeID=20199
| |
| − | | mid3name=Dread Guristas Adaptive Invulnerability Field
| |
| − | | mid3typeID=13969
| |
| − | | mid4name=EM Ward Field II
| |
| − | | mid4typeID=2301
| |
| − | | mid5name=Large Shield Extender II
| |
| − | | mid5typeID=3841
| |
| − | | high1name=Dread Guristas Heavy Missile Launcher, Guristas Inferno Heavy Missile
| |
| − | | high1typeID=13922
| |
| − | | charge1name=Guristas Inferno Heavy Missile x1
| |
| − | | charge1typeID=27445
| |
| − | | high2name=Dread Guristas Heavy Missile Launcher, Guristas Inferno Heavy Missile
| |
| − | | high2typeID=13922
| |
| − | | high3name=Dread Guristas Heavy Missile Launcher, Guristas Inferno Heavy Missile
| |
| − | | high3typeID=13922
| |
| − | | high4name=Dread Guristas Heavy Missile Launcher, Guristas Inferno Heavy Missile
| |
| − | | high4typeID=13922
| |
| − | | rig1name=Medium Core Defense Field Extender I
| |
| − | | rig1typeID=31790
| |
| − | | rig2name=Medium Core Defense Field Extender I
| |
| − | | rig2typeID=31790
| |
| − | | rig3name=Medium Core Defense Field Extender I
| |
| − | | rig3typeID=31790
| |
| − | | mid6name=open
| |
| − | | high5name=open
| |
| − | | charge2name=open
| |
| − | | charge3name=open
| |
| − | | charge4name=open
| |
| − | | charge5name=open
| |
| − | | drone1name=open
| |
| − | | drone2name=open
| |
| − | | drone3name=open
| |
| − | | drone4name=open
| |
| − | | drone5name=open
| |
| − | | skills=
| |
| − | | showSKILLS=N
| |
| − | | notes=May have a Dread Guristas EM Ward Field and two Dread Guristas ECM modules: this is over the CPU allocation for the ship however. typeID 43624
| |
| − | | showNOTES=N
| |
| − | | difficulty=1
| |
| − | | warsop=D
| |
| − | | warsopReason=
| |
| − | | version=LATEST
| |
| − | | showTOC=Y
| |
| − | | shipDNA=17715:2048;1:13937;2:12058;1:20199;1:13969;1:2301;1:3841;1:13922;4:27445;1:31790;3::
| |
| − | | fleetup=
| |
| − | | alphacanuse=N
| |
| − | }}{{ShipFitting
| |
| − | | ship=Blackbird
| |
| − | | shipTypeID=632
| |
| − | | fitName=Blackbird - NPC Guristas FOB EWAR
| |
| − | | fitID=Blackbird---NPC-Guristas-FOB-EWAR
| |
| − | | low1name=Damage Control II
| |
| − | | low1typeID=2048
| |
| − | | low2name=Signal Distortion Amplifier II
| |
| − | | low2typeID=25563
| |
| − | | low3name=Signal Distortion Amplifier II
| |
| − | | low3typeID=25563
| |
| − | | mid1name=10MN Afterburner II
| |
| − | | mid1typeID=12058
| |
| − | | mid2name=Dread Guristas Multispectral ECM
| |
| − | | mid2typeID=20199
| |
| − | | mid3name=Dread Guristas Multispectral ECM
| |
| − | | mid3typeID=20199
| |
| − | | mid4name=EM Ward Field II
| |
| − | | mid4typeID=2301
| |
| − | | mid5name=Large Shield Extender II
| |
| − | | mid5typeID=3841
| |
| − | | mid6name=Large Shield Extender II
| |
| − | | mid6typeID=3841
| |
| − | | high1name=Dread Guristas Heavy Missile Launcher, Guristas Inferno Heavy Missile
| |
| − | | high1typeID=13922
| |
| − | | charge1name=Guristas Inferno Heavy Missile x1
| |
| − | | charge1typeID=27445
| |
| − | | high2name=Dread Guristas Heavy Missile Launcher, Guristas Inferno Heavy Missile
| |
| − | | high2typeID=13922
| |
| − | | high3name=Dread Guristas Heavy Missile Launcher, Guristas Inferno Heavy Missile
| |
| − | | high3typeID=13922
| |
| − | | rig1name=Medium Core Defense Field Extender I
| |
| − | | rig1typeID=31790
| |
| − | | rig2name=Medium Core Defense Field Extender I
| |
| − | | rig2typeID=31790
| |
| − | | rig3name=Medium Core Defense Field Extender I
| |
| − | | rig3typeID=31790
| |
| − | | high4name=open
| |
| − | | charge2name=open
| |
| − | | charge3name=open
| |
| − | | charge4name=open
| |
| − | | charge5name=open
| |
| − | | drone1name=open
| |
| − | | drone2name=open
| |
| − | | drone3name=open
| |
| − | | drone4name=open
| |
| − | | drone5name=open
| |
| − | | skills=
| |
| − | | showSKILLS=N
| |
| − | | notes=Two DG ECM Modules assumed. typeID 43625
| |
| − | | showNOTES=N
| |
| − | | difficulty=1
| |
| − | | warsop=D
| |
| − | | warsopReason=
| |
| − | | version=LATEST
| |
| − | | showTOC=Y
| |
| − | | shipDNA=632:2048;1:25563;2:12058;1:20199;2:2301;1:3841;2:13922;3:27445;1:31790;3::
| |
| − | | fleetup=
| |
| − | | alphacanuse=N
| |
| − | }}
| |
| − | {{ShipFitting
| |
| − | | ship=Osprey
| |
| − | | shipTypeID=620
| |
| − | | fitName=Osprey - NPC Guristas FOB Logistics
| |
| − | | fitID=Osprey---NPC-Guristas-FOB-Logistics
| |
| − | | low1name=Damage Control II
| |
| − | | low1typeID=2048
| |
| − | | low2name=Power Diagnostic System II
| |
| − | | low2typeID=1541
| |
| − | | low3name=Power Diagnostic System II
| |
| − | | low3typeID=1541
| |
| − | | mid1name=10MN Afterburner II
| |
| − | | mid1typeID=12058
| |
| − | | mid2name=Large Compact Pb-Acid Cap Battery
| |
| − | | mid2typeID=4871
| |
| − | | mid3name=EM Ward Field II
| |
| − | | mid3typeID=2301
| |
| − | | mid4name=Dread Guristas Adaptive Invulnerability Field
| |
| − | | mid4typeID=13969
| |
| − | | mid5name=Large Shield Extender II
| |
| − | | mid5typeID=3841
| |
| − | | high1name=Medium Asymmetric Enduring Remote Shield Booster
| |
| − | | high1typeID=8583
| |
| − | | high2name=Medium Asymmetric Enduring Remote Shield Booster
| |
| − | | high2typeID=8583
| |
| − | | high3name=Medium Asymmetric Enduring Remote Shield Booster
| |
| − | | high3typeID=8583
| |
| − | | rig1name=Medium Capacitor Control Circuit I
| |
| − | | rig1typeID=31372
| |
| − | | rig2name=Medium Core Defense Field Extender I
| |
| − | | rig2typeID=31790
| |
| − | | rig3name=Medium Core Defense Field Extender I
| |
| − | | rig3typeID=31790
| |
| − | | high4name=open
| |
| − | | high5name=open
| |
| − | | charge1name=open
| |
| − | | charge2name=open
| |
| − | | charge3name=open
| |
| − | | charge4name=open
| |
| − | | charge5name=open
| |
| − | | drone1name=open
| |
| − | | drone2name=open
| |
| − | | drone3name=open
| |
| − | | drone4name=open
| |
| − | | drone5name=open
| |
| − | | skills=
| |
| − | | showSKILLS=N
| |
| − | | notes=typeID 43623
| |
| − | | showNOTES=N
| |
| − | | difficulty=1
| |
| − | | warsop=D
| |
| − | | warsopReason=
| |
| − | | version=LATEST
| |
| − | | showTOC=Y
| |
| − | | shipDNA=620:2048;1:1541;2:12058;1:4871;1:2301;1:13969;1:3841;1:8583;3:31372;1:31790;2::
| |
| − | | fleetup=
| |
| − | | alphacanuse=N
| |
| − | }}{{ShipFitting
| |
| − | | ship=Raven
| |
| − | | shipTypeID=638
| |
| − | | fitName=Raven - NPC Guristas FOB Damage
| |
| − | | fitID=Raven---NPC-Guristas-FOB-Damage
| |
| − | | low1name=Ballistic Control System II
| |
| − | | low1typeID=22291
| |
| − | | low2name=Ballistic Control System II
| |
| − | | low2typeID=22291
| |
| − | | low3name=Signal Amplifier II
| |
| − | | low3typeID=1987
| |
| − | | low4name=Signal Amplifier II
| |
| − | | low4typeID=1987
| |
| − | | low5name=Damage Control II
| |
| − | | low5typeID=2048
| |
| − | | mid1name=500MN Quad LiF Restrained Microwarpdrive
| |
| − | | mid1typeID=35662
| |
| − | | mid2name=Dread Guristas EM Ward Field
| |
| − | | mid2typeID=13965
| |
| − | | mid3name=Dread Guristas Adaptive Invulnerability Field
| |
| − | | mid3typeID=13969
| |
| − | | mid4name=Large Shield Extender II
| |
| − | | mid4typeID=3841
| |
| − | | mid5name=Large Shield Extender II
| |
| − | | mid5typeID=3841
| |
| − | | mid6name=Sensor Booster II, Targeting Range Script
| |
| − | | mid6typeID=1952
| |
| − | | charge1name=Targeting Range Script x1
| |
| − | | charge1typeID=29009
| |
| − | | mid7name=Missile Guidance Computer II, Missile Precision Script
| |
| − | | mid7typeID=35790
| |
| − | | charge2name=Missile Precision Script x1
| |
| − | | charge2typeID=35795
| |
| − | | high1name=Heavy Energy Neutralizer II
| |
| − | | high1typeID=12271
| |
| − | | high2name=Dread Guristas Cruise Missile Launcher, Guristas Inferno Cruise Missile
| |
| − | | high2typeID=13929
| |
| − | | charge3name=Guristas Inferno Cruise Missile x1
| |
| − | | charge3typeID=27409
| |
| − | | high3name=Dread Guristas Cruise Missile Launcher, Guristas Inferno Cruise Missile
| |
| − | | high3typeID=13929
| |
| − | | high4name=Dread Guristas Cruise Missile Launcher, Guristas Inferno Cruise Missile
| |
| − | | high4typeID=13929
| |
| − | | high5name=Dread Guristas Cruise Missile Launcher, Guristas Inferno Cruise Missile
| |
| − | | high5typeID=13929
| |
| − | | high6name=Dread Guristas Cruise Missile Launcher, Guristas Inferno Cruise Missile
| |
| − | | high6typeID=13929
| |
| − | | high7name=Dread Guristas Cruise Missile Launcher, Guristas Inferno Cruise Missile
| |
| − | | high7typeID=13929
| |
| − | | rig1name=Large Core Defense Field Extender I
| |
| − | | rig1typeID=26088
| |
| − | | rig2name=Large Core Defense Field Extender I
| |
| − | | rig2typeID=26088
| |
| − | | rig3name=Large Core Defense Field Extender I
| |
| − | | rig3typeID=26088
| |
| − | | charge4name=open
| |
| − | | charge5name=open
| |
| − | | drone1name=open
| |
| − | | drone2name=open
| |
| − | | drone3name=open
| |
| − | | drone4name=open
| |
| − | | drone5name=open
| |
| − | | skills=
| |
| − | | showSKILLS=N
| |
| − | | notes=typeID 46524
| |
| − | | showNOTES=N
| |
| − | | difficulty=1
| |
| − | | warsop=D
| |
| − | | warsopReason=
| |
| − | | version=LATEST
| |
| − | | showTOC=Y
| |
| − | | shipDNA=638:22291;2:1987;2:2048;1:35662;1:13965;1:13969;1:3841;2:1952;1:29009;1:35790;1:35795;1:12271;1:13929;6:27409;1:26088;3::
| |
| − | | fleetup=
| |
| − | | alphacanuse=N
| |
| − | }}
| |
| | | | |
| − | ==Blood Raiders== | + | == Image Gallery == |
| | | | |
| − | CCP makes changes to ship mass for cruisers and below. They basically remove the mass penalty applied as part of armor plates. Mass figure used in game is in the notes. Cruor and Augoror have links (Command Bursts) as noted. The reader must account for these factors when referencing the fits. The other ships do not have the effects of links. Fits have relevant notes for each.
| + | {| class="wikitable" style="margin-left: auto; margin-right: auto; border: none;" |
| | + | |[[File:3R72_FOB_1.png|thumb|none|alt=A|The first Stronghold to be destroyed, probing it down]]||[[File:3R72_FOB_2.png|thumb|none|alt=A|On-Grid with the first Stronghold: note distance to Star]]||[[File:3R72_FOB_3.png|thumb|none|alt=A|Very first Guristas Stronghold. 1.5b lost ([https://www.reddit.com/r/Eve/comments/78s6ke/an_epilogue_of_the_new_pirate_fobs/ AAR])]]||[[File:3R72_FOB_4.png|thumb|none|alt=A|Singularity, the early RR Battleships. Different response(1)]]||[[File:3R72_FOB_5.png|thumb|none|alt=A|The Escalating Fleet Comp model (Arms Race update)]]|| |
| | + | |} |
| | | | |
| − | {{ShipFitting | + | {| class="wikitable" style="margin-left: auto; margin-right: auto; border: none;" |
| − | | ship=Cruor | + | |[[File:3R72_FOB_6.png|thumb|none|alt=A|Attempting the first solo attempt in Feb 2018 release]]||[[File:3R72_FOB_7.png|thumb|none|alt=A|First solo kill since December 5th release]]||[[File:3R72_FOB_8.png|thumb|none|alt=A|The first E-UNI successful Stronghold kill with RR Dominixes]]||[[File:3R72_FOB_9.png|thumb|none|alt=A|(Singularity) Response to a Dreadnought on field]]||[[File:3R72_FOB_10.png|thumb|none|alt=A|(Singularity) Response to a Carrier and Force Auxiliary Carrier]]|| |
| − | | shipTypeID=17926
| |
| − | | fitName=Cruor - NPC Blood Raiders FOB Tackle
| |
| − | | fitID=Cruor---NPC-Blood-Raiders-FOB-Tackle
| |
| − | | low1name=Damage Control II
| |
| − | | low1typeID=2048
| |
| − | | low2name=Nanofiber Internal Structure II
| |
| − | | low2typeID=2605
| |
| − | | low3name=Dark Blood Adaptive Nano Plating
| |
| − | | low3typeID=14003
| |
| − | | low4name=200mm Steel Plates II
| |
| − | | low4typeID=20347
| |
| − | | mid1name=Shadow Serpentis 1MN Afterburner
| |
| − | | mid1typeID=14112
| |
| − | | mid2name=Dark Blood Stasis Webifier
| |
| − | | mid2typeID=14262
| |
| − | | mid3name=Dark Blood Warp Disruptor
| |
| − | | mid3typeID=14242
| |
| − | | high1name=Dark Blood Small Energy Nosferatu
| |
| − | | high1typeID=14148
| |
| − | | high2name=Dark Blood Small Energy Nosferatu
| |
| − | | high2typeID=14148
| |
| − | | high3name=Dark Blood Small Focused Pulse Laser, Dark Blood Multifrequency S
| |
| − | | high3typeID=13811
| |
| − | | charge1name=Dark Blood Multifrequency S x1
| |
| − | | charge1typeID=21270
| |
| − | | high4name=Dark Blood Small Focused Pulse Laser, Dark Blood Multifrequency S
| |
| − | | high4typeID=13811
| |
| − | | rig1name=Small Polycarbon Engine Housing II
| |
| − | | rig1typeID=31183
| |
| − | | rig2name=Small Auxiliary Thrusters I
| |
| − | | rig2typeID=31105
| |
| − | | rig3name=Small Auxiliary Thrusters I
| |
| − | | rig3typeID=31105
| |
| − | | charge2name=open
| |
| − | | charge3name=open
| |
| − | | charge4name=open
| |
| − | | charge5name=open
| |
| − | | drone1name=open
| |
| − | | drone2name=open
| |
| − | | drone3name=open
| |
| − | | drone4name=open
| |
| − | | drone5name=open
| |
| − | | skills=
| |
| − | | showSKILLS=N
| |
| − | | notes=Mass is off. On Master: 1003000.0kg</li><li>Speed is off: On Master: 1643.828691m/sec. Not 100% sure on the rigs. </li><li>Afterburner is off: Unknown which faction afterburner they are using.</li><li>Command Ship Links with Tech II Command Bursts and mindlink with All V characters. All 3 Information, 2 Skirmish links (Rapid Deployment and Interdiction Maneuvers) and all 3 Armor links provided. </li><li></li><li>Otherwise, matches. typeID 45680
| |
| − | | showNOTES=N
| |
| − | | difficulty=1
| |
| − | | warsop=A
| |
| − | | warsopReason=
| |
| − | | version=LATEST
| |
| − | | showTOC=Y
| |
| − | | shipDNA=17926:2048;1:2605;1:14003;1:20347;1:14112;1:14262;1:14242;1:14148;2:13811;2:21270;1:31183;1:31105;2::
| |
| − | | fleetup=
| |
| − | | alphacanuse=N
| |
| − | }}{{ShipFitting
| |
| − | | ship=Omen
| |
| − | | shipTypeID=2006
| |
| − | | fitName=Omen - NPC Blood Raiders FOB Damage
| |
| − | | fitID=Omen---NPC-Blood-Raiders-FOB-Damage
| |
| − | | low1name=Dark Blood Heat Sink
| |
| − | | low1typeID=13941
| |
| − | | low2name=Dark Blood Heat Sink
| |
| − | | low2typeID=13941
| |
| − | | low3name=Damage Control II
| |
| − | | low3typeID=2048
| |
| − | | low4name=Dark Blood Energized Explosive Membrane
| |
| − | | low4typeID=14082
| |
| − | | low5name=Dark Blood Energized Kinetic Membrane
| |
| − | | low5typeID=14076
| |
| − | | low6name=1600mm Rolled Tungsten Compact Plates
| |
| − | | low6typeID=11325
| |
| − | | mid1name=10MN Afterburner II
| |
| − | | mid1typeID=12058
| |
| − | | mid2name=Tracking Computer II
| |
| − | | mid2typeID=1978
| |
| − | | mid3name=Tracking Computer II
| |
| − | | mid3typeID=1978
| |
| − | | high1name=Dark Blood Focused Medium Beam Laser, Blood Standard M
| |
| − | | high1typeID=13799
| |
| − | | charge1name=Blood Standard M x1
| |
| − | | charge1typeID=21214
| |
| − | | high2name=Dark Blood Focused Medium Beam Laser, Blood Standard M
| |
| − | | high2typeID=13799
| |
| − | | high3name=Dark Blood Focused Medium Beam Laser, Blood Standard M
| |
| − | | high3typeID=13799
| |
| − | | high4name=Dark Blood Focused Medium Beam Laser, Blood Standard M
| |
| − | | high4typeID=13799
| |
| − | | high5name=Dark Blood Focused Medium Beam Laser, Blood Standard M
| |
| − | | high5typeID=13799
| |
| − | | rig1name=Medium Anti-Thermal Pump I
| |
| − | | rig1typeID=31035
| |
| − | | rig2name=Medium Trimark Armor Pump I
| |
| − | | rig2typeID=31055
| |
| − | | rig3name=open
| |
| − | | charge2name=open
| |
| − | | charge3name=open
| |
| − | | charge4name=open
| |
| − | | charge5name=open
| |
| − | | drone1name=open | |
| − | | drone2name=open
| |
| − | | drone3name=open
| |
| − | | drone4name=open
| |
| − | | drone5name=open
| |
| − | | skills=
| |
| − | | showSKILLS=N
| |
| − | | notes=Uses old capacitor capacity (1475 GJ base) instead of 1600 GJ. As such the cap recharge time is 394.5sec.</li><li>Also the mass is off: 13000000kg by specification. </li><li>Unknown rig slot: it doesn't have any indications that it uses any engineering rigs, but could be an Ancillary Current Router, which it doesn't need.</li><li></li><li>typeID 43601
| |
| − | | showNOTES=N | |
| − | | difficulty=1 | |
| − | | warsop=A | |
| − | | warsopReason= | |
| − | | version=LATEST
| |
| − | | showTOC=Y | |
| − | | shipDNA=2006:13941;2:2048;1:14082;1:14076;1:11325;1:12058;1:1978;2:13799;5:21214;1:31035;1:31055;1:: | |
| − | | fleetup= | |
| − | | alphacanuse=N | |
| − | }}
| |
| − | {{ShipFitting
| |
| − | | ship=Ashimmu | |
| − | | shipTypeID=17922
| |
| − | | fitName=Ashimmu - NPC Blood Raiders FOB Damage
| |
| − | | fitID=Ashimmu---NPC-Blood-Raiders-FOB-Damage
| |
| − | | low1name=Damage Control II
| |
| − | | low1typeID=2048
| |
| − | | low2name=Dark Blood Energized Kinetic Membrane
| |
| − | | low2typeID=14076
| |
| − | | low3name=Dark Blood Energized Explosive Membrane
| |
| − | | low3typeID=14082
| |
| − | | low4name=Dark Blood Heat Sink
| |
| − | | low4typeID=13941
| |
| − | | low5name=Dark Blood Heat Sink
| |
| − | | low5typeID=13941
| |
| − | | low6name=1600mm Rolled Tungsten Compact Plates
| |
| − | | low6typeID=11325
| |
| − | | mid1name=10MN Afterburner II
| |
| − | | mid1typeID=12058
| |
| − | | mid2name=Medium Cap Battery II
| |
| − | | mid2typeID=3496
| |
| − | | mid3name=Medium Cap Battery II
| |
| − | | mid3typeID=3496
| |
| − | | mid4name=Dark Blood Stasis Webifier
| |
| − | | mid4typeID=14262
| |
| − | | high1name=Dark Blood Heavy Beam Laser, Blood Standard M
| |
| − | | high1typeID=13805
| |
| − | | charge1name=Blood Standard M x1
| |
| − | | charge1typeID=21214
| |
| − | | high2name=Dark Blood Heavy Beam Laser, Blood Standard M
| |
| − | | high2typeID=13805
| |
| − | | high3name=Dark Blood Heavy Beam Laser, Blood Standard M
| |
| − | | high3typeID=13805
| |
| − | | high4name=Dark Blood Medium Energy Neutralizer
| |
| − | | high4typeID=14164
| |
| − | | high5name=Dark Blood Medium Energy Neutralizer
| |
| − | | high5typeID=14164
| |
| − | | rig1name=Medium Auxiliary Thrusters I
| |
| − | | rig1typeID=31107
| |
| − | | rig2name=Medium Ancillary Current Router I
| |
| − | | rig2typeID=31360
| |
| − | | rig3name=Medium Capacitor Control Circuit I
| |
| − | | rig3typeID=31372
| |
| − | | charge2name=open
| |
| − | | charge3name=open
| |
| − | | charge4name=open
| |
| − | | charge5name=open
| |
| − | | drone1name=open | |
| − | | drone2name=open | |
| − | | drone3name=open | |
| − | | drone4name=open
| |
| − | | drone5name=open
| |
| − | | skills=
| |
| − | | showSKILLS=N
| |
| − | | notes=Mass is off: in game uses 11010000kg. typeID 43604
| |
| − | | showNOTES=N | |
| − | | difficulty=1 | |
| − | | warsop=A | |
| − | | warsopReason= | |
| − | | version=LATEST
| |
| − | | showTOC=Y
| |
| − | | shipDNA=17922:2048;1:14076;1:14082;1:13941;2:11325;1:12058;1:3496;2:14262;1:13805;3:21214;1:14164;2:31107;1:31360;1:31372;1::
| |
| − | | fleetup=
| |
| − | | alphacanuse=N
| |
| − | }}{{ShipFitting
| |
| − | | ship=Arbitrator
| |
| − | | shipTypeID=628
| |
| − | | fitName=Arbitrator - NPC Blood Raiders FOB EWAR
| |
| − | | fitID=Arbitrator---NPC-Blood-Raiders-FOB-EWAR
| |
| − | | low1name=Damage Control II
| |
| − | | low1typeID=2048
| |
| − | | low2name=Dark Blood Energized Kinetic Membrane
| |
| − | | low2typeID=14076
| |
| − | | low3name=Dark Blood Energized Explosive Membrane
| |
| − | | low3typeID=14082
| |
| − | | low4name=1600mm Rolled Tungsten Compact Plates
| |
| − | | low4typeID=11325
| |
| − | | low5name=Dark Blood Heat Sink
| |
| − | | low5typeID=13941
| |
| − | | mid1name=10MN Afterburner II
| |
| − | | mid1typeID=12058
| |
| − | | mid2name=Sensor Booster II
| |
| − | | mid2typeID=1952
| |
| − | | mid3name=Tracking Disruptor II
| |
| − | | mid3typeID=2109
| |
| − | | mid4name=Guidance Disruptor II
| |
| − | | mid4typeID=37546
| |
| − | | high1name=Dark Blood Quad Beam Laser, Dark Blood Radio M
| |
| − | | high1typeID=13819
| |
| − | | charge1name=Dark Blood Radio M x1
| |
| − | | charge1typeID=21272
| |
| − | | high2name=Dark Blood Quad Beam Laser, Dark Blood Radio M
| |
| − | | high2typeID=13819
| |
| − | | rig1name=Medium Trimark Armor Pump I
| |
| − | | rig1typeID=31055
| |
| − | | rig2name=Medium Trimark Armor Pump I
| |
| − | | rig2typeID=31055
| |
| − | | rig3name=Medium Trimark Armor Pump I
| |
| − | | rig3typeID=31055
| |
| − | | high3name=open
| |
| − | | high4name=open
| |
| − | | charge2name=open
| |
| − | | charge3name=open
| |
| − | | charge4name=open | |
| − | | charge5name=open | |
| − | | drone1name=open
| |
| − | | drone2name=open
| |
| − | | drone3name=open
| |
| − | | drone4name=open
| |
| − | | drone5name=open
| |
| − | | skills=
| |
| − | | showSKILLS=N
| |
| − | | notes=Mass modified: 11200000kg by default. Targeting Range: base was 50km when this was released before the Lifeblood expansion, now is 70km but this fit retains the older value. As such the actual lock range is 81.250km. Nothing indicated in the high slots. typeID 43603
| |
| − | | showNOTES=N | |
| − | | difficulty=1 | |
| − | | warsop=A | |
| − | | warsopReason= | |
| − | | version=LATEST | |
| − | | showTOC=Y | |
| − | | shipDNA=628:2048;1:14076;1:14082;1:11325;1:13941;1:12058;1:1952;1:2109;1:37546;1:13819;2:21272;1:31055;3::
| |
| − | | fleetup=
| |
| − | | alphacanuse=N
| |
| − | }}
| |
| − | {{ShipFitting
| |
| − | | ship=Augoror
| |
| − | | shipTypeID=625
| |
| − | | fitName=Augoror - NPC Blood Raiders FOB Logistics
| |
| − | | fitID=Augoror---NPC-Blood-Raiders-FOB-Logistics
| |
| − | | low1name=Damage Control II
| |
| − | | low1typeID=2048
| |
| − | | low2name=Dark Blood Energized Explosive Membrane
| |
| − | | low2typeID=14082
| |
| − | | low3name=Dark Blood Energized Kinetic Membrane
| |
| − | | low3typeID=14076
| |
| − | | low4name=800mm Steel Plates II
| |
| − | | low4typeID=20351
| |
| − | | low5name=Dark Blood Capacitor Power Relay
| |
| − | | low5typeID=14144
| |
| − | | mid1name=10MN Afterburner II
| |
| − | | mid1typeID=12058
| |
| − | | mid2name=Medium Cap Battery II
| |
| − | | mid2typeID=3496
| |
| − | | mid3name=Medium Compact Pb-Acid Cap Battery
| |
| − | | mid3typeID=6073
| |
| − | | high1name=Medium I-ax Enduring Remote Armor Repairer
| |
| − | | high1typeID=16441
| |
| − | | high2name=Medium I-ax Enduring Remote Armor Repairer
| |
| − | | high2typeID=16441
| |
| − | | high3name=Medium I-ax Enduring Remote Armor Repairer
| |
| − | | high3typeID=16441
| |
| − | | rig1name=Medium Anti-Thermal Pump I
| |
| − | | rig1typeID=31035
| |
| − | | rig2name=Medium Trimark Armor Pump I
| |
| − | | rig2typeID=31055
| |
| − | | rig3name=Medium Trimark Armor Pump I
| |
| − | | rig3typeID=31055
| |
| − | | high4name=open
| |
| − | | high5name=open
| |
| − | | charge1name=open
| |
| − | | charge2name=open
| |
| − | | charge3name=open
| |
| − | | charge4name=open
| |
| − | | charge5name=open
| |
| − | | drone1name=open
| |
| − | | drone2name=open
| |
| − | | drone3name=open
| |
| − | | drone4name=open
| |
| − | | drone5name=open
| |
| − | | skills=
| |
| − | | showSKILLS=N
| |
| − | | notes=Actual ship mass used is 12870000kg. Uses Command Ship links with T2 links, all 3 Armor, all 3 Information, and Skirmish ones used are Interdiction Maneuvers (not used here) and Rapid Deployment. </li><li>typeID 43602
| |
| − | | showNOTES=N | |
| − | | difficulty=1 | |
| − | | warsop=A | |
| − | | warsopReason=
| |
| − | | version=LATEST
| |
| − | | showTOC=Y
| |
| − | | shipDNA=625:2048;1:14082;1:14076;1:20351;1:14144;1:12058;1:3496;1:6073;1:16441;3:31035;1:31055;2::
| |
| − | | fleetup=
| |
| − | | alphacanuse=N
| |
| − | }}{{ShipFitting
| |
| − | | ship=Apocalypse
| |
| − | | shipTypeID=642
| |
| − | | fitName=Apocalypse - NPC Blood Raiders FOB Damage
| |
| − | | fitID=Apocalypse---NPC-Blood-Raiders-FOB-Damage
| |
| − | | low1name=Damage Control II
| |
| − | | low1typeID=2048
| |
| − | | low2name=Dark Blood Energized Kinetic Membrane
| |
| − | | low2typeID=14076
| |
| − | | low3name=Dark Blood Energized Explosive Membrane
| |
| − | | low3typeID=14082
| |
| − | | low4name=1600mm Rolled Tungsten Compact Plates
| |
| − | | low4typeID=11325
| |
| − | | low5name=1600mm Rolled Tungsten Compact Plates
| |
| − | | low5typeID=11325
| |
| − | | low6name=Dark Blood Heat Sink
| |
| − | | low6typeID=13941
| |
| − | | low7name=Dark Blood Heat Sink
| |
| − | | low7typeID=13941
| |
| − | | mid1name=500MN Cold-Gas Enduring Microwarpdrive
| |
| − | | mid1typeID=5945
| |
| − | | mid2name=Sensor Booster II
| |
| − | | mid2typeID=1952
| |
| − | | mid3name=Sensor Booster II, Targeting Range Script
| |
| − | | mid3typeID=1952
| |
| − | | charge1name=Targeting Range Script x1
| |
| − | | charge1typeID=29009
| |
| − | | mid4name=Tracking Computer II, Optimal Range Script
| |
| − | | mid4typeID=1978
| |
| − | | charge2name=Optimal Range Script x1
| |
| − | | charge2typeID=28999
| |
| − | | high1name=Dual Heavy Beam Laser II, Aurora L
| |
| − | | high1typeID=2985
| |
| − | | charge3name=Aurora L x1
| |
| − | | charge3typeID=12824
| |
| − | | high2name=Dual Heavy Beam Laser II, Aurora L
| |
| − | | high2typeID=2985
| |
| − | | high3name=Dual Heavy Beam Laser II, Aurora L
| |
| − | | high3typeID=2985
| |
| − | | high4name=Dual Heavy Beam Laser II, Aurora L
| |
| − | | high4typeID=2985
| |
| − | | high5name=Dual Heavy Beam Laser II, Aurora L
| |
| − | | high5typeID=2985
| |
| − | | high6name=Dual Heavy Beam Laser II, Aurora L
| |
| − | | high6typeID=2985
| |
| − | | high7name=Dual Heavy Beam Laser II, Aurora L
| |
| − | | high7typeID=2985
| |
| − | | high8name=Dual Heavy Beam Laser II, Aurora L
| |
| − | | high8typeID=2985
| |
| − | | rig1name=Large Capacitor Control Circuit II
| |
| − | | rig1typeID=26374
| |
| − | | rig2name=Large Trimark Armor Pump II
| |
| − | | rig2typeID=26302
| |
| − | | rig3name=open
| |
| − | | charge4name=open
| |
| − | | charge5name=open
| |
| − | | drone1name=open
| |
| − | | drone2name=open
| |
| − | | drone3name=open | |
| − | | drone4name=open
| |
| − | | drone5name=open
| |
| − | | skills=
| |
| − | | showSKILLS=N
| |
| − | | notes=Nothing explains the empty rig slot: it could be an engineering rig with no specific penalty or value that is trackable (like an Ancillary Current Rounter, or something that isn't trackable easily, like a Large Energy Discharge Elutriation) as there is no attribute value to check the activation cost of the lasers and all other values and properties match.</li><li>typeID 45056
| |
| − | | showNOTES=N
| |
| − | | difficulty=1
| |
| − | | warsop=A
| |
| − | | warsopReason=
| |
| − | | version=LATEST
| |
| − | | showTOC=Y
| |
| − | | shipDNA=642:2048;1:14076;1:14082;1:11325;2:13941;2:5945;1:1952;2:29009;1:1978;1:28999;1:2985;8:12824;1:26374;1:26302;1::
| |
| − | | fleetup=
| |
| − | | alphacanuse=N
| |
| − | }}
| |
| − | {{ShipFitting
| |
| − | | ship=Bhaalgorn
| |
| − | | shipTypeID=17920
| |
| − | | fitName=Bhaalgorn - NPC Blood Raiders FOB Damage
| |
| − | | fitID=Bhaalgorn---NPC-Blood-Raiders-FOB-Damage
| |
| − | | low1name=Damage Control II
| |
| − | | low1typeID=2048
| |
| − | | low2name=Dark Blood Energized Kinetic Membrane
| |
| − | | low2typeID=14076
| |
| − | | low3name=Dark Blood Energized Explosive Membrane
| |
| − | | low3typeID=14082
| |
| − | | low4name=1600mm Steel Plates II
| |
| − | | low4typeID=20353
| |
| − | | low5name=1600mm Steel Plates II
| |
| − | | low5typeID=20353
| |
| − | | low6name=Dark Blood Heat Sink
| |
| − | | low6typeID=13941
| |
| − | | low7name=Dark Blood Heat Sink
| |
| − | | low7typeID=13941
| |
| − | | mid1name=500MN Cold-Gas Enduring Microwarpdrive
| |
| − | | mid1typeID=5945
| |
| − | | mid2name=Large Cap Battery II
| |
| − | | mid2typeID=3504
| |
| − | | mid3name=Dark Blood Stasis Webifier
| |
| − | | mid3typeID=14262
| |
| − | | mid4name=Sensor Booster II, Targeting Range Script
| |
| − | | mid4typeID=1952
| |
| − | | charge1name=Targeting Range Script x1
| |
| − | | charge1typeID=29009
| |
| − | | mid5name=Tracking Computer II, Optimal Range Script
| |
| − | | mid5typeID=1978
| |
| − | | charge2name=Optimal Range Script x1
| |
| − | | charge2typeID=28999
| |
| − | | high1name=Tachyon Beam Laser II, Aurora L
| |
| − | | high1typeID=3065
| |
| − | | charge3name=Aurora L x1
| |
| − | | charge3typeID=12824
| |
| − | | high2name=Tachyon Beam Laser II, Aurora L
| |
| − | | high2typeID=3065
| |
| − | | high3name=Tachyon Beam Laser II, Aurora L
| |
| − | | high3typeID=3065
| |
| − | | high4name=Tachyon Beam Laser II, Aurora L
| |
| − | | high4typeID=3065
| |
| − | | high5name=Dark Blood Heavy Energy Neutralizer
| |
| − | | high5typeID=14168
| |
| − | | rig1name=Large Trimark Armor Pump II
| |
| − | | rig1typeID=26302
| |
| − | | rig2name=Large Trimark Armor Pump II
| |
| − | | rig2typeID=26302
| |
| − | | rig3name=Large Ionic Field Projector II
| |
| − | | rig3typeID=26358
| |
| − | | high6name=open
| |
| − | | high7name=open
| |
| − | | charge4name=open
| |
| − | | charge5name=open
| |
| − | | drone1name=open
| |
| − | | drone2name=open
| |
| − | | drone3name=open
| |
| − | | drone4name=open
| |
| − | | drone5name=open
| |
| − | | skills=
| |
| − | | showSKILLS=N
| |
| − | | notes=The data dump only indicates 1050 GJ neutralized, so only one heavy energy neutralizer. If it was 3, it would say 3150GJ, which it does not. </li><li>typeID 45055
| |
| − | | showNOTES=N
| |
| − | | difficulty=1
| |
| − | | warsop=A
| |
| − | | warsopReason=
| |
| − | | version=LATEST
| |
| − | | showTOC=Y
| |
| − | | shipDNA=17920:2048;1:14076;1:14082;1:20353;2:13941;2:5945;1:3504;1:14262;1:1952;1:29009;1:1978;1:28999;1:3065;4:12824;1:14168;1:26302;2:26358;1::
| |
| − | | fleetup= | |
| − | | alphacanuse=N | |
| − | }}
| |
| | |} | | |} |
| | | | |
| − | === Strategy === | + | (1) In those days the NPC reinforcement fleet used the same ships and setup as the NPC miner response fleets. Nowadays they use different setups. |
| − | Previous headings explained strategies that worked in former iterations of the FOB structure system. This one will aim to be updated, hopefully, for current viable strategies.
| + | |
| | + | ==Patch History== |
| | + | {{expansion past| |
| | | | |
| − | Solo operations survive off extremely high resists against the hostile damage type: against Guristas, the aim is 94% Thermal resistances, and against Blood Raider NPCs, the goal is over 90%, ideally at least 92% against both EM and Thermal damage. Fleets of players attempting these structures should also aim for the same levels.
| + | '''Lifeblood 1.0 Expansion - 2017-10-24''' ([https://www.eveonline.com/article/patch-notes-for-eve-online-lifeblood Lifeblood 1.0 expansion]) |
| | + | * Introduced |
| | + | * Hunt down Forward Operating Bases by searching asteroid belts from system to system |
| | + | * Response Fleet spawns to defend the Forward Operating Base when: it was attacked and at 30% Hull |
| | | | |
| − | Drone ships are preferred because of ECM on Gurista sites, and energy neutralizing on Blood Raider sites. Armor is also preferred because the Reactive Armor Hardener's resistances are calculated differently (just like the Damage Control module) than other modules on the vessel, though it does stack against the Damage Control and thusly it's easier to get the resistance levels required for this job.
| + | '''Arms Race 1.0 - 2017-12-5''' ([https://www.eveonline.com/article/patch-notes-for-december-2017-release Arms Race 1.0]) |
| | + | * Can now be found via the Agency window |
| | + | * Forward Operating Bases are equipped with 300 km webs |
| | + | * Response Fleet is reinforced with every minute |
| | | | |
| − | The structure itself has a 500 HP/sec damage requirement to prevent it from repairing itself. Aim for 600 DPS solo to account for damage variations.
| + | '''Arms Race 1.6 - 2018-02-13''' ([https://www.eveonline.com/article/p435cx/patch-notes-for-february-2018-release-1-0 Arms Race 1.6]) |
| | + | * Response Fleet size limit introduced |
| | | | |
| − | The current trend is Remote Rep Dominixes with Micro Jump Drives for escape for a fleet setup of 3 people or more. Remote Rep (often called simply RR) doctrines don't scale very well with numbers and required high levels of pilot skill and skill points to work effectively. They also suffer from range projection problems so a player that drifts out of repair range could easily die. Players must understand cap chains and how to work with people who have been jammed or neuted out entirely. A single Nestor can be fit identically to the Dominixes and allows for combat refitting after the structure has capped itself out and hostile forces have been eradicated.
| |
| | | | |
| − | Solo operations are rather pilot intensive and require compentence in combat refitting (and knowing which fits to use at any one time) with experience in higher end PvE content.
| + | '''Havoc Expansion 21.06 - 2023-11-14''' ([https://www.eveonline.com/news/view/havoc-expansion-notes Havoc: Expansion Notes]) |
| | + | * Renamed from Forward Operating Bases to Strongholds (unlisted change) |
| | + | }} |
| | | | |
| − | === Payout === | + | == External links == |
| − | The first solo kill of a Forward Operating Base since the February changes had zero payout from the DED. A more recent solo kill netted a 15.000.000 ISK payout for the operation. The maximum payout is 30.000.000 ISK per player, which is possible with 26 participants. However, adding one additional capsuleer can provide 29.629.629.63 ISK per participant - not much of a loss all together. Standard Meta 0 Tech I modules can drop from the structure; in addition, a rare chance at a strongbox which has a blueprint for either a Dark Blood Standup Heavy Energy Neutralizer (Blood Raiders) or a Dread Guristas Standup Variable Spectrum ECM module.
| + | * [https://www.youtube.com/watch?v=aPA8Ya0efCE Gurista FOB Playtrough (Highsec, Dualbox)] by JPNS (Youtube, 2023) |
| | | | |
| − | == Ending comments ==
| + | <noinclude> |
| − | The Forward Operating Bases have become more prevalent in recent days compared to the first deployment and high security space dwellers must be famailiar with the methods of taking them out easily, effectively and on a budget. It is hoped this article can help in some areas.
| + | [[Category:PvE]] |
| | + | </noinclude> |
Strongholds are Guristas Pirates and Blood Raider fleet staging structures in Gallente, Caldari and Amarr High and Low Security systems.
The Stronghold fleets will:
The Structure
In the Agency window, systems with Strongholds currently show icons with the pirate logo when a player has chosen the Pirate Strongholds filter: it is further sub-filtered by the player's current region, although ones in neighboring regions can be shown as well. Guristas Pirate Strongholds are found in Gurista and Serpentis space: Blood Raider Strongholds are found in Minmatar and Amarr space. Search radius is capped to a 5 jump radius of current system. If a Stronghold was just spawned in system the Encounters tab will only illuminate when you are in the system. For each day the Stronghold exists it can be detected one jump further until it reaches the 5 jump radius. If the jumps are further than that it is due to how your routing settings are set.
The structure itself has close to 3.000.000 hit points of structure. It does not offer any services to players, is in low-power mode, has no resistances in structure, and has no tethering abilities. There are two kinds of models: Gurista Pirates, which is fit with two heavy energy neutralizers, a stasis webifier (modified to reach to 300km), a multispectral ECM jammer, and two signal amplifiers. The Blood Raiders have a similar fit except they use a sensor dampener in place of the ECM jammer. If a player is able to survive on grid, the structure will eventually cap itself out after roughly 10-12 minutes. Advanced users can use [zKillboard] to grab the typeIDs to look up the profile in-game.
New Diamond NPCS (♦ prefixes) respond with player presence on grid.
The NPCs
There are four specific types of diamond (♦) NPCs which are part of PvE content within EVE Online:
- NPC Mining Corporation miners and their response fleets
- Roaming pirate frigate forces which loiter in belts and shoot at player structures
- Pirate NPC mining forces with their response fleets
- Strongholds and their NPC reinforcement fleets (somewhat similar to the ♦ Sotiyo forces)
Specifically, the Pirate NPC mining forces do have a hauler that warps to the Pirate Strongholds to unload cargo. If the hauler warps on grid to the Stronghold while a player force is just showing up, the hauler can call its own reinforcement fleet, separate from the Stronghold's reinforcement fleet (and the fits that both forces use are different in most cases), which can overwhelm the capsuleer fleet. The miners also have this ability if one were to warp into the asteroid belt they happen to be in.
When a player group comes on grid with the Stronghold, The Structure itself has a detection range of about 375km where it is waiting for a capsuleer to pass through before summoning a response based on the class of ship that has warped in as well as how many warped in at the same time. This being said three Battleships warping in as a fleet often times will pull a rather large response compared to warping each one in separately with a little time passed between the warp ins.
When the Pirate Stronghold is destroyed, the pirate siege of the system (which includes the roaming pirate frigate group and the pirate mining fleet) is terminated immediately and they vacate the system.
While the other types of diamond NPCs are interesting topics in themselves, the focus of this article is on the Strongholds themselves. When the Strongholds first came out, the response fleet numbers and composition was roughly equal to what the capsuleers brought: the number of frigates (tackle), cruisers (damage, logistics and electronic warfare) and battleships (damage) varied from spawn to spawn. The first solo attempts used Vexor Navy Issues with a specific fit to tank their exact damage (EM and Thermal for Blood Raiders, Thermal for Guristas) with a second refit to a 500MN battleship sized Microwarpdrive to kite around the structure. In those days there would usually be 4-5 vessels, usually cruisers that would spawn, and once those were destroyed the structure itself was wide open to attack, aside from its EWAR and energy neutralizing capabilities. It was possible in those days to kite around the NPCs, forcing them to continuously "bounce" to attempt to get in operational range, yet because of the 500MN Microwarpdrive's speed made it impossible for the NPCs to catch up. This is no longer possible because the structure can stasis webify a target out to 300km, the edge of the lock range for subcapital vessels.
Nowadays, a single player warping to the structure can expect 2-3 battleships with a few frigates, or a few frigates with the rest in randomly called cruisers, roughly adding up to about 10 vessels in total (such as 7 Omens and 2 Cruors). Responses to fleets warped to the structure are still in the dark as the response composition. (Capitals, at the time of writing, do not trigger NPC capital responses.) NPCs killed do not respawn; curiously however, they can be sent remote assistance (such as shield repairs) from capsuleers. They do have capacitors like conventional player ships however certain elements like afterburners and shield hardeners cannot be turned off: tackle modules, however, can be.
As the diamond NPCs are concerned, they can warp around to arbitrary points around the structure, anywhere on grid, to "bounce" to within a few kilometers of their intended engagement range (which contrasts the miner NPC response fleets, which do not have the warp ability as of this writing). They use capsuleer fits of varying quality. The frigates have Microwarpdrives backed with Warp Disruptors and Stasis Webifiers; the cruisers and battleships use Afterburners.
The new diamond NPC vessels can be combat probed and hunted with the directional scanner. This can be invaluable for operational purposes to position ships in a strategic fashion.
Strategy
Previous headings explained strategies that worked in former iterations of the Stronghold structure system. This one will aim to be updated, hopefully, for current viable strategies.
Solo operations survive off extremely high resists against the hostile damage type: against Guristas, the aim is 94% Thermal resistances, and against Blood Raider NPCs, the goal is over 90%, ideally at least 92% against both EM and Thermal damage. Fleets of players attempting these structures should also aim for the same levels.
Drone ships are preferred because of ECM on Gurista sites, and energy neutralizing on Blood Raider sites. Armor is also preferred because the Reactive Armor Hardener's resistances are calculated differently (just like the Damage Control module) than other modules on the vessel, though it does stack against the Damage Control and thusly it's easier to get the resistance levels required for this job.
The structure itself has a 500 HP/sec damage requirement to prevent it from repairing itself. Aim for 600 DPS solo to account for damage variations.
The current trend is Remote Rep Dominixes with Micro Jump Drives for escape for a fleet setup of 3 people or more. Remote Rep (often called simply RR) doctrines don't scale very well with numbers and required high levels of pilot skill and skill points to work effectively. They also suffer from range projection problems so a player that drifts out of repair range could easily die. Players must understand cap chains and how to work with people who have been jammed or neuted out entirely. A single Nestor can be fit identically to the Dominixes and allows for combat refitting after the structure has capped itself out and hostile forces have been eradicated.
Solo operations are rather pilot intensive and require compentence in combat refitting (and knowing which fits to use at any one time) with experience in higher end PvE content.
Reward
Every Fleet member who is on grid with the Stronghold when it is destroyed is awarded 29M ISK. Up to 40 Fleet members can claim the reward.
You may also be able to loot:
- Tech 1 Upwell structure modules
- Faction Upwell structure modules
- Blueprint Copy*: Dark Blood Standup Heavy Energy Neutralizer or a Dread Guristas Standup Variable Spectrum ECM
*Note: Appears as a 400,000 m3 strong box, so a freighter will be needed to scoop it up.
Image Gallery
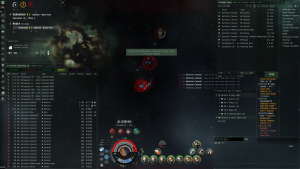
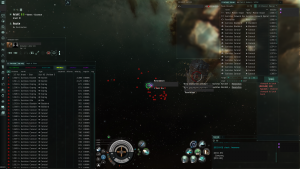
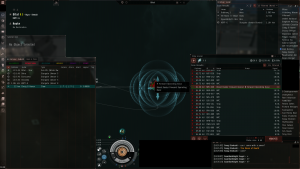 The first Stronghold to be destroyed, probing it down |
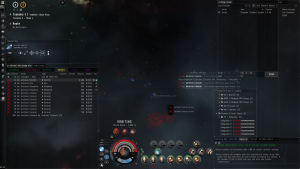
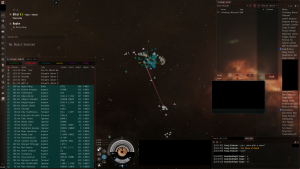 On-Grid with the first Stronghold: note distance to Star |
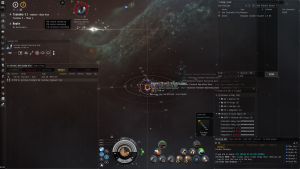
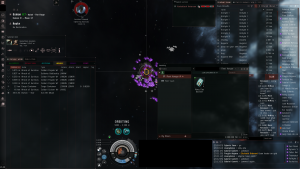 Very first Guristas Stronghold. 1.5b lost ( AAR) |
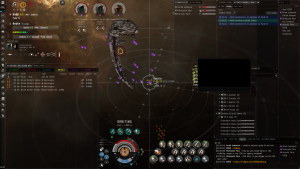
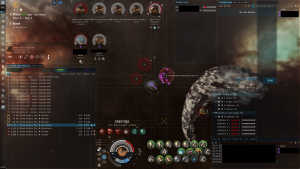 Singularity, the early RR Battleships. Different response(1) |
 The Escalating Fleet Comp model (Arms Race update) |
|
 Attempting the first solo attempt in Feb 2018 release |
 First solo kill since December 5th release |
 The first E-UNI successful Stronghold kill with RR Dominixes |
 (Singularity) Response to a Dreadnought on field |
 (Singularity) Response to a Carrier and Force Auxiliary Carrier |
|
(1) In those days the NPC reinforcement fleet used the same ships and setup as the NPC miner response fleets. Nowadays they use different setups.
Patch History
| A long, long time ago...
|
|
Lifeblood 1.0 Expansion - 2017-10-24 (Lifeblood 1.0 expansion)
- Introduced
- Hunt down Forward Operating Bases by searching asteroid belts from system to system
- Response Fleet spawns to defend the Forward Operating Base when: it was attacked and at 30% Hull
Arms Race 1.0 - 2017-12-5 (Arms Race 1.0)
- Can now be found via the Agency window
- Forward Operating Bases are equipped with 300 km webs
- Response Fleet is reinforced with every minute
Arms Race 1.6 - 2018-02-13 (Arms Race 1.6)
- Response Fleet size limit introduced
Havoc Expansion 21.06 - 2023-11-14 (Havoc: Expansion Notes)
- Renamed from Forward Operating Bases to Strongholds (unlisted change)
|
External links


