More actions
| Line 381: | Line 381: | ||
===Logistic Depot=== | ===Logistic Depot=== | ||
After activating the Spatial Rift, | After activating the Spatial Rift, pilots will land in the main area. Assuming no hostile players are present, there is no immediate danger. | ||
<br /> | <br /> | ||
| Line 389: | Line 389: | ||
|}<br /> | |}<br /> | ||
At the warp-in | At the warp-in, drop a mobile depot and bookmark it. While the timer on it is counting down, head over to the Remote Defense Grid Unit nearby: | ||
{| style="background:#350000; border:1px solid #333333; padding:0px;" | {| style="background:#350000; border:1px solid #333333; padding:0px;" | ||
| style="padding:0px;" | [[image:Icon_warning.png|56px|link=]] | | style="padding:0px;" | [[image:Icon_warning.png|56px|link=]] | ||
| style="padding:8px;" | WARNING: ''Failure of the data hacks can cause the sitewide Alarm Level to increment. At Level 5, the Alarm '''will''' trip, however it may also trip at lower levels. | | style="padding:8px;" | WARNING: ''Failure of the data hacks can cause the sitewide Alarm Level to increment. At Level 5, the Alarm '''will''' trip, however it may also trip at lower levels. Alarm trips have been confirmed at Levels 1, 2 and 3. An image of the alarm [http://wiki.eveuniversity.org/File:3P38_Standard_23.png tripping at Level 2].'' | ||
|} | |} | ||
'''CAN DIFFICULTY: 8/10 [RED HACK]'''<br /> | '''CAN DIFFICULTY: 8/10 DATA <span style="color:red">[RED HACK]</span>'''<br /> | ||
<span style="color:green">SUCCESS:</span> In the back area | <span style="color:green">SUCCESS:</span> In the back area, one Sentry Gun will be deactivated (out of three), but another one near the Tractor Beam will be activated.<br /> | ||
<span style="color:red">FAILURE:</span> Overall, the Site has a "sitewide" Alarm Level. Failing this hack (or the other one down below) will raise the Alarm Level by 1. | <span style="color:red">FAILURE:</span> Overall, the Site has a "sitewide" Alarm Level. Failing this hack (or the other one down below) will raise the Alarm Level by 1. The Alarm Level starts at 0 out of 5. At Alarm Level 4, pilots should proceed with extreme caution. At Level 5, the Sleeper Engineering Stations will spawn in each mini-room (the warpin, the Tractor Beam mini-room, and the Back Room mini-room) to generate highly dangerous damage clouds (though the alarm can also trip at lower levels). | ||
The damage clouds are extremely dangerous to frigates, and will most likely destroy them in seconds. | |||
{| class="collapsible collapsed" style="background-color:#0d2710; background-image: linear-gradient(#071709, #0d2710); border: 1px solid #287833; padding:0.2em; width:{{{width|90%}}}" | {| class="collapsible collapsed" style="background-color:#0d2710; background-image: linear-gradient(#071709, #0d2710); border: 1px solid #287833; padding:0.2em; width:{{{width|90%}}}" | ||
! style="text-align:left" | <span style="color:#44c055">Guardian Extermination Unit Damage</span> | ! style="text-align:left" | <span style="color:#44c055">Guardian Extermination Unit Damage</span> | ||
|- | |- | ||
| style="font-size:90%; color:#FFFFFF" | {{{1|When the Extermination units first spawn, they generate a smaller radius cloud. | | style="font-size:90%; color:#FFFFFF" | {{{1|When the Extermination units first spawn, they generate a smaller radius cloud. The exact radius of the small clouds is unknown. Here is the damage report of an Astero with just an Anti-Explosive armor rig and a Damage Control II equipped (near the end I dip into structure): | ||
[ 2016.06.24 14:37:38 ] (combat) <span style="color:red">'''44'''</span> <small>from</small> '''Guardian Extermination Unit'''<small> - Hits</small><br /> | [ 2016.06.24 14:37:38 ] (combat) <span style="color:red">'''44'''</span> <small>from</small> '''Guardian Extermination Unit'''<small> - Hits</small><br /> | ||
| Line 433: | Line 434: | ||
160 DPS. | 160 DPS. | ||
Once the damage clouds have enlarged, their damage radius is about 67km. Assuming roughly 63% resistances to all damage types, the expanded cloud does about 354 damage per second. Using EFT or Pyfa's calculations of Effective Hit Points per Second (EHP/s), a ship that can repair 900 EHP/s won't be destroyed right away, but will eventually be destroyed. 1200 EHP/sec is most likely sufficient to tank the clouds indefinitely. The Spatial Rift near the Calibration containers doesn't work with the Engineering Stations spawned. If you want to MJD to the back room while tanking the damage clouds, you must also account for the sentry tower damage. Output from the expanded clouds ([http://wiki.eveuniversity.org/File:3P38_Standard_13.png image for reference]): | |||
[ 2016.06.20 01:08:53 ] (combat) <span style="color:red">'''94'''</span> <small>from</small> '''Guardian Extermination Unit'''<small> - Hits</small><br /> | [ 2016.06.20 01:08:53 ] (combat) <span style="color:red">'''94'''</span> <small>from</small> '''Guardian Extermination Unit'''<small> - Hits</small><br /> | ||
| Line 466: | Line 467: | ||
|} | |} | ||
Now, head over to the three Coordinate Plotting Devices on your right | Now, head over to the three Coordinate Plotting Devices on your right: | ||
'''CAN DIFFICULTY: 7/10 [RED HACK]'''<br /> | '''CAN DIFFICULTY: 7/10 DATA <span style="color:red">[RED HACK]</span>'''<br /> | ||
<span style="color:green">SUCCESS:</span> The coordinate for the can which you just hacked is added into your cargohold | <span style="color:green">SUCCESS:</span> The coordinate for the can which you just hacked is added into your ship's cargohold (using "Open Cargo" on the can is unnecessary).<br /> | ||
<span style="color:red">FAILURE:</span> The Alarm Level may increment by 1 or trip. | <span style="color:red">FAILURE:</span> The Alarm Level may increment by 1 or trip. | ||
Obtain all three coordinates. Place those three Coordinates (there should be X, Y, and Z Coordinates) into the High Power Calibration Unit can, | Obtain all three coordinates. Place those three Coordinates (there should be X, Y, and Z Coordinates) into the High Power Calibration Unit can nearby. To do this, get within 2500m of the container (it looks like a jetcan), "Open Cargo", and place the Coordinates from your ship's cargo hold into the container. A message will appear onscreen to indicate success. | ||
Go back to the mobile depot. Remove all unnecessary cloaks, probe launchers, unnecessary cargo, and travel-fit modules and pack them into the Mobile Depot itself. Refit into one of the fits specified above for running the back room with an afterburner. | |||
<br /> | <br /> | ||
The reason | The reason for using the Spatial Rift is because simply burning 200km to the back room will not go unnoticed by the 3 Sentry Towers in the back enclave. At the distances involved, your ship's effective transversal velocity will be low. The Sentry Towers can strike out to 250km, meaning that frigates will be toasted before they even make it halfway. In fact, a frigate with a Microwarpdrive on when the initial alpha strike happens could be destroyed with a single hit. '''Also be warned:''' There is a hidden Restless Sentry Tower that can be activated by proximity to the Tractor Beam zone, right next to the Tractor Beam itself. It is activated by a ship being somewhere around 20km of that object, although the exact activation proximity is uncertain. This Sentry Tower is a duplicate of one that is activated by hacking the RDGU in the back enclave. | ||
As | As discussed earlier, the fits shown above are specific to this next room. The Afterburner is vital for keeping the ship moving, the EM and Thermal hardeners are there to resist the damage types of the Sentry Guns, and the buffer tank is there to absorb one or two or maybe 3 hits at the most. The Data Analyzer is necessary to hack the can. The guns and the drones are there to kill one of the Sentry Guns. By the way, I have used a fit for a Heron using a Medium Ancillary Shield Booster, you can try that if you want. But don't forget that your buffer is what makes your resistances worthwhile, as the damage has to sink into something: frigates and destroyers don't really have the native HP to make tanking unbuffered alpha damage worthwhile (that's a cruiser and above concept); therefore it's easy for one solid whack to alpha your ship off the site. You could also try using two Anti-Thermal Screen Reinforcers and one T2 active EM hardener, which might make it so you can fit a shield booster. Start with my fit first and see how it works for you. Experimenting with a friendly Bantam or Inquisitor pilot can help, or bring a Scythe for extra drone damage. (Use light drones. The 50m signature radius of the Towers means medium drones can hardly track them.) | ||
Having refit the ship, head to the area rightward of where you warped in. Double check that you are ready: drones in the bay, ammo in the guns, hardeners are on, Orbit distance set to 2500m (for the Orbit button on your Selected Item window) and otherwise ready. Read my directions first before you take the gate: There is a Remote Defense Grid Unit that you need to hack. It'll be just forward and to your slight left of your warpin on that spot. As soon as you land, you'll need to Orbit the Remote Defense Grid Unit (if you don't know where it is, just move any direction for now) and '''immediately''' turn on the Afterburner. | Having refit the ship, head to the area rightward of where you warped in. Double check that you are ready: drones in the bay, ammo in the guns, hardeners are on, Orbit distance set to 2500m (for the Orbit button on your Selected Item window) and otherwise ready. Read my directions first before you take the gate: There is a Remote Defense Grid Unit that you need to hack. It'll be just forward and to your slight left of your warpin on that spot. As soon as you land, you'll need to Orbit the Remote Defense Grid Unit (if you don't know where it is, just move any direction for now) and '''immediately''' turn on the Afterburner. | ||
Revision as of 05:51, 14 January 2017
A Standard Sleeper Cache is a Cosmic Signature that can be found in all areas of known space. Like other Sleeper Caches, it does not require combat, though ships with combat capability may be able to bypass or neutralize certain obstacles. The Standard Sleeper Cache in particular is much easier to run in a ship with combat capability.
Sleeper Caches can be much more difficult to fully scan down than other nearby signatures, particularly when they are found in highsec. Sleeper Caches require both a Data Analyzer and a Relic Analyzer to progress and obtain loot.
Ship Fittings
| Exercise caution when downgrading these fits, as they have been thoroughly tested. They do not need to be modified, but meta modules can be upgraded to T2 equivalents (such as hardeners) if desired. |
The following "Site Run" fits represent the standard for moving around the site, and are equipped with a Microwarpdrive, Medium Shield Extender, both Analyzers and a cargo scanner. However, these fits are only safe to use once all Sentry Towers have been neutralized, because they have no specific hardeners to resist multiple hits. The standard fit can also be used for running the hidden room.
Data Analyzer II
5MN Quad LiF Restrained Microwarpdrive
Medium Azeotropic Restrained Shield Extender
Relic Analyzer II
Type-E Enduring Cargo Scanner
Damage Control II
Micro Auxiliary Power Core I
Small Anti-EM Screen Reinforcer I
Small Anti-Thermal Screen Reinforcer I
Small Gravity Capacitor Upgrade I
'Integrated' Acolyte x3


- Not for skirmishing with Sentry Towers: it doesn't have enough resists to survive a couple of whacks from those guns.
- Drones are chosen because they are the cheapest non-T1 drones. Use as preferred.
Relic Analyzer II
Data Analyzer II
5MN Quad LiF Restrained Microwarpdrive
Damage Control II
Small Armor Repairer II
200mm Crystalline Carbonide Restrained Plates
Micro Auxiliary Power Core I
Small Gravity Capacitor Upgrade I
Small Auxiliary Nano Pump I
Small Anti-Explosive Pump I
'Integrated' Acolyte x3


- Swap an unneeded Analyzer out for a cargo scanner as needed.
The following fits are specifically for handling the two Sentry Towers in the back room while hacking the local Remote Defense Grid Unit. The hardeners can be upgraded to their T2 equivalents, along with Electron Blasters (or AutoCannons for the Magnate) if possible, as they will do more damage than railguns. The same fits are useful for shooting the Restless Sentry Tower in the middle area.
75mm Compressed Coil Gun I, Antimatter Charge S
75mm Compressed Coil Gun I, Antimatter Charge S
Data Analyzer II
Limited 'Anointed' EM Ward Field
Medium Azeotropic Restrained Shield Extender
Limited Thermal Dissipation Field I
1MN Monopropellant Enduring Afterburner
Damage Control II
Micro Auxiliary Power Core I
Small Anti-EM Screen Reinforcer I
Small Anti-Thermal Screen Reinforcer I
Small Gravity Capacitor Upgrade I
'Integrated' Acolyte x3
Antimatter Charge S x1


- As it has only buffer, proper flying is essential to avoid taking too much damage.
- Upgrade to Electron Blasters as room permits (requires
 Advanced Weapon Upgrades).
 - T2 Hardeners are optional.
125mm Light Gallium Machine Gun, Phased Plasma S
125mm Light Gallium Machine Gun, Phased Plasma S
1MN Monopropellant Enduring Afterburner
Data Analyzer II
Cap Recharger II
Armor EM Hardener II
Small Armor Repairer II
200mm Crystalline Carbonide Restrained Plates
Armor Thermal Hardener II
Small Gravity Capacitor Upgrade I
Small Auxiliary Nano Pump I
Small Anti-Explosive Pump I
'Integrated' Acolyte x3
Phased Plasma S x1


- You may elect to swap out the Data Analyzer for an extra Capacitor Recharger, this will help with repair module usage, and/or swap for T2 Energized Thermal and EM Membranes.
- Be ready to overheat the Armor Repairer.
The following fits are designed for the approach to the hidden room when the Restless Sentry Tower has not been destroyed. The Small Ancillary Shield Booster, with all 9 Navy Cap Booster 25 charges used up, does fix the entirety of 1 hit from that Tower. Destroying the Restless Sentry Tower does take longer, but it can be much safer than attempting to avoid it.
Small Ancillary Shield Booster, Navy Cap Booster 25
Medium Azeotropic Restrained Shield Extender
Limited 'Anointed' EM Ward Field
Limited Thermal Dissipation Field I
5MN Quad LiF Restrained Microwarpdrive
Damage Control II
Micro Auxiliary Power Core I
Small Anti-Thermal Screen Reinforcer I
Small Anti-EM Screen Reinforcer I
Small Gravity Capacitor Upgrade I
Navy Cap Booster 25 x9


5MN Quad LiF Restrained Microwarpdrive
Armor EM Hardener II
Micro Auxiliary Power Core I
400mm Rolled Tungsten Compact Plates
Armor Thermal Hardener II
Small Gravity Capacitor Upgrade I
Small Auxiliary Nano Pump I
Small Anti-Explosive Pump I
'Integrated' Acolyte x3


- May elect to overheat the hardeners properly: it's slower than the Heron so takes longer to get to the Rift.
An Astero would be fit very similarly to the Magnate. The Heron is faster than both the Magnate and the Astero, but speed is mostly a convenience for this site.
Quick Guide
- Scan down the site.
- Hack the Hyperfluct Generator to spawn a Spatial Rift, which functions identically to an acceleration gate. Battleships and below can activate the Rift.
- Drop the mobile depot at the warp in. Hack the Remote Defense Grid Unit. Warning: Failure of any data hack may trip the alarm: watch messages in Local. Hack slowly and cautiously. Same goes for the Coordinate Plotting containers.
- Hack the 3 Coordinate Plotting cans. Place the Coordinates into the Long Distance Calibration can. Head back to the mobile depot.
- Refit for a Afterburner fit with a buffer tank with EM and Thermal hardeners. Make sure you have guns or drones. Activate any active hardeners; take the nearby Spatial Rift.
- Upon landing, you will be aggressed by two Sentry Guns. Immediately active the afterburner and make haste towards the Remote Defense Grid Unit. Orbit it at 2500m and hack it. Shoot the remaining Tower nearby.
- Using a spiraling approach on the remaining Restless Sentry Tower in the middle near the Tractor Beam, approach it and engage it. Then head back to the Mobile Depot near the warpin.
- Refit for a Relic Analyzer, cargo scanner and MWD, then take the rift again and hack the cans at your leisure. When finished, warp out of the site and back in, or just burn the MWD back to the main area. At the main site warpin, hack the two closer storage depots, but not the farther one. Refit for both analyzers. Pick up the mobile depot.
- Look for the depot container about 30km from the warp-in beacon. Hack that can with the Relic Analyzer. Immediately loot the can and look for the Defense Alarm Unit can, and attempt to hack it. It's a rough hack, and speed counts too: be prepared to fail it. If you do fail it on the first attempt, do not attempt to repeat it. Immediately align the ship straight upwards (on the Z axis) and burn the Microwarpdrive. When you're about 120km away from the area you just were, you may turn off the MWD and wait. If you succeed in hacking the Alarm Unit, then the alarm must be triggered manually. After hacking the Pristine Depot nearby, take the Spatial Rift to the back area. Look for a structure named "Sleeper Enclave" (there are two such named objects). Lock it up, burn the MWD out of the area (straight up is fine) and aggress it with a hostile module such as a web, target painter, a gun, or the like. Drones will not work.
- Let the Engineering Stations do their thing. After about 20 seconds, a rift will spawn in the middle. Burn around the highly dangerous gas clouds (80km away from them is fine) down and between them to the rift. Take it.
- Move around a bit to activate the Remote Defense Grid Unit. Hack it.
- Immediately lock up the loot cans and cargo scan for the two most valuable ones. Burn with the MWD to one, then hack it. Then make your way over to the self-destruct can and hack it. Then go hack the second most valuable can, then the third. By then the fourth can is a bonus. Warp out and pick up your secure container after the site despawns (if used), refit to your travel fit, and make your way home.
 |
 |
 |
 |
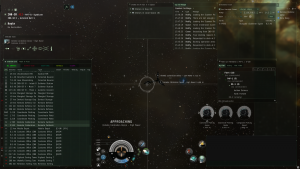 |
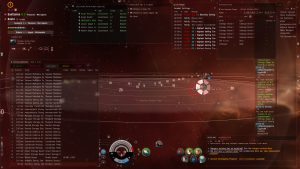
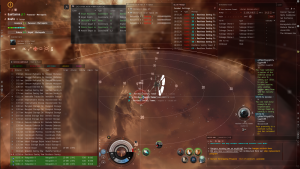
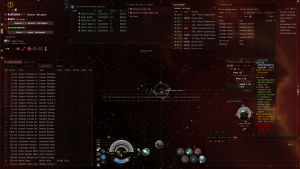
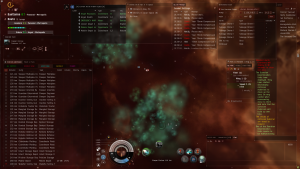
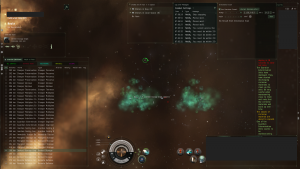
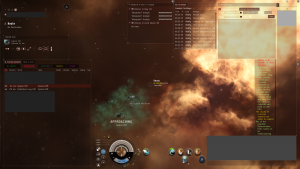
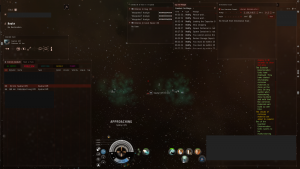
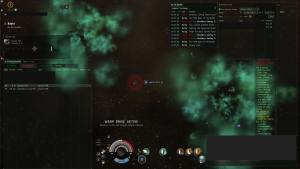
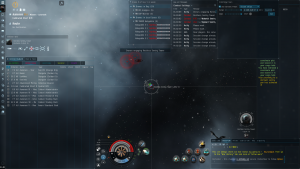
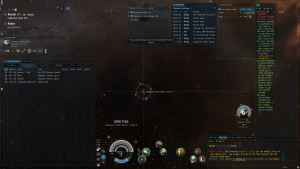
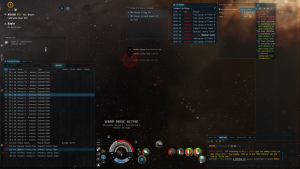
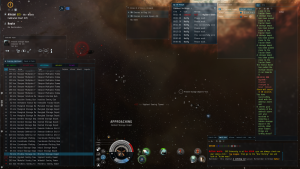
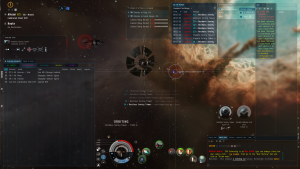
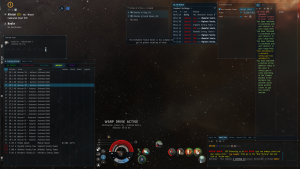
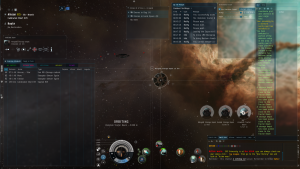
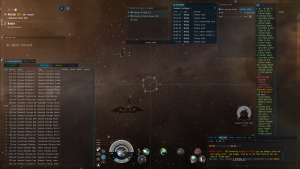
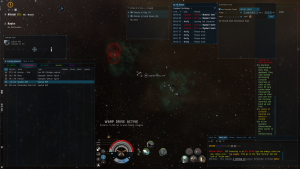
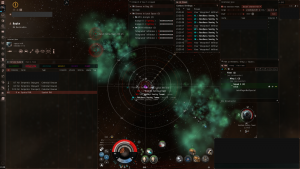
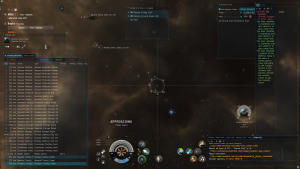
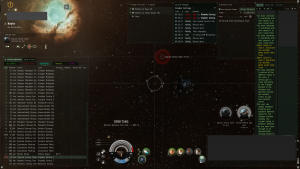
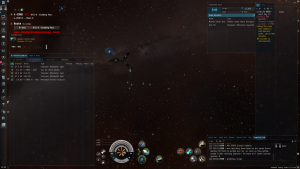
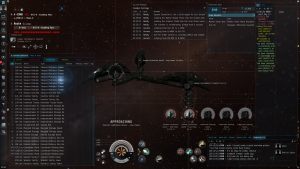
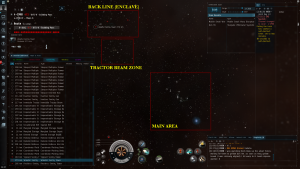
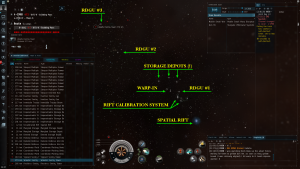
The images above quick a quick preview of the site. Examine the images below for detailed notation of most site features:
 |
 |
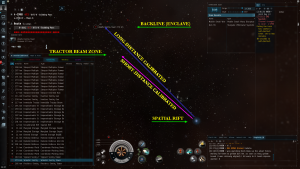 |
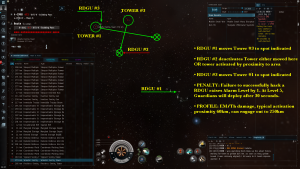 |
Walkthrough
| If the Alarm has been activated, and the Guardian Extermination Units are fully deployed, frigate pilots will have no choice but to slowboat cloaked to the Hidden Room, avoiding both damage clouds. Read the collapsed notation below for further information. |
| Running a "tripped" site |
|---|
| Your ship will land at a different Beacon, as the warpin beacon is relocated once the Alarm is tripped and the Extermination Units spawn. Your ship may take some slight damage as it warps through the damage cloud: it is not enough to warrant any concern. The new beacon ensures you won't be immediately destroyed upon entry, however be very aware of the damage cloud sizes, and stay well away from them, along with a chance of a nearby Sentry Tower.
Assuming basic T1 frigates and standard cruisers like the Stratios, the only option is to slowboat to the Spatial Rift inside the site, ignoring all else inside the site. The hazards include the large damage clouds and the distant Sentry Towers which can engage out to 250km. Cloaking is recommended to slide up to the Rift without taking long-range damage which can wreck plans without too much difficulty. The slow speed under cloak is the only annoyance but is mandatory because the Towers in the backline (and possibly one or two in the middle) require such an approach. There won't be enough time or tank to burn through 70km to the Rift. Cruisers have enough hit points and tank ability to simply burn through. Basic cruisers like the Stratios will need a dual rep fit to survive against 3 Sentry Towers, and will just have to burn through to the Hidden Room like the frigates, although MWDs are more or less a requirement and a consequence of that is increased damage taken. Any cruiser or above with greater than 1000 EHP/sec can simply ignore the damage clouds and hack the storage depots, though 1200 EHP/sec may be slightly better depending on the situation of the Sentry Towers. |
Entrance
Upon warping to the site, pilots will land in the first room, which contains one can, named the Hyperfluct Generator. The possibilities are below:
CAN DIFFICULTY: 7/10 DATA [RED HACK]
SUCCESS: A new Spatial Rift is generated, which functions identically to an Acceleration Gate. It will take you to the main area, which is called the Logistic Depot. (The site makes references to "frontline" and "backline": frontline refers to the area near the Tractor Beam, and backline refers to the area in the way back near the Sleeper Enclave structure.)
FAILURE: You have two minutes to attempt a successful hack. Should you fail to hack it successfully within that timeframe, the site will despawn. Take your time and work slowly on the first hack to make the most of the first attempt.
In dangerous space, you should look to see if the Hyperfluct Generator has been hacked already, and if the Spatial Rift is there. If it has, then someone may have been there before. If there are neutrals in system, it could also be an ambush.
Logistic Depot
After activating the Spatial Rift, pilots will land in the main area. Assuming no hostile players are present, there is no immediate danger.
| If you were looking to spoil the day of someone you don't like who got here first, you could try shooting the Sleeper Enclave in the back area to raise the Alarm Level (discussed later) to 5, for which then the Sleeper Extermination Units will spawn to create some nicely-sized AoE damage clouds which can wipe a frigate off the field handily. Then you can sneak around and go into the Hidden Room to run that yourself. |
At the warp-in, drop a mobile depot and bookmark it. While the timer on it is counting down, head over to the Remote Defense Grid Unit nearby:
| WARNING: Failure of the data hacks can cause the sitewide Alarm Level to increment. At Level 5, the Alarm will trip, however it may also trip at lower levels. Alarm trips have been confirmed at Levels 1, 2 and 3. An image of the alarm tripping at Level 2. |
CAN DIFFICULTY: 8/10 DATA [RED HACK]
SUCCESS: In the back area, one Sentry Gun will be deactivated (out of three), but another one near the Tractor Beam will be activated.
FAILURE: Overall, the Site has a "sitewide" Alarm Level. Failing this hack (or the other one down below) will raise the Alarm Level by 1. The Alarm Level starts at 0 out of 5. At Alarm Level 4, pilots should proceed with extreme caution. At Level 5, the Sleeper Engineering Stations will spawn in each mini-room (the warpin, the Tractor Beam mini-room, and the Back Room mini-room) to generate highly dangerous damage clouds (though the alarm can also trip at lower levels).
The damage clouds are extremely dangerous to frigates, and will most likely destroy them in seconds.
| Guardian Extermination Unit Damage |
|---|
| When the Extermination units first spawn, they generate a smaller radius cloud. The exact radius of the small clouds is unknown. Here is the damage report of an Astero with just an Anti-Explosive armor rig and a Damage Control II equipped (near the end I dip into structure):
[ 2016.06.24 14:37:38 ] (combat) 44 from Guardian Extermination Unit - Hits 160 DPS. Once the damage clouds have enlarged, their damage radius is about 67km. Assuming roughly 63% resistances to all damage types, the expanded cloud does about 354 damage per second. Using EFT or Pyfa's calculations of Effective Hit Points per Second (EHP/s), a ship that can repair 900 EHP/s won't be destroyed right away, but will eventually be destroyed. 1200 EHP/sec is most likely sufficient to tank the clouds indefinitely. The Spatial Rift near the Calibration containers doesn't work with the Engineering Stations spawned. If you want to MJD to the back room while tanking the damage clouds, you must also account for the sentry tower damage. Output from the expanded clouds (image for reference): [ 2016.06.20 01:08:53 ] (combat) 94 from Guardian Extermination Unit - Hits |
Now, head over to the three Coordinate Plotting Devices on your right:
CAN DIFFICULTY: 7/10 DATA [RED HACK]
SUCCESS: The coordinate for the can which you just hacked is added into your ship's cargohold (using "Open Cargo" on the can is unnecessary).
FAILURE: The Alarm Level may increment by 1 or trip.
Obtain all three coordinates. Place those three Coordinates (there should be X, Y, and Z Coordinates) into the High Power Calibration Unit can nearby. To do this, get within 2500m of the container (it looks like a jetcan), "Open Cargo", and place the Coordinates from your ship's cargo hold into the container. A message will appear onscreen to indicate success.
Go back to the mobile depot. Remove all unnecessary cloaks, probe launchers, unnecessary cargo, and travel-fit modules and pack them into the Mobile Depot itself. Refit into one of the fits specified above for running the back room with an afterburner.
The reason for using the Spatial Rift is because simply burning 200km to the back room will not go unnoticed by the 3 Sentry Towers in the back enclave. At the distances involved, your ship's effective transversal velocity will be low. The Sentry Towers can strike out to 250km, meaning that frigates will be toasted before they even make it halfway. In fact, a frigate with a Microwarpdrive on when the initial alpha strike happens could be destroyed with a single hit. Also be warned: There is a hidden Restless Sentry Tower that can be activated by proximity to the Tractor Beam zone, right next to the Tractor Beam itself. It is activated by a ship being somewhere around 20km of that object, although the exact activation proximity is uncertain. This Sentry Tower is a duplicate of one that is activated by hacking the RDGU in the back enclave.
As discussed earlier, the fits shown above are specific to this next room. The Afterburner is vital for keeping the ship moving, the EM and Thermal hardeners are there to resist the damage types of the Sentry Guns, and the buffer tank is there to absorb one or two or maybe 3 hits at the most. The Data Analyzer is necessary to hack the can. The guns and the drones are there to kill one of the Sentry Guns. By the way, I have used a fit for a Heron using a Medium Ancillary Shield Booster, you can try that if you want. But don't forget that your buffer is what makes your resistances worthwhile, as the damage has to sink into something: frigates and destroyers don't really have the native HP to make tanking unbuffered alpha damage worthwhile (that's a cruiser and above concept); therefore it's easy for one solid whack to alpha your ship off the site. You could also try using two Anti-Thermal Screen Reinforcers and one T2 active EM hardener, which might make it so you can fit a shield booster. Start with my fit first and see how it works for you. Experimenting with a friendly Bantam or Inquisitor pilot can help, or bring a Scythe for extra drone damage. (Use light drones. The 50m signature radius of the Towers means medium drones can hardly track them.)
Having refit the ship, head to the area rightward of where you warped in. Double check that you are ready: drones in the bay, ammo in the guns, hardeners are on, Orbit distance set to 2500m (for the Orbit button on your Selected Item window) and otherwise ready. Read my directions first before you take the gate: There is a Remote Defense Grid Unit that you need to hack. It'll be just forward and to your slight left of your warpin on that spot. As soon as you land, you'll need to Orbit the Remote Defense Grid Unit (if you don't know where it is, just move any direction for now) and immediately turn on the Afterburner.
| Warning: An active Microwarpdrive on a frigate can be fatal if a Sentry Tower secures a good hit. The frigate fits cannot absorb too many errant strikes: failure to keep moving and good transversal can likely be fatal. |
Does that make sense? Good. Then take the rift. Do as I have instructed above. Hack the Remote Defense Grid Unit:
CAN DIFFICULTY: 8/10 [RED HACK]
SUCCESS: One Sentry Gun (the one to your left) is deactivated, and one Sentry Gun in the Tractor Beam area is activated.
FAILURE: The Alarm Level for the site is raised by 1 for each failure or may trip. Messages in Local will inform you of your progress.
IMMEDIATELY after you land, turn on your Afterburner and orbit the Remote Defense Grid Unit. Hack it. (Speed Tip: Lock up the Sentry Tower further away and put your drones on it for now. If you don't have the skills for a T2 Data Analyzer, now is when you'll start regretting it. I know it's long train. But it's worth it.) Once you've hacked that one can, start approaching WHILE MAINTAINING SOME TRANSVERSAL to the nearby Sentry Gun. Do NOT approach it head-on: manually pilot towards it at an angle. It fires once every 15 seconds like all Sentry Guns at these sites: you can creatively overheat your hardeners if you know what you're doing. Once you get within range of your drones and weapons, start engaging it. You can orbit it safely at 7500m or whatever and it will hardly ever hit you. Its tracking is terrible, fire rate is very slow, but hits very hard when it does. Be careful.
If the Alarm Level gets a little too high, like Level 3, you should abort the hack and instead shoot all the Towers until they're all destroyed. As shown below, you may elect to swap out for a DPS ship or call someone else to whack the Towers. Cruise missiles are not a good choice because of the 50m signature radius of the Towers. To be honest, the time spent reshipping is hardly worth it versus just using the same ship: although if a corpmate is bored, it'll give them something to do.
Once the Sentry Gun is down, which can take awhile (No shields, 40% armor resistances to all 4 damage types, no resistances on structure), burn the Afterburner towards the middle area Restless Sentry Tower. Using the tactical overlay, head straight for the Tower until about 80km separates your ship from the Tower. Then begin spiraling in: if you do not spiral in, you will likely lose your ship. Shoot the Sentry Tower, you may orbit the Tower at 2000m with the afterburner off (so the guns will track) and finish it off. Then head back to the main area where the Mobile Depot was dropped.
Some other random images follow below. For damage, the Maelstrom with 1200mm Artillery was...Eh. Not the best, but given the circumstances, it was suitable enough. Not a lot of ships can project 300 DPS+ past 80km against targets with a 50m signature radius and apply full damage. A Gila wouldn't work because medium drones are terrible at tracking the Towers.
Refit for a Microwarpdrive and Relic Analyzer, as it's time to collect. Take the nearby Rift again. As you land, you'll see Impenetrable Storage Depots on your Overview (you might need to look at your ALL tab). When you get somewhere within 10km of them, they'll transform into either a Mangled, Dented, Pristine or Intact Storage Depot:
CAN DIFFICULTY: 5/10 to 9/10: [YELLOW to RED HACKS]
SUCCESS: You may collect the loot as you normally would.
FAILURE: No penalty.
You may find that a cargo scanner can be helpful to identify which cans are worth your effort. I have had junk R.A.M. or other useless stuff inside Pristine and Intact Depots (with nothing else!). Generally, the Pristine and Intact Depots have a higher chance of having the good stuff inside. When you have finished, warp out of the site, then warp back in. Remember that if the Signature for the site has disappeared from the Probe Scanner window, the site will despawn in two minutes if you cloak up or warp out and fail to ensure that a ship is inside and active (not cloaked) inside the site to hold it open. You could burn the Microwarpdrive 200km or so but it takes less effort to just warp out and back in.
So. It's now time for Phase 2 of this site. Assuming you're back at your mobile depot, you'll want to cargo scan the nearby containers: there's usually 2 Mangled and 1 Dented Storage Depot. Here's a critical detail: The farther Mangled Storage Depot (at about 26km versus 10-14km for the other two relative to the warp-in beacon) is very important. Don't hack it yet.
From here forward, read the directions first before you do them, as the particulars for this next part are extremely important. You have a good chance of loosing your ship from this stage onwards. If you don't feel confident, you can skip it, for your first or second run of this type of site, it's understandable. But on your third you should definitely try it.
Hack the two closer Storage Depots if they have good things inside them. Before you hack the farther one, you will want to get ready with a fit for both analyzers and a Microwarpdrive. Remember that all fits have been provided up above which are suitable for this next stage.
| The warp-in beacon for the site is moved once the alarm has been tripped. |
Hack the "farther" Mangled Storage Depot:
CAN DIFFICULTY: 6/10 [YELLOW HACK]
SUCCESS: A Defense Alarm Unit can is spawned, and the loot can be scooped up.
FAILURE: No penalty.
Immediately loot the container, and quickly look for a Defense Alarm Unit can. Hack it with the Data Analyzer:
CAN DIFFICULTY: 10/10 [RED HACK]
SUCCESS: The alarm is suppressed. You are rewarded with a Pristine Storage Depot. I've had junk in this container, but confident and capable hackers in in T1 exploration ships can break the alarm unit.
FAILURE: No penalty immediately, however the alarm is not suppressed. You should not attempt a second try. The alarm messages in Local will inform you of what's happening. Sleeper Engineering Stations will spawn in each room area which do massive DPS once fully expanded.
| Do not spend too much time on the Defense Alarm Unit hack. Experienced hackers may be able to squeeze in a second attempt but those inexperienced with these high class hacks should not attempt a second try. The important thing is to save the ship first. |
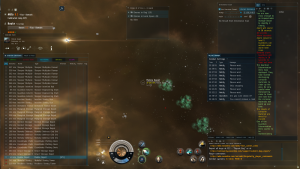
This hack is very difficult. It's worth a shot, but don't take it too seriously if you can't. Don't spend too much time on the hack: just work quickly, and if it appears to be buried behind some impenetrable fortress of hostile nodes, you should just abort and move on. The most pressing matter is to GTFO if the System Core is not easily accessed within 20 seconds. MAKE SURE TO WATCH LOCAL: messages will tell you when bad things are about to happen.
 |
 |
 |
 |
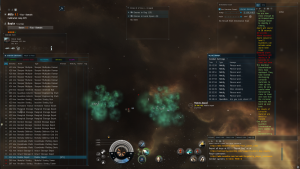
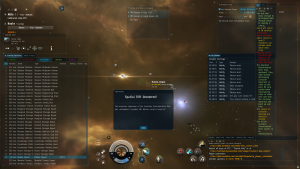
If you fail your first attempt, or feel you've taken too long (more than 25 seconds), immediately manually direct your ship straight upwards. Activate the Microwarpdrive, and if you think you ran a little late that time, you may want to overheat. The idea is to get as far away from that area as possible: you should be at least 100km by the time the Sleeper Engineer Stations spawn: your goal is to be already at least 30km away burning the MWD when it says "Elevated alarm. Guardians will deploy in 30 seconds to clear out area."
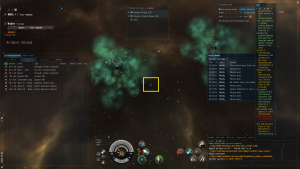
Wait for the middle area Station to blow up. The detonation activates a rift which takes you to the Hidden Room, as one Guardian Extermination Unit malfunctions, failing to expand its gas clouds to full size. Getting there without getting blown up is the next part. If you still haven't hacked the Mangled Storage Depot yet, go ahead and do that, then get to this point.
Let's get to the next phase. Your main concern is not getting plastered by the gas clouds, and the one lone Sentry Tower. Again, read the text below first, understand it, then execute it.
Burn to an area high and between the two gas clouds. Avoid the lone Sentry Tower in the distance: I approach high and at a strong angle to the Rift so the Tower never concerns me.
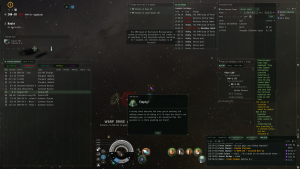
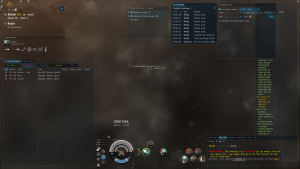
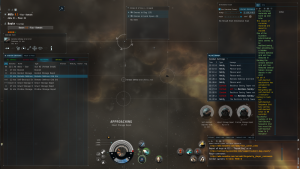
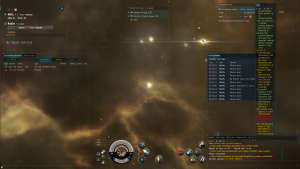
Now that you've taken the rift, you're safe for now. Don't move yet. If flying a Magnate, then you'll have to run blind on the containers as a cargo scanner is not an option. (This is why the Heron is still ideal for this site.) Read the instructions first, understand what you need to do, then conduct them according to the instructions, as time is limited, and the hacks are difficult.
 |
 |
 |
 |
Move around for a little bit (orbit the beacon at 7500m if it doesn't show up right away): a Remote Defense Grid Unit will activate:
CAN DIFFICULTY: 8/10 [RED HACK]
SUCCESS: Three Storage Depots are generated. Shortly therafter, a Self-Destruct Reset container is generated, along with a fourth Storage Depot. A timer is set for the room to self-destruct all containers in 180 seconds (3 minutes).
FAILURE: No penalty.
Here's what you'll want to do: Immediately lock up all four loot cans. Quickly identify the one with the most valuable loot in it (Magnate pilots: just pick an Intact or Pristine Depot at random):
CAN DIFFICULTY: 6/10 - 8/10 [YELLOW / RED HACK]
SUCCESS: The loot is up for collection.
FAILURE: No penalty.
Go ahead and hack it, loot it, then approach the Self-Destruct can. Hack it:
CAN DIFFICULTY: 8/10 [RED HACK]
SUCCESS: The count-down timer for this little room is reset to 3 minutes.
FAILURE: The count-down timer is set to 60 seconds, in which case the containers will self-destruct unless you can attempt a successful re-hack within 60 seconds, in which case it will be set back to 3 minutes.
You can only hack the Self-Destruct can once, meaning the timer can only be reset once. Make haste towards the other two cans which you inspected and identified as having valuable cargo. When the clock is up, the cans not hacked detonate like they normally do in a regular data/relic site, but you do not incur any damage when that happens. If you cut it close, don't feel bad -- this is basically the bonus room -- I have had the cans blow up while I was just finished with a can and pressed the Open Cargo button, but before I could loot it. D'oh.
Warp out of the site to your bounce point. If you had your Mobile Depot left behind in the area where the toxic gas clouds are, just wait for the site to despawn entirely, which it should do shortly (2-3 minutes). Collect all mobile depots and jetcans, if any, refit to your travel fit, and enjoy your victory. Don't get plastered at a gatecamp. If you are in nullsec or lowsec, you may have additional precautions or escorts to undertake: smart gankers or lowsec ambushers know that exploration vessels can sometimes be packed full of costly cargo, and are extremely fragile. Don't be that guy.
Your next quest is the Superior Sleeper Cache. Hunt on!
Bonus Section: The Tractor Beam Approach
Back when you put the X, Y and Z Coordinates into the High Power Calibration Device, you may have observed the Low Power Calibration Device. Once you put the coordinates into one can and calibrate the rift, you may not re-calibrate it for the other type. Leave the Remote Defense Grid Unit alone near your warp in area: you won't want to hack it, because you'll need it to forcibly trip the alarm for the Hidden Room.
| This approach exposes your vessel to long-range damage, which by reason of the range, means your transversal relative to the distant Sentry Towers is low. Although the Sentry Towers may not aggress, they also might and frigates have a very hard time tanking the damage. |
When you have calibrated the rift using the Low Power can, this sends you over to the middle area by the tractor beam. When you land, you will be presented with a couple of challenges:
- A hidden Sentry Tower will spawn and aggress you. (Activation proximity roughly 15km.)
- You will also be aggressed by Sentry Towers (I was aggressed by two out of three) in the back room. While you can avoid damage from the nearby one, your low effective angular velocity for the far distant ones means you will eat damage from them.
- The nearby Remote Defense Grid Unit.
- The Tractor Beam "can".
I do not recommend this approach. I tested this approach using a Heron, and overloaded EM and Thermal hardeners. I could last about a minute or so before I was forced to warp out. By orbiting the nearby Remote Defense Grid Unit, you won't take damage from the nearby Sentry Tower, but the distant ones hit hard. If you have a buddy with a T1 Logistics Frigate (use T2 remote shield boosters, and use T2 hardeners on the "patient" ship: look for at least 250 EHP/sec capacitor stable, which will handle two Towers. Three will be too much), you should be able to sustain the damage just fine with an oversized buffer fit against two distant Sentry Towers. Without the buffer, you'll probably get alpha'd off the field in short order. That dual-rep Omen seen above tanked 187.5 EHP/sec omni-damage, 220 EHP/sec against EM & Thermal (50/50 split) damage.
But let's pretend you want to try this approach anyways. Quickly orbit the nearby Remote Defense Grid Unit. You must work quickly. Hack it:
CAN DIFFICULTY: 7/10 [RED HACK]
SUCCESS: The nearby Sentry Gun near you is switched off.
FAILURE: No penalty for failure. I attempted multiple attempts until I was forced to warp out and nothing happened when I deliberately failed the can.
You may need to warp out. If so, then warp back to the site, repair your overloaded hardeners if needed, fix up, and go back again. Hack the Tractor Beam Unit. Doing so will pull all of the loot cans to an area just forward of the Tractor Beam. Having recently switched off the Remote Defense Grid Unit near the Tractor Beam, that should mean (it was so in my case) the Sentry Guns in the back room enclave should not aggress while you loot the cans.
CAN DIFFICULTY: 7/10 [RED HACK]
SUCCESS: The Tractor Beam will commence teleporting storage depots to your area near you.
FAILURE: No penalty for failure.
Now, the Hidden Room. In the first approach outlined earlier, you get aggressed by one Sentry Tower on your approach. In this method, you are aggressed by two. This makes it more dangerous than the first. Obviously you'll need to trigger the Sleeper Guardians to activate the hidden rift. There are two approaches, as earlier:
- 1. Hacking the farther Mangled Storage Depot, and successfully hacking the Alarm Unit. I have succeeded in hacking this can only a few times. If this happens, then go to the nearby Remote Defense Grid Unit which should not have been hacked earlier (as doing so provides no particular benefit here), and deliberately fail it repeatedly. Just activate the Data Analyzer II on the can, wait a couple of seconds, then just abort the hack by closing the hacking window. Be ready to move far away, as before, with your Microwarpdrive.
- Aggressing the Sleeper Enclave structure in the back area (which is probably extremely dangerous to approach considering 3 Sentry Towers present back there with this method) will trigger the alarm level directly to 5. Any hostile module works, like a web. Drones will not.
- 2. Failing the Alarm Unit hack. In this case, just burn out with the Microwarpdrive, and wait for things to develop.
It is considerably more dangerous than using the first method, but it's important for me to discuss this method for those who are curious.

