POS Warfare
Contents
Overview
- overview that explains the basic concepts behind attacking or defending a POS
- general information about POS configuration belongs on a different page
- specific POS setups should be put on a separate "Example POS Setups(?)" page to keep page length down
- Configuration - we're only going to list very basic attributes for modules and only for the base version, so things like (m3, kg, powergrid used, CPU used, and hitpoints).
- faction versions of POS towers/modules are not covered here
- *briefly* describe a few of the different types of POS setups, with links to the Example POS Setups page for specifics, bulleted list will be plenty, mention only the major styles such as deathstar, etc
- basic setup of a POS should be covered on a POS Setup page
- null-sec POS tower elements like cyno jammers, etc are not covered at the moment
Defense
The primary form of defense for a POS is its force field (or shield bubble). If you are inside the shield bubble, you cannot be targeted or damaged, nor can you target/damage anyone outside it. You can either enter the bubble based on standings or be given the starbase password to slip through the shield. Even if your POS access is based on access, you must set a password on the tower. The bubble will exist until the tower is destroyed (shield and structure of the control tower) or taken offline.
There are two caveats to the invulnerability when you are inside the POS shield however. The first is that someone who is inside with you may decide to bump you out of the shield radius. The second is that the shield radius tends to warp and wobble, slowly moving inward and outward a few hundred meters. Therefore you should always stay at least 3-5 kilometers inside the bubble and not hang near the edges. Anyone else inside the bubble should be instructed to not move their ship around as it can bump pilots away from the tower. Use of the "keep at range" functionality of the selected item window may be useful for short AFKs to keep you within range of the tower or arrays.
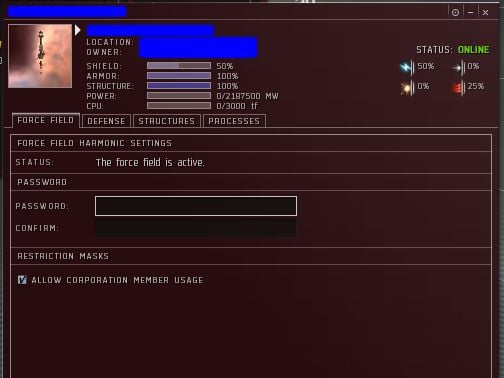
All towers have shield, armor and structure like normal ships, but during the initial phase of combat only the shield comes into play. In addition, each tower as a set of basic shield resists that vary according to the race/faction of the tower. One of the resists will be 50%, one will be 25%, and the other two resists will be at zero. You should add shield hardeners to shore up your weaker resists.
As a general rule of thumb, "array" structures are mounted inside the POS bubble while "battery" structures are mounted outside the POS bubble. If the module targets enemy ships then it must be outside the POS bubble. This is enforced by the game when you attempt to anchor the structure at the POS location. Batteries should be evenly spaced around the POS bubble in order to avoid dead spots or weaknesses in coverage. In general, "battery" structures will need to be at least 5km away from the edge of the POS shield bubble. See the section on offense for more discussion on this.
Shield Hardening
The correct way to harden the shields of the POS depends on the tower size, the tower location, and expected opposition. But you should probably use one of the following recommendations. You will need the most modules (highest number) for the two resists that start at 0%, with one fewer hardener for the resist that starts at 25%, and one fewer for the 50% resist. So if your tower starts with 0% EM, 0% THE, 25% KIN and 50% EXP (i.e. Amarr towers), you will need (4) EM, (4) THE, (3) KIN and (2) EXP shield hardeners to reach 68-72% resists across the board.
- 1/1/0/0 results in 25%/25%/25%/50% resists
- 2/2/1/0 results in 44%/44%/44%/50% resists
- 3/3/2/1 results in 58%/58%/58%/63% resists
- 4/4/3/2 results in 68%/68%/68%/72% resists
Small towers in hi-sec should start with either no hardeners or a 1/1/0/0 hardener setup, lo-sec should use a minimum of a 2/2/1/0 setup. Medium towers should use a 2/2/1/0 normally, or a 3/3/2/1 setup in lo-sec or during wartime. Large towers should use a minimum of a 2/2/1/0 setup in hi-sec with an upgrade to 3/3/2/1 or 4/4/3/2 in situations where you are more likely to come under attack. In all cases, if you plan on leaving the tower anchored during attacks, you should have spare hardeners already anchored so that you can quickly online additional hardeners. This general means that you will have a setup with 5 or 9 hardeners always running with another 4 hardeners ready to be put online.
A tower with high resists becomes very difficult to reinforce since you force the attackers to spend 1.8x to 3.1x more time then if you don't plug the two 0% resist holes. Trying to stack the resist modules beyond 4/4/3/2 is pointless (due to stacking penalties) and you'd be better off using that PG/CPU for other defensive modules.
See Shield Hardening Arrays on the POS Structures page for more detailed information.
Sensor Dampening
Sensor Dampening Batteries are extremely useful because can force the enemy to move closer to the POS. Up to the optimal range of 150km, they cut the target's scan resolution and targeting range in half, with decreasing effects for the next 150km of falloff range. This prevents attackers from sitting at long range and sniping at your POS batteries or tower. Due to their minimal fitting requirements, all towers should mount at least a pair of these. Since they are designed to draw attackers closer, you should spread these around the tower to get full coverage instead of clumping them all together.
Note: Dreads are immune to sensor dampening in siege mode and carriers are immune if in triage mode.
Electronic Countermeasures
The purpose of electronic countermeasueres (or ECM) is to break a target's locks on other ships/targets and to prevent them from reacquiring those locks for up to 30 seconds. In POS warfare, ECM is extremely useful for frustrating enemy pilots who are trying to do damage to batteries and the POS shield, for breaking up remote-repair gangs so that they cannot repair each other, or for making logistics ships ineffective. Some POS setups place a heavy emphasis on ECM as a way to prolong the amount of time that it takes for the enemy to put a tower into reinforced mode.
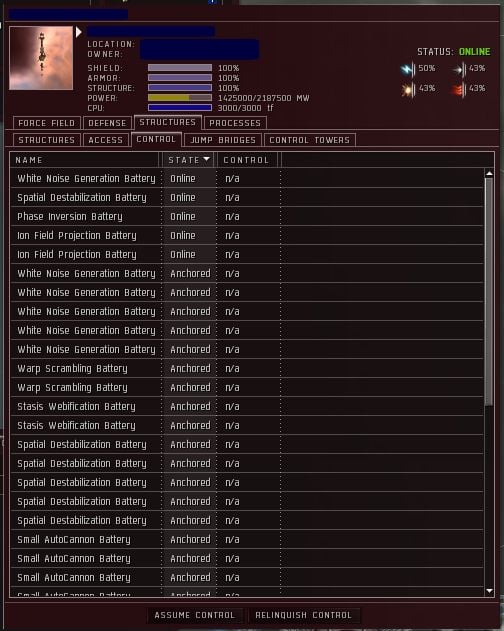
The four types of ECM batteries are Ion Field Projection Battery (MAGNET, Gallente), Phase Inversion Battery (LADAR, Minmatar), Spatial Destabilization Battery (GRAV, Caldari) and White Noise Generation Battery (RADAR, Amarr). They have an optimal range of 200km, a falloff range of 100km, with a jam strength of 45.00 for their primary type and 15.00 for their secondary types. In comparision, ships like the Blackbird, Kitsune, Falcon, and Scorpion have jam strengths in the 6.00 to 12.00 range. These modules must be mounted outside the POS bubble.
Faction ECM is recommended for large towers in hostile environments to ensure jamming on enemy ships, even on secondary types. At a minimum, a medium tower should have (2) of each type online and a large tower will probably want (4) of each type online. If a medium or large tower will be actively defended by players (POS gunners) taking control of the defenses, then you may wish to anchor spares of each type. Some POS setups mount as many as 24-36 ECM batteries anchored with at least half of them online at all times. For more details, see the Example POS Setups page. Small towers can be fitted with (1) of each type online, but in most cases you should take a small POS down if you are under threat of a wardec or attack.
Strontium Calthrates
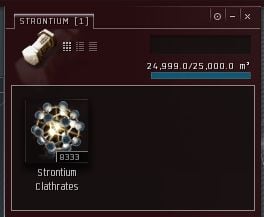
POS towers have two bays, a fuel bay and a 'stront' bay. The stront bay holds Strontium Calthrates which determine how long the tower will remain in reinforced mode if attackers manage to reduce the POS shields to 25%. The more stront, the longer that reinforced mode will last which will enforce a delay before enemies can fully destroy your POS tower. This delay gives you time to rally defenders before the POS is completely destroyed. See reinforced mode for a full discussion of this.
Never online a tower without putting at least 1 hour of Strontium Calthrates in the stront bay.
- Small: 100/hr, 4166 max units for 41.7 hours
- Medium: 200/hr, 8333 max units for 41.7 hours
- Large: 400/hr, 16666 max units for 41.7 hours
You can access the fuel/stront bays as long as you are within 2500m of the POS tower. Right-click on the tower and choose "Access Strontium Bay".
Tower Force Field Settings
The tower force field settings tab controls your POS bubble and shows information about the tower and shield (hit point percentage and shield resists). In the above figure, the tower is online, the shield resists are the default of 0%/0%/25%/50% and the POS shield is at 50% strength.
Status
- Anchoring - Tower is being anchored and a timer will show how long remains.
- Online - Tower is anchored, online and there is enough fuel for the next hour.
- Offline - Tower has run out of fuel, but is still anchored.
- Unanchoring - Tower is being unanchored.
Password
You must set a password on your POS shield in order for the POS bubble to function properly and keep people out of the bubble who aren't allowed in. There are two ways to set the POS bubble password. You can either right-click on the tower in space and choose "set password" or you can set the password in the tower management UI. Once set, you can use it as an "open" secret to allow non-corp/non-alliance pilots to shelter inside your POS bubble. This password only allows them to pass through the boundary, it does not protect them from offensive systems or grant them access to storage modules such as corporate hangars.
Corp/Alliance members should be granted access to the POS via the Restriction Masks.
Be aware that if a spy guesses or knows your password, they can enter the POS bubble and bump AFK pilots or empty ships outside the bubble or board and steal empty ships.
If the tower manager changes the POS password and you were not granted access via the restriction masks, you will be immediately kicked outside of the POS bubble. Never go AFK in lo-sec or null-sec space at a POS.
In order for a non-alliance/non-corp pilot to enter the POS bubble, they will need to right-click on their ship in space and choose "Enter Starbase Forcefield Password...". This setting is not sticky and gets cleared if you eject from the ship, logout, or at downtime. This means that their ship will be ejected from the POS bubble when the password gets cleared due to those conditions.
- what about passwords getting cleared if you disconnect?
Restriction Masks
There are two restriction masks that can be checked on the "Force Field" tab.
- Allow Corporation Members
- Allow Alliance Members
If either is checked, then people who fall into that category will be able to pass through the POS bubble without needing the password. If these are turned off while people are inside the shield, they will be kicked out of the POS bubble (true/false?).
- explain what the various checkboxes are for - need to find out if there are more restriction masks in an alliance or lo/null sec space
Tower Defense Settings
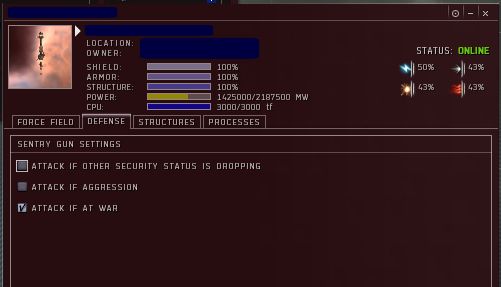
There are (3) checkboxes in the POS tower management UI that allow you to configure automatic defense of the tower. POS batteries have built-in self-checks that prevent them from firing on targets that would summon CONCORD in hi-sec.
- Are there more settings in lo-sec / null-sec? There are, need to document how to run NBSI and NRDS settings.
- Editor's note, the description of the first two settings is in dispute and is probably presented incorrectly (will fix in a few days).
Attack if other security status is dropping
Your POS batteries will automatically attack anyone who's security status is dropping (global criminal flagged) while on-grid. Such as someone shooting at your POS guns without declaring war first. In hi-sec, this checkbox should be turned off as CONCORD will deal with the offender much better then your POS batteries will. If you have a GCC flag, you should never approach a POS (even a normally friendly one) as this setting can cause it to fire on you as a valid target.
Attack if aggression
Your POS batteries will automatically fire on anyone who engages a corp/alliance member. This should be turned off in hi-sec as CONCORD will deal with the offenders. Once again, if you have an aggression timer, you should never approach a POS (even if normally friendly) as this setting can cause it to fire upon you. Never shoot or duel other corporation members near a POS.
Attack if at war
This is the only setting that should be checked normally in hi-sec space. It will ensure that your POS batteries automatically fire on valid war targets, even if you are not around to control them.
Offense
There are two types of offense that a POS can engage in. One is acting as a tackler, using energy neutralizers, stasis webs and warp disruptors/scrambers in order to hold enemy ships in place for destruction by the POS weapons or support fleet. The second type of POS offense is weapon systems such as hybrid turrets, laser turrets, missile launchers or projectile batteries. Each race/faction POS tower gives different bonuses to weapons, but that must be balanced with the issue that once a tower enters reinforced mode all weapons that use CPU will go offline.
All offensive systems that target enemy ships must be mounted outside the POS bubble. This is usually a minimum of 5km outside the POS bubble. Small setups will place clusters of systems at both the north and south pole for good coverage, medium/large setups should spread modules evenly around the entire sphere. A 4-point (pyramid corners), 5-point (north / south / 3 around equator), or 6-point (north / south / 4 around equator) setup around the POS are common configurations.
Structures that are placed outside the POS are vulnerable to attack by the enemy even when the POS tower's bubble is intact.
Hybrid Batteries
Laser Batteries
- Small: Useful against frigates, cruisers and fighters
- Medium: Better for cruisers, battlecruisers and battleships
- Large: Only works well against capital ships and battleships
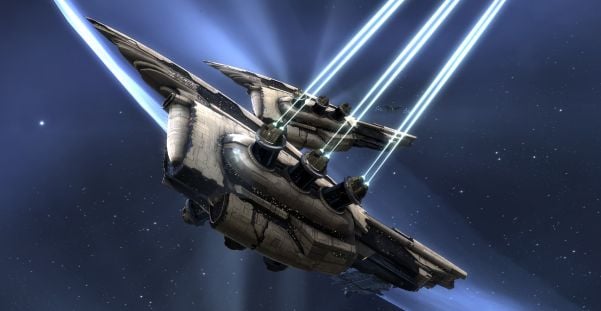
Laser batteries get bonuses from Amarr towers and come in two flavors, "beam" for long range and "pulse" for short range. Laser batteries use zero CPU and will continue to function after the tower is reinforced (if repaired and in working order). As with regular Amarr pulse/beam weapons, they use crystals, but the size of the crystals is always one larger then the laser battery. This means that large laser batteries use XL crystals, medium uses large crystals, and small batteries use medium crystals.
| Type | Power | CPU | Optimal | Falloff |
|---|---|---|---|---|
| Small Beam Laser | 112,500 | 0 | 187km | 50km |
| Medium Beam Laser | 225,000 | 0 | 280km | 75km |
| Large Beam Laser | 450,000 | 0 | 375km | 100km |
| Small Pulse Laser | 78,750 | 0 | 52km | 14km |
| Medium Pulse Laser | 157,500 | 0 | 79km | 21km |
| Large Pulse Laser | 315,000 | 0 | 106km | 28km |
One downside to using Laser Batteries is that the active crystal cannot be removed when you need to unanchor and move the battery. Inactive crystals can be removed before you unanchor.
Missile Batteries
Projectile Batteries
The primary advantage of projectile batteries on a POS is that they do not require any CPU in order to operate. In addition, they can be fitted with different types of ammo in order to spread damage across multiple resists. Minmatar-based towers give bonuses to rate-of-fire, optimal range and fall-off ranges.
- need ammo capacity, max ammo stored, estimated time to deplete ammo. should be around 13 hours for arty and 65 hours for autocannnons
Energy Neutralizing Battery
- 4000 m3 4000 kg
- 350,000 PG 25 CPU
- 100k shield HP, 1.5M armor HP, 100k structure HP
The energy neutralizer has a 250km (50?) range and drains 1000 GJ (a heavy T2 neutralizer on a ship does 600 GJ). Compared to the other types of defensive modules, their fitting requirement is rather high.
Stasis Webification Battery
- 4000 m3 4000 kg
- 50,000 PG 25 CPU
- 100k shield HP, 1.5M armor HP, 100k structure HP
These will cut an enemy's ship speed by 75% and have a range of 150km.
Warp Disruption Battery
- 4000 m3 100 kg
- 100,000 PG 50 CPU
- 100k shield HP, 1.5M armor HP, 100k structure HP
The disruption batteries have a 150km range, but higher fitting needs then the scramblers. They have a warp scrambling strength of 3 points.
Warp Scrambling Battery
- 4000 m3 100 kg
- 25,000 PG 25 CPU
- 100k shield HP, 1.5M armor HP, 100k structure HP
The scrambling batteries only have a 75km range, but much lower fitting needs. They have a warp scramble strength of 6 points.
Anchoring of Spares
A recommended tactic is that you always anchor extra weapon and countermeasures outside the POS bubble, but leave them offline until needed. As existing weapons and countermeasures are incapacitated by damage, you can bring new weapons and countermeasures online. This tactic mostly only works if you will have people actively defending the POS during the initial or follow-up sieges who will need spare modules to continue fighting off the attackers. See the Starbase Defense Management section for a discussion of actively defending a POS.
The other theory behind anchoring offline spares is that it makes it more difficult for your enemy to know what modules will be active when they come to attack the POS. This is an effective tactic against enemies that are not specifically out to get you. If you have lots of electronic warfare batteries, weapon batteries and shield hardeners ready to go, smaller groups of opportunistic attackers may decide that you are too much trouble and go looking for easier POS towers. It is only an effective tactic on medium / large towers. Small towers are simply too easy to destroy and expensive modules / labs / contents should be evacuated at the first sign of trouble.
Starbase Defense Management
The Starbase Defense Management skill allows a pilot with the Starbase Defense Operator role to control weapons and countermeasures mounted outside the POS bubble.
- need explanations, what you can control
- how to use the UI
- how to control batteries
- how to relinquish control of batteries
Initial Attack
- what do we bring, how long should it take
- ammo types, range needed
Incapacitation of Modules
- order of modules to attack
- modules inside the bubble cannot be attacked (such as shield hardeners)
- how to keep ships from being popped
- what ammo works best
Damage POS Shield
- Best Ammo
- Based on type of faction tower. Each faction tower has 2 weaknesses with 0% base resistance. Any active shield hardening array may also play a factor.
- Amarr EMP and Thermal
- Caldari EMP and Explosive
- Gallente EMP and Explosive
- Minmatar Explosive and Kinetic
- Shield Radii
- 30km for a large POS
- 21km for a medium POS
- 15km for a small POS
- taking down the shield
Once the POS shield drops below 50%, the POS owner can no longer add Strontium Calthrates to the stront bay to affect the length of time that the tower will stay in reinforced mode. When the shield drops below 25%, the tower will enter reinforced mode.
Reinforced Mode
Once the POS shields have been damaged down to 25%, the POS may enter reinforced mode. If there is at least one unit of Strontium Calthrates a timer will appear by the tower in space. This timer will say "reinforced" along with the length of time remaining before the tower comes out of reinforced mode. All towers can carry a maximum of around 41.7 hours worth of Strontium Calthrates in their "stront bay" (see the "Capacity2" field on a tower's attributes). If there is not enough Strontium Calthrates in the tower for at least one hour, you can continue straight to final destruction of the POS.
The math for the stront bay is 50,000 m3 (for a large tower) divided by 3.0 m3 per Strontium Calthrate, give you 16666 units. A large tower goes through 400 per hour in reinforced mode, giving you 41.665 hours of reinforcement (1d 17h 39m 54s).
In addition, the following things will happen:
- The POS shield will no longer regenerate when reinforced
- All modules/structures that require CPU power will go offline
- Modules/guns that do not use CPU power will stay online
- Modules/structures inside the tower are still safe
What the owner can do while the POS is reinforced:
- Repair guns and modules outside the bubble
- Anchor new guns that do not use CPU power
- Online already anchored guns/modules that do not use CPU
- Can access the contents of a Ship Maintenance Array (uses no CPU)
What the owner cannot do while the POS is reinforced:
- Online anchored modules/guns that require CPU power
- Online repaired guns/modules that require CPU power
- Add Strontium Calthrates to the stront bay
- Cannot repair the POS shields
- Cannot access the contents of corporate hangar, labs or silos
The POS will exit reinforced mode once the Strontium Calthrates run out. At that point in time the shields will start to regenerate on their own. The owner of the POS can bring the shields up to the 50% mark by using ships with shield transporter modules (such as Basilisks, Scimitars, Ospreys, or any other ship that can fit them and stay cap-stable). Once the shield has been repaired to 50%, the owner may online any modules/structures that require CPU power. They may also re-stront the tower so that it will enter reinforced mode again if the shields are lowered again to the 25% mark.
If the attacking force wishes to completely destroy the POS after the reinforcement timer, they should leave a harassing force in place to prevent the repair of guns or other modules outside the POS bubble.
Final Takedown
- when do we come back, what do we bring, how long should it take
What to Shoot
- repaired modules
- shields
- other modules?
What to Loot
- mobile labs retain their contents after being unanchored. they can either be anchored at another POS to retrieve the contents or can be repackaged which will extract the contents
- corporate hangars and ship maint arrays must be destroyed (yes/no?) to obtain the contents, repacking these two modules will result in loss? can't unanchor if they have stuff in them?
- silos and weapon batteries will destroy their contents when unanchored after the POS tower is destroyed, no way to obtain contents?
- modules? hangar contents?
- link to IVY war loot policy
Hi-Sec War-Dec Defensive Preparations
You've setup your POS to discourage attackers, but that will not always be enough if your adversaries are determined. So what do you do with a hi-sec POS if you get a war-dec? The answers to that will depend on the expected strength of the opposition, whether or not you will be actively using the POS weapons against the opposition, and how much risk you are willing to tolerate.
In general, hi-sec POSs are fairly immune to attacks unless the attacker is willing to bring 5-25 battleships and spend a few hours beating on it to put it into reinforced mode. During the 24h warm-up period for a hi-sec war-dec you need to make decisions about what modules you will leave in space and what modules you will tear down and store in a nearby station.
Rip it all Down
The first strategy involves removing all ships, items, lab slots, silos, assembly arrays or ship maintenance bays and storing them in a nearby station. You should leave the defensive / offensive arrays for last as they are fairly inexpensive and if you run out of time they will still function to make the attacker's job much more difficult.
The major downside of this strategy is that you may find that another corp will erect a POS tower at your moon while you are occupied with the war. The second downside is the time required to put everything offline, unanchor all of the modules, and them haul everything to a station.
Bunker Down
The next option is a middle ground. You remove all high value options such as assembly arrays, lab slots, ship maintenance arrays but you leave the tower and all defensive/offensive modules in place. If you have any spare defenses, you will want to bring them online now that there is more spare CPU/PG to play with on the tower. The primary goal here is to minimize losses while not giving up your place at the moon. The secondary goal is to make the attacker's life as difficult as possible for the least amount of ISK by putting ECM / damps / hardeners online.
Medium and large towers should switch to a 4/4/3/2 shield hardener setup to maximize shield hit points. Small towers will only be able to fit a 2/2/1/0 setup (44% minimum resist, 50% maximum resist).
A good example of this would be a small Minmatar tower. During normal operations, you run with (2) shield hardeners online but no other defenses. Then when a war happens, you take down any non-defensive modules, store them in a nearby station, and put (3) more shield hardeners, (4) ECM batteries and (2) sensor dampening batteries online. No weapon systems are involved as you will not be actively defending the tower. Make the attackers spend time chewing through the shields while the ECM batteries constantly disrupt their target locks.
Even if the attackers take the time to destroy your small tower with those modest defenses, you will only be out about 80-120M ISK.
Active Defense
Reference Links
Starbase Defense Management skill (plus warfare info)
POS Death Star Setups: Jump Bridge, Cyno Jam, Reactions, Moon Mining (EVE Online forums)
Alternate link to "POS Setups: Jump Bridge/Cyno Jam/Reactions, Moon Mine/Mining, Labs, WH"
Managing Your POS – If You’re Attacked (Talocan United)


