The reason is: Check how they changed over the years and how are they different from Upwell structures ArinBot (talk) 07:05, 25 July 2023 (UTC)
- Main article: Player-owned starbases
Reason: Info on POS modules is out of date, do not use this page as a guide
Overview
- details about the POS structures (as it was causing the POS Setup and POS Warfare pages to balloon).
- need to add graphics on the right side of each area, opposite the bullet points at the start of each module's section, images should be 160x120
Control Towers
Control towers are the cornerstone of any POS setup. The choice of tower and size will determine how much fuel you use per month and how much PG/CPU you have for onlined (active) structures. Smaller towers will often have to leave modules anchored but offline until needed due to limited PG/CPU.
- Amarr - first in PG, fourth in CPU
- Caldari - fourth in PG, first in CPU
- Gallente - third in PG, second in CPU
- Minmatar - second in PG, third in CPU
- Faction - reduced fuel costs, more HP, shorter anchor/online timer
At the time of writing, faction tower fuel savings require about 2-3 years less than a year before the fuel cost savings will outweigh the cost of a faction tower over a regular tower. If you are living in a wormhole or are having logistical issues with getting enough fuel to the tower on a regular basis, faction towers may be a better choice. Faction towers have more hit points and lower anchor and online times than non-faction towers.
Note that faction towers in lo-sec / hi-sec can be a security risk as they will potentially draw unwanted attention from other players. Their high cost may be a deciding factor in whether an attack takes place.
Assembly Arrays
Assembly arrays are mounted inside the POS bubble and are used to construct modules, ships, and other items. They function similar to the manufacturing slots in NPC stations.
- need short blurb of how to use, where can the BPO be located, where can raw materials be located, where does output go
S/M/L Ship Assembly Array
There are (3) sizes of the regular ship assembly arrays. There must be a Ship Maintenance Array (SMA) within range (2500m?) of the Ship Assembly Array in order to use the production lines. When ships roll off the production lines, they are stored in the SMA. These arrays can be anchored in all security classifications (hi/lo/null).
- Small (SSAA) - T1 Frigates, T1 Destroyers, T1 Fighter and Fighter Bomber Drones
- Medium (MSAA) - T1 Cruisers, T1 Battlecruisers, T1 Barges, T1 Industrials
- Large (LSAA) - (3) lines, T1 Battleships, T1 Freighters, T1 Industrial Command Ships
Under the old system where arrays were NPC-sold, all three sizes cost about 80M ISK. In 2010, CCP changed things so that players would have to use resources from Planetary Industry in order to construct the arrays. As of November 2013, small, medium and large arrays all sell for about 60 - 70M ISK. Therefore, the cost of the ship assembly array's size is not a major factor in the decision of which array to use.
For hi-sec use, where you have manufacturing slots available in nearby stations (which are far cheaper on a per-hour basis), the only real use of a ship assembly array is bulk storage. The SSAA and MSAA both hold 2M m3 of materials, while the LSAA holds a massive 18.5M m3. All sizes of ship assembly arrays have corporate hangar tabs to make organization easier. However, while the LSAA holds 9x more cargo then the SSAA/MSAA siblings, it only requires 4x the CPU and 3x the PG of the SSAA. So for bulk storage in a hi-sec POS, the LSAA is a very popular choice.
In order for a member to use a Ship Assembly Array as storage, you should use the tower management screen and change permissions on the xSAA module to "Corporation" or "Alliance". Do not hand out roles like "Config Starbase Equipment" or "Starbase Fuel Technician" (unless you absolutely want to).
Advanced S/M/L Ship Assembly Arrays
- T2 ship construction
- should not be used for regular ship production due to 10% increase in materials required
The advanced ship assembly arrays should only be used in w-space or deep null-sec where there are no station slots for manufacturing due to the 10% penalty in material requirements.
X-Large Ship Assembly Array
- Location: Inside POS bubble
- Times: 5s Anchor, 3s Online, 5s Unanchor
- Fitting: 1000tf CPU, 300k MW PG
- Size: 25,000 m3
- Capacity: 18.5M m3
- Op Range: 3000m
- Slots: 3 Manufacturing (0.75x time, 1.0x materials)
- Restrictions: Security level less than 0.5 (null through 0.4 sec)
Allows the construction of large ships such as T1 Battleships, T1 Carriers, T1 Dreadnoughts, T1 Freighters, T1 Industrial Command Ships and T1 Capital Industrial Ships. This array cannot be anchored in hi-sec space. Fitting requirements are identical to that of the LSAA, but are more expensive to produce with Planetary Industry. In order to directly use a ship produced by the XLSAA, you must also anchor a Ship Maintenance Array.
Capital Ship Assembly Array
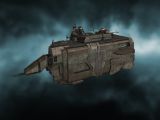
- Location: Inside POS bubble
- Times: 30s Anchor, 10s Online, 600s Unanchor
- Fitting: 2000tf CPU, 1000k MW PG
- Size: 850,000 m3
- Capacity: 155M m3
- Op Range: 3000m
- Slots: 1 Manufacturing
- Restrictions: Null-sec with system sovereignty
- Requires: Supercapital Construction Facilities Infrastructure Upgrade
Allows for the construction of capital ships such as Dreadnoughts, Carriers, Supercarriers, Titans. However, they are generally only used for the construction of Supercarriers and Titans as Carriers/Dreads can be constructed using the much less expensive X-Large Ship Assembly Array.
Anchoring one of these arrays will ensure negative attention from larger alliances who will suspect that you are building super-caps or titans. Very expensive to construct using Planetary Industry (the BPO alone is 500M ISK). Note that in order to move these around, you must have a ship with an 850k m3 cargo bay.
Ammunition Assembly Array
- Location: Inside POS bubble
- Times: 5s Anchor, 3s Online, 5s Unanchor
- Fitting: 150tf CPU, 50k MW PG
- Size: 1250 m3
- Capacity: 100k m3
- Op Range: 3000m
- Slots: 5 Manufacturing (0.75x time, 1.0x materials)
Used to manufacture Tech I and Tech II ammunition (missiles, hybrid charges, projectile ammo and frequency crystals).
Component Assembly Array
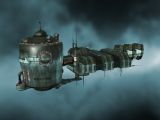
- Location: Inside POS bubble
- Times: 5s Anchor, 3s Online, 5s Unanchor
- Fitting: 150tf CPU, 50k MW PG
- Size: 12,500 m3
- Capacity: 1M m3
- Op Range: 3000m
- Slots: 10 Manufacturing (0.75x time, 1.0x materials)
Used to manufacture components for Capital, Tech II and Tech III ships. Also used to manufacture Fuel Blocks.
Drone Assembly Array
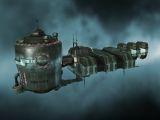
- Location: Inside POS bubble
- Times: 5s Anchor, 3s Online, 5s Unanchor
- Fitting: 150tf CPU, 50k MW PG
- Size: 1250 m3
- Capacity: 100k m3
- Op Range: 3000m
- Slots: 8 Manufacturing (0.75x time, 1.0x materials)
The Drone Assembly Array (DAA) can be used to build small unmanned drones (mining drones, small/medium/heavy combat drones, including EW/web drones). Fighter and Fighter Bomber drones are manufactured using Small Ship Assembly Arrays.
Drug Lab
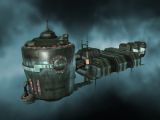
- Location: Inside POS bubble
- Times: 5s Anchor, 3s Online, 5s Unanchor
- Fitting: 150tf CPU, 50k MW PG
- Size: 1250 m3
- Capacity: 100k m3
- Op Range: 3000m
- Slots: 1 Booster Manufacture
- Restrictions: Security level less than 0.4
The Drug Lab is used to produce performance enhancing drugs.
Equipment Assembly Array

- Location: Inside POS bubble
- Times: 5s Anchor, 3s Online, 5s Unanchor
- Fitting: 150tf CPU, 90k MW PG
- Size: 6250 m3
- Capacity: 500k m3
- Op Range: 3000m
- Slots: 6 Manufacturing (0.75x time, 1.0x materials)
The Equipment Assembly Array (EAA) is used to manufacture ship modules. Slower, but more efficient then the Rapid Equipment Assembly Array.
Rapid Equipment Assembly Array
- Location: Inside POS bubble
- Times: 5s Anchor, 3s Online, 5s Unanchor
- Fitting: 200tf CPU, 110k MW PG
- Size: 6250 m3
- Capacity: 500k m3
- Op Range: 3000m
- Slots: 5 Manufacturing (0.65x time, 1.2x materials)
The Rapid Equipment Assembly Array (REAA) is used to manufacture ship modules. Faster, but less efficient (+20% material requirement) then the Equipment Assembly Array.
Subsystem Assembly Array
- Location: Inside POS bubble
- Times: 5s Anchor, 5s Online, 5s Unanchor
- Fitting: 500tf CPU, 200k MW PG
- Size: 17,000 m3
- Capacity: 2M m3
- Op Range: 3000m
- Slots: 3 Manufacturing (1.0x time, 1.0x materials)
The Subsystem Assembly Array (SAA) allows you to assemble Tech III hulls and advanced subsystems. However, the hulls and subsystems can only be assembled (fitted?) when docked at a station.
Storage
All storage arrays should be anchored inside the POS bubble.
Corporate Hangar Array
- Location: Inside POS bubble
- Times: 5s Anchor, 3s Online, 5s Unanchor
- Fitting: 150tf CPU, 100k MW PG
- Size: 4,000 m3
- Capacity: 1.4M m3
- Op Range: Within POS shield
Designed to provide floating corporate hangars at the POS tower, complete with normal corporate hangar features like divisional tabs. Because this array uses CPU, it will not be accessible if the POS is reinforced. If you need more storage, you may wish to use a LSAA instead.
Since this array will be unavailable once the POS tower enters reinforced mode that you should not store spare ammo or batteries in the array. Spare items like ammo/batteries should be stored in anchored secure containers in safe-spots, or in a nearby station.
If the array is destroyed by enemy fire (after the POS shield is gone) then the contents will drop as loot according to the standard loot rules (typically 50% of the stacks survive destruction). However, if the hangar is scooped up, taken to a station and repackaged, it may be possible to recover the contents (not extensively tested - and conflicting reports of success/failure).
Personal Hangar Array
- Location: Inside POS bubble
- Times: 5s Anchor, 3s Online, 5s Unanchor
- Fitting: 150tf CPU, 100k MW PG
- Size: 4,000 m3
- Capacity: 50K m3 per individual
- Op Range: Within POS shield
A large hangar structure, for easy storage of materials and modules. This hangar is designed for personal storage of moderate volume items, and each individual only has access to their own section of the storage space. As with the Corporate Hangar Array, the Personal Hangar Array uses CPU and therefore will not be accessible if the POS is reinforced. If you need more storage, you may wish to use a LSAA instead.
Ship Maintenance Array
- Location: Inside POS bubble
- Times: 5s Anchor, 3s Online, 5s Unanchor
- Fitting: 250k MW PG (no CPU)
- Size: 8,000 m3
- Capacity: 20M m3 (assembled ships only)
- Op Range: Within POS shield
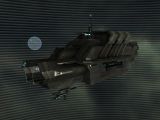
The Ship Maintenance Array (SMA), when anchored and online, provides a place to store fitted/rigged ships. Ships can only be stored in the SMA if their cargo bay is empty of everything except for charges (ammo, scripts, crystals, probes). It can be used by up to 10 pilots simultaneously to refit their ships at the POS if they are within 3000m of the SMA. The SMA can be used/accessed even if the POS is in reinforced mode because it requires zero CPU in order to operate.
Capital Ship Maintenance Array
- Location: Inside POS bubble
- Times: 30s Anchor, 10s Online, 600s Unanchor
- Fitting: 1000k MW PG (no CPU)
- Size: 40,000 m3
- Capacity: 155M m3 (assembled ships only)
- Op Range: Within POS shield
- Restrictions: null-sec with system sovereignty
- Requires: Supercapital Construction Facilities Infrastructure Upgrade
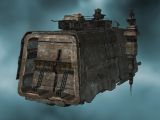
The Capital Ship Maintenance Array (CSMA) is a larger version of the SMA only useful in player controlled null-sec. It only uses power and can be used/accessed even if the POS is reinforced.
Cynos, Jammers and Jump Bridges (no longer functional)
The below arrays were replaced by the navigation structures! And are no longer functioning! These structures were used to make travel between systems faster or to prevent enemies from generating cynosural fields.
Cynosural Generator Array

- Location: 15km+ outside POS bubble
- Times: 10s Anchor, 300s Online, 10s Unanchor
- Fitting: 150tf CPU, 375k MW PG
- Size: 4000 m3
- HP: 1M Shield, 15M Armor, 100k Structure
- Restrictions: null-sec with system sovereignty
- Requires: Cynosural Navigation Infrastructure Upgrade
- Limitations: Max of 1 per system
The Cynosural Generator Array (CGA) is a stationary cynosural field generator which allows capital ships with jump drives to jump to the POS's location from surrounding systems without the need for a cyno ship.Once anchored and onlined, the cynosural field remains active at all times. It may take a few hours until downtime until the beacon shows up for all pilots in the corp/alliance. Be warned that if you jump to a CGA, you will have to slow-boat around 15km to duck inside the POS bubble at the destination. If the POS is currently camped, this may be a fatal blunder.
Cynosural System Jammer

- Location: 15km+ outside POS bubble
- Times: 300s Anchor, 1800s Online, 60s Unanchor
- Fitting: 750k MW PG (no CPU)
- Size: 4000 m3
- HP: 1M Shield, 15M Armor, 100k Structure
- Restrictions: null-sec with system sovereignty
- Requires: Cynosural Suppression Infrastructure Upgrade
- Limitations: Max of 1 per system
Prevents the generation of normal cynosural fields (does not affect covert cynosural fields). Note that this prevents all cynosural activity, including attempts to light beacons by friendly pilots.
- Question: Does the CSJ prevent the operation of a CGA in the system or can the two co-exist?
Jump Bridge
- Location: 15km+ outside of a POS bubble
- Delays: Anchor: 30 sec, Online: 30 min, Unanchor: 60 sec
- Fitting: CPU: 4,000 tf, PowerGrid: 750k MW
- Size: 100,000 m3
- HP: 1 mil Shield, 15 mil Armor, 100K Structure (0% resists)
- Fuel Bay: 30,000 m3 of Liquid Ozone (75,000 units)
- Operation Range: 2,500m
- Restrictions: Null Sec Space with system sovereignty
- Requires: Advanced Logistics Network Infrastructure Upgrade
- Limitations: Max of 1 per Solar System
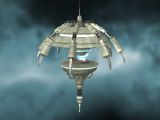
Used to link two Star Base in different systems to allow all ships to jump between systems without the need to setup a cynosural field. Maximum jump range is 5 Light Years. Also see Jump Bridge.
Labs, Reactors and Silos
Mobile Laboratory

- Location: Inside POS bubble
- Times: 5s Anchor, 3s Online, 5s Unanchor
- Fitting: 500tf CPU, 100k MW PG
- Size: 3000 m3
- Slots: 1 Copy (0.75x time), 3 ME (0.75x time), 3 PE (0.75 time), 5 Invention (0.5x time)
- Capacity: 25k m3
- Range: Within POS Shield
Basic laboratory used for the research (material and time) of BPOs. Also useful for Invention due to the (5) invention slots. ME/PE research can by done on the tower by any corporation within the alliance who has a station office rented in the same system. Copy/Invention requires access to the mobile laboratory storage and thus is limited to the corporation who owns the POS tower.
In order for corporation members to use the array for invention (and copying?), you will need to change the query/take permissions using the POS tower's management screen. In that screen you can change who is able to "query" from "Starbase Fuel Technician" to "Corporation" and you will change the "take" from "Config Starbase Equipment" to "Corporation".
If a laboratory array is taken offline, any jobs that were running on that array will be paused. If the laboratory array is then unanchored, any BPOs inside the array will be destroyed. If the BPOs were kept in a station in the same system, then all research progress will be lost but the BPO will not be destroyed during the unanchor process. If the tower is still intact, you cannot unanchor a mobile lab that has items inside (you will have to put it back online, empty it out, then go back to unanchoring it).
Advanced Mobile Laboratory
- Location: Inside POS bubble
- Times: 5s Anchor, 3s Online, 5s Unanchor
- Fitting: 600tf CPU, 120k MW PG
- Size: 3000 m3
- Slots: 3 Copy (0.65x time), 2 ME (0.75x time), 2 Invention (0.5x time)
- Capacity: 25k m3
- Range: Within POS Shield
Mostly used when you need a lot of copy slots for T2 production. Most POS towers will run a mix of AMLs and MLs to balance out the ME/PE/copy/invention slots to meet user's needs. For instance, a mix of five AMLs and six MLs will give 28 ME / 12 PE / 21 copy / 40 invention slots.
Moon Harvesting Array
Moon Harvesting Arrays are structures for Moon Mining. When set up correctly, they will extract raw materials from the moon you starbase is Anchored at. Depending on your configuration, the Harvester Array will pass the materials onto a Reactor Array for reaction or will store them in a Silo.
- Location: Inside POS bubble
- Times: 5s Anchor, 3s Online, 5s Unanchor
- Fitting: 500tf CPU, 10k MW PG
- Size: 4000 m3
- low/null sec moon mining structures
Refining Arrays
Refining Arrays (better known as Mobile Refineries) allow you to reprocess ore at a starbase. You must load the Refinery with the ore (only one ore type is allowed in the refinery at a time). Once loaded, right-click the Refinery and start the process. Unlike stations, the process is not immediate. You have to wait between 1 and 3 hours before the contents of the Refinery are changed into minerals.
There are three types of Mobile Refinery:
Refining Array
- Location: Inside POS Bubble
- Times: 5s Anchor, 3s Online, 5s Unanchor
- Fitting: 700tf CPU, 100K MW PG
- Size: 4,000 m3
- 35% yield
- Cycle time: 1 hour
- Capacity: 40,000 m3
- Restricted to Security <0.4
- 20K Shield | 20K Armor | 10K Structure
Medium Intensive Refining Array
- Location: Inside POS Bubble
- Times: 5s Anchor, 3s Online, 5s Unanchor
- Fitting: 2,000tf CPU, 375K MW PG
- Size: 4,000 m3
- 75% yield
- Cycle time: 1.5 Hours
- Capacity: 25,000 m3
- Restricted to Security <0.4
- 20K Shield | 20K Armor | 10K Structure
Intensive Refining Array
- Location: Inside POS Bubble
- Times: 5s Anchor, 3s Online, 5s Unanchor
- Fitting: 4,000tf CPU, 750K MW PG
- Size: 6,000 m3
- 75% yield
- Cycle time: 3 hour
- Capacity: 200,000 m3
- Restricted to Security <0.4
- 20K Shield | 20K Armor | 10K Structure
Note that the Refining Arrays refining yield efficiency does not apply to ice ores, which are always refined at the maximum efficiency the operator is capable of. Also, if the array's control tower runs out of fuel while the array is in the middle of a processing operation, the materials being refined will be irrevocably lost.
For further information see POS Refining.
Silos
Silos are used to store Raw Materials, Processed Materials, Advanced Materials or Minerals. A Silo can only hold one type of material at a time and must be put offline to change type or to empty it.
Silo varieties:
Biochemical Silo
- Specialized container designed to store and handle gas clouds.
- Location: Inside POS Shield
- Times: 5s Anchor, 3s Online, 5s Unanchor
- Fitting: 250tf CPU, 50K MW PG
- Size: 4,000 m3
- Capacity: 20,000 m3
Catalyst Silo
- Specialized container designed to store and handle hazardous liquids.
- Location: Inside POS Shield
- Times: 5s Anchor, 3s Online, 5s Unanchor
- Fitting: 250tf CPU, 50K MW PG
- Size: 4,000 m3
- Capacity: 20,000 m3
General Storage
- Used to store or provide general commodities.
- Location: Inside POS Shield
- Times: 5s Anchor, 3s Online, 5s Unanchor
- Fitting: 250tf CPU, 50K MW PG
- Size: 4,000 m3
- Capacity: 20,000 m3
Hazardous Chemical Silo
- Used to store and handle hazardous biochemicals.
- Location: Inside POS Shield
- Times: 5s Anchor, 3s Online, 5s Unanchor
- Fitting: 250tf CPU, 50K MW PG
- Size: 4,000 m3
- Capacity: 20,000 m3
Hybrid Polymer Silo
- Specialized container designed to store and handle polymers used in the production of hybrid components.
- Location: Inside POS Shield
- Times: 5s Anchor, 3s Online, 5s Unanchor
- Fitting: 250tf CPU, 50K MW PG
- Size: 4,000 m3
- Capacity: 40,000 m3
Silo
- Used to store or provide resources.
- Location: Inside POS Shield
- Times: 5s Anchor, 3s Online, 5s Unanchor
- Fitting: 500tf CPU, 50K MW PG
- Size: 4,000 m3
- Capacity: 20,000 m3
Coupling Array
Coupling Arrays act as an intermediary holding pipe between two structures. Take for instance the Moon Harvesting Array and Silo. Since you must offline your Silo before emptying it, you may lose a cycle of raw materials. By placing a Coupling Array between the Harvester and Silo, you can safely offline the Silo while you empty it and any Raw Materials that arrive will temporarily be stored in the Coupler Array.
The Coupling Array is also useful for when the Harvesters and a Reactor are running/processing at different speeds. For instance, two Harvesters may produce 100 units each an hour. The Reactor may only be able to process the said units every 2 hours. This leaves you with a surplus of 100 units that will be lost in the process. A Coupling Array acts as a buffer to temporarily hold the surplus materials until the Reactor is free.
- Location: Inside POS Shield
- Times: 5s Anchor, 3s Online, 5s Unanchor
- Fitting: 155tf CPU, 10K MW PG
- Size: 4,000 m3
- Capacity: 1,500 m3
Defensive Structures
Shield Hardening Arrays
- Location: Inside POS Bubble
- Times: 5s Anchor, 120s Online, 5s Unanchor
- Fitting: 250tf CPU, 150k MW PG
- Size: 4000 m3
- Types: 1 for each resist (EMP, EXP, KIN, THE)
- Strength: 25% (but with stacking penalties)
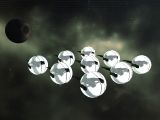
Shield hardeners come in four types, one for each resist, and should be mounted inside the POS bubble. They are named Ballistic Deflection Array (KIN), Explosion Dampening Array (EXP), Heat Dissipation Array (THE), and Photon Scattering Array (EMP). Since shield hardening arrays are inside the bubble, they cannot be targeted until the tower is destroyed. However, they become inactive once the tower enters reinforced mode.
For details about how many hardeners to anchor/online, see Shield Hardening on the POS Warfare page.
Sensor Dampening Battery
- Location: 5km+ outside POS bubble
- Times: 5s Anchor, 120s Online, 5s Unanchor
- Fitting: 25tf CPU, 12.5k MW PG
- Size: 4000 m3
- HP: 100k Shield, 1.5M Armor, 100k Structure
- Range: 300km Activation, 150km Optimal, 150km Falloff
The Sensor Dampening Battery cuts the target's scan resolution and targeting range in half. It has very low fitting requirements and can force an enemy to come closer to POS weapons instead of being able to sit at long range and snipe. Just like any other module that targets enemy ships, it must be mounted outside the POS bubble and can be attacked by enemy ships before the POS tower is destroyed.
There are two schools of thought with regards to Sensor Dampening Batteries. One is that they are completely unnecessary if you have faction ECM batteries with their 200km optimal + 100km falloff range. The other school of thought is that a few Sensor Dampening Batteries never hurt and could be used to good effect by POS gunners. Either way, you will generally not need more then a small handful (as few as 1-3, probably no more then 6) of these and your tower defenses will be fine without any at all (as long as you have ECM).
Note: Dreads are immune to sensor dampening in siege mode and carriers are immune if in triage mode.
ECM Batteries
- Location: 5km+ outside POS bubble
- Times: 5s Anchor, 120s Online, 5s Unanchor
- Fitting: 50tf CPU, 25k MW PG
- Size: 4000 m3
- HP: 100k Shield, 1.5M Armor, 100k Structure
- Range: 300km Activation, 200km Optimal, 100km Falloff
- Jam Strength: 45 for primary, 15 for secondaries
The four ECM batteries are Ion Field Projection Battery (MAGNET, Gallente), Phase Inversion Battery (LADAR, Minmatar), Spatial Destabilization Battery (GRAV, Caldari) and White Noise Generation Battery (RADAR, Amarr).
Faction versions of these modules are recommended but will cost about 6x-10x more. A regular faction ECM battery (Gurista) will have 51 primary / 17 secondary jam strength and the advanced faction ECM battery (Dread Gurista) will have 76 primary / 25 secondary jam strength. The Dread Gurista versions are worth the cost if you expect hostiles at the tower. With their increased jam strength, even ECCM-fitted battleships will constantly lose their locks and have to retarget.
See POS Warfare (ECM section) for more details on proper use of ECM.
Offensive Weaponry
- blurb about offensive weapons (guns/missiles) and why missile batteries are less recommended
Hybrid Batteries
- Location: 5km+ outside POS bubble
- Times: 5s Anchor, 120s Online, 5s Unanchor
- Fittings, Sizes and Ranges:
| Battery Type> | L Blaster | L Railgun | M Blaster | M Railgun | S Blaster | S Railgun |
| Powergrid> | <225K MW> | <360K MW> | <112.5K MW> | <180K MW> | <56.25K MW> | <90K MW> |
| Size> | 5,000 m3 | 5,000 m3 | 1,000 m3 | 1,000 m3 | 500 m3 | 500 m3 |
| Activation | 90 KM | 330 KM | 90 KM | 330 KM | 90 KM | 330 KM |
| Optimal | 21 KM | 300 KM | 16 KM | 225 KM | 10 KM | 150 KM |
| Falloff | 35 KM | 150 KM | 26 KM | 112 KM | 17 KM | 75 KM |
- HP: 100k Shield, 1.5M Armor, 100k Structure
Laser Batteries
- Location: 5km+ outside POS bubble
- Times: 5s Anchor, 120s Online, 5s Unanchor
- Fittings, Sizes and Ranges:
| Battery Type> | L Beam Laser | L Pulse Laser | M Beam Laser | M Pulse Laser | S Beam Laser | S Pulse Laser |
| Powergrid> | <450K MW> | <315K MW> | <225K MW> | <157.5K MW> | <112.5K MW> | <78.75K MW> |
| Size> | 5,000 m3 | 5,000 m3 | 1,000 m3 | 1,000 m3 | 500 m3 | 500 m3 |
| Activation | 300 KM | 90 KM | 300 KM | 90 KM | 300 KM | 90 KM |
| Optimal | 375 KM | 106 KM | 280 KM | 79.5 KM | 187.5 KM | 52.5 KM |
| Falloff | 100 KM | 28 KM | 75 KM | 21 KM | 50 KM | 14 KM |
- HP: 100k Shield, 1.5M Armor, 100k Structure
Missile Batteries
- Location: 5km+ outside POS bubble
- Times: 5s Anchor, 120s Online, 5s Unanchor
- Fittings, Sizes and Range Multipliers:
| Battery Type> | Citadel Torpedo | Torpedo | Cruise Missile |
| Powergrid> | <160K MW> | <80K MW> | <40K MW> |
| CPU > | 160 tf | 80 tf | 40 tf |
| Size> | 5,000 m3 | 1,000 m3 | 500 m3 |
| Activation | 350 KM | 350 KM | 350 KM |
| Flight Time Bonus | x4 | x5 | x2.5 |
| Velocity Bonus | x3 | x2.5 | x2 |
- HP: 100k Shield, 1.5M Armor, 100k Structure
There are two major reasons why missile / torpedo batteries are rarely used. First off is the travel time of the missiles, the second is that they are the only offensive batteries that use CPU power. Due to this use of CPU power, once the POS tower goes into reinforced mode, all missile batteries will go offline and be worthless. The only way to put the missile batteries back online is to wait for the POS to come out of reinforced mode, repair the shields up to 50% or higher, and then manually put each missile battery back online.
Projectile Batteries
- Location: 5km+ outside POS bubble
- Times: 5s Anchor, 120s Online, 5s Unanchor
- Fittings, Sizes and Ranges:
| Battery Type> | L Artillery | L Autocannon | M Artillary | M Autocannon | S Artillary | S Autocannon |
| Powergrid> | <405K MW> | <270K MW> | <202.5K MW> | <135K MW> | <101.25K MW> | <67.5K MW> |
| Size> | 5,000 m3 | 5,000 m3 | 1,000 m3 | 1,000 m3 | 500 m3 | 500 m3 |
| Activation | 330 KM | 90 KM | 330 KM | 90 KM | 330 KM | 90 KM |
| Optimal | 300 KM | 21 KM | 280.5 KM | 15 KM | 187.5 KM | 10.5 KM |
| Falloff | 327 KM | 85.5 KM | 246 KM | 63 KM | 168 KM | 42 KM |
- HP: 100k Shield, 1.5M Armor, 100k Structure
Projectile batteries are popular, even on non-Minmatar towers because their damage can be tuned with the appropriate choice of ammunition. Good ammunition to use with projectile batteries are Fusion (EXP/KIN), Phased Plasma (THE/KIN) and EMP (EMP/EXP/KIN) or Titanium Sabot (KIN/EXP). The long-range ammunition versions are not needed and will do less damage. Faction ammunition is a popular choice for the increased alpha / DPS.
Scrams, Neuts and Webs
- blurb about scrams, neuts and webs
Energy Neutralizing Battery

- Location: 5km+ outside POS bubble
- Times: 5s Anchor, 120s Online, 5s Unanchor
- Fitting: 25tf CPU, 350k MW PG
- Size: 4000 m3
- HP: 100k Shield, 1.5M Armor, 100k Structure
- Range: 300km Activation, 250km Max Range
Neutralizes up to 1000 GJ of capacitor energy every 10 seconds. Very heavy powergrid requirements, not recommended for small or medium towers. In comparison, most battleships have around 4,000 to 6,000 GJ of capacitor with 10-30 GJ/s recharge. These weapons are most often used against enemy carriers in triage mode. Rarely used in hi-sec tower defense due to the heavy fitting requirements and it is generally better to employ additional ECM batteries.
Stasis Webification Battery
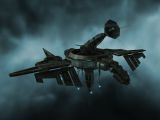
- Location: 5km+ outside POS bubble
- Times: 5s Anchor, 120s Online, 5s Unanchor
- Fitting: 25tf CPU, 50k MW PG
- Size: 4000 m3
- HP: 100k Shield, 1.5M Armor, 100k Structure
- Range: 300km Activation, 150km Max Range
Turns fast-moving targets into slow-moving targets with a -75% penalty to the web target's velocity. Works on a 10 second cycle. In generally, you should have at least a few of these to keep interceptor pilots from draining your weapon batteries of their ammo by speed-tanking.
Warp Disruption Battery

- Location: 5km+ outside POS bubble
- Times: 5s Anchor, 120s Online, 5s Unanchor
- Fitting: 50tf CPU, 100k MW PG
- Size: 4000 m3
- HP: 100k Shield, 1.5M Armor, 100k Structure
- Range: 300km Activation, 150km Max Range
- Strength: 3 points
Warp disruption batteries are long range warp scramblers with 3 points of strength. Works on a 10 second cycle. Best used when you have POS gunners to tackle a particular ship and then focus all weapons on that ship while they are trapped. Even with the heavy fitting requirements, you will want to anchor 2 of these on a large tower.
Warp Scrambling Battery

- Location: 5km+ outside POS bubble
- Times: 5s Anchor, 120s Online, 5s Unanchor
- Fitting: 25tf CPU, 25k MW PG
- Size: 4000 m3
- HP: 100k Shield, 1.5M Armor, 100k Structure
- Range: 100km Activation, 75km Max Range
- Strength: 6 points
Warp scrambling batteries are short range warp scramblers with 6 points of strength. Compared to their big brothers, they are a lot easier to fit (1/2 the CPU and 1/4 the PG). Works on a 10 second cycle.
