
|
| Planetary Industry |
|---|
| Introduction to PI |
| The Basics |
| Advanced |
| Other Resources |
Overview
All planetary structures are placed via Planet Mode, after you've placed a Command Center for the appropriate planet type and clicked "Submit." To deploy a Command Center you must have one in your cargo hold and be undocked in the desired system. You can build and manage any of the other structures while docked or in space from anywhere in the universe via the "Planets" tab of the Science and Industry window of your NeoCom.
Command Centers

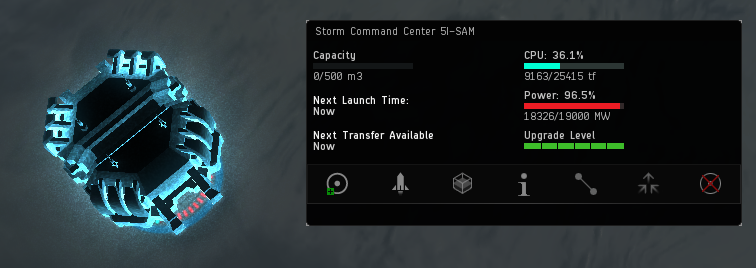
The Command Center is the first building to be deployed and provides the CPU and Powergrid for the colony. Oddly enough, there is actually no need to connect the Command Center to any of your other buildings, unless you want to take advantage of the storage or launch abilities, but a Launchpad has superior capabilities for both, albeit at the cost of more CPU and Powergrid.
To deploy the Command Center you need to be in space with it in your cargo hold and view the planet in planet mode. Under the build menu there will be a Command Center submenu which when clicked shows the Command Center type for the planet. Assuming you have that type of Command Center in your cargo hold, you can select and place it. Click "Submit" and you are the proud owner of a new colony.
You can use the rocket icon (or double click the structure) to launch commodites stored at the Command Center, up to its total capacity of 500m3. However, exporting costs 50% more from a Command Center than from a Launchpad, and unlike a Launchpad a Command Center cannot import commodities. To find your cargo once you launch it into orbit with the Command Center, go to your Journal and click on the Planetary Launches tab. Right-click on your container to warp to it and pick it up.
You can review the CPU and Powergrid use of your colony from the Command Center window. You can see the same display under the build menu, but only if you have any construction pending. In that case you'll also be able to see two bars indicating how much additional CPU and Powergrid will be consumed by the pending changes (the area past the vertical white lines), plus a numeric display of the same.
If the Command Center is decommissioned, all other buildings in the colony will be lost!
The Command Center has a volume of 1000 m3, and is upgraded in place on the planet. When first deployed, it has the profile of a Basic Command Center. Each level increments the power, CPU, and cost as listed below. You need a level of the Command Center Upgrades skill to use each Command Center upgrade beyond Basic.
| Level | Capacity | CPU Provided | Power Provided | Upgrade Cost |
|---|---|---|---|---|
| 0 | 500 m3 | 1,675 tf | 6,000 MW | N/A |
| 1 | 500 m3 | 7,057 tf | 9,000 MW | 580,000 ISK |
| 2 | 500 m3 | 12,136 tf | 12,000 MW | 930,000 ISK |
| 3 | 500 m3 | 17,215 tf | 15,000 MW | 1,200,000 ISK |
| 4 | 500 m3 | 21,315 tf | 17,000 MW | 1,500,000 ISK |
| 5 | 500 m3 | 25,415 tf | 19,000 MW | 2,100,000 ISK |
Planetary Structures
| Name | CPU Required | Power Required | Cost |
|---|---|---|---|
| Extractor Control Unit | 400 tf | 2600 MW | 45,000.00 ISK |
| Extractor Head | 110 tf | 550 MW | 0.00 ISK |
| Basic Industry Facility | 200 tf | 800 MW | 75,000.00 ISK |
| Advanced Industry Facility | 500 tf | 700 MW | 250,000.00 ISK |
| High-Tech Industry Facility | 1100 tf | 400 MW | 525,000.00 ISK |
| Storage Facility | 500 tf | 700 MW | 250,000.00 ISK |
| Launchpad | 3600 tf | 700 MW | 900,000.00 ISK |
Extractor Control Units

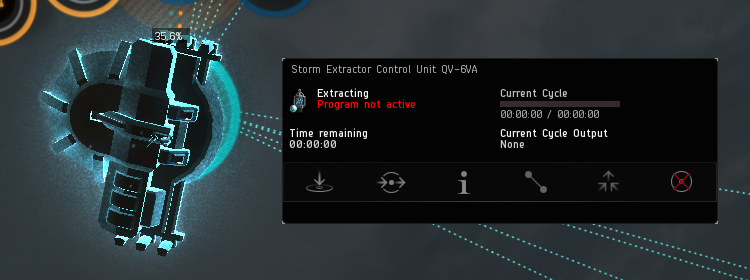
The Extractor Control Unit (ECU) is the main facility that handles the extraction of a specific planetary resource. You must set up a route for the resources to go to either storage or a basic processor.
After selecting the ECU from the build tab, a large transparent circle will be visible around the icon while hovering over the planet. This is the area in which extractor heads can be placed and operated after placement of the ECU. By placing the ECU so that its area is surrounding several hot-spots the extractor heads can be placed on different hot-spots every time a program is installed, balancing the depletion of the resource between the hot-spots. You need to place the ECU and click "Submit" before you can program the ECU and the extractor heads (see next section on extractor heads).
After installing an extraction program, simply click the output of your extractor under the Products tab, then click "Create Route" and select a destination. You have to have a link in place, but can build it in the same submit cycle - no need to commit any actions other than building the extractor itself before doing everything else. If you forget this step or want to continue with another action first (like creating a link) you can always return to the products tab by hitting the second button on the ECU window labeled "Products." It is recommended that you link to a building with storage capacity (such as a Storage Facility, Command Center, or Launchpad) before routing your products to a Basic Industry Facility for processing. This way you avoid the risk of losing materials by sending to a filled factory, as while an Industry Facility is processing it can only hold a backlog of one run's worth of component materials. Any additional materials sent to the facility will be automatically thrown out and lost.
Extractor Heads
Extraction of resources is done by extractor heads that are installable via the ECU window. The heads can be placed within the ECU's area and can be moved via drag and drop. The links between the heads and the ECUs do not add Powergrid or CPU but every head (up to a maximum of 10) needs an amount of Powergrid (550) and CPU (110).
The main idea for extractor heads is to move them around to resource hot-spots for a greater extraction amount. After placing an ECU and submitting the changes, click the first button on the ECU's pop-up widow called "Survey for Deposits." You will be presented by a screen with 10 small circles on the left labeled "extractor head units," an "extraction area size" slider below that and 5 potential planetary products on the top right. Begin by selecting the desired product. The planet will display a "heat map" for the selected product according to your scan settings. Next, set the extraction area size slider to the duration you want to extract materials. Setting a very long program (up to 14 days) will make the heads extract over a very large area, but only extract once every few hours. Selecting a short program will allow you to mine with pinpoint accuracy and get resources several times per hour, but will require more active management. Click on the first circle to attach an extractor head to your ECU. Move the extractor head to the desired location (see extractor heads to the right). When the extraction areas overlap, a penalty is displayed as a percentage in red in the ECU window. After adding the desired number of extractor heads (up to 10 per ECU), you can install the program and the ECU window will switch to the Products tab.
Processors
Processors, also known as factories, are used to convert one type of planetary resource or product into a different product. See Planetary Commodities for details on the various combinations you can use. A processor waiting for materials will have its "progress ring" slowly pulsing.
For the first two tiers of Processors are especially useful by decreasing the volume of the involved materials. Turning raw resources (R0) into P1 goods will reduce the total volume to about 25% of the original, and to another 25% of that if worked to P2 goods. After that point the volume reduction becomes less substantial and it becomes impossible to find a single planet to run the whole process perfectly from start to finish without the export/import of material.
Basic Industry Facility

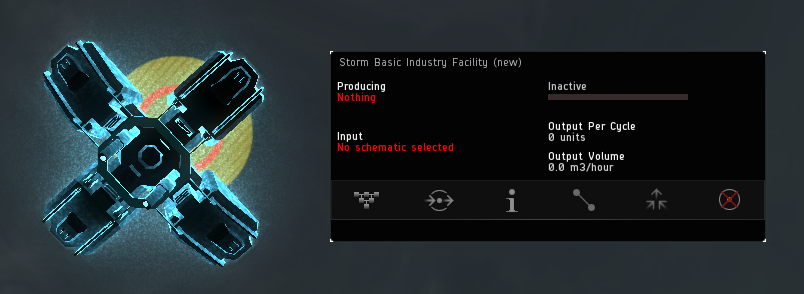
A Basic Processor turns planetary resources into the first level of products. You have to select which "Schematic" to produce via the first icon (simply double clicking the structure works too) where a drop-down will reveal all the P1 products. For instance, the first item "Bacteria" will set the Processor to take Micro Organisms as input and create Bacteria as output.
You must route a planetary resource to the Processor either directly from an Extractor or from storage. After selecting your schematic you'll be forwarded to the Products menu, where just like an Extractor you'll have to select the output, click "Create Route", and pick a destination for the product.
Be careful about routing your input directly from Extractors, as the Processor only has "storage" capacity for exactly one cycle, with anything else routed to the Processor being lost!
Advanced Industry Facility

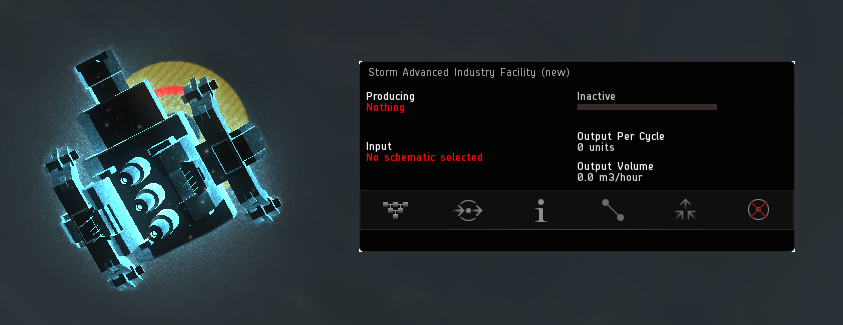
Advanced Processors are just like Basic Processors, with the exception that they produce P2 and P3 goods, with each either two or even three input products.
Again you have to select a schematic and then route input material to the Processor. P2 schematics take exactly two P1 products as input, while P3 schematics take either two or even three P2 products. The icon of the structure will change to show two or three "bars" wrapping the icon based on whatever it is producing, so you cannot tell Advanced and High Tech Processors apart from their icon, although it would be easy to get that impression.
Advanced processors, like their Basic siblings, will store up to exactly one batch of input materials, so be careful about waste!
P3 advanced factories will need two P2 advanced factories feeding it per required input product to keep it running at full efficiency.
High Tech Production Plant

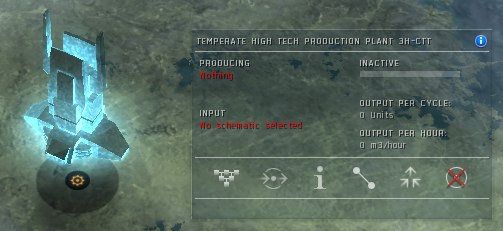
At this point you probably think you've spotted the pattern with Processors and you're just about right! The only real surprise out of this final tier of Processor, which makes tier 4 Products (P4) is that they can only be built on Barren or Temperate planets.
They take three input goods, either three P3 products or two P3 products and one P1 product. Each output P4 item is 100 m3 in volume.
You need two P3 factories per input product to keep P4 production running at full efficiency
Storage Facilities

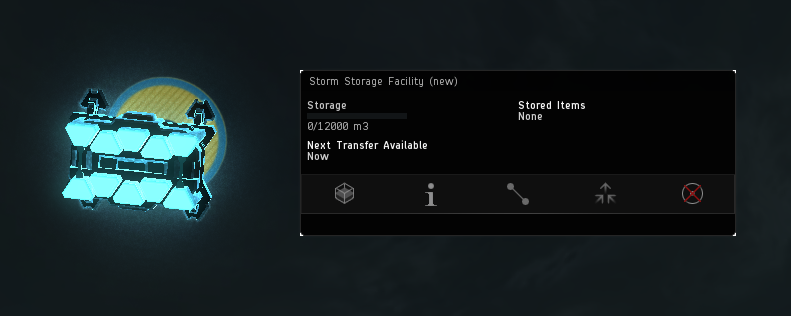
A Storage Facility is a relatively cheap way to make a buffer to hold resources or product prior to being converted or shipped to orbit. However, unless you really have substantial logistical needs on your planet, you might be better off relying on your Command Center or a Launchpad. Storage facilities originally held 5000 m3 (as in the picture) but that was increased to 12,000 m3 in the Crucible 1.1 patch making Storage Facilities more useful.
Instead of routing straight from your Extractors to Processors (at a potential risk of waste) you can first route to Storage, then route from Storage to Processor. One issue is that you cannot use routes to transfer between a Storage Facility and a building that is not a Processor - so if you want to export a commodity, you'll want to route it straight to the Command Center or a Launchpad.
If you do end up needing to move something between Storage, you can use the "Expedited Transfer" option under the Storage icon on either Storage Facilities, Launchpads, or Command Centers. Simply move the goods you want to be part of the transfer to the center panel. While this option costs no ISK, it does have a cooldown!
Launchpad

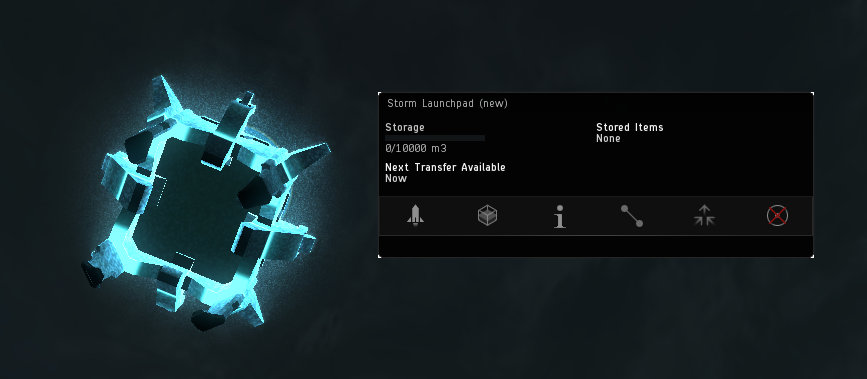
An alternative to using your Command Center as a launching point, Launchpads have more storage than Command Centers in which they can hold up to 10,000m3 of resources and products and are less expensive for exporting goods to orbit.
Each planet has a corresponding Customs Office orbiting it that connects to all Launchpads on the planet, regardless of location and owner. The Customs Office essentially provides a private hangar for all users and is the only way to move material down to the planet surface (import). However, since the Customs Office is a single point that anyone can warp to, it offers tremendous ambush potential.
Select "Access Customs Office" from anywhere you can select the Customs Office, or click the Rocket icon on your Launchpad controls directly (or just double-click the structure). This will work from anywhere in space in the same system as the planet, but you must be present in orbit to actually transfer items between your ship and the Customs Office.
See Colony Management for more details on using the Customs Office.
Planetary Links

Links are used to connect planetary buildings together so that you can route goods between them. You can CTRL -click a structure to automatically start placing a link starting from that location, then click a target. You can also build links from the main menu like all other structures, or even do so via the link menu on an existing structure. Like most other actions you have to hit "Submit" before the links are created, but you can start planning out routes before the links are created.
You do not need direct links between all your buildings - you can connect buildings to each other and route materials through them, up to a maximum of 6 hops. Do note that links have a capacity, and the more routes that pass through the same link, the more that capacity will be impacted. If your link design include any "bottleneck" links you may have to upgrade that link to a higher capacity.
You can see current usage of link capacity as a percentage above the link while you are either hovering the mouse above the link or simply hover over a building to see all links involved in routes to / from that building.
In addition to the base rate to build a link (10 PG+15 CPU), it also costs 0.20 cpu and 0.15 power per kilometer. This means links can be more expensive on larger planets. A handy table is available to estimate your cost.
See Setting up a planetary colony for more details on how to plan and use your Links efficiently.
Link Cost By Distance
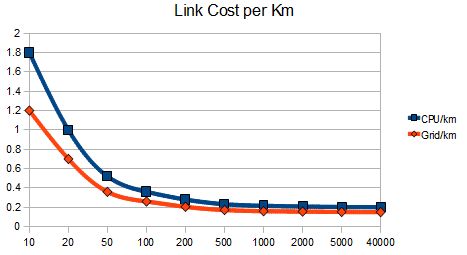
| Distance | CPU Required | Power Required |
|---|---|---|
| 2.5 km | 16 tf | 11 MW |
| 10 km | 18 tf | 12 MW |
| 20 km | 20 tf | 14 MW |
| 50 km | 26 tf | 18 MW |
| 100 km | 36 tf | 26 MW |
| 200 km | 56 tf | 41 MW |
| 500 km | 116 tf | 86 MW |
| 1000 km | 215 tf | 160 MW |
| 2000 km | 416 tf | 311 MW |
| 5000 km | 1016 tf | 761 MW |
| 40000 km | 8016 tf | 6001 MW |
Link Upgrade Costs
Data on relative costs of upgrading the link capacity (uses a link that is 500km as a base):
| Level | Capacity | CPU Required | Power Required |
|---|---|---|---|
| 0 | 250 m3 | 116 tf | 86 MW |
| 1 | 500 m3 | 280 tf | 183 MW |
| 2 | 1000 m3 | 481 tf | 291 MW |
| 3 | 2000 m3 | 713 tf | 407 MW |
| 4 | 4000 m3 | 968 tf | 528 MW |
| 5 | 8000 m3 | 1245 tf | 655 MW |
| 6 | 16000 m3 | 1542 tf | 786 MW |
| 7 | 32000 m3 | 1855 tf | 921 MW |
| 8 | 64000 m3 | 2185 tf | 1059 MW |
| 9 | 128000 m3 | 2530 tf | 1200 MW |
| 10 | 256000 m3 | 2889 tf | 1344 MW |
The increase in capacity adds 100% over the previous level.
Notice that as you upgrade the link to higher levels, the CPU usage scales faster than powergrid usage. (2010-04-29 upgrade costs no ISK, unclear whether it will stay that way.) The CPU and PG penalty declines as the level goes higher. Looking at the CPU, level 1 adds a 162% increase in CPU usage over the previous level, but going from level 9 to 10 adds only 14% increase (though level 10 is 28.5 times greater than level 0 link cost). Level 1 power grid adds a 128% increase, from level 9 to 10 adds 12% increase, and level 10 is 17.5 times the level 0 link cost.
However, in a high sec planet, you will be hard-pressed to use up the level 0 capacity of 250 m3 on most links, though depending on your layout, you might have to upgrade the occasional link by 1-2 levels.
