More actions
m Remove self targeting, that is already covered by the "this page or section ..." part. |
|||
| (5 intermediate revisions by 2 users not shown) | |||
| Line 1: | Line 1: | ||
{{ | <noinclude>{{Important note box|This information found on this page is transcluded onto [[Wormhole attributes]]. Do not delete.}}</noinclude> | ||
=== The 'Eye' or core of the Wormhole === | |||
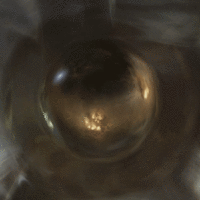
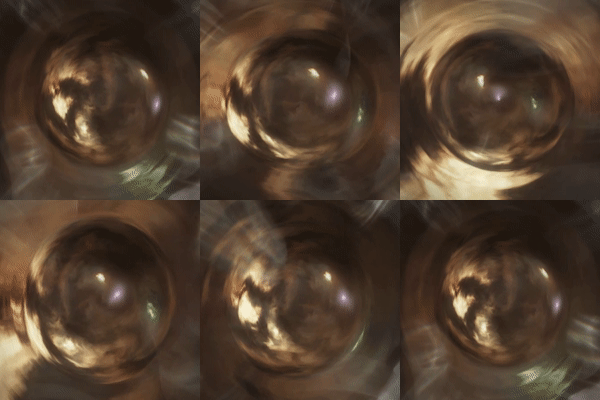
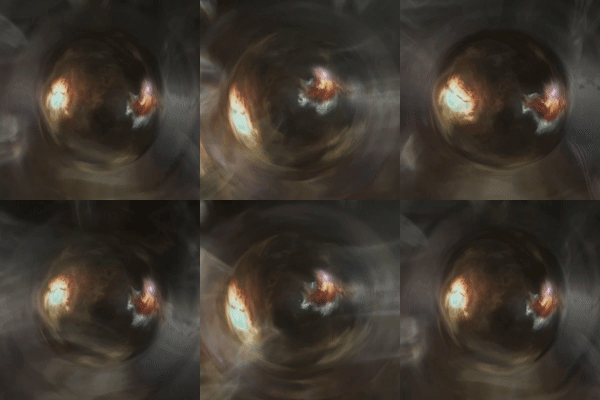
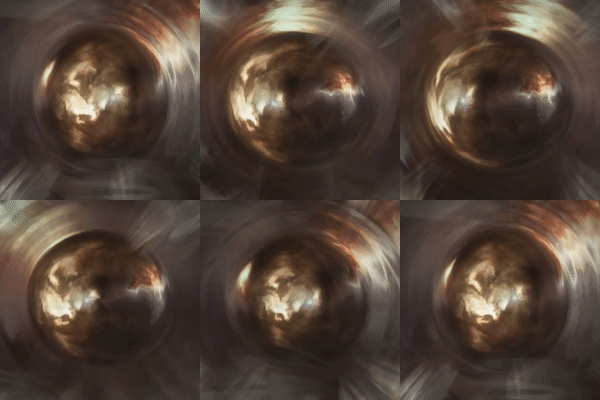
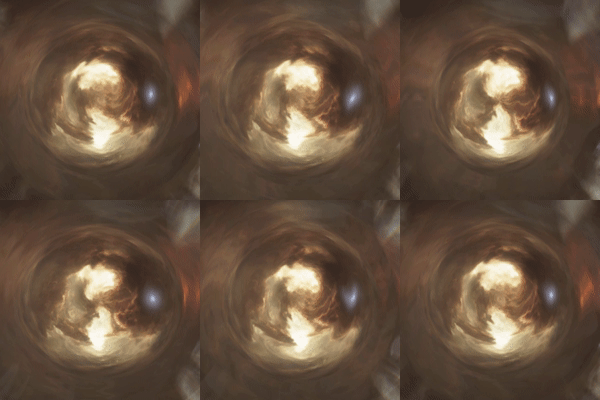
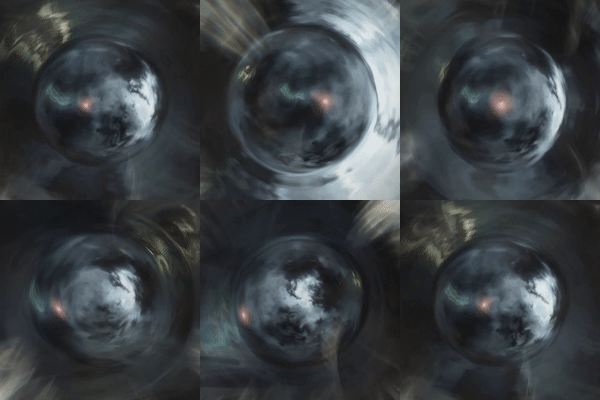
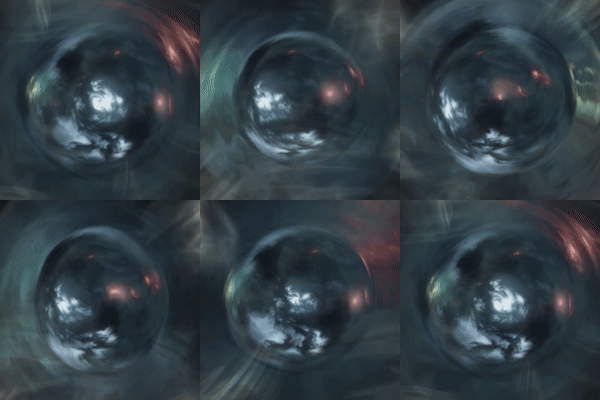
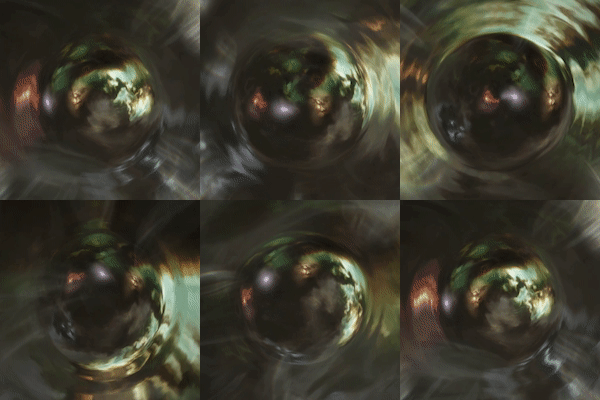
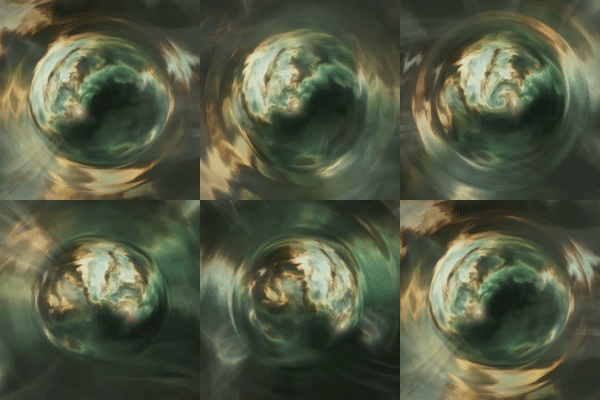
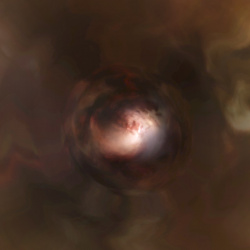
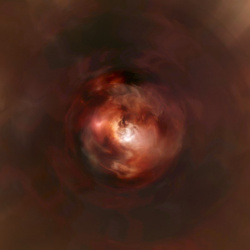
Wormholes always show the skybox of the system they are connected to in the main area of the orb. Rotating around the wormhole while "Looking At" it will rotate the view of the Skybox as well, giving you more details to look for. Each region of the game has a unique skybox, based on where it is in New Eden - you can see various nebulas in the distance that the Empires are centered in when outside of High-Sec, and when in High-Sec there are varying features that can be seen as well to determine which part of the nebula you are in. The same is true for Low-Sec, Null, and even WH Classes - each can be visually identified as to the general region/class the other side of the WH is in. | |||
Here are some gif's and images that can be used to help identify what region or class the wormhole leads too. | |||
== | ==== Wormholes that exit into Empire High-Sec ==== | ||
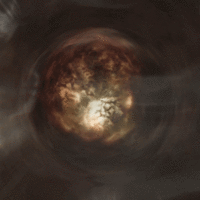
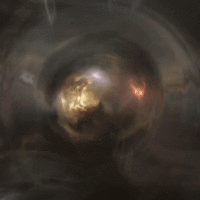
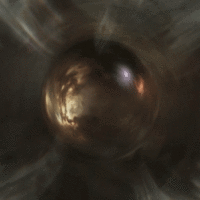
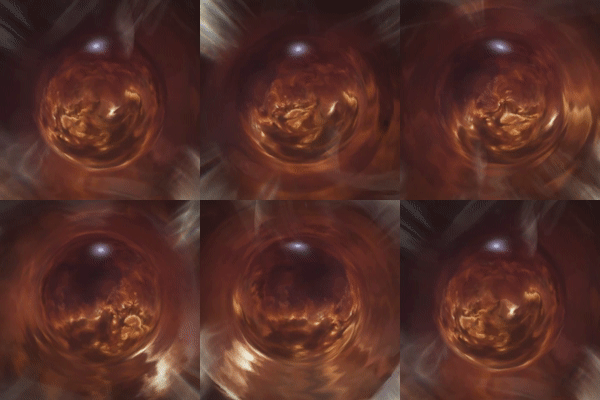
Empire based K-Space destinations, ie: High-Sec holes, will take on the color of the nebula that exists in that empire. As all 4 empires are color coded for a variety of game mechanics, so too does this color association exist for High-Sec Wormholes. {{Co|Gold|Amarr}} is gold, {{Co|Blue|Caldari}} is blue, {{Co|Green|Gallente}} is green, and {{Co|Red|Minmatar}} is red. | |||
'''(Every one of these is an animated gif - some do not show because of Mediawiki preventing gifs of a certain size from being active when resized. Clicking on one will show the animated version in its native resolution)''' | |||
<table> | |||
<tr> | |||
<td style="padding:2px">[[File:Wh Amarr - Aridia.gif|x200px|thumb|Amarr - Aridia]]</td> | |||
<td style="padding:2px">[[File:Wh Amarr - Derelik.gif|x200px|thumb|Amarr - Derelik]]</td> | |||
<td style="padding:2px">[[File:Wh Amarr - Devoid.gif|x200px|thumb|Amarr - Devoid]]</td> | |||
<td style="padding:2px">[[File:Wh Amarr - Domain.gif|x200px|thumb|Amarr - Domain]]</td> | |||
<td style="padding:2px">[[File:Wh Amarr - Genesis.gif|x200px|thumb|Amarr - Genesis]]</td> | |||
</tr> | |||
<td style="padding:2px">[[File:Wh Amarr - Kador.gif|x200px|thumb|Amarr - Kador]]</td> | |||
<td style="padding:2px">[[File:Wh Amarr - Khanid.gif|x200px|thumb|Amarr - Khanid]]</td> | |||
<td style="padding:2px">[[File:Wh Amarr - Kor-Azor.gif|x200px|thumb|Amarr - Kor-Azor]]</td> | |||
<td style="padding:2px">[[File:Wh Amarr - Tash-Murkon.gif|x200px|thumb|Amarr - Tash-Murkon]]</td> | |||
<td style="padding:2px">[[File:Wh Amarr - The Bleak Lands.gif|x200px|thumb|Amarr - The Bleak Lands]]</td> | |||
</tr> | |||
<tr> | |||
<td style="padding:2px">[[File:Wh_Caldari_-_Black_Rise.gif|x200px|thumb|Caldari - Black Rise]]</td> | |||
<td style="padding:2px">[[File:Wh Caldari - Lonetrek.gif|x200px|thumb|Caldari - Lonetrek]]</td> | |||
<td style="padding:2px">[[File:Wh Caldari - The Citadel.gif|x200px|thumb|Caldari - The Citadel]]</td> | |||
<td style="padding:2px">[[File:Wh Caldari - The Forge.gif|x200px|thumb|Caldari - The Forge]]</td> | |||
<td style="padding:2px">[[File:Wh Gallente - Essence.gif|x200px|thumb|Gallente - Essence]]</td> | |||
</tr> | |||
<tr> | |||
<td style="padding:2px">[[File:Wh Gallente - Everyshore.gif|x200px|thumb|Gallente - Everyshore]]</td> | |||
<td style="padding:2px">[[File:Wh Gallente - Placid.gif|x200px|thumb|Gallente - Placid]]</td> | |||
<td style="padding:2px">[[File:Wh Gallente - Sinq Laison.gif|x200px|thumb|Gallente - Sinq Laison]]</td> | |||
<td style="padding:2px">[[File:Wh Gallente - Solitude.gif|x200px|thumb|Gallente - Solitude]]</td> | |||
<td style="padding:2px">[[File:Wh Gallente - Verge Vendor.gif|x200px|thumb|Gallente - Verge Vendor]]</td> | |||
</tr> | |||
<tr> | |||
<td style="padding:2px">[[File:Wh Minmatar - Heimatar.gif|x200px|thumb|Minmatar - Heimatar]]</td> | |||
<td style="padding:2px">[[File:Wh Minmatar - Metropolis.gif|x200px|thumb|Minmatar - Metropolis]]</td> | |||
<td style="padding:2px">[[File:Wh Minmatar - Molden Heath.gif|x200px|thumb|Minmatar - Molden Heath]]</td> | |||
</tr> | |||
</table> | |||
''Above WH Gifs snagged from the now defunct Turbofeed or Glory: WH Identifier site, that had accreditation to Zeth and Taylor for getting the images. Thanks Zeth and Taylor!'' | |||
==== Wormholes that Exit to Jspace ==== | |||
{|class=wikitable style="width: 900px;background:#111111;text-align:center" | {|class=wikitable style="width: 900px;background:#111111;text-align:center" | ||
| Line 13: | Line 55: | ||
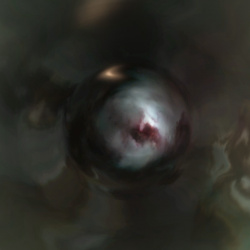
|[[File:Connection to c1.jpg|250px|border]] | |[[File:Connection to c1.jpg|250px|border]] | ||
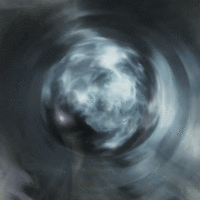
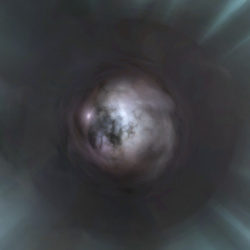
|Wormholes leading to class 1 systems have grayish clouds with some black spots and some blue and cyan details. A wormhole leading to C1 system may look similar to a wormhole leading to C2 or C3 system, the most notable difference is lack of any notable detail. | |Wormholes leading to class 1 systems have grayish clouds with some black spots and some blue and cyan details. A wormhole leading to C1 system may look similar to a wormhole leading to C2 or C3 system, the most notable difference is lack of any notable detail. | ||
It is worth noting that C1 connections can never be larger than "Medium" - meaning they will (with the exception of frig holes) have the teal connection (see chart below) - So if you are unsure, and it has a White Aura, then it cannot be a c1 connection | |||
|- | |- | ||
| Line 25: | Line 69: | ||
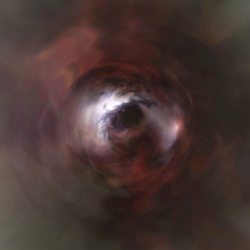
|[[File:Connection to c4.jpg|250px|border]] | |[[File:Connection to c4.jpg|250px|border]] | ||
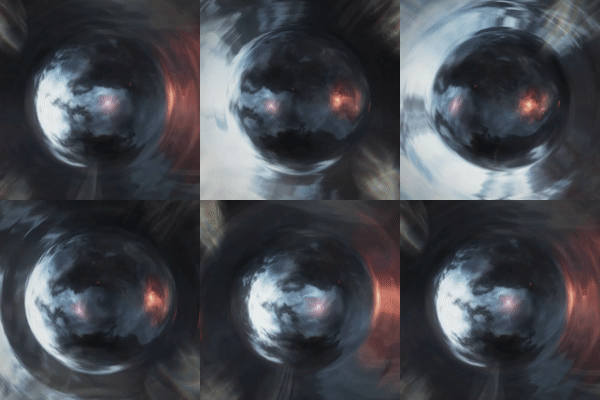
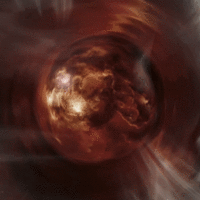
|Wormholes leading to class 4 are mainly dark red with one bright white cloud and some distinct black spots. The color of a wormhole to C4 system is unique making it easier to identify by color instead of shapes. | |Wormholes leading to class 4 are mainly dark red with one bright white cloud and some distinct black spots. The color of a wormhole to C4 system is unique making it easier to identify by color instead of shapes. | ||
It is worth noting that a c4 connection can never be a Very Large connection - meaning they will never have the Orange aura (see below) - so if you are unsure if it is a c4 or c5, check if it has an orange aura or can take very large ships - if so, it must be a c5. | |||
|- | |- | ||
| Line 35: | Line 81: | ||
|} | |} | ||
= | ====Special wormholes==== | ||
===Special wormholes=== | |||
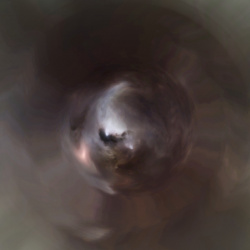
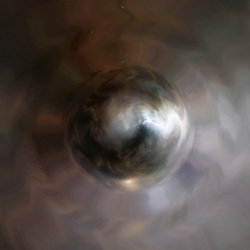
Some of the more unique wormhole systems also have their own skybox so it is possible to identify them visually without jumping. | Some of the more unique wormhole systems also have their own skybox so it is possible to identify them visually without jumping. | ||
| Line 55: | Line 91: | ||
|} | |} | ||
===Aurora of the wormhole=== | |||
The color of the flare around a wormhole will tell you the maximum mass of | Wormholes come with [[Wormhole Information|mass restrictions]]. Wormhole have both a maximum amount of mass that can pass through them in total, but also individual (per ship) transfer limits. | ||
The color of the flare around a wormhole will tell you the maximum mass of an individual ship that can go through. | |||
{|class=wikitable style="width: 900px;background:#111111;text-align:center" | {|class=wikitable style="width: 900px;background:#111111;text-align:center" | ||
|- | |- | ||
|[[File:owc_flare-frigate_960.jpg|349px|border]] | |[[File:owc_flare-frigate_960.jpg|349px|border]] | ||
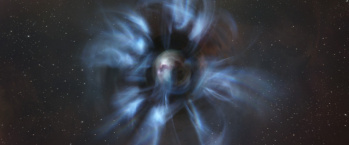
|A royal blue aurora indicates wormholes that only allow | |A royal blue aurora indicates wormholes that only allow destroyer-mass ships and below (5,000,000 kg). (This includes the [[Porpoise]], but not mining barges.) This is the most important one to recognize as it will allow scouting frigate to pass through but deny the main fleet from jumping. | ||
|- | |- | ||
|[[File:owc_flare-small_960.jpg|349px|border]] | |[[File:owc_flare-small_960.jpg|349px|border]] | ||
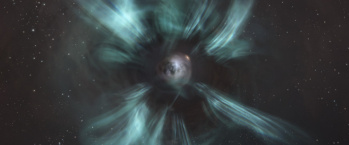
|A wormhole with a teal aurora allows medium sized ships, including cruisers, battlecruisers and industrials, to pass through (20,000,000 kg). | |A wormhole with a teal aurora allows medium sized ships, including cruisers, battlecruisers and industrials, to pass through (20,000,000 kg or 62,000,000 kg depending on type). Notably the [[Nestor]] is the only battleship that can be flown through this wormhole. | ||
|- | |- | ||
|[[File:owc_flare-medium_960.jpg|349px|border]] | |[[File:owc_flare-medium_960.jpg|349px|border]] | ||
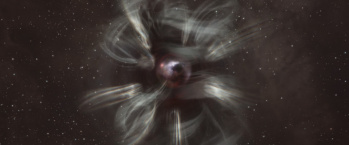
|A gray aurora highlights a wormhole that allows every ship below capital hulls to pass through (300,000,000 kg). | |A gray aurora highlights a wormhole that allows every ship below capital hulls, other than the [[Bowhead]], to pass through (300,000,000 kg). | ||
|- | |- | ||
| Line 81: | Line 118: | ||
==Wormhole health== | ==Wormhole health== | ||
As the wormhole gets older the visuals change slightly. With 24-4 hours left on the hole the aurora surrounding it wiggle more. With less than 4 hours left on the hole the aurora become faded and have less defined forms. | As the wormhole gets older the visuals change slightly. With 24-4 hours left on the hole the aurora surrounding it wiggle more. With less than 4 hours left on the hole the aurora become faded and have less defined forms. | ||
(Some claim this effect gets more intense the closer to closing the hole is - there is no mechanical information or datamined information to support this, only anecdotal) | |||
Furthermore, as a wormhole becomes destabilized from large amounts of mass traversing it, it starts to shrink. This effect is generally most visible at the moment a hole drops to 50% or 10% mass and thus actively shrinks, as it can be more difficult to get an idea of the wormhole's visible size in a vacuum. | Furthermore, as a wormhole becomes destabilized from large amounts of mass traversing it, it starts to shrink. This effect is generally most visible at the moment a hole drops to 50% or 10% mass and thus actively shrinks, as it can be more difficult to get an idea of the wormhole's visible size in a vacuum. | ||
[[Category:Wormholes]] | |||
<!-- Preserved in a comment for now. Probably just needs to be removed entirely. | |||
Reason: The images here are not entirely correct. A C3 destination wh always looks the same in its eye no matter what class it spawns in. Also, the wisps that are included are not indicitive of the destination, wisps/aura indicate the individual mass transfer limit. | |||
<table> | |||
<tr> | |||
<th style="border:none"></th> | |||
<th style="text-align:center; vertical-align:middle">C1</th> | |||
<th style="text-align:center; vertical-align:middle">C2</th> | |||
<th style="text-align:center; vertical-align:middle">C3</th> | |||
<th style="text-align:center; vertical-align:middle">C4</th> | |||
<th style="text-align:center; vertical-align:middle">C5</th> | |||
<th style="text-align:center; vertical-align:middle">C6</th> | |||
</tr> | |||
<tr> | |||
<th style="text-align:center; vertical-align:middle">C1</th> | |||
<td style="padding:2px">[[File:wc_c1_to_c1_wh.jpg|thumb|C1 to C1]]</td> | |||
<td style="padding:2px">[[File:wc_c1_to_c2_wh.jpg|thumb|C1 to C2]]</td> | |||
<td style="padding:2px">[[File:wc_c1_to_c3_wh.jpg|thumb|C1 to C3]]</td> | |||
<td style="padding:2px">[[File:wc_c1_to_c4_wh.jpg|thumb|C1 to C4]]</td> | |||
<td style="padding:2px">[[File:wc_c1_to_c5_wh.jpg|thumb|C1 to C5]]</td> | |||
<td style="padding:2px">[[File:wc_c1_to_c6_wh.jpg|thumb|C1 to C6]]</td> | |||
</tr> | |||
<tr> | |||
<th style="text-align:center; vertical-align:middle">C2</th> | |||
<td style="padding:2px">[[File:wc_c2_to_c1_wh.jpg|thumb|C2 to C1]]</td> | |||
<td style="padding:2px">[[File:wc_c2_to_c2_wh.jpg|thumb|C2 to C2]]</td> | |||
<td style="padding:2px">[[File:wc_c2_to_c3_wh.jpg|thumb|C2 to C3]]</td> | |||
<td style="padding:2px">[[File:wc_c2_to_c4_wh.jpg|thumb|C2 to C4]]</td> | |||
<td style="padding:2px">[[File:wc_c2_to_c5_wh.jpg|thumb|C2 to C5]]</td> | |||
<td style="padding:2px">[[File:wc_c2_to_c6_wh.jpg|thumb|C2 to C6]]</td> | |||
</tr> | |||
<tr> | |||
<th style="text-align:center; vertical-align:middle">C3</th> | |||
<td style="padding:2px">[[File:wc_c3_to_c1_wh.jpg|thumb|C3 to C1]]</td> | |||
<td style="padding:2px">[[File:wc_c3_to_c2_wh.jpg|thumb|C3 to C2]]</td> | |||
<td style="padding:2px">[[File:wc_c3_to_c3_wh.jpg|thumb|C3 to C3]]</td> | |||
<td style="padding:2px">[[File:wc_c3_to_c4_wh.jpg|thumb|C3 to C4]]</td> | |||
<td style="padding:2px">[[File:wc_c3_to_c5_wh.jpg|thumb|C3 to C5]]</td> | |||
<td style="padding:2px">[[File:wc_c3_to_c6_wh.jpg|thumb|C3 to C6]]</td> | |||
</tr> | |||
<tr> | |||
<th style="text-align:center; vertical-align:middle">C4</th> | |||
<td style="padding:2px">[[File:wc_c4_to_c1_wh.jpg|thumb|C4 to C1]]</td> | |||
<td style="padding:2px">[[File:wc_c4_to_c2_wh.jpg|thumb|C4 to C2]]</td> | |||
<td style="padding:2px">[[File:wc_c4_to_c3_wh.jpg|thumb|C4 to C3]]</td> | |||
<td style="padding:2px">[[File:wc_c4_to_c4_wh.jpg|thumb|C4 to C4]]</td> | |||
<td style="padding:2px">[[File:wc_c4_to_c5_wh.jpg|thumb|C4 to C5]]</td> | |||
<td style="padding:2px">[[File:wc_c4_to_c6_wh.jpg|thumb|C4 to C6]]</td> | |||
</tr> | |||
<tr> | |||
<th style="text-align:center; vertical-align:middle">C5</th> | |||
<td style="padding:2px">[[File:wc_c5_to_c1_wh.jpg|thumb|C5 to C1]]</td> | |||
<td style="padding:2px">[[File:wc_c5_to_c2_wh.jpg|thumb|C5 to C2]]</td> | |||
<td style="padding:2px">[[File:wc_c5_to_c3_wh.jpg|thumb|C5 to C3]]</td> | |||
<td style="padding:2px">[[File:wc_c5_to_c4_wh.jpg|thumb|C5 to C4]]</td> | |||
<td style="padding:2px">[[File:wc_c5_to_c5_wh.jpg|thumb|C5 to C5]]</td> | |||
<td style="padding:2px">[[File:wc_c5_to_c6_wh.jpg|thumb|C5 to C6]]</td> | |||
</tr> | |||
<tr> | |||
<th style="text-align:center; vertical-align:middle">C6</th> | |||
<td style="padding:2px">[[File:wc_c6_to_c1_wh.jpg|thumb|C6 to C1]]</td> | |||
<td style="padding:2px">[[File:wc_c6_to_c2_wh.jpg|thumb|C6 to C2]]</td> | |||
<td style="padding:2px">[[File:wc_c6_to_c3_wh.jpg|thumb|C6 to C3]]</td> | |||
<td style="padding:2px">[[File:wc_c6_to_c4_wh.jpg|thumb|C6 to C4]]</td> | |||
<td style="padding:2px">[[File:wc_c6_to_c5_wh.jpg|thumb|C6 to C5]]</td> | |||
<td style="padding:2px">[[File:wc_c6_to_c6_wh.jpg|thumb|C6 to C6]]</td> | |||
</tr> | |||
</table> | |||
--> | |||
<noinclude> | |||
[[Category: Wormholes]] | |||
</noinclude> | |||
Latest revision as of 19:13, 10 May 2025
The 'Eye' or core of the Wormhole
Wormholes always show the skybox of the system they are connected to in the main area of the orb. Rotating around the wormhole while "Looking At" it will rotate the view of the Skybox as well, giving you more details to look for. Each region of the game has a unique skybox, based on where it is in New Eden - you can see various nebulas in the distance that the Empires are centered in when outside of High-Sec, and when in High-Sec there are varying features that can be seen as well to determine which part of the nebula you are in. The same is true for Low-Sec, Null, and even WH Classes - each can be visually identified as to the general region/class the other side of the WH is in.
Here are some gif's and images that can be used to help identify what region or class the wormhole leads too.
Wormholes that exit into Empire High-Sec
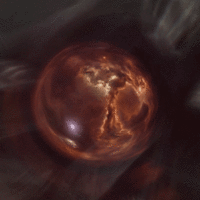
Empire based K-Space destinations, ie: High-Sec holes, will take on the color of the nebula that exists in that empire. As all 4 empires are color coded for a variety of game mechanics, so too does this color association exist for High-Sec Wormholes. Amarr is gold, Caldari is blue, Gallente is green, and Minmatar is red.
(Every one of these is an animated gif - some do not show because of Mediawiki preventing gifs of a certain size from being active when resized. Clicking on one will show the animated version in its native resolution)
Above WH Gifs snagged from the now defunct Turbofeed or Glory: WH Identifier site, that had accreditation to Zeth and Taylor for getting the images. Thanks Zeth and Taylor!
Wormholes that Exit to Jspace
Special wormholes
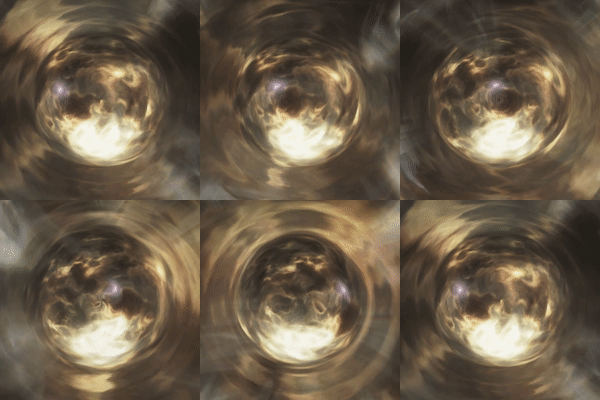
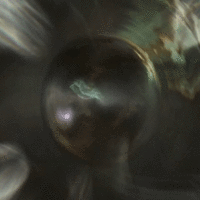
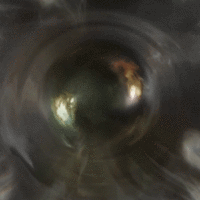
Some of the more unique wormhole systems also have their own skybox so it is possible to identify them visually without jumping.
|
This skybox is shown on Thera wormholes, C13 frigate sized shattered wormholes and on Drifter wormholes. Not all shattered wormholes have this visual. |
Aurora of the wormhole
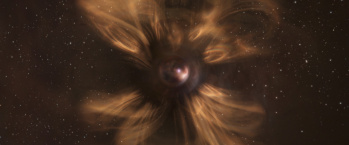
Wormholes come with mass restrictions. Wormhole have both a maximum amount of mass that can pass through them in total, but also individual (per ship) transfer limits.
The color of the flare around a wormhole will tell you the maximum mass of an individual ship that can go through.
|
A royal blue aurora indicates wormholes that only allow destroyer-mass ships and below (5,000,000 kg). (This includes the Porpoise, but not mining barges.) This is the most important one to recognize as it will allow scouting frigate to pass through but deny the main fleet from jumping. |
|
A wormhole with a teal aurora allows medium sized ships, including cruisers, battlecruisers and industrials, to pass through (20,000,000 kg or 62,000,000 kg depending on type). Notably the Nestor is the only battleship that can be flown through this wormhole. |
|
A gray aurora highlights a wormhole that allows every ship below capital hulls, other than the Bowhead, to pass through (300,000,000 kg). |
|
A yellow aurora indicates wormholes that freighters and capitals can transit (1,000,000,000 kg, 1,350,000,000 kg or 1,800,000,000 kg). |
Wormhole health
As the wormhole gets older the visuals change slightly. With 24-4 hours left on the hole the aurora surrounding it wiggle more. With less than 4 hours left on the hole the aurora become faded and have less defined forms.
(Some claim this effect gets more intense the closer to closing the hole is - there is no mechanical information or datamined information to support this, only anecdotal)
Furthermore, as a wormhole becomes destabilized from large amounts of mass traversing it, it starts to shrink. This effect is generally most visible at the moment a hole drops to 50% or 10% mass and thus actively shrinks, as it can be more difficult to get an idea of the wormhole's visible size in a vacuum.

