Ellis Ofsol (talk | contribs) mNo edit summary |
Ellis Ofsol (talk | contribs) mNo edit summary |
||
| (6 intermediate revisions by 2 users not shown) | |||
| Line 12: | Line 12: | ||
== Overview: damage types, EWAR, factions == | == Overview: damage types, EWAR, factions == | ||
The following table details the electronic warfare ([[EWAR]]) tactics you’ll face and the primary and secondary damage profiles pilots must defend against. | The following table details the electronic warfare ([[EWAR]]) tactics you’ll face and the primary and secondary damage profiles pilots must defend against. | ||
{| class="wikitable" | {| class="wikitable mw-collapsible" | ||
! colspan="4" |[[File:Logo_faction_gallente_federation_clean.png|64x64px|Gallente space]]Gallente Region | |+ | ||
! colspan="4" style="background-color: #222d23" |[[File:Logo_faction_gallente_federation_clean.png|64x64px|Gallente space]]Gallente Region | |||
! colspan="4" style="background-color: #442a28" |[[File:Logo_faction_minmatar_republic_clean.png|64x64px|Minmatar space]] Minmatar Region | |||
|- | |- | ||
!Site | !Site | ||
!Damage Types | !Damage Types | ||
!EWAR | !EWAR | ||
! | !Weakness | ||
!Site | |||
!Damage types | |||
!EWAR | |||
!Weakness | |||
|- | |- | ||
|[[Suspicious Signal|Suspicious Signal: Stop the Siphon]] | |[[Suspicious Signal|Suspicious Signal: Stop the Siphon]] | ||
|{{Damage to resist|Caldari}} | |{{Damage to resist|Caldari}} | ||
|[[File:Icon_target_max.png|16x16px]] ECM | |[[File:Icon_target_max.png|16x16px]] ECM | ||
| | |{{Damagetype|EM}} | ||
|[[Suspicious Signal|Suspicious Signal: Stop the Sabotage]] | |||
|{{Damage to resist|Amarr}} | |||
|[[File:Icon_energy_neutralizer_i.png|16x16px]] Neuts / [[File:Icon_track_disruptor_64.png|16x16px]][[File:Icon_missile_guidance_computer_i.png|16x16px]] Weapon disruption | |||
|{{Damagetype|EX}} | |||
|- | |- | ||
|[[Dread Assault|Dread Assault: Primacy Base]] | |[[Dread Assault|Dread Assault: Primacy Base]] | ||
|{{Damagetype|ex|em}}<!--Gallentia Primacy--> | |{{Damagetype|ex|em}}<!--Gallentia Primacy--> | ||
|[[File:Icon_energy_neutralizer_i.png|16x16px]] Neuts /[[File:Icon_target_max.png|16x16px]] ECM | |[[File:Icon_energy_neutralizer_i.png|16x16px]] Neuts /[[File:Icon_target_max.png|16x16px]] ECM | ||
| | |{{Damagetype|TH}} | ||
|[[Dread Assault|Dread Assault: Cartel Racket]] | |||
|{{Damage to resist|Angel}} | |||
|[[File:Icon_target_painter_i.png|16x16px]] Paints/[[File:Icon_target_max.png|16x16px]] ECM | |||
|{{Damagetype|em}} | |||
|- | |- | ||
|[[Raid|Raid: Narcotics Lab]] | |[[Raid|Raid: Narcotics Lab]] | ||
|{{Damage to resist|Serpentis}} | |{{Damage to resist|Serpentis}} | ||
|[[File:Icon_remote_sensor_dampening.png|16x16px]] Damps | |[[File:Icon_remote_sensor_dampening.png|16x16px]] Damps | ||
| | |{{Damagetype|Em}} | ||
|[[Raid|Raid: Deserters Hideout]] | |||
|{{Damagetype|th|em}}<!--Ashes of Turnur--> | |||
|[[File:Icon_target_max.png|16x16px]] ECM | |||
|{{Damagetype|EX}} | |||
|- | |- | ||
|[[Emergency Aid|Emergency Aid: Automated Factory]] | |[[Emergency Aid|Emergency Aid: Automated Factory]] | ||
|{{Damagetype|em|th}}<!--Rogue Drones--> | |{{Damagetype|em|th}}<!--Rogue Drones--> | ||
|[[File:Icon_stasis_webifier_i.png|16x16px]] Webs | |[[File:Icon_stasis_webifier_i.png|16x16px]] Webs | ||
| | |{{Damagetype|ex}} | ||
|[[Emergency Aid|Emergency Aid: Clan Holding]] | |||
|{{Damage to resist|Angel}} | |||
|[[File:Icon_target_painter_i.png|16x16px]] Paints | |||
|{{Damagetype|Em}} | |||
|- | |- | ||
|[[Metaliminal Meteoroid|Metaliminal Meteoroid: Gallente Mining]] | |[[Metaliminal Meteoroid|Metaliminal Meteoroid: Gallente Mining]] | ||
|{{Damagetype|em|th}}<!--Rogue Drones--> | |{{Damagetype|em|th}}<!--Rogue Drones--> | ||
|[[File:Icon_stasis_webifier_i.png|16x16px]] Webs | |[[File:Icon_stasis_webifier_i.png|16x16px]] Webs | ||
|{{Damagetype|Ex}} | |||
|{{Damagetype| | |||
|[[Metaliminal Meteoroid|Metaliminal Meteoroid: Minmatar Mining]] | |[[Metaliminal Meteoroid|Metaliminal Meteoroid: Minmatar Mining]] | ||
|{{Damagetype|th|em}}<!--Ashes of Turnur--> | |{{Damagetype|th|em}}<!--Ashes of Turnur--> | ||
|[[File:Icon_target_max.png|16x16px]] ECM | |[[File:Icon_target_max.png|16x16px]] ECM | ||
| | |{{Damagetype|ex}} | ||
|- | |- | ||
| colspan="4" |[[File:Logo_faction_caldari_state_clean.png|64x64px|Caldari space]] Caldari | | colspan="4" style="background-color: #222222" |[[File:Logo_faction_caldari_state_clean.png|64x64px|Caldari space]] Caldari Region | ||
| colspan="4" style="background-color: #443719" |[[File:Logo_faction_amarr_empire_clean.png|64x64px|Amarr space]] Amarr Region | |||
|- | |- | ||
!Site | !Site | ||
!Damage | !Damage types | ||
!EWAR | |||
!Weakness | |||
!Site | |||
!Damage types | |||
!EWAR | !EWAR | ||
! | !Weakness | ||
|- | |- | ||
|[[Suspicious Signal|Suspicious Signal: Block the Broadcast]] | |[[Suspicious Signal|Suspicious Signal: Block the Broadcast]] | ||
|{{Damage to resist|Gallente}} | |{{Damage to resist|Gallente}} | ||
|[[File:Icon_remote_sensor_dampening.png|16x16px]] Damps | |[[File:Icon_remote_sensor_dampening.png|16x16px]] Damps | ||
| | |{{Damagetype|EM}} | ||
|[[Suspicious Signal|Suspicious Signal: Secure the Intel]] | |||
|{{Damage to resist|Minmatar}} | |||
|[[File:Icon_target_painter_i.png|16x16px]] Paints | |||
|{{Damagetype|Em}} | |||
|- | |- | ||
|[[Dread Assault|Dread Assault: Occupied Industry]] | |[[Dread Assault|Dread Assault: Occupied Industry]] | ||
|{{Damagetype|ex|em}}<!--United Champions of Freedom--> | |{{Damagetype|ex|em}}<!--United Champions of Freedom--> | ||
|[[File:Icon_energy_neutralizer_i.png|16x16px]] Neuts /[[File:Icon_target_max.png|16x16px]] ECM | |[[File:Icon_energy_neutralizer_i.png|16x16px]] Neuts /[[File:Icon_target_max.png|16x16px]] ECM | ||
| | |{{Damagetype|TH}} | ||
|[[Dread Assault|Dread Assault: Blood Raider Temple]] | |||
|{{Damage to resist|Blood raiders}} | |||
|[[File:Icon_energy_neutralizer_i.png|16x16px]] Neuts / [[File:Icon_track_disruptor_64.png|16x16px]][[File:Icon_missile_guidance_computer_i.png|16x16px]] Weapon disruption / [[File:Icon_target_max.png|16x16px]] ECM | |||
|{{Damagetype|ex}} | |||
|- | |- | ||
|[[Raid|Raid: Black Market]] | |[[Raid|Raid: Black Market]] | ||
|{{Damage to resist|Guristas}} | |{{Damage to resist|Guristas}} | ||
|[[File:Icon_target_max.png|16x16px]] ECM | |[[File:Icon_target_max.png|16x16px]] ECM | ||
| | |{{Damagetype|Em}} | ||
|[[Raid|Raid: Hall of Sacrifice]] | |||
|{{Damage to resist|Blood raiders}} | |||
|[[File:Icon_energy_neutralizer_i.png|16x16px]] Neuts / [[File:Icon_track_disruptor_64.png|16x16px]][[File:Icon_missile_guidance_computer_i.png|16x16px]] Weapon disruption | |||
|{{Damagetype|ex}} | |||
|- | |- | ||
|[[Emergency Aid|Emergency Aid: Convoy]] | |[[Emergency Aid|Emergency Aid: Convoy]] | ||
|{{Damage to resist|Guristas}} | |{{Damage to resist|Guristas}} | ||
|[[File:Icon_target_max.png|16x16px]] ECM | |[[File:Icon_target_max.png|16x16px]] ECM | ||
| | |{{Damagetype|Em}} | ||
|[[Emergency Aid|Emergency Aid: Holy Mission]] | |||
|{{Damagetype|th|ex}}<!--Disciples of Purity--> | |||
|[[File:Icon_target_max.png|16x16px]] ECM | |||
|{{Damagetype|em}} | |||
|- | |- | ||
|[[Homefront operation#Metaliminal Meteoroid|Metaliminal Meteoroid: Caldari Mining]] | |[[Homefront operation#Metaliminal Meteoroid|Metaliminal Meteoroid: Caldari Mining]] | ||
|{{Damage to resist|Guristas}} | |{{Damage to resist|Guristas}} | ||
|[[File:Icon_target_max.png|16x16px]] ECM | |[[File:Icon_target_max.png|16x16px]] ECM | ||
|{{Damagetype|em}} | |||
|{{Damagetype| | |||
|[[Metaliminal Meteoroid|Metaliminal Meteoroid: Amarr Mining]] | |[[Metaliminal Meteoroid|Metaliminal Meteoroid: Amarr Mining]] | ||
|{{Damagetype|th|ex}}<!--Disciples of Purity--> | |{{Damagetype|th|ex}}<!--Disciples of Purity--> | ||
|[[File:Icon_target_max.png|16x16px]] ECM | |[[File:Icon_target_max.png|16x16px]] ECM | ||
| | |{{Damagetype|em}} | ||
|- | |- | ||
| colspan=" | | colspan="8" style="background-color: #111111" |[[File:4factions_logo.png|64x64px]] All Empires | ||
|- | |- | ||
!Site | ! colspan="2" |Site | ||
!Damage Types | !Damage Types | ||
!EWAR | ! colspan="4" |EWAR | ||
! | !Weakness | ||
|- | |- | ||
|[[Abyssal Artifact Recovery]] | | colspan="2" |[[Abyssal Artifact Recovery]] | ||
|{{Damage to resist|Triglavians}} | |||
| colspan="4" | [[File:Icon_warp_disruptor_i.png|16px]] Warp bubble / [[File:Icon_energy_neutralizer_i.png|16x16px]] Neuts / [[File:Icon_track_disruptor_64.png|16x16px]][[File:Icon_missile_guidance_computer_i.png|16x16px]] Weapon disruption / [[File:Icon_stasis_webifier_i.png|16px]] Webs / [[File:Icon_target_painter_i.png|16px]]Paints / [[File:Icon_remote_sensor_dampening.png|16px]]Damps | |||
|{{Damage to resist|Triglavians}} | |{{Damage to resist|Triglavians}} | ||
|- | |- | ||
|[[Salvage Research]] (3 pilots) | | colspan="2" |[[Salvage Research]] (3 pilots) | ||
|{{Damagetype| | |{{Damagetype|th|em}}<!--Ashes of Turnur--> | ||
|[[File:Icon_target_max.png|16x16px]] ECM | | colspan="4" |[[File:Icon_target_max.png|16x16px]] ECM | ||
| | |{{Damagetype|Ex}} | ||
|- | |- | ||
|[[Traffic Stop]] (3 pilots) | | colspan="2" |[[Traffic Stop]] (3 pilots) | ||
|[[File:Icon_damage_em.png|16x16px|Electromagnetic damage]] EM | |[[File:Icon_damage_em.png|16x16px|Electromagnetic damage]] EM | ||
|None | | colspan="4" |None | ||
| | |{{Damagetype|EM}}{{Damagetype|ex}} | ||
|- | |- | ||
|[[Stabilize Rift]] (3 pilots) | | colspan="2" |[[Stabilize Rift]] (3 pilots) | ||
|{{Damage to resist|Sleepers}} | |{{Damage to resist|Sleepers}} | ||
|[[File:Icon_energy_neutralizer_i.png|16x16px]] Neuts / Enemies Cap Transfer Arrays | | colspan="4" |[[File:Icon_energy_neutralizer_i.png|16x16px]] Neuts / [[File:Icon_remote_capacitor_transmitter_i.png|16px]] Enemies Cap Transfer Arrays | ||
| | |{{Damage to resist|Triglavians}} | ||
|} | |} | ||
| Line 209: | Line 195: | ||
{{Main|Suspicious Signal}} | {{Main|Suspicious Signal}} | ||
[[File:Suspicious_Signal-_Vexor_Cruiser_.jpg|left|thumb|Suspicious Signal: Secure the Intel]] | [[File:Suspicious_Signal-_Vexor_Cruiser_.jpg|left|thumb|Suspicious Signal: Secure the Intel]] | ||
This mission focuses on bringing down an enemy structure. At first it cannot be harmed, and only becomes vulnerable once three | This mission focuses on bringing down an enemy structure. At first it cannot be harmed, and only becomes vulnerable once three arrays on the site are successfully hacked. Each successful hack opens a timed window, and if all are done together, the group has a short opportunity to inflict as much damage as possible. | ||
The structure itself is tough, demanding steady firepower and good coordination. Typical groups bring strong damage-dealing ships, with some pilots handling the hacking, while others keep the team stable and supported. The challenge lies in timing the hacks and concentrating fire so the structure can be destroyed before the opportunity closes. | The structure itself is tough, demanding steady firepower and good coordination. Typical groups bring strong damage-dealing ships, with some pilots handling the hacking, while others keep the team stable and supported. The challenge lies in timing the hacks and concentrating fire so the structure can be destroyed before the opportunity closes. | ||
| Line 237: | Line 223: | ||
=== Stabilize Rift === | === Stabilize Rift === | ||
{{Main|Stabilize Rift}} | {{Main|Stabilize Rift}} | ||
[[File:Stabilize_Rift-_Dragoon.png|thumb| | [[File:Stabilize_Rift-_Dragoon.png|thumb|Stabilize Rift]] | ||
The Stabilize Rift requires your fleet to prevent the Sleepers from collapsing an active abyssal rift. The enemy has anchored five Destabilizing Arrays, which must be drained of capacitor and held below 20% simultaneously to break the destabilization cycle. | The Stabilize Rift requires your fleet to prevent the Sleepers from collapsing an active abyssal rift. The enemy has anchored five Destabilizing Arrays, which must be drained of capacitor and held below 20% simultaneously to break the destabilization cycle. | ||
Destroyer-class vessels equipped with energy neutralizer modules and combat drones are advised. Sleeper reinforcements may attempt to neutralize your capacitor or restore power to the arrays, forcing a prolonged engagement. This mission demands strict coordination and precise execution. Success will stabilize the rift and | Destroyer-class vessels equipped with energy neutralizer modules and combat drones are advised. Sleeper reinforcements may attempt to neutralize your capacitor or restore power to the arrays, forcing a prolonged engagement. This mission demands strict coordination and precise execution. Success will stabilize the rift and allow free passage for the Triglavian caravan. | ||
=== Traffic Stop === | === Traffic Stop === | ||
{{Main|Traffic Stop}} | {{Main|Traffic Stop}} | ||
[[File:Homefronts_Traffic_Stop.jpg|left|thumb|Traffic Stop]] | [[File:Homefronts_Traffic_Stop.jpg|left|thumb|Traffic Stop]] | ||
The mission requires your fleet to scan incoming | The mission requires your fleet to scan incoming haulers as they try to reach the local market. Any ship carrying illicit data must be stopped and destroyed, webifier modules are recommended. Once an enemy hauler is caught, it will deploy attack drones to engage your ship and greatly increase its speed in an attempt to reach its destination. | ||
At the same time, pilots must avoid harming civilians. Attacking more than two civilians or allowing five contraband ships to dock will fail the mission. Success depends on careful scanning, precise targeting, and steady coordination throughout the full timer, meeting both objectives without mistakes. | At the same time, pilots must avoid harming civilians. Attacking more than two civilians or allowing five contraband ships to dock will fail the mission. Success depends on careful scanning, precise targeting, and steady coordination throughout the full timer, meeting both objectives without mistakes. | ||
Latest revision as of 08:45, 27 August 2025

|
| Homefront Operations |
|---|
|
|
| Universal Sites |
Homefront operations are Cosmic Anomalies found in high security space that demand coordinated groups of pilots, filling roles ranging from traditional fleet positions like enforcers (DPS), miners, haulers and logistics (Logi) to more specialized tasks such as hacking, cargo scanning and tackling.
There a total of 9 unique Homefront operations to choose from, 6 missions are designed for fleets of 5 pilots, the other 3 missions require fleets of 3 pilots. Each operation offers its own scenario, team setup, and strategy. At the entrance, the acceleration gate restricts access to specific ship types, depending on the mission.
Goal
Bringing new and experienced capsuleers together to do new activities, help to establish social connections and introduce fleet gameplay.
Homefront types in different Empires
The enemies, narrative, and specific goals of a site depend on which empire’s space it is located in. Some sites feature hostiles from newly traitorous corporations that have splintered away from their parent empire.
Overview: damage types, EWAR, factions
The following table details the electronic warfare (EWAR) tactics you’ll face and the primary and secondary damage profiles pilots must defend against.
 Gallente Region Gallente Region
|
 Minmatar Region Minmatar Region
| ||||||
|---|---|---|---|---|---|---|---|
| Site | Damage Types | EWAR | Weakness | Site | Damage types | EWAR | Weakness |
| Suspicious Signal: Stop the Siphon | Suspicious Signal: Stop the Sabotage | ||||||
| Dread Assault: Primacy Base | Dread Assault: Cartel Racket | ||||||
| Raid: Narcotics Lab | Raid: Deserters Hideout | ||||||
| Emergency Aid: Automated Factory | Emergency Aid: Clan Holding | ||||||
| Metaliminal Meteoroid: Gallente Mining | Metaliminal Meteoroid: Minmatar Mining | ||||||
 Caldari Region Caldari Region
|
 Amarr Region Amarr Region
| ||||||
| Site | Damage types | EWAR | Weakness | Site | Damage types | EWAR | Weakness |
| Suspicious Signal: Block the Broadcast | Suspicious Signal: Secure the Intel | ||||||
| Dread Assault: Occupied Industry | Dread Assault: Blood Raider Temple | ||||||
| Raid: Black Market | Raid: Hall of Sacrifice | ||||||
| Emergency Aid: Convoy | Emergency Aid: Holy Mission | ||||||
| Metaliminal Meteoroid: Caldari Mining | Metaliminal Meteoroid: Amarr Mining | ||||||
| Site | Damage Types | EWAR | Weakness | ||||
| Abyssal Artifact Recovery | |||||||
| Salvage Research (3 pilots) | |||||||
| Traffic Stop (3 pilots) | None | ||||||
| Stabilize Rift (3 pilots) | |||||||
Site summary
| See the linked main articles in the summary for full mission details |
Dread Assault
- Main article: Dread Assault

Your objective is to keep a friendly Dreadnought operational by charging its capacitor 3 times to 30,000 units. After each charge, the allied Dread enters Siege mode for 90 seconds, during which it cannot accept any more capacitor.
A hostile fleet consisting of frigates, destroyers, cruisers, and battlecruisers will be present upon arrival. The enemy will attempt to drain its power and overwhelm your defenses.
A chain of T1 logistics cruisers equipped with remote capacitor transmitters is essential to sustain the Dreadnought, while damage-dealing ships are required to break neut pressure and clear the field.
Emergency Aid
- Main article: Emergency Aid

Emergency Aid tasks you with keeping a friendly asset alive for 10 minutes. Your fleet may provide either shield boosts or armor repairs.
Hostile ships will remain on grid throughout the engagement, but destroying them only summons reinforcements, making firepower secondary to survival.
This site can be completed entirely with Logistics cruisers, with T1 hulls such as the Ospreys or Augurors proving effective. Success depends on strict coordination, careful capacitor management, and the ability to maintain continuous repairs under pressure.
Metaliminal Meteoroid
- Main article: Metaliminal Meteoroid

The mission revolves around mining a large asteroid until it is fully depleted. Hostile ships will continuously respawn, so engaging them directly is not recommended. Survival and efficiency are the priorities.
Teams can approach the task in different ways, such as using small mining ships with support, or tougher ships capable of withstanding damage while extracting ore. Rewards come both from completing the site itself and from selling the mined ore, which has significant value. Some groups choose to have an additional hauler remain outside the site to collect the ore separately, maximizing profit without sharing the standard payout. Overall, the focus is on coordination, endurance, and making the most of the ore’s market value.
Raid
- Main article: Raid

The mission centers on intercepting enemy haulers as they arrive. A new one appears quickly after you land on the site, but each will attempt to escape. If one gets away, you’ll need to wait for another to show up.
The key task is to warp disrupt them, recover the cargo, and deliver it safely to the nearby freighter waiting on grid. The cargo itself is bulky, so at least one fast hauler is needed to carry 3 large packages back to the drop-off. A balanced team works best: ships to apply damage and hold targets in place, support to keep the group alive, and a hauler to secure and deliver the loot. The challenge is maintaining steady coordination so that nothing slips through.
Suspicious Signal
- Main article: Suspicious Signal

This mission focuses on bringing down an enemy structure. At first it cannot be harmed, and only becomes vulnerable once three arrays on the site are successfully hacked. Each successful hack opens a timed window, and if all are done together, the group has a short opportunity to inflict as much damage as possible.
The structure itself is tough, demanding steady firepower and good coordination. Typical groups bring strong damage-dealing ships, with some pilots handling the hacking, while others keep the team stable and supported. The challenge lies in timing the hacks and concentrating fire so the structure can be destroyed before the opportunity closes.
Abyssal Artifact Recovery
- Main article: Abyssal Artifact Recovery

This mission is an attempt to uncover hidden Triglavian artifacts that have appeared through Abyssal rifts. The site unfolds in stages, beginning with a short setup before waves of asteroids and hostile fleets arrive.
Each wave is a race against time: clear every asteroid to uncover the artifacts before the timer runs out, while holding off enemies that grow stronger and more numerous with each stage.
The asteroids contain Admixti Mutanite, a mineral with unique properties. It generates a powerful warp bubble field that prevents your fleet from warping out. Only by mining them completely can the field be dispersed.
Success brings steady payouts that scale with difficulty, and sometimes rare caches appear among the shattered rocks, offering additional rewards if collected quickly.
The challenge lies in coordination: balancing mining, combat, and survival while the pressure escalates across nine waves. Once the final stage is complete, a short window opens to retreat. Any delay brings an overwhelming Drifter fleet, making escape impossible.
Salvage Research
- Main article: Salvage Research

Salvage Research plunges a fleet into a tense field of wrecks scattered across Empire space. Within 20 minutes, every piece of valuable data must be recovered from 30 shattered ships.
Pilots must move quickly, using their salvagers on each wreck while keeping an eye on hostile ships. Somewhere among the debris lies a malfunctioning Werpost. Activate it with a Data Analyzer, and its disintegrator will begin targeting enemy ships, lending support to your fleet.
Every salvaged wreck yields a piece of encrypted data that contributes to the reward. Success demands fleet coordination, manual piloting, and precision.
Stabilize Rift
- Main article: Stabilize Rift

The Stabilize Rift requires your fleet to prevent the Sleepers from collapsing an active abyssal rift. The enemy has anchored five Destabilizing Arrays, which must be drained of capacitor and held below 20% simultaneously to break the destabilization cycle.
Destroyer-class vessels equipped with energy neutralizer modules and combat drones are advised. Sleeper reinforcements may attempt to neutralize your capacitor or restore power to the arrays, forcing a prolonged engagement. This mission demands strict coordination and precise execution. Success will stabilize the rift and allow free passage for the Triglavian caravan.
Traffic Stop
- Main article: Traffic Stop

The mission requires your fleet to scan incoming haulers as they try to reach the local market. Any ship carrying illicit data must be stopped and destroyed, webifier modules are recommended. Once an enemy hauler is caught, it will deploy attack drones to engage your ship and greatly increase its speed in an attempt to reach its destination.
At the same time, pilots must avoid harming civilians. Attacking more than two civilians or allowing five contraband ships to dock will fail the mission. Success depends on careful scanning, precise targeting, and steady coordination throughout the full timer, meeting both objectives without mistakes.
Type of ships allowed
The operations take place in a deadspace pocket with an acceleration gate that has ship restrictions.
For the 5-ships sites only the following type of ships are allowed:
- Tech 1 frigates, navy and pirate frigates
- Tech 1 destroyers, navy and pirate destroyers
- Tech 1 cruisers
- Tech 1 haulers, including Squall
- Ventures
For 3-ships sites the list is:
- Tech 1 frigates, navy and pirate frigates
- Tech 1 destroyers
- Ventures
Finding sites
Homefront operations are Cosmic Anomalies located in empire owned High Security systems, mostly focused around trade hubs or career agent systems.
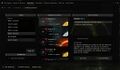
- Opportunities window > Homefront Operations tab: will render a list of the available homefronts within a limited range.
- Agency window > Homefront Operations tab: will give you a more detailed filtering ability that allows you to search any region.
- Probe Scanner > Displays all available anomalies in the system, including their distance in AU, with options to warp or align to them.
-
 Opportunities > Homefront Operations
 -
 Agency > Homefront Operations
 -
 Probe Scanner > Homefront Anomalies


Rewards
The amount of the ISK payout depends on the number of participants who have interacted with the site. Interacting with the site might consist of dealing at least 1000 damage to any enemy, repairing at least 1000 shield or armor (it counts even if the target has full hp) or other interactions depending on the objective.
The max number of people who can receive a payout is twice the ideal fleet size: 10 people for 5-person sites and 6 people for 3-person sites.
Payout amount for Emergency Aid, Dread Assault, Raid and Metaliminal Meteoroid peaks at 5 people, giving 15,486,410 ISK. The payout amount for Salvage Research, Traffic Stop and Stabilize Rift peaks at 3 people, giving 11,025,000 ISK.
| Abyssal Artifact Recovery payout peaks at 5 people but follows a different, wave-based payout structure that is not reflected in these graphs. |
.svg)
.svg)
Interaction & standings
The hostile ships encountered in Homefront operations represent a wide variety of factions, including empire and major pirate factions as well factions that are unique to Homefronts. These unique factions are:
- Ashes of Turnur - a criminal Minmatar faction
- Disciples of Purity - a criminal Amarr faction
- Gallentia Primacy - a criminal Gallente faction
- United Champions of Freedom - a criminal Caldari faction
No standing is gained or lost when fighting any of these hostile Homefront factions.
No standing is gained or lost when fighting the Amarr, Caldari, Gallente, or Minmatar ships present in the Suspicious Signal operations.
Some standing is lost when killing the pirate haulers in Raid operations in Amarr (Blood Raiders), Caldari (Guristas), and Gallente (Serpentis) space.
Spawn mechanics
The anomalies can spawn anywhere in highsec, with a heavily increased probability of spawning near trade hubs (Dodixie, Jita, Amarr, Rens and Hek[1]) and Career Agents constellations. The spawns for each type are independent[2] and the total number for each type in Gallente space seems to be 18, in Caldari space 17, in Minmatar 14 (without newly added in Hek) and in Amarr 28[3].
| There are some islands of high security systems behind low security systems where homefront operation sites can spawn; these sites are rarely completed. |
As a result, many sites can build up in these systems, which reduces the number available in other parts of the region. To resolve this, simply enter the unwanted sites with any ship. Once activated, their timers will run down, the sites will fail, and new ones will respawn elsewhere in the region.
History
Homefront operations were introduced in Viridian expansion in summer 2023 (see Viridian expansion notes). All of them were tuned for 5-ship fleets (Abyssal Artifact Recovery, Dread Assault, Emergency Aid, Metaliminal Meteoroid, Raid, Suspicious Signal).
In autumn 2023 they were rebalanced, nerfing the overall payouts and bringing the outliers closer to others.Expansion#Equinox in summer 2024 new 3-ship types (Salvage Research, Traffic Stop and Stabilize Rift) were introduced. The old types had another tuning pass.
In september 2024 Abyssal Artifact Recovery was reworked as it was one of two most complicated but the least rewarding.
See also
- Talk:Overview#June 2023 additions — new overview entities
- User:Amfion_Bravais/Homefronts — collection of fits and strategies
Notes and references
- ^ Added in patch 2024-06-26.1
- ^ They do not share a pool (CCP Rampant)
- ^ Research by Mednik Breau using Agency per region. Spreadsheet with results and methodology.