Difference between revisions of "User:Christopher Nolm/Armor Training Fleet"
| Line 183: | Line 183: | ||
| fitName=Rear Booster T2 | | fitName=Rear Booster T2 | ||
| fitID=Rear-Booster-T2 | | fitID=Rear-Booster-T2 | ||
| − | | low1name= | + | | low1name=True Sansha Energized Explosive Membrane |
| − | | low1typeID= | + | | low1typeID=14084 |
| low2name=Drone Damage Amplifier II | | low2name=Drone Damage Amplifier II | ||
| low2typeID=4405 | | low2typeID=4405 | ||
| low3name=Adaptive Nano Plating II | | low3name=Adaptive Nano Plating II | ||
| low3typeID=1306 | | low3typeID=1306 | ||
| − | | low4name= | + | | low4name=Corelum C-Type Energized Thermal Membrane |
| − | | low4typeID= | + | | low4typeID=18807 |
| low5name=Drone Damage Amplifier II | | low5name=Drone Damage Amplifier II | ||
| low5typeID=4405 | | low5typeID=4405 | ||
| low6name=Damage Control II | | low6name=Damage Control II | ||
| low6typeID=2048 | | low6typeID=2048 | ||
| − | | low7name= | + | | low7name=Corpum C-Type Energized Kinetic Membrane |
| − | | low7typeID= | + | | low7typeID=18833 |
| mid1name=10MN Afterburner II | | mid1name=10MN Afterburner II | ||
| mid1typeID=12058 | | mid1typeID=12058 | ||
| Line 255: | Line 255: | ||
| notes= | | notes= | ||
| showNOTES=N | | showNOTES=N | ||
| − | | difficulty= | + | | difficulty=1 |
| warsop=A | | warsop=A | ||
| warsopReason= | | warsopReason= | ||
| version=LATEST | | version=LATEST | ||
| − | | showTOC= | + | | showTOC=Y |
| − | | shipDNA=16233: | + | | shipDNA=16233:14084;1:4405;2:1306;1:18807;1:2048;1:18833;1:12058;1:4871;1:3496;1:1855;1:3025;2:12822;3:43552;3:42833;601:42834;601:42832;601:30999;1:43896;2:2185;2:2456;1:23709;5:2205;5:2478;2:23707;5:21640;5:247;2:254;2:12826;2:23089;2:: |
| fleetup= | | fleetup= | ||
| alphacanuse=N | | alphacanuse=N | ||
| Line 268: | Line 268: | ||
| fitName=Rear Booster T1 | | fitName=Rear Booster T1 | ||
| fitID=Rear-Booster-T1 | | fitID=Rear-Booster-T1 | ||
| − | | low1name= | + | | low1name=True Sansha Energized Explosive Membrane |
| − | | low1typeID= | + | | low1typeID=14084 |
| low2name=Drone Damage Amplifier II | | low2name=Drone Damage Amplifier II | ||
| low2typeID=4405 | | low2typeID=4405 | ||
| low3name=Adaptive Nano Plating II | | low3name=Adaptive Nano Plating II | ||
| low3typeID=1306 | | low3typeID=1306 | ||
| − | | low4name= | + | | low4name=Corelum C-Type Energized Thermal Membrane |
| − | | low4typeID= | + | | low4typeID=18807 |
| low5name=Drone Damage Amplifier II | | low5name=Drone Damage Amplifier II | ||
| low5typeID=4405 | | low5typeID=4405 | ||
| low6name=Damage Control II | | low6name=Damage Control II | ||
| low6typeID=2048 | | low6typeID=2048 | ||
| − | | low7name= | + | | low7name=Corpum C-Type Energized Kinetic Membrane |
| − | | low7typeID= | + | | low7typeID=18833 |
| mid1name=10MN Afterburner II | | mid1name=10MN Afterburner II | ||
| mid1typeID=12058 | | mid1typeID=12058 | ||
| Line 340: | Line 340: | ||
| notes= | | notes= | ||
| showNOTES=N | | showNOTES=N | ||
| − | | difficulty= | + | | difficulty=1 |
| warsop=A | | warsop=A | ||
| warsopReason= | | warsopReason= | ||
| version=LATEST | | version=LATEST | ||
| − | | showTOC= | + | | showTOC=Y |
| − | | shipDNA=16233: | + | | shipDNA=16233:14084;1:4405;2:1306;1:18807;1:2048;1:18833;1:12058;1:3504;1:6073;1:1855;1:3025;2:12822;3:42526;3:42833;601:42834;601:42832;601:30999;1:43896;2:2185;2:2456;1:23709;5:2205;5:2478;2:23707;5:21640;5:247;2:254;2:12826;2:23089;2:: |
| fleetup= | | fleetup= | ||
| alphacanuse=N | | alphacanuse=N | ||
Revision as of 21:12, 5 March 2017
Fittings
Booster Ships
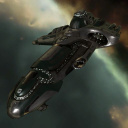
Amarr Battlecruiser - Prophecy
| ||
|---|---|---|
Forward Booster T2Prophecy: Forward Booster T2
EFT
[Prophecy, Forward Booster T2]
Armor Command Burst II, Armor Energizing Charge Armor Command Burst II, Armor Reinforcement Charge Skirmish Command Burst II, Interdiction Maneuvers Charge Auto Targeting System I Auto Targeting System I 10MN Afterburner II Large Compact Pb-Acid Cap Battery Medium Cap Battery II Sensor Booster II, Scan Resolution Script True Sansha Energized Explosive Membrane 1600mm Steel Plates II Energized Adaptive Nano Membrane II Corelum C-Type Energized Thermal Membrane Drone Damage Amplifier II Damage Control II Corpum C-Type Energized Kinetic Membrane Medium Anti-EM Pump I Medium Command Processor I Medium Command Processor I                               FITTING DIFFICULTY
EVE VERSION
LATEST
ALPHA CAN USE
NO
RECOMMENDED SKILLS
NOTES
Forward Booster T1Prophecy: Forward Booster T1
EFT
[Prophecy, Forward Booster T1]
Armor Command Burst I, Armor Energizing Charge Armor Command Burst I, Armor Reinforcement Charge Skirmish Command Burst I, Interdiction Maneuvers Charge Auto Targeting System I Auto Targeting System I 10MN Afterburner II Large Compact Pb-Acid Cap Battery Medium Cap Battery II Sensor Booster II True Sansha Energized Explosive Membrane 1600mm Steel Plates II Energized Adaptive Nano Membrane II Corelum C-Type Energized Thermal Membrane Drone Damage Amplifier II Damage Control II Corpum C-Type Energized Kinetic Membrane Medium Anti-EM Pump I Medium Command Processor I Medium Command Processor I   FITTING DIFFICULTY
EVE VERSION
LATEST
ALPHA CAN USE
NO
RECOMMENDED SKILLS
NOTES
|
Amarr Battlecruiser - Prophecy
| ||
|---|---|---|
Rear Booster T2Prophecy: Rear Booster T2
EFT
[Prophecy, Rear Booster T2]
Heavy Beam Laser II, Aurora M Armor Command Burst II, Rapid Repair Charge Armor Command Burst II, Armor Reinforcement Charge Armor Command Burst II, Armor Energizing Charge Heavy Beam Laser II, Aurora M 10MN Afterburner II Large Compact Pb-Acid Cap Battery Medium Cap Battery II Ship Scanner II True Sansha Energized Explosive Membrane Drone Damage Amplifier II Adaptive Nano Plating II Corelum C-Type Energized Thermal Membrane Drone Damage Amplifier II Damage Control II Corpum C-Type Energized Kinetic Membrane Medium Anti-EM Pump I Medium Command Processor I Medium Command Processor I           FITTING DIFFICULTY
EVE VERSION
LATEST
ALPHA CAN USE
NO
RECOMMENDED SKILLS
NOTES
Rear Booster T1Prophecy: Rear Booster T1
EFT
[Prophecy, Rear Booster T1]
Heavy Beam Laser II, Aurora M Armor Command Burst I, Rapid Repair Charge Armor Command Burst I, Armor Reinforcement Charge Armor Command Burst I, Armor Energizing Charge Heavy Beam Laser II, Aurora M 10MN Afterburner II Large Cap Battery II Medium Compact Pb-Acid Cap Battery Ship Scanner II True Sansha Energized Explosive Membrane Drone Damage Amplifier II Adaptive Nano Plating II Corelum C-Type Energized Thermal Membrane Drone Damage Amplifier II Damage Control II Corpum C-Type Energized Kinetic Membrane Medium Anti-EM Pump I Medium Command Processor I Medium Command Processor I   FITTING DIFFICULTY
EVE VERSION
LATEST
ALPHA CAN USE
NO
RECOMMENDED SKILLS
NOTES
|
Heavy Tackle/Neuting Ships
Amarr Cruiser - Maller
| ||
|---|---|---|
|
Maller: Heavy Tackle High Skill
EFT
[Maller, Heavy Tackle High Skill]
Medium Knave Scoped Energy Nosferatu Medium Knave Scoped Energy Nosferatu Medium Knave Scoped Energy Nosferatu Small Infectious Scoped Energy Neutralizer Small Infectious Scoped Energy Neutralizer 50MN Y-T8 Compact Microwarpdrive Fleeting Compact Stasis Webifier Faint Epsilon Scoped Warp Scrambler Damage Control II 1600mm Steel Plates II Energized Explosive Membrane II Energized Kinetic Membrane II Prototype Energized Thermal Membrane I Energized Adaptive Nano Membrane II Medium Polycarbon Engine Housing I Medium Auxiliary Thrusters I Medium Polycarbon Engine Housing I           FITTING DIFFICULTY
EVE VERSION
LATEST
ALPHA CAN USE
YES
RECOMMENDED SKILLS
NOTES
Maller: Heavy Tackle Low Skill
EFT
[Maller, Heavy Tackle Low Skill]
Medium Knave Scoped Energy Nosferatu Medium Knave Scoped Energy Nosferatu Medium Knave Scoped Energy Nosferatu Small Infectious Scoped Energy Neutralizer Small Infectious Scoped Energy Neutralizer 50MN Cold-Gas Enduring Microwarpdrive X5 Enduring Stasis Webifier J5b Enduring Warp Scrambler Damage Control II 1600mm Crystalline Carbonide Restrained Plates Prototype Energized Explosive Membrane I Prototype Energized Kinetic Membrane I Prototype Energized Thermal Membrane I Prototype Energized Adaptive Nano Membrane I Medium Polycarbon Engine Housing I Medium Auxiliary Thrusters I Medium Polycarbon Engine Housing I         FITTING DIFFICULTY
EVE VERSION
LATEST
ALPHA CAN USE
YES
RECOMMENDED SKILLS
NOTES
|
Damage Dealers
Amarr Cruiser - Omen
| ||
|---|---|---|
|
Omen: Amarr DD T2
EFT
[Omen, Amarr DD T2]
Focused Medium Pulse Laser II, Imperial Navy Multifrequency M Focused Medium Pulse Laser II, Imperial Navy Multifrequency M Focused Medium Pulse Laser II, Imperial Navy Multifrequency M Focused Medium Pulse Laser II, Imperial Navy Multifrequency M Focused Medium Pulse Laser II, Imperial Navy Multifrequency M 10MN Afterburner II Small Cap Battery II Warp Disruptor II Heat Sink II Heat Sink II Energized Explosive Membrane II Energized Adaptive Nano Membrane II 1600mm Crystalline Carbonide Restrained Plates Damage Control II Medium Anti-Kinetic Pump I Medium Anti-Thermal Pump I Medium Trimark Armor Pump I          FITTING DIFFICULTY
EVE VERSION
LATEST
ALPHA CAN USE
NO
RECOMMENDED SKILLS
NOTES
Omen: Amarr DD T1
EFT
[Omen, Amarr DD T1]
Focused Modal Pulse Laser I, Imperial Navy Multifrequency M Focused Modal Pulse Laser I, Imperial Navy Multifrequency M Focused Modal Pulse Laser I, Imperial Navy Multifrequency M Focused Modal Pulse Laser I, Imperial Navy Multifrequency M Focused Modal Pulse Laser I, Imperial Navy Multifrequency M 10MN Y-S8 Compact Afterburner Small Electrochemical Capacitor Booster I, Cap Booster 200 J5 Enduring Warp Disruptor Extruded Compact Heat Sink Extruded Compact Heat Sink Experimental Energized Adaptive Nano Membrane I Prototype Energized Explosive Membrane I 1600mm Rolled Tungsten Compact Plates Damage Control II Medium Anti-Kinetic Pump I Medium Anti-Thermal Pump I Medium Trimark Armor Pump I           FITTING DIFFICULTY
EVE VERSION
LATEST
ALPHA CAN USE
NO
RECOMMENDED SKILLS
NOTES
|
Caldari Cruiser - Moa
| ||
|---|---|---|
|
Moa: Caldari DD T2
EFT
[Moa, Caldari DD T2]
Heavy Electron Blaster II, Void M Heavy Electron Blaster II, Void M Heavy Electron Blaster II, Void M Heavy Electron Blaster II, Void M Heavy Electron Blaster II, Void M 10MN Afterburner II Small Cap Battery II Stasis Webifier II Warp Disruptor II Tracking Computer II, Tracking Speed Script Energized Adaptive Nano Membrane II Energized Adaptive Nano Membrane II 1600mm Steel Plates II Damage Control II Medium Anti-Explosive Pump I Medium Anti-Explosive Pump I Medium Anti-Kinetic Pump I           FITTING DIFFICULTY
EVE VERSION
LATEST
ALPHA CAN USE
NO
RECOMMENDED SKILLS
NOTES
Moa: Caldari DD T1
EFT
[Moa, Caldari DD T1]
Anode Electron Particle Cannon I, Caldari Navy Antimatter Charge M Anode Electron Particle Cannon I, Caldari Navy Antimatter Charge M Anode Electron Particle Cannon I, Caldari Navy Antimatter Charge M Anode Electron Particle Cannon I, Caldari Navy Antimatter Charge M Anode Electron Particle Cannon I, Caldari Navy Antimatter Charge M 10MN Monopropellant Enduring Afterburner Small Cap Battery II X5 Enduring Stasis Webifier Faint Scoped Warp Disruptor F-12 Enduring Tracking Computer, Tracking Speed Script Experimental Energized Adaptive Nano Membrane I Experimental Energized Adaptive Nano Membrane I 1600mm Crystalline Carbonide Restrained Plates Damage Control II Medium Anti-Explosive Pump I Medium Anti-Explosive Pump I Medium Anti-Kinetic Pump I      FITTING DIFFICULTY
EVE VERSION
LATEST
ALPHA CAN USE
YES
RECOMMENDED SKILLS
NOTES
|
Gallente Cruiser - Thorax
| ||
|---|---|---|
|
Thorax: Gallente DD T2
EFT
[Thorax, Gallente DD T2]
Heavy Electron Blaster II, Caldari Navy Antimatter Charge M Heavy Electron Blaster II, Caldari Navy Antimatter Charge M Heavy Electron Blaster II, Caldari Navy Antimatter Charge M Heavy Electron Blaster II, Caldari Navy Antimatter Charge M Heavy Electron Blaster II, Caldari Navy Antimatter Charge M 10MN Y-S8 Compact Afterburner Small Compact Pb-Acid Cap Battery Stasis Webifier II Warp Disruptor II Magnetic Field Stabilizer II Energized Adaptive Nano Membrane II Energized Explosive Membrane II 1600mm Steel Plates II Damage Control II Medium Anti-Kinetic Pump I Medium Anti-Thermal Pump I Medium Trimark Armor Pump I    FITTING DIFFICULTY
EVE VERSION
LATEST
ALPHA CAN USE
NO
RECOMMENDED SKILLS
NOTES
Thorax: Gallente DD T1
EFT
[Thorax, Gallente DD T1]
Anode Electron Particle Cannon I, Caldari Navy Antimatter Charge M Anode Electron Particle Cannon I, Caldari Navy Antimatter Charge M Anode Electron Particle Cannon I, Caldari Navy Antimatter Charge M Anode Electron Particle Cannon I, Caldari Navy Antimatter Charge M Anode Electron Particle Cannon I, Caldari Navy Antimatter Charge M 10MN Monopropellant Enduring Afterburner Small Compact Pb-Acid Cap Battery X5 Enduring Stasis Webifier Faint Scoped Warp Disruptor Vortex Compact Magnetic Field Stabilizer Prototype Energized Adaptive Nano Membrane I Prototype Energized Explosive Membrane I 1600mm Rolled Tungsten Compact Plates Damage Control II Medium Anti-Kinetic Pump I Medium Anti-Thermal Pump I Medium Trimark Armor Pump I   FITTING DIFFICULTY
EVE VERSION
LATEST
ALPHA CAN USE
YES
RECOMMENDED SKILLS
NOTES
|
Minmatar Cruiser - Rupture
| ||
|---|---|---|
|
Rupture: Minmatar DD T2
EFT
[Rupture, Minmatar DD T2]
220mm Vulcan AutoCannon II, Republic Fleet EMP M 220mm Vulcan AutoCannon II, Republic Fleet EMP M 220mm Vulcan AutoCannon II, Republic Fleet EMP M 220mm Vulcan AutoCannon II, Republic Fleet EMP M Small Energy Neutralizer II 10MN Afterburner II Small Cap Battery II Stasis Webifier II Warp Disruptor II Gyrostabilizer II Energized Adaptive Nano Membrane II Energized Explosive Membrane II 1600mm Steel Plates II Damage Control II Medium Anti-Thermal Pump I Medium Anti-Kinetic Pump I Medium Projectile Burst Aerator I          FITTING DIFFICULTY
EVE VERSION
LATEST
ALPHA CAN USE
NO
RECOMMENDED SKILLS
NOTES
Rupture: Minmatar DD T1
EFT
[Rupture, Minmatar DD T1]
220mm Medium Prototype Automatic Cannon, Republic Fleet EMP M 220mm Medium Prototype Automatic Cannon, Republic Fleet EMP M 220mm Medium Prototype Automatic Cannon, Republic Fleet EMP M 220mm Medium Prototype Automatic Cannon, Republic Fleet EMP M Small Infectious Scoped Energy Neutralizer 10MN Monopropellant Enduring Afterburner Small Cap Battery II X5 Enduring Stasis Webifier J5 Enduring Warp Disruptor Counterbalanced Compact Gyrostabilizer Experimental Energized Adaptive Nano Membrane I Prototype Energized Explosive Membrane I 1600mm Crystalline Carbonide Restrained Plates Damage Control II Medium Anti-Thermal Pump I Medium Anti-Kinetic Pump I Medium Projectile Burst Aerator I    FITTING DIFFICULTY
EVE VERSION
LATEST
ALPHA CAN USE
YES
RECOMMENDED SKILLS
NOTES
|
Logi
Amarr Cruiser - Augoror
| ||
|---|---|---|
|
Augoror: Amarr Logi T2
EFT
[Augoror, Amarr Logi T2]
Medium Remote Armor Repairer II Medium 'Regard' Remote Capacitor Transmitter Medium Remote Armor Repairer II Medium 'Regard' Remote Capacitor Transmitter Medium Remote Armor Repairer II Alumel-Wired Enduring Sensor Booster 10MN Monopropellant Enduring Afterburner Alumel-Wired Enduring Sensor Booster Prototype Armor Thermal Hardener I Damage Control II Armor Kinetic Hardener II 800mm Crystalline Carbonide Restrained Plates Armor Explosive Hardener II Medium Anti-EM Pump I Medium Trimark Armor Pump I Medium Trimark Armor Pump I         FITTING DIFFICULTY
EVE VERSION
LATEST
ALPHA CAN USE
NO
RECOMMENDED SKILLS
NOTES
Augoror: Augoror Logi T1
EFT
[Augoror, Augoror Logi T1]
Medium Coaxial Compact Remote Armor Repairer Medium 'Regard' Remote Capacitor Transmitter Medium Coaxial Compact Remote Armor Repairer Medium 'Regard' Remote Capacitor Transmitter Medium Coaxial Compact Remote Armor Repairer Alumel-Wired Enduring Sensor Booster 10MN Monopropellant Enduring Afterburner Alumel-Wired Enduring Sensor Booster Prototype Armor Thermal Hardener I Damage Control II Prototype Armor Kinetic Hardener I 800mm Rolled Tungsten Compact Plates Prototype Armor Explosive Hardener I Medium Anti-EM Pump I Medium Trimark Armor Pump I Medium Trimark Armor Pump I      FITTING DIFFICULTY
EVE VERSION
LATEST
ALPHA CAN USE
YES
RECOMMENDED SKILLS
NOTES
|
EWAR
Amarr Frigate - Crucifier
| ||
|---|---|---|
|
Crucifier: Amarr Ewar
EFT
[Crucifier, Amarr Ewar]
Baker Nunn Enduring Tracking Disruptor I, Tracking Speed Disruption Script Baker Nunn Enduring Tracking Disruptor I, Tracking Speed Disruption Script A-211 Enduring Guidance Disruptor, Missile Range Disruption Script 5MN Quad LiF Restrained Microwarpdrive F-89 Compact Signal Amplifier Nanofiber Internal Structure II Damage Control II Small Ionic Field Projector I Small Tracking Diagnostic Subroutines I Small Drone Control Range Augmentor I              FITTING DIFFICULTY
EVE VERSION
LATEST
ALPHA CAN USE
YES
RECOMMENDED SKILLS
NOTES
|
Caldari Frigate - Griffin
| ||
|---|---|---|
|
Griffin: Caldari Ewar
EFT
[Griffin, Caldari Ewar]
FZ-3a Enduring Gravimetric ECM Languid Enduring Ladar ECM Morpheus Enduring Magnetometric ECM Gloom Enduring Radar ECM 5MN Quad LiF Restrained Microwarpdrive Morpheus Enduring Magnetometric ECM x3 Languid Enduring Ladar ECM x3 FZ-3a Enduring Gravimetric ECM x3 'Hypnos' Signal Distortion Amplifier I Damage Control II Small Particle Dispersion Projector I Small Particle Dispersion Projector I Small Particle Dispersion Augmentor I         FITTING DIFFICULTY
EVE VERSION
LATEST
ALPHA CAN USE
YES
RECOMMENDED SKILLS
NOTES
|
Gallente Frigate - Maulus
| ||
|---|---|---|
|
Maulus: Gallente Ewar
EFT
[Maulus, Gallente Ewar]
LFT Enduring Sensor Dampener, Scan Resolution Dampening Script LFT Enduring Sensor Dampener, Scan Resolution Dampening Script LFT Enduring Sensor Dampener, Scan Resolution Dampening Script 5MN Quad LiF Restrained Microwarpdrive F-89 Compact Signal Amplifier Nanofiber Internal Structure II Damage Control II Small Particle Dispersion Projector I Small Particle Dispersion Projector I Small Inverted Signal Field Projector I     FITTING DIFFICULTY
EVE VERSION
LATEST
ALPHA CAN USE
YES
RECOMMENDED SKILLS
NOTES
|
Minmatar Frigate - Vigil
| ||
|---|---|---|
|
Vigil: Minmatar Ewar
EFT
[Vigil, Minmatar Ewar]
Parallel Enduring Target Painter Parallel Enduring Target Painter Parallel Enduring Target Painter Parallel Enduring Target Painter 5MN Quad LiF Restrained Microwarpdrive F-89 Compact Signal Amplifier Damage Control II Small Particle Dispersion Projector I Small Ionic Field Projector I Small Particle Dispersion Projector I  FITTING DIFFICULTY
EVE VERSION
LATEST
ALPHA CAN USE
YES
RECOMMENDED SKILLS
NOTES
|
Tackle
Amarr Frigate - Executioner
| ||
|---|---|---|
|
Executioner: Fleet Tackle
EFT
[Executioner, Fleet Tackle]
5MN Y-T8 Compact Microwarpdrive Medium Azeotropic Restrained Shield Extender Faint Epsilon Scoped Warp Scrambler Nanofiber Internal Structure II Overdrive Injector System II Damage Control II Small Anti-EM Screen Reinforcer I Small Auxiliary Thrusters I Small Low Friction Nozzle Joints I       FITTING DIFFICULTY
EVE VERSION
LATEST
ALPHA CAN USE
YES
RECOMMENDED SKILLS
NOTES
|
Caldari Frigate - Condor
| ||
|---|---|---|
|
Condor: Fleet Tackle
EFT
[Condor, Fleet Tackle]
5MN Y-T8 Compact Microwarpdrive Medium Azeotropic Restrained Shield Extender X5 Enduring Stasis Webifier J5b Enduring Warp Scrambler Nanofiber Internal Structure II Damage Control II Small Anti-EM Screen Reinforcer I Small Auxiliary Thrusters I Small Low Friction Nozzle Joints I FITTING DIFFICULTY
EVE VERSION
LATEST
ALPHA CAN USE
YES
RECOMMENDED SKILLS
NOTES
|
Gallente Frigate - Maulus
| ||
|---|---|---|
|
Atron: Fleet Tackle
EFT
[Atron, Fleet Tackle]
5MN Cold-Gas Enduring Microwarpdrive Medium Azeotropic Restrained Shield Extender J5b Enduring Warp Scrambler Nanofiber Internal Structure II Overdrive Injector System II Damage Control II Small Anti-EM Screen Reinforcer I Small Auxiliary Thrusters I Small Low Friction Nozzle Joints I  FITTING DIFFICULTY
EVE VERSION
LATEST
ALPHA CAN USE
YES
RECOMMENDED SKILLS
NOTES
|
Minmatar Frigate - Slasher
| ||
|---|---|---|
|
Slasher: Fleet Tackle
EFT
[Slasher, Fleet Tackle]
5MN Y-T8 Compact Microwarpdrive Medium Azeotropic Restrained Shield Extender X5 Enduring Stasis Webifier Faint Epsilon Scoped Warp Scrambler Nanofiber Internal Structure II Damage Control II Small Anti-EM Screen Reinforcer I Small Auxiliary Thrusters I Small Low Friction Nozzle Joints I FITTING DIFFICULTY
EVE VERSION
LATEST
ALPHA CAN USE
YES
RECOMMENDED SKILLS
NOTES
|
Tactics
The fleet is a brawling armor fleet. The fleet is built around two boosting ships. The forward booster would be flown by the FC and is deliberately has no weapons so that the FC can concentrate on managing the fleet. The forward booster goes as far forward as possible and tries to draw fire as it has the best resistances and tank. The rear booster position is about 30 km behind the forward booster but may need to move forward if DD/Heavy tackler stray out of range of the logi. The rear booster would apply damage at range and would also provide intel to the FC using the ship scanner. The logi will anchor on the rear booster. The heavy tackler/neuter follows the primary calls to disable the primary and is also the drone bunny. The heavy tackler is a priority for the logi wing. DD pilots would orbit the primary directly. The frigate tackle and frigate ewar would follow normal tactics for their ship. Ewar pilots that are not confident can anchor on the rear booster.
Given ideal circumstances when warping into a fleet, the forward booster, heavy tackle, DD, tackle frigates would warp in first at zero. The rear booster, logi and ewar would warp in at range a few seconds after that. Logi would immediately land reps before setting up the cap chain.