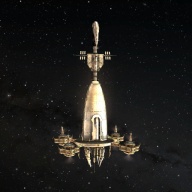
More actions
Added NPC tables, removed rewards. |
|||
| Line 240: | Line 240: | ||
| valign="top" | Type: Courier | | valign="top" | Type: Courier | ||
Destination: Nishah (4 jumps) | '''Destination:''' Nishah (4 jumps) | ||
Summary: Travel to Nishah, the second mission hub. | '''Summary:''' Travel to Nishah, the second mission hub. | ||
|} | |} | ||
| Line 251: | Line 251: | ||
| valign="top" | Type: Encounter (Sansha's Nation) | | valign="top" | Type: Encounter (Sansha's Nation) | ||
Summary: Destroy all enemy ships. | '''Summary:''' Destroy all enemy ships. | ||
* | |||
*It will help to destroy the waves in the order they spawn. If you form a fleet with yourself, you can tag waves of ships as they appear to keep track of them. | '''Tips:''' | ||
* Attacking each wave will trigger the next reinforcement. | |||
* It will help to destroy the waves in the order they spawn. If you form a fleet with yourself, you can tag waves of ships as they appear to keep track of them. | |||
|} | |} | ||
{{NPCTableHead|Initial Group}} | |||
{{NPCTableRow|Elite Cruiser|3|Centum Loyal Mutilator/Hellhound}} | |||
{{NPCTableRow|Battleship|2|Centus Dread Lord/Tyrant}} | |||
{{NPCTableFoot}} | |||
{{NPCTableHead|Wave 1}} | |||
{{NPCTableRow|Battlecruiser|2|Centatis Devil/Wraith}} | |||
{{NPCTableFoot}} | |||
{{NPCTableHead|Wave 2}} | |||
{{NPCTableRow|Elite Frigate|3|Centii Loyal Minion/Servant|point=yes|ewar={{icon|web|24|Stasis webifier}}}} | |||
{{NPCTableFoot}} | |||
{{NPCTableHead|Wave 3}} | |||
{{NPCTableRow|Elite Cruiser|2|Centum Loyal Mutilator/Hellhound}} | |||
{{NPCTableRow|Battleship|3|Centus Tyrant}} | |||
{{NPCTableFoot}} | |||
{{NPCTableHead|Wave 4}} | |||
{{NPCTableRow|Battlecruiser|2|Centatis Devil/Wraith}} | |||
{{NPCTableFoot}} | |||
{{NPCTableHead|Wave 5}} | |||
{{NPCTableRow|Elite Frigate|1|Centii Loyal Servant/Minion|point=yes|ewar={{icon|web|24|Stasis webifier}}}} | |||
{{NPCTableFoot}} | |||
{{NPCTableHead|Wave 6}} | |||
{{NPCTableRow|Elite Cruiser|2|Centum Loyal Torturer/Mutilator/Fiend}} | |||
{{NPCTableRow|Battleship|3|Centus Dread Lord/Tyrant}} | |||
{{NPCTableFoot}} | |||
The last ship destroyed in Wave 6 completes the mission objective. | |||
{{NPCTableHead|Wave 7}} | |||
{{NPCTableRow|Battlecruiser|2|Centatis Wraith/Devil}} | |||
{{NPCTableFoot}} | |||
{{NPCTableHead|Wave 8}} | |||
{{NPCTableRow|Elite Frigate|2|Centii Loyal Minion/Servant|point=yes|ewar={{icon|web|24|Stasis webifier}}}} | |||
{{NPCTableFoot}} | |||
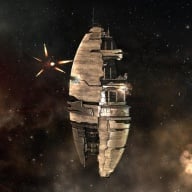
==Longing Leman== | ==Longing Leman== | ||
| Line 260: | Line 294: | ||
|- | |- | ||
| valign="top" | [[Image:Amarr_epic_08.jpg|thumb|left|192px]] | | valign="top" | [[Image:Amarr_epic_08.jpg|thumb|left|192px]] | ||
| valign="top" | Type: Encounter ( | | valign="top" | '''Type:''' Encounter (Amarr Empire/No combat) | ||
'''Summary:''' Retrieve the Communications Logs (0.1 m3) | |||
'''Tips:''' | |||
*You need a | * You will need a Data Analyzer module to hack the Encrypted Communications Array. The mission does not provide you with one, so you'll have to get one yourself. | ||
* | * This is not a combat mission. It is not necessary to destroy any NPC ships. | ||
|} | |} | ||
{{StructureTable| | |||
{{StructureTableRow|Hackable|1|Encrypted Communications Array|cargo=1 x Communications Logs}} | |||
}} | |||
{{NPCTableHead|Outpost Guards}} | |||
{{NPCTableRow|Fighter|5|Outpost Defender (Equite)}} | |||
{{NPCTableRow|Elite Frigate|4|Divine Imperial Imran/Sixtus|point=yes|ewar={{icon|web|24|Stasis webifier}}}} | |||
{{NPCTableRow|Battlecruiser|6|Imperial Templar Phalanx}} | |||
{{NPCTableRow|Battleship|7|Imperial Templar Diviner/Judgement|ewar={{icon|td|24|Tracking disruptor}}|ewar2={{icon|neut|24|Energy neutralizer}}}} | |||
{{NPCTableFoot}} | |||
==Languishing Lord== | ==Languishing Lord== | ||
| Line 271: | Line 317: | ||
|- | |- | ||
| valign="top" | [[Image:Amarr_epic_09.jpg|thumb|left|192px]] | | valign="top" | [[Image:Amarr_epic_09.jpg|thumb|left|192px]] | ||
| valign="top" | Type: Encounter ( | | valign="top" | '''Type:''' Encounter (Amarr Empire/No combat) | ||
Summary: No combat. | '''Summary:''' No combat. | ||
'''Tips:''' | |||
*You'll be told to fly to a structure (about 20k away). Then you watch for a minute, and the mission completes. Do not engage any of the ships that appear. | *You'll be told to fly to a structure (about 20k away). Then you watch for a minute, and the mission completes. Do not engage any of the ships that appear. | ||
|} | |} | ||
{{StructureTable| | |||
{{StructureTableRow|Structure|1|Broken Metallic Crystal Asteroid}} | |||
{{StructureTableRow|Asteroid|30|Veldspar}} | |||
}} | |||
{{NPCTableHead|Initial Spawn}} | |||
{{NPCTableRow|Battleship|1|Lord Manik}} | |||
{{NPCTableRow|Battleship|1|Mercenary}} | |||
{{NPCTableFoot}} | |||
Mission objective is completed after Lord Manik and the mercenary leave the area. | |||
==Razing the Outpost== | ==Razing the Outpost== | ||
| Line 281: | Line 339: | ||
|- | |- | ||
| valign="top" | [[Image:Amarr_epic_10.jpg|thumb|left|192px]] | | valign="top" | [[Image:Amarr_epic_10.jpg|thumb|left|192px]] | ||
| valign="top" | Type: Encounter (Mercenaries - | | valign="top" | '''Type:''' Encounter (Mercenaries - Mordu's Legion ships) | ||
Summary: Destroy all enemy ships and The Outpost. | '''Summary:''' Destroy all enemy ships and The Outpost. | ||
'''Tips:''' | |||
*Switch your tank to Kinetic/Thermal, and your damage to Kinetic (Thermal secondary) if possible. | *Switch your tank to Kinetic/Thermal, and your damage to Kinetic (Thermal secondary) if possible. | ||
|} | |} | ||
===Acceleration Gate Entrance=== | |||
{{NPCTableHead}} | |||
{{NPCTableRow|Frigate|3|Mordus Bounty Hunter|point=yes|ewar={{icon|web|24|Stasis webifier}}}} | |||
{{NPCTableRow|Cruiser|3|Mordus Lion}} | |||
{{NPCTableRow|Battleship|4|Mordus Gigamar/Phanti}} | |||
{{NPCTableRow|Sentry|3|Caldari Cruise Missile Battery|note=Scourge missiles (kinetic)}} | |||
{{NPCTableFoot}} | |||
===Room 1=== | |||
{{NPCTableHead}} | |||
{{NPCTableRow|Cruiser|6|Mordus Puma/Leopard}} | |||
{{NPCTableRow|Battleship|4|Mordus Gigamar/Phanti/Mammoth}} | |||
{{NPCTableRow|Sentry|3|Caldari Cruise Missile Battery|note=Scourge missiles (kinetic)}} | |||
{{NPCTableFoot}} | |||
===Room 2=== | |||
{{NPCTableHead|Initial Group}} | |||
{{NPCTableRow|Frigate|2|Mordus Bounty Hunter|point=yes|ewar={{icon|web|24|Stasis webifier}}}} | |||
{{NPCTableRow|Cruiser|4|Mordus Bobcat}} | |||
{{NPCTableRow|Battleship|2|Mordus Gigamar|trigger=Last battleship destroyed triggers Wave 1}} | |||
{{NPCTableRow|Sentry|3|Caldari Heavy Missile Battery|note=Inferno missiles (thermal)}} | |||
{{NPCTableRow|Sentry|3|Caldari Cruise Missile Battery|note=Scourge missiles (kinetic)}} | |||
{{NPCTableFoot}} | |||
{{NPCTableHead|Wave 1}} | |||
{{NPCTableRow|Frigate|2|Mordus Bounty Hunter|point=yes|ewar={{icon|web|24|Stasis webifier}}}} | |||
{{NPCTableRow|Cruiser|4|Mordus Leopard}} | |||
{{NPCTableRow|Battleship|4|Mordus Gigamar/Mammoth|trigger=Third battleship destroyed triggers Wave 2}} | |||
{{NPCTableFoot}} | |||
{{NPCTableHead|Wave 2}} | |||
{{NPCTableRow|Frigate|4|Mordus Bounty Hunter|point=yes|ewar={{icon|web|24|Stasis webifier}}}} | |||
{{NPCTableRow|Cruiser|3|Mordus Lion}} | |||
{{NPCTableRow|Battleship|8|Mordus Gigamar/Phanti/Mammoth}} | |||
{{NPCTableFoot}} | |||
{{StructureTable| | |||
{{StructureTableRow|Structure|1|The Outpost|trigger=Destroying completes the mission objective|note=~53,000 HP}} | |||
}} | |||
==Ascending Nobles== | ==Ascending Nobles== | ||
| Line 298: | Line 388: | ||
|- | |- | ||
| valign="top" | [[Image:Amarr_epic_11.jpg|thumb|left|192px]] | | valign="top" | [[Image:Amarr_epic_11.jpg|thumb|left|192px]] | ||
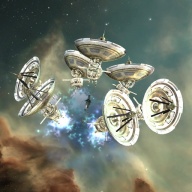
| valign="top" | Type: Encounter (Mercenaries - Amarr ships) | | valign="top" | '''Type:''' Encounter (Mercenaries - Amarr ships) | ||
Destination: Reteka (7 jumps) | '''Destination:''' Reteka (7 jumps) | ||
Summary: Destroy enemy ships, then loot Mina Darabi near the Amarr Chapel. | '''Summary:''' Destroy enemy ships, then loot Mina Darabi near the Amarr Chapel. | ||
*All spawns start | |||
*The Veteran battleships do heavy damage if you let them get close (They orbit ~49k) | '''Tips:''' | ||
* All spawns start approximately 80k from warp in. | |||
* The Veteran battleships do heavy damage if you let them get close (They orbit ~49k). | |||
|} | |} | ||
The last ship destroyed in each group will trigger the next wave. | |||
{{NPCTableHead|Initial Group}} | |||
{{NPCTableRow|Battleship|5|Independent Veteran Abaddon/Armageddon/Apocalypse}} | |||
{{NPCTableRow|Sentry|2|Amarr Light Missile Battery|note=Mjolnir missiles (EM)}} | |||
{{NPCTableRow|Sentry|2|Amarr Cruise Missile Battery|note=Mjolnir missiles (EM)}} | |||
{{NPCTableFoot}} | |||
{{NPCTableHead|Wave 1}} | |||
{{NPCTableRow|Cruiser|8|Independent Veteran Omen/Augoror/Maller/Arbitrator|ewar={{icon|td|24|Tracking disruptor}}|ewar2={{icon|neut|24|Energy neutralizer - 25km range}}}} | |||
{{NPCTableFoot}} | |||
{{NPCTableHead|Wave 2}} | |||
{{NPCTableRow|Battleship|7|Independent Green-Crewed Abaddon/Armageddon/Apocalypse}} | |||
{{NPCTableFoot}} | |||
{{NPCTableHead|Wave 3}} | |||
{{NPCTableRow|Battleship|6|Independent Abaddon/Armageddon/Apocalypse|trigger=Last ship destroyed completes the mission objective}} | |||
{{NPCTableFoot}} | |||
{{StructureTable| | |||
{{StructureTableRow|Structure|1|Amarr Chapel}} | |||
}} | |||
Mina Darabi spawns near the Amarr Chapel. | |||
====Additional Spawn==== | |||
If the mission is not completed within 30 minutes after Mina Darabi is collected, the following message will appear: | |||
{{MessageBox|Pop-up message: | |||
|I know salvaging is fun, but there are several hostile ships inbound. I suggest we retreat now. Mina Darabi is too valuable an informant to lose.}} | |||
Approximately 5-10 seconds after that message appears, a new battle group will spawn. | |||
{{NPCTableHead|Additional Spawn}} | |||
{{NPCTableRow|Elite Frigate|6|Independent Veteran Crucifier/Inquisitor|point=yes|ewar={{icon|web|24|Stasis webifier}}}} | |||
{{NPCTableRow|Elite Cruiser|6|Independent Veteran Omen/Maller/Augoror|ewar={{icon|td|24|Tracking disruptor}}|ewar2={{icon|neut|24|Energy neutralizer}}}} | |||
{{NPCTableRow|Battleship|6|Independent Veteran Armageddon/Apocalypse/Abaddon|ewar={{icon|neut|24|Energy neutralizer}}}} | |||
{{NPCTableFoot}} | |||
This spawn is incredibly strong. It is suggested that pilots bring additional fleet members with logistics. Ships do not award bounties, but may drop faction tags and loot/salvage. | |||
==Hunting the Hunter== | ==Hunting the Hunter== | ||
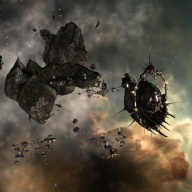
| Line 315: | Line 436: | ||
|- | |- | ||
| valign="top" | [[Image:Amarr_epic_12.jpg|thumb|left|192px]] | | valign="top" | [[Image:Amarr_epic_12.jpg|thumb|left|192px]] | ||
| valign="top" | Type: Encounter (Sansha's Nation) | | valign="top" | '''Type:''' Encounter (Sansha's Nation) | ||
'''Summary:''' Progress through the rooms and obtain 1 x Rahsa, Sansha Commander (1.0 m3). | |||
|} | |} | ||
===Acceleration Gate Entrance=== | |||
{{NPCTableHead}} | |||
{{NPCTableRow|Elite Cruiser|6|Centum Loyal Fiend/Hellhound}} | |||
{{NPCTableRow|Battleship|3|Centus Dark Lord/Dread Lord}} | |||
{{NPCTableRow|Sentry|6|Sansha Heavy Missile Battery|note=Mjolnir missiles (EM)}} | |||
{{NPCTableFoot}} | |||
===Room 1=== | |||
{{NPCTableHead|Initial Group}} | |||
{{NPCTableRow|Sentry|1|Sansha Energy Neutralizer I|ewar={{icon|neut|24|Energy neutralizer = 100km range}}}} | |||
{{NPCTableRow|Sentry|2|Sansha Sentry III}} | |||
{{NPCTableRow|Elite Frigate|2|Centii Loyal Savage/Slavehunter|ewar={{icon|td|24|Tracking disruptor}}}} | |||
{{NPCTableRow|Elite Cruiser|3|Centum Loyal Mutilator/Torturer}} | |||
{{NPCTableRow|Battlecruiser|4|Centatis Devil/Daemon|trigger=Last ship destroyed triggers Wave 1}} | |||
{{NPCTableRow|Battleship|4|Centus Tyrant/Dread Lord|trigger=Last ship destroyed triggers Wave 2}} | |||
{{NPCTableRow|Battleship|3|Centus Beast Lord/Savage Lord/Overlord|ewar={{icon|td|24|Tracking disruptor}}}} | |||
{{NPCTableFoot}} | |||
{{NPCTableHead|Wave 1}} | |||
{{NPCTableRow|Elite Cruiser|3|Centum Loyal Execrator/Slaughterer|ewar={{icon|td|24|Tracking disruptor}}}} | |||
{{NPCTableFoot}} | |||
{{NPCTableHead|Wave 2}} | |||
{{NPCTableRow|Elite Frigate|3|Centii Loyal Plague/Butcher}} | |||
{{NPCTableRow|Battleship|Centus Beast Lord/Plague Lord|ewar={{icon|td|24|Tracking disruptor}}}} | |||
{{NPCTableFoot}} | |||
{{StructureTable| | |||
{{StructureTableRow|Accl Gate|1|Acceleration Gate|note=Locked - Requires Rahsa's Security Card}} | |||
{{StructureTableRow|Structure|1|Sansha Battletower|note=Destroying unlocks the Acceleration Gate}} | |||
}} | |||
===Room 2=== | |||
On warp in, you will receive a message from Rahsa: | |||
{{MessageBox|Message from Rahsa: | |||
|A Deal: Well, you're quite the formidable one, aren't you? I have a proposal for you. When you report back to your agent, tell him that you've destroyed my forces, and that I should be executed. Yes, I'm a capsuleer too, but he doesn't need to know that. Do this and I'll make sure you get introduced to one of my friends. The Nation treats its friends well.}} | |||
{{NPCTableHead}} | |||
{{NPCTableRow|Battleship|1|Rahsa's Battleship|cargo=1 x Rahsa, Sansha Commander}} | |||
{{NPCTableFoot}} | |||
{{StructureTable| | |||
{{StructureTableRow|Structure|1|Rahsa's Habitation Module|cargo=Basic trade goods}} | |||
}} | |||
Destroying Rahsa's Battleship completes the mission objective. | |||
==Fate of a Madman== | ==Fate of a Madman== | ||
| Line 331: | Line 489: | ||
|- | |- | ||
| valign="top" | [[Image:Aralin Jick.jpg|thumb|left|192px]] | | valign="top" | [[Image:Aralin Jick.jpg|thumb|left|192px]] | ||
| valign="top" | Type: Branch | | valign="top" | '''Type:''' Branch | ||
Summary: You must choose your path. | '''Summary:''' You must choose your path. | ||
*Choose ''Interrogation: Catching the Scent'' to work for the Amarr Empire. This guide follows this choice. | *Choose ''Interrogation: Catching the Scent'' to work for the Amarr Empire. This guide follows this choice. | ||
*Choose ''Silence Rahsa: The Nation's Path'' to work for Sansha's Nation. | *Choose ''Silence Rahsa: The Nation's Path'' to work for Sansha's Nation. | ||
Revision as of 08:53, 20 November 2016
| |||||
"For over a century the mighty Amarr Empire has been at an uneasy peace with the enigmatic Sansha's Nation. But the Sansha are pushing further into Amarr space without warning or explanation. Ministry of Internal Order agent Kandus Sandar enlists you to be his primary investigator, to uncover plots and annihilate threats as only a capsuleer can."
Requirements
To start the Amarr Epic Arc you must have standings of 5.0 or higher with the Ministry of Internal Order corporation or the Amarr Empire faction. In addition to being comfortable with level 4 missions, you should have the Hacking skill trained and bring a Data Analyzer module.
Rewards
During this Epic Mission Arc you will decide whether to work for the Amarr Empire or for Sansha's Nation. The Amarr Empire will award you
- +10% Amarr Empire faction standing (12.5% at Social V)
- 1 x Imperial Navy Modified 'Noble' Implant
Sansha's Nation will award you
- +10% Sansha's Nation faction standing (12.5% at Social V)
- 1 x Sansha Modified 'Gnome' Implant
After you complete the arc, be sure to check that you have received the faction standing increase, because there have been many cases of people not receiving the increase. If your standing has not changed, file a petition. It may help to include a link to CCP Dropbear's post in the old forums.
Enemies
You will face mostly Sansha's Nation and Amarr Empire ships, so you should tank your ship approximately equally against EM and Thermal damage, and ideally you would do EM damage (Thermal secondary). Some of the battleships' missiles do Kinetic damage, but this is relatively insignificant. In one mission you will encounter Mercenaries in Mordus ships and should refit for Kinetic/Thermal resistance and damage for that mission.
Most frigates you encounter are able to web and warp scramble, but this behavior is inconsistent. Many of the cruisers and battleships and a few of the frigates have tracking disruption, and you should expect to encounter this in every combat mission. Also, in some of the missions there is neuting, but anything serious should be mentioned in the summaries below.
Other Comments
Rewards are listed using Negotiation III, but even so bonuses will vary.
This is meant to be a guide, not a comprehensive reference. See EVE-Survival's Epic Arc Mission Reports and Jowan Datloran's Epic Arc Guides for more. Also EVElopedia (mirror of original site).
The following people have posted some comments on their personal experience and/or fittings on their user pages:
Beginning the Arc
Aiding an Investigator
 |
Type: Courier
Destination: Nahyeen (3 jumps) Summary: Travel to Nahyeen, the first mission hub. |
Chapter 1: Interference
This chapter takes place in the Nimedaz constellation. Remember that most missions can be completed - and the next accepted - remotely, minimizing travel time.
Late Reports
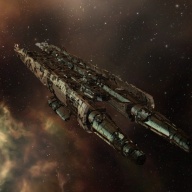 |
Type: Encounter (Sansha's Nation)
Summary: Destroy all enemy ships and loot 1 Reports (0.1 m3). Tips:
|
The last ship destroyed in each group will trigger a new wave.
| WD | EWAR | L
| ||
|---|---|---|---|---|
| |
3 x Elite Frigate Centii Loyal Ravener/Scavenger | |
|
|
| |
4 x Battleship Centus Mutant Lord/Savage Lord | |||
| WD | EWAR | L
| ||
|---|---|---|---|---|
| |
4 x Elite Cruiser Centum Loyal Beast/Juggernaut/Slaughterer/Execrator | |
||
| |
4 x Battleship Centus Beast Lord/Plague Lord | |
||
The Outclassed Outpost
| WD | EWAR | L
| ||
|---|---|---|---|---|
| |
4 x Elite Frigate Centii Loyal Manslayer/Plague/Enslaver/Butcher | |
|
|
| |
4 x Battleship Centus Dark Lord/Overlord | |||
 |
Type: Encounter (Sansha's Nation)
Summary: Destroy all enemy ships. |
The last ship destroyed in each group will trigger a new wave.
| WD | EWAR | L
| ||
|---|---|---|---|---|
| |
4 x Elite Frigate Centii Loyal Savage/Slavehunter | |
||
| |
3 x Battleship Centus Plague Lord | |
||
| WD | EWAR | L
| ||
|---|---|---|---|---|
| |
3 x Elite Frigate Centii Loyal Servant | |
|
|
| |
4 x Battleship Centus Beast Lord/Plague Lord | |||
Raging Sansha
| WD | EWAR | L
| ||
|---|---|---|---|---|
| |
3 x Elite Frigate Centii Loyal Butcher/Plague/Enslaver | |
|
|
| |
3 x Battleship Centus Dark Lord/Overlord | |||
| WD | EWAR | L
| ||
|---|---|---|---|---|
| |
3 x Battlecruiser Centatis Specter | |||
| WD | EWAR | L
| ||
|---|---|---|---|---|
| |
5 x Elite Frigate Centii Loyal Servant/Butcher/Enslaver |
|
||
| |
2 x Elite Cruiser Centum Loyal Execrator/Slaughterer | |
||
| WD | EWAR | L
| ||
|---|---|---|---|---|
| |
1 x Cruiser Centum Torturer |
|||
Cowardly Commander
| WD | EWAR | L
| ||
|---|---|---|---|---|
| |
1 x Elite Frigate Centii Loyal Manslayer/Enslaver | |||
| |
2 x Elite Cruiser Centum Loyal Torturer/Slaughterer/Hellhound | |
||
| |
1 x Battleship Centus Plague Lord | |
||
Acceleration Gate Entrance
Destroying the last ship in the Initial Group will trigger Wave 1.
| WD | EWAR | L
| ||
|---|---|---|---|---|
| |
3 x Elite Frigate Centii Loyal Minion/Scavenger | |
||
| |
4 x Battleship Centus Plague Lord/Beast Lord | |
||
| |
2 x Sentry Sansha Sentry III |
|||
Room 1
Destroying the last ship in the Initial Group will trigger Wave 1.
| WD | EWAR | L
| ||
|---|---|---|---|---|
| |
4 x Elite Frigate Centii Loyal Butcher/Manslayer/Follower | |
||
| |
Centus Dark Lord/Overlord x Battleship | |||
| WD | EWAR | L
| ||
|---|---|---|---|---|
| |
4 x Elite Frigate Centii Loyal Slavehunter/Savage | |
||
| |
4 x Battleship Centus Dark Lord/Overlord | |||
| |
2 x Sentry Sansha Energy Neutralizer I | |
||
| |
2 x Sentry Sansha Sentry III |
|||
Room 2
| WD | EWAR | L
| ||
|---|---|---|---|---|
| |
3 x Battlecruiser Centatis Daemon/Devil | |||
| |
4 x Battleship Centus Beast Lord/Plague Lord | |
||
| WD | EWAR | L
| ||
|---|---|---|---|---|
| |
3 x Elite Frigate Centii Loyal Scavenger/Ravener | |
||
| |
3 x Battleship Centus Dread Lord/Tyrant | |||
Room 3
No standing loss for destroying Amarr ships in Room 3.
| WD | EWAR | L
| ||
|---|---|---|---|---|
| |
4 x Elite Frigate Centii Loyal Butcher/Plague/Manslayer | |||
| |
Centus Dark Lord/Overlord x Battleship | |||
| WD | EWAR | L
| ||
|---|---|---|---|---|
| |
2 x Elite Frigate Divine Imperial Imran | |
|
|
| |
3 x Cruiser Imperial Templar Tamir/Donus | |||
| |
3 x Battleship Imperial Martyr/Dominator |
|
||
Chapter 2: Spiderweb Politics
Half the missions in this chapter are in the Nishah solar system, and only one is outside the Gebem constellation.
Aralin Jick
| WD | EWAR | L
| ||
|---|---|---|---|---|
| |
3 x Destroyer Imperial Templar Caius | |||
| |
2 x Battlecruiser Imperial Templar Phalanx | |||
| |
2 x Battleship Imperial Templar Martyr | |||
 |
Type: Courier
Destination: Nishah (4 jumps) Summary: Travel to Nishah, the second mission hub. |
Background Check
| WD | EWAR | L
| ||
|---|---|---|---|---|
| |
3 x Elite Cruiser Centum Loyal Mutilator/Hellhound | |||
| |
2 x Battleship Centus Dread Lord/Tyrant | |||
| WD | EWAR | L
| ||
|---|---|---|---|---|
| |
2 x Battlecruiser Centatis Devil/Wraith | |||
| WD | EWAR | L
| ||
|---|---|---|---|---|
| |
3 x Elite Frigate Centii Loyal Minion/Servant | |
|
|
| WD | EWAR | L
| ||
|---|---|---|---|---|
| |
2 x Elite Cruiser Centum Loyal Mutilator/Hellhound | |||
| |
3 x Battleship Centus Tyrant | |||
| WD | EWAR | L
| ||
|---|---|---|---|---|
| |
2 x Battlecruiser Centatis Devil/Wraith | |||
| WD | EWAR | L
| ||
|---|---|---|---|---|
| |
1 x Elite Frigate Centii Loyal Servant/Minion | |
|
|
| WD | EWAR | L
| ||
|---|---|---|---|---|
| |
2 x Elite Cruiser Centum Loyal Torturer/Mutilator/Fiend | |||
| |
3 x Battleship Centus Dread Lord/Tyrant | |||
| WD | EWAR | L
| ||
|---|---|---|---|---|
| |
2 x Battlecruiser Centatis Wraith/Devil | |||
Longing Leman
| WD | EWAR | L
| ||
|---|---|---|---|---|
| |
2 x Elite Frigate Centii Loyal Minion/Servant | |
|
|
Languishing Lord
| WD | EWAR | L
| ||
|---|---|---|---|---|
| |
5 x Fighter Outpost Defender (Equite) | |||
| |
4 x Elite Frigate Divine Imperial Imran/Sixtus | |
|
|
| |
6 x Battlecruiser Imperial Templar Phalanx | |||
| |
7 x Battleship Imperial Templar Diviner/Judgement | |
||
Razing the Outpost
| WD | EWAR | L
| ||
|---|---|---|---|---|
| |
1 x Battleship Lord Manik | |||
| |
1 x Battleship Mercenary | |||
Acceleration Gate Entrance
Template:NPCTableFootRoom 1
| WD | EWAR | L
| ||
|---|---|---|---|---|
| |
3 x Frigate Mordus Bounty Hunter | |
|
|
| |
3 x Cruiser Mordus Lion | |||
| |
4 x Battleship Mordus Gigamar/Phanti | |||
| |
3 x Sentry Caldari Cruise Missile Battery |
|||
Room 2
| WD | EWAR | L
| ||
|---|---|---|---|---|
| |
6 x Cruiser Mordus Puma/Leopard | |||
| |
4 x Battleship Mordus Gigamar/Phanti/Mammoth | |||
| |
3 x Sentry Caldari Cruise Missile Battery |
|||
| WD | EWAR | L
| ||
|---|---|---|---|---|
| |
2 x Frigate Mordus Bounty Hunter | |
|
|
| |
4 x Cruiser Mordus Bobcat | |||
| |
2 x Battleship Mordus Gigamar |
|||
| |
3 x Sentry Caldari Heavy Missile Battery |
|||
| |
3 x Sentry Caldari Cruise Missile Battery |
|||
| WD | EWAR | L
| ||
|---|---|---|---|---|
| |
2 x Frigate Mordus Bounty Hunter | |
|
|
| |
4 x Cruiser Mordus Leopard | |||
| |
4 x Battleship Mordus Gigamar/Mammoth |
|||
Ascending Nobles
| WD | EWAR | L
| ||
|---|---|---|---|---|
| |
4 x Frigate Mordus Bounty Hunter | |
|
|
| |
3 x Cruiser Mordus Lion | |||
| |
8 x Battleship Mordus Gigamar/Phanti/Mammoth | |||
The last ship destroyed in each group will trigger the next wave.
| WD | EWAR | L
| ||
|---|---|---|---|---|
| |
5 x Battleship Independent Veteran Abaddon/Armageddon/Apocalypse | |||
| |
2 x Sentry Amarr Light Missile Battery |
|||
| |
2 x Sentry Amarr Cruise Missile Battery |
|||
| WD | EWAR | L
| ||
|---|---|---|---|---|
| |
8 x Cruiser Independent Veteran Omen/Augoror/Maller/Arbitrator | |
||
| WD | EWAR | L
| ||
|---|---|---|---|---|
| |
7 x Battleship Independent Green-Crewed Abaddon/Armageddon/Apocalypse | |||
Additional Spawn
If the mission is not completed within 30 minutes after Mina Darabi is collected, the following message will appear:
| WD | EWAR | L
| ||
|---|---|---|---|---|
| |
6 x Battleship Independent Abaddon/Armageddon/Apocalypse |
|||
| Pop-up message: |
|---|
| I know salvaging is fun, but there are several hostile ships inbound. I suggest we retreat now. Mina Darabi is too valuable an informant to lose. |
Approximately 5-10 seconds after that message appears, a new battle group will spawn.
Hunting the Hunter
| WD | EWAR | L
| ||
|---|---|---|---|---|
| |
6 x Elite Frigate Independent Veteran Crucifier/Inquisitor | |
|
|
| |
6 x Elite Cruiser Independent Veteran Omen/Maller/Augoror | |
||
| |
6 x Battleship Independent Veteran Armageddon/Apocalypse/Abaddon | |
||
 |
Type: Encounter (Sansha's Nation)
Summary: Progress through the rooms and obtain 1 x Rahsa, Sansha Commander (1.0 m3). |
Acceleration Gate Entrance
Template:NPCTableFootRoom 1
| WD | EWAR | L
| ||
|---|---|---|---|---|
| |
6 x Elite Cruiser Centum Loyal Fiend/Hellhound | |||
| |
3 x Battleship Centus Dark Lord/Dread Lord | |||
| |
6 x Sentry Sansha Heavy Missile Battery |
|||
| WD | EWAR | L
| ||
|---|---|---|---|---|
| |
3 x Elite Cruiser Centum Loyal Execrator/Slaughterer | |
||
Room 2
On warp in, you will receive a message from Rahsa:
| WD | EWAR | L
| ||
|---|---|---|---|---|
| |
3 x Elite Frigate Centii Loyal Plague/Butcher | |||
| |
Centus Beast Lord/Plague Lord x Battleship | |
||
| Message from Rahsa: |
|---|
| A Deal: Well, you're quite the formidable one, aren't you? I have a proposal for you. When you report back to your agent, tell him that you've destroyed my forces, and that I should be executed. Yes, I'm a capsuleer too, but he doesn't need to know that. Do this and I'll make sure you get introduced to one of my friends. The Nation treats its friends well. |
Fate of a Madman
| WD | EWAR | L
| ||
|---|---|---|---|---|
| |
1 x Battleship Rahsa's Battleship | |
||
Chapter 3: The Old Guard
Catching the Scent
Falling into Place
 |
Type: Encounter (Mercenaries - Amarr ships)
Destination: Shaha (13 jumps) Summary: Place the Homemade Sansha Beacon (1.0 m3) in the Linked Broadcast Array Hub, and destroy the ships that spawn. |
Making an Arrest
An Unfortunate End
 |
Type: Courier
Destination: Palas (about 6 jumps) Summary: Travel - no cargo.
|
Panic Response
The Right to Rule
External Links/Guides
EVElopedia (mirror of original site)


