More actions
→Vexor: Corrected skill |
No edit summary |
||
| Line 957: | Line 957: | ||
* An advanced fit with 19k EHP and 628 dps for maxed skills.<br> | * An advanced fit with 19k EHP and 628 dps for maxed skills.<br> | ||
* The resist rigs were chosen instead of extenders because the EHP is nearly the same with them, but they are much cheaper than field extenders. | * The resist rigs were chosen instead of extenders because the EHP is nearly the same with them, but they are much cheaper than field extenders. | ||
}} | }} | ||
| Line 1,404: | Line 1,366: | ||
* This fitting has 67k EHP and 520 DPS with recommended skills.<br> | * This fitting has 67k EHP and 520 DPS with recommended skills.<br> | ||
* Pilots with tracking disruption and EW support skills trained may wish to fit a tracking disruptor instead of the ECCM. | * Pilots with tracking disruption and EW support skills trained may wish to fit a tracking disruptor instead of the ECCM. | ||
}} | }} | ||
| Line 1,730: | Line 1,649: | ||
* This fit has 68k EHP with recommended skills. DPS with 2x Ogres, 2x Hammerheads, and 1x Hobgoblin is 541. DPS with 5x Hammerheads is 474. | * This fit has 68k EHP with recommended skills. DPS with 2x Ogres, 2x Hammerheads, and 1x Hobgoblin is 541. DPS with 5x Hammerheads is 474. | ||
* Pilots with tracking disruption and EW support skills trained may wish to fit a tracking disruptor instead of the ECCM. A medium capacitor booster to be able to run MWD longer and counter neuts is another option. | * Pilots with tracking disruption and EW support skills trained may wish to fit a tracking disruptor instead of the ECCM. A medium capacitor booster to be able to run MWD longer and counter neuts is another option. | ||
}} | }} | ||
| Line 2,165: | Line 2,038: | ||
* A 1% powergrid implant 'Squire' PG2 (slot 6) can be used to upgrade the remote reps to T2 and thus reduce the module cost significantly.<br> | * A 1% powergrid implant 'Squire' PG2 (slot 6) can be used to upgrade the remote reps to T2 and thus reduce the module cost significantly.<br> | ||
* For additional neuting power at close range, one of the remote reps and the drone link augmentor can be changed for two Medium Energy Neutralizer II. | * For additional neuting power at close range, one of the remote reps and the drone link augmentor can be changed for two Medium Energy Neutralizer II. | ||
}} | }} | ||
| Line 2,432: | Line 2,259: | ||
* Requires a 3% powergrid implant (slot 6) and a 3% turret cpu implant (slot 10). Without ''PG4'' and ''KZA1000'' implants or with insufficient powergrid skills, one or two of the blasters can be switched to ion. With Advanced Weapon Upgrades V, this fit requires a ''PG2'' 1% powergrid implant. | * Requires a 3% powergrid implant (slot 6) and a 3% turret cpu implant (slot 10). Without ''PG4'' and ''KZA1000'' implants or with insufficient powergrid skills, one or two of the blasters can be switched to ion. With Advanced Weapon Upgrades V, this fit requires a ''PG2'' 1% powergrid implant. | ||
* With recommended skills, this fitting has 113k EHP and 1007 DPS. | * With recommended skills, this fitting has 113k EHP and 1007 DPS. | ||
}} | }} | ||
Revision as of 21:44, 15 November 2011
This guide provides general information and recommendations for T1 ships of a single player faction.
For more advanced and in-depth information on specific ships refer to EVE ships. This guide simply gathers the characteristics and overview of racial lineups in an easy to browse format for the very new player.
Rookie Ship
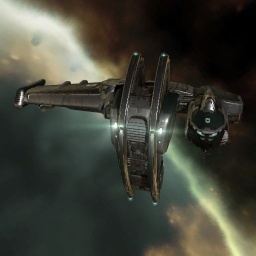
The rookie ship is the first ship you start with. If you are Gallente, it will be a Velator. A new rookie ship is given whenever you dock at a station where you do not have any ships.
Velator

RELATED UNI-WIKI REFERENCES
|
S H I P B O N U S E S
Role Bonus: The Velator class corvette is one of the older vessel types in the Gallente fleet. It was first deployed on the market as a fast passenger craft but the extra passenger quarters were later modified into weapon hardpoints as the newer models came to be used for small-scale security and military duties. The Velator is still a very solid mining and trading vessel. |
Frigate
Frigates are small, fast ships, used often for PvE in level 1 missions. They are also used for tackling and electronic warfare roles in PvP.
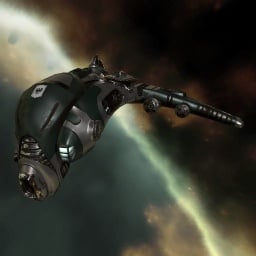
Atron

RELATED UNI-WIKI REFERENCES
|
S H I P B O N U S E S
Gallente Frigate bonuses (per skill level): The Atron is a hard nugget with an advanced power conduit system, but little space for cargo. Although it is a good harvester when it comes to mining, its main ability is as a combat vessel. |
The Atron is the Gallente fast frigate, although only having two mid slots makes it unloved for tackling in PvP despite its speed and high scan resolution. It can serve as a level 1 mission runner until Gallente Frigate III is trained for the Incursus and Destroyers I for the Catalyst.

RELATED UNI-WIKI REFERENCES
|
S H I P B O N U S E S
Gallente Frigate bonuses (per skill level): In YC114 each major empire faction, having been embroiled in a harrowing, extensive, long-term war, recognized the growing need for support and logistics functionality in their vessels during the kind of protracted interstellar warfare that might otherwise prove exhausting for its participants. In the Gallente Federation, this led to the redesign and redeployment of the Navitas. |
The Navitas is the Gallente mining frigate. Compared to the Caldari mining frigate (considered the best racial mining frigate) it has a slightly smaller cargo bay.
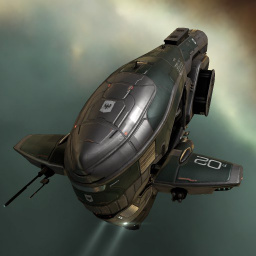
Imicus

RELATED UNI-WIKI REFERENCES
|
S H I P B O N U S E S
Gallente Frigate bonuses (per skill level): The Imicus is a slow but hard-shelled frigate, ideal for any type of scouting activity. Used by merchant, miner and combat groups, the Imicus is usually relied upon as the operation's eyes and ears when traversing low security sectors. |
The Imicus is the Gallente scanning frigate, and it boasts a 15 m3 drone bay, enough for 3 light drones. Some players who train drone skills early will use if for level 1 missions instead of the incursus or catalyst.
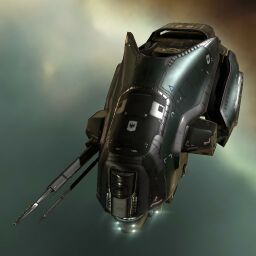
Incursus

RELATED UNI-WIKI REFERENCES
|
S H I P B O N U S E S
Gallente Frigate bonuses (per skill level): The Incursus may be found both spearheading and bulwarking Gallente military operations. Its speed makes it excellent for skirmishing duties, while its resilience helps it outlast its opponents on the battlefield. Incursus-class ships move together in groups and can quickly and effectively gang up on ships many times their size and overwhelm them. In recent years the Incursus has increasingly found its way into the hands of pirates, who love its aggressive appearance. |
The Incursus is the typical PvE and PvP frigate for Gallente players. It is faster and has a better scan resolution than the Tristan, which makes it better for tackling in PvP. It is also the only Gallente frigate with 3 turret slots. Turret fitted Incursus may deal more damage than a Tristan depending on missile skills.
Maulus

RELATED UNI-WIKI REFERENCES
|
S H I P B O N U S E S
Gallente Frigate bonuses (per skill level): The Maulus is a high-tech vessel, specialized for electronic warfare. It is particularly valued in fleet warfare due to its optimization for sensor dampening technology. |
The Maulus is an electronic warfare frigate, specialized in dampening. Its low locking range makes it ineffective at range damping snipers. However, it can resolution damp effectively with the help of ECM in the fleet.
Tristan

RELATED UNI-WIKI REFERENCES
|
S H I P B O N U S E S
Gallente Frigate bonuses (per skill level): Often nicknamed The Fat Man, this nimble little frigate is mainly used by the Federation in escort duties or on short-range patrols. The Tristan has been very popular throughout Gallente space for years because of its versatility. It is rather expensive, but buyers will definitely get their money's worth, as the Tristan is one of the more powerful frigates available on the market. |
The Tristan is an excellent PvP frigate, but requires missile skills to use effectively, which many Gallente players will not train early in their career. It is also slower and has less scan resolution than the Incursus, making it slightly worse for a dedicated tackling role in fleets.
Destroyer
Destroyers are ships slightly larger than frigates. They use the same sized modules as frigates, have more high slots. They are often used in PvE for level 1 missions. They are rarely used in PvP, as their DPS is not impressive without high skills, although they sometimes fill the role of anti-interceptor.
Flying destroyers is not recommended for PvP Uni fleets. There are some exceptions, like Thrashers for a specialized Hit & Run fleet.
Catalyst

RELATED UNI-WIKI REFERENCES
|
S H I P B O N U S E S
Gallente Destroyer bonuses (per skill level): Ideally suited for both skirmish warfare and fleet support, the Catalyst is touted as one of the best anti-frigate platforms out there. Faced with its top-of-the-line tracking equipment, not many can argue. |
The Catalyst has 8 high slots, all of which can be fitted with guns. It is the typical level 1 mission runner ship for Gallente pilots.
The Catalyst is also used as a salvaging boat or suicide gank ship.
Cruiser
Celestis

RELATED UNI-WIKI REFERENCES
|
S H I P B O N U S E S
Gallente Cruiser bonuses (per skill level): The Celestis cruiser is a versatile ship which can be employed in a myriad of roles, making it handy for small corporations with a limited number of ships. True to Gallente style the Celestis is especially deadly in close quarters combat due to its advanced targeting systems. |
The Celestis is the Gallente EW cruiser. Damps have a poor optimal, and even in falloff, it has difficulty applying damps at typical sniper range. Although it can do well with range damping against mid-range snipers up to 100 km or so. Resolution damping is made much more useful with ECM on the field as well.
Exequror

RELATED UNI-WIKI REFERENCES
|
S H I P B O N U S E S
Gallente Cruiser bonuses (per skill level): In YC114 each major empire faction, having been embroiled in a harrowing, extensive, long-term war, recognized the growing need for support and logistics functionality in their vessels during the kind of protracted interstellar warfare that might otherwise prove exhausting for its participants. Both Frigate and Cruiser-class ships were put under the microscope, and in the Gallente Federation the outcome of the re-evaluation process led, among other developments, to a redesign and redeployment of the Exequoror. |
The Exequror is the Gallente logistics cruiser. It is not often used in PvP. It has a cargo bay bonus which can make it useful as a hauler for players on trial accounts who cannot train industrial ships. An Exequror fitted with Expanded Cargohold in low slots can haul over 1000 m3 in its cargo bay.
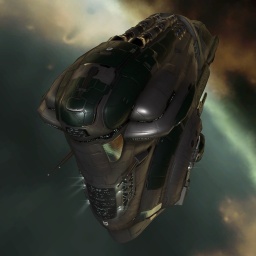
Thorax

RELATED UNI-WIKI REFERENCES
|
S H I P B O N U S E S
Gallente Cruiser bonuses (per skill level): The Thorax-class cruiser is the latest combat ship commissioned by the Federation. While the Thorax is a very effective ship at any range, typical of modern Gallente design philosophy it is most effective when working at extreme close range where its blasters and hordes of combat drones tear through even the toughest of enemies. |
The Thorax is the first ship newbie pilots should look at to fill a damage dealing role in PvP fleets. Its bonus to MWD cap and high DPS potential make it an excellent heavy tackler.
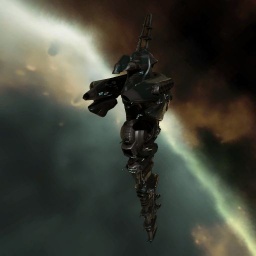
Vexor

RELATED UNI-WIKI REFERENCES
|
S H I P B O N U S E S
Gallente Cruiser bonuses (per skill level): The Vexor is a strong combat ship that is also geared to operate in a variety of other roles. The Vexor is especially useful for surveying in potentially hostile sectors as it can stay on duty for a very long time before having to return to base. Furthermore, it is well capable of defending itself against even concentrated attacks. |
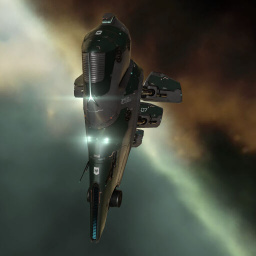
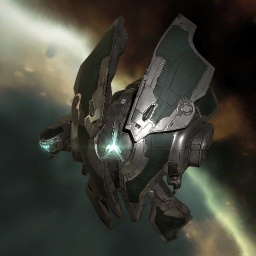
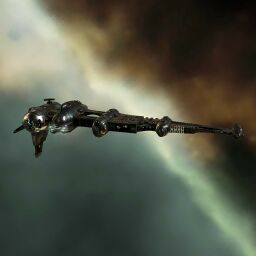
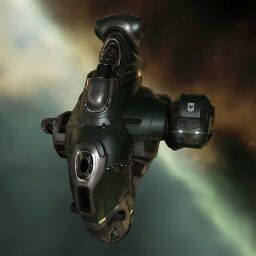
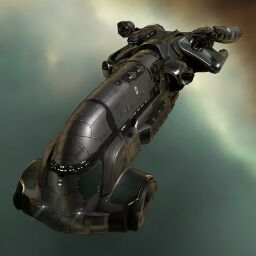
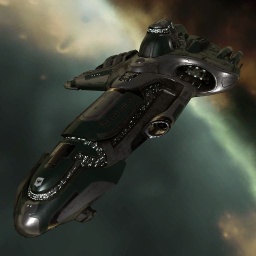
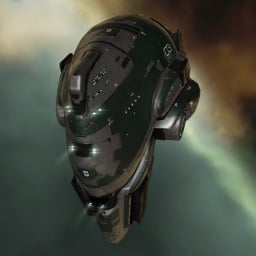
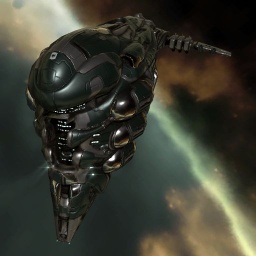
The Vexor, like the Myrmidon and Dominix, is a drone boat. The vexor is an excellent mission ship, and it can also be a good PvP ship. For low skill pilots, it is usually easier to get DPS out of the Thorax, even with more skills in drones than gunnery.
Battlecruiser
Brutix

RELATED UNI-WIKI REFERENCES
|
S H I P B O N U S E S
Gallente Battlecruiser bonuses (per skill level): One of the most ferocious war vessels to ever spring from Gallente starship design, the Brutix is a behemoth in every sense of the word. When this hard-hitting monster appears, the battlefield takes notice. |
The Brutix is renowned for its high DPS potential in PvP. It is also a popular suicide gank ship.
Although Gallente ships are usually better armor tanked, the Brutix benefits from a shield tank in several areas. Low slots can be dedicated to gank modules to increase DPS. The shield tank Brutix also has the advantage of being faster than an armor tank, which means it can get into the short blaster range sooner.
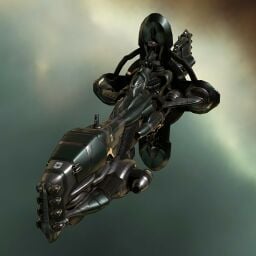
Myrmidon

RELATED UNI-WIKI REFERENCES
|
S H I P B O N U S E S
Gallente Battlecruiser bonuses (per skill level): Worried that their hot-shot pilots would burn brightly in their eagerness to engage the enemy, the Federation Navy created a ship that encourages caution over foolhardiness. A hardier version of its counterpart, the Myrmidon is a ship designed to persist in battle. Its numerous medium and high slots allow it to slowly bulldoze its way through the opposition, while its massive drone space ensures that no enemy is left unscathed. |
The Myrmidon is the typical level 3 missioning ship. It can fit a passive shield tank like the Drake, but most Gallente players will focus on armor tanking skills, and its armor repair bonus make it an excellent armor tanker.
The Myrmidon can also be an excellent PvP ship, though the damage potential is less than the Brutix with most fittings. The Myrmidons shown here have autocannons, since it will perform much better with those, although if you have T2 autocannons trained, you should have cross-trained to a hurricane which will perform much better with a buffer tank. The myrm is sometimes used in PvP with dual or triple reps, although such setups are much more useful for solo or small gangs than for large fleets.
The most DPS from drones is with 2x Ogres, 2x Hammerheads, and 1x Hobgoblin due to the unusual 75 mb drone bandwidth. However, Ogres may have difficulty tracking targets smaller than battleships, and travel time can also be an issue depending on the initial engagement range. Pilots without T2 ogres may wish to use hammerheads, valkyries, warriors, and ec-300 drones in their drone bay instead.
Battleship
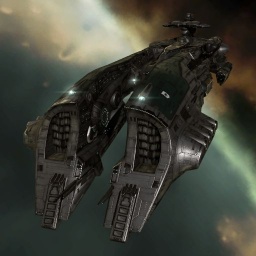
Dominix

RELATED UNI-WIKI REFERENCES
|
S H I P B O N U S E S
Gallente Battleship bonuses (per skill level): The Dominix is one of the old warhorses dating back to the Gallente-Caldari War. While no longer regarded as the king of the hill, it is by no means obsolete. Its formidable hulk and powerful drone arsenal means that anyone not in the largest and latest battleships will regret ever locking horns with it. |
The mission Dominix fits are cap stable with Energy Management IV, Energy Systems Operation IV, Controlled Bursts III, and Fuel Conservation III (for the afterburner version). The single LAR tank version should be used in easier missions and the dual LAR in harder missions. Although as your skills increase and you become more familiar with L4 missions, you may want to set up some mission-specific fitting variants. Some people prefer heavy drones, other prefer sentries. Try both and upgrade whichever you prefer to Tech 2. If you use sentries, you should consider fitting some Omnidirectional Tracking Links in mid slots.
Hyperion

RELATED UNI-WIKI REFERENCES
|
S H I P B O N U S E S
Gallente Battleship bonuses (per skill level): Recognizing the necessity for a blaster platform to round out their high-end arsenal, the Federation Navy brought in top-level talent to work on the Hyperion. The result: one of the most lethal and versatile gunboats ever to take to the dark skies. |
The Hyperion is unloved by many. In battleship fleets, remote repping is far superior, making the local rep bonus pointless. For Uni operations, it might act as a decent bait ship during lowsec patrols for pilots with too much ISK on their hands.
Megathron

RELATED UNI-WIKI REFERENCES
|
S H I P B O N U S E S
Gallente Battleship bonuses (per skill level): The Megathron has established itself as one of the most feared and respected battleships around. Since its first appearance almost two decades ago it has seen considerable service in the troublesome regions on the outskirts of the Federation, helping to expand and defend Gallentean influence there. |
The Megathron is one of the best player vs. player ships available to the Gallente. With his high amount of high slots and low slots, it can fit a sporty tank while dealing out a relatively high amount of DPS. Common setups for the Megathron include "Blaster"-throns and "Sniper"-throns, the former being a close range blaster fitted ship while the latter being a railgun fitted long range ship.
Industrial
The Iteron line of ships, from I to V, are excellent haulers. The Iteron V when rigged is the T1 industrial ship with the largest cargo capacity, although for most players and Iteron I or III will suffice. Industrials can be used to store mission loot and salvage, to haul at a later time and sell at a trade hub for more ISK than can be made in most backwater mission stations.
Iteron

RELATED UNI-WIKI REFERENCES
|
S H I P B O N U S E S
Gallente Hauler bonuses (per skill level): Originally set to sail under the guise of "Iteron", this new iteration of an old stalwart is fast and reliable. It is equally popular among civilians and militaries due to its low price and ability to be fitted in myriad different ways. Despite its speed and resilience, however, it may need to be guarded while in particularly unfriendly territories, which is why it has also been outfitted with a drone bay for extra protection. |
Iteron Mark II
Iteron Mark III
Iteron Mark IV
Iteron Mark V

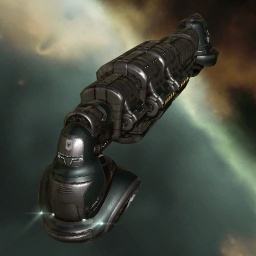
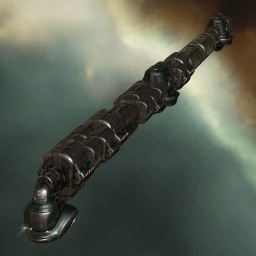
RELATED UNI-WIKI REFERENCES
|
S H I P B O N U S E S
Gallente Hauler bonuses (per skill level): This lumbering giant is the latest and last iteration in a chain of haulers. It is the only one to retain the original "Iteron"-class callsign, but while all the others eventually evolved into specialized versions, the Iteron Mk. V still does what haulers do best: Transporting enormous amounts of goods and commodities between the stars. |
Ammunition, Range, and Kiting
You should carry 3 types of ammo during missions, and switch when required. By default, close range (antimatter or plutonium) ammo should be used. If you are taking too much damage at close range, switch to medium range (lead or thorium) or long (iron or tungsten) range ammo and fire from further away. Guns can suffer from tracking issues, so it is recommend to use the 'keep at range' option instead of the 'orbit' option. With the amount of enemies in missions, orbiting is less likely to mitigate the total incoming damage from rats. Even close to optimal, when orbiting and using close range ammo, guns will often have difficulty tracking enemies. Enemies should be kept close to optimal with the 'keep at range' option, this should keep angular velocity low to avoid suffering from tracking issues, and as long as enemies are within optimal there will be no reduction in damage from range.
Antimatter requires the most cap, has the shortest range, and does the most damage. Lead requires the least cap, has no range modifier, and does middling damage. Iron has the longest range, and the least damage.
To find out your optimal with ammo, load ammo in your guns, then right click and show info. The optimal displayed in the attributes will be adjusted for ammo and skills. Or better yet, use EFT and import your character skills to see all of your ship's stats.
For PvP, faction antimatter and null (blasters) or spike (rails) are usually used. Javelin (rails) is not recommended due to the tracking penalty while having nearly the same DPS as faction antimatter. Void (blasters) has slightly better DPS than faction antimatter, and better optimal, worse falloff, worse tracking, and worse cap consumption. Void can be useful in some circumstances, especially if the target has multiple webs applied to it. It is often better to keep at range close to your optimal in PvP to avoid tracking problems. Orbiting can cause tracking problems, except with small ships orbiting large ships due to the higher signature radius making shots hit the target easily.
When using a battleship that requires cap boosters, it is recommended to keep a medium standard container in the cargo hold. This will provide extra space, which is handy for switching out ammo types and picking up loot after a fight. Always make sure you have the required space for one full load of ammo in the cargo hold, otherwise switching ammo will be difficult.
Tech and Meta Levels
These fittings were made mostly using Tech 1 Meta 0 modules for frigates and cruisers, and meta 4 and Tech 2 for larger ships. Higher Meta items up to meta 4 will often be easier to fit. Tech 2 is Meta 5, and usually harder to fit. Meta 3 and 4 are usually expensive, often more expensive than Tech 2. Meta 1 and 2 modules will often be less expensive than Meta 0, due to low demand and high supply on the market. Sometimes meta 4 is cheaper and better than Tech 2, like for ECCM modules. Some meta 4 modules are nearly always used instead of the T2 version, because the T2 having worse attributes and being harder to fit, like for armor plates.
In PvP, frigates and cruisers are often not worth fitting expensive modules on for low skill point or inexperienced pilots. Tech 1 Meta 0 modules are provided freely by the university. Once pilots have the skill points, a certain amount of combat experience, and enough ISK to replace bigger ships, they should consider moving to a battlecruiser with T2 fittings.
Pilots without T2 guns fitting a BC for PvP should probably avoid the overpriced meta 3 and 4 guns. Some of the meta 3 and 4 medium waepons are reasonably priced, but many are not, and will only make your ship into a loot piñata for the enemy when it is destroyed, for very little increase in effective dps. It is recommended to get T2 guns before getting into BC, BS, or any T2 damage dealing ships for PvP.
Meta 4 guns are recommended on some of these PvE ships, as many gallente pilots in their early careers will focus sooner on T2 drones than T2 guns. Some Meta 4 guns are reasonably priced, others are hideously expensive. If you can't afford to lose expensive Meta 4 guns, downgrade them to meta 3 or 2 instead.
Meta level can be checked in the 'show info' window under the attributes tab. Items without a meta level displayed in the attributes tab are meta 0. Meta level can also be displayed in a ship or station hangar when the items are displayed in list mode. To add the Meta column, right-click the header and select 'show meta lvl'.
Drones
Small drones should be used against frigate sized enemies, medium drones should be used against cruiser sized enemies, and heavy drones should be used against battleship sized enemies. Sentries are mostly meant for battleship sized enemies, but if smaller enemies are far enough that tracking and signature radius isn't an issue, they can deal relatively well those.
Amarr drones are not recommended; due to their low damage multiplier, they are rarely useful. Even against rats who's lowest resistance is EM damage, they can be outperformed by Gallente drones. However, the Amarr curator sentry drones can be good to use against rats with a low EM resist (depending on range and tracking). Gallente drones have the highest damage multiplier, and thermal damage is the best or second best damage to deal against many rat types. It is strongly recommended to fit the best drone types to match rat weaknesses.
- Caldari scout drones: Guristas, Mordu's Legion, Mercenaries, Serpentis
- Gallente scout drones: Blood Raiders, Sansha's Nation, Rogue Drones
- Minmatar scout drones: Angel Cartel
Some of these factions have ships with variable resists in different ship sizes. It is advised to check the two lowest resist options and compare drone damage reports. NPC Damage Types
Drone aggro should be watched. When arriving in a mission room, aggro should be acquired by approaching enemies and shooting them with guns. If a new wave of enemies arrives and the drones catch aggro, they should be recalled to the drone bay, and released only when the enemies have targeted your ship. Under normal circumstances, you should never lose drones when using proper aggro management with rats. Some missions have particular aggro rules that can lead to drones getting shot, check Eve Survival mission reports for details.
Keyboard shortcuts are recommended for drone management. Drones need to be initially launched manually from the drone window, but shortcuts can be set for attack and return to drone bay commands.
In PvP, Gallente and Minmatar scout drones are used almost exclusively. Gallente drones for their damage potential, Minmatar drones for their speed and explosive damage which armor tankers will not always patch. Explosive damage is also better than thermal against a wider range of T2 ships that have augmented resists. Amarr drones are sometimes used in PvP to gank mission runners and ratters that have a weak EM hole. For sentries, bouncers are popular for their damage type and range.
In general, it is better to keep drones in passive mode. In missions and wormholes, drones on active can trigger a new wave earlier than desired. In PvP, drones on active mode can lead to having an aggression timer when it is not wanted and being unable to dock or jump through a gate.
See Drones and Using Drones for more advice on drone selection and deployment.
Tank & Gank
Different rat (NPC pirates) factions have different damage type resistances, and deal different damage types. Drones and hardeners should be switched around based on rat types. Damage type resistance and dealt by rats can be found in the NPC Damage Types article. Mission-specific damage profiles can be found on Eve Survival.
All EHP in this guide is given with EFT calculations, not in-game EHP. The listed EHP and DPS in various fits include both gun and drone DPS, and exclude any enhancements such as overheating, boosters, or implants.
Salvaging After the Mission
Salvaging boats are usually used to clean up rooms after missions are complete. To do so, make sure you bookmark one wreck for each room in the mission, since the acceleration gates will disappear after the mission has be turned in at the agent. Once the mission is turned in, the MWD can be used to propel the salvaging boat within tractor range faster.
Once players can afford it (hull price can range from 40 to 50 million ISK), the Noctis is strongly recommended for salvaging.
Enhancements
The Thermodynamics, Cybernetics, and Biology skills can grant pilots increased performance with overheating, implants, and boosters.
See the Overloading, Implants, and Booster Drugs articles for information on these.
Related Links
- Basic skills and Support skills - Training support skills is a key step towards flying a ship well. Read up on support skills here.
- Fitting Guidelines - Some general guidelines for fitting ships.
- Fitting Modules and Rigs Guide - A list of rigs and module types with short descriptions.
- NPC damage types and NPC Ship Attributes - To see which resists to use and damage types to deal against NPC rats.
- Creating an Alt Hauler - Having an alt hauler can be useful for shopping trips during wartime, if you are living in highsec.

