More actions
Sivaira Chen (talk | contribs) No edit summary |
Sivaira Chen (talk | contribs) m abyssal npcs do not give standing hits |
||
| (9 intermediate revisions by 2 users not shown) | |||
| Line 46: | Line 46: | ||
{{expansion past| | {{expansion past| | ||
Tier 4 and 5 (T6 didn't exist yet) abyssal filaments used to always give players a suspect timer by default when used, regardless of system security. The suspect flag mechanics were reworked following the | Tier 4 and 5 (T6 didn't exist yet) abyssal filaments used to always give players a suspect timer by default when used, regardless of system security. The suspect flag mechanics were reworked following the Nov. 4, 2022 patch to the security scaling system shown above. | ||
}} | }} | ||
=== Abyssal layout === | === Abyssal layout === | ||
An Abyssal Deadspace instance is composed of three pockets, | An Abyssal Deadspace instance is composed of three pockets, frequently called "rooms" by players. Each pocket contains enemies and a gate to the next pocket; you will always spawn anywhere from 35-70 km away from the gate and the enemies will be sitting at 0 on it. The gate only unlocks once all enemies in the pocket are cleared. | ||
The enemies in the pocket are randomly selected from a range of spawns appropriate to the tier of the filament used. Higher tier filaments take you to pockets with (much) more dangerous enemies. Some pockets may contain enemies who are in combat against each other. However, none of these factions will be allied with you. You must fight your own way out. | The enemies in the pocket are randomly selected from a range of spawns appropriate to the tier of the filament used. Higher tier filaments take you to pockets with larger spawns, (much) more dangerous enemies and a larger variety of said enemies. Some pockets may contain enemies who are in combat against each other in lore. However, none of these factions will be allied with you. You must fight your own way out. | ||
Abyssal NPCs leave no wrecks to loot or salvage. | Abyssal NPCs leave no wrecks to loot or salvage, and have no bounties. Destroying them will also not penalize your standings with their related faction - what happens in the Abyss, stays in the Abyss. | ||
=== Loot === | === Loot === | ||
[[File:Triglavian Bioadaptive Cache.jpg|thumb|200px|'''Triglavian Bioadaptive Cache''' contains the loot for each pocket.]] | [[File:Triglavian Bioadaptive Cache.jpg|thumb|200px|'''Triglavian Bioadaptive Cache''' contains the loot for each pocket.]] | ||
[[File:Triglavian extractionNodes.jpg|thumb|200px|'''Triglavian Extraction Nodes''' also contains | [[File:Triglavian extractionNodes.jpg|thumb|200px|'''Triglavian Extraction Nodes''' also contains additional loot.]] | ||
Each pocket also contains a structure called the "Triglavian Bioadaptive Cache" which has a scant 300 hit points and which, once destroyed, drops most of the loot for that pocket. | Each pocket also contains a structure called the "Triglavian Bioadaptive Cache" which has a scant 300 hit points and which, once destroyed, drops most of the loot for that pocket. | ||
| Line 152: | Line 152: | ||
'''Maximum Velocity bonus (Dark):''' Enemies and player drones will only use the bonused attribute of "Maximum Velocity" when chasing. When in their desired range, they will use their normal, un-bonused "Orbit Velocity". Players, however, are able to control how much of their max velocity they are using, and thus can fully benefit from this bonus. | '''Maximum Velocity bonus (Dark):''' Enemies and player drones will only use the bonused attribute of "Maximum Velocity" when chasing. When in their desired range, they will use their normal, un-bonused "Orbit Velocity". Players, however, are able to control how much of their max velocity they are using, and thus can fully benefit from this bonus. Better pay extra attention to those Tachyon clouds, though! | ||
'''Capacitor recharge time bonus (Electrical):''' This bonus effectively grants not a 50% bonus, but rather 100%, as it halves capacitor recharge time, thereby doubling the capacitor recharge rate. NPCs receive essentially no benefit from this bonus, but players are able to leverage the additional capacitor regen to great effect. | '''Capacitor recharge time bonus (Electrical):''' This bonus effectively grants not a 50% bonus, but rather 100%, as it halves capacitor recharge time, thereby doubling the capacitor recharge rate. NPCs receive essentially no benefit from this bonus, but players are able to leverage the additional capacitor regen to great effect. Ship fits for this tier can afford to run many more cap-hungry tank mods than usual and still have little problem, and as such Electrical is generally considered one of the easiest weathers. | ||
| Line 164: | Line 164: | ||
'''Scan resolution bonus (Exotic):''' Largely irrelevant, be aware that NPCs will lock you faster, enjoy locking NPCs faster. | '''Scan resolution bonus (Exotic):''' Largely irrelevant, be aware that NPCs will lock you faster, enjoy locking NPCs faster. The kinetic damage bonus is generally more of a boon. | ||
=== Localized Effects === | === Localized Effects === | ||
| Line 174: | Line 174: | ||
* Filament Cloud (orange): Penalty to Shield Booster boosting (-40%) and reduction to shield booster duration (-40%). If using a conventional (not Ancillary) shield booster, in effect this does not weaken your shield booster, but rather increases its capacitor cost per second by 66%. If you rely on a shield booster to survive, you should avoid entering these clouds. | * Filament Cloud (orange): Penalty to Shield Booster boosting (-40%) and reduction to shield booster duration (-40%). If using a conventional (not Ancillary) shield booster, in effect this does not weaken your shield booster, but rather increases its capacitor cost per second by 66%. If you rely on a shield booster to survive, you should avoid entering these clouds. | ||
* Bioluminescence Cloud (light blue): +300% Signature Radius (4.0x signature radius multiplier). Entering this cloud will make your ship an easier target to hit but it will also make all rats easier to hit. If fighting small but accurate enemies like Damaviks, this cloud can actually be helpful, and you can lure the rats into it. Large ships (like the Abyssal Overminds) will be able to hit you much more easy to hit as well - stay out of these clouds if you are speed-tanking a battleship room. | * Bioluminescence Cloud (light blue): +300% Signature Radius (4.0x signature radius multiplier). Entering this cloud will make your ship an easier target to hit but it will also make all rats easier to hit. If fighting small but accurate enemies like Damaviks, this cloud can actually be helpful, and you can lure the rats into it. Large ships (like the Abyssal Overminds) will be able to hit you much more easy to hit as well - stay out of these clouds if you are speed-tanking a battleship room. | ||
* Tachyon Cloud (white): +300% Velocity (x4.0 velocity), -50% Inertia Modifier. Be ''very'' careful entering this cloud with an active [[Propulsion_equipment|MWD]], as the inertia reduction will cause you to accelerate ''very'' quickly (x4 velocity, x0.5 inertia, '''x8''' acceleration), potentially slingshotting you outside the pocket boundary for a very quick death. These clouds will also increase enemy velocities, causing them to either close range very quickly, or suddenly pull away. | * Tachyon Cloud (white): +300% Velocity (x4.0 velocity), -50% Inertia Modifier. Be ''very'' careful entering this cloud with an active [[Propulsion_equipment|MWD]], as the inertia reduction will cause you to accelerate ''very'' quickly (x4 velocity, x0.5 inertia, '''x8''' acceleration), potentially slingshotting you outside the pocket boundary for a very quick death. These clouds will also increase enemy velocities, causing them to either close range very quickly, or suddenly pull away. Drone-reliant ships should beware of these clouds as well since drones will struggle with damage application to enemies inside these clouds. | ||
{{expansion past|In September, 2020, the Tachyon Cloud was introduced, replacing the older Caustic Cloud. The Caustic Cloud applied a -80% penalty to local and remote Armor Repair modules, making it a death sentence for armor tanked ships. However, the cloud was very rarely seen.}} | {{expansion past|In September, 2020, the Tachyon Cloud was introduced, replacing the older Caustic Cloud. The Caustic Cloud applied a -80% penalty to local and remote Armor Repair modules, making it a death sentence for armor tanked ships. However, the cloud was very rarely seen.}} | ||
Triglavian Towers: | Triglavian Towers: | ||
* Deviant Automata Suppressor: Damages all missiles, drones, and rogue drone frigates within its area of effect. The larger tower does about the same damage to drones as a single medium smartbomb; the smaller does more than double that. Flying into the range of this Suppressor can help you take out pirate drones. Watch out for your own drones. | * Deviant Automata Suppressor: Damages all missiles, drones, and rogue drone frigates within its area of effect. The larger tower does about the same damage to drones as a single medium smartbomb; the smaller does more than double that and can eat your missiles and drones very quickly. Flying into the range of this Suppressor can help you take out pirate drones. Watch out for your own drones. | ||
** Short-Range Deviant Suppressor will attack all drones, missiles and rogue drone frigates within 15 KM | ** Short-Range Deviant Suppressor will attack all drones, missiles and rogue drone frigates within 15 KM. Damage rate is fast enough to delete light missiles in its range extremely quickly. | ||
** Medium-Range Deviant Suppressor will attack all drones, missiles, and rogue drone frigates within 40 KM | ** Medium-Range Deviant Suppressor will attack all drones, missiles, and rogue drone frigates within 40 KM | ||
* Multibody Tracking Pylon: +60% or +80% [[tracking]] to all ships (including NPCs) in its area of effect. This can be helpful for fighting small, fast enemies. It helps your drones as well as your ship. | * Multibody Tracking Pylon: +60% (Medium-Range) or +80% (Short-Range) turret [[tracking]] bonus to all ships (including NPCs) in its area of effect. This can be helpful for fighting small, fast enemies. It helps your drones as well as your ship. The two variants of this pylon have the same area of effect scaling as the Suppressors - 15 KM for Short-Range and 40 KM for Medium-Range. | ||
** Do note that this will also allow large NPCs (such as the Drifter battleship) to track and hit you much more easily than usual - beware if you rely on speed-tanking! | ** Do note that this will also allow large NPCs (such as the Drifter battleship) to track and hit you much more easily than usual - beware if you rely on speed-tanking! | ||
| Line 190: | Line 190: | ||
Unlike in most other regions in EVE, Abyssal Deadspace NPCs have very clear naming patterns and will have either a prefix or suffix that states what special abilities they have. | Unlike in most other regions in EVE, Abyssal Deadspace NPCs have very clear naming patterns and will have either a prefix or suffix that states what special abilities they have. | ||
This makes target prioritization easier, which is extremely important in the Abyss: the general best strategy in most rooms is to start out by killing any EWAR that poses a threat to your ship. Depending on your fit, this can mean Neutralizers, Webs, Tracking/Guidance disruptors, or, if the pocket has battleships, Target Painters. | This makes target prioritization easier, which is extremely important in the Abyss: the general best strategy in most rooms is to start out by killing any EWAR that poses a threat to your ship. Depending on your fit, this can mean Neutralizers, Webs, Warp scramblers, Tracking/Guidance disruptors, or, if the pocket has battleships, Target Painters. | ||
You should also pay attention on whether dedicated remote repair ships are on grid; if you can't kill other frigates before repairs land, prioritize killing remote repairs first. After the dangerous EWAR and remote repair ships are dead, you can focus on the damage dealers in your preferred order. | You should also pay attention on whether dedicated remote repair ships are on grid; if you can't kill other frigates before repairs land, prioritize killing remote repairs first. After the dangerous EWAR and remote repair ships are dead, you can focus on the damage dealers in your preferred order. | ||
| Line 431: | Line 431: | ||
While the EDENCOM ships offer no EWAR, they bring very high alpha damage on very slow fire rates, meaning that the combination of Marshal DPS and EDENCOM alpha can easily and unexpectedly break an Abyssal runner's buffer. | While the EDENCOM ships offer no EWAR, they bring very high alpha damage on very slow fire rates, meaning that the combination of Marshal DPS and EDENCOM alpha can easily and unexpectedly break an Abyssal runner's buffer. | ||
The | The few saving graces when fighting CONCORD/EDENCOM ships are: | ||
# they always deal a constant amount of damage relative to signature radius and velocity, meaning they cannot land critical hits ("Wrecking Shots"). | # they always deal a constant amount of damage relative to signature radius and velocity, meaning they cannot land critical hits ("Wrecking Shots"). | ||
# since their damage is completely based on [[Missile mechanics|missile damage mechanics]], maintaining transversal is a non-issue. | |||
# Vorton Projectors will chain their damage to ''any'' objects within 10km of your ship, and can thus be exploited into dealing friendly fire damage to other enemy CONCORD/EDENCOM ships | # Vorton Projectors will chain their damage to ''any'' objects within 10km of your ship, and can thus be exploited into dealing friendly fire damage to other enemy CONCORD/EDENCOM ships | ||
# CONCORD ships have poor tank relative to their damage, which turns the room into a pure DPS race to determine whether you die first or the Marshals die first. | # CONCORD ships have poor tank relative to their damage, which turns the room into a pure DPS race to determine whether you die first or the Marshals die first. | ||
| Line 563: | Line 564: | ||
But that does not mean you are wholly safe. Once the filament has been used, a rift appears that can be combat scanned by anyone in the system and can be warped to. It also appears on the directional scanner of anyone who has not filtered it out. This makes it possible for people to camp the exit and shoot whoever comes out. | But that does not mean you are wholly safe. Once the filament has been used, a rift appears that can be combat scanned by anyone in the system and can be warped to. It also appears on the directional scanner of anyone who has not filtered it out. This makes it possible for people to camp the exit and shoot whoever comes out. | ||
This means that you have to consider where you use the filament, especially in low security and null security space. Even in high-security space you should be cautious, especially when running high tiers, since they often require blingy ship fittings and thus provide tempting targets for [[ | This means that you have to consider where you use the filament, especially in low security and null security space. Even in high-security space you should be cautious, especially when running high tiers, since they often require blingy ship fittings and thus provide tempting targets for [[suicide ganking]]. It is best to activate the filament at a [[safespot]] bookmark, preferably more than directional-scanner range (14.3 AU) away from any celestial and any frequently-warped routes. Experienced Abyssal runners find large systems where they can set up such bookmarks, and replace their bookmarks frequently. | ||
You will be invulnerable for a short time when you leave the Abyss. If you leave the rift and find yourself being camped, pause to assess your best options, and stay calm. One survival tactic is to quickly activate a new filament, but players who know you can do this will anchor a mobile depot nearby, preventing filament activation. Based on your assessment of the situation, you will have to decide. | You will be invulnerable for a short time when you leave the Abyss. If you leave the rift and find yourself being camped, pause to assess your best options, and stay calm. One survival tactic is to quickly activate a new filament, but players who know you can do this will anchor a mobile depot nearby, preventing filament activation. Based on your assessment of the situation, you will have to decide. | ||
| Line 580: | Line 581: | ||
** '''All weathers''' can drop '''damage module''' mutaplasmids - Heat Sink, Gyrostabilizer, Magnetic Field Stabilizer, Ballistic Control System, Entropic Radiation Sink | ** '''All weathers''' can drop '''damage module''' mutaplasmids - Heat Sink, Gyrostabilizer, Magnetic Field Stabilizer, Ballistic Control System, Entropic Radiation Sink | ||
*** Additionally can drop '''harvesting''' mutaplasmids - Gas Cloud Harvester, Gas Cloud Scoop, Ice Harvester, Ice Mining Laser, Mining Laser, Deep Core Mining Laser, Modulated Deep Core (Strip) Miner, all other Strip Miner types | *** Additionally can drop '''harvesting''' mutaplasmids - Gas Cloud Harvester, Gas Cloud Scoop, Ice Harvester, Ice Mining Laser, Mining Laser, Deep Core Mining Laser, Modulated Deep Core (Strip) Miner, all other Strip Miner types | ||
*** '''Smartbomb''' mutaplasmids based on the weather being run (e.g. Electrical filament = EMP Smartbomb mutaplasmid) | |||
** '''T6 filaments''' can drop '''capital module''' mutaplasmids - All capital-sized versions of the modules above, plus Ancillary Shield Booster/Armor Repairer, Heavy Warp Disruptor/Scrambler, and Siege Module | ** '''T6 filaments''' can drop '''capital module''' mutaplasmids - All capital-sized versions of the modules above, plus Ancillary Shield Booster/Armor Repairer, Heavy Warp Disruptor/Scrambler, and Siege Module | ||
* Precursor ship and weapon skill books, disintegrator specialization skill books | * Precursor ship and weapon skill books, disintegrator specialization skill books | ||
* Blueprint copies required for the production of Triglavian hulls, weapon systems, modules and ammunition: | * Blueprint copies required for the production of Triglavian hulls, weapon systems, modules and ammunition: | ||
** [[#Triglavian Collective|Triglavian ship hulls]] | ** T1 [[#Triglavian Collective|Triglavian ship hulls]] | ||
** [[Entropic Disintegrators]]: Weapons with unique properties and only usable by the Triglavian ships | ** [[Entropic Disintegrators]]: Weapons with unique properties and only usable by the Triglavian ships | ||
** [[Turrets#Exotic_plasma|Exotic Plasma]]: Ammunition used by Entropic Disintegrators | *** T1, Meta and Faction (Veles) variants will drop; T2 weapons must be researched like normal. | ||
** [[Turrets#Exotic_plasma|Exotic Plasma]]: Ammunition used by Entropic Disintegrators. Only Tech 1 BPCs will drop; Tech 2s must be researched like normal. | |||
*** XL-size (capital) Exotic Plasma BPCs will only drop from T4s and higher. | |||
** Mutadaptive Remote Armor Repairer: A special remote armor repairer module used by the Triglavian Rodiva and Zarmazd logistics cruisers | ** Mutadaptive Remote Armor Repairer: A special remote armor repairer module used by the Triglavian Rodiva and Zarmazd logistics cruisers | ||
** Perun Heavy Mutadaptive Remote Armor Repairer - a faction version of the Mutadaptive Remote Armor Repairer | ** Perun Heavy Mutadaptive Remote Armor Repairer - a faction version of the Mutadaptive Remote Armor Repairer | ||
| Line 596: | Line 600: | ||
* Abyssal Filaments: | * Abyssal Filaments: | ||
** [[Exploration#Relic_and_Data_sites|data hacking sites]] are the only source for Abyssal filaments outside of Abyssal Deadspace, and they only provide Tranquil (Tier 0) and Calm (Tier 1) filaments | ** [[Exploration#Relic_and_Data_sites|data hacking sites]] are the only source for Abyssal filaments outside of Abyssal Deadspace, and they only provide Tranquil (Tier 0) and Calm (Tier 1) filaments | ||
** the Bioadaptive/Biocombinative Caches in Abyssal Deadspace can drop filaments of all tiers | ** the Bioadaptive/Biocombinative Caches in Abyssal Deadspace can drop filaments of all tiers, though the pool of filament drops seems to be limited by the tier of the filament used. Example: if running a T3, any filament from T0-T3 can drop, plus any filament up to two tiers up (T4, T5). Running T4 is the bare minimum for dropping the highest tier (T6) filament. | ||
** it is therefore only by running Abyssals that the filaments for higher-tier Abyssal runs can be found, and there is a busy market in retrieved filaments | ** it is therefore only by running Abyssals that the filaments for higher-tier Abyssal runs can be found, and there is a busy market in retrieved filaments | ||
* Abyssal Deadspace is also one source from which players can acquire crates for [[Ship SKINR|SKINR]] sequencers and design elements. | * Abyssal Deadspace is also one source from which players can acquire crates for [[Ship SKINR|SKINR]] sequencers and design elements. | ||
Latest revision as of 21:40, 11 February 2026

|
| Abyssal Deadspace links |
|
|
|---|
Abyssal Deadspace is a mysterious area of isolated space which players can enter to try to complete time-limited PvE combat challenges in order to obtain lucrative rewards.
Pilots can only enter abyssal deadspace by using special filaments, and even then only limited pockets are accessible for a limited time. The pockets are filled with dangerous localized space effects and any ship that ventures away from the stable pocket or stays in for too long will be destroyed by these effects.
Abyssal mechanics
Running Abyssals can be fun and profitable, but it is very important that pilots grasp the core mechanics involved, as--unlike most PvE combat in EVE--failure means the certain loss of both ship and pod.
Entry

Pilots can enter Abyssal deadspace using Abyssal filaments obtained from data sites, from abyssal deadspace itself, or purchased from the in-game market. Seven tiers of increasing difficulty exist, numbered from 0 to 6. Entry into the Abyss is limited to either:
- A single Tech 1, Tech 2, Navy Faction or Pirate Faction cruiser; T3 Strategic Cruisers cannot enter
- Up to two destroyers, at the cost of 2 filaments; Unlike cruisers, T3 variants of destroyers are allowed
- Up to three frigates, at the cost of 3 filaments
To enter the Abyss, activate the filament(s) while in space. When activated, a beacon (named Abyssal trace) is created at your entry location. If a frigate or destroyer Abyssal trace is opened, only a fleet can activate it. The Abyssal trace can be scanned down using combat probes, which means that sufficiently motivated players might be able to find it and await your return from the pocket.
Activation can be carried out anywhere in space, as long as the following conditions are satisfied:
- No Gates, Stations or mobile depots at less than 1000 km.
- No other Abyssal trace at less than 1000 km.
- Not in a deadspace pocket.
- The player does not have a capsuleer log-off timer active.
To keep their abyssal trace more secure, most players activate their filaments at safespot bookmarks.
Abyssal filaments can not be activated in 1.0 or 0.9 space [1] [2]. Triggering an abyssal filament in high security space can also trigger a suspect timer. This is based on the filament tier and the security of the system.
| Security | No suspect flag | Suspect flag |
|---|---|---|
| 1.0 | - | - |
| 0.9 | - | - |
| 0.8 | T0, T1, T2, T3 | T4, T5, T6 |
| 0.7 | T0, T1, T2, T3, T4 | T5, T6 |
| 0.6 | T0, T1, T2, T3, T4, T5 | T6 |
| 0.5 | T0, T1, T2, T3, T4, T5, T6 | - |
| A long, long time ago... |
|---|
|
Tier 4 and 5 (T6 didn't exist yet) abyssal filaments used to always give players a suspect timer by default when used, regardless of system security. The suspect flag mechanics were reworked following the Nov. 4, 2022 patch to the security scaling system shown above. |
Abyssal layout
An Abyssal Deadspace instance is composed of three pockets, frequently called "rooms" by players. Each pocket contains enemies and a gate to the next pocket; you will always spawn anywhere from 35-70 km away from the gate and the enemies will be sitting at 0 on it. The gate only unlocks once all enemies in the pocket are cleared.
The enemies in the pocket are randomly selected from a range of spawns appropriate to the tier of the filament used. Higher tier filaments take you to pockets with larger spawns, (much) more dangerous enemies and a larger variety of said enemies. Some pockets may contain enemies who are in combat against each other in lore. However, none of these factions will be allied with you. You must fight your own way out.
Abyssal NPCs leave no wrecks to loot or salvage, and have no bounties. Destroying them will also not penalize your standings with their related faction - what happens in the Abyss, stays in the Abyss.
Loot


Each pocket also contains a structure called the "Triglavian Bioadaptive Cache" which has a scant 300 hit points and which, once destroyed, drops most of the loot for that pocket.
In all but the easiest (Tier 0) Abyssals, there are also "Triglavian Extraction Nodes" and "Triglavian Extraction SubNodes" which also contain additional loot. These extra cans are often placed far away from the conduit, have a limited loot pool (Survey Databases, Zero-Point Condensate and Crystalline Isogen-10), and sometimes will contain nothing inside of them at a random chance, so going after these should only be done if you have ample time to spare in your run.
Cache wrecks can be salvaged for Triglavian materials, though the time- and ISK-efficiency of doing this is dubious.
Time and space limits
The deadspace instance is stable for only 20 minutes. If you are still in the pocket after 20 minutes your ship and your pod will be immediately destroyed.
Note: 3 May 2024 Exploit Notification - Extending Abyssal Timers
You must clear the three pockets and exit within the allocated time, or you will lose both your ship and your pod. The third pocket gate returns you to the location in space where you activated the filament. To finish the Abyssal run within the 20-minute limit, you must achieve a faster average pocket clear time than 6.66 minutes.
Each pocket is surrounded by dangerous space which will destroy your ship and pod if you enter it. This space appears as a red graphical effect which becomes more obvious the closer you fly toward it.
Restrictions
Other restrictions on Abyssals are:
- Fleet-mates cannot warp to you while you are within the Abyss, nor can you warp out of it.
- You cannot cloak
- You cannot deploy a mobile depot.
- There is no Local chat channel.
- If you start a probe scan with Core Probes and Combat probes, probes will take damage when they move outside of the pocket boundary, and will soon be destroyed as they have low structure HP.
- The Directional Scanner will not work.
- The map will not work.
If a player is in Abyssal Deadspace when server downtime occurs, the player will return to the solar system from which they entered. Any drones must be recovered before the server goes down, or they will be lost.

| WARNING: Any ship and capsule should be considered potentially lost the moment a player enters Abyssal Deadspace. Abyssals are unforgiving to inexperienced, ill-equipped or foolhardy pilots. If your ship is lost inside the site, you will lose your capsule, clone, and any implants equipped as well. Running Abyssals can be a fun and profitable challenge, but do not enter Abyssal Deadspace with a ship or with implants that you cannot afford to lose. |
Environmental Effects
Abyssal deadspace has several environmental effects that will all apply to both the player ship and the NPC ships. These effects will disadvantage unprepared ships, but they can be predicted from the type of filament used, and players can use them to their advantage.
All effects applied to your ship will be shown in the same location as EWAR effects; by default, this is above the capacitor and health displays, at the centre of the base of your screen. Hover your mouse over the icon to see what effect is applied to your ship.
Weather Effects
Each Abyssal Deadspace site will have one of five pairs of weather effects comprised of one bonus, and one penalty. These effects are intrinsic to success, as they are highly impactful. It is important to note that since both the "bonus" and "penalty" components of any weather apply to all entities, the "bonus" can end up being a bonus to the player, and/or a penalty to the player by virtue of being a bonus to the enemies, and similarly vice versa with the "penalty" component. Not every bonus is impactful in every situation, and the same goes for penalties, so it is critical to consider these effects when planning a ship/fleet build, strategies, and tactics.
The bonus and penalty effects found in each of the five kinds of weather are as follows:
| Weather | Penalty | Bonus |
|---|---|---|
| Dark | ||
| Electrical | ||
| Exotic | ||
| Firestorm | ||
| Gamma |
Penalty strength selection:
The strength of the penalty found in a given site is determined by a roll between either 30% or 50% through tier 3, and a roll between either 50% or 70% in tier 4 and above, as described in the table below:
| Tier | Name | Appearance | Penalty Strength |
|---|---|---|---|
| 0 | Tranquil | -30% or -50%, random per site | |
| 1 | Calm | ||
| 2 | Agitated | ||
| 3 | Fierce | ||
| 4 | Raging | -50% or -70%, random per site | |
| 5 | Chaotic | ||
| 6 | Cataclysmic |
These bonuses and penalties may be addressed in the following ways:
Resistance penalties (all weathers but Dark): These will increase the amount of damage taken in the damage type of the resistance penalty. These penalties are addressed by covering this hole on your ship(s), and ensuring that you are putting out damage that matches this resist hole as closely as possible. By forgoing the resist hole, one is choosing to fight against the natural resistances of the NPCs, just as one would in Dark weather, which lacks a resistance penalty.
Turret optimal and falloff penalty (Dark): As this applies to not only NPC and player turrets but player drone turrets, it is inadvisable to bring turret or drone boats to these sites, and to use launchers instead. Additionally, missiles lack of navigation requirements for the purposes of damage application, enable the player to more easily and better take advantage of the maximum velocity bonus found in this weather. This penalty will dramatically reduce the amount of tank requirement/damage taken by players due to the NPC AI not correcting for the reduced range; they will fire on you from outside optimal, and often even outside 1x falloff or more, and consistently miss. Finally, this penalty means that there is no resist penalty, and therefore no resist hole to attack. This weather will require more damage output than most others, save potentially Firestorm.
Maximum Velocity bonus (Dark): Enemies and player drones will only use the bonused attribute of "Maximum Velocity" when chasing. When in their desired range, they will use their normal, un-bonused "Orbit Velocity". Players, however, are able to control how much of their max velocity they are using, and thus can fully benefit from this bonus. Better pay extra attention to those Tachyon clouds, though!
Capacitor recharge time bonus (Electrical): This bonus effectively grants not a 50% bonus, but rather 100%, as it halves capacitor recharge time, thereby doubling the capacitor recharge rate. NPCs receive essentially no benefit from this bonus, but players are able to leverage the additional capacitor regen to great effect. Ship fits for this tier can afford to run many more cap-hungry tank mods than usual and still have little problem, and as such Electrical is generally considered one of the easiest weathers.
Armor hit point bonus (Firestorm): This bonus is the opposite of what is found in Electrical sites, in a way - it is usually not relevant to player ships, only in certain cases, and is highly impactful to the enemies. As many enemies you will encounter in these sites are armor-heavy, this will dramatically increase the time-to-kill for each individual enemy, thereby keeping threats on the field longer, and increasing overall site time. The hit point bonus on the player ship can be relevant to players running destroyers and frigates, to some degree, though is largely unimpactful for players using cruisers. Firestorm is generally known as the most difficult weather.
Shield hit point bonus (Gamma): While most enemies are armor-heavy and some (Lucid Sleepers of the Vigilant Tyrannos) lack shield entirely, there is more than enough shield HP present for this to present a time challenge compared to sites without a hit point bonus, though less of a challenge than Firestorm. In terms of players leveraging this bonus, players are able to utilize the increased shield regeneration that comes along with the increased hit points, building passive shield regeneration tanks that can handle massive amounts of damage. NPC shields found here generally are designed to effectively not regenerate whatsoever, and thus do not gain a notable amount of regeneration from this bonus.
Scan resolution bonus (Exotic): Largely irrelevant, be aware that NPCs will lock you faster, enjoy locking NPCs faster. The kinetic damage bonus is generally more of a boon.
Localized Effects


The pockets will also contain clouds and Triglavian towers that apply effects to player and NPC ships in their immediate vicinity.
Localized Clouds:
- Filament Cloud (orange): Penalty to Shield Booster boosting (-40%) and reduction to shield booster duration (-40%). If using a conventional (not Ancillary) shield booster, in effect this does not weaken your shield booster, but rather increases its capacitor cost per second by 66%. If you rely on a shield booster to survive, you should avoid entering these clouds.
- Bioluminescence Cloud (light blue): +300% Signature Radius (4.0x signature radius multiplier). Entering this cloud will make your ship an easier target to hit but it will also make all rats easier to hit. If fighting small but accurate enemies like Damaviks, this cloud can actually be helpful, and you can lure the rats into it. Large ships (like the Abyssal Overminds) will be able to hit you much more easy to hit as well - stay out of these clouds if you are speed-tanking a battleship room.
- Tachyon Cloud (white): +300% Velocity (x4.0 velocity), -50% Inertia Modifier. Be very careful entering this cloud with an active MWD, as the inertia reduction will cause you to accelerate very quickly (x4 velocity, x0.5 inertia, x8 acceleration), potentially slingshotting you outside the pocket boundary for a very quick death. These clouds will also increase enemy velocities, causing them to either close range very quickly, or suddenly pull away. Drone-reliant ships should beware of these clouds as well since drones will struggle with damage application to enemies inside these clouds.
| A long, long time ago... |
|---|
| In September, 2020, the Tachyon Cloud was introduced, replacing the older Caustic Cloud. The Caustic Cloud applied a -80% penalty to local and remote Armor Repair modules, making it a death sentence for armor tanked ships. However, the cloud was very rarely seen. |
Triglavian Towers:
- Deviant Automata Suppressor: Damages all missiles, drones, and rogue drone frigates within its area of effect. The larger tower does about the same damage to drones as a single medium smartbomb; the smaller does more than double that and can eat your missiles and drones very quickly. Flying into the range of this Suppressor can help you take out pirate drones. Watch out for your own drones.
- Short-Range Deviant Suppressor will attack all drones, missiles and rogue drone frigates within 15 KM. Damage rate is fast enough to delete light missiles in its range extremely quickly.
- Medium-Range Deviant Suppressor will attack all drones, missiles, and rogue drone frigates within 40 KM
- Multibody Tracking Pylon: +60% (Medium-Range) or +80% (Short-Range) turret tracking bonus to all ships (including NPCs) in its area of effect. This can be helpful for fighting small, fast enemies. It helps your drones as well as your ship. The two variants of this pylon have the same area of effect scaling as the Suppressors - 15 KM for Short-Range and 40 KM for Medium-Range.
- Do note that this will also allow large NPCs (such as the Drifter battleship) to track and hit you much more easily than usual - beware if you rely on speed-tanking!
Enemies
Abyssal Deadspace contains a wide variety of different hostile NPCs. Each NPC will behave differently, and taking the right combat approach in different situations is important. The following discussion covers all the different types of NPCs and their abilities; for an overview of the possible sets of NPCs you can face in an Abyssal room, see Possible rooms in Abyssal Deadspace.
Unlike in most other regions in EVE, Abyssal Deadspace NPCs have very clear naming patterns and will have either a prefix or suffix that states what special abilities they have.
This makes target prioritization easier, which is extremely important in the Abyss: the general best strategy in most rooms is to start out by killing any EWAR that poses a threat to your ship. Depending on your fit, this can mean Neutralizers, Webs, Warp scramblers, Tracking/Guidance disruptors, or, if the pocket has battleships, Target Painters.
You should also pay attention on whether dedicated remote repair ships are on grid; if you can't kill other frigates before repairs land, prioritize killing remote repairs first. After the dangerous EWAR and remote repair ships are dead, you can focus on the damage dealers in your preferred order.
| Rogue Drones | Drifters | Sleepers | Triglavians | Sansha's Nation | CONCORD | Angel Cartel |
|---|---|---|---|---|---|---|
 |
Rogue Drones
Rogue Drones are perhaps the most common type of enemies encountered in Abyssal Deadspace, and come in three sizes: Frigate, Battlecruiser, and Battleship. Rogue Drone Frigates can often be found in rooms containing extremely large groups of them, alongside other larger Rogue Drones, or even alongside ships from other factions. Rogue Drone Battlecruisers are somewhat slow and have very short range (only 2+4km), but have pinpoint tracking within that range and extremely high damage. The Rogue Drone Battleship ("Abyssal Overmind") has extremely long range and damage, comes in a different variant at each Abyssal Filament level, and is discussed further, later in this page.
Rogue Drone Frigates deal either a single type of damage based on their name, or a small amount of omni damage alongside EWAR. Rogue Drone Frigates are also susceptible to Deviant Automata Suppressor pylons, but if those are not available, they can be much more easily fought using Multibody Tracking Pylons or Bioluminescent Clouds.
Rogue Drone Battlecruisers also deal only a single type of damage, based on their name.
The Rogue Drone Battleship deals Kinetic and Thermal damage, and the Battleship found in Tier 5 and 6 sites also has a Stasis Webifier, which helps counteract its poor tracking.
Rogue Drone Battleships have a small exploitable gimmick - if a generic damage dealer frigate (e.g. Sparkneedle Tessella) spawns, the battleship follows it in orbit and as a result will draw close to you, as Rogue Drone Frigates naturally orbit close to your ship (minus the repair frigates). This can greatly help afterburner-fit ships which normally can't easily get under the battleship's guns, but can also become problematic in high tier sites as it may put you within their webifier range.
Rogue Drone Frigate names have the suffix Tessella. Rogue Drone Battlecruiser names have the suffix Tessera.
| Rogue Drone Ship | |
|---|---|
| Name | Weapon |
| Spark | |
| Ember | |
| Strike | |
| Blast | |
| (name) needle Tessella | |
| (name) lance Tessella | |
| (name) grip Tessera | |
| Snarecaster | |
| Fogcaster | |
| Gazedimmer | |
| Spotlighter | |
| Fieldweaver | |
| Plateforger | |
Drifters and Seekers
Drifters and seekers are sometimes encountered together but can also appear on their own. They all fire omni-damage turrets and have flat omni-resist profiles.
The key ship in a Drifter room is Karybdis Tyrannos, who flies a Drifter Battleship. This battleship has extremely long range, and will attempt to fly away from your ship(s) at around 300m/s, to drag you to the edge of the abyssal pocket.
This can be very irritating, as it forces you to fly all the way back to the exit gate after the battleship finally dies. During the time spent chasing the battleship, you are vulnerable to its poorly-tracking but hard-hitting turrets. The strength of the battleship varies with the level of the Abyssal filament; higher-level filaments feature more damage and HP. Thankfully, the Drifter Battleship here does not come with either a Doomsday Weapon or any EWAR abilities.
The same gimmick that applies to Rogue Drone Battleships also applies to Drifter battleships, albeit even easier to exploit, which can greatly benefit afterburner-focused cruisers; if the pocket happens to spawn an Ephialtes Lancer, the battleship will follow it in orbit and as a result move closer to you, making it significantly easier to get under its guns and save a lot of stress. This does not work with any other Sleeper/Drifter cruiser types.
Drifter ships start the fight with pre-existing damage; cruisers have 24% shields, 14% armor (~50% in Firestorm) and 30% hull, while the battleship's damage varies according to the filament tier. Drifter cruisers all use some form of EWAR in addition to dealing damage, but they also have large signature radii and are thus easy to finish off.
Seeker ships are far more generic than Drifter ships, and while they feature many forms of EWAR, they also have only thin armor. They all have the Ephialtes prefix.
Drifter Cruisers will all be named Scylla Tyrannos, and so their type must be checked to see their abilities.
| Drifter Cruiser | |
|---|---|
| Cruiser Type | Weapon |
| Entanglement | |
| Nullwarp | |
| Nullcharge | |
| Seeker types | |
|---|---|
| Seeker Name | Weapon |
| Lancer | Generic Damage Dealer |
| Entangler | |
| Spearfisher | |
| Illuminator | |
| Dissipator | |
| Obfuscator | |
| Confuser | |
Sleeper Drones
Every Sleeper drone is equipped with remote repairers, so it is best to kill smaller ships first, as they die before repairs land. In addition to damage, they will also use webs and energy neutralizers. The Sleeper drone battleship (Lucid Deepwatcher) spawns alone in T1 and 2, in pairs in T3 and 4, and in trios in T5 and 6. It starts with 50% armor (65% in Firestorm) and 65% structure, and deals strong EM/Thermal damage, but has very poor tracking (worse than the Drifter battleship), and its Kinetic/Explosive missiles have poor application and will generally not hit at all unless you are extremely close to it. Its damage can easily be evaded with a sub-10km orbit, though it has some of the strongest tank of any Abyssal enemy and usually kills via timeout.
Sleeper drones fire EM/Thermal turrets (and the cruisers have irritatingly high tracking and range), and Kinetic/explosive missiles (with poor flight speed and application).
Sleeper Drones all have the Lucid prefix.
| Sleeper Drone Frigates | |
|---|---|
| Name | Weapon |
| Escort | Generic Damage Dealer |
| Aegis | Higher Damage Dealer |
| Warden | |
| Firewatcher | |
| Preserver | |
| Sleeper Drone Cruisers | |
|---|---|
| Name | Weapon |
| Watchman | Generic Damage Dealer |
| Upholder | |
| Sentinel | |
| Sleeper Drone Battleship | |
|---|---|
| Name | Weapon |
| Deepwatcher | |
Triglavian Collective
Triglavian ships can often appear alongside Rogue Drone spawns (though never with the drone battleship). They use Entropic Disintegrators to deal high Thermal and Explosive damage. As each ship's damage will slowly increase the longer it stays focused on one target, Triglavian rooms can quickly become DPS or range-control races, to either kill their high-damage ships before they can kill you or to kill their tackle ships and fly beyond their damage range.
Triglavian ships almost all feature Remote Armor Repair abilities, and mount the widest range of EWAR of any Abyssal faction.
| Triglavian Ships | |
|---|---|
| Name or Prefix | Ability |
| Damavik | |
| Kikimora | |
| Vedmak | |
| Rodiva | |
| Drekavac | Spawns with 37% shield, 69% armor and 11% hull. |
| Leshak | Spawns with 46% hull (less for Tangling and Renewing variants) and no shields or armor (though they gain ~40% armor in Firestorm). |
| Prefixes | |
| Striking | Generic Damage Dealer |
| Starving | |
| Harrowing / Shining [Note 1] | |
| Anchoring | |
| Renewing | |
| Blinding | |
| Tangling | |
| Ghosting | |
| Vila Swarmer | Focus on destroying the controlling ships since the Swarmers will deactivate when they are destroyed, and the gate will still unlock regardless of if they are alive or not. |
- ^ Harrowing variant exists only for Vedmaks, and is functionally the same as a Generic Damage Dealer.
Sansha's Nation
Sansha's Nation ships have slow speed, deal large amounts of EM/Thermal damage and are most safely fought at long range. Fighting them up close is a challenge, as they bring a wide range of EWAR abilities, including significant energy neutralizers.
All Sansha's Nation ships have the Devoted prefix.
| Sansha's Nation Cruisers | |
|---|---|
| Name | Weapon |
| Knight | |
| Sansha's Nation Frigates | |
|---|---|
| Name | Weapon |
| Hunter | Above Generic (50% More) Damage Dealer |
| Fisher | |
| Priest | |
| Trapper | |
| Smith | |
| Lookout | |
| Herald | |
| Torchbearer | |
CONCORD
CONCORD rooms contain a mix of CONCORD and EDENCOM ship hulls. CONCORD hulls use Thermal or Explosive missiles, while EDENCOM ships use EM-Kinetic Vorton Projectors. Marshals start off with no shields and 28% armor, while EDENCOM Thunderchilds start off with about 8% shield, no armor and 40% structure.
CONCORD rooms are generally feared by many Abyssal runners due to their high damage and heavy damage-application support. The sheer incoming DPS, combined with the multiple Webs and Target Painters, makes passive or active tanking in these rooms extremely difficult. Because of this, Marshal rats (especially Drainers) are often targeted first to reduce incoming DPS.
While the EDENCOM ships offer no EWAR, they bring very high alpha damage on very slow fire rates, meaning that the combination of Marshal DPS and EDENCOM alpha can easily and unexpectedly break an Abyssal runner's buffer.
The few saving graces when fighting CONCORD/EDENCOM ships are:
- they always deal a constant amount of damage relative to signature radius and velocity, meaning they cannot land critical hits ("Wrecking Shots").
- since their damage is completely based on missile damage mechanics, maintaining transversal is a non-issue.
- Vorton Projectors will chain their damage to any objects within 10km of your ship, and can thus be exploited into dealing friendly fire damage to other enemy CONCORD/EDENCOM ships
- CONCORD ships have poor tank relative to their damage, which turns the room into a pure DPS race to determine whether you die first or the Marshals die first.
All CONCORD and EDENCOM ships have the Disparu Troop suffix.
| CONCORD ships | |
|---|---|
| Name | Weapon |
| (prefix) Pacifier | |
| (prefix) Enforcer | |
| (prefix) Marshal | |
| Prefixes | |
| Attacker/Assault | Generic damage dealer |
| Arrester | |
| Marker | |
| Drainer | |
| EDENCOM ships | |
| (no prefix) Skybreaker | 87% |
| (no prefix) Stormbringer | 87% |
| (no prefix) Thunderchild | 77% |
| A long, long time ago... |
|---|
|
When the Depths of the Abyss expansion released and first introduced CONCORD spawns, Marshals used to spawn with full HP, resulting in said spawns being unfairly difficult to many players. In a later unknown update the Marshal NPCs were nerfed to provide slightly more balanced gameplay of CONCORD spawns in particular. |
Angel Cartel
Angel Cartel rooms are the bane of fast and evasive ships. Angel Cartel ships have extremely high flight speeds, rather small signature radii, good range, varied damage types, and varied EWAR. The Cynabal is especially problematic, as it features all of these abilities combined in one ship.
All Angel Cartel rats have the Lucifer prefix, and deal heavy EM and Explosive damage along with a small amount of Kinetic/Thermal. The Cynabal and Dramiel can additionally spawn with an Elite prefix, with slightly increased damage, better tracking speed, even higher flight speed and a significantly stronger resist profile. The Elite Lucifer Dramiel also gains stasis web.
| Angel Cartel Ships | |||
|---|---|---|---|
| Name | Role | Ewar | Weapon |
| (Elite) Cynabal | Heavy damage dealer; high range & tracking | ||
| Ixion | Target Painting, Missile Disruption | ||
| (Elite) Dramiel [Note 1] | Generic damage dealer | None | |
| Fury | Energy Neutralizers | ||
| Echo | Webbing and Scrambling | ||
| Medusa | Sensor Dampening | ||
| Burst | Remote repairs | None | |
| Swordspine | Target Painting | ||
- ^ The elite variant of this ship uses stasis web.
Damage to deal
The Abyssal Deadspace resist penalties apply to both the player ship and to the NPCs present. Thanks to the mechanics of resist penalties, this means that damage-matching to the penalized resist will effectively earn a damage bonus equal to the resist penalty (smaller damage increase if the target has too low a base resist). So, in general, you should select your damage to match the weather.
However, in some cases, the natural resist hole of the NPC is equal to or greater than the resist hole caused by the weather. This is the case in Dark filaments, which have no resist penalty.
- Drifter ships, Seeker drones, and Sleeper drones have uniform resists.
- Sansha's Nation ships other than the Devoted Knight are weak to EM and Thermal and strong against Kinetic and Explosive. The Devoted Knight is weak to EM, then Explosive, and strong against Thermal and Kinetic.
- Angel Cartel ships are the opposite of Sansha's Nation: strong against EM and Thermal, weak to Explosive and Kinetic.
- CONCORD ships have uniform resists. EDENCOM ships are weak to Thermal and EM.
- Triglavian ships are weak to Explosive, then Thermal, and strong against Kinetic and EM. In a -30% Electrical filament, their EM resist is equal to Explosive resist.
- Rogue drone ships have wildly varying resists. Damage-dealing and EWAR frigates have the same natural resists as a Tech 1 hull from one of the races. Repair frigates have 0 resists. Battlecruisers are slightly weak to EM/EX, and slightly more resistant to TH/KIN.
The Rogue Drone Battleship's resistances change at different tiers. With one exception, the Weather-induced hole is greater than any natural resist hole, and should be targeted; however, in a Dark Filament, these resistances become relevant.
If swapping damage types (i.e. through missile reloads) is possible, it should be done for these battleships. Their Shields are weak to EM damage, and the following chart lists their Armor weaknesses:
| Rogue Drone Battleship | ||
|---|---|---|
| Abyssal Tier | Name | Damage to deal |
| 1 | Photic Abyssal Overmind | |
| 2 | Twilit Abyssal Overmind | |
| 3 | Bathyic Abyssal Overmind | |
| 4 | Hadal Abyssal Overmind | |
| 5 | Benthic Abyssal Overmind | |
| 6 | Endobenthic Abyssal Overmind | |
- ^ The one exception. Very high Kinetic resist. Use Thermal, even in an Exotic Filament.
Abyssal Deadspace Co-op for Frigates and Destroyers
When the Abyss was created, the pockets were designed for a single cruiser. However, later updates allowed the Abyss to be entered with fleets of either three frigates, or two destroyers.
Entering the Abyss as a fleet of small ships requires 2 (for destroyers) or 3 (for frigates) of the appropriate filaments, of the same type, in a single ship's cargohold. All ships in the group must be in the same fleet.
The pilot of the ship carrying the filaments can then use them and select the Activate For Fleet option. Doing so will consume the filaments, and rather than pulling the ship into the abyss, it will open a limited-use acceleration gate that leads to the abyss. Fleet members can then activate that acceleration gate and launch themselves into the abyss.
The 20-minute timer is shared by all ships in the fleet and starts counting down when the first of the ships finishes activating the acceleration gate and enters the abyssal pocket.
To compensate for the increased filament consumption and the loot being split across 2 or 3 ships and pilots, the Biocombinative Cache found in multi-ship pockets contains significantly more loot than the ordinary Bioadaptive Cache.
Players are not required to do 2-ship or 3-ship Abyssals in 2 or 3 ships. One tactic used by experienced Abyssal runners is to activate three filaments for three ships--significantly boosting the available loot--and then run the resulting pockets alone. Since the pockets will be balanced for three ships, not one, this requires careful planning and fitting and is not for the faint-of-heart. It does, however, markedly increase the profits made by successful runners.
Abyssal Deadspace from the outside

When you enter an Abyssal, you will be removed from the Local chat channel in your system of origin and from the directional scanner. You cannot see who is in the system outside the deadspace, and they cannot see who is inside or in what ship they are using.
But that does not mean you are wholly safe. Once the filament has been used, a rift appears that can be combat scanned by anyone in the system and can be warped to. It also appears on the directional scanner of anyone who has not filtered it out. This makes it possible for people to camp the exit and shoot whoever comes out.
This means that you have to consider where you use the filament, especially in low security and null security space. Even in high-security space you should be cautious, especially when running high tiers, since they often require blingy ship fittings and thus provide tempting targets for suicide ganking. It is best to activate the filament at a safespot bookmark, preferably more than directional-scanner range (14.3 AU) away from any celestial and any frequently-warped routes. Experienced Abyssal runners find large systems where they can set up such bookmarks, and replace their bookmarks frequently.
You will be invulnerable for a short time when you leave the Abyss. If you leave the rift and find yourself being camped, pause to assess your best options, and stay calm. One survival tactic is to quickly activate a new filament, but players who know you can do this will anchor a mobile depot nearby, preventing filament activation. Based on your assessment of the situation, you will have to decide.
Rewards
Abyssal Deadspace is dangerous, but the rewards can be worthwhile. Abyssal Deadspace is the only source for many valuable items found in the Caches and Extraction Nodes/Subnodes. No wrecks are left behind by any NPCs, and all drops come from these two listed cans.
The (mostly) Abyssal-exclusive rewards are as follows:
- Mutaplasmids that can be used to change the stats of certain modules. Which mutaplasmids are able to drop depends on the weather selected:
- Gamma sites can drop shield related mutaplasmids - S/M/L Shield Extender, S/M/L/XL Shield Booster
- Dark sites can drop propulsion module mutaplasmids - 1/10/100MN Afterburner, 5/50/500MN Microwarpdrive
- Firestorm sites can drop armor related mutaplasmids - S/M/L Armor Plate, S/M/L Armor Repairer
- Electrical sites can drop capacitor related mutaplasmids - S/M/L Cap Battery, S/M/L Energy Neutralizer, S/M/L Energy Nosferatu
- Exotic sites can drop tackle related mutaplasmids - Stasis Webifier, Warp Disruptor, Warp Scrambler
- All weathers can drop damage module mutaplasmids - Heat Sink, Gyrostabilizer, Magnetic Field Stabilizer, Ballistic Control System, Entropic Radiation Sink
- Additionally can drop harvesting mutaplasmids - Gas Cloud Harvester, Gas Cloud Scoop, Ice Harvester, Ice Mining Laser, Mining Laser, Deep Core Mining Laser, Modulated Deep Core (Strip) Miner, all other Strip Miner types
- Smartbomb mutaplasmids based on the weather being run (e.g. Electrical filament = EMP Smartbomb mutaplasmid)
- T6 filaments can drop capital module mutaplasmids - All capital-sized versions of the modules above, plus Ancillary Shield Booster/Armor Repairer, Heavy Warp Disruptor/Scrambler, and Siege Module
- Precursor ship and weapon skill books, disintegrator specialization skill books
- Blueprint copies required for the production of Triglavian hulls, weapon systems, modules and ammunition:
- T1 Triglavian ship hulls
- Entropic Disintegrators: Weapons with unique properties and only usable by the Triglavian ships
- T1, Meta and Faction (Veles) variants will drop; T2 weapons must be researched like normal.
- Exotic Plasma: Ammunition used by Entropic Disintegrators. Only Tech 1 BPCs will drop; Tech 2s must be researched like normal.
- XL-size (capital) Exotic Plasma BPCs will only drop from T4s and higher.
- Mutadaptive Remote Armor Repairer: A special remote armor repairer module used by the Triglavian Rodiva and Zarmazd logistics cruisers
- Perun Heavy Mutadaptive Remote Armor Repairer - a faction version of the Mutadaptive Remote Armor Repairer
- Production materials required for the production of Triglavian hulls, weapon systems, and ammunition:
- Crystalline Isogen-10
- Zero-Point Condensate
- Modules:
- Compact Entropic Radiation Sink - a compact (low-fitting) version of the Entropic Radiation Sink
- Triglavian Survey Database: often referred to as "red loot", this item is an ISK token item similar to Sleeper "blue loot" and Overseer's Personal Effects in that it can be sold to unlimited NPC buy orders for a fixed price, in this case, 100,000 ISK/ea
- Abyssal Filaments:
- data hacking sites are the only source for Abyssal filaments outside of Abyssal Deadspace, and they only provide Tranquil (Tier 0) and Calm (Tier 1) filaments
- the Bioadaptive/Biocombinative Caches in Abyssal Deadspace can drop filaments of all tiers, though the pool of filament drops seems to be limited by the tier of the filament used. Example: if running a T3, any filament from T0-T3 can drop, plus any filament up to two tiers up (T4, T5). Running T4 is the bare minimum for dropping the highest tier (T6) filament.
- it is therefore only by running Abyssals that the filaments for higher-tier Abyssal runs can be found, and there is a busy market in retrieved filaments
- Abyssal Deadspace is also one source from which players can acquire crates for SKINR sequencers and design elements.
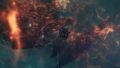
Gallery
-
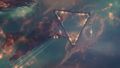 Approaching the Gate in an Electrical Abyss
 -
 Slow boating through the impressive entry of the Abyss
 -
 Collecting the Loot in the Abyss
 -
 Investigating Comets in the Abyss
 -
 Valuable Ore in the Abyss
 -
 Triglavian Bioadaptive Cache
 -
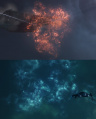 Abyssal Clouds
 -
 Abyssal Filament Traces


History
Abyssal deadspace was added to the game in the Into The Abyss expansion that went live on May 29th 2018. It was further expanded in the Onslaught expansion that was released on the 13th November 2018, and again in the Depths of the Abyss update on the 15th September 2020.