|
| Incursion sites |
|---|
| Click the title for a summary, or return to Incursions for general information. |
| Staging sites |
| Vanguard sites |
| Assault sites |
| Headquarter sites |
| Mothership sites |
Objectives
Force required
| Fleet of 40 - 80 pilots (up to 120 in low/null) 10+ logistics needed (5+ utility cap needed) Site takes about 15 - 25 minutes and ends the Incursion |
Military information
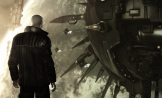
| Your primary objective is to locate the Sansha‘s Nation flagship and destroy it. The destruction of this vessel will bring the local incursion to a halt. |
Background information
The construction of the first Sansha Supercarrier is believed to have begun as early as ten decades ago, during the slow but steady resurgence of Nation forces in Stain. Various blueprints, technical documents and other evidence suggested a large-scale construction project, although a starship was not the primary suspicion at the time.
The exact technical specifications of the vessel remain unknown. Limited intelligence suggests improvements made to the jump drive calibrators, allowing unprecedented jump ranges, although this is currently unconfirmed.
The crew aboard these flagship vessels is constituted of civilians abducted during the initial planetary invasions. During one engagement with the flagship, segments of crew were ejected following an explosion deep inside the hull. DNA analyses of these crew members confirmed their origins.
Synopsis from ISHAEKA-0107. DED Special Operations.
Authorized for Capsuleer dissemination.
Enemies
Below is a list of enemies that spawn in this site. See Sansha's Manual for a full list of the incursion rats.
| Name | Sig [1] | Speed [2] | Orbit / Speed [3] | Damage / Volley [4] | Range [5] | Effective HP [6] | |
|---|---|---|---|---|---|---|---|
Antem Neo [7] |
60 km |
168 dps |
146 - 176 km |
88k ehp |
|||
Arnon Epithalamus |
50 km |
164 dps |
< 113 km |
65k ehp |
|||
Auga Hypophysis |
6 km |
480 dps |
12 - 20 km |
52k ehp |
|||
Deltole Tegmentum |
12 km |
818 dps |
< 45 km |
179k ehp |
|||
Eystur Rhomben |
11 km |
120 dps |
10 - 12 km |
9k ehp |
|||
Intaki Colliculus |
50 km |
282 dps |
< 148 km |
316k ehp |
|||
Lirsautton Parichaya [8] |
8 km |
440 dps |
< 69 km |
25k ehp |
|||
Mara Paleo |
60 km |
(no weapons) | (no weapons) | 30k ehp |
|||
Niarja Myelen |
15 km |
(no weapons) | (no weapons) | 4k ehp |
|||
| 18 km |
352 dps |
45 - 65 km |
215k ehp |
||||
Renyn Meten |
9 km |
192 dps |
10 - 12 km |
9k ehp |
|||
Romi Thalamus |
18 km |
320 dps |
23 - 33 km |
106k ehp |
|||
Schmaeel Medulla |
12 km |
50 dps |
12 - 20 km |
9k ehp |
|||
Tama Cerebellum |
12 km |
300 dps |
< 70 km |
8k ehp |
|||
The Kundalini Manifest |
40 km |
(no weapons) | (no weapons) | 13,996k ehp |
|||
Yulai Crus Cerebi [10] |
60 km |
397 dps |
160 - 210 km |
118k ehp |
- ^ While using their propulsion module, they suffer the same signature bloom as players.
- ^ This is the speed of the ship while they try to get within orbit or as they try to chase after you, suffering the same signature bloom as players do with the propulsion module on. They will turn off any propulsion modules once they get close to their preferred orbit.
- ^ Preferred orbit range and regular speed while orbiting, which is their regular speed without the propulsion module turned on.
- ^ Damage per second as well as damage per volley. Unless stated otherwise, turrets do an equal amount of EM and thermal damage while torpedoes do an equal amount of kinetic and explosive damage.
- ^ This is the effective range of this ship, presented with two values for turrets, optimal and optimal + double falloff, as well as a single range for torpedoes.
- ^ This is the amount of damage this ship can take, taking into account their resists. All ships, except the Lirsautton Parichaya have omni tanks. Hover over the icon for information about raw hitpoints.
- ^ The Antem Neo does 29% EM and 71% thermal damage with its turrets.
- ^ The Lirsautton Parichaya doesn't share the traditional omni tank of its brethren and is a little weaker against thermal damage (23,961 ehp) and stronger against explosive damage (29,875 ehp). They also have bonuses that remove any reduction from explosive radius and explosive velcoity, meaning resists are the only thing mitigating damage from them.
- ^ The Outuni Mesen does 82% EM and 18% thermal damage with its turrets.
- ^ The Yulai Crus Cerebi does 63% EM and 38% thermal damage with its turrets.
Priorities
This is a generic kill order that works with most fleet compositions.
- Bombers must die! No matter what else is on grid the Lirsautton Parichaya must die quickly. Failure to kill these quickly creates the single most dangerous situation in all of incursions outside of suicide ganking.
- Arnon Epithalamus, this rat has the ability to jam up to 3 ships potentially wreaking havoc with cap chains and temporarily removing logi from a fight.
- Outuni Mesen, this rat has very powerful energy neutralisation capable of shutting down a battleship completely. Should you be shield tanked you have a large risk of having your invulns deactivated if you cannot receive cap quickly. A good rule of thumb is you need 1 Large Remote Capacitor Transmitter per outuni to maintain fleet safety.
- Kundalini, nothing else in site needs to be killed and a normal complement of logi should be adequate to safely tank the site, this allows you to finish the site quickly killing only what poses a threat to the safety of the threat.
How to run the site
- Make sure all logi are flying high-influence fits.
- Brief the fleet on the dangers of the site, take care to mention the ECM Burst and Bombers.
- Elect a meatshield with a solid tank. A battleship with 130K EHP or more is recommended.
- Have full fleet align down gate.
- Send in meatshield, wait 5 seconds and send in the rest of your fleet.
- Kill Bombers while sat on the beacon.
- Follow the killing order while burning to optimal range on the mothership.
- Take care not to bump the mothership, should it be bumped away it makes it harder to bring in reinforcements.
- Kill the mothership, remember to stop shooting it to kill rats that spawn if you need to.
Other tips for what to kill
- If your fleet isn't breaking the shield repairs on the mothership you may consider killing Mara Paleos, or using the special site mechanics detailed above.
- Have your light drone bunny kill some frigates followed by shooting kundalini (Niarja > Tama > Kundalini/ Uroborus).
- In a contest, you want to follow a different kill order to maximise applied damage. This may vary depending on positioning and composition, it is recommended that you have plenty of experience FCing in incursions and have a good knowledge of the NPCs before attempting to contest a mothership site.
Triggers
This site has no triggers, everything spawns on a random timer with a random amount of rats spawning.
Hints & tips

- If you burn 120km forward upon landing you will find yourself at a Logistics Control Array which when hacked interferes with the Sansha ability to repair and forces them to repair the capsuleer fleet inside the site.
- If you burn 90km forward and 30km left of where the mothership spawns you will find yourself at a container labeled as Central Control Nexus inside of which periodically spawns a Tactical Response Transmitter. If you move this item to the Sansha Control Relay located 15km behind the beacon it will force some of the Sansha rats on grid to warp off. This can be very useful if you have a small fleet to limit the DPS and Mara Paleos on grid at any one time, it should be noted however that this is only a temporary measure as they will warp back after a short time. Moving the Tactical Response Transmitter is usually done by means of a Macharial dragging it behind him in a jetcan by means of a Tractor Beam II.
- Every couple of minutes the mothership will emit an ECM burst, when this happens it is important that cap chains and reps are established quickly.
| ||||||||||||||||||||