More actions
Cornwalace (talk | contribs) tweaking |
m Change background color to design-token. Replace deprecated html with CSS. |
||
| (33 intermediate revisions by 10 users not shown) | |||
| Line 1: | Line 1: | ||
{{incursions sites}} | |||
== Intelligence Reports == | |||
{{incursion sites|headquarter sites|tpph}} | |||
=Intelligence | === Military Intelligence === | ||
{| | |||
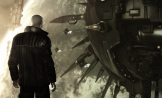
| [[File:incursions_sansha_transmission.png]] | |||
| Your objective is to secure a path to True Power's Mobile HQ and then destroy it. You will need to pass through three layers of security before you will arrive at the station. Sansha commanders will attempt to reinforce the area en-masse if you give them time to, so be sure to bring pilots to breach their defenses quickly. | |||
|} | |||
== | === Background information === | ||
True Power, the leading corporation within Sansha's Nation, has acquired the means to establish provisional headquarters in areas of their choosing. The exact nature of these operations or how such large complexes are established so quickly remains unknown. The use of mobile nano-factories is strongly suspected, and would help account for the rapidity of setup. It is also possible that rogue drone technology, or even worker drones themselves, are for some reason assisting in the rapid deployment of these battle stations, although this remains unconfirmed. | |||
The strategic value of these outposts is significant. Nation can re-equip local fighting forces at a moment's notice, transmit instructions and battle reports along secure lines, and rally retreating Nation forces that have been ejected from other strongholds, which are always in close proximity to the larger headquarters for this reason. | |||
''Synopsis from ISHAEKA-0081. DED Special Operations.''<br>''Authorized for Capsuleer dissemination.'' | |||
== Rewards == | |||
{| class="wikitable" | |||
|- | |||
! High Sec Payout !! Low / Null Sec Payout | |||
|- | |||
| 31,500,000 ISK || 45,000,000 ISK | |||
|- | |||
| 7,000 CONCORD LP || 10,000 CONCORD LP | |||
|- | |||
| For 20-40 pilots || For 30-60 pilots | |||
|} | |||
''Rewards decrease significantly for fleet sizes outside of these ranges'' | |||
== Completion Requirements == | |||
Destroy the True Power Mobile Headquarters in the third room. The structure cannot be destroyed until all the rats in the third room are dead. Killing the final rats causes the Large Collidable Object that initially appears to be the structure to be replaced with a new destructible object. | |||
Accessing the third room requires killing all rats in both of the previous rooms to unlock acceleration gates to the next room. The same mechanic of spawning a new usable object after the final rat dies is present for the acceleration gates in both the first and second rooms. | |||
== Special Mechanics == | |||
There are no special mechanics related to site completion. In the third room the trigger for each new wave to spawn is the destruction of the final Ostingele Tectum in the previous wave. Ignoring the smaller ships while killing all battleships may lead to significant additional incoming dps. | |||
= | == Enemies == | ||
Below is a list of enemies that spawn in this site. See [[Sansha's Manual]] for a full list of the incursion rats. | |||
{{incursion rats|Start}} | |||
{{incursion rats|Antem Neo}} | |||
{{incursion rats|Arnon Epithalamus}} | |||
{{incursion rats|Auga Hypophysis}} | |||
{{incursion rats|Deltole Tegmentum}} | |||
{{incursion rats|Eystur Rhomben}} | |||
{{incursion rats|Intaki Colliculus}} | |||
{{incursion rats|Mara Paleo}} | |||
{{incursion rats|Ostingele Tectum}} | |||
{{incursion rats|Outuni Mesen}} | |||
{{incursion rats|Romi Thalamus}} | |||
{{incursion rats|Schmaeel Medulla}} | |||
{{incursion rats|Tama Cerebellum}} | |||
{{incursion rats|Vylade Dien}} | |||
{{incursion rats|Yulai Crus Cerebi}} | |||
{{incursion rats|End}} | |||
== Priorities == | |||
This is a generic kill order that works no matter what fleet you're running. Certain special doctrines or fleet compositions could change some things in order to optimize their fleet efficiency, so this isn't necessarily the only kill order, but it works. | |||
'' | As a general rule of thumb, if you cannot shoot the highest priority target due to low damage projection, move on to the next target you can actually hit. Just remember to switch back to a higher priority target if it moves into range later on. | ||
{| class="wikitable" | |||
|- style="background-color: var(--background-color-warning-subtle);" | |||
! colspan="2" rowspan="2" | # | |||
! colspan="3" | Targets for the entire fleet | |||
! style="text-align: center;" rowspan="2" nowrap | Reason | |||
|- style="background-color: var(--background-color-warning-subtle); white-space: nowrap;" | |||
! Regular targets<small> <ref>These targets are usually larger, cruisers or battleships and suitable for ships with good damage projection, lower tracking, like battleships with large guns.</ref></small> | |||
! Sniper targets<small> <ref>Sniper targets are enemies that stay up to 150km away, requiring you to have increased locking range and extreme damage projection. Once you run out of sniper targets, change to short range ammo and follow regular targets.</ref></small> | |||
! Small targets<small> <ref>Smaller targets, like frigates or extremely fast or small cruisers. Ideally the primary targets for '''strategic cruisers''', [[Vindicator]]s or the [[Roles in Incursions#Dronebunny|dronebunny]] as a last resort.</ref></small> | |||
|- style="vertical-align: top;" | |||
| 1 | |||
| style="width: 1em; background-color: Red;" | | |||
| style="text-align: center;" colspan="2" | '''Arnon Epithalamus''' [[File:Icon_target_max.png|24px|link=|Jamming]]<br>'''Outuni Mesen'''<small> <ref>The threat of the '''Outuni''' comes from it being within neuting range. If you're confident that your fleet can take it out before it comes within neuting range, you can forego this ship in favour of other ships, as long as you make sure it's dead before it reached neuting range.</ref></small> [[File:icon_warp_disruptor_i.png|24px|link=|Warp disrupting]][[File:icon_energy_neutralizer_i.png|24px|link=|Energy neutralizing]][[File:icon_stasis_webifier_i.png|24px|link=|Webbing]] | |||
| style="white-space: nowrap;" | '''Schmaeel Medulla''' [[File:icon_warp_disruptor_i.png|24px|link=|Warp disrupting]][[File:icon_stasis_webifier_i.png|24px|link=|Webbing]] | |||
| The '''Arnons''' because they jam and the '''Outunis''' due to heavy neuts (also warp disrupts and web). | |||
= | The '''Schmaeels''' because they web and warp disrupts. | ||
[[File: | |- style="vertical-align: top;" | ||
| 2 | |||
| style="background-color: OrangeRed;" | | |||
| style="white-space: nowrap;" | '''Auga Hypophysis''' [[File:icon_warp_disruptor_i.png|24px|link=|Warp disrupting]][[File:icon_stasis_webifier_i.png|24px|link=|Webbing]]<br>'''Deltole Tegmentum''' [[File:icon_warp_disruptor_i.png|24px|link=|Warp disrupting]][[File:icon_energy_neutralizer_i.png|24px|link=|Energy neutralizing]][[File:icon_target_painter_i.png|24px|link=|Target painting]]<br>'''Vylade Dien'''<small> <ref>The '''Vylade''' is technically not much of a threat. The more Sansha on the grid the higher the priority to kill it, as it'll make all ships capable of taking more damage. But with less ships on grid that aspect becomes more or less trivial.</ref></small> [[File:Warfare-links.png|24px|link=|Siege Warfare links]] | |||
| style="white-space: nowrap;" | '''Mara Paleo'''<small> <ref>The '''Mara''' can often be ignored in favour of other ships in the last room due to superior firepower of the fleet.</ref></small> [[File:icon_shield_transporter_i.png|24px|link=|Remote shield booster]] | |||
| '''Tama Cerebellum''' [[File:icon_warp_disruptor_i.png|24px|link=|Warp disrupting]] | |||
| '''Augas''' before '''Deltoles''' as they die rapidly and also web, then '''Vylades''' because they boost resists. | |||
The '''Maras''' because they remote repair. | |||
'''Tamas''' due to their high damage and warp disruption. | |||
|- style="vertical-align: top;" | |||
| 3 | |||
| style="background-color: Green;" | | |||
| '''Intaki Colliculus'''[[File:icon_shield_transporter_i.png|24px|link=|Remote shield booster]]<br>'''Ostingele Tectum'''<br>'''Romi Thalamus''' | |||
| '''Yulai Crus Cerebi'''<br>'''Antem Neo''' | |||
| '''Eystur Rhomben''' | |||
| '''Intakis''' because they are logistics then '''Ostingeles''' before '''Romis''' as they are easier to hit and do more damage. | |||
''' | '''Yulais''' before '''Antems''' as they are easier to hit and do more damage. | ||
'''Eysturs''' pose no specific threat. | |||
|} | |||
<small><references/></small> | |||
{{Incursions sites horizontal}} | |||
[[Category:Incursions sites]] | |||
[[Category: | |||
Latest revision as of 09:50, 18 June 2025
|
| Incursion sites |
|---|
| Click the title for a summary, or return to Incursions for general information. |
| Staging sites |
| Vanguard sites |
| Assault sites |
| Headquarter sites |
| Mothership sites |
Intelligence Reports
| Fleet of 40 pilots (up to 60 in low/null) 6 - 10 logistics needed (5+ utility cap needed) 0 - 15 snipers (optional) Sites take about 10 - 20 minutes |
Military Intelligence
| Your objective is to secure a path to True Power's Mobile HQ and then destroy it. You will need to pass through three layers of security before you will arrive at the station. Sansha commanders will attempt to reinforce the area en-masse if you give them time to, so be sure to bring pilots to breach their defenses quickly. |
Background information
True Power, the leading corporation within Sansha's Nation, has acquired the means to establish provisional headquarters in areas of their choosing. The exact nature of these operations or how such large complexes are established so quickly remains unknown. The use of mobile nano-factories is strongly suspected, and would help account for the rapidity of setup. It is also possible that rogue drone technology, or even worker drones themselves, are for some reason assisting in the rapid deployment of these battle stations, although this remains unconfirmed.
The strategic value of these outposts is significant. Nation can re-equip local fighting forces at a moment's notice, transmit instructions and battle reports along secure lines, and rally retreating Nation forces that have been ejected from other strongholds, which are always in close proximity to the larger headquarters for this reason.
Synopsis from ISHAEKA-0081. DED Special Operations.
Authorized for Capsuleer dissemination.
Rewards
| High Sec Payout | Low / Null Sec Payout |
|---|---|
| 31,500,000 ISK | 45,000,000 ISK |
| 7,000 CONCORD LP | 10,000 CONCORD LP |
| For 20-40 pilots | For 30-60 pilots |
Rewards decrease significantly for fleet sizes outside of these ranges
Completion Requirements
Destroy the True Power Mobile Headquarters in the third room. The structure cannot be destroyed until all the rats in the third room are dead. Killing the final rats causes the Large Collidable Object that initially appears to be the structure to be replaced with a new destructible object.
Accessing the third room requires killing all rats in both of the previous rooms to unlock acceleration gates to the next room. The same mechanic of spawning a new usable object after the final rat dies is present for the acceleration gates in both the first and second rooms.
Special Mechanics
There are no special mechanics related to site completion. In the third room the trigger for each new wave to spawn is the destruction of the final Ostingele Tectum in the previous wave. Ignoring the smaller ships while killing all battleships may lead to significant additional incoming dps.
Enemies
Below is a list of enemies that spawn in this site. See Sansha's Manual for a full list of the incursion rats.
| Name | Sig [1] | Speed [2] | Orbit / Speed [3] | Damage / Volley [4] | Range [5] | Effective HP [6] | |
|---|---|---|---|---|---|---|---|
Antem Neo [7] |
60 km |
168 dps |
146 - 176 km |
88k ehp |
|||
Arnon Epithalamus |
50 km |
164 dps |
< 113 km |
65k ehp |
|||
Auga Hypophysis |
6 km |
480 dps |
12 - 20 km |
52k ehp |
|||
Deltole Tegmentum |
12 km |
818 dps |
< 45 km |
179k ehp |
|||
Eystur Rhomben |
11 km |
120 dps |
10 - 12 km |
9k ehp |
|||
Intaki Colliculus |
50 km |
282 dps |
< 148 km |
316k ehp |
|||
Mara Paleo |
60 km |
(no weapons) | (no weapons) | 30k ehp |
|||
Ostingele Tectum |
40 km |
528 dps |
45 - 65 km |
290k ehp |
|||
| 18 km |
352 dps |
45 - 65 km |
215k ehp |
||||
Romi Thalamus |
18 km |
320 dps |
23 - 33 km |
106k ehp |
|||
Schmaeel Medulla |
12 km |
50 dps |
12 - 20 km |
9k ehp |
|||
Tama Cerebellum |
12 km |
300 dps |
< 70 km |
8k ehp |
|||
Vylade Dien |
60 km |
(no weapons) | (no weapons) | 275k ehp |
|||
Yulai Crus Cerebi [9] |
60 km |
397 dps |
160 - 210 km |
118k ehp |
- ^ While using their propulsion module, they suffer the same signature bloom as players.
- ^ This is the speed of the ship while they try to get within orbit or as they try to chase after you, suffering the same signature bloom as players do with the propulsion module on. They will turn off any propulsion modules once they get close to their preferred orbit.
- ^ Preferred orbit range and regular speed while orbiting, which is their regular speed without the propulsion module turned on.
- ^ Damage per second as well as damage per volley. Unless stated otherwise, turrets do an equal amount of EM and thermal damage while torpedoes do an equal amount of kinetic and explosive damage.
- ^ This is the effective range of this ship, presented with two values for turrets, optimal and optimal + double falloff, as well as a single range for torpedoes.
- ^ This is the amount of damage this ship can take, taking into account their resists. All ships, except the Lirsautton Parichaya have omni tanks. Hover over the icon for information about raw hitpoints.
- ^ The Antem Neo does 29% EM and 71% thermal damage with its turrets.
- ^ The Outuni Mesen does 82% EM and 18% thermal damage with its turrets.
- ^ The Yulai Crus Cerebi does 63% EM and 38% thermal damage with its turrets.
Priorities
This is a generic kill order that works no matter what fleet you're running. Certain special doctrines or fleet compositions could change some things in order to optimize their fleet efficiency, so this isn't necessarily the only kill order, but it works.
As a general rule of thumb, if you cannot shoot the highest priority target due to low damage projection, move on to the next target you can actually hit. Just remember to switch back to a higher priority target if it moves into range later on.
| # | Targets for the entire fleet | Reason | |||
|---|---|---|---|---|---|
| Regular targets [1] | Sniper targets [2] | Small targets [3] | |||
| 1 | Arnon Epithalamus Outuni Mesen [4] |
Schmaeel Medulla |
The Arnons because they jam and the Outunis due to heavy neuts (also warp disrupts and web).
The Schmaeels because they web and warp disrupts. | ||
| 2 | Auga Hypophysis Deltole Tegmentum Vylade Dien [5] |
Mara Paleo [6] |
Tama Cerebellum |
Augas before Deltoles as they die rapidly and also web, then Vylades because they boost resists.
The Maras because they remote repair. Tamas due to their high damage and warp disruption. | |
| 3 | Intaki Colliculus Ostingele Tectum Romi Thalamus |
Yulai Crus Cerebi Antem Neo |
Eystur Rhomben | Intakis because they are logistics then Ostingeles before Romis as they are easier to hit and do more damage.
Yulais before Antems as they are easier to hit and do more damage. Eysturs pose no specific threat. | |
- ^ These targets are usually larger, cruisers or battleships and suitable for ships with good damage projection, lower tracking, like battleships with large guns.
- ^ Sniper targets are enemies that stay up to 150km away, requiring you to have increased locking range and extreme damage projection. Once you run out of sniper targets, change to short range ammo and follow regular targets.
- ^ Smaller targets, like frigates or extremely fast or small cruisers. Ideally the primary targets for strategic cruisers, Vindicators or the dronebunny as a last resort.
- ^ The threat of the Outuni comes from it being within neuting range. If you're confident that your fleet can take it out before it comes within neuting range, you can forego this ship in favour of other ships, as long as you make sure it's dead before it reached neuting range.
- ^ The Vylade is technically not much of a threat. The more Sansha on the grid the higher the priority to kill it, as it'll make all ships capable of taking more damage. But with less ships on grid that aspect becomes more or less trivial.
- ^ The Mara can often be ignored in favour of other ships in the last room due to superior firepower of the fleet.
| ||||||||||||||||||||