More actions
mNo edit summary |
|||
| Line 126: | Line 126: | ||
{{Ship|Ibis|box}} | {{Ship|Ibis|box}} | ||
An Ibis can be used for the first few tutorial missions, although upgrading to a frigate as soon as it’s offered during the military tutorial is recommended. | An Ibis can be used for the first few tutorial missions, although upgrading to a frigate as soon as it’s offered during the military tutorial is recommended. | ||
=Frigate= | =Frigate= | ||
| Line 154: | Line 155: | ||
The Heron is the T1 Caldari [[Scanning_%26_Probing|probing]] frigate and a good exploration starter ship. It is useful for probing down exploration sites and wormholes, though it is weak in combat so you should switch to a tougher ship to do any sites you find. | The Heron is the T1 Caldari [[Scanning_%26_Probing|probing]] frigate and a good exploration starter ship. It is useful for probing down exploration sites and wormholes, though it is weak in combat so you should switch to a tougher ship to do any sites you find. | ||
==Kestrel== | ==Kestrel== | ||
| Line 170: | Line 172: | ||
Destroyers are ships slightly larger than frigates. They use the same sized modules as frigates, but have more high slots. They are often used in PvE for level 1 missions. They are rarely used in PvP, as their DPS is not impressive without high skills, although they can sometimes fill the role of anti-interceptor. | Destroyers are ships slightly larger than frigates. They use the same sized modules as frigates, but have more high slots. They are often used in PvE for level 1 missions. They are rarely used in PvP, as their DPS is not impressive without high skills, although they can sometimes fill the role of anti-interceptor. | ||
==Cormorant== | ==Cormorant== | ||
| Line 180: | Line 181: | ||
<br><br> | <br><br> | ||
In PvP it suffers from a comparatively large signature radius, making it easier to hit with bigger weapons, which can be problematic with the frigate sized tank of the Cormorant. | In PvP it suffers from a comparatively large signature radius, making it easier to hit with bigger weapons, which can be problematic with the frigate sized tank of the Cormorant. | ||
| Line 192: | Line 192: | ||
Due to its 20% bonus to mining laser yield, the Osprey is primarily used as a mining vessel. | Due to its 20% bonus to mining laser yield, the Osprey is primarily used as a mining vessel. | ||
The Osprey can also serve as a logistics vessel, and benefits from both the reduction in capacitor use for shield transports and the shield transporter range bonus. | The Osprey can also serve as a logistics vessel, and benefits from both the reduction in capacitor use for shield transports and the shield transporter range bonus. | ||
==Blackbird== | ==Blackbird== | ||
| Line 198: | Line 199: | ||
The Blackbird makes a formidable [[EWar_101_Guide| ewar]] ship and is generally used as such. | The Blackbird makes a formidable [[EWar_101_Guide| ewar]] ship and is generally used as such. | ||
You can find a detailed discussion of Blackbird fitting [[ECM_Guide#Fitting_Fleet_Blackbirds|here]]. | You can find a detailed discussion of Blackbird fitting [[ECM_Guide#Fitting_Fleet_Blackbirds|here]]. | ||
==Caracal== | ==Caracal== | ||
| Line 205: | Line 207: | ||
<br><br> | <br><br> | ||
There are some niche uses for the Caracal in PvP, for example as dedicated frigate-hunter as its Rapid Light Missile Launchers can deal a huge amount of DPS to frigates. With higher fitting skills it is also possible to equip it with a full rack of Heavy Missile Launchers and achieve ranges in excess of 130km. | There are some niche uses for the Caracal in PvP, for example as dedicated frigate-hunter as its Rapid Light Missile Launchers can deal a huge amount of DPS to frigates. With higher fitting skills it is also possible to equip it with a full rack of Heavy Missile Launchers and achieve ranges in excess of 130km. | ||
==Moa== | ==Moa== | ||
| Line 210: | Line 213: | ||
The Moa recieves both an optimal range bonus for its turrets and a bonus to shield resistance. While still an acceptable choice for PvE, it is generally considered inferior to other Caldari cruisers, such as the Caracal. Due to the resistance bonus, it can be adaquately used as both a sniper and brawler in PvE. | The Moa recieves both an optimal range bonus for its turrets and a bonus to shield resistance. While still an acceptable choice for PvE, it is generally considered inferior to other Caldari cruisers, such as the Caracal. Due to the resistance bonus, it can be adaquately used as both a sniper and brawler in PvE. | ||
=Battlecruiser= | =Battlecruiser= | ||
| Line 219: | Line 223: | ||
The Ferox is a versatile battlecruiser capable of a strong [[Shield_tanking#Shield_Tanking_Styles|passive or active shield tank]] and of over 125km optimal range with railguns or heavy kinetic and thermal damage with blasters. However, it is overshadowed by the [[#Drake|Drake]], whose seven bonused launchers far surpass the Ferox's unbonused five, and its hybrid turret range bonus is generally less favored than the damage bonus and additional turret of the Gallente [[Gallente_Basic_Ship_and_Skill_Guide#Brutix|Brutix]] battlecruiser. | The Ferox is a versatile battlecruiser capable of a strong [[Shield_tanking#Shield_Tanking_Styles|passive or active shield tank]] and of over 125km optimal range with railguns or heavy kinetic and thermal damage with blasters. However, it is overshadowed by the [[#Drake|Drake]], whose seven bonused launchers far surpass the Ferox's unbonused five, and its hybrid turret range bonus is generally less favored than the damage bonus and additional turret of the Gallente [[Gallente_Basic_Ship_and_Skill_Guide#Brutix|Brutix]] battlecruiser. | ||
==Drake== | ==Drake== | ||
| Line 224: | Line 229: | ||
The Drake is an incredably strong ship due to its shield resistance and kinetic missile damage bonuses. It can be effectively fitted for both PvE and PvP and is in both situations incredably resiliant. The Drake is used in a wide variety of situations, including alliance/null warfare. | The Drake is an incredably strong ship due to its shield resistance and kinetic missile damage bonuses. It can be effectively fitted for both PvE and PvP and is in both situations incredably resiliant. The Drake is used in a wide variety of situations, including alliance/null warfare. | ||
==Naga== | ==Naga== | ||
| Line 229: | Line 235: | ||
The Naga is the Caldari tier 3 battlecruiser. While requiring a bit more training than the Drake and Ferox, it can fit battleship sized guns while retaining the agility and tank of a battlecruiser. It can be effectively fit with long or short range turrets, making it incredably effective in PvP. | The Naga is the Caldari tier 3 battlecruiser. While requiring a bit more training than the Drake and Ferox, it can fit battleship sized guns while retaining the agility and tank of a battlecruiser. It can be effectively fit with long or short range turrets, making it incredably effective in PvP. | ||
=Battleship= | =Battleship= | ||
| Line 253: | Line 260: | ||
The Rokh is a solid shield-tanked hybrid turret platform. Although it doesn't have the raw damage bonuses found on the Megathron and Hyperion, its optimal bonus sometimes helps it deal more applied DPS when fitted with blasters. When rail-fitted it can achieve tremendous optimal ranges -- even, uselessly, beyond the hard 250km targeting range limit. Although it can be used for PvE, most Caldari mission-runners prefer missiles' flexibility and ease-of-use. | The Rokh is a solid shield-tanked hybrid turret platform. Although it doesn't have the raw damage bonuses found on the Megathron and Hyperion, its optimal bonus sometimes helps it deal more applied DPS when fitted with blasters. When rail-fitted it can achieve tremendous optimal ranges -- even, uselessly, beyond the hard 250km targeting range limit. Although it can be used for PvE, most Caldari mission-runners prefer missiles' flexibility and ease-of-use. | ||
=Industrial= | =Industrial= | ||
| Line 260: | Line 268: | ||
The Badger is the basic Caldari industrial hauler ship. It's useful to train to use a Caldari Industrial in order to haul ore from your jetcans to the station, or for filling with mission loot to haul to a trade hub in order to sell for larger profit margins. Level 3 courier missions will likely need a ship the size of a Badger to complete them. | The Badger is the basic Caldari industrial hauler ship. It's useful to train to use a Caldari Industrial in order to haul ore from your jetcans to the station, or for filling with mission loot to haul to a trade hub in order to sell for larger profit margins. Level 3 courier missions will likely need a ship the size of a Badger to complete them. | ||
==Badger Mark II== | ==Badger Mark II== | ||
| Line 265: | Line 274: | ||
The Badger Mark II has a cargo hold noticeably larger than the Badger, and is better defended. However it is marginally slower at subwarp speeds, and takes longer to turn. In general though the larger cargo hold offsets the disadvantages and so training Caldari Industrial to III to fly this ship is definitely worth it, particularly if you constantly find yourself filling the Badger's hold. | The Badger Mark II has a cargo hold noticeably larger than the Badger, and is better defended. However it is marginally slower at subwarp speeds, and takes longer to turn. In general though the larger cargo hold offsets the disadvantages and so training Caldari Industrial to III to fly this ship is definitely worth it, particularly if you constantly find yourself filling the Badger's hold. | ||
=Related Links= | =Related Links= | ||
Revision as of 09:19, 28 August 2012
This guide provides general information and recommendations for T1 ships of a single player faction.
For more advanced and in-depth information on specific ships refer to EVE ships. This guide simply gathers the characteristics and overview of racial lineups in an easy to browse format for the very new player.
Caldari General Information
The Caldari State is one of the four playable factions and has a unique and distinct line of ships.
Characteristics
Tank
Caldari ships are designed to be shield tanked and thus they generally have more medium slots (so as to fit shield modules) and fewer low-slots. They can be passively, actively or buffer tanked depending on the situation, making them incredibly versatile.
Weapons Systems
Caldari ships favor the use of missiles and, to a lesser extent, hybrid turrets.
- Missile Launchers can be categorized into two categories: short range launchers and long range launchers. Short range launchers sacrifice the range of the long range launchers for a higher rate of fire.
- There is a delay between shooting a missile and the missile reaching a target, which can lead to problems in PvP. This can be at least partially counteracted by using short range missiles.
- Missiles do the same damage at all ranges, but are heavily impacted by a targets speed and signature size. Missiles can do any damage type allowing the pilot to select the proper ammunition on a situational basis, making missile ships especially capable mission running ships. Caldari ships often have bonuses for kinetic missile damage, making the damage done with kinetic missiles particularly formidable. Missiles use no capacitor to fire.
- Hybrid turrets come in two varieties: blasters (short-range) and railguns (long-range). Caldari (hybrid) ships generally have range bonuses for hybrid turrets. Hybrid turrets always do kinetic and thermal damage and ammunition is on a sliding scale with the ammunition that does the highest damage generally having the shortest range and requiring the most capacitor to fire.
Drones
Caldari Ships generally have a relatively small drone bay.
Electronic Warfare
The Caldari State favors the Electronic Counter Measures (ECM) as their method of Electronic Warfare, and several Caldari ships receive ECM bonuses. ECMs are an incredibly strong form of electronic warfare, forcing an enemy ship to break its target lock for the duration of the cycle time.
Skills
For general skills that benefit all pilots, see Basic Skills and Support Skills.
Every pilot should think about which skills they want to train in order to reach their goals. The following only touches on basic and essential skills and should only serve as a guideline.
Ship Command Skills
In order to fly a ship, pilots must train the appropriate skill for that ship. For Caldari these include:
- Caldari Frigate
- Destroyers
- Caldari Cruiser
- Battlecruisers
- Caldari Battleship
- Caldari Industrial
Fitting Skills
In order to fit Caldari ships in particular, but also other ships, effectively and efficiently, certain skills should be trained:
Capacitor Skills
While Caldari ships don’t generally depend on capacitor as much as other races, capacitor is still important for active shield tanking and propulsion modules. Certain skills can be trained in order to achieve an optimal size, recharge rate and efficiency for a ships capacitor.
Mobility Skills
Mobility skills increase the agility and speed of a ship, which can be a lifesaver, even for the most cumbersome of ships.
Shield Tanking Skills
Caldari ships are generally designed as shield tanks. This means that it is necessary to achieve a certain level of proficiency for shield support skills, including eventually being able to fit a T2 shield tanking module. To do this, following skills can be trained:
- Shield Upgrades
- Shield Operation
- Tactical Shield Manipulation
- Shield Management
- Energy Grid Upgrades
- Shield Compensation
Weapons Skills
Missile Skills
In order to use a missile launcher, it is necessary to train the following skill:
In order to put missiles in your missile launcher, you have to additionally train the appropriate missile skills. For example:
The missile skills are partially based on each other, meaning that in order to train a higher skill, you may need to train a lower skill. Each additional level of the appropriate missile type brings a 5% bonus to missile damage for that missile type. Furthermore there are various support skills, which make missiles more effective:
- Missile Bombardment
- Guided Missile Precision
- Missile Projection
- Rapid Launch
- Target Navigation Prediction
- Warhead Upgrades
- Long Range Targeting (though not strictly a missile skill, this is useful due to the long-range nature of missiles)
Hybrid Turrets
Caldari Pilots who choose to use hybrid turrets require a completely different skillset from their missile using counterparts. To maximize the effectiveness of turrets, pilots can train:
- Gunnery
- Hybrid Turrets
- Small Hybrid Turret for Frigates/Destroyers
- Medium Hybrid Turret for Cruisers/Battlecruisers
- Large Hybrid Turret for Battleships
- Motion Prediction
- Rapid Firing
- Sharpshooter
- Surgical Strike
- Trajectory Analysis
- Controlled Bursts
Drone Skills
Bigger Caldari ships can generally fit drones. Pilots planning to do this should train the appropriate skills.
Rigs
Most ships can fit rigs, these need to be trained appropriately.
Rookie Ship
The rookie ship is the first ship you start with. If you are Caldari, it will be an Ibis. A new rookie ship is given whenever you dock in your pod at a station where you do not have any ships.
Ibis

RELATED UNI-WIKI REFERENCES
|
S H I P B O N U S E S
Role Bonus: The Caldari Ibis corvette is a small but stout vessel that fits admirably well as a cargo hauler or small-scale miner. Its reliability makes it a good choice for novice ship captains. |
An Ibis can be used for the first few tutorial missions, although upgrading to a frigate as soon as it’s offered during the military tutorial is recommended.
Frigate
Frigates are small fast ships, used mostly for level 1 missions or for tackling and electronic warfare roles in PvP.
Condor

RELATED UNI-WIKI REFERENCES
|
S H I P B O N U S E S
Caldari Frigate bonuses (per skill level): The Condor is fast and agile. It has limited cargo space so it's not very suitable for trading or mining. It is best used as an assault vessel in a hit-and-run type of operations. |
The Condor is a fast Caldari frigate. It can be used for level 1 missions and also as a tackler in PvP encounters.
Bantam

RELATED UNI-WIKI REFERENCES
|
S H I P B O N U S E S
Caldari Frigate bonuses (per skill level): In YC114 each major empire faction, having been embroiled in a harrowing, extensive, long-term war, recognized the growing need for support and logistics functionality in their vessels during the kind of protracted interstellar warfare that might otherwise prove exhausting for its participants. In the Caldari State, this led to the redesign and redeployment of the Bantam. |
The Bantam is the Caldari mining frigate. It is considered the best racial mining frigate due to its relatively large cargo bay.
Griffin

RELATED UNI-WIKI REFERENCES
|
S H I P B O N U S E S
Caldari Frigate bonuses (per skill level): The Griffin is much used by the Caldari Navy as a support vessel in combat squadrons, using its impressive array of electronic gadgetry to disrupt the operation of target ships, making them easy prey for traditional combat vessels. |
The Griffin is an Electronic Counter Measure frigate, often seen in E-UNI fleets offering Electronic Warfare support. ECM is touted as the most useful form of Electronic Warfare as it operates by breaking enemy target locks and preventing them from re-acquiring targets for 20 secs. This has the potential to greatly reduce the amount of damage being directed at your fleet, prevent enemies from using Remote Repair modules on each other or to break Warp Disruption, allowing an escape. For new players interested in trying out ECM the Griffin is the ideal starting place on your way up to the Blackbird and eventually the Scorpion. Expect to lose them a lot though, as ECM boats are often called primary by enemy commanders.
Heron

RELATED UNI-WIKI REFERENCES
|
S H I P B O N U S E S
Caldari Frigate bonuses (per skill level): The Heron has good computer and electronic systems, giving it the option of participating in electronic warfare. But it has relatively poor defenses and limited weaponry, so it's more commonly used for scouting and exploration. |
The Heron is the T1 Caldari probing frigate and a good exploration starter ship. It is useful for probing down exploration sites and wormholes, though it is weak in combat so you should switch to a tougher ship to do any sites you find.
Kestrel

RELATED UNI-WIKI REFERENCES
|
S H I P B O N U S E S
Caldari Frigate bonuses (per skill level): The Kestrel is a heavy missile boat with one of the most sophisticated sensor arrays around. Interestingly enough, it has been used by both the Caldari Navy and several wealthy trade corporations as a cargo-hauling vessel. It is one of few trading vessels with good punching power, making it ideal for solo trade-runs in dangerous areas. The Kestrel was designed so that it could take up to four missile launchers but as a result it can not be equipped with turret weapons nor with mining lasers. |
The Kestrel is a commonly flown frigate in New Eden. With its four standard launchers, it is an excellent choice for level 1 missions and static complexes up to DED 2. It can be comfortably flown with fairly low skills, primarily due to its ability to 'Range Tank'. i.e.; stay at sufficient range to eliminate or mitigate a great deal of incoming damage. Furthermore, missile systems make for ideal starter weapons as they do not require capacitor energy (so reducing the need for good capacitor skills) and their damage is not affected by such factors as tracking, optimal ranges and falloff.
Merlin

RELATED UNI-WIKI REFERENCES
|
S H I P B O N U S E S
Caldari Frigate bonuses (per skill level): The Merlin is the most powerful combat frigate of the Caldari. Its role has evolved through the years, and while its defenses have always remained exceptionally strong for a Caldari vessel, its offensive capabilities have evolved from versatile, jack-of-all-trades attack patterns into focused and deadly gunfire tactics. The Merlin's primary aim is to have its turrets punch holes in opponents' hulls. |
The Merlin is a capable Caldari frigate, commonly used in PvP. It has overall higher damage and survivability than other comparable racial frigates. The four mid-slots make the Merlin useful as a tackler and its use of turrets make it a relatively quick train.
Destroyer
Destroyers are ships slightly larger than frigates. They use the same sized modules as frigates, but have more high slots. They are often used in PvE for level 1 missions. They are rarely used in PvP, as their DPS is not impressive without high skills, although they can sometimes fill the role of anti-interceptor.
Cormorant

RELATED UNI-WIKI REFERENCES
|
S H I P B O N U S E S
Caldari Destroyer bonuses (per skill level): The Cormorant is the only State-produced space vessel whose design has come from a third party. Rumors abound, of course, but the designer's identity has remained a tightly-kept secret in the State's inner circle. |
The Cormorant has eight high slots, making it a good starting vessel to use for salvaging wrecks. Due to its small size it can move speedily across deadspaces, but also has enough cargo space to hold the salvage you collect.
When it is used in PvE as a combat ship (Level 1 missions and the Sisters of Eve storyline arc) it is strongly recommended that a 'kiting' technique is used, meaning that the capsuleer should keep his range from the NPC ships.
In PvP it suffers from a comparatively large signature radius, making it easier to hit with bigger weapons, which can be problematic with the frigate sized tank of the Cormorant.
Cruiser
Cruisers are Eve's medium-sized ships.
Osprey

RELATED UNI-WIKI REFERENCES
|
S H I P B O N U S E S
Caldari Cruiser bonuses (per skill level): In YC114 each major empire faction, having been embroiled in a harrowing, extensive, long-term war, recognized the growing need for support and logistics functionality in their vessels during the kind of protracted interstellar warfare that might otherwise prove exhausting for its participants. Both Frigate and Cruiser-class ships were put under the microscope, and in the Caldari State the outcome of the re-evaluation process led, among other developments, to a redesign and redeployment of the Osprey. |
Due to its 20% bonus to mining laser yield, the Osprey is primarily used as a mining vessel. The Osprey can also serve as a logistics vessel, and benefits from both the reduction in capacitor use for shield transports and the shield transporter range bonus.
Blackbird

RELATED UNI-WIKI REFERENCES
|
S H I P B O N U S E S
Caldari Cruiser bonuses (per skill level): The Blackbird is a small high-tech cruiser newly employed by the Caldari Navy. Commonly seen in fleet battles or acting as wingman, it is not intended for head-on slugfests, but rather delicate tactical situations. |
The Blackbird makes a formidable ewar ship and is generally used as such. You can find a detailed discussion of Blackbird fitting here.
Caracal

RELATED UNI-WIKI REFERENCES
|
S H I P B O N U S E S
Caldari Cruiser bonuses (per skill level): The Caracal is a powerful vessel that specializes in missile deployment. It has excellent shield defenses, but poor armor plating. Its missile arsenal, when fully stocked, is capable of making a piece-meal of almost anyone. |
The Caracal is arguably the most effective Caldari cruiser for PvE. It receives strong bonuses to increasing the range of its missiles, as well as a damage bonus for kinetic missiles. It can fit an effective shield tank and keep opponents at bay while dealing damage to them from afar.
There are some niche uses for the Caracal in PvP, for example as dedicated frigate-hunter as its Rapid Light Missile Launchers can deal a huge amount of DPS to frigates. With higher fitting skills it is also possible to equip it with a full rack of Heavy Missile Launchers and achieve ranges in excess of 130km.
Moa

RELATED UNI-WIKI REFERENCES
EXTERNAL LINKS
|
S H I P B O N U S E S
Caldari Cruiser bonuses (per skill level): The Moa was designed as an all-out combat ship, and its heavy armament allows the Moa to tackle almost anything that floats in space. In contrast to its nemesis the Thorax, the Moa is most effective at long range where its railguns can rain death upon foes. |
The Moa recieves both an optimal range bonus for its turrets and a bonus to shield resistance. While still an acceptable choice for PvE, it is generally considered inferior to other Caldari cruisers, such as the Caracal. Due to the resistance bonus, it can be adaquately used as both a sniper and brawler in PvE.
Battlecruiser
Battlecruisers are sometimes considered a more powerful version of Destroyer class ships, they fit the same sized weapons as Cruisers and more widely used as a damage dealing ship than Destroyers.
Ferox

RELATED UNI-WIKI REFERENCES
|
S H I P B O N U S E S
Caldari Battlecruiser bonuses (per skill level): Designed as much to look like a killing machine as to be one, the Ferox will strike fear into the heart of anyone unlucky enough to get caught in its crosshairs. With the potential for sizable armament as well as tremendous electronic warfare capability, this versatile gunboat is at home in a great number of scenarios. |
The Ferox is a versatile battlecruiser capable of a strong passive or active shield tank and of over 125km optimal range with railguns or heavy kinetic and thermal damage with blasters. However, it is overshadowed by the Drake, whose seven bonused launchers far surpass the Ferox's unbonused five, and its hybrid turret range bonus is generally less favored than the damage bonus and additional turret of the Gallente Brutix battlecruiser.
Drake

RELATED UNI-WIKI REFERENCES
|
S H I P B O N U S E S
Caldari Battlecruiser bonuses (per skill level): Of the meticulous craftsmanship the Caldari are renowned for, the Drake was born. It was found beneath such a ship to rely on anything other than the time-honored combat tradition of missile fire, while the inclusion of sufficient CPU capabilities for decent electronic warfare goes without saying. |
The Drake is an incredably strong ship due to its shield resistance and kinetic missile damage bonuses. It can be effectively fitted for both PvE and PvP and is in both situations incredably resiliant. The Drake is used in a wide variety of situations, including alliance/null warfare.
Naga

RELATED UNI-WIKI REFERENCES
|
S H I P B O N U S E S
Caldari Battlecruiser bonuses (per skill level): The Naga was designed in YC 109 by Corporate Police Force as an anti-Guristas ship, sacrificing the usual robust Caldari Navy standards in favor of supporting battleship-class weaponry. It was rejected by Hyasyoda management for being overspecialized. |
The Naga is the Caldari tier 3 battlecruiser. While requiring a bit more training than the Drake and Ferox, it can fit battleship sized guns while retaining the agility and tank of a battlecruiser. It can be effectively fit with long or short range turrets, making it incredably effective in PvP.
Battleship
Battleships are the biggest combat ships in the game before Capital-class ships. Battleships usually mount large sized weaponry and mostly used as a damage dealing combat ship in Eve, although there are several Battleships that have different role, such as the Scorpion.
Scorpion

RELATED UNI-WIKI REFERENCES
|
S H I P B O N U S E S
Caldari Battleship bonuses (per skill level): The first Scorpion-class battleship was launched only a couple of years ago, and those that have been built are considered to be prototypes. Little is known of its capabilities, but what has been garnered suggests that the Scorpion is crammed to the brink with sophisticated hi-tech equipment that few can match. |
The Scorpion is the Caldari ECM Battleship. With its 8 mid-slots, it is capable of either fitting up to 8 jammers/bursts, making it the ECM weapons platform of choice. In order to free up mid-slots, some pilots choose rely on a weak armour buffer tank in its four low-slots, while others fit shield modules for survivability and use their low slots to enhance their jammers.
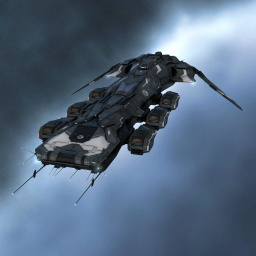
Raven

RELATED UNI-WIKI REFERENCES
|
S H I P B O N U S E S
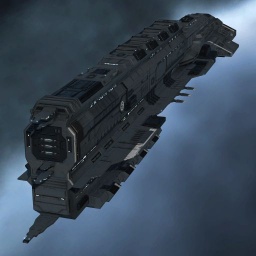
Caldari Battleship bonuses (per skill level): The Raven is the powerhouse of the Caldari Navy. With its myriad launcher slots and powerful shields, few ships can rival it in strength or majesty. |
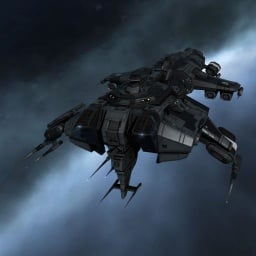
The Raven is possibly the most used PvE ship for Level 4 missions as it has good range when fitted with Cruise Launchers (in addition to the usual effectiveness of selectable damage type from missiles) and can sport a good active shield tank (either cap-stable with a Large Shield Booster or a X-Large Shield Booster for non-cap-stable 'pulsing'). Its drawbacks are a small drone bay, usually filled with one flight of light drones and one flight of medium drones. In addition it is a very slow ship, as most Caldari boats are.
For PvP it can be fitted with Torpedo Launchers to get good close range DPS or with Cruise missile Launchers for sniping distances.
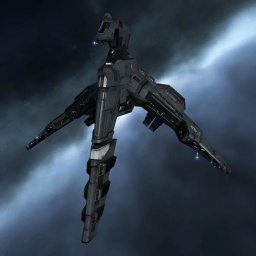
Rokh

RELATED UNI-WIKI REFERENCES
|
S H I P B O N U S E S
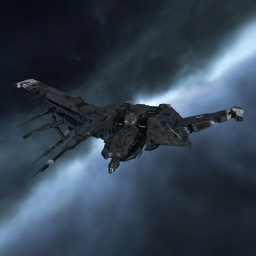
Caldari Battleship bonuses (per skill level): Having long suffered the lack of an adequate hybrid platform, the Caldari State's capsule pilots found themselves rejoicing as the Rokh's design specs were released. A fleet vessel if ever there was one, this far-reaching and durable beast is expected to see a great deal of service on battlefields near and far. |
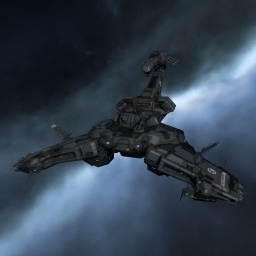
The Rokh is a solid shield-tanked hybrid turret platform. Although it doesn't have the raw damage bonuses found on the Megathron and Hyperion, its optimal bonus sometimes helps it deal more applied DPS when fitted with blasters. When rail-fitted it can achieve tremendous optimal ranges -- even, uselessly, beyond the hard 250km targeting range limit. Although it can be used for PvE, most Caldari mission-runners prefer missiles' flexibility and ease-of-use.
Industrial
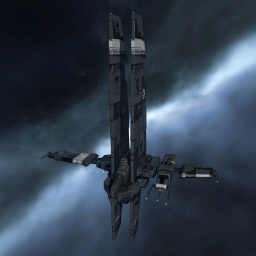
Badger

RELATED UNI-WIKI REFERENCES
|
S H I P B O N U S E S
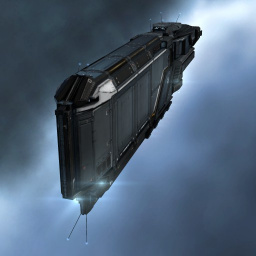
Caldari Hauler bonuses (per skill level): The Badger-class hauler is the main cargo-carrier for the Caldari State, particularly in long, arduous trade-runs. Its huge size and comfortable armament makes it perfectly equipped for those tasks, although the Caldari seldom let it roam alone. |
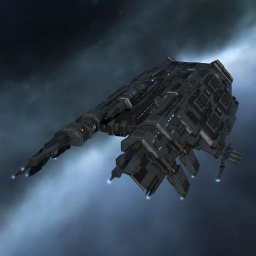
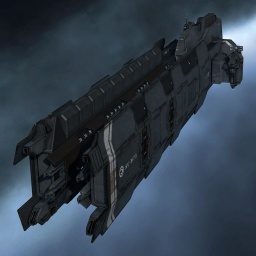
The Badger is the basic Caldari industrial hauler ship. It's useful to train to use a Caldari Industrial in order to haul ore from your jetcans to the station, or for filling with mission loot to haul to a trade hub in order to sell for larger profit margins. Level 3 courier missions will likely need a ship the size of a Badger to complete them.
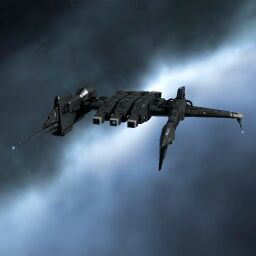
Badger Mark II
The Badger Mark II has a cargo hold noticeably larger than the Badger, and is better defended. However it is marginally slower at subwarp speeds, and takes longer to turn. In general though the larger cargo hold offsets the disadvantages and so training Caldari Industrial to III to fly this ship is definitely worth it, particularly if you constantly find yourself filling the Badger's hold.
Related Links
- Basic skills and Support skills - Training support skills is a key step towards flying a ship well. Read up on support skills here.
- Fitting Guidelines - Some general guidelines for fitting ships.
- Fitting Modules and Rigs Guide - A list of rigs and module types with short descriptions.
- NPC damage types and NPC Ship Attributes - To see which resists to use and damage types to deal against NPC rats.
- Creating an Alt Hauler - Having an alt hauler can be useful for shopping trips during wartime, if you are living in highsec.

