More actions
→Logistics organization and tactics: Wording change |
→General Guidelines: Layout revamp, spelling improvements |
||
| Line 1,196: | Line 1,196: | ||
===General Guidelines=== | ===General Guidelines=== | ||
[[File:Broadcasting.jpg|frame|In the Fleet window, Ctl-click on your fleetmate's broadcast for reps to target them and provide support. If | [[File:Broadcasting.jpg|frame|In the Fleet window, Ctl-click on your fleetmate's broadcast for reps to target them and provide support. If you are the one that needs support, click on the appropriate symbol at the bottom of the Fleet window. It is also possible to bind these broadcasts to hotkeys in the game's General Settings window.]] | ||
*<span style="color: | *<span style="color:cyan;">Prepare and use your fleet window.</span> | ||
::[[File:BroadcastSettings2.gif|frame|left|From the Fleet window, open the Broadcast Settings sub-window to adjust the appearance of your fleetmates' broadcasts, and to make them stand out against other fleet events. Use the dropdown boxes to the right of | |||
If your gang is small enough, your fleetmates may be able to request repairs in comms. ("Hey, Bob! John needs reps!") But in even a medium-sized fleet, comms are intended for communication between FC(s) and the rest of the fleet. Under these circumstances, fleetmates "broadcast for reps" via the Fleet window. You can see their requests under the window's History tab. As described in the [[Fleet User Interface]] guide, use the Broadcast Settings window to make the "Need Armor", "Need Shield", and "Need Capacitor" broadcasts show up with distinct colour backgrounds. When one of these broadcasts is listed in the Fleet History window, you can Ctl-click the broadcast to lock that pilot and immediately provide repairs or cap. Once your fleetmate no longer needs assistance -maybe because the enemy fleet has shifted targets— they will broadcast "In Position At". You will need to watch the Fleet window for this signal, and be prepared to switch the focus of your remote support. This applies when other fleetmates need repairs. | |||
When you are the one needing repairs because you are the enemy's primary target, you will be the one broadcasting. | |||
::[[File:BroadcastSettings2.gif|frame|left|From the Fleet window, open the Broadcast Settings sub-window to adjust the appearance of your fleetmates' broadcasts, and to make them stand out against other fleet events. Use the dropdown boxes to the right of armour, shield and capacitor broadcasts to set their colours to something other than grey.]] | |||
<br clear=all> | <br clear=all> | ||
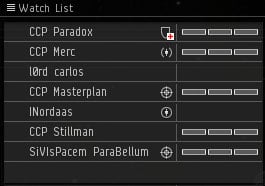
[[File:Watchlist_Example.jpg|frame|An example of a fleet watchlist. The three horizontal bars correspond to shield, | [[File:Watchlist_Example.jpg|frame|An example of a fleet watchlist. The three horizontal bars correspond to shield, armour, and hull for each pilot. Pilots that are off-grid don't show any bars. The symbols to the left of the bars correspond to the latest broadcast from that pilot.]] | ||
*<span style="color: | *<span style="color:cyan;">Fill your watchlist.</span> | ||
The Watchlist is a window that allows you to monitor the shield, armour and hull HP of fleetmates that are on grid with you, without having to lock them. In addition, clicking on names in the Watchlist window has the same effect as selecting them in space or in the Overview window, which makes interacting with these particular pilots very easy. The Watchlist is an extremely important tool for logistics pilots, and will allow you to identify fleetmates that need repairs even before they identify themselves. | |||
Fleetmates can be added to your Watchlist by right-clicking on the pilot name and selecting "Add to Watchlist". Unfortunately, the Watchlist can only hold 15 pilots. If you are flying logistics in a small gang, this may be enough space to list your entire fleet. But if you are in a larger fleet, you will need to choose who to include (or you will need to follow the FC's or logi captain's instructions on who to add). In general, you will be asked to include fleet, wing, and squad commanders on your watchlist first, because they are critical to passing fleet boosts to the fleet. You will then probably add your fellow logistics pilots, because they are so often the primary targets of the opposing fleet. Finish out your list with any critical damage dealers or other pilots you expect to need early repairs. | |||
*<span style="color:cyan;">Know your optimal and falloff ranges, and what distance you and your fellow logistics pilots plan to repair from.</span> | |||
As described above, different logistics hulls and modules have different characteristic repair ranges. Know how far from your damage-dealing fleetmates you plan to be. | |||
*<span style="color:cyan;">Warp into the engagement at the appropriate range, opposite the enemy.</span> | |||
The FC will likely warp the fleet's damage dealers at their weapons' optimal range. You will need to be behind those damage dealers, so ignore the FC's fleet warp instructions to the damage-dealing group. (You might do this by cancelling the fleet warp once it starts, or the FC may have organized wings and squads so that the logistics group warps separately.) You will warp at your own range to your fleetmates, with them in between you and the enemy. If you are flying armour logistics, this will probably be at your repair modules' optimal range. If you are flying shield logistics, your range will be dictated by the FC, but (optimal + half-falloff) is a good rule of thumb. | |||
*<span style="color:cyan;">If there are multiple logistics pilots, orbit the nominated logi anchor.</span> | |||
Before the fleet gets underway, the FC should have named a logistics "anchor"—a pilot that logistics ships should orbit at close distance. In this way, only the anchor pilot is responsible for positioning the logistics group, and all the other pilots simply follow that anchor. (The logi anchor may or may not be the same as the logi captain.) The situation can get more complicated if your opponents field Command Destroyers, which use Micro Jump Fields to separate clustered logistics ships from their fleetmates; if the FC orders you to spread out, that might be why. But at least initially, stick to your anchor. | |||
: | *<span style="color:cyan;">If you fall behind the rest of the fleet, out of repair distance, warp out and back in.</span> | ||
Logistics ships are sometimes slower than the rest of the fleet, especially when they are fitted with afterburners instead of microwarpdrives. If you fall behind, try to warp to a tactical bookmark ''behind'' the logistics group, and then warp back to a damage dealer at closer range than you need. (This ensures that your fleetmate won't just race away from you again.) | |||
*<span style="color: | *<span style="color:cyan;">Watch your capacitor.</span> | ||
Capacitor regenerates fastest when it is at 25% of maximum, but very slowly at 0%. Don't allow your capacitor to drop to 0%. You may need to deactivate one repair module for a while, deactivate an active resist module that you realize you don't need vs. the opponents' damage type, or be more conservative with your propulsion module. If you cap yourself out, you won't be able to activate anything, or even warp out—you'll be a sitting duck. Don't let that happen! | |||
*<span style="color: | *<span style="color:cyan;">Stagger your repair modules' activation, if you can.</span> | ||
Repair modules can have pretty long activation times. If you activate them all at once, it might be 8 seconds before you can re-target them to a different fleetmate who calls for emergency reps. By staggering your repair modules, you can gradually shift the target of your repairs. Staggering also evens out the load on your capacitor. | |||
*<span style="color: | *<span style="color:cyan;">If you are the target of a specialized ship or tactic, communicate that with the logi leader or FC.</span> | ||
If you find that a specific enemy ship is taking you out of the fight with neuts or EWAR, tell the FC (preferably in fleet/logi chat); the fleet may be able to switch targets to take out the threat, or your FC may have other instructions for you. | |||
*<span style="color: | *<span style="color:cyan;">Don't forget to launch and use your drones!</span> | ||
===Cap-Chain Logistics=== | ===Cap-Chain Logistics=== | ||
Revision as of 19:27, 16 July 2020
| EVE University offers classes on: | |
Logistics refers to ships and modules that provide remote support to other ships. In real life, the term "logistics" is typically used to describe the coordination of military troops and supplies, and EVE University has a Logistics Division that serves this role. But in the EVE client, Logistics decribes remote assistance, and particularly:
- Remote Shield Boosting
- Remote Armor Repair
- Remote Hull Repair
- Remote Capacitor Transfer
- Remote Tracking Support
- Remote Sensor Boosting
One other type of on-grid remote boost module, the Command Burst, is not typically considered logistics and will not be described here. This guide summarizes the common mechanics of logistics modules; explains the differences between remote shield, armor, and hull repair in detail; and compares ships that are bonused for logistics.
Visual effects for the different types of logistics modules are shown on the Identifying Visual Effects page.
Logistics Modules and Mechanics
Remote Repair: Comparing Shield, Armor, and Hull
Most commonly, fleet logistics is about remote repair. "Local" repair—in which a ship repairs itself—is not considered "logistics" in EVE. Instead, logistics ships specialize in repairing other ships. In this way, logistics ships in EVE are similar to the "healer" character classes you find in many other online multiplayer games; logistics pilots usually assist their fleetmates by restoring their hitpoints (HP), during battle. Remote repair can be used to restore HP to a ship's shield, armor, or hull, via three types of high-slot, remote repair modules: Remote Shield Boosters, Remote Armor Repairers, and Remote Hull Repairers. (Technically speaking, shields are "boosted" rather than "repaired", but for the purpose of this Guide, shield boosters have been classified as repair modules.) These three types of remote repair modules have some important differences. The chart below illustrates these differences for medium-sized, Tech I modules of each type:
| Item | CPU (tf) |
Powergrid (MW) |
Cycle Time (sec) |
Repair Amount (HP) |
Repair Rate (HP/sec) |
Activation Cost (GJ) |
Cap Demand (GJ/sec) |
Optimal Range |
Falloff | Rep Applied At | |
|---|---|---|---|---|---|---|---|---|---|---|---|
| Medium Remote Shield Booster I | 50 | 52 | 8 | 260 | 32.5 | 232 | 29.0 | 5.00 km | 7.50 km | beginning of cycle | |
| Fitted to a (Tech I shield logistics cruiser) |
390 | 48.8 | 158 | 19.7 | 26.5 km | 39.8 km | |||||
| Medium Remote Armor Repairer I | 20 | 120 | 6 | 196 | 32.7 | 155 | 25.8 | 8.75 km | 2.50 km | end of cycle | |
| Fitted to an (Tech I armor logistics cruiser) |
294 | 49.0 | 105 | 17.6 | 46.4 km | 13.3 km | |||||
| Medium Remote Hull Repairer I | 68 | 115 | 6 | 96 | 16.0 | 244 | 40.7 | 8.75 km | 5.00 km | end of cycle | |
∗ Skills: Racial Cruiser IV, ![]() Shield Emission Systems III,
Shield Emission Systems III, ![]() Remote Armor Repair Systems III.
Remote Armor Repair Systems III.
As the table above shows, fitting remote repair modules to bonused logistics ships makes them work much better, and pilot skills affect these numbers as well. In addition, there are meta versions of these modules with improved range ("Scoped"), CPU and powergrid requirements ("Compact"), or capacitor usage ("Enduring"). So, the specific values in this table are not so important. Nevertheless, the chart does illustrate some of the most important differences between remote shield, armor, and hull repair modules:
- The icons for remote repair modules look like those of local repair modules, and armor and hull repairers look alike. Make sure you select the module you want! Most remote assistance modules are distinguished from local modules by a double arrow on the icon. The icons for remote armor and hull repairers show welding helmets with different colors: gold for armor, and silver for hull. If you find the symbols confusing, the names are much clearer, so you can mouse over the module icon to make sure you have the right kind.
- Remote hull repairers are inferior to remote armor repairers and shield boosters, so remote hull repairers are never used in combat. Remote hull repairers require a great deal of CPU, powergrid and capacitor, and repair less HP than other repair modules. Unlike the other two remote repair types, there are no ships in EVE that are bonused for hull repair. As a result, remote hull repairers are not generally used in fleets, even for compositions focused on hull tanking. Remote hull repair is a convenient alternative to paying for hull repairs in station, however, and so these modules are used outside of combat.
- Overall, remote shield boosters and armor repairers restore HP at the same rate. Neither of these repair modes is inherently better than the other. They do have differences, however, that make each one preferable under certain circumstances.
- Remote armor repairers require less capacitor than remote shield boosters. Not only do armor repairers require less capacitor per cycle, they are also more cap efficient (requiring less cap per time) relative to shield boosters. This means that armor-repairing ships have more cap room for other active modules, and are less sensitive to enemy neutralizers and Nosferatus, than shield-boosting ships. Armor logistics ships have an easier time running all of their repair modules continuously, whereas shield logistics ships often have to cycle their boosting modules on and off to conserve capacitor. Because of their cap efficiency, armor logistics ships are more powerful for longer engagements (in which fleetmates don't die quickly), and in any PvE activity where cap stability may be an issue.
- Remote armor repairers have longer optimal range than remote shield boosters. Armor logistics ships can stay farther away from the action, and still deliver 100% of their repping power, compared to shield logistics ships. As the chart shows, ship-bonused armor repairers have fairly long optimal range, and an
 Exequror—a Tech I armor logistics cruiser—can apply full armor repairs from 50 km away. The optimal range of a
  Scythe, the matching Tech I shield logistics cruiser, is less than two-thirds as long. As a result, it is easier to keep armor-repairing ships out of harm's way than it is shield-repairing ships.
- Because shield boosters deliver HP at the beginning of the module cycle, no cycles are wasted. Armor repairers, by contrast, deliver repairs at the end of the module cycle. One downside of flying armor logistics is that, sometimes, your armor-tanked fleetmates will die faster than the cycle time of your remote armor repair modules. When this happens, each module's repair cycle is lost; the target of the remote armor repairer no longer exists, and so when the module completes its cycle, nothing gets repaired. This never happens with remote shield boosters, because a shield booster delivers HP at the beginning of its module cycle. This may sound like an unusual situation—how is it possible that a ship is destroyed in just 6 seconds? In fact, this happens frequently in large fleet fights, where tens of opponent damage dealers are focusing fire on a single ship. But wasted cycles also affect longer fights, where each wasted cycle diminishes the overall, average efficiency of repairs. Not only does shield repair involve no wasted cycles, but because shield disappears before armor, shield logistics pilots have a little more time to rescue their fleetmates than armor logistics pilots do. As a result, shield logistics is better than armor in very large fleet engagements, or in any situation where you expect your fleetmates to die quickly.
- Remote shield boosters deliver more HP/cycle, so they have more repair "alpha". Combat ships are sometimes judged by how much damage they can deliver in their first ("alpha") volley. Logistics ships can be compared by a very similar measure, by how much damage they can repair in their initial repair cycle. By this measure, remote shield boosters are better than remote armor repairers—they repair more damage, right away.
Logistics pilots seldom get to choose whether to fly armor or shield logistics; they are always expected to fly whatever logistics type matches their fleet's doctrine. Still, logistics pilots do have to pilot shield and armor ships differently, according to their strengths and limitations.
Remote Repair: Comparing Module Size
As can be expected, small, medium and large remote repair modules differ in the amount of HP they repair per cycle, and in their repair range. These characteristics are also affected a great deal by the ships they are fit to. The chart below compares remote repair modules that have been fitted to logistics ships of matching size:
| Item | Repair Rate (HP/sec) |
Optimal Range |
Falloff |
|---|---|---|---|
| Small Solace Scoped Remote Armor Repairer fit to an |
28 | 11.6 km | 19.3 km |
| Medium Solace Scoped Remote Armor Repairer fit to an |
61 | 51.0 km | 14.6 km |
| Large Solace Scoped Remote Armor Repairer fit to a |
112 | 26.4 km | 7.7 km |
∗ Skills: All V's.
Though this chart is focused on just armor logistics, and shows just a few of the ships that are bonused for remote repair, it illustrates something that is true across all sub-capital logistics ships and modules: logistics cruisers, and matching medium-sized logistics modules, represent a sort of sub-capital "sweet spot" in terms of repair amount and range. Medium modules fit to logistics cruisers repair much more effectively than frigates, and have a significant range bonus relative to battleships. (This is due to ship bonuses, not to module differences; unbonused large repairers have longer range than medium repairers.)
Remote Repair vs. Local Repair
One, very intuitive reason for including logistics ships in fleets is so that damage dealers can focus on their own role; by having logistics ships manage repair, the other, combat-oriented ships in the fleet can fit more modules, rigs, and implants dedicated to damage-dealing. But another, less intuitive justification is that logistics ships are often better at repairing other ships than those ships are at repairing themselves. The table below illustrates this by comparing local and remote armor repairers fit to cruiser hulls:
| Item | Repair Rate (HP/sec) |
Repair Efficiency (HP/cap unit) |
|---|---|---|
| Medium Remote Armor Repairer II fit to an |
69 | 4.3 |
| Medium Armor Repairer II fit to an unbonused hull |
41 | 2.3 |
∗ Skills: All V's.
Logistics ships often repair their fleetmates more effectively, and with less capacitor, than their targets can repair themselves. This comparison can become a bit more complicated with shield boosting, particularly for combat ships that can fit oversized local shield boosters. Nevertheless, remote shield boosters fit to logistics ships—like the remote armor repairers shown above—are more effective than local shield boosters of the same size.
Ancillary Remote Repair Modules
Ancillary Remote Shield Boosters and Ancillary Remote Armor Repairers are similar in function to local ancillary repair modules that consume charges in exchange for local repairs; the remote versions apply repairs to a fleetmate instead of locally. The attributes of ancillary remote repair modules are different from those of local repair modules, however, and are discussed further below. In general, both ancillary remote armor repairers and ancillary remote shield boosters are used to provide a quick burst of remote repair over a few module cycles, which consume all of the module's loaded charges. Once this happens, ancillary remote repair modules must undergo an extremely slow reload before they can be used in charge-boosted mode again. As a result, ancillary remote repair modules do not improve on the overall repair rate of standard remote repair modules—the combination of boosted repair and the long reload time results in an averaged HP/time that is similar to ordinary remote repair modules—but they can be used to front-load these repairs.
Ancillary Remote Shield Boosters
| Item | Shield Boost (HP) |
Activation Cost, without charges (GJ) |
Activation Cost, with charges* (GJ) |
# Cycles Before Reload |
Reload Time (sec) |
Boost Rate (HP/sec, including reload time) |
CPU (tf) |
Powergrid (MW) |
Cycle Time (sec) |
Optimal Range |
Falloff |
|---|---|---|---|---|---|---|---|---|---|---|---|
| Medium Ancillary Remote Shield Booster I | 475 | 700 | 0 | 9 | 60 | 32.4 | 50 | 52 | 8 | 5.00 km | 7.50 km |
| Medium Remote Shield Booster I | 260 | 232 | 32.5 | 50 | 52 | 8 | 5.00 km | 7.50 km |
∗Navy Cap Booster 50. The Cap Booster 25 size may not be used with ancillary shield booster modules. Larger boosters can fit, but they offer no repair gain over Navy Cap Booster 50's, so the smallest possible booster should be used.
As the comparison chart above shows, ancillary remote shield boosters (ARSBs) have two advantages over standard, Tech I shield boosters: they deliver almost double the shield boost of a standard shield booster for 9 module cycles, and they require no capacitor when operated with cap booster charges. ARSBs also receive all of the ship bonuses that standard remote shield boosters do (and so, while the exact numbers in this table will change according to the ship they are fitted to, the comparison will not). These are pretty significant advantages. Shield logistics ships are often capacitor-limited, and so delivering repairs without the need for capacitor not only helps them contribute longer, but also makes them more resistant against enemy capacitor warfare. And an initial, powerful shield boost might be just what your fleet needs at the beginning of a fight, when incoming alpha damage is at its greatest.
Nevertheless, ARSBs have some clear drawbacks. When the ARSB module runs out of cap booster charges, the logistics pilot has two choices: either wait for a 60-second reload, or use the module without charges, which costs three times as much capacitor as the standard module. (Most shield logistics ships don't have enough capacitor for the second option.) As is true for local ancillary repair modules, only one ARSB can be fit to a ship, so logistics pilots with an ASRB fitted will also have to use standard shield boosters. And finally, while ARSBs compare well against standard Tech I modules, they don't look quite as strong compared to meta, Tech II, faction or deadspace shield boosters; they have shorter range, and sometimes worse fitting, than many of these other options. In particular, Tech II logistics ships are probably better fit with standard shield boosters, because Tech II ships are less capacitor-limited. On the other hand, groups of Tech I ![]() Scythe pilots could benefit significantly by fitting ARSBs, so that they can boost each other through the initial wave of damage that is frequently aimed at logistics. Although ARSBs are very new and rare—they can only be manufactured from blueprint copies found via exploration or ratting—they may still find a niche in low-skill logistics.
Scythe pilots could benefit significantly by fitting ARSBs, so that they can boost each other through the initial wave of damage that is frequently aimed at logistics. Although ARSBs are very new and rare—they can only be manufactured from blueprint copies found via exploration or ratting—they may still find a niche in low-skill logistics.
Ancillary Remote Armor Repairers
| Item | Repair Amount, with charges* (HP) |
Repair Amount, without charges (HP) |
Activation Cost | # Cycles Before Reload |
Reload Time (sec) |
Repair Rate (HP/sec, including reload time) |
CPU (tf) |
Powergrid (MW) |
Cycle Time (sec) |
Optimal Range |
Falloff |
|---|---|---|---|---|---|---|---|---|---|---|---|
| Medium Ancillary Remote Armor Repairer I | 435 | 145 | 155 | 8 | 60 | 32.2 | 20 | 120 | 6 | 8.75 km | 2.50 km |
| Medium Remote Armor Repairer I | 196 | 155 | 32.7 | 20 | 120 | 6 | 8.75 km | 2.50 km |
∗Nanite Repair Paste.
Ancillary Remote Armor Repairers (ARARs) are similar to ARSBs in that they deliver more HP repair—more than double that of a standard, Tech I remote repair module—at the expense of charges. ARARs consume nanite repair paste instead of cap boosters, and they can only be loaded with eight cycles worth of charges instead of nine. More significantly, ARARs consume capacitor whether they are loaded with paste or not, but they only repair 1/3 as much HP when they are operated without paste. Just like ARSBs, ARARs have a 60-second reload time that limits the average repair efficiency of the modules. You can only fit a maximum of one, and ARARs compare poorly against meta, Tech II, faction and deadspace repairers in fitting and overall efficiency. But, as with ARSBs, they can be used for a short burst of repairs at the beginning of an engagement.
Mutadaptive Remote Armor Repairers
Mutadaptive Remote Armor Repairers are a type of remote armor repairer introduced in the Onslaught expansion in November 2018. Only Heavy (Medium) versions currently exist, and they can currently only be fitted onto a Rodiva or Zarmazd. Like with Entropic Disintegrators, only one Mutadaptive Remote Armor Repairer can be fit onto a ship, which substitutes for multiple conventional remote armor repairers. Also like Entropic Disintegrators, the mutadaptive repairers have a spooling effect, where they will repair more HP the longer they have been active on a target. It takes 15 cycles (90 seconds) for a Mutadaptive Remote Armor Repairer to reach full strength. As shown in the table below, they initially start off having repair rates equivalent to two conventional remote repairers, but over time ramp up to being equivalent to five conventional remote repairers. However, one again like Entropic Disintegrators, Mutadaptive Amor Repairers have no Falloff range, will deactivate immediately upon their target leaving optimal range, and if deactivated for any reason reset to their minimum effectiveness.
| Item | CPU (tf) |
Powergrid (MW) |
Cycle Time (sec) |
Minimum Repair Amount (HP) |
Minimum Repair Rate (HP/sec) |
Maximum Repair Amount (HP) |
Maximum Repair Rate (HP/sec) |
Activation Cost (GJ) |
Cap Demand (GJ/sec) |
Optimal Range |
Falloff | |
|---|---|---|---|---|---|---|---|---|---|---|---|---|
| Heavy Mutadaptive Remote Armor Repairer I | 60 | 360 | 6 | 392 | 65.3 | 980 | 163.3 | 465 | 77.5 | 10.5 km | 0 km | |
| Fitted to a (Tech I Triglavian logistics cruiser) |
588 | 98 | 1470 | 245 | 316 | 52.7 | 65.6 km | 0 km | ||||
| Medium Remote Armor Repairer I (x3) | 60 | 360 | 6 | 588 | 98 | 588 | 98 | 465 | 77.5 | 8.75 km | 2.50 km | |
| Fitted to an (Tech I Gallente logistics cruiser) |
882 | 147 | 882 | 147 | 315 | 52.5 | 46.4 km | 13.3 km | ||||
∗ Skills: Racial Cruiser IV, ![]() Remote Armor Repair Systems III.
Remote Armor Repair Systems III.
Logistics Drones
- See also: Logistics drones
Logistics drones (also known as "Maintenance Bots") are an important component of logistics piloting. All sub-capital logistics ships have drone bays that can fit one or more maintenance bots. In addition, nearly all Tech I and Tech II logistics cruisers (except the ![]() Osprey and
Osprey and ![]() Augoror) receive a 100% bonus to maintenance bot repair amount. To put the importance of this bonus into perspective, about 25% of the repping power of a standard, Unista Fleet-Up Fit
Augoror) receive a 100% bonus to maintenance bot repair amount. To put the importance of this bonus into perspective, about 25% of the repping power of a standard, Unista Fleet-Up Fit ![]() Scythe comes from its drones.
Scythe comes from its drones.
Logistics Rigs
There are two sets of rigs dedicated to assisting logistics ships:
Remote Repair Augmentors: Reduce the capacitor demand of remote armor repairers (by 20% for Tech I rigs, 25% for Tech II). These do not affect shield boosters.
Drone Repair Augmentors: Increase drone repair amount (10% for Tech I, 15% for Tech II).
Given the cap demand of remote repair modules, and the value of logistics drones, it might seem as though logistics pilots should always fit one or more of these rigs. But Capacitor Control Circult, Trimark Armor Pump, or Ancillary Current Router rigs may be preferable, depending on the fit.
Remote Capacitor Transfer
Remote Capacitor Transmitters consume capacitor on the fitted ship, and transfer that capacitor to a targeted fleetmate. On unbonused ships, remote capacitor transmitters can be used to counter the effects of capacitor warfare, but local options (such as cap battery or booster modules) are often more effective at this job. However, as explained further below in the logistics ships section, Caldari and Amarr logistics cruisers have significant bonuses to remote capacitor transmitters that create an unusual situation: when these ships activate a remote capacitor transmitter, they transfer more capacitor than they consume. In effect, Caldari and Amarr logistics cruisers can use remote capacitor transmitters to generate capacitor from nothing.
| Medium 'Regard' Remote Capacitor Transmitter:* (meta 4) |
Activation Cost (GJ) |
Capacitor Transferred (GJ) |
Optimal Range |
|---|---|---|---|
| unbonused | 85 | 108 | 6.0 km |
| fit to an |
85 | 324 | 66.0 km |
∗ Skills: All V's, including Capacitor Emission Systems V.
As shown in the chart, an unbonused transmitter transfers about the same amount of capacitor as it consumes. (A bit more at high skills, a bit less at low skills.) When fit to a Caldari or Amarr logistics cruiser, on the other hand, these modules can generate hundreds of capacitor units for other ships in the fleet, at significant ranges. Most commonly, this extra capacitor is transferred to other logistics ships in a capacitor chain (or "cap chain"). In cap-chain logistics, a squad of logistics ships simultaneously give and receive capacitor to each other as a means of increasing their available capacitor. (Cap-chain logistics is described further in the tactics section.)
Remote Tracking Computers and Sensor Boosters
The ![]() Oneiros and the
Oneiros and the ![]() Scimitar—both solo (non-cap-chain) Tech II logistics cruisers—are bonused for remote tracking computers. These are primarily used to support battleship fleets, and to help their battleship fleetmates hit cruiser-sized targets. Although remote tracking support is probably not the first thing that EVE players think of when they consider logistics ships, remote tracking computers are often fit to these two specific logistics hulls.
Scimitar—both solo (non-cap-chain) Tech II logistics cruisers—are bonused for remote tracking computers. These are primarily used to support battleship fleets, and to help their battleship fleetmates hit cruiser-sized targets. Although remote tracking support is probably not the first thing that EVE players think of when they consider logistics ships, remote tracking computers are often fit to these two specific logistics hulls.
No logistics hulls receive bonuses to remote sensor boosters (RSBs), but they are a form of on-grid remote assistance, and RSBs are sometimes fit to logistics ships as a counter to enemy electronic warfare (EWAR). In particular, cap-chained logistics ships can combine RSBs to help counter focused EWAR that is aimed at breaking the cap chain; in this scenario, multiple RSBs can be used to shore up the sensor strength of the targeted chain member.
Logistics Ships
Racial Specializations
| Race | Armor or Shield? | Cap-Chain or Solo? |
|---|---|---|

|
Armor | Cap-Chain |

|
Shield | Cap-Chain |

|
Armor | Solo |

|
Shield | Solo |
Each of the four player races specializes in the type of logistics that their ships are naturally tanked for. Caldari and Minmatar ships are ordinarily shield-tanked, and so these two races specialize in shield logistics; and Amarr and Gallente ships are typically armor-tanked, so these two races specialize in armor logistics. In addition, each race either specializes in cap-chain logistics, or not, as shown by the chart at right. It is important to note that capacitor chaining only works for cruisers and force auxiliaries; all frigate logistics ships, of all races, are "solo" logistics ships.
Tech I Logistics Frigates
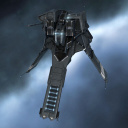
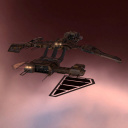
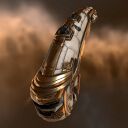
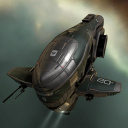
Each of the four empire factions has a Tech I frigate dedicated to logistics, and these frigates are good starting ships for Unistas looking to begin training into the logistics role. The bonuses for the two Tech I shield logistics frigates—the ![]() Bantam and the
Bantam and the ![]() Burst—are identical, as are the bonuses for the two Tech I armor logistics frigates, the
Burst—are identical, as are the bonuses for the two Tech I armor logistics frigates, the ![]() Inquisitor and the
Inquisitor and the ![]() Navitas. The most common fits for the four ships are also very similar. In general, the Burst and Inquisitor are slightly favored over the other two because of advantages in speed (Burst) and capacitor and tank (Inquisitor).
Navitas. The most common fits for the four ships are also very similar. In general, the Burst and Inquisitor are slightly favored over the other two because of advantages in speed (Burst) and capacitor and tank (Inquisitor).
Logistics frigates have the least repping power and shortest optimal range out of all the logistics ships, but they do have the advantage of being very inexpensive and difficult to hit (like any other Tech I frigate). The charts below illustrate statistics for Tech I shield and armor logistics frigates (using fits that can be shown by mousing over the corresponding table headers):
|
|
Caldari/Minmatar Frigate bonuses (per skill level): 10% bonus to Remote Shield Booster amount Role bonus: (applies regardless of skill level) 300% bonus to Remote Shield Booster falloff |
| Burst (mouseover for sample fit)Template:GuideFittings | |||
| Shield Boost Rate | Optimal Range | Falloff | eHP |
|---|---|---|---|
| 73 HP/sec | 4 km | 29 km | 4000 |
∗ Calculated using UniWiki minimum recommended skillplan, plus ![]() Shield Emission Systems III.
Shield Emission Systems III.
|
|
Amarr/Gallente Frigate bonuses (per skill level): 10% bonus to Remote Armor Repairer amount Role bonuses: 50% bonus to Remote Armor Repairer optimal range |
| Inquisitor (mouseover for sample fit)Template:GuideFittings | |||
| Armor Repair Rate | Optimal Range | Falloff | eHP |
|---|---|---|---|
| 73 HP/sec | 12 km | 19 km | 6800 |
∗ Calculated using UniWiki minimum recommended skillplan, plus ![]() Remote Armor Repair Systems III.
Remote Armor Repair Systems III.
As these tables show, a Tech I logistics frigate can repair the damage caused by one or two opponents at most, at short range. (These tables shows HP repaired, rather than eHP repaired. HP can be converted to eHP by dividing by the resist remainder; so, if a ![]() Burst was boosting the shields of a fleetmate
Burst was boosting the shields of a fleetmate ![]() Svipul that had 75% resists across the board, you would be providing [73 / 0.25] = 292 eHP/sec. That means that the repair rate numbers shown above are not as low as they may appear.)
Svipul that had 75% resists across the board, you would be providing [73 / 0.25] = 292 eHP/sec. That means that the repair rate numbers shown above are not as low as they may appear.)
Shield logistics frigates have very short optimal ranges, so they can almost never apply their full repair capacity. Pilots with poor capacitor skills, or low skills in the appropriate racial frigate skill or in ![]() Shield Emission Systems or
Shield Emission Systems or ![]() Remote Armor Repair Systems, will have trouble with capacitor even if they use all "Enduring" meta versions of all active modules. For a freshman Unista, as a result, Tech I logistics frigates demand higher skills than analogous Tech I EWAR or tackle frigates.
Remote Armor Repair Systems, will have trouble with capacitor even if they use all "Enduring" meta versions of all active modules. For a freshman Unista, as a result, Tech I logistics frigates demand higher skills than analogous Tech I EWAR or tackle frigates.
Still, there are a few roles that Tech I logistics frigates fill uniquely well. Logistics frigates are better than logistics cruisers in gangs of frigate and destroyer damage dealers, because they have the speed to keep up, particularly when fitted with microwarpdrives. And the ![]() Inquisitor (along with the Tech II
Inquisitor (along with the Tech II ![]() Deacon, described in the next section) is the preferred logistics hull for small-ship wormhole PvE. In general, however, logistics pilots fly cruisers much more often than frigates.
Deacon, described in the next section) is the preferred logistics hull for small-ship wormhole PvE. In general, however, logistics pilots fly cruisers much more often than frigates.
Tech II Logistics Frigates
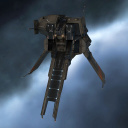
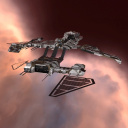
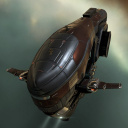
Tech II logistics frigates were designed to improve on their Tech I counterparts in a number of ways. They have considerably more CPU and powergrid, and one more fitting slot, relative to the Tech I frigates above. Tech II logistics frigates also have some unique bonuses relative to Tech I frigates. Flying a Tech II logistics frigate requires a dedicated skill, ![]() Logistics Frigates. Because this skill contributes significantly to bonuses in this ship class, pilots are encouraged to train it to IV or V before flying a Tech II logistics frigate. The charts below show data on Tech II shield and armor logistics frigates (and, specifically, the
Logistics Frigates. Because this skill contributes significantly to bonuses in this ship class, pilots are encouraged to train it to IV or V before flying a Tech II logistics frigate. The charts below show data on Tech II shield and armor logistics frigates (and, specifically, the ![]() Kirin and
Kirin and ![]() Deacon, fit in distinctly different ways) piloted by a high-skill logistics pilot*:
Deacon, fit in distinctly different ways) piloted by a high-skill logistics pilot*:
|
|
Caldari/Minmatar Frigate bonuses (per skill level): 10% bonus to Remote Shield Booster amount Logistics Frigates bonuses (per skill level): 5% reduction in Remote Shield Booster duration and activation cost Role bonus: 300% bonus to Remote Shield Booster falloff |
| Kirin (mouseover for sample fit)Template:GuideFittings | |||
| Shield Boost Rate | Optimal Range | Falloff | eHP |
|---|---|---|---|
| 123 HP/sec | 5 km | 31 km | 9700 |
∗ Calculated usng UniWiki advanced recommended skillplan +1 at each skill, plus Logistics Frigates IV, Shield Emission Systems V.

|
|
Amarr/Gallente Frigate bonuses (per skill level): 10% bonus to Remote Armor Repairer amount Logistics Frigates bonuses (per skill level): 5% reduction in Remote Armor Repairer duration and activation cost Role bonuses: 50% bonus to Remote Armor Repairer optimal range |
| Deacon (mouseover for sample fit)Template:GuideFittings | |||
| Armor Repair Rate | Optimal Range | Falloff | eHP |
|---|---|---|---|
| 136 HP/sec | 14 km | 24 km | 17600 |
∗ Calculated usng UniWiki advanced recommended skillplan +1 at each skill, plus Logistics Frigates IV, Remote Armor Repair Systems V.
The repair bonuses, repair range and base velocity of Tech II logistics frigates aren't dramatically better than those of their Tech I relatives. When Tech II logistics frigates were introduced, developers argued that the signature radius bonus of the ![]() Scalpel and
Scalpel and ![]() Thalia might be useful for "signature tanking", by which ships can evade damage. Signature tanking works poorly against opponents with light drones, though, and so this strategy has not been widely successful.
Thalia might be useful for "signature tanking", by which ships can evade damage. Signature tanking works poorly against opponents with light drones, though, and so this strategy has not been widely successful.
Increased CPU and powergrid do mean that Tech II logistics frigates can fit better repair modules than Tech I ships. Tech II modules increase the repair rate of Tech II logistics frigates, and deadspace repair modules increase it further still, as shown in the charts above. Nevertheless, even fit with rare modules, a Tech II logistics frigate repairs no faster than a Tech I logistics cruiser, with shorter range and higher cost. These frigates—and particularly the ![]() Deacon, the most popular of the four—are still used in small-ship gangs and in wormhole PvE. But Tech I logistics cruisers are used far more often for logistics than Tech I or Tech II frigates.
Deacon, the most popular of the four—are still used in small-ship gangs and in wormhole PvE. But Tech I logistics cruisers are used far more often for logistics than Tech I or Tech II frigates.
Tech I Logistics Cruisers
Tech I logistics cruisers are powerful platforms for remote repair. They receive better range bonuses than any other logistics ship (including Tech II cruisers), and considerable bonuses to repair amount. They are also inexpensive, and relatively easy to skill into. Unistas interested in flying logistics ships are advised to focus their initial training on this ship class. As shown in a chart at the beginning of this Ships section, logistics cruisers can either be "solo" or cap-chain ships; this Guide will deal with these subtypes separately.
"Solo" Logistics Cruisers
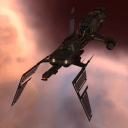
The ![]() Scythe and the
Scythe and the ![]() Exequror are the two Tech I logistics cruisers that are not bonused for remote capacitor transfer. New logistics pilots often begin flying one of these first, because they are simpler to pilot than the cap-chain cruisers. But the performance of all of the logistics cruisers is sensitive to pilot skill, and pilots with different skill levels sometimes have to fly even these simpler hulls differently. The charts below illustrate statistics for the Scythe and Exequror, fitted with somewhat different priorities, and piloted by Unistas with different skill levels:
Exequror are the two Tech I logistics cruisers that are not bonused for remote capacitor transfer. New logistics pilots often begin flying one of these first, because they are simpler to pilot than the cap-chain cruisers. But the performance of all of the logistics cruisers is sensitive to pilot skill, and pilots with different skill levels sometimes have to fly even these simpler hulls differently. The charts below illustrate statistics for the Scythe and Exequror, fitted with somewhat different priorities, and piloted by Unistas with different skill levels:
|
Minmatar Cruiser bonuses (per skill level): 12.5% bonus to Remote Shield Booster amount Role bonuses: 430% bonus to Remote Shield Booster optimal range and falloff |
| Scythe (mouseover for sample fit)Template:GuideFittings | ||||||
| Pilot Skill Level | Shield Boost Rate (3 Boosters, plus Drones) |
Optimal Range |
Falloff | Capacitor Duration, 3 Boosters Active (other mods off) |
Capacitor Duration, 2 Boosters Active (other mods on) |
eHP |
|---|---|---|---|---|---|---|
| Low* | 155 HP/sec | 27 km | 40 km | 1m 14sec | 2m 54sec | 30,500 |
| Intermediate** | 219 HP/sec | 27 km | 40 km | 2m 47sec | stable (48%) | 31,900 |
| High*** | 235 HP/sec | 27 km | 40 km | stable (50%) | stable (62%) | 32,900 |
∗ Low Skill: UniWiki minimum recommended skillplan, plus ![]() Minmatar Cruiser III,
Minmatar Cruiser III, ![]() Shield Emission Systems III. Logistics drones cannot be used at this skill level, and an all-Tech-I fit is still 12 MW short on powergrid.
Shield Emission Systems III. Logistics drones cannot be used at this skill level, and an all-Tech-I fit is still 12 MW short on powergrid.
∗∗ Intermediate Skill: UniWiki advanced recommended skillplan, plus ![]() Minmatar Cruiser IV,
Minmatar Cruiser IV, ![]() Shield Emission Systems IV.
Shield Emission Systems IV.
∗∗∗ High Skill: UniWiki advanced recommended skillplan +1 at each skill, plus ![]() Minmatar Cruiser V,
Minmatar Cruiser V, ![]() Shield Emission Systems V.
Shield Emission Systems V.
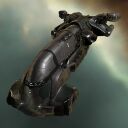
|
Gallente Cruiser bonuses (per skill level): 12.5% bonus to Remote Armor Repairer amount Role bonuses: 430% bonus to Remote Armor Repairer optimal range and falloff |
| Exequror (mouseover for sample fit)Template:GuideFittings | |||||
| Pilot Skill Level | Armor Repair Rate (3 Repairers, plus Drones) |
Optimal Range |
Falloff | Capacitor Duration, all modules active | eHP |
|---|---|---|---|---|---|
| Low* | 154 HP/sec | 51 km | 15 km | 6m 56sec | 24,400 |
| Intermediate** | 223 HP/sec | 51 km | 15 km | stable (60%) | 25,700 |
| High*** | 240 HP/sec | 51 km | 15 km | stable (79%) | 26,200 |
∗ Low Skill: UniWiki minimum recommended skillplan, plus ![]() Gallente Cruiser III,
Gallente Cruiser III, ![]() Remote Armor Repair Systems III. Logistics drones cannot be used at this skill level.
Remote Armor Repair Systems III. Logistics drones cannot be used at this skill level.
∗∗ Intermediate Skill: UniWiki advanced recommended skillplan, plus ![]() Gallente Cruiser IV,
Gallente Cruiser IV, ![]() Remote Armor Repair Systems IV.
Remote Armor Repair Systems IV.
∗∗∗ High Skill: UniWiki advanced recommended skillplan +1 at each skill, plus ![]() Gallente Cruiser V,
Gallente Cruiser V, ![]() Remote Armor Repair Systems V.
Remote Armor Repair Systems V.
The Scythe and Exequror are very similar, with roughly the same ship bonuses and repair capacity. As is true for all logistics ships, the shield-boosting Scythe has a shorter optimal range and a longer falloff, whereas the armor-repairing Exequror has a much longer optimal range, but shorter falloff. The role bonuses that logistics cruisers receive to repairer range makes both of these cruisers excellent at repairing from a distance, and the bonuses do not depend on pilot skill level. Repair rate, on the other hand, is very sensitive to pilot skill. Unista logistics pilots are encouraged to target the "Intermediate" skill level above before flying Tech I logistics cruisers.
Tech I logistics cruisers offer more flexibility in fitting than logistics frigates. As a result, pilots with different skill levels may find that they need to fit their ships differently. (You should expect to modify any campus re-ship logistics cruiser you purchase on corp contracts; the pre-made fit you buy may not be appropriate for your skill level.) The fits and data in the charts above illustrate some of the relationships between tank, capacitor, repair capability and pilot skill for solo logistics ships. The Scythe fit sacrifices some capacitor for tank, by filling its mid slots with shield modules. This results in a ship that has greater eHP, but is chronically short on capacitor, especially for low-skill pilots. A low-skill Unista flying this Scythe might need to constantly cycle modules on and off, choosing what to activate and what not to activate at any given moment, depending on circumstances. In this way, a Tech I logistics cruiser can be more challenging to fly than a damage-dealing ship.
The Exequror fit appears to address this problem, by using both a capacitor booster and a capacitor battery in its mid slots. (Capacitor boosters provide more cap, in general, but capacitor batteries offer inherent resistance to enemy neutralizers and Nosferatus.) Sure enough, the Exequror fit shown above is cap stable even with all modules active, and would probably be easier to fly than the Scythe. But this Exequror has a different problem: it has significantly less tank than the Scythe fit. This is particularly bad for logistics ships, because they are typically the initial primary target of enemy fleets. This comparison illustrates the uncomfortable choice that low-skill logistics pilots often have to make between capacitor and tank, and that choice affects how easy it is to fly the ship. Higher-skill logistics pilots, on the other hand, often get the best of both worlds. They have the luxury of fitting plenty of tank, and still having enough capacitor to activate all modules simultaneously.
Unista logistics pilots are encouraged to use out-of-game fitting programs, like Pyfa, to explore the logistics fits that work best for them.
Cap-Chain Logistics Cruisers
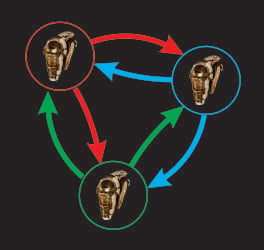
The ![]() Osprey and the
Osprey and the ![]() Augoror are the two Tech I logistics cruisers that are bonused for remote capacitor transfer. As described above in the modules section, these bonuses allow the Osprey and Augoror to activate their remote capacitor transfer modules, transfer more capacitor than they spend, and thus effectively create capacitor from nothing. In order for a logistics pilot to benefit from this, the pilot must simultaneously give capacitor to and receive capacitor from one or more logistics partners. In principle, the minimum number of partnered logistics pilots is two, but cap-chain logistics is less vulnerable to enemy interference when larger groups of pilots are matched up. So, Osprey and Augoror pilots are typically organized into a capacitor chain (illustrated at right), in which each pilot gives and receives capacitor with two neighboring partners in the chain. (More information on how to organize cap chains is given in the tactics section.)
Augoror are the two Tech I logistics cruisers that are bonused for remote capacitor transfer. As described above in the modules section, these bonuses allow the Osprey and Augoror to activate their remote capacitor transfer modules, transfer more capacitor than they spend, and thus effectively create capacitor from nothing. In order for a logistics pilot to benefit from this, the pilot must simultaneously give capacitor to and receive capacitor from one or more logistics partners. In principle, the minimum number of partnered logistics pilots is two, but cap-chain logistics is less vulnerable to enemy interference when larger groups of pilots are matched up. So, Osprey and Augoror pilots are typically organized into a capacitor chain (illustrated at right), in which each pilot gives and receives capacitor with two neighboring partners in the chain. (More information on how to organize cap chains is given in the tactics section.)
Cap chaining solves the capacitor challenges discussed above for solo logistics cruisers. The charts below show bonuses for both the Osprey and Augoror, and then illustrates the advantage of cap-chained cruisers by comparing an intermediate-skill* fit for the Augoror with the solo ![]() Exequror:
Exequror:
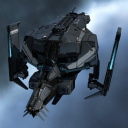
|
Caldari Cruiser bonuses (per skill level): 12.5% bonus to Remote Shield Booster amount Role bonuses: 1,000% bonus to Remote Capacitor Transmitter range |
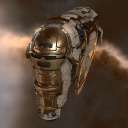
|
Amarr Cruiser bonuses (per skill level): 12.5% bonus to Remote Armor Repairer amount Role bonuses: 1,000% bonus to Remote Capacitor Transmitter range |
| Ship | Capacitor Consumption | Capacitor Peak Recharge | Capacitor Duration (all modules active) | Remote Capacitor Transfer Range |
|---|---|---|---|---|
| Augoror (mouseover for sample fit)Template:GuideFittings | -97.8 GJ/sec | +148.4 GJ/sec** | stable (100%) | 66 km |
| Exequror (mouseover for sample fit)Template:GuideFittings | -55.7 GJ/sec | +60.5 GJ/sec | stable (55%) |
∗ Calculated using UniWiki advanced recommended skillplan, plus ![]() Gallente Cruiser V/Amarr Cruiser V,
Gallente Cruiser V/Amarr Cruiser V, ![]() Shield Emission Systems IV.
Shield Emission Systems IV.
∗∗ Assuming Augoror is part of a cap chain, partnered with two other Augorors.
The Augoror fit used to generate the chart above has mostly active modules that consume capacitor, including active armor resist modules. So the Augoror consumes a lot of capacitor. Nevertheless, when cap-chained, the Augoror has more than enough capacitor to run all these active modules simultaneously. The Augoror can even periodically break the chain in order to transfer capacitor to damage-dealing fleetmates that need the help. Pilots of all skill levels receive this benefit, because the role bonuses to remote capacitor transfer do not depend on skill level. The Osprey has the same advantages as the Augoror; it can fit more active resist modules and still retain a considerable capacitor advantage over the ![]() Scythe.
Scythe.
But in order for cap-chain logistics cruisers to be cap-stable, they must be partnered, and this represents a vulnerability for these ships. Enemy fleets can break the cap chain, either by isolating chain members using electronic warfare, or by splitting them up using command destroyers and micro jump field generators. Cap-chain logistics ships are often specially fit to counter some of these strategies. For example, the Augoror above has sensor boosters to counter EWAR, but one of these can be replaced with a warp scrambler to counter micro jump fields. In any case, cap-chain logistics pilots are dependent on their fleetmates, and keeping cap chains intact under enemy fire can make them challenging to fly.
Unistas interested in flying cap-chain logistics ships are advised to attend Logistics 102 before flying an Osprey or Augoror in an E-UNI fleet. This class covers how to fly these cruisers in fleets, and how to respond to changes in circumstances.
Tech II Logistics Cruisers
Tech II logistics cruisers are the most powerful sub-capital repair ships in EVE. Tech II logistics cruisers have increased tank, CPU and powergrid, and better bonuses compared to Tech I logistics cruisers. Flying these ships requires training in a dedicated skill, ![]() Logistics Cruisers. Unistas are encouraged to train this skill to IV before attempting to fly Tech II logistics cruisers. When flown by pilots with sufficient skills, Tech II logistics cruisers have considerably more repair capacity than their Tech I relatives. They also have even more fitting flexibility than Tech I cruisers, and are typically fit specifically to their role. Unique among logistics ships, Tech II cruisers can fit over-sized, large remote repair and remote capacitor transfer modules instead of medium ones, if the fit makes compromises in other areas. As a result of this diversity, specific comparisons of Tech II logistics cruiser fits are beyond the scope of this Guide.
Logistics Cruisers. Unistas are encouraged to train this skill to IV before attempting to fly Tech II logistics cruisers. When flown by pilots with sufficient skills, Tech II logistics cruisers have considerably more repair capacity than their Tech I relatives. They also have even more fitting flexibility than Tech I cruisers, and are typically fit specifically to their role. Unique among logistics ships, Tech II cruisers can fit over-sized, large remote repair and remote capacitor transfer modules instead of medium ones, if the fit makes compromises in other areas. As a result of this diversity, specific comparisons of Tech II logistics cruiser fits are beyond the scope of this Guide.
Tech II logistics cruisers follow the same racial specializations as their Tech I relatives. The ![]() Scimitar and
Scimitar and ![]() Oneiros are "solo" logistics ships, and the
Oneiros are "solo" logistics ships, and the ![]() Basilisk and
Basilisk and ![]() Guardian are cap-chain specialists. This is illustrated below in the ship bonuses for these hulls.
Guardian are cap-chain specialists. This is illustrated below in the ship bonuses for these hulls.
Solo Tech II Logistics Cruisers

|
Minmatar Cruiser bonuses (per skill level): 60% bonus to Remote Shield Booster optimal range and falloff Logistics Cruisers bonuses (per skill level): 15% reduction in Remote Shield Booster activation cost Role bonus: 50% reduction in Remote Shield Booster CPU requirement |

|
Gallente Cruiser bonuses (per skill level): 60% bonus to Remote Armor Repairer optimal range and falloff Logistics Cruisers bonuses (per skill level): 15% reduction in Remote Armor Repairer activation cost Role bonus: 65% reduction in Remote Armor Repairer powergrid requirement |
The solo Tech II logistics cruisers are like the solo Tech I cruisers, in that they are intended to operate independently, and often have to make tradeoffs between capacitor and tank in their fits. The ![]() Scimitar and
Scimitar and ![]() Oneiros are strongest in smaller gangs of Tech II and Tech III damage dealers, where there is only room for one or two logistics pilots.
Oneiros are strongest in smaller gangs of Tech II and Tech III damage dealers, where there is only room for one or two logistics pilots.
Cap-Chain Tech II Logistics Cruisers
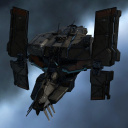
|
Caldari Cruiser bonuses (per skill level): 60% bonus to Remote Shield Booster optimal range and falloff Logistics Cruisers bonuses (per skill level): 15% reduction in Remote Shield Booster activation cost Role bonuses: 50% reduction in Remote Shield Booster CPU requirement |
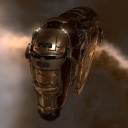
|
Amarr Cruiser bonuses (per skill level): 60% bonus to Remote Armor Repairer optimal range and falloff Logistics Cruisers bonuses (per skill level): 15% reduction in Remote Armor Repairer activation cost Role bonuses: 65% reduction in Remote Armor Repairer powergrid requirement |
The cap-chain Tech II logistics cruisers are like their cap-chain Tech I relatives, in that they must work in groups, and they have enough capacitor to sustain a fit full of high-capacitor-demand modules. These cruisers have the broadest array of options in terms of modules they can fit. Tech II logistics pilots can fit faction, deadspace, or large-sized repair modules to the ![]() Basilisk and
Basilisk and ![]() Guardian comfortably. These ships are strongest in large Tech II/III fleets, in high-skill PvE, and in medium-sized wormhole gangs where the group is expected to be able to handle incoming DPS.
Guardian comfortably. These ships are strongest in large Tech II/III fleets, in high-skill PvE, and in medium-sized wormhole gangs where the group is expected to be able to handle incoming DPS.
Bonused and Unbonused Battleship Logistics
In contrast to the variety of bonused logistics hulls available in frigate and cruiser sizes, there is only one battleship bonused for logistics: the ![]() Nestor. The bonuses of this battleship are not that great, however, and the hull can be expensive. The Nestor is used very rarely.
Nestor. The bonuses of this battleship are not that great, however, and the hull can be expensive. The Nestor is used very rarely.
Remote repair modules are sometimes fitted to unbonused battleship hulls as part of "spider-tanking" fleet doctrines. The ![]() Dominix, in particular, has plenty of high-slot room for remote repairers, because its bonuses to drones don't match up well with high-slot weapons modules.
Dominix, in particular, has plenty of high-slot room for remote repairers, because its bonuses to drones don't match up well with high-slot weapons modules.
Capital Logistics: Force Auxiliaries
Introduced in the Citadel expansion of Apr 2016, Force Auxiliaries are a new class of capital ship dedicated to logistics. CCP created force auxiliaries by dividing the two roles previously fulfilled by Carriers—logistics and fighter support—into two separate capital ship classes. Force auxiliaries are now the only capital ship class to receive bonuses to remote repair. They are also the only capitals able to use triage modules, which enhance the defensive and remote repair capabilities of the ship for five minutes, but also make the ship incapable of receiving remote assistance. Force auxiliaries and triage modules are discussed in more detail in Logistics 103, and in the UniWiki ship class page on Capital Ships.
Recommended Logistics Pilot Skills
As mentioned above, logistics ships are more skill-intensive than many other ship classes in EVE. Flying these ships requires training some skills that are broadly useful across many ship classes, but also some other skills that are uniquely useful to logistics pilots. But there is a logistics hull in EVE to match almost every pilot skill level, and Unistas interested in flying logistics are encouraged to start with Tech I logistics frigates and work their way up.
The chart below makes some skill recommendations for pilots interested in flying different logistics hulls, and explanations of why some specific skills are so critical:
| Skill | Recommended skill level for: | Why is this skill important? | ||
| Tech I Logistics Frigates |
Tech I Logistics Cruisers |
Tech II Logistics | ||
| Core pilot skills: | ||||
| Capacitor Management | Increases total capacitor.
Remote repair modules consume a lot of capacitor. Having this skill to IV or V helps logistics hulls meet this cap demand. | |||
| Capacitor Systems Operation | Increases capacitor regeneration rate.
Similar to Capacitor Management above, having this at IV or V helps meet the cap demand of logistics modules. The skill benefit also stacks with the benefit from cap rechargers. | |||
| CPU Management | Increases ship CPU.
Allows "Compact" meta Tech I modules to be replaced with Tech II modules. | |||
| Evasive Maneuvering | Improves ship agility.
Similar to Spaceship Command, helps logistics ships align to warp and maneuver in combat. | |||
| Long Range Targeting | Increases targeting range.
Somewhat helpful with keeping fleetmates locked, though lock range of logistics ships is typically much longer than repair range. Long Range Targeting I is required for Tech I sensor boosters; Long Range Targeting IV is required for Tech II sensor boosters, and for Logistics Frigates. Long Range Targeting V is required for Logistics Cruisers. | |||
| Mechanics | Increases ship structure HP.
Mechanics III is required for Remote Armor Repair Systems, Jury Rigging. | |||
| Navigation | Increases ship velocity.
Important for keeping up with repair targets, which are often faster than logistics ships. Navigation I, II or III is required for other propulsion skills (Evasive Maneuvering, Warp Drive Operation, Afterburner, High Speed Maneuvering, Fuel Conservation). | |||
| Power Grid Management | Increases ship powergrid.
Similar to CPU Management above; permits Tech II modules to be fit in place of meta Tech I versions. | |||
| Signature Analysis | Increases lock speed.
Helps with switching repair targets. Signature Analysis V is required for Logistics Cruisers and Logistics Frigates. | |||
| Spaceship Command | Improves ship agility.
Helpful for aligning to warp out of combat, which logistics ships sometimes have to do in order to reposition themselves. Spaceship Command III is required for Logistics Cruisers and Logistics Frigates. | |||
| Warp Drive Operation | Reduces capacitor cost of entering warp. | |||
| Valuable to all logistics pilots: | ||||
| Advanced Target Management | Increases maximum number of locked targets.
Required to increase number of targets beyond 6 allowed by Target Management. | |||
| Afterburner | Reduces cycle time and capacitor cost of afterburners.
Important for cruiser logistics, which often have afterburners fitted. Skill bonus not important for microwarpdrive-fit frigates, but Afterburner III is required for High Speed Maneuvering (which is required for microwarpdrives). Afterburner IV is required for Tech II afterburners. | |||
| Capacitor Emission Systems | Required for remote capacitor transfer modules.
Capacitor Emission Systems I is required for Tech I remote capacitor transfer modules; Capacitor Emission Systems IV is required for Tech II transfer modules. The skill does not offer any advantages to the operation of these modules, so feel free to train to the minimum level. However, if you plan to use neutralizers or Nosferatus on other ships, the skill does affect those modules. | |||
| Drones |
Increases number of controllable drones.
Drones V is required for maintenance bots. | |||
| Energy Grid Upgrades | Reduces CPU need of capacitor and powergrid upgrades.
Different levels of Energy Grid Upgrades are required for all capacitor support modules, including cap batteries, cap rechargers, and capacitor power relays, as well as powergrid modules such as reactor control units. Higher skill levels in this skill enable Tech I modules to be replaced with Tech II variants. | |||
| Fuel Conservation | Reduces capacitor cost of afterburners. | |||
| High Speed Maneuvering | Reduces capacitor cost of microwarpdrives.
High Speed Maneuvering I is required for Tech I microwarpdrives, and High Speed Maneuvering III is required for Tech II microwarpdrives. | |||
| Hull Upgrades | Increases armor HP.
Different levels of Hull Upgrades are required for armor plates and energized armor membranes. Hull Upgrades IV is required for the Damage Control II module, which is fit to nearly all logistics hulls. | |||
| Jury Rigging | Prerequisite to other rigging skills.
Jury Rigging offers no benefits other than enabling training of other rigging skills. Do not train past Jury Rigging III. (Unless you do rig manufacturing.) | |||
| Racial Cruiser | Tied to cruiser ship bonuses.
Critical for flying Tech I logistics cruisers. The effect of this skill on remote repair amount and capacitor cost is huge. Racial Cruiser V is required for any Tech II logistics cruiser. | |||
| Racial Frigate | Tied to frigate ship bonuses.
Critical for flying Tech I logistics frigates. The effect of this skill on remote repair amount and capacitor cost is pretty dramatic. Racial Frigate V is required for any Tech II logistics frigate. | |||
| Repair Drone Operation | Increases logistics drone repair rate.
Repair Drone Operation I is required for Tech I maintenance bots; Repair Drone Operation V is required for Tech II bots. | |||
| Target Management | Increases maximum number of locked targets.
Useful for quickly switching between multiple repair targets. | |||
| Thermodynamics | Reduces heat damage from overheating.
Thermodynamics I is required to overheat modules. Overheating is valuable for logistics pilots; one or two overheated cycles of a resist or repair module may mean the difference between survival and death for you or a repair target. | |||
| Important for shield logistics: | ||||
| Shield Emission Systems | Reduces capacitor cost of remote shield boosters.
Shield Emission Systems I is required for Tech I remote shield boosters, including ancillary remote boosters. Shield Emission Systems III is required for both Tech I shield maintenance bots and small Tech II remote shield boosters; Shield Emission Systems IV is required for medium and large Tech II remote boosters, and Tech II shield maintenance bots. Remote shield boosters consume a lot of capacitor, and so high levels in this skill help meet the cap demand of shield logistics ships. | |||
| Shield Management | Increases shield HP. | |||
| Shield Operation | Increases shield recharge rate. | |||
| Shield Rigging | Reduces signature radius penalty of shield rigs. | |||
| Shield Upgrades | Reduces powergrid need of shield extenders.
Shield Upgrades I is required for Tech I shield extenders and shield resistance amplifiers. Shield Upgrades IV is required for Tech II versions of these same modules. | |||
| Important for armor logistics: | ||||
| Armor Rigging | Reduces velocity penalty of armor rigs. | |||
| Remote Armor Repair Systems | Reduces capacitor cost of remote armor repairers.
Remote Armor Repair Systems I is required for small Tech I remote armor repairers, including small ancillary remote repairers, and Remote Armor Repair Systems II is required for medium-sized versions. Remote Armor Repair Systems III is required for large Tech I remote armor repairers, small Tech II repairers, and Tech I armor maintenance bots. Remote Armor Repair Systems IV is required for Tech II armor bots. Remote armor repairers consume a lot of capacitor, and so high levels in this skill help meet the cap demand of armor logistics ships. | |||
| Advanced skills: | ||||
| Logistics Cruisers | Tied to Tech II logistics cruiser bonuses.
Important for flying Tech II logistics cruisers. This skill reduces remote repair module capacitor cost, and for cap-chain cruisers, remote capacitor transfer cost. | |||
| Logistics Frigates | Tied to Tech II logistics frigate bonuses.
Important for flying Tech II logistics frigates. This skill contributes both to repair capacity and either HP or signature radius. | |||
| Sensor Linking | Reduces capacitor cost of remote sensor boosters.
Sensor Linking I is required for Tech I remote sensor boosters and remote tracking computers. The train time to level III is short, and the cap benefit is okay. Might as well. | |||
Bonuses from Implants and Boosts
Implants
There are three sets of implants that directly affect the capacitor efficiency of logistics modules:
| Slot | Implant | Bonus |
|---|---|---|
| 7 | Inherent Implants 'Noble' Remote Armor Repair Systems series (RA-70x) | 1% to 6% reduced capacitor need for remote armor repair modules. |
| 8 | Zainou ‘Gnome’ Shield Emission Systems series (SE-80x) | 1% to 6% reduced capacitor need for remote shield boosting modules. |
| 9 | Zainou ‘Gypsy’ Sensor Linking series (SL-90x) | 1% to 6% reduced capacitor need for sensor linking modules. |
Command Burst Boosts
- See also: Command Bursts
Remote shield boosting and remote armor repair are directly improved by a nearby fleet member utilizing Command Burst modules dedicated to armor or shields. These include:
The magnitude of the effects of these modules depends on booster skills, on the ship the link modules are fit to, and on whether the module is Tech I or Tech II.
Logistics organization and tactics
Logistics pilots have the greatest impact when they work well within their fleet. As a result, a good understanding of the fleet's organization, mechanics, and the fleet interface is essential for logistics pilots. We recommend prospective logistics pilots to be familiar with The Rookie's Guide To Fleet Ops, as well as the UniWiki's guides on the Fleet User Interface and Fleet Watch Lists. You may also be interested in attending Fleets 101 and participating in a few fleets as a damage dealer or EWAR pilot. This way, you can get used to fleet operations before joining a fleet with multiple logistics partners.
General Guidelines
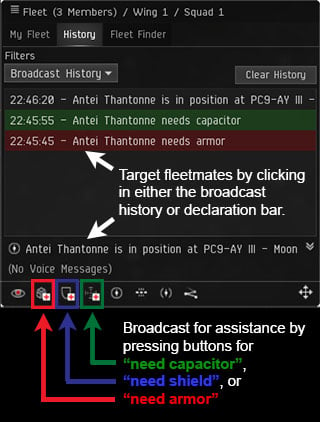
- Prepare and use your fleet window.
If your gang is small enough, your fleetmates may be able to request repairs in comms. ("Hey, Bob! John needs reps!") But in even a medium-sized fleet, comms are intended for communication between FC(s) and the rest of the fleet. Under these circumstances, fleetmates "broadcast for reps" via the Fleet window. You can see their requests under the window's History tab. As described in the Fleet User Interface guide, use the Broadcast Settings window to make the "Need Armor", "Need Shield", and "Need Capacitor" broadcasts show up with distinct colour backgrounds. When one of these broadcasts is listed in the Fleet History window, you can Ctl-click the broadcast to lock that pilot and immediately provide repairs or cap. Once your fleetmate no longer needs assistance -maybe because the enemy fleet has shifted targets— they will broadcast "In Position At". You will need to watch the Fleet window for this signal, and be prepared to switch the focus of your remote support. This applies when other fleetmates need repairs.
When you are the one needing repairs because you are the enemy's primary target, you will be the one broadcasting.
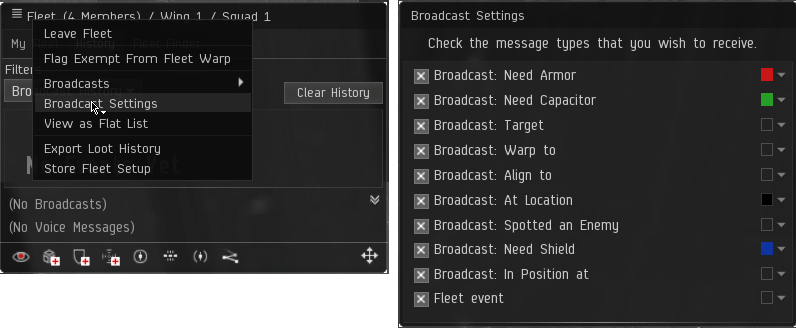
From the Fleet window, open the Broadcast Settings sub-window to adjust the appearance of your fleetmates' broadcasts, and to make them stand out against other fleet events. Use the dropdown boxes to the right of armour, shield and capacitor broadcasts to set their colours to something other than grey.
- Fill your watchlist.
The Watchlist is a window that allows you to monitor the shield, armour and hull HP of fleetmates that are on grid with you, without having to lock them. In addition, clicking on names in the Watchlist window has the same effect as selecting them in space or in the Overview window, which makes interacting with these particular pilots very easy. The Watchlist is an extremely important tool for logistics pilots, and will allow you to identify fleetmates that need repairs even before they identify themselves.
Fleetmates can be added to your Watchlist by right-clicking on the pilot name and selecting "Add to Watchlist". Unfortunately, the Watchlist can only hold 15 pilots. If you are flying logistics in a small gang, this may be enough space to list your entire fleet. But if you are in a larger fleet, you will need to choose who to include (or you will need to follow the FC's or logi captain's instructions on who to add). In general, you will be asked to include fleet, wing, and squad commanders on your watchlist first, because they are critical to passing fleet boosts to the fleet. You will then probably add your fellow logistics pilots, because they are so often the primary targets of the opposing fleet. Finish out your list with any critical damage dealers or other pilots you expect to need early repairs.
- Know your optimal and falloff ranges, and what distance you and your fellow logistics pilots plan to repair from.
As described above, different logistics hulls and modules have different characteristic repair ranges. Know how far from your damage-dealing fleetmates you plan to be.
- Warp into the engagement at the appropriate range, opposite the enemy.
The FC will likely warp the fleet's damage dealers at their weapons' optimal range. You will need to be behind those damage dealers, so ignore the FC's fleet warp instructions to the damage-dealing group. (You might do this by cancelling the fleet warp once it starts, or the FC may have organized wings and squads so that the logistics group warps separately.) You will warp at your own range to your fleetmates, with them in between you and the enemy. If you are flying armour logistics, this will probably be at your repair modules' optimal range. If you are flying shield logistics, your range will be dictated by the FC, but (optimal + half-falloff) is a good rule of thumb.
- If there are multiple logistics pilots, orbit the nominated logi anchor.
Before the fleet gets underway, the FC should have named a logistics "anchor"—a pilot that logistics ships should orbit at close distance. In this way, only the anchor pilot is responsible for positioning the logistics group, and all the other pilots simply follow that anchor. (The logi anchor may or may not be the same as the logi captain.) The situation can get more complicated if your opponents field Command Destroyers, which use Micro Jump Fields to separate clustered logistics ships from their fleetmates; if the FC orders you to spread out, that might be why. But at least initially, stick to your anchor.
- If you fall behind the rest of the fleet, out of repair distance, warp out and back in.
Logistics ships are sometimes slower than the rest of the fleet, especially when they are fitted with afterburners instead of microwarpdrives. If you fall behind, try to warp to a tactical bookmark behind the logistics group, and then warp back to a damage dealer at closer range than you need. (This ensures that your fleetmate won't just race away from you again.)
- Watch your capacitor.
Capacitor regenerates fastest when it is at 25% of maximum, but very slowly at 0%. Don't allow your capacitor to drop to 0%. You may need to deactivate one repair module for a while, deactivate an active resist module that you realize you don't need vs. the opponents' damage type, or be more conservative with your propulsion module. If you cap yourself out, you won't be able to activate anything, or even warp out—you'll be a sitting duck. Don't let that happen!
- Stagger your repair modules' activation, if you can.
Repair modules can have pretty long activation times. If you activate them all at once, it might be 8 seconds before you can re-target them to a different fleetmate who calls for emergency reps. By staggering your repair modules, you can gradually shift the target of your repairs. Staggering also evens out the load on your capacitor.
- If you are the target of a specialized ship or tactic, communicate that with the logi leader or FC.
If you find that a specific enemy ship is taking you out of the fight with neuts or EWAR, tell the FC (preferably in fleet/logi chat); the fleet may be able to switch targets to take out the threat, or your FC may have other instructions for you.
- Don't forget to launch and use your drones!
Cap-Chain Logistics
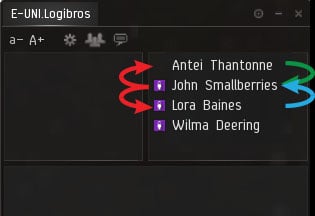
As explained in the section on Cap-Chain Logistics Cruisers, cap-chain ships have the advantage of abundant capacitor and they seldom have to worry about having to cycle modules on and off. But cap-chain logistics pilots do have an extra layer of complexity to deal with: maintaining the capacitor chain. There are a few ways to do this, but the most common method in EVE University fleets is to organize cap-transfer partners in a dedicated logistics chat channel set up by the logi captain. Once you are in this channel, the names above and below yours in the Member List are your transfer partners (assuming a 1-up, 1-down transfer scheme—your FC could choose a different one). Members at the very top and very bottom of the member list are also partnered. The advantage of using a chat channel is that members can drop out of the channel when they are destroyed or otherwise incapacitated, and the remaining, neighboring pilots can adjust by obtaining a new cap-transfer partner from the member list.
Logistics and Crimewatch
Assuming their safeties are set to the appropriate level, logistics pilots inherit the timers of the pilots they repair, and may receive new ones. If the repaired ship is engaged in combat, the logistics pilot will almost certainly receive PvP, Weapons, and Limited Engagement timers. In addition, if repair occurs in low- or high-security space, and the logistics pilot is not legally allowed to engage all of the repaired ship's combat targets--say, the logistics pilot is not at war with the other party in the engagement--the logistics pilot will become criminal, even if neither of the engaged pilots are. As a result, logistics pilots occasionally have to think about how repair affects other, non-aligned pilots in system. Your logistics ship may end up attackable by parties in system that you did not expect including CONCORD.
On the other hand, repairing a ship that is not engaged in combat does not tag you in any important way. (You could still inherit a limited engagement timer, but this does not bind your actions.) So if a pilot has a corpmate that undocked from a station and is taking fire, but the corpmate has not fired a shot, the pilot may undock in their logistics ship and repair their corpmate without significant consequences; they could immediately dock afterwards to avoid getting hit by the opponent. But this is only true if the corpmate has not engaged the opponent. If they have, the logistics pilot would inherit a PvP timer that prohibits them from docking for 1 minute.
