More actions
→Combat Sites: added stub headings for the harder sites |
Change background color to design-token. |
||
| (8 intermediate revisions by 4 users not shown) | |||
| Line 1: | Line 1: | ||
{{ | {{Past content}} | ||
{{NPCTableCSS}} | {{NPCTableCSS}} | ||
[[File:Crimson Harvest 2021 Banner.png|thumb|right|300px|News article banner image]] | [[File:Crimson Harvest 2021 Banner.png|thumb|right|300px|News article banner image]] | ||
[[Crimson Harvest]] is a recurring event involving the [[Blood Raiders]] pirate faction and the [[Tetrimon]] mercenaries. In 2021, the event ran from October 28th through to November 9th, downtime to downtime, and was announced as part of EVE's Halloween Horrors. The event merged the traditional Crimson Harvest event site and rewards with a higher loot drop from PvP and structure losses (90% instead of 50%) and special wreck icons from the Trick or Treat event from the year before. | [[Crimson Harvest]] is a recurring event involving the [[Blood Raiders]] pirate faction and the [[Tetrimon]] mercenaries. In 2021, the event ran from October 28th through to November 9th, downtime to downtime, and was announced as part of EVE's Halloween Horrors. The event merged the traditional Crimson Harvest event site and rewards with a higher loot drop from PvP and structure losses (90% instead of 50%) and special wreck icons from the Trick or Treat event from the year before. | ||
== | == Login campaign == | ||
[[ | The campaign rewards [[SKIN]]s and 60.000 [[Skill Points]] for {{Clonestate|alpha|Alpha clones}} with 175.000 additional Skill Points and [[Medical boosters|Boosters]] for {{Clonestate|omega|Omega clones}}. | ||
{| class="wikitable" | |||
|- style="background-color: var(--background-color-warning-subtle);" | |||
! style="text-align:center" | Day !! For Alpha Accounts !! Additional for Omega | |||
|- | |||
| style="text-align:center" | 1 || [[File:Icon 10k Skill Points.png|link=|32px]] 10,000 Skill Points {{color|#5ABF63|(Tier 2 Gift)}} || [[File:Icon 25k Skill Points.png|link=|32px]] 25,000 Skill Points {{color|#5188C2|(Tier 3 Gift)}} | |||
{| class="wikitable" | |||
|- style="background-color: | |||
! | |||
|- | |- | ||
| | | style="text-align:center" | 2 || [[File:Deathglow Remnant SKIN.png|link=|32px]] [[Incursus]] Deathglow Remnant SKIN (Tier 1 Gift) || [[File:Icon cerebral accelerator.png|link=|32px]] Harvest Anti-Disruptor Booster I (Tier 1 Gift)<br>''+8% Weapon Disruptor Resistance. Base Duration: 2 Hours'' | ||
|- | |- | ||
| | | style="text-align:center" | 3 || [[File:Deathglow Remnant SKIN.png|link=|32px]] [[Tormentor]] Deathglow Remnant SKIN {{color|#5ABF63|(Tier 2 Gift)}} || [[File:Deathglow Remnant SKIN.png|link=|32px]] [[Megathron]] Deathglow Remnant SKIN {{color|#5188C2|(Tier 3 Gift)}} | ||
|- | |- | ||
| | | style="text-align:center" | 4 || [[File:Icon halloween horrors crate.png|link=|32px]] Halloween Horrors Fireworks and Launcher Crate (Tier 1 Gift) || [[File:Icon cerebral accelerator.png|link=|32px]] Harvest Nosferatu Booster I (Tier 1 Gift)<br>''-4% Nosferatu Module Cycle Time Bonus. Base Duration: 2 Hours'' | ||
|- | |- | ||
| | | style="text-align:center" | 5 || [[File:Deathglow Remnant SKIN.png|link=|32px]] [[Caracal]] Deathglow Remnant SKIN {{color|#5188C2|(Tier 3 Gift)}} || [[File:Icon 50k Skill Points.png|link=|32px]] 50,000 Skill Points {{color|#8063AA|(Tier 4 Gift)}} | ||
|- | |- | ||
| | | style="text-align:center" | 6 || [[File:Deathglow Remnant SKIN.png|link=|32px]] [[Stabber]] Deathglow Remnant SKIN {{color|#5188C2|(Tier 3 Gift)}} || [[File:Icon cerebral accelerator.png|link=|32px]] Harvest Webifier Booster I (Tier 1 Gift)<br>''+2km Stasis Webifier Range Bonus. Base Duration: 2 Hours'' | ||
|- | |- | ||
| | | style="text-align:center" | 7 || [[File:Deathglow Remnant SKIN.png|link=|32px]] [[Vexor]] Deathglow Remnant SKIN {{color|#5188C2|(Tier 3 Gift)}} || [[File:Deathglow Remnant SKIN.png|link=|32px]] [[Armageddon]] Deathglow Remnant SKIN {{color|#5188C2|(Tier 3 Gift)}} | ||
|- | |- | ||
| | | style="text-align:center" | 8 || [[File:Deathglow Remnant SKIN.png|link=|32px]] [[Omen]] Deathglow Remnant SKIN {{color|#5188C2|(Tier 3 Gift)}} || [[File:Icon cerebral accelerator.png|link=|32px]] Harvest Damage Booster I (Tier 1 Gift)<br>''+4% Energy Turret Damage Bonus. Base Duration: 2 Hours'' | ||
|- | |- | ||
| | | style="text-align:center" | 9 || [[File:Icon 50k Skill Points.png|link=|32px]] 50,000 Skill Points {{color|#8063AA|(Tier 4 Gift)}} || [[File:Icon 100k Skill Points.png|link=|32px]] 100,000 Skill Points {{color|#8063AA|(Tier 5 Gift)}} | ||
|} | |||
== Agency campaign== | |||
=== Blood Raiders === | |||
[[File:Crimson Harvest Blood Raiders.png|right|150px]] | |||
{| class="wikitable collapsible collapsed" style="width: 1000px; text-align: center;" | |||
|- style="background-color: var(--background-color-warning-subtle);" | |||
! Task Name!! Description !! Reward | |||
|- | |- | ||
! colspan=4 style="background-color: var(--background-color-warning-subtle);" | Combat Challenges | |||
|- | |- | ||
| | | '''Bloody Massacre 1/3''' || Enter a Tetrimon Base combat site. || [[File:Event icon.png|32px|link=]] 10 points | ||
|- | |- | ||
| | | '''Bloody Massacre 2/3''' || Destroy 10 Tetrimon ships within a Tetrimon Base combat site. || [[File:Event icon.png|32px|link=]] 20 points | ||
|- | |- | ||
| | | '''Bloody Massacre 3/3''' || Destroy the final Tetrimon battleship within a Tetrimon Base combat site. || [[File:Event icon.png|32px|link=]] 20 points | ||
|- | |- | ||
| | | '''Bloody Massacre 1/2'''<br>''Repeatable'' || Destroy 10 Tetrimon ships within a Tetrimon Base combat site. || [[File:Event icon.png|32px|link=]] 10 points | ||
|- | |- | ||
| | | '''Bloody Massacre 2/2'''<br>''Repeatable'' || Destroy the Tetrimon Commander battleship || [[File:Event icon.png|32px|link=]] 20 points | ||
|- | |- | ||
! colspan=4 style="background-color: var(--background-color-warning-subtle);" | Exploration Challenges | |||
|- | |- | ||
| | | '''Black Hat 1/2''' || Scan down and enter a Tetrimon Network Node or Hub data site. || [[File:Event icon.png|32px|link=]] 20 points | ||
|- | |- | ||
| | | '''Black Hat 2/2''' || Hack a Tetrimon Network Node or Hub. || [[File:Event icon.png|32px|link=]] 30 points | ||
|- | |- | ||
| | | '''Black Hat'''<br>''Repeatable'' || Hack a Tetrimon Network Node or Hub. || [[File:Event icon.png|32px|link=]] 10 points | ||
|} | |} | ||
* Please note all of these rewards will be applied automatically once you redeem them from the Redeem interface and thus cannot be sold. | |||
*Please note all of these rewards will be applied automatically once you redeem them from the Redeem interface and thus cannot be sold. | |||
{| class="wikitable" | {| class="wikitable" | ||
|- style="background-color: | |- style="background-color: var(--background-color-warning-subtle);" | ||
! Points !! Icon !! Reward | ! Points !! Icon !! Reward | ||
|- | |- | ||
| Line 126: | Line 100: | ||
|} | |} | ||
== Combat | === Order of Tetrimon === | ||
=== Crimson Gauntlet === | [[File:Crimson Harvest Tetrimon.png|right|150px]] | ||
Crimson Gauntlet has the player engage Blood Raider NPCs. The site consists of 3 rooms, though you can take the shortcut acceleration gate to the final room if you have the Crimson Gauntlet Shortcut Keypass. In the first room you land in the middle of an NPC group, once fully cleared the gate to the second room will open up. NPC ships use tacticals to bounce if you try to kite - you need to be able to tank the DPS and neut pressure. All the NPCs fight at a range below 20 km, they usually try to get close and orbit you, Frigates at ~5km, Cruisers at ~10km. Harvest Exsanguinators are an exception with 15-20km engagement range. | * Halt the Harvest 3/3 task and combat site repeatables aren't confirmed. | ||
{| class="wikitable collapsible collapsed" style="width: 1000px; text-align: center;" | |||
|- style="background-color: var(--background-color-warning-subtle);" | |||
! Task Name!! Description !! Reward | |||
|- | |||
! colspan=4 style="background-color: var(--background-color-warning-subtle);" | Combat Challenges | |||
|- | |||
| '''Halt the Harvest 1/3''' || Enter a Crimson Gauntlet combat site. || [[File:Event icon.png|32px|link=]] 10 points | |||
|- | |||
| '''Halt the Harvest 2/3''' || Destroy 10 Blood Raider ships within a Crimson Gauntlet combat site. || [[File:Event icon.png|32px|link=]] 20 points | |||
|- | |||
| '''Halt the Harvest 3/3''' || Destroy the final Blood Raider Battleship in a Crimson Gauntlet combat site. || [[File:Event icon.png|32px|link=]] 30 points | |||
|- | |||
| '''Halt the Harvest 1/2'''<br>''Repeatable'' || Destroy 10 Blood Raider ships within a Crimson Gauntlet combat site. || [[File:Event icon.png|32px|link=]] 10 points | |||
|- | |||
| '''Halt the Harvest 2/2'''<br>''Repeatable'' || Destroy the final Blood Raider Battleship in a Crimson Gauntlet combat site. || [[File:Event icon.png|32px|link=]] 20 points | |||
|- | |||
! colspan=4 style="background-color: var(--background-color-warning-subtle);" | Exploration Challenges | |||
|- | |||
| '''Harvest Hacking 1/2''' || Scan down and enter a Crimson Harvest Network Node or Hub data site. || [[File:Event icon.png|32px|link=]] 20 points | |||
|- | |||
| '''Harvest Hacking 2/2''' || Hack a Crimson Harvest Network Node or Hub. || [[File:Event icon.png|32px|link=]] 30 points | |||
|- | |||
| '''Harvest Hacking'''<br>''Repeatable'' || Hack a Crimson Harvest Network Node or Hub. || [[File:Event icon.png|32px|link=]] 10 points | |||
|} | |||
* Please note all of these rewards will be applied automatically once you redeem them from the Redeem interface and thus cannot be sold. | |||
{| class="wikitable" | |||
|- style="background-color: var(--background-color-warning-subtle);" | |||
! Points !! Icon !! Reward | |||
|- | |||
| 50 || [[File:Icon halloween horrors crate.png|link=|32px]] || Halloween Horrors Fireworks Crate | |||
|- | |||
| 100 || [[File:Ardishapur SKIN.png|link=|32px]] || [[Crucifier]] Ardishapur SKIN | |||
|- | |||
| 150 || [[File:Icon cerebral accelerator.png|link=|32px]] || Tetrimon Anti-Drain Booster II | |||
|- | |||
| 200 || [[File:Sarum SKIN.png|link=|32px]] || [[Punisher]] Sarum SKIN | |||
|- | |||
| 250 || [[File:Icon cerebral accelerator.png|link=|32px]] || Tetrimon Capacitor Booster II | |||
|- | |||
| 300 || [[File:Ardishapur SKIN.png|link=|32px]] || [[Imperial Navy Slicer]] Ardishapur SKIN | |||
|- | |||
| 350 || [[File:Icon cerebral accelerator.png|link=|32px]] || Tetrimon Resistance Booster II | |||
|- | |||
| 400 || [[File:Sarum SKIN.png|link=|32px]] || [[Purifier]] Sarum SKIN | |||
|- | |||
| 450 || [[File:Icon cerebral accelerator.png|link=|32px]] || Tetrimon Precision Booster II | |||
|- | |||
| 500 || [[File:Ardishapur SKIN.png|link=|32px]] || [[Dragoon]] Ardishapur SKIN | |||
|- | |||
| 550 || [[File:Icon cerebral accelerator.png|link=|32px]] || Tetrimon Anti-Drain Booster III | |||
|- | |||
| 600 || [[File:Sarum SKIN.png|link=|32px]] || [[Maller]] Sarum SKIN | |||
|- | |||
| 650 || [[File:Icon cerebral accelerator.png|link=|32px]] || Tetrimon Capacitor Booster III | |||
|- | |||
| 700 || [[File:Ardishapur SKIN.png|link=|32px]] || [[Augoror Navy Issue]] Ardishapur SKIN | |||
|- | |||
| 750 || [[File:Icon cerebral accelerator.png|link=|32px]] || Tetrimon Resistance Booster III | |||
|- | |||
| 800 || [[File:Sarum SKIN.png|link=|32px]] || [[Zealot]] Sarum SKIN | |||
|- | |||
| 850 || [[File:Icon cerebral accelerator.png|link=|32px]] || Tetrimon Precision Booster III | |||
|- | |||
| 900 || [[File:Ardishapur SKIN.png|link=|32px]] || [[Apocalypse Navy Issue]] Ardishapur SKIN | |||
|} | |||
==Activities == | |||
=== Combat === | |||
==== Crimson Gauntlet ==== | |||
Crimson Gauntlet has the player engage Blood Raider NPCs. The site consists of 3 rooms, though you can take the shortcut acceleration gate to the final room if you have the Crimson Gauntlet Shortcut Keypass which can be found in the [[#Crimson Harvest/Tetrimon Network Node/Hub|Crimson Harvest Network Node or Hub]] data sites. In the first room you land in the middle of an NPC group, once fully cleared the gate to the second room will open up. NPC ships use tacticals to bounce if you try to kite - you need to be able to tank the DPS and neut pressure. All the NPCs fight at a range below 20 km, they usually try to get close and orbit you, Frigates at ~5km, Cruisers at ~10km. Harvest Exsanguinators are an exception with 15-20km engagement range. | |||
{{NPCTableHead|Crimson Gauntlet Room 1}} | {{NPCTableHead|Crimson Gauntlet Room 1}} | ||
{{NPCTableSeparator|1 wave}} | {{NPCTableSeparator|1 wave}} | ||
{{NPCTableRow|Frigate| | {{NPCTableRow|Frigate|0-6|Harvest Savior/Shepherd|ewar=Neut|ewar2=Web|note=40% EM, 27% TH, 34% EX. Neuts ~15 GJ/5s @ 4km}} | ||
{{NPCTableRow|Frigate|0- | {{NPCTableRow|Frigate|0-3|Harvest Follower|point=yes|ewar=Neut|note=40% EM, 27% TH, 34% EX}} | ||
{{NPCTableRow|Frigate|0- | {{NPCTableRow|Frigate|0-3|Harvest Exsanguinator|note=1% EM, 1% TH, 98% EX}} | ||
{{NPCTableRow|Destroyer|0- | {{NPCTableRow|Destroyer|0-4|Harvest Cleric|point=yes|note=50% EM, 50% TH}} | ||
{{NPCTableRow|Cruiser|0- | {{NPCTableRow|Cruiser|0-4|Harvest Prophet|point=yes|note=60% EM, 40% TH}} | ||
{{NPCTableRow|Cruiser|0- | {{NPCTableRow|Cruiser|0-3|Harvest Sage|ewar=Neut|ewar2=Web|note=60% EM, 40% TH. Neuts ~55 GJ/5s @ 13km}} | ||
{{NPCTableRow|Battlecruiser|0-2|Harvest Diviner|point=yes|note=40% EM, 32% TH, 28% EX. High DPS spawn}} | {{NPCTableRow|Battlecruiser|0-2|Harvest Diviner|point=yes|note=40% EM, 32% TH, 28% EX. High DPS spawn}} | ||
|} | |} | ||
Similar to the first room the second room has you fight through an initial wave of enemies, but has 2 more waves afterward. The gate to the final room unlocks after the second wave. There are 9 Cthonic Attar asteroids, 1 has 500 x 16{{m3}} the other 8 only have 1 x 16{{m3}}, but it is the same asteroids for each site. | Similar to the first room the second room has you fight through an initial wave of enemies, but has up to 2 more waves afterward. The gate to the final room unlocks after the second wave. There are 9 Cthonic Attar asteroids, 1 has 500 x 16{{m3}} the other 8 only have 1 x 16{{m3}}, but it is the same asteroids for each site. | ||
{{NPCTableHead|Crimson Gauntlet Room 2}} | {{NPCTableHead|Crimson Gauntlet Room 2}} | ||
{{NPCTableSeparator|3 waves}} | {{NPCTableSeparator|3 waves}} | ||
{{NPCTableRow|Frigate| | {{NPCTableRow|Frigate|0-6|Harvest Savior/Shepherd|ewar=Neut|ewar2=Web|note=40% EM, 27% TH, 34% EX. Neuts ~15 GJ/5s @ 4km}} | ||
{{NPCTableRow|Frigate|0- | {{NPCTableRow|Frigate|0-3|Harvest Follower|point=yes|ewar=Neut|note=40% EM, 27% TH, 34% EX}} | ||
{{NPCTableRow|Frigate|0- | {{NPCTableRow|Frigate|0-3|Harvest Exsanguinator|note=1% EM, 1% TH, 98% EX}} | ||
{{NPCTableRow|Destroyer|0- | {{NPCTableRow|Destroyer|0-4|Harvest Cleric|point=yes|note=50% EM, 50% TH}} | ||
{{NPCTableRow|Cruiser|0- | {{NPCTableRow|Cruiser|0-4|Harvest Prophet|point=yes|note=60% EM, 40% TH}} | ||
{{NPCTableRow|Cruiser|0- | {{NPCTableRow|Cruiser|0-3|Harvest Sage|ewar=Neut|ewar2=Web|note=60% EM, 40% TH. Neuts ~55 GJ/5s @ 13km}} | ||
{{NPCTableRow|Battlecruiser|0-2|Harvest Diviner|point=yes|note=40% EM, 32% TH, 28% EX. High DPS spawn}} | {{NPCTableRow|Battlecruiser|0-2|Harvest Diviner|point=yes|note=40% EM, 32% TH, 28% EX. High DPS spawn}} | ||
|} | |} | ||
| Line 158: | Line 205: | ||
{{NPCTableHead|Crimson Gauntlet Room 3}} | {{NPCTableHead|Crimson Gauntlet Room 3}} | ||
{{NPCTableSeparator|2 waves}} | {{NPCTableSeparator|2 waves}} | ||
{{NPCTableRow|Frigate| | {{NPCTableRow|Frigate|0-6|Harvest Savior/Shepherd|ewar=Neut|ewar2=Web|note=40% EM, 27% TH, 34% EX. Neuts ~15 GJ/5s @ 4km}} | ||
{{NPCTableRow|Frigate|0- | {{NPCTableRow|Frigate|0-3|Harvest Follower|point=yes|ewar=Neut|note=40% EM, 27% TH, 34% EX}} | ||
{{NPCTableRow|Frigate|0- | {{NPCTableRow|Frigate|0-3|Harvest Exsanguinator|note=1% EM, 1% TH, 98% EX}} | ||
{{NPCTableRow|Destroyer|0- | {{NPCTableRow|Destroyer|0-4|Harvest Cleric|point=yes|note=50% EM, 50% TH}} | ||
{{NPCTableRow|Cruiser|0- | {{NPCTableRow|Cruiser|0-4|Harvest Prophet|point=yes|note=60% EM, 40% TH}} | ||
{{NPCTableRow|Cruiser|0- | {{NPCTableRow|Cruiser|0-3|Harvest Sage|ewar=Neut|ewar2=Web|note=60% EM, 40% TH. Neuts ~55 GJ/5s @ 13km}} | ||
{{NPCTableRow|Battlecruiser|0-2|Harvest Diviner|point=yes|note=40% EM, 32% TH, 28% EX. High DPS spawn}} | {{NPCTableRow|Battlecruiser|0-2|Harvest Diviner|point=yes|note=40% EM, 32% TH, 28% EX. High DPS spawn}} | ||
{{NPCTableSeparator|Final Wave}} | {{NPCTableSeparator|Final Wave}} | ||
| Line 176: | Line 223: | ||
* Engage a swarm of small(-er) targets at close range, you will usually have to deal with more frigates than anything | * Engage a swarm of small(-er) targets at close range, you will usually have to deal with more frigates than anything | ||
=== Tetrimon Base === | |||
The principles mentioned for the Crimson Gauntlet apply here as well. The highest DPS opponents you will be facing deal primarily EM damage, especially the Oracle will hit you pretty hard if you don't have good EM resists. | ==== Tetrimon Base ==== | ||
The principles mentioned for the Crimson Gauntlet apply here as well. The highest DPS opponents you will be facing deal primarily EM damage, especially the Oracle will hit you pretty hard if you don't have good EM resists. The site consists of 3 rooms, though you can take the shortcut acceleration gate to the final room if you have the consumable Tetrimon Shortcut Keypass. | |||
The bigger NPCs (cruisers, battlecruisers, final spawn) in this site have the following resist profile: | The bigger NPCs (cruisers, battlecruisers, final spawn) in this site have the following resist profile: | ||
| Line 184: | Line 232: | ||
* Shield: 0% EM, 20% Thermal, 40% Kinetic, 50% Explosive | * Shield: 0% EM, 20% Thermal, 40% Kinetic, 50% Explosive | ||
{{NPCTableHead|Tetrimon Base}} | {{NPCTableHead|Tetrimon Base Room 1}} | ||
{{NPCTableRow|Frigate| | {{NPCTableSeparator|1 wave}} | ||
{{NPCTableRow|Frigate| | {{NPCTableRow|Frigate|0-4|Tetrimon Crucifier|point=yes|ewar=Neut|ewar2=GD|note=35% EM, 6% TH, 59% Kin. Neuts ~4 GJ/3s @11 km}} | ||
{{NPCTableRow| | {{NPCTableRow|Frigate|0-4|Tetrimon Crusader|ewar=Web|ewar2=Neut|note=50% EM, 50% TH, 34% EX. Neuts ~4 GJ/3s @11 km}} | ||
{{NPCTableRow|Destroyer| | {{NPCTableRow|Destroyer|0-3|Tetrimon Heretic|point=yes|ewar=TP|note=40% EM, 27% TH, 34% EX}} | ||
{{NPCTableRow|Cruiser| | {{NPCTableRow|Cruiser|0-3|Tetrimon Augoror|note=63% EM, 38% TH, engages at ~20 KM|ewar=[[File:Icon remote armor repair i.png|24px]]}} | ||
{{NPCTableRow|Cruiser| | {{NPCTableRow|Cruiser|0-3|Tetrimon Curse|point=yes|ewar=Neut|ewar2=TD|note=25% EM, 15% TH, 60% KN. Neuts ~100 GJ/5s @12 km}} | ||
{{NPCTableRow|Cruiser|0-3|Tetrimon Omen|ewar=Web|note=63% EM, 38% TH. High DPS.}} | |||
{{NPCTableRow|Battlecruiser|0-2|Tetrimon Oracle|note=100% EM, very high DPS at ~20 KM}} | |||
|} | |||
{{NPCTableHead|Tetrimon Base Room 2}} | |||
{{NPCTableSeparator|2-3 waves}} | |||
{{NPCTableRow|Frigate|0-4|Tetrimon Crucifier|point=yes|ewar=Neut|ewar2=GD|note=35% EM, 6% TH, 59% Kin. Neuts ~4 GJ/3s @11 km}} | |||
{{NPCTableRow|Frigate|0-4|Tetrimon Crusader|ewar=Web|ewar2=Neut|note=50% EM, 50% TH, 34% EX. Neuts ~4 GJ/3s @11 km}} | |||
{{NPCTableRow|Destroyer|0-3|Tetrimon Heretic|point=yes|ewar=TP|note=40% EM, 27% TH, 34% EX}} | |||
{{NPCTableRow|Cruiser|0-3|Tetrimon Augoror|note=63% EM, 38% TH, engages at ~20 KM|ewar=[[File:Icon remote armor repair i.png|24px]]}} | |||
{{NPCTableRow|Cruiser|0-3|Tetrimon Curse|point=yes|ewar=Neut|ewar2=TD|note=25% EM, 15% TH, 60% KN. Neuts ~100 GJ/5s @12 km}} | |||
{{NPCTableRow|Cruiser|0-3|Tetrimon Omen|ewar=Web|note=63% EM, 38% TH. High DPS.}} | |||
{{NPCTableRow|Battlecruiser|0-2|Tetrimon Oracle|note=100% EM, very high DPS at ~20 KM}} | |||
|} | |||
{{NPCTableHead|Tetrimon Base Room 3}} | |||
{{NPCTableSeparator|2-3 waves}} | |||
{{NPCTableRow|Frigate|0-4|Tetrimon Crucifier|point=yes|ewar=Neut|ewar2=GD|note=35% EM, 6% TH, 59% Kin. Neuts ~4 GJ/3s @11 km}} | |||
{{NPCTableRow|Frigate|0-4|Tetrimon Crusader|ewar=Web|ewar2=Neut|note=50% EM, 50% TH, 34% EX. Neuts ~4 GJ/3s @11 km}} | |||
{{NPCTableRow|Destroyer|0-3|Tetrimon Heretic|point=yes|ewar=TP|note=40% EM, 27% TH, 34% EX}} | |||
{{NPCTableRow|Cruiser|0-3|Tetrimon Augoror|note=63% EM, 38% TH, engages at ~20 KM|ewar=[[File:Icon remote armor repair i.png|24px]]}} | |||
{{NPCTableRow|Cruiser|0-3|Tetrimon Curse|point=yes|ewar=Neut|ewar2=TD|note=25% EM, 15% TH, 60% KN. Neuts ~100 GJ/5s @12 km}} | |||
{{NPCTableRow|Cruiser|0-3|Tetrimon Omen|ewar=Web|note=63% EM, 38% TH. High DPS.}} | |||
{{NPCTableRow|Battlecruiser|0-2|Tetrimon Oracle|note=100% EM, very high DPS at ~20 KM}} | {{NPCTableRow|Battlecruiser|0-2|Tetrimon Oracle|note=100% EM, very high DPS at ~20 KM}} | ||
{{NPCTableSeparator|Final Wave}} | {{NPCTableSeparator|Final Wave}} | ||
{{NPCTableRow|Battleship|1|Tetrimon Commander|point=yes|ewar=Web|note=50% EM, 50% TH.}} | {{NPCTableRow|Battleship|1|Tetrimon Commander|point=yes|ewar=Web|note=50% EM, 50% TH.|cargo=Warclone Blanks}} | ||
|} | |} | ||
The '''Tetrimon Commander''' holds the majority of the loot in ''Warclone Blanks'', which can be sold at the market. Some wrecks from the other NPCs contain ''Warclone Blanks'' as well. | |||
==== Dark Blood Gauntlet ==== | |||
Found in Derelik lowsec and the Blood Raiders constellation in Delve. | Found in Derelik lowsec and the Blood Raiders constellation in Delve. | ||
==== Tetrimon Frontline Base ==== | |||
Found in Derelik lowsec and the Blood Raiders constellation in Delve. | Found in Derelik lowsec and the Blood Raiders constellation in Delve. | ||
== | |||
=== Hacking === | |||
[[File:Crimson Harvest Network Node.png|right|200px]] | [[File:Crimson Harvest Network Node.png|right|200px]] | ||
[[File:Tetrimon Network Node.png|right|200px]] | [[File:Tetrimon Network Node.png|right|200px]] | ||
The | The Crimson Harvest/Tetrimon Network Node/Hub signatures appear as a level III data site but are harder to scan down than usual and require a data analyzer. These sites are a single ungated pocket containing 1 data cache and no hostiles. The can is a high difficulty/red node. | ||
{|class="wikitable" | |||
|+ | |||
! scope="col" style="width: 80px;" | Difficulty | |||
! scope="col" style="width: 80px;" | System Core | |||
! scope="col" style="width: 80px;" | Firewall | |||
! scope="col" style="width: 80px;" | Anti-Virus | |||
! scope="col" style="width: 80px;" | Restorer Node | |||
! scope="col" style="width: 80px;" | Suppressor Node | |||
== | |- | ||
|Hard | |||
| style="text-align:center;" |[[File:Core node hard red.png]] | |||
| style="text-align:center;" |[[File:Firewall hard node.png]] | |||
| style="text-align:center;" |[[File:Antivirus hard node.png]] | |||
| style="text-align:center;" |[[File:Restorer node.png]] | |||
| style="text-align:center;" |[[File:Supressor node.png]] | |||
|} | |} | ||
Beyond the regular data site loot, there is also: | |||
* Boosters | |||
* Clothes | |||
* Cerebral Accelerators | |||
* Fireworks | |||
* Overseers Effects (5th - 14th tier) | |||
* Shortcut Keypasses | |||
* SKINs (Blood Raider, Cold Iron) | |||
* Warclone Blanks | |||
== External links == | == External links == | ||
Latest revision as of 09:14, 19 May 2025
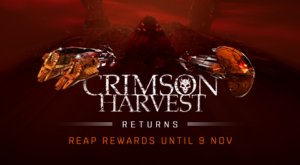
Crimson Harvest is a recurring event involving the Blood Raiders pirate faction and the Tetrimon mercenaries. In 2021, the event ran from October 28th through to November 9th, downtime to downtime, and was announced as part of EVE's Halloween Horrors. The event merged the traditional Crimson Harvest event site and rewards with a higher loot drop from PvP and structure losses (90% instead of 50%) and special wreck icons from the Trick or Treat event from the year before.
Login campaign
The campaign rewards SKINs and 60.000 Skill Points for ![]() Alpha clones with 175.000 additional Skill Points and Boosters for
Alpha clones with 175.000 additional Skill Points and Boosters for ![]() Omega clones.
Omega clones.
| Day | For Alpha Accounts | Additional for Omega |
|---|---|---|
| 1 | ||
| 2 | +8% Weapon Disruptor Resistance. Base Duration: 2 Hours | |
| 3 | ||
| 4 | -4% Nosferatu Module Cycle Time Bonus. Base Duration: 2 Hours | |
| 5 | ||
| 6 | +2km Stasis Webifier Range Bonus. Base Duration: 2 Hours | |
| 7 | ||
| 8 | +4% Energy Turret Damage Bonus. Base Duration: 2 Hours | |
| 9 |
Agency campaign
Blood Raiders
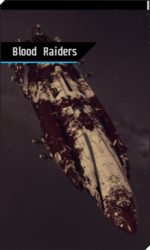
| Task Name | Description | Reward | |
|---|---|---|---|
| Combat Challenges | |||
| Bloody Massacre 1/3 | Enter a Tetrimon Base combat site. | ||
| Bloody Massacre 2/3 | Destroy 10 Tetrimon ships within a Tetrimon Base combat site. | ||
| Bloody Massacre 3/3 | Destroy the final Tetrimon battleship within a Tetrimon Base combat site. | ||
| Bloody Massacre 1/2 Repeatable |
Destroy 10 Tetrimon ships within a Tetrimon Base combat site. | ||
| Bloody Massacre 2/2 Repeatable |
Destroy the Tetrimon Commander battleship | ||
| Exploration Challenges | |||
| Black Hat 1/2 | Scan down and enter a Tetrimon Network Node or Hub data site. | ||
| Black Hat 2/2 | Hack a Tetrimon Network Node or Hub. | ||
| Black Hat Repeatable |
Hack a Tetrimon Network Node or Hub. | ||
- Please note all of these rewards will be applied automatically once you redeem them from the Redeem interface and thus cannot be sold.
| Points | Icon | Reward |
|---|---|---|
| 50 | Halloween Horrors Fireworks Crate | |
| 100 | Crucifier Ironblood SKIN | |
| 150 | Harvest Anti-Drain Booster II | |
| 200 | Punisher Blood Raiders SKIN | |
| 250 | Harvest Capacitor Booster II | |
| 300 | Cruor Ironblood SKIN | |
| 350 | Harvest Resistance Booster II | |
| 400 | Purifier Blood Raiders SKIN | |
| 450 | Harvest Precision Booster II | |
| 500 | Dragoon Ironblood SKIN | |
| 550 | Harvest Anti-Drain Booster III | |
| 600 | Maller Blood Raiders SKIN | |
| 650 | Harvest Capacitor Booster III | |
| 700 | Ashimmu Ironblood SKIN | |
| 750 | Harvest Resistance Booster III | |
| 800 | Zealot Blood Raiders SKIN | |
| 850 | Harvest Precision Booster III | |
| 900 | Bhaalgorn Ironblood SKIN |
Order of Tetrimon
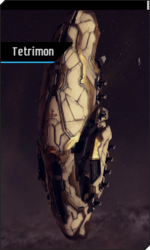
- Halt the Harvest 3/3 task and combat site repeatables aren't confirmed.
| Task Name | Description | Reward | |
|---|---|---|---|
| Combat Challenges | |||
| Halt the Harvest 1/3 | Enter a Crimson Gauntlet combat site. | ||
| Halt the Harvest 2/3 | Destroy 10 Blood Raider ships within a Crimson Gauntlet combat site. | ||
| Halt the Harvest 3/3 | Destroy the final Blood Raider Battleship in a Crimson Gauntlet combat site. | ||
| Halt the Harvest 1/2 Repeatable |
Destroy 10 Blood Raider ships within a Crimson Gauntlet combat site. | ||
| Halt the Harvest 2/2 Repeatable |
Destroy the final Blood Raider Battleship in a Crimson Gauntlet combat site. | ||
| Exploration Challenges | |||
| Harvest Hacking 1/2 | Scan down and enter a Crimson Harvest Network Node or Hub data site. | ||
| Harvest Hacking 2/2 | Hack a Crimson Harvest Network Node or Hub. | ||
| Harvest Hacking Repeatable |
Hack a Crimson Harvest Network Node or Hub. | ||
- Please note all of these rewards will be applied automatically once you redeem them from the Redeem interface and thus cannot be sold.
| Points | Icon | Reward |
|---|---|---|
| 50 | Halloween Horrors Fireworks Crate | |
| 100 | Crucifier Ardishapur SKIN | |
| 150 | Tetrimon Anti-Drain Booster II | |
| 200 | Punisher Sarum SKIN | |
| 250 | Tetrimon Capacitor Booster II | |
| 300 | Imperial Navy Slicer Ardishapur SKIN | |
| 350 | Tetrimon Resistance Booster II | |
| 400 | Purifier Sarum SKIN | |
| 450 | Tetrimon Precision Booster II | |
| 500 | Dragoon Ardishapur SKIN | |
| 550 | Tetrimon Anti-Drain Booster III | |
| 600 | Maller Sarum SKIN | |
| 650 | Tetrimon Capacitor Booster III | |
| 700 | Augoror Navy Issue Ardishapur SKIN | |
| 750 | Tetrimon Resistance Booster III | |
| 800 | Zealot Sarum SKIN | |
| 850 | Tetrimon Precision Booster III | |
| 900 | Apocalypse Navy Issue Ardishapur SKIN |
Activities
Combat
Crimson Gauntlet
Crimson Gauntlet has the player engage Blood Raider NPCs. The site consists of 3 rooms, though you can take the shortcut acceleration gate to the final room if you have the Crimson Gauntlet Shortcut Keypass which can be found in the Crimson Harvest Network Node or Hub data sites. In the first room you land in the middle of an NPC group, once fully cleared the gate to the second room will open up. NPC ships use tacticals to bounce if you try to kite - you need to be able to tank the DPS and neut pressure. All the NPCs fight at a range below 20 km, they usually try to get close and orbit you, Frigates at ~5km, Cruisers at ~10km. Harvest Exsanguinators are an exception with 15-20km engagement range.
Similar to the first room the second room has you fight through an initial wave of enemies, but has up to 2 more waves afterward. The gate to the final room unlocks after the second wave. There are 9 Cthonic Attar asteroids, 1 has 500 x 16 m3 the other 8 only have 1 x 16 m3, but it is the same asteroids for each site.
The final room has you fight 2 waves until the Blood Raider Harvest Overseer warps in. Once the battleship is cleared any remaining ships will warp off. The Harvest Overseer webs at 20km range and applies good damage thanks to its web. It applies a neut pressure of ~300 GJ at 5km every 5 seconds (neut value is an approximation, needs to be double-checked). There are 18 Cthonic Attar asteroids in the final room each with 1 x 16 m3. Overall there is approximately 12.4 million ISK in bounties for a full clear.
To summarize, your ship needs to be able to:
- Tank upwards of 300 DPS, at least at the beginning of the site
- Deal with several neuting ships at once, especially the final spawn applies serious neut pressure
- Resist primarily EM/Thermal damage types
- Engage a swarm of small(-er) targets at close range, you will usually have to deal with more frigates than anything
Tetrimon Base
The principles mentioned for the Crimson Gauntlet apply here as well. The highest DPS opponents you will be facing deal primarily EM damage, especially the Oracle will hit you pretty hard if you don't have good EM resists. The site consists of 3 rooms, though you can take the shortcut acceleration gate to the final room if you have the consumable Tetrimon Shortcut Keypass. The bigger NPCs (cruisers, battlecruisers, final spawn) in this site have the following resist profile:
- Hull: 33% Omni
- Armor: 55% EM, 43% Thermal, 38% Kinetic, 35% Explosive
- Shield: 0% EM, 20% Thermal, 40% Kinetic, 50% Explosive
The Tetrimon Commander holds the majority of the loot in Warclone Blanks, which can be sold at the market. Some wrecks from the other NPCs contain Warclone Blanks as well.
Dark Blood Gauntlet
Found in Derelik lowsec and the Blood Raiders constellation in Delve.
Tetrimon Frontline Base
Found in Derelik lowsec and the Blood Raiders constellation in Delve.
Hacking
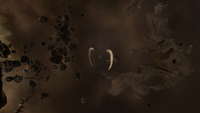
The Crimson Harvest/Tetrimon Network Node/Hub signatures appear as a level III data site but are harder to scan down than usual and require a data analyzer. These sites are a single ungated pocket containing 1 data cache and no hostiles. The can is a high difficulty/red node.
| Difficulty | System Core | Firewall | Anti-Virus | Restorer Node | Suppressor Node |
|---|---|---|---|---|---|
| Hard | 
|

|

|

|

|
Beyond the regular data site loot, there is also:
- Boosters
- Clothes
- Cerebral Accelerators
- Fireworks
- Overseers Effects (5th - 14th tier)
- Shortcut Keypasses
- SKINs (Blood Raider, Cold Iron)
- Warclone Blanks
External links
