More actions
m fix broken links |
m Fix typo. |
||
| (49 intermediate revisions by 7 users not shown) | |||
| Line 13: | Line 13: | ||
} | } | ||
.wikitable.hull td:nth-child(1), | |||
.wikitable.hull td:nth-child(2), | |||
.wikitable.hull td:nth-child(3), | |||
.wikitable.t1shield td:nth-child(1), | |||
.wikitable.t1shield td:nth-child(2), | |||
.wikitable.t1shield td:nth-child(3), | |||
.wikitable.t1armor td:nth-child(1), | .wikitable.t1armor td:nth-child(1), | ||
.wikitable.t1armor td:nth-child(2), | .wikitable.t1armor td:nth-child(2), | ||
| Line 19: | Line 25: | ||
.wikitable.t1armor td:nth-child(7) { border-right: none; } | .wikitable.t1armor td:nth-child(7) { border-right: none; } | ||
.wikitable.hull td:nth-child(2), | |||
.wikitable.hull td:nth-child(3), | |||
.wikitable.hull td:nth-child(4), | |||
.wikitable.t1shield td:nth-child(2), | |||
.wikitable.t1shield td:nth-child(3), | |||
.wikitable.t1shield td:nth-child(4), | |||
.wikitable.t1armor td:nth-child(2), | .wikitable.t1armor td:nth-child(2), | ||
.wikitable.t1armor td:nth-child(3), | .wikitable.t1armor td:nth-child(3), | ||
| Line 24: | Line 36: | ||
.wikitable.t1armor td:nth-child(7), | .wikitable.t1armor td:nth-child(7), | ||
.wikitable.t1armor td:nth-child(8) { border-left: none; } | .wikitable.t1armor td:nth-child(8) { border-left: none; } | ||
.imageserver { | |||
margin-left: auto; | |||
margin-right: auto; | |||
width: 147px; | |||
height: 147px; | |||
} | |||
.imageserver img { | |||
width: 100%; | |||
height: auto; | |||
} | |||
}} | }} | ||
Every ship has a certain '''natural resistance''' to incoming damage. These resistances, quoted as a percentage of damage resisted for each of the four damage types, form the shield, armor and hull '''resistance profiles'''. Tech I ships from the same faction generally have the same natural resistances, but this rule does not apply to Tech II or Tech III ships. | Every ship has a certain '''natural resistance''' to incoming damage. These resistances, quoted as a percentage of damage resisted for each of the four damage types, form the shield, armor, and hull '''resistance profiles'''. Tech I ships from the same faction generally have the same natural resistances, but this rule does not apply to Tech II or Tech III ships. | ||
== Hull resistances == | == Hull resistances == | ||
All ships have natural 33% hull | All ships have a natural 33/33/33/33 hull resistance (%EM/%Thermal/%Kinetic/%Explosive respectively – this order will be used throughout this page). | ||
{| class="wikitable hull" style="text-align:center" | |||
|+ Hull resistances | |||
|- | |||
! colspan="4" | [[File:Icon_hull.png|32px|link=]] Hull resist profile | |||
|- | |||
| {{icon|em resist||EM}}33% | |||
| {{icon|th resist||Thermal}}33% | |||
| {{icon|ki resist||Kinetic}}33% | |||
| {{icon|ex resist||Explosive}}33% | |||
|} | |||
== Tech I shield resistances == | == Tech I shield resistances == | ||
T1 ships generally have the same natural shield resistances: 0/20/40/50. [[EDENCOM]] ships are the sole non-special edition ship exception, using a 20/20/50/50 resist profile, giving them better EM and Kinetic resistances. | |||
{| class="wikitable | Some [[Special Edition Ships|Special Edition]] T1 ships have a different shield resistance profile. For example, {{sh|Metamorphosis}}, {{sh|Sunesis}}, {{sh|Gnosis}}, {{sh|Praxis}} from the [[Society of Conscious Thought]] have a 27.5/27.5/27.5/27.5 profile, and the {{sh|Council Diplomatic Shuttle}} has a 33/33/33/33 profile. | ||
|+ The Tech I shield | |||
{| class="wikitable t1shield" style="text-align:center" | |||
|+ The Tech I ships – natural shield resistances by faction | |||
|- | |- | ||
! | ! colspan="4" | [[File:Icon_shield.png|link=]] Shield resist profile | ||
! Faction | |||
|- | |- | ||
| 0% || 20% || 40% || 50% | | {{icon|em resist||EM}}0% | ||
| {{icon|th resist||Thermal}}20% | |||
| {{icon|ki resist||Kinetic}}40% | |||
| {{icon|ex resist||Explosive}}50% | |||
| Most factions | |||
|- | |||
| {{icon|em resist||EM}}20% | |||
| {{icon|th resist||Thermal}}20% | |||
| {{icon|ki resist||Kinetic}}50% | |||
| {{icon|ex resist||Explosive}}50% | |||
| [[File:Logo_faction_edencom.png|64px|link=EDENCOM]] | |||
|} | |} | ||
=== T1 ships with shield resistance bonuses === | === T1 ships with shield resistance bonuses === | ||
Some [[Caldari]] ships and all [[Guristas]] ships have a bonus to their shield resistances. The bonus resistance is 4% for each level of the pilot's applicable Caldari ship skill. | |||
The Caldari ships with this bonus are the {{sh|Merlin}}, {{sh|Moa}}, {{sh|Drake}}, {{sh|Rokh}}, {{sh|Scorpion Navy Issue}}, {{sh|Phoenix}}, {{sh|Chimera}}, {{sh|Minokawa}}, {{sh|Wyvern}}. | |||
{{sh|Skybreaker}} and {{sh|Stormbringer}} have an even stronger bonus resistance of 6% per level of the pilot's applicable EDENCOM ship skill. | |||
== Tech I armor resistances == | == Tech I armor resistances == | ||
{| class="wikitable" style="float:right; margin-left: 25px; text-align: center;" | |||
|+Historic enemies of the empire factions and their damage types | |||
|- | |||
! rowspan="2" | Faction | |||
! rowspan="2" | Enemy | |||
! colspan="2" | Enemy damage type | |||
|- | |||
! style="width: 6em;"|Primary | |||
! style="width: 6em;"|Secondary | |||
|- | |||
| {{icon|amarr|64|Amarr}} || {{icon|minmatar|64|Minmatar}} || {{icon|ex damage||Explosive}}<br />Exp || {{icon|ki damage||Kinetic}}<br />Kinetic | |||
|- | |||
| {{icon|caldari|64|Caldari}} || {{icon|gallente|64|Gallente}} || {{icon|th damage||Thermal}}<br />Thermal || {{icon|ki damage||Kinetic}}<br />Kinetic | |||
|- | |||
| {{icon|gallente|64|Gallente}} || {{icon|caldari|64|Caldari}} || {{icon|ki damage||Kinetic}}<br />Kinetic || {{icon|th damage||Thermal}}<br />Thermal | |||
|- | |||
| {{icon|minmatar|64|Minmatar}} || {{icon|amarr|64|Amarr}} || {{icon|em damage||EM}}<br />EM || {{icon|th damage||Thermal}}<br />Thermal | |||
|} | |||
{| class="wikitable t1armor" style="text-align: center;" | {| class="wikitable t1armor" style="text-align: center;" | ||
|+ Tech I ships – natural armor resistances by faction | |+ Tech I ships – natural armor resistances by faction | ||
|- | |- | ||
!colspan="4" | [[File:Icon_armor.png|link=]] Armor resist profile | ! colspan="4" | [[File:Icon_armor.png|link=]] Armor resist profile | ||
! Empire faction | |||
! colspan="3" | Other factions | |||
|- | |- | ||
| {{icon|em resist||EM}}50% | | {{icon|em resist||EM}}50% | ||
| {{icon|th resist||Thermal}}35% | | {{icon|th resist||Thermal}}35% | ||
| {{icon|ki resist||Kinetic}}25% | | {{icon|ki resist||Kinetic}}25% | ||
| {{icon|ex resist||Explosive}}20% | | {{icon|ex resist||Explosive}}20% | ||
| [[File:Logo_faction_amarr_empire.png|link=Amarr_Empire]] | | [[File:Logo_faction_amarr_empire.png|link=Amarr_Empire]] | ||
| scope="col" width="8em"| [[File:Logo_faction_sanshas_nation.png|64px|link=Sansha's_Nation]] | | scope="col" width="8em"| [[File:Logo_faction_sanshas_nation.png|64px|link=Sansha's_Nation]] | ||
| Line 68: | Line 131: | ||
| scope="col" width="8em"| [[File:Logo_faction_triglavian_collective.png|64px|link=Triglavian_Collective]] | | scope="col" width="8em"| [[File:Logo_faction_triglavian_collective.png|64px|link=Triglavian_Collective]] | ||
|- | |- | ||
| {{icon|em resist||EM}}50% | | {{icon|em resist||EM}}50% | ||
| {{icon|th resist||Thermal}}45% | |||
| {{icon|ki resist||Kinetic}}25% | |||
| {{icon|ex resist||Explosive}}10% | |||
| [[File:Logo_faction_caldari_state.png|link=Caldari_State]] | | [[File:Logo_faction_caldari_state.png|link=Caldari_State]] | ||
| [[File:Logo faction guristas pirates.png|64px|link=Guristas_Pirates]] | | [[File:Logo faction guristas pirates.png|64px|link=Guristas_Pirates]] | ||
| [[File:Logo_faction_mordus_legion.png|64px|link=Mordu's_Legion]] | | [[File:Logo_faction_mordus_legion.png|64px|link=Mordu's_Legion]] | ||
| | | [[File:Logo_faction_edencom.png|64px|link=EDENCOM]] | ||
|- | |- | ||
| {{icon|em resist||EM}}50% | | {{icon|em resist||EM}}50% | ||
| {{icon|th resist||Thermal}}35% | |||
| {{icon|ki resist||Kinetic}}35% | |||
| {{icon|ex resist||Explosive}}10% | |||
| [[File:Logo_faction_gallente_federation.png|link=Gallente Federation]] | | [[File:Logo_faction_gallente_federation.png|link=Gallente Federation]] | ||
| [[File: | | [[File:Logo_faction_serpentis.png|64px|link=serpentis]] | ||
| [[File:Logo_faction_sisters_of_eve.png|64px|link= | | [[File:Logo_faction_sisters_of_eve.png|64px|link=Sisters of EVE]] | ||
| | | [[File:Logo_faction_outer_ring_excavations.png|64px|link=Outer Ring Excavations]] | ||
|- | |- | ||
| {{icon|em resist||EM}}60% | | {{icon|em resist||EM}}60% | ||
| {{icon|th resist||Thermal}}35% | |||
| {{icon|ki resist||Kinetic}}25% | |||
| {{icon|ex resist||Explosive}}10% | |||
| [[File:Logo_faction_minmatar_republic.png|link=Minmatar Republic]] | | [[File:Logo_faction_minmatar_republic.png|link=Minmatar Republic]] | ||
| [[File: | | [[File:Logo_faction_angel_cartel.png|64px|link=Angel Cartel]] | ||
| [[File:Logo_faction_outer_ring_excavations.png|64px|link= | | [[File:Logo_faction_outer_ring_excavations.png|64px|link=Outer Ring Excavations]] | ||
| | | [[File:Logo_faction_deathless_circle.png|64px|link=Deathless Circle]] | ||
|} | |} | ||
A T1 ship's natural armor resistance profile is determined by the race of the ship. | |||
| | |||
There is a reason for these resist profiles. They are all based on a 50/35/25/10 profile, but each race has a 10% bonus to one damage type. For the [[New_Eden#Rise_of_the_Empires|empire factions]], the bonused armor resist is the same as the primary damage type of the faction they were historically at war with. The warring factions and their damage types are shown in the table to the right. Perhaps this is best illuminated with an example: Take Gallente ships. Start with the base profile of 50/35/25/10 and add 10% kinetic resistance, kinetic being the primary damage type of the Caldari, the historic enemy of the Gallente. You get a 50/35/35/10 profile, which is indeed correct for T1 Gallente ships. | |||
ORE use two sets of armor resistance profile: Their {{sh|Venture}}, {{sh|Procurer}}, {{sh|Covetor}}, {{sh|Retriever}} use a 60/35/25/10 profile while {{sh|Noctis}}, {{sh|Bowhead}}, {{sh|Porpoise}}, {{sh|Orca}}, {{sh|Rorqual}} use a 50/35/35/10 profile. | |||
Some Special Edition T1 ships have a different armor resistance profile. For example, {{sh|Metamorphosis}}, {{sh|Sunesis}}, {{sh|Gnosis}}, {{sh|Praxis}} from the Society of Conscious Thought have a 32.5/32.5/32.5/32.5 profile, and the {{sh|Council Diplomatic Shuttle}} has a 33/33/33/33 profile. | |||
{{sh|Capsule}} use a 60/35/25/10 profile. | |||
| {{ | === T1 ships with armor resistance bonuses === | ||
Some Amarr ships, all Sisters of EVE ships, and some Triglavian ships have bonuses to their armor resistances. The bonus resistance is 4% for each level of the pilot's applicable racial ship skill. | |||
| {{ | |||
The Amarr ships with this bonus are the {{sh|Punisher}}, {{sh|Maller}}, {{sh|Prophecy}}, {{sh|Abaddon}}, {{sh|Revelation}}, {{sh|Archon}}, {{sh|Apostle}}, {{sh|Aeon}}. The Triglavian ships with this bonus are the {{sh|Drekavac}} and {{sh|Zirnitra}}. | |||
| {{ | |||
|} | |||
== Tech II and Tech III resists == | |||
{| class="wikitable shipBonusTable floatright" style="margin-left: 25px;" | {| class="wikitable shipBonusTable floatright" style="margin-left: 25px;" | ||
|+ Tech II and III resist bonuses by class of ship | |+ Tech II and III resist bonuses by class of ship | ||
|- | |- | ||
! rowspan="2"|Classes | ! rowspan="2"|Classes | ||
! colspan="2"|Bonuses | ! colspan="2"|Bonuses | ||
|- | |- | ||
! style="width: 6em;"|Primary !! style="width: 6em;"|Secondary | ! style="width: 6em;"|Primary !! style="width: 6em;"|Secondary | ||
| Line 121: | Line 190: | ||
* Logistics Cruisers | * Logistics Cruisers | ||
* Transport Ships | * Transport Ships | ||
| | | −75% || −50% | ||
|- | |- | ||
| | | | ||
* Recon Ships | * Recon Ships | ||
| | | −62.5% || −37.5% | ||
|- | |- | ||
| | | | ||
| Line 134: | Line 203: | ||
* Electronic Attack Ships | * Electronic Attack Ships | ||
* Logistics Frigates | * Logistics Frigates | ||
| | | −50% || −25% | ||
|- | |||
| | |||
* Black Ops | |||
| −37.5% || −18.75% | |||
|- | |- | ||
| | | | ||
| Line 140: | Line 213: | ||
* Stealth Bombers | * Stealth Bombers | ||
* Jump Freighters | * Jump Freighters | ||
| | * Lancer Dreadnoughts | ||
| −25% || −12.5% | |||
|- | |||
| | |||
* Interceptors | |||
* Covert Ops | |||
| −10% (flat) || 0% | |||
|- | |||
| | |||
* Expedition Frigates | |||
* Exhumers | |||
| 0% || 0% | |||
|} | |} | ||
Tech II and Tech III ships generally have much better resist profiles than Tech I ships. In particular, they gain significant resistance to the primary and secondary damage types of their faction's historical enemies. | |||
The table on the right shows the bonus resistances given to each different ship type. These bonuses are applied to both shields and armor by taking a racial or default T1 resist profile and multiplying the remaining vulnerability by the resistance bonus. | |||
To calculate a T2 ship's shield resists, start with the 'default' profile of 0/20/40/50. Reduce its remaining vulnerability to its enemy's primary damage type by 75%, and to the secondary damage type by 50%. For example, let's take the {{sh|Ishtar}}. Start with 0/20/40/50. The Gallente's enemy is the Caldari, whose damage types are Kinetic and Thermal. Reduce the remaining kinetic vulnerability of {{nowrap|(100 − 40) {{=}} 60}} by 75% to 15, giving {{nowrap|(100 − 15) {{=}} 85%}} shield kinetic resistance. Similarly, reduce the remaining thermal vulnerability of {{nowrap|(100 − 20) {{=}} 80}} by 50% to 40, giving {{nowrap|(100 − 40) {{=}} 60%}} shield thermal resistance. This gives the Ishtar a shield resist profile of 0/60/85/50. | |||
The Amarr | To calculate a T2 ship's armor resists, start with the ship's T1 racial profile. Reduce its remaining vulnerability to its enemy's primary damage type by 75%, and to the secondary damage type by 50%. For example, let's take the {{sh|Muninn}}. Start with the Minmatar T1 racial profile of 60/35/25/10. The Minmatar's enemy is the Amarr, whose damage types are EM and Thermal. Reduce the remaining EM vulnerability of {{nowrap|(100 − 60) {{=}} 40}} by 75% to 10, giving {{nowrap|(100 − 10) {{=}} 90%}} armor EM resistance. Similarly, reduce the remaining thermal vulnerability of {{nowrap|(100 − 35) {{=}} 65}} by 50% to 32.5, giving {{nowrap|(100 − 32.5) {{=}} 67.5%}} armor thermal resistance. This gives the Muninn an armor resist profile of 90/67.5/25/10. | ||
; [[Frigates#Assault Frigates|Assault Frigates]], [[Heavy Assault Cruisers]], [[Heavy Interdiction Cruisers]], [[Command Ships]], [[Logistics Cruisers]], [[Transport Ships]] | |||
These are a mix of the most front-line combat ships, and the most dedicated cargo ships. Fittingly, these ships gain the largest bonuses and have the strongest natural resists of all normal ships. Furthermore, the {{sh|Harpy}}, {{sh|Vengeance}}, {{sh|Nergal}}, {{sh|Sacrilege}}, {{sh|Eagle}}, all Command Ships (except for the {{sh|Sleipnir}} and {{sh|Astarte}}), and all of the {{sh|Heavy Interdictors}} get an additional 20% bonus to their shield (Caldari, Minmatar) or armor (Amarr, Gallente, Triglavian) resists. (These further bonuses are not considered "base" resists though.) | |||
The only ship to have stronger natural resists than one of these ships is the {{sh|Monitor}} Flag Cruiser. | |||
; [[Recon Ships]] | |||
As these ships are generally not intended for front-line combat but do still need to be able to shrug off deterrence attempts, these ships gain the second strongest resists. | |||
; [[Electronic Attack Ships]], [[Frigates#Logistics Frigates|Logistics Frigates]], [[Interdictors]], [[Command Destroyer]]s, [[Tactical Destroyers]], [[Strategic Cruisers]] | |||
These ships are generally more supportive or flexible in other ways and rely less on raw durability and more on their other utilities. | |||
These ships also get bonuses to two damage types. The bonuses are smaller than for HACs, etc., but are still strong. | |||
; [[Black Ops]] | |||
Black Ops Battleships are the odd ones out, in that their resist bonuses are not exactly like other classes, and difference in bonus values. Unlike on most ships, their resistances values are rounded off, result in no decimal part in their nature resistance. Once a mix between lightly increased primary and/or secondary resistances, resistances are now approximately either 40% (Widow, Sin) or 36% (Panther, Redeemer) bonus to the primary, and approximately either 18.75% (Widow, Sin) or 21.25% (Panther, Redeemer) for the secondary. | |||
= | {| class="wikitable" | ||
|- | |||
! Ship !! Armor primary !! Armor secondary !! Shield primary !! Shield secondary | |||
|- | |||
| {{sh|Redeemer}} || {{icon|ex resist||Explosive}}36.25% || {{icon|ki resist||Kinetic}}21.33% || {{icon|ex resist||Explosive}}36% || {{icon|ki resist||Kinetic}}21.67% | |||
|- | |||
| {{sh|Widow}} || {{icon|th resist||Thermal}}40% || {{icon|ki resist||Kinetic}}18.67% || {{icon|th resist||Thermal}}37.5% || {{icon|ki resist||Kinetic}}18.33% | |||
|- | |||
| {{sh|Sin}} || {{icon|ki resist||Kinetic}}38.46% || {{icon|th resist||Thermal}}18.46% || {{icon|ki resist||Kinetic}}40% || {{icon|th resist||Thermal}}18.75% | |||
|- | |||
| {{sh|Panther}} || {{icon|em resist||EM}}37.5% || {{icon|th resist||Thermal}}21.54% || {{icon|em resist||EM}}36% || {{icon|th resist||Thermal}}21.25% | |||
|} | |||
; [[Stealth Bombers]], [[Marauders]], [[Jump Freighter]]s, [[Dreadnoughts|Lancer Dreadnoughts]] | |||
The main defense of a bomber is its cloaking device, and so it sacrifices some durability. As Jump Freighters are non-combat ships they are not built to be durable. Marauders, meanwhile, have a different approach to defense: much of their endurance comes from their [[Bastion Module]]; and as a result of that heavy specialization, the ships are somewhat vulnerable when not in bastion. Lancer Dreadnoughts, like other T1 dreadnoughts, defense with their local repairers enhanced by their Siege Module. | |||
; [[Interceptor]]s and [[Covert Ops#Covert Ops|Covert Ops]] | |||
Interceptors and the exploration-bonused Covert Ops frigates get one resistance bonus, to their enemy's primary damage type. Unlike most other ships listed here, the bonus these ships gain is a ''flat'' 10% bonus, added to the base T1 shield and armor profiles. (This stacks with the flat 10% racial bonus to armor, meaning that in effect interceptors take the base 50/35/25/10 armor profile, and add +20 to one resist.) | |||
; [[Expedition Frigates]] and [[Exhumers]] | |||
T2 ORE ships have zero improvement in nature resistances compared to their T1 variants. | |||
The exhumers and the {{sh|Endurance}} then get a 4% bonus to all shield resistances for each level of the {{Sk|Exhumers}} and {{Sk|Expedition Frigates}} skills respectively. | |||
; [[Triglavian Collective|Triglavian]] Ships | |||
[[ | For {{sh|Nergal}}, {{sh|Draugur}}, and {{sh|Ikitursa}}, their "enemy damage types" for purpose of T2 resistances are explosive and thermal to against Triglavian Collective. Their bonuses are also unlike any other ship of their type, which are flat 35% explosive and flat 30% thermal to shields, and flat 35% explosive and flat 40% thermal to armor. | ||
{{sh|Zarmazd}} Logistics Cruiser uses the same +75% explosive and +50% thermal resist bonuses as an Amarr {{sh|Guardian}}. | |||
; [[CONCORD]] ships | |||
The CONCORD {{sh|Pacifier}}, {{sh|Enforcer}} and {{sh|Marshal}} are considered T2 ships. The Pacifier and Enforcer have even resist profiles of 33/33/33/33 for both shield and armor, like the Gnosis but a little stronger. The Marshal has an improved resist profile of 40/40/40/40 for both shield and armor. The Flag Cruiser, the {{sh|Monitor}}, is also T2. While it has normal 33% hull resists its shield and armor resists are extremely high at 90%, with bonus skill-based resistances. | |||
== | == Table of Tech II & III resists by ship == | ||
''Improved resists are shaded in green, with brighter shades corresponding to the strength of the bonus.'' | |||
=== Amarr === | === Amarr === | ||
{| | {| class="wikitable" style="text-align: center;" | ||
!colspan=" | !colspan="8" style="font-size: 22px;"| Tech II & III Amarr Ships - Natural Resistances | ||
|- style="font-size: 18px;" | |||
|colspan="4" | Interceptors | |||
|colspan="4" | Assault Frigates | |||
|- | |- | ||
| | |'''[[Crusader]]''' | ||
|'''[[Malediction]]''' | |||
| | |style="width:90px;"| [[File:Icon_shield.png|link=|Shield]] | ||
|style="width: | |style="width:90px;"| [[File:Icon_armor.png|link=|Armor]] | ||
|style="width: | |'''[[Vengeance]]''' | ||
| | |'''[[Retribution]]''' | ||
|style="width: | |style="width:90px;"| [[File:Icon_shield.png|link=|Shield]] | ||
|style="width: | |style="width:90px;"| [[File:Icon_armor.png|link=|Armor]] | ||
|- | |- | ||
|rowspan="4"|[[File:Crusader.jpg|link=crusader| | |rowspan="4"|[[File:Crusader.jpg|link=crusader|147px]] | ||
|[[File:Icon_resist_em.png]]0% | |rowspan="4"|[[File:Malediction.jpg|link=malediction|147px]] | ||
|[[File:Icon_resist_em.png]]50% | |[[File:Icon_resist_em.png|link=]]0% | ||
|rowspan="4"|[[File: | |[[File:Icon_resist_em.png|link=]]50% | ||
|[[File:Icon_resist_em.png]]0% | |rowspan="4"|[[File:Vengeance.jpg|link=Vengeance|147px]] | ||
|[[File:Icon_resist_em.png]]50% | |rowspan="4"|[[File:Retribution.jpg|link=Retribution|147px]] | ||
|[[File:Icon_resist_em.png|link=]]0% | |||
|[[File:Icon_resist_em.png|link=]]50% | |||
|- | |- | ||
|[[File:Icon_resist_therm.png]]20% | |[[File:Icon_resist_therm.png|link=]]20% | ||
|[[File:Icon_resist_therm.png]]35% | |[[File:Icon_resist_therm.png|link=]]35% | ||
|[[File:Icon_resist_therm.png]]20% | |[[File:Icon_resist_therm.png|link=]]20% | ||
|[[File:Icon_resist_therm.png]]35% | |[[File:Icon_resist_therm.png|link=]]35% | ||
|- | |- | ||
|[[File:Icon_resist_kin.png]]40% | |[[File:Icon_resist_kin.png|link=]]40% | ||
|[[File:Icon_resist_kin.png]]25% | |[[File:Icon_resist_kin.png|link=]]25% | ||
|[[File:Icon_resist_kin.png]] | |style="background-color: #3A5923; color: white;" | [[File:Icon_resist_kin.png|link=|40% base (-50%)]]70% | ||
|[[File:Icon_resist_kin.png]] | |style="background-color: #3A5923; color: white;" | [[File:Icon_resist_kin.png|link=|25% base (-50%)]]63% | ||
|- style="color: white;" | |||
|style="background-color: #213314;"| [[File:Icon_resist_exp.png|link=|50% base (flat 10%, -20%)]]60% | |||
|style="background-color: #1A2810;"| [[File:Icon_resist_exp.png|link=|20% base (flat 10%, -12.5%)]]30% | |||
|style="background-color: #4C772F;"| [[File:Icon_resist_exp.png|link=|50% base (-75%)]]88% | |||
|style="background-color: #4C772F;" |[[File:Icon_resist_exp.png|link=|20% base (-75%)]]80% | |||
|- | |- | ||
| | |colspan="8" style="font-size: 18px;"|Covert Ops | ||
| | |||
|- | |- | ||
|colspan= | |colspan=2| '''[[Anathema]]''' | ||
| [[File:Icon_shield.png|link=|Shield]] | |||
| [[File:Icon_armor.png|link=|Armor]] | |||
|colspan=2| '''[[Purifier]]''' | |||
| [[File:Icon_shield.png|link=|Shield]] | |||
| [[File:Icon_armor.png|link=Armor]] | |||
|- | |- | ||
| | |rowspan="4" colspan="2"|[[File:anathema.jpg|147px|link=anathema]] | ||
|[[File:Icon_resist_em.png|link=]]0% | |||
| | |[[File:Icon_resist_em.png|link=]]50% | ||
| | |rowspan="4" colspan="2"|[[File:Purifier.jpg|147px|link=purifier]] | ||
|[[File:Icon_resist_em.png|link=]]0% | |||
| | |[[File:Icon_resist_em.png|link=]]50% | ||
|- | |- | ||
|[[File:Icon_resist_therm.png|link=]]20% | |||
|[[File: | |[[File:Icon_resist_therm.png|link=]]35% | ||
|[[File: | |[[File:Icon_resist_therm.png|link=]]20% | ||
|[[File:Icon_resist_therm.png|link=]]35% | |||
|[[File: | |||
| | |||
|- | |- | ||
|[[File: | |[[File:Icon_resist_kin.png|link=]]40% | ||
|[[File: | |[[File:Icon_resist_kin.png|link=]]25% | ||
|[[File: | |style="background-color: #1C2A11; color: white;" | [[File:Icon_resist_kin.png|link=|40% base (-12.5%)]]48% | ||
|[[File: | |style="background-color: #1C2A11; color: white;" | [[File:Icon_resist_kin.png|link=|25% base (-12.5%)]]34% | ||
|- style="color: white;" | |||
|style="background-color: #213314;"| [[File:Icon_resist_exp.png|link=|50% base (flat 10%, -20%)]]60% | |||
|style="background-color: #1A2810;"| [[File:Icon_resist_exp.png|link=|20% base (flat 10%, -12.5%)]]30% | |||
|style="background-color: #263917;"| [[File:Icon_resist_exp.png|link=|50% base (-25%)]]63% | |||
|style="background-color: #263917;"| [[File:Icon_resist_exp.png|link= | |||
20% base (-25%)]]40% | |||
|- style="font-size: 18px;" | |||
|colspan="4" |Electronic Attack Frigates | |||
|colspan="4" |Logistics Frigates | |||
|- | |- | ||
|[[File: | |colspan="2"| '''[[Sentinel]]''' | ||
|[[File: | | [[File:Icon_shield.png|link=]] | ||
|[[File: | | [[File:Icon_armor.png|link=]] | ||
|[[File: | |colspan="2"| '''[[Deacon]]''' | ||
| [[File:Icon_shield.png|link=]] | |||
| [[File:Icon_armor.png|link=]] | |||
|- | |- | ||
|[[File: | |rowspan="4" colspan="2"|[[File:Sentinel.jpg|147px|link=sentinel]] | ||
|[[File: | |[[File:Icon_resist_em.png|link=]]0% | ||
|[[File: | |[[File:Icon_resist_em.png|link=]]50% | ||
|[[File: | |rowspan="4" colspan="2"|[[File:Deacon.jpg|147px|link=deacon]] | ||
|[[File:Icon_resist_em.png|link=]]0% | |||
|[[File:Icon_resist_em.png|link=]]50% | |||
|- | |- | ||
| | |[[File:Icon_resist_therm.png|link=]]20% | ||
|[[File:Icon_resist_therm.png|link=]]35% | |||
|[[File:Icon_resist_therm.png|link=]]20% | |||
|[[File:Icon_resist_therm.png|link=]]35% | |||
|- style="color: white;" | |||
|style="background-color: #263917;"| [[File:Icon_resist_kin.png|link=|40% base (-25%)]]55% | |||
|style="background-color: #263917;"| [[File:Icon_resist_kin.png|link=|25% base (-25%)]]44% | |||
|style="background-color: #263917;"| [[File:Icon_resist_kin.png|link=|40% base (-25%)]]55% | |||
|style="background-color: #263917;"| [[File:Icon_resist_kin.png|link=|25% base (-25%)]]44% | |||
|- style="color: white;" | |||
|style="background-color: #3A5923;"| [[File:Icon_resist_exp.png|link=|50% base (-50%)]]75% | |||
|style="background-color: #3A5923;"| [[File:Icon_resist_exp.png|link=|20% base (-50%)]]60% | |||
|style="background-color: #3A5923;"| [[File:Icon_resist_exp.png|link=|50% base (-50%)]]75% | |||
|style="background-color: #3A5923;"| [[File:Icon_resist_exp.png|link=|20% base (-50%)]]60% | |||
|- style="font-size: 18px;" | |||
|colspan="4" | Interdictors | |||
|colspan="4" | Command Destroyers | |||
|- | |- | ||
| | |colspan="2"| '''[[Heretic]]''' | ||
| [[File:Icon_shield.png|link=]] | |||
| [[File:Icon_armor.png|link=]] | |||
|colspan="2"| '''[[Pontifex]]''' | |||
| | | [[File:Icon_shield.png|link=]] | ||
| [[File:Icon_armor.png|link=]] | |||
|- | |- | ||
|rowspan="4"|[[File: | |rowspan="4" colspan="2"|[[File:Heretic.jpg|147px|link=heretic]] | ||
|[[File:Icon_resist_em.png]]0% | |[[File:Icon_resist_em.png|link=]]0% | ||
|[[File:Icon_resist_em.png]]50% | |[[File:Icon_resist_em.png|link=]]50% | ||
|rowspan="4"|[[File: | |rowspan="4" colspan="2"|[[File:Pontifex.jpg|147px|link=pontifex]] | ||
|[[File:Icon_resist_em.png]]0% | |[[File:Icon_resist_em.png|link=]]0% | ||
|[[File:Icon_resist_em.png]]50% | |[[File:Icon_resist_em.png|link=]]50% | ||
|- | |- | ||
|[[File:Icon_resist_therm.png]]20% | |[[File:Icon_resist_therm.png|link=]]20% | ||
|[[File:Icon_resist_therm.png]]35% | |[[File:Icon_resist_therm.png|link=]]35% | ||
|[[File:Icon_resist_therm.png]]20% | |[[File:Icon_resist_therm.png|link=]]20% | ||
|[[File:Icon_resist_therm.png]]35% | |[[File:Icon_resist_therm.png|link=]]35% | ||
|- style="color: white;" | |||
|style="background-color: #263917;"| [[File:Icon_resist_kin.png|link=|40% base (-25%)]]55% | |||
|style="background-color: #263917;"| [[File:Icon_resist_kin.png|link=|25% base (-25%)]]44% | |||
|style="background-color: #263917; color: white;"| [[File:Icon_resist_kin.png|link=|40% base (-25%)]]55% | |||
|style="background-color: #263917; color: white;"| [[File:Icon_resist_kin.png|link=|25% base (-25%)]]44% | |||
|- | |- | ||
|[[File: | |style="background-color: #3A5923; color: white;"| [[File:Icon_resist_exp.png|link=|50% base (-50%)]]75% | ||
|[[File: | |style="background-color: #3A5923; color: white;"| [[File:Icon_resist_exp.png|link=|20% base (-50%)]]60% | ||
|[[File: | |style="background-color: #3A5923; color: white;"| [[File:Icon_resist_exp.png|link=|50% base (-50%)]]75% | ||
|[[File: | |style="background-color: #3A5923; color: white;"| [[File:Icon_resist_exp.png|link=|20% base (-50%)]]60% | ||
|- style="font-size: 18px;" | |||
|colspan="4" | Recon Ships | |||
|colspan="4" | Heavy Assault Cruisers | |||
|- | |- | ||
|[[File: | |'''[[Pilgrim]]''' | ||
|[[File: | |'''[[Curse]]''' | ||
|[[File: | | [[File:Icon_shield.png|link=]] | ||
|[[File: | | [[File:Icon_armor.png|link=]] | ||
|'''[[Zealot]]''' | |||
|'''[[Sacrilege]]''' | |||
| [[File:Icon_shield.png|link=]] | |||
| [[File:Icon_armor.png|link=]] | |||
|- | |- | ||
| | |rowspan="4"|[[File:Pilgrim.jpg|147px|link=pilgrim]] | ||
|rowspan="4"|[[File:Curse.jpg|147px|link=curse]] | |||
|[[File:Icon_resist_em.png|link=]]0% | |||
|[[File:Icon_resist_em.png|link=]]50% | |||
|rowspan="4"|[[File:Zealot.jpg|147px|link=zealot]] | |||
|rowspan="4"|[[File:Sacrilege.jpg|147px|link=sacrilege]] | |||
|[[File:Icon_resist_em.png|link=]]0% | |||
|[[File:Icon_resist_em.png|link=]]50% | |||
|- | |- | ||
| | |[[File:Icon_resist_therm.png|link=]]20% | ||
|style=" | |[[File:Icon_resist_therm.png|link=]]35% | ||
|style=" | |[[File:Icon_resist_therm.png|link=]]20% | ||
|[[File:Icon_resist_therm.png|link=]]35% | |||
|- style="color: white;" | |||
|style="background-color: #30491D;"| [[File:Icon_resist_kin.png|link=|40% base (-37.5%)]]63% | |||
|style="background-color: #30491D;"| [[File:Icon_resist_kin.png|link=|25% base (-37.5%)]]53% | |||
|style="background-color: #3A5923;"| [[File:Icon_resist_kin.png|link=|40% base (-50%)]]70% | |||
|style="background-color: #3A5923;"| [[File:Icon_resist_kin.png|link=|25% base (-50%)]]63% | |||
|- style="color: white;" | |||
|style="background-color: #45692A;"| [[File:Icon_resist_exp.png|link=|50% base (-62.5%)]]81% | |||
|style="background-color: #45692A;"| [[File:Icon_resist_exp.png|link=|20% base (-62.5%)]]70% | |||
|style="background-color: #4C772F;"| [[File:Icon_resist_exp.png|link=|50% base (-75%)]]88% | |||
|style="background-color: #4C772F;"| [[File:Icon_resist_exp.png|link=|20% base (-75%)]]80% | |||
|- style="font-size: 18px;" | |||
|colspan="4" | Heavy Interdiction Cruisers | |||
|colspan="4" | Logistics Cruisers | |||
|- | |- | ||
| | |colspan="2" | '''[[Devoter]]''' | ||
|[[File: | | [[File:Icon_shield.png|link=]] | ||
|[[File: | | [[File:Icon_armor.png|link=]] | ||
|colspan="2" | '''[[Guardian]]''' | |||
| [[File:Icon_shield.png|link=]] | |||
| [[File:Icon_armor.png|link=]] | |||
|- | |- | ||
|[[File: | |rowspan="4" colspan="2"|[[File:Devoter.jpg|147px|link=devoter]] | ||
|[[File: | |[[File:Icon_resist_em.png|link=]]0% | ||
|[[File:Icon_resist_em.png|link=]]50% | |||
|rowspan="4" colspan="2"|[[File:Guardian.jpg|147px|link=guardian]] | |||
|[[File:Icon_resist_em.png|link=]]0% | |||
|[[File:Icon_resist_em.png|link=]]50% | |||
|- | |- | ||
|[[File: | |[[File:Icon_resist_therm.png|link=]]20% | ||
| | |[[File:Icon_resist_therm.png|link=]]35% | ||
|[[File:Icon_resist_therm.png|link=]]20% | |||
|[[File: | |[[File:Icon_resist_therm.png|link=]]35% | ||
| | |- style="color: white;" | ||
|style="background-color: #3A5923;"| [[File:Icon_resist_kin.png|link=|40% base (-50%)]]70% | |||
|style="background-color: #3A5923;"| [[File:Icon_resist_kin.png|link=|25% base (-50%)]]63% | |||
|style="background-color: #3A5923;"| [[File:Icon_resist_kin.png|link=|40% base (-50%)]]70% | |||
|style="background-color: #3A5923;"| [[File:Icon_resist_kin.png|link=|25% base (-50%)]]63% | |||
|- style="color: white;" | |||
|style="background-color: #4C772F;"| [[File:Icon_resist_exp.png|link=|50% base (-75%)]]88% | |||
|style="background-color: #4C772F;"| [[File:Icon_resist_exp.png|link=|20% base (-75%)]]80% | |||
|style="background-color: #4C772F;"| [[File:Icon_resist_exp.png|link=|50% base (-75%)]]88% | |||
|style="background-color: #4C772F;"| [[File:Icon_resist_exp.png|link=|20% base (-75%)]]80% | |||
|- style="font-size: 18px;" | |||
|[[File:Icon_resist_therm.png | |colspan="4" | Command Ships | ||
| | |colspan="4" | Tactical Destroyers/Strategic Cruisers | ||
|- | |||
|style=" | |||
| | |||
|style=" | |||
| | |||
|- | |||
| | |||
| | |||
|- | |||
|[[File:Icon_resist_kin.png | |||
| | |||
| | |||
|- | |||
|style=" | |||
| | |||
|style=" | |||
| | |||
| | |||
| | |||
| | |||
| | |||
|- | |||
| | |||
| | |||
|- | |- | ||
| | |'''[[Absolution]]''' | ||
|[[File: | |'''[[Damnation]]''' | ||
|[[File: | | [[File:Icon_shield.png|link=]] | ||
| [[File:Icon_armor.png|link=]] | |||
|'''[[Confessor]]''' | |||
|'''[[Legion]]''' | |||
| [[File:Icon_shield.png|link=]] | |||
| [[File:Icon_armor.png|link=]] | |||
|- | |- | ||
|[[File: | |rowspan="4"|[[File:Absolution.jpg|147px|link=absolution]] | ||
|[[File: | |rowspan="4"|[[File:Damnation.jpg|147px|link=damnation]] | ||
|[[File:Icon_resist_em.png|link=]]0% | |||
|[[File:Icon_resist_em.png|link=]]50% | |||
|rowspan="4"|[[File:Confessor.jpg|147px|link=confessor]] | |||
|rowspan="4"|[[File:Legion.jpg|147px|link=legion]] | |||
|[[File:Icon_resist_em.png|link=]]0% | |||
|[[File:Icon_resist_em.png|link=]]50% | |||
|- | |- | ||
|[[File: | |[[File:Icon_resist_therm.png|link=]]20% | ||
|[[File: | |[[File:Icon_resist_therm.png|link=]]35% | ||
|[[File:Icon_resist_therm.png|link=]]20% | |||
|[[File: | |[[File:Icon_resist_therm.png|link=]]35% | ||
|[[File: | |- style="color: white;" | ||
|- | |style="background-color: #3A5923;"| [[File:Icon_resist_kin.png|link=|40% base (-50%)]]70% | ||
|style="background-color: #3A5923;"| [[File:Icon_resist_kin.png|link=|25% base (-50%)]]63% | |||
|style="background-color: #263917;"| [[File:Icon_resist_kin.png|link=|40% base (-25%)"]]55% | |||
|style="background-color: #263917;"| [[File:Icon_resist_kin.png|link=|25% base (-25%)]]44% | |||
|style=" | |- style="color: white;" | ||
|style=" | |style="background-color: #4C772F;"| [[File:Icon_resist_exp.png|link=|50% base (-75%)]]88% | ||
|style="background-color: #4C772F;"| [[File:Icon_resist_exp.png|link=|20% base (-75%)]]80% | |||
|style=" | |style="background-color: #3A5923;"| [[File:Icon_resist_exp.png|link=|50% base (-50%)]]75% | ||
|style=" | |style="background-color: #3A5923;"| [[File:Icon_resist_exp.png|link=|20% base (-50%)]]60% | ||
|- | |||
| | |||
| | |||
| | |||
| | |||
|- | |||
|[[File: | |||
| | |||
| | |||
| | |||
|[[File: | |||
| | |||
| | |||
|- style="font-size: 18px;" | |||
|colspan="4" | Black Ops | |||
|colspan="4" | Marauders | |||
|- | |- | ||
|colspan=" | |colspan="2"|'''[[Redeemer]]''' | ||
| [[File:Icon_shield.png|link=]] | |||
| [[File:Icon_armor.png|link=]] | |||
|colspan="2"|'''[[Paladin]]''' | |||
| [[File:Icon_shield.png|link=]] | |||
| [[File:Icon_armor.png|link=]] | |||
|- | |- | ||
| | |rowspan="4" colspan="2"|[[File:Redeemer.jpg|147px|link=redeemer]] | ||
| | |[[File:Icon_resist_em.png|link=]]0% | ||
| | |[[File:Icon_resist_em.png|link=]]50% | ||
|rowspan="4" colspan="2"|[[File:Paladin.jpg|147px|link=paladin]] | |||
|[[File:Icon_resist_em.png|link=]]0% | |||
|[[File:Icon_resist_em.png|link=]]50% | |||
|- | |- | ||
| | |[[File:Icon_resist_therm.png|link=]]20% | ||
|[[File: | |[[File:Icon_resist_therm.png|link=]]35% | ||
|[[File: | |[[File:Icon_resist_therm.png|link=]]20% | ||
|- | |[[File:Icon_resist_therm.png|link=]]35% | ||
|[[File: | |- style="color: white;" | ||
|[[File: | |style="background-color: #243816;"| [[File:Icon_resist_kin.png|link=|40% base (-21.66%)]]53% | ||
|- | |style="background-color: #223615;"| [[File:Icon_resist_kin.png|link=|25% base (-21.33%)]]41% | ||
|[[File:Icon_resist_kin.png]] | |style="background-color: #1C2A11;"| [[File:Icon_resist_kin.png|link=|40% base (-12.5%)]]48% | ||
|[[File: | |style="background-color: #1C2A11;"| [[File:Icon_resist_kin.png|link=|25% base (-12.5%)]]34% | ||
|- | |- style="color: white;" | ||
|[[File:Icon_resist_exp.png]] | |style="background-color: #2E471D;"| [[File:Icon_resist_exp.png|link=|50% base (-36%)]]68% | ||
|[[File:Icon_resist_exp.png]] | |style="background-color: #2E471D;"| [[File:Icon_resist_exp.png|link=|20% base (-36.25%)]]49% | ||
|style="background-color: #263917;"| [[File:Icon_resist_exp.png|link=|50% base (-25%)]]63% | |||
|style="background-color: #263917;"| [[File:Icon_resist_exp.png|link=|20% base (-25%)]]40% | |||
|- style="font-size: 18px;" | |||
|colspan="4" | Transport Ships | |||
|colspan="4" | Jump Freighters | |||
|- | |- | ||
| | |'''[[Impel]]''' | ||
|'''[[Prorator]]''' | |||
|[[File:Icon_shield.png|link=]] | |||
|[[File:Icon_armor.png|link=]] | |||
| | |colspan="2"|'''[[Ark]]''' | ||
|[[File:Icon_shield.png|link=]] | |||
|[[File:Icon_armor.png|link=]] | |||
|[[File: | |||
|[[ | |||
|[[File: | |||
|[[File: | |||
|- | |- | ||
|[[File: | |rowspan="4"|[[File:Impel.jpg|147px|link=impel]] | ||
|[[File: | |rowspan="4"|[[File:Prorator.jpg|147px|link=Prorator]] | ||
|[[File:Icon_resist_em.png|link=]]0% | |||
|[[File:Icon_resist_em.png|link=]]50% | |||
|rowspan="4" colspan="2"|[[File:Ark.jpg|147px|link=ark]] | |||
|[[File:Icon_resist_em.png|link=]]0% | |||
|[[File:Icon_resist_em.png|link=]]50% | |||
|- | |- | ||
|[[File:Icon_resist_exp.png]]63% | |[[File:Icon_resist_therm.png|link=]]20% | ||
|[[File:Icon_resist_exp.png]]40% | |[[File:Icon_resist_therm.png|link=]]35% | ||
|[[File:Icon_resist_therm.png|link=]]20% | |||
|[[File:Icon_resist_therm.png|link=]]35% | |||
|- style="color: white;" | |||
|style="background-color: #3A5923;"| [[File:Icon_resist_kin.png|link=|40% base (-50%)]]70% | |||
|style="background-color: #3A5923;"| [[File:Icon_resist_kin.png|link=|25% base (-50%)]]63% | |||
|style="background-color: #1C2A11;"| [[File:Icon_resist_kin.png|link=|40% base (-12.5%)]]48% | |||
|style="background-color: #1C2A11;"| [[File:Icon_resist_kin.png|link=|25% base (-12.5%)]]34% | |||
|- style="color: white;" | |||
|style="background-color: #4C772F;"| [[File:Icon_resist_exp.png|link=|50% base (-75%)]]88% | |||
|style="background-color: #4C772F;"| [[File:Icon_resist_exp.png|link=|20% base (-75%)]]80% | |||
|style="background-color: #263917;"| [[File:Icon_resist_exp.png|link=|50% base (-25%)]]63% | |||
|style="background-color: #263917;"| [[File:Icon_resist_exp.png|link=|20% base (-25%)]]40% | |||
|- | |- | ||
|colspan=" | |colspan="8" style="font-size: 18px;"|Lancer Dreadnoughts | ||
|- | |- | ||
|[[ | |colspan="6"|'''[[Bane]]''' | ||
|[[File: | | [[File:Icon_shield.png|link=]] | ||
|[[File: | | [[File:Icon_armor.png|link=]] | ||
| | |||
|- | |- | ||
| | |rowspan="6" colspan="6"| <div class="imageserver">{{Imageserver|types|77283|render|size=256}}</div> | ||
|[[File: | |[[File:Icon_resist_em.png|link=]]0% | ||
|[[File: | |[[File:Icon_resist_em.png|link=]]50% | ||
| | |||
|- | |- | ||
|[[File: | |[[File:Icon_resist_therm.png|link=]]20% | ||
| | |[[File:Icon_resist_therm.png|link=]]35% | ||
|[[File: | |- style="color: white;" | ||
| | |style="background-color: #1C2A11;"| [[File:Icon_resist_kin.png|link=|40% base (-12.5%)]]48% | ||
|- | |style="background-color: #1C2A11;"| [[File:Icon_resist_kin.png|link=|25% base (-12.5%)]]34% | ||
|- style="color: white;" | |||
|style="background-color: #263917;"| [[File:Icon_resist_exp.png|link=|50% base (-25%)]]63% | |||
|style="background-color: #263917;"| [[File:Icon_resist_exp.png|link=|20% base (-25%)]]40% | |||
|style=" | |||
|style=" | |||
|- | |||
| | |||
| | |||
|- | |||
|[[File: | |||
| | |||
|} | |} | ||
=== Caldari === | === Caldari === | ||
{| | {|class="wikitable" style="text-align: center;" | ||
!colspan=" | !colspan="8" style="font-size: 22px;"| Tech II & III Caldari Ships - Natural Resistances | ||
|- style="font-size: 18px;" | |||
|colspan="4" | Interceptors | |||
|colspan="4" |Assault Frigates | |||
|- | |- | ||
| | |'''[[Crow]]''' | ||
|'''[[Raptor]]''' | |||
|style="width:90px;"|[[File:Icon_shield.png|link=|Shield]] | |||
|style="width:90px;"|[[File:Icon_armor.png|link=|Armor]] | |||
|'''[[Hawk]]''' | |||
|'''[[Harpy]]''' | |||
|style="width:90px;"|[[File:Icon_shield.png|link=|Shield]] | |||
|style="width:90px;"|[[File:Icon_armor.png|link=Armor]] | |||
|- | |- | ||
| | |rowspan="4"|[[File:Crow.jpg|link=Crow|147px]] | ||
|style=" | |rowspan="4"|[[File:Raptor.jpg|link=Raptor|147px]] | ||
|style=" | |[[File:Icon_resist_em.png|link=]]0% | ||
|[[File:Icon_resist_em.png|link=]]50% | |||
|style=" | |rowspan="4"|[[File:Hawk.jpg|147px|link=Hawk]] | ||
|style=" | |rowspan="4"|[[File:Harpy.jpg|147px|link=Harpy]] | ||
|[[File:Icon_resist_em.png|link=]]0% | |||
|[[File:Icon_resist_em.png|link=]]50% | |||
|- style="color: white;" | |||
|style="background-color: #1A2810;"| [[File:Icon_resist_therm.png|link=|20% base (flat 10%, -12.5%)]]30% | |||
|style="background-color: #314A1E;"| [[File:Icon_resist_therm.png|link=|45% base (flat 10%, -18%)]]55% | |||
|style="background-color: #4C772F;"| [[File:Icon_resist_therm.png|link=|20% base (-75%)]]80% | |||
|style="background-color: #4C772F;"| [[File:Icon_resist_therm.png|link=|45% base (-75%)]]86% | |||
|- | |- | ||
|[[File:Icon_resist_kin.png|link=]]40% | |||
|[[File: | |[[File:Icon_resist_kin.png|link=]]25% | ||
| | |style="background-color: #3A5923; color: white;"| [[File:Icon_resist_kin.png|link=|40% base (-50%)]]70% | ||
| | |style="background-color: #3A5923; color: white;"| [[File:Icon_resist_kin.png|link=|25% base (-50%)]]63% | ||
| | |||
|[[File: | |||
|- | |- | ||
|[[File: | |[[File:Icon_resist_exp.png|link=]]50% | ||
|[[File: | |[[File:Icon_resist_exp.png|link=]]10% | ||
|[[File: | |[[File:Icon_resist_exp.png|link=]]50% | ||
|[[File: | |[[File:Icon_resist_exp.png|link=]]10% | ||
|- | |- | ||
| | |colspan="8" style="font-size: 18px;"|Covert Ops | ||
| | |||
|- | |- | ||
|[[File: | |colspan="2"|'''[[Buzzard]]''' | ||
|[[File: | |[[File:Icon_shield.png|link=]] | ||
|[[File: | |[[File:Icon_armor.png|link=]] | ||
|[[File: | |colspan="2"|'''[[Manticore]]''' | ||
|[[File:Icon_shield.png|link=]] | |||
|[[File:Icon_armor.png|link=]] | |||
|- | |- | ||
|colspan=" | |rowspan="4" colspan="2"|[[File:Buzzard.jpg|147px|link=Buzzard]] | ||
|[[File:Icon_resist_em.png|link=]]0% | |||
|[[File:Icon_resist_em.png|link=]]50% | |||
|rowspan="4" colspan="2"|[[File:Manticore.jpg|147px|link=Manticore]] | |||
|[[File:Icon_resist_em.png|link=]]0% | |||
|[[File:Icon_resist_em.png|link=]]50% | |||
|-- style="color: white;" | |||
|style="background-color: #1A2810;"| [[File:Icon_resist_therm.png|link=|20% base (flat 10%, -12.5%)]]30% | |||
|style="background-color: #314A1E;"| [[File:Icon_resist_therm.png|link=|45% base (flat 10%, -18%)]]55% | |||
|style="background-color: #263917;"| [[File:Icon_resist_therm.png|link=|20% base (-25%)]]40% | |||
|style="background-color: #263917;"| [[File:Icon_resist_therm.png|link=|45% base (-25%)]]59% | |||
|- | |- | ||
|[[File:Icon_resist_kin.png|link=]]40% | |||
|[[File:Icon_resist_kin.png|link=]]25% | |||
|style="background-color: #1A2810; color: white;"|<span title="40% base (-12.5%)">[[File:Icon_resist_kin.png|link=]]48%</span> | |||
|style="background-color: #1A2810; color: white;;"|<span title="20% base (-12.5%)">[[File:Icon_resist_kin.png|link=]]34%</span> | |||
|style=" | |||
|style=" | |||
|- | |- | ||
|[[File:Icon_resist_exp.png|link=]]50% | |||
|[[File: | |[[File:Icon_resist_exp.png|link=]]10% | ||
|[[File: | |[[File:Icon_resist_exp.png|link=]]50% | ||
|[[File:Icon_resist_exp.png|link=]]10% | |||
| | |||
| | |- style="font-size: 18px;" | ||
|colspan="4" | Electronic Attack Frigates | |||
|colspan="4" | Logistics Frigates | |||
|- | |- | ||
|[[File: | |colspan="2"|'''[[Kitsune]]''' | ||
|[[File: | |[[File:Icon_shield.png|link=]] | ||
|[[File: | |[[File:Icon_armor.png|link=]] | ||
|[[File: | |colspan="2"|'''[[Kirin]]''' | ||
|[[File:Icon_shield.png|link=]] | |||
|[[File:Icon_armor.png|link=]] | |||
|- | |- | ||
|[[File:Icon_resist_kin.png]] | |rowspan="4" colspan="2"|[[File:Kitsune.jpg|147px|link=Kitsune]] | ||
|[[File:Icon_resist_kin.png]] | |[[File:Icon_resist_em.png|link=]]0% | ||
|[[File:Icon_resist_kin.png]] | |[[File:Icon_resist_em.png|link=]]50% | ||
|[[File:Icon_resist_kin.png]] | |rowspan="4" colspan="2"|[[File:Kirin.jpg|147px|link=Kirin]] | ||
|[[File:Icon_resist_em.png|link=]]0% | |||
|[[File:Icon_resist_em.png|link=]]50% | |||
|- style="color: white;" | |||
|style="background-color: #3A5923;"| [[File:Icon_resist_therm.png|link=|20% base (-50%)]]60% | |||
|style="background-color: #3A5923;"| [[File:Icon_resist_therm.png|link=|35% base (-50%)]]73% | |||
|style="background-color: #3A5923;"| [[File:Icon_resist_therm.png|link=|20% base (-50%)]]60% | |||
|style="background-color: #3A5923;"| [[File:Icon_resist_therm.png|link=|35% base (-50%)]]73% | |||
|- style="color: white;" | |||
|style="background-color: #1A2810;"| [[File:Icon_resist_kin.png|link= | |||
40% base (-25%)]]55% | |||
|style="background-color: #1A2810;"| [[File:Icon_resist_kin.png|link=|25% base (-25%)]]44% | |||
|style="background-color: #1A2810;"| [[File:Icon_resist_kin.png|link=|40% base (-25%)]]55% | |||
|style="background-color: #1A2810;"| [[File:Icon_resist_kin.png|link=|25% base (-25%)]]44% | |||
|- | |- | ||
|[[File:Icon_resist_exp.png]]50% | |[[File:Icon_resist_exp.png|link=]]50% | ||
|[[File:Icon_resist_exp.png]]10% | |[[File:Icon_resist_exp.png|link=]]10% | ||
|[[File:Icon_resist_exp.png]]50% | |[[File:Icon_resist_exp.png|link=]]50% | ||
|[[File:Icon_resist_exp.png]]10% | |[[File:Icon_resist_exp.png|link=]]10% | ||
|- style="font-size: 18px;" | |||
|colspan="4" | Interdictors | |||
|colspan="4" | Command Destroyers | |||
|- | |- | ||
|colspan=" | |colspan="2"|'''[[Flycatcher]]''' | ||
|[[File:Icon_shield.png|link=]] | |||
|[[File:Icon_armor.png|link=]] | |||
|colspan="2"|'''[[Stork]]''' | |||
|[[File:Icon_shield.png|link=]] | |||
|[[File:Icon_armor.png|link=]] | |||
|- | |- | ||
| | |rowspan="4" colspan="2"|[[File:Flycatcher.jpg|147px|link=Flycatcher]] | ||
|style=" | |[[File:Icon_resist_em.png|link=]]0% | ||
|style=" | |[[File:Icon_resist_em.png|link=]]50% | ||
| | |rowspan="4" colspan="2"|[[File:Stork.jpg|147px|link=Stork]] | ||
|style=" | |[[File:Icon_resist_em.png|link=]]0% | ||
|style=" | |[[File:Icon_resist_em.png|link=]]50% | ||
|- style="color: white;" | |||
|style="background-color: #3A5923;"| [[File:Icon_resist_therm.png|link=|20% base (-50%)]]60% | |||
|style="background-color: #3A5923;"| [[File:Icon_resist_therm.png|link=|35% base (-50%)]]73% | |||
|style="background-color: #4C772F;"| [[File:Icon_resist_therm.png|link=|20% base (-75%)]]80% | |||
|style="background-color: #4C772F;"| [[File:Icon_resist_therm.png|link=|45% base (-75%)]]86% | |||
|- style="color: white;" | |||
|style="background-color: #1A2810;"| [[File:Icon_resist_kin.png|link=|40% base (-25%)]]55% | |||
|style="background-color: #1A2810;"| [[File:Icon_resist_kin.png|link=|25% base (-25%)]]44% | |||
|style="background-color: #3A5923;"| [[File:Icon_resist_kin.png|link=|40% base (-50%)]]70% | |||
|style="background-color: #3A5923;"| [[File:Icon_resist_kin.png|link=|25% base (-50%)]]63% | |||
|- | |- | ||
|[[File:Icon_resist_exp.png|link=]]50% | |||
|[[File: | |[[File:Icon_resist_exp.png|link=]]10% | ||
|[[File: | |[[File:Icon_resist_exp.png|link=]]50% | ||
|[[File:Icon_resist_exp.png|link=]]10% | |||
| | |||
| | |- style="font-size: 18px;" | ||
|colspan="4" | Recon Ships | |||
|colspan="4" | Heavy Assault Cruisers | |||
|- | |- | ||
|[[File: | |'''[[Falcon]]''' | ||
|[[File: | |'''[[Rook]]''' | ||
|[[File: | |[[File:Icon_shield.png|link=]] | ||
|[[File: | |[[File:Icon_armor.png|link=]] | ||
|'''[[Cerberus]]''' | |||
|'''[[Eagle]]''' | |||
|[[File:Icon_shield.png|link=]] | |||
|[[File:Icon_armor.png|link=]] | |||
|- | |- | ||
|[[File:Icon_resist_kin.png]] | |rowspan="4"|[[File:Falcon.jpg|147px|link=Falcon]] | ||
|[[File:Icon_resist_kin.png]] | |rowspan="4"|[[File:Rook.jpg|147px|link=Rook]] | ||
|[[File:Icon_resist_kin.png]] | |[[File:Icon_resist_em.png|link=]]0% | ||
|[[File:Icon_resist_kin.png]] | |[[File:Icon_resist_em.png|link=]]50% | ||
|rowspan="4"|[[File:Cerberus.jpg|147px|link=Cerberus]] | |||
|rowspan="4"|[[File:Eagle.jpg|147px|link=Eagle]] | |||
|[[File:Icon_resist_em.png|link=]]0% | |||
|[[File:Icon_resist_em.png|link=]]50% | |||
|- style="color: white;" | |||
|style="background-color: #45692A;"| [[File:Icon_resist_therm.png|link=|20% base (-62.5%)]]70% | |||
|style="background-color: #45692A;"| [[File:Icon_resist_therm.png|link=|45% base (-62.5%)]]79% | |||
|style="background-color: #4C772F;"| [[File:Icon_resist_therm.png|link=|20% base (-75%)]]80% | |||
|style="background-color: #4C772F;"| [[File:Icon_resist_therm.png|link=|45% base (-75%)]]86% | |||
|- style="color: white;" | |||
|style="background-color: #30491D;"| [[File:Icon_resist_kin.png|link=|40% base (-37.5%)]]63% | |||
|style="background-color: #30491D;"| [[File:Icon_resist_kin.png|link=|25% base (-37.5%)]]53% | |||
|style="background-color: #3A5923;"| [[File:Icon_resist_kin.png|link=|40% base (-50%)]]70% | |||
|style="background-color: #3A5923;"| [[File:Icon_resist_kin.png|link=|25% base (-50%)]]63% | |||
|- | |- | ||
|[[File:Icon_resist_exp.png]]50% | |[[File:Icon_resist_exp.png|link=]]50% | ||
|[[File:Icon_resist_exp.png]]10% | |[[File:Icon_resist_exp.png|link=]]10% | ||
|[[File:Icon_resist_exp.png]]50% | |[[File:Icon_resist_exp.png|link=]]50% | ||
|[[File:Icon_resist_exp.png]]10% | |[[File:Icon_resist_exp.png|link=]]10% | ||
|- style="font-size: 18px;" | |||
|colspan="4" | Heavy Interdiction Cruisers | |||
|colspan="4" | Logistics Cruisers | |||
|- style="font-size: 18px; height: 30px" | |||
|colspan="2"|'''[[Onyx]]''' | |||
| [[File:Icon_shield.png|link=]] | |||
| [[File:Icon_armor.png|link=]] | |||
|colspan="2"|'''[[Basilisk]]''' | |||
| [[File:Icon_shield.png|link=]] | |||
| [[File:Icon_armor.png|link=]] | |||
|- | |- | ||
|colspan=" | |rowspan="4" colspan="2"|[[File:Onyx.jpg|147px|link=Onyx]] | ||
|[[File:Icon_resist_em.png|link=]]0% | |||
|[[File:Icon_resist_em.png|link=]]50% | |||
|rowspan="4" colspan="2"|[[File:Basilisk.jpg|147px|link=Basilisk]] | |||
|[[File:Icon_resist_em.png|link=]]0% | |||
|[[File:Icon_resist_em.png|link=]]50% | |||
|- style="color: white;" | |||
|style="background-color: #4C772F;"| [[File:Icon_resist_therm.png|link=|20% base (-75%)]]80% | |||
|style="background-color: #4C772F;"| [[File:Icon_resist_therm.png|link=|45% base (-75%)]]86% | |||
|style="background-color: #4C772F;"| [[File:Icon_resist_therm.png|link=|20% base (-75%)]]80% | |||
|style="background-color: #4C772F;"| [[File:Icon_resist_therm.png|link=|45% base (-75%)]]86% | |||
|- style="color: white;" | |||
|style="background-color: #3A5923;"| [[File:Icon_resist_kin.png|link=|40% base (-50%)]]70% | |||
|style="background-color: #3A5923;"| [[File:Icon_resist_kin.png|link=|25% base (-50%)]]63% | |||
|style="background-color: #3A5923;"| [[File:Icon_resist_kin.png|link=|40% base (-50%)]]70% | |||
|style="background-color: #3A5923;"| [[File:Icon_resist_kin.png|link=|25% base (-50%)]]63% | |||
|- | |- | ||
|[[File:Icon_resist_exp.png|link=]]50% | |||
|[[File:Icon_resist_exp.png|link=]]10% | |||
|[[File:Icon_resist_exp.png|link=]]50% | |||
|[[File:Icon_resist_exp.png|link=]]10% | |||
|- style="font-size: 18px;" | |||
|colspan="4" | Command Ships | |||
|colspan="4" | Tactical Destroyers/Strategic Cruisers | |||
|[[File: | |||
| | |||
|[[File: | |||
| | |||
|[[File:Icon_resist_exp.png | |||
| | |||
|- | |||
|- | |- | ||
| | |'''[[Vulture]]''' | ||
| | |'''[[Nighthawk]]''' | ||
| | | [[File:Icon_shield.png|link=]] | ||
| [[File:Icon_armor.png|link=]] | |||
|'''[[Jackdaw]]''' | |||
|'''[[Tengu]]''' | |||
| [[File:Icon_shield.png|link=]] | |||
| [[File:Icon_armor.png|link=]] | |||
|- | |- | ||
|rowspan="4"|[[File: | |rowspan="4"|[[File:Vulture.jpg|147px|link=Vulture]] | ||
|[[File:Icon_resist_em.png]]0% | |rowspan="4"|[[File:Nighthawk.jpg|147px|link=Nighthawk]] | ||
|[[File:Icon_resist_em.png]]50% | |[[File:Icon_resist_em.png|link=]]0% | ||
|[[File:Icon_resist_em.png|link=]]50% | |||
|rowspan="4"|[[File:Jackdaw.jpg|147px|link=Jackdaw]] | |||
|rowspan="4"|[[File:Tengu.jpg|147px|link=Tengu]] | |||
|[[File:Icon_resist_em.png|link=]]0% | |||
|[[File:Icon_resist_em.png|link=]]50% | |||
|- style="color: white;" | |||
|style="background-color: #4C772F"| [[File:Icon_resist_therm.png|link=|20% base (-75%)]]80% | |||
|style="background-color: #4C772F"| [[File:Icon_resist_therm.png|link=|45% base (-75%)]]86% | |||
|style="background-color: #3A5923"| [[File:Icon_resist_therm.png|link=|20% base (-50%)]]60% | |||
|style="background-color: #3A5923"| [[File:Icon_resist_therm.png|link=|35% base (-50%)]]73% | |||
|- style="color: white;" | |||
|style="background-color: #3A5923"| [[File:Icon_resist_kin.png|link=|40% base (-50%)]]70% | |||
|style="background-color: #3A5923"| [[File:Icon_resist_kin.png|link=|25% base (-50%)]]63% | |||
|style="background-color: #1A2810"| [[File:Icon_resist_kin.png|link=|40% base (-25%)]]55% | |||
|style="background-color: #1A2810"| [[File:Icon_resist_kin.png|link=|25% base (-25%)]]44% | |||
|- | |- | ||
|[[File:Icon_resist_exp.png|link=]]50% | |||
|[[File:Icon_resist_exp.png|link=]]10% | |||
|[[File:Icon_resist_exp.png|link=]]50% | |||
|[[File:Icon_resist_exp.png|link=]]10% | |||
|[[File:Icon_resist_exp.png | |||
|[[File:Icon_resist_exp.png | |||
|[[File:Icon_resist_exp.png | |||
|[[File:Icon_resist_exp.png | |||
|- style="font-size: 18px;" | |||
|colspan="4" | Black Ops | |||
|colspan="4" | Marauders | |||
|- | |- | ||
|colspan=" | |colspan="2"|'''[[Widow]]''' | ||
| [[File:Icon_shield.png|link=]] | |||
| [[File:Icon_armor.png|link=]] | |||
|colspan="2"|'''[[Golem]]''' | |||
| [[File:Icon_shield.png|link=]] | |||
| [[File:Icon_armor.png|link=]] | |||
| | |||
|[[File: | |||
| | |||
|[[File: | |||
| | |||
|- | |- | ||
|[[File:Icon_resist_kin.png]]40% | |rowspan="4" colspan="2"|[[File:Widow.jpg|147px|link=Widow]] | ||
|[[File:Icon_resist_kin.png]] | |[[File:Icon_resist_em.png|link=]]0% | ||
|[[File:Icon_resist_em.png|link=]]50% | |||
|rowspan="4" colspan="2"|[[File:Golem.jpg|147px|link=Golem]] | |||
|[[File:Icon_resist_em.png|link=]]0% | |||
|[[File:Icon_resist_em.png|link=]]50% | |||
|- style="color: white;" | |||
|style="background-color: #314A1E"| [[File:Icon_resist_therm.png|link=|20% base (-37.5%)]]50% | |||
|style="background-color: #314D1F"| [[File:Icon_resist_therm.png|link=|45% base (-40%)]]67% | |||
|style="background-color: #263917"| [[File:Icon_resist_therm.png|link=|20% base (-25%)]]40% | |||
|style="background-color: #263917"| [[File:Icon_resist_therm.png|link=|45% base (-25%)]]59% | |||
|- style="color: white;" | |||
|style="background-color: #1F3013"| [[File:Icon_resist_kin.png|link=|40% base (-18.33%)]]51% | |||
|style="background-color: #1F3013"| [[File:Icon_resist_kin.png|link=|20% base (-18.67%)]]39% | |||
|style="background-color: #1A2810"| [[File:Icon_resist_kin.png|link=|40% base (-12.5%)]]48% | |||
|style="background-color: #1A2810"| [[File:Icon_resist_kin.png|link=|20% base (-12.5%)]]34% | |||
|- | |- | ||
|[[File:Icon_resist_exp.png]]50% | |[[File:Icon_resist_exp.png|link=]]50% | ||
|[[File:Icon_resist_exp.png]]10% | |[[File:Icon_resist_exp.png|link=]]10% | ||
|[[File:Icon_resist_exp.png|link=]]50% | |||
|[[File:Icon_resist_exp.png|link=]]10% | |||
|- style="font-size: 18px;" | |||
|colspan="4" | Transport Industrials | |||
|colspan="4" | Jump Freighters | |||
|- | |- | ||
| | |'''[[Bustard]]''' | ||
|'''[[Crane]]''' | |||
| [[File:Icon_shield.png|link=]] | |||
| [[File:Icon_armor.png|link=]] | |||
| | |colspan="2"|'''[[Rhea]]''' | ||
| [[File:Icon_shield.png|link=]] | |||
| [[File:Icon_armor.png|link=]] | |||
|[[File: | |||
|[[ | |||
|[[File: | |||
|[[File: | |||
|- | |- | ||
|[[File:Icon_resist_kin.png]]48% | |rowspan="4"|[[File:Bustard.jpg|147px|link=Bustard]] | ||
|[[File:Icon_resist_kin.png]]34% | |rowspan="4"|[[File:Crane.jpg|147px|link=Crane]] | ||
|[[File:Icon_resist_em.png|link=]]0% | |||
|[[File:Icon_resist_em.png|link=]]50% | |||
|rowspan="4" colspan="2"|[[File:Rhea.jpg|147px|link=Rhea]] | |||
|[[File:Icon_resist_em.png|link=]]0% | |||
|[[File:Icon_resist_em.png|link=]]50% | |||
|- style="color: white;" | |||
|style="background-color: #4C772F;"| [[File:Icon_resist_therm.png|link=|20% base (-75%)]]80% | |||
|style="background-color: #4C772F;"| [[File:Icon_resist_therm.png|link=|45% base (-75%)]]86% | |||
|style="background-color: #263917;"| [[File:Icon_resist_therm.png|link=|20% base (-25%)]]40% | |||
|style="background-color: #263917;"| [[File:Icon_resist_therm.png|link=|45% base (-25%)]]59% | |||
|- style="color: white;" | |||
|style="background-color: #3A5923;"| [[File:Icon_resist_kin.png|link=|40% base (-50%)]]70% | |||
|style="background-color: #3A5923;"| [[File:Icon_resist_kin.png|link=|25% base (-50%)]]63% | |||
|style="background-color: #1A2810;"| [[File:Icon_resist_kin.png|link=|40% base (-12.5%)]]48% | |||
|style="background-color: #1A2810;"| [[File:Icon_resist_kin.png|link=|20% base (-12.5%)]]34% | |||
|- | |- | ||
|[[File:Icon_resist_exp.png]]50% | |[[File:Icon_resist_exp.png|link=]]50% | ||
|[[File:Icon_resist_exp.png]]10% | |[[File:Icon_resist_exp.png|link=]]10% | ||
|[[File:Icon_resist_exp.png|link=]]50% | |||
|[[File:Icon_resist_exp.png|link=]]10% | |||
|- | |- | ||
|colspan=" | |colspan="8" style="font-size: 18px"|Lancer Dreadnoughts | ||
|- | |- | ||
|[[ | |colspan="6"|'''[[Karura]]''' | ||
|[[File: | |style="width:80px;"|[[File:Icon_shield.png|link=]] | ||
| | |style="width:80px;"|[[File:Icon_armor.png|link=]] | ||
|[[File: | |||
|- | |- | ||
|[[File: | |rowspan="6" colspan="6"|<div class="imageserver">{{Imageserver|types|77284|render|size=256}}</div> | ||
|[[File: | |[[File:Icon_resist_em.png|link=]]0% | ||
|[[File: | |[[File:Icon_resist_em.png|link=]]50% | ||
|[[File: | |- style="color: white;" | ||
|style="background-color: #263917;"| [[File:Icon_resist_therm.png|link=|20% base (-25%)]]40% | |||
|style="background-color: #263917;"| [[File:Icon_resist_therm.png|link=|45% base (-25%)]]59% | |||
|- style="color: white;" | |||
|style="background-color: #1A2810;"| [[File:Icon_resist_kin.png|link=|40% base (-12.5%)]]48% | |||
|style="background-color: #1A2810;"| [[File:Icon_resist_kin.png|link=|20% base (-12.5%)]]34% | |||
|- | |- | ||
|[[File:Icon_resist_exp.png|link=]]50% | |||
|[[File:Icon_resist_exp.png|link=]]10% | |||
|[[File:Icon_resist_exp.png | |||
| | |||
|} | |} | ||
=== Gallente === | === Gallente === | ||
{| | {|class="wikitable" style="text-align: center;" | ||
!colspan=" | !colspan="8" style="font-size: 22px;"| Tech II & III Gallente Ships - Natural Resistances | ||
|- style="font-size: 18px;" | |||
|colspan="4" | Interceptors | |||
|colspan="4" | Assault Frigates | |||
|- | |- | ||
| | |'''[[Taranis]]''' | ||
|'''[[Ares]]''' | |||
|style="width:90px;"|[[File:Icon_shield.png|link=]] | |||
|style="width:90px;"|[[File:Icon_armor.png|link=]] | |||
|'''[[Ishkur]]''' | |||
|'''[[Enyo]]''' | |||
|style="width:90px;"|[[File:Icon_shield.png|link=]] | |||
|style="width:90px;"|[[File:Icon_armor.png|link=]] | |||
|- | |- | ||
| | |rowspan="4"|[[File:Taranis.jpg|link=Taranis|147px]] | ||
|rowspan="4"|[[File:Ares.jpg|link=Ares|147px]] | |||
| | |[[File:Icon_resist_em.png|link=]]0% | ||
| | |[[File:Icon_resist_em.png|link=]]50% | ||
| | |rowspan="4"|[[File:Ishkur.jpg|link=Ishkur|147px]] | ||
| | |rowspan="4"|[[File:Enyo.jpg|link=Enyo|147px]] | ||
|[[File:Icon_resist_em.png|link=]]0% | |||
|[[File:Icon_resist_em.png|link=]]50% | |||
|- | |- | ||
| | |[[File:Icon_resist_therm.png|link=]]20% | ||
|[[File: | |[[File:Icon_resist_therm.png|link=]]35% | ||
|[[File: | |style="background-color: #9f05;"| [[File:Icon_resist_therm.png|link=|20% base (-50%)]]60% | ||
| | |style="background-color: #9f05;"| [[File:Icon_resist_therm.png|link=|35% base (-50%)]]68% | ||
|[[File: | |- style="color: white;" | ||
|[[File: | |style="background-color: #9f03;"| [[File:Icon_resist_kin.png|link=|40% base (-16.7%)]]50% | ||
|style="background-color: #9f03;"| [[File:Icon_resist_kin.png|link=|35% base (-15.4%)]]45% | |||
|style="background-color: #9f07;"| [[File:Icon_resist_kin.png|link=|40% base (-75%)]]85% | |||
|style="background-color: #9f07;"| [[File:Icon_resist_kin.png|link=|35% base (-75%)]]84% | |||
|- | |- | ||
|[[File: | |[[File:Icon_resist_exp.png|link=]]50% | ||
|[[File: | |[[File:Icon_resist_exp.png|link=]]10% | ||
|[[File: | |[[File:Icon_resist_exp.png|link=]]50% | ||
|[[File: | |[[File:Icon_resist_exp.png|link=]]10% | ||
|- | |- | ||
| | |colspan="8" style="font-size: 18px;"|Covert Ops Frigates | ||
| | |||
|- | |- | ||
|[[File: | |colspan="2"|'''[[Helios]]''' | ||
|[[File: | | [[File:Icon_shield.png|link=]] | ||
|[[File: | | [[File:Icon_armor.png|link=]] | ||
|[[File: | |colspan="2"|'''[[Nemesis]]''' | ||
| [[File:Icon_shield.png|link=]] | |||
| [[File:Icon_armor.png|link=]] | |||
|- | |- | ||
|colspan=" | |rowspan="4" colspan="2"|[[File:Helios.jpg|147px|link=Helios]] | ||
|[[File:Icon_resist_em.png|link=]]0% | |||
|[[File:Icon_resist_em.png|link=]]50% | |||
|rowspan="4" colspan="2"|[[File:Nemesis.jpg|147px|link=Nemesis]] | |||
|[[File:Icon_resist_em.png|link=]]0% | |||
|[[File:Icon_resist_em.png|link=]]50% | |||
|- | |- | ||
| | |[[File:Icon_resist_therm.png|link=]]20%</span> | ||
|style=" | |[[File:Icon_resist_therm.png|link=]]35%</span> | ||
|style=" | |style="background-color: #9f02; color: white;"| [[File:Icon_resist_therm.png|link=|20% base (-12.5%)]]30% | ||
| | |style="background-color: #9f02; color: white;"| [[File:Icon_resist_therm.png|link=|35% base (-12.5%)]]43% | ||
|style=" | |- style="color: white;" | ||
|style=" | |style="background-color: #9f03;"| [[File:Icon_resist_kin.png|link=|40% base (-16.7%)]]50% | ||
|style="background-color: #9f03;"| [[File:Icon_resist_kin.png|link=|35% base (-15.4%)]]45% | |||
|style="background-color: #9f04;"| [[File:Icon_resist_kin.png|link=|40% base (-25%)]]55% | |||
|style="background-color: #9f04;"| [[File:Icon_resist_kin.png|link=|35% base (-25%)]]51% | |||
|- | |- | ||
|[[File:Icon_resist_exp.png|link=]]50% | |||
|[[File: | |[[File:Icon_resist_exp.png|link=]]10% | ||
|[[File: | |[[File:Icon_resist_exp.png|link=]]50% | ||
|[[File:Icon_resist_exp.png|link=]]10% | |||
| | |||
| | |- style="font-size: 18px;" | ||
|colspan="4" | Electronic Attack Frigates | |||
|colspan="4" | Logistics Frigate | |||
|- | |- | ||
|[[File: | |colspan="2"|'''[[Keres]]''' | ||
|[[File: | | [[File:Icon_shield.png|link=]] | ||
|[[File: | | [[File:Icon_armor.png|link=]] | ||
|[[File: | |colspan="2"|'''[[Thalia]]''' | ||
| [[File:Icon_shield.png|link=]] | |||
| [[File:Icon_armor.png|link=]] | |||
|- | |- | ||
|[[File:Icon_resist_kin.png]] | |rowspan="4" colspan="2"|[[File:Keres.jpg|147px|link=Keres]] | ||
|[[File:Icon_resist_kin.png]] | |[[File:Icon_resist_em.png|link=]]0% | ||
|[[File:Icon_resist_kin.png]] | |[[File:Icon_resist_em.png|link=]]50% | ||
|[[File:Icon_resist_kin.png]] | |rowspan="4" colspan="2"|[[File:Thalia.jpg|147px|link=Thalia]] | ||
|[[File:Icon_resist_em.png|link=]]0% | |||
|[[File:Icon_resist_em.png|link=]]50% | |||
|- style="color: white;" | |||
|style="background-color: #9f04"| [[File:Icon_resist_therm.png|link=|20% base (-25%)]]40% | |||
|style="background-color: #9f04"| [[File:Icon_resist_therm.png|link=|35% base (-25%)]]51% | |||
|style="background-color: #9f04"| [[File:Icon_resist_therm.png|link=|20% base (-25%)]]40% | |||
|style="background-color: #9f04"| [[File:Icon_resist_therm.png|link=|35% base (-25%)]]51% | |||
|- style="color: white;" | |||
|style="background-color: #9f05"| [[File:Icon_resist_kin.png|link=|40% base (-50%)]]70% | |||
|style="background-color: #9f05"| [[File:Icon_resist_kin.png|link=|35% base (-50%)]]68% | |||
|style="background-color: #9f05"| [[File:Icon_resist_kin.png|link=|40% base (-50%)]]70% | |||
|style="background-color: #9f05"| [[File:Icon_resist_kin.png|link=|35% base (-50%)]]68% | |||
|- | |- | ||
|[[File:Icon_resist_exp.png]]50% | |[[File:Icon_resist_exp.png|link=]]50% | ||
|[[File:Icon_resist_exp.png]]10% | |[[File:Icon_resist_exp.png|link=]]10% | ||
|[[File:Icon_resist_exp.png]]50% | |[[File:Icon_resist_exp.png|link=]]50% | ||
|[[File:Icon_resist_exp.png]]10% | |[[File:Icon_resist_exp.png|link=]]10% | ||
|- style="font-size: 18px;" | |||
|colspan="4" | Interdictors | |||
|colspan="4" | Command Destroyers | |||
|- | |- | ||
|colspan=" | |colspan="2"|'''[[Eris]]''' | ||
| [[File:Icon_shield.png|link=]] | |||
| [[File:Icon_armor.png|link=]] | |||
|colspan="2"|'''[[Magus]]''' | |||
| [[File:Icon_shield.png|link=]] | |||
| [[File:Icon_armor.png|link=]] | |||
|- | |- | ||
| | |rowspan="4" colspan="2"|[[File:Eris.jpg|147px|link=Eris]] | ||
|style=" | |[[File:Icon_resist_em.png|link=]]0% | ||
|style=" | |[[File:Icon_resist_em.png|link=]]50% | ||
| | |rowspan="4" colspan="2"|[[File:Magus.jpg|147px|link=Magus]] | ||
|style=" | |[[File:Icon_resist_em.png|link=]]0% | ||
|style=" | |[[File:Icon_resist_em.png|link=]]50% | ||
|- style="color: white;" | |||
|style="background-color: #9f04"| [[File:Icon_resist_therm.png|link=|20% base (-25%)]]40% | |||
|style="background-color: #9f04"| [[File:Icon_resist_therm.png|link=|35% base (-25%)]]51% | |||
|style="background-color: #9f04"| [[File:Icon_resist_therm.png|link=|20% base (-25%)]]40% | |||
|style="background-color: #9f04"| [[File:Icon_resist_therm.png|link=|35% base (-25%)]]51% | |||
|- style="color: white;" | |||
|style="background-color: #9f05"| [[File:Icon_resist_kin.png|link=|40% base (-50%)]]70% | |||
|style="background-color: #9f05"| [[File:Icon_resist_kin.png|link=|35% base (-50%)]]68% | |||
|style="background-color: #9f05"| [[File:Icon_resist_kin.png|link=|40% base (-50%)]]70% | |||
|style="background-color: #9f05"| [[File:Icon_resist_kin.png|link=|35% base (-50%)]]68% | |||
|- | |- | ||
|[[File:Icon_resist_exp.png|link=]]50% | |||
|[[File: | |[[File:Icon_resist_exp.png|link=]]10% | ||
|[[File: | |[[File:Icon_resist_exp.png|link=]]50% | ||
|[[File:Icon_resist_exp.png|link=]]10% | |||
| | |||
| | |- style="font-size: 18px;" | ||
|colspan="4" | Recon Ships | |||
|colspan="4" |Heavy Assault Cruisers | |||
|- | |- | ||
|[[File: | |'''[[Arazu]]''' | ||
|[[File: | |'''[[Lachesis]]''' | ||
|[[File: | | [[File:Icon_shield.png|link=]] | ||
|[[File: | | [[File:Icon_armor.png|link=]] | ||
|'''[[Ishtar]]''' | |||
|'''[[Deimos]]''' | |||
| [[File:Icon_shield.png|link=]] | |||
| [[File:Icon_armor.png|link=]] | |||
|- | |- | ||
|[[File:Icon_resist_kin.png]] | |rowspan="4"|[[File:Arazu.jpg|147px|link=Arazu]] | ||
|[[File:Icon_resist_kin.png]] | |rowspan="4"|[[File:Lachesis.jpg|147px|link=Lachesis]] | ||
|[[File:Icon_resist_kin.png]] | |[[File:Icon_resist_em.png|link=]]0% | ||
|[[File:Icon_resist_kin.png]] | |[[File:Icon_resist_em.png|link=]]50% | ||
|rowspan="4"|[[File:Ishtar.jpg|147px|link=Ishtar]] | |||
|rowspan="4"|[[File:Deimos.jpg|147px|link=Deimos]] | |||
|[[File:Icon_resist_em.png|link=]]0% | |||
|[[File:Icon_resist_em.png|link=]]50% | |||
|- style="color: white;" | |||
|style="background-color: #9f04;"| [[File:Icon_resist_therm.png|link=|20% base (-37.5%)]]50% | |||
|style="background-color: #9f04;"| [[File:Icon_resist_therm.png|link=|35% base (-37.5%)]]59% | |||
|style="background-color: #9f05;"| [[File:Icon_resist_therm.png|link=|20% base (-50%)]]60% | |||
|style="background-color: #9f05;"| [[File:Icon_resist_therm.png|link=|35% base (-50%)]]68% | |||
|- style="color: white;" | |||
|style="background-color: #9f06;"| [[File:Icon_resist_kin.png|link=|40% base (-62.5%)]]78% | |||
|style="background-color: #9f06;"| [[File:Icon_resist_kin.png|link=|35% base (-62.5%)]]76% | |||
|style="background-color: #9f07;"| [[File:Icon_resist_kin.png|link=|40% base (-75%)]]85% | |||
|style="background-color: #9f07;"| [[File:Icon_resist_kin.png|link=|35% base (-75%)]]84% | |||
|- | |- | ||
|[[File:Icon_resist_exp.png]]50% | |[[File:Icon_resist_exp.png|link=]]50% | ||
|[[File:Icon_resist_exp.png]]10% | |[[File:Icon_resist_exp.png|link=]]10% | ||
|[[File:Icon_resist_exp.png]]50% | |[[File:Icon_resist_exp.png|link=]]50% | ||
|[[File:Icon_resist_exp.png]]10% | |[[File:Icon_resist_exp.png|link=]]10% | ||
|- style="font-size: 18px;" | |||
|colspan="4" | Heavy Interdiction Cruisers | |||
|colspan="4" | Logistics Cruisers | |||
|- | |- | ||
|colspan=" | |colspan="2"|'''[[Phobos]]''' | ||
| [[File:Icon_shield.png|link=]] | |||
| [[File:Icon_armor.png|link=]] | |||
|colspan="2"|'''[[Oneiros]]''' | |||
| [[File:Icon_shield.png|link=]] | |||
| [[File:Icon_armor.png|link=]] | |||
|- | |- | ||
| | |rowspan="4" colspan="2"|[[File:Phobos.jpg|147px|link=Phobos]] | ||
|style=" | |[[File:Icon_resist_em.png|link=]]0% | ||
|style=" | |[[File:Icon_resist_em.png|link=]]50% | ||
|rowspan="4" colspan="2"|[[File:Oneiros.jpg|147px|link=Oneiros]] | |||
|[[File:Icon_resist_em.png|link=]]0% | |||
|[[File:Icon_resist_em.png|link=]]50% | |||
|- style="color: white;" | |||
|style="background-color: #9f05"| [[File:Icon_resist_therm.png|link=|20% base (-50%)]]60% | |||
|style="background-color: #9f05"| [[File:Icon_resist_therm.png|link=|35% base (-50%)]]68% | |||
|style="background-color: #9f05"| [[File:Icon_resist_therm.png|link=|20% base (-50%)]]60% | |||
|style="background-color: #9f05"| [[File:Icon_resist_therm.png|link=|35% base (-50%)]]68% | |||
|- style="color: white;" | |||
|style="background-color: #9f07"| [[File:Icon_resist_kin.png|link=|40% base (-75%)]]85% | |||
|style="background-color: #9f07"| [[File:Icon_resist_kin.png|link=|35% base (-75%)]]84% | |||
|style="background-color: #9f07"| "[[File:Icon_resist_kin.png|link=|40% base (-75%)]]85% | |||
|style="background-color: #9f07"| [[File:Icon_resist_kin.png|link=|35% base (-75%)]]84% | |||
|- | |- | ||
|[[File:Icon_resist_exp.png|link=]]50% | |||
|[[File: | |[[File:Icon_resist_exp.png|link=]]10% | ||
|[[File: | |[[File:Icon_resist_exp.png|link=]]50% | ||
|[[File:Icon_resist_exp.png|link=]]10% | |||
|[[File: | |||
| | |- style="font-size: 18px;" | ||
|colspan="4" | Command Battlecruisers | |||
|colspan="4" | Tactical Destroyers/Strategic Cruisers | |||
|- | |- | ||
|[[File: | |'''[[Eos]]''' | ||
|[[File: | |'''[[Astarte]]''' | ||
| [[File:Icon_shield.png|link=]] | |||
| [[File:Icon_armor.png|link=]] | |||
|'''[[Hecate]]''' | |||
|'''[[Proteus]]''' | |||
| [[File:Icon_shield.png|link=]] | |||
| [[File:Icon_armor.png|link=]] | |||
|- | |- | ||
|[[File: | |rowspan="4"|[[File:Eos.jpg|147px|link=Eos]] | ||
|[[File: | |rowspan="4"|[[File:Astarte.jpg|147px|link=Astarte]] | ||
|[[File:Icon_resist_em.png|link=]]0% | |||
|[[File:Icon_resist_em.png|link=]]50% | |||
|rowspan="4"|[[File:Hecate.jpg|147px|link=Hecate]] | |||
|rowspan="4"|[[File:Proteus.jpg|147px|link=Proteus]] | |||
|[[File:Icon_resist_em.png|link=]]0% | |||
|[[File:Icon_resist_em.png|link=]]50% | |||
|- style="color: white;" | |||
|style="background-color: #9f05;"| [[File:Icon_resist_therm.png|link=|20% base (-50%)]]60% | |||
|style="background-color: #9f05;"| [[File:Icon_resist_therm.png|link=|35% base (-50%)]]68% | |||
|style="background-color: #9f04;"| [[File:Icon_resist_therm.png|link=|20% base (-25%)]]40% | |||
|style="background-color: #9f04;"| [[File:Icon_resist_therm.png|link=|35% base (-25%)]]51% | |||
|- style="color: white;" | |||
|style="background-color: #9f07;"| [[File:Icon_resist_kin.png|link=|40% base (-75%)]]85% | |||
|style="background-color: #9f07;"| [[File:Icon_resist_kin.png|link=|35% base (-75%)]]84% | |||
|style="background-color: #9f05;"| [[File:Icon_resist_kin.png|link=|40% base (-50%)]]70% | |||
|style="background-color: #9f05;"| [[File:Icon_resist_kin.png|link=|35% base (-50%)]]68% | |||
|- | |- | ||
|[[File:Icon_resist_exp.png|link=]]50% | |||
|[[File:Icon_resist_exp.png|link=]]10% | |||
|[[File:Icon_resist_exp.png|link=]]50% | |||
|[[File:Icon_resist_exp.png|link=]]10% | |||
|[[File:Icon_resist_exp.png | |||
|[[File:Icon_resist_exp.png | |||
|[[File:Icon_resist_exp.png | |||
|[[File:Icon_resist_exp.png | |||
|- style="font-size: 18px;" | |||
|colspan="4" | Black Ops | |||
|colspan="4" | Marauders | |||
|- | |- | ||
|colspan=" | |colspan="2"|'''[[Sin]]''' | ||
| [[File:Icon_shield.png|link=]] | |||
| [[File:Icon_armor.png|link=]] | |||
|colspan="2"|'''[[Kronos]]''' | |||
| [[File:Icon_shield.png|link=]] | |||
| [[File:Icon_armor.png|link=]] | |||
| | |||
|[[File: | |||
| | |||
|[[File: | |||
| | |||
|- | |- | ||
|[[File:Icon_resist_kin.png]] | |rowspan="4" colspan="2"|[[File:Sin.jpg|147px|link=Sin]] | ||
|[[File:Icon_resist_kin.png]] | |[[File:Icon_resist_em.png|link=]]0% | ||
|[[File:Icon_resist_em.png|link=]]50% | |||
|rowspan="4" colspan="2"|[[File:Kronos.jpg|147px|link=Kronos]] | |||
|[[File:Icon_resist_em.png|link=]]0% | |||
|[[File:Icon_resist_em.png|link=]]50% | |||
|- style="color: white;" | |||
|style="background-color: #9f03;"| [[File:Icon_resist_therm.png|link=|20% base (-18.75%)]]35% | |||
|style="background-color: #9f03;"| [[File:Icon_resist_therm.png|link=|35% base (-18.46%)]]47% | |||
|style="background-color: #9f02;"| [[File:Icon_resist_therm.png|link=|20% base (-12.5%)]]30% | |||
|style="background-color: #9f02;"| [[File:Icon_resist_therm.png|link=|35% base (-12.5%)]]43% | |||
|- style="color: white;" | |||
|style="background-color: #9f05;"| [[File:Icon_resist_kin.png|link=|40% base (-40%)]]64% | |||
|style="background-color: #9f05;"| [[File:Icon_resist_kin.png|link=|35% base (-38.46%)]]60% | |||
|style="background-color: #9f04;"| [[File:Icon_resist_kin.png|link=|40% base (-25%)]]55% | |||
|style="background-color: #9f04;"| [[File:Icon_resist_kin.png|link=|35% base (-25%)]]51% | |||
|- | |- | ||
|[[File:Icon_resist_exp.png]]50% | |[[File:Icon_resist_exp.png|link=]]50% | ||
|[[File:Icon_resist_exp.png]]10% | |[[File:Icon_resist_exp.png|link=]]10% | ||
|[[File:Icon_resist_exp.png|link=]]50% | |||
|[[File:Icon_resist_exp.png|link=]]10% | |||
|- style="font-size: 18px;" | |||
|colspan="4" | Transport Ships | |||
|colspan="4" | Jump Freighters | |||
|- | |- | ||
| | |'''[[Occator]]''' | ||
| | |'''[[Viator]]''' | ||
| | | [[File:Icon_shield.png|link=]] | ||
| | | [[File:Icon_armor.png|link=]] | ||
|colspan="2"|'''[[Anshar]]''' | |||
| [[File:Icon_shield.png|link=]] | |||
| [[File:Icon_armor.png|link=]] | |||
|- | |- | ||
|rowspan="4"|[[File: | |rowspan="4"|[[File:Occator.jpg|147px|link=Occator]] | ||
|[[File:Icon_resist_em.png]]0% | |rowspan="4"|[[File:Viator.jpg|147px|link=Viator]] | ||
|[[File:Icon_resist_em.png]]50% | |[[File:Icon_resist_em.png|link=]]0% | ||
|[[File:Icon_resist_em.png|link=]]50% | |||
|rowspan="4" colspan="2"|[[File:Anshar.jpg|147px|link=Anshar]] | |||
|[[File:Icon_resist_em.png|link=]]0% | |||
|[[File:Icon_resist_em.png|link=]]50% | |||
|- style="color: white;" | |||
|style="background-color: #9f05;"| [[File:Icon_resist_therm.png|link=|20% base (-50%)]]60% | |||
|style="background-color: #9f05;"| [[File:Icon_resist_therm.png|link=|35% base (-50%)]]68% | |||
|style="background-color: #9f02;"| [[File:Icon_resist_therm.png|link=|20% base (-12.5%)]]30% | |||
|style="background-color: #9f02;"| [[File:Icon_resist_therm.png|link=|35% base (-12.5%)]]43% | |||
|- style="color: white;" | |||
|style="background-color: #9f07;"| [[File:Icon_resist_kin.png|link=|40% base (-75%)]]85% | |||
|style="background-color: #9f07;"| [[File:Icon_resist_kin.png|link=|35% base (-75%)]]84% | |||
|style="background-color: #9f04;"| [[File:Icon_resist_kin.png|link=|40% base (-25%)]]55% | |||
|style="background-color: #9f04;"| [[File:Icon_resist_kin.png|link=|35% base (-25%)]]51% | |||
|- | |- | ||
|[[File: | |[[File:Icon_resist_exp.png|link=]]50% | ||
| | |[[File:Icon_resist_exp.png|link=]]10% | ||
|[[File:Icon_resist_exp.png|link=]]50% | |||
|[[File: | |[[File:Icon_resist_exp.png|link=]]10% | ||
| | |||
|[[File:Icon_resist_exp.png]]50% | |||
|[[File:Icon_resist_exp.png]]10% | |||
|- | |- | ||
|colspan=" | |colspan="8" style="font-size: 18px;"|Lancer Dreadnoughts | ||
|- | |- | ||
| | |colspan="6"|'''[[Hubris]]''' | ||
|[[File: | | [[File:Icon_shield.png|link=]] | ||
| [[File:Icon_armor.png|link=]] | |||
|[[File: | |||
| | |||
|- | |- | ||
|[[File: | |rowspan="6" colspan="6"|<div class="imageserver">{{Imageserver|types|77281|render|size=256}}</div> | ||
|[[File:Icon_resist_therm.png]] | |[[File:Icon_resist_em.png|link=]]0% | ||
|[[File:Icon_resist_therm.png]]40% | |[[File:Icon_resist_em.png|link=]]50% | ||
|[[File: | |- style="color: white;" | ||
|style="background-color: #9f02;"| [[File:Icon_resist_therm.png|link=|20% base (-12.5%)]]30% | |||
|style="background-color: #9f02;"| [[File:Icon_resist_therm.png|link=|35% base (-12.5%)]]43% | |||
|- style="color: white;" | |||
|style="background-color: #9f04;"| [[File:Icon_resist_kin.png|link=|40% base (-25%)]]55% | |||
|style="background-color: #9f04;"| [[File:Icon_resist_kin.png|link=|35% base (-25%)]]51% | |||
|- | |- | ||
|[[File:Icon_resist_exp.png|link=]]50% | |||
|[[File:Icon_resist_exp.png|link=]]10% | |||
|[[File:Icon_resist_exp.png | |||
| | |||
|[[File:Icon_resist_exp.png | |||
|} | |} | ||
=== Minmatar === | === Minmatar === | ||
{| | {| class="wikitable" style="text-align: center;" | ||
!colspan=" | !colspan="8" style="font-size: 22px;"| Tech II Minmatar Ships - Natural Resistances | ||
|- style="font-size: 18px;" | |||
|colspan="4" | Interceptors | |||
|colspan="4" | Assault Frigates | |||
|- | |- | ||
| | |'''[[Claw]]''' | ||
|'''[[Stiletto]]''' | |||
|style="width:90px;"|[[File:Icon_shield.png|link=]] | |||
|style="width:90px;"|[[File:Icon_armor.png|link=]] | |||
|'''[[Wolf]]''' | |||
|'''[[Jaguar]]''' | |||
|style="width:90px;"|[[File:Icon_shield.png|link=]] | |||
|style="width:90px;"|[[File:Icon_armor.png|link=]] | |||
|- | |- | ||
| | |rowspan="4"|[[File:Claw.jpg|link=Claw|147px]] | ||
|style=" | |rowspan="4"|[[File:Stiletto.jpg|link=Stiletto|147px]] | ||
|style=" | |style="background-color: #19260F; color: white;"| [[File:Icon_resist_em.png|link=|0% base (flat 10%, -10%)]]10% | ||
| | |style="background-color: #263917; color: white;"| [[File:Icon_resist_em.png|link=|60% base (flat 10%, -25%)]]70% | ||
|style=" | |rowspan="4"|[[File:Wolf.jpg|147px|link=Wolf]] | ||
|style=" | |rowspan="4"|[[File:Jaguar.jpg|147px|link=Jaguar]] | ||
|style="background-color: #4C772F; color: white;"| [[File:Icon_resist_em.png|link=|0% base (-75%)]]75% | |||
|style="background-color: #4C772F; color: white;"| [[File:Icon_resist_em.png|link=|60% base (-75%)]]90% | |||
|- | |- | ||
|[[File:Icon_resist_therm.png|link=]]20% | |||
|[[File: | |[[File:Icon_resist_therm.png|link=]]35% | ||
| | |style="background-color: #3A5923; color: white;"| [[File:Icon_resist_therm.png|link=|20% base (-50%)]]60% | ||
| | |style="background-color: #3A5923; color: white;"| [[File:Icon_resist_therm.png|link=|35% base (-50%)]]68% | ||
| | |||
|[[File: | |||
|- | |- | ||
|[[File: | |[[File:Icon_resist_kin.png|link=]]40% | ||
|[[File: | |[[File:Icon_resist_kin.png|link=]]25% | ||
|[[File: | |[[File:Icon_resist_kin.png|link=]]40% | ||
|[[File: | |[[File:Icon_resist_kin.png|link=]]25% | ||
|- | |- | ||
|[[File: | |[[File:Icon_resist_exp.png|link=]]50% | ||
|[[File: | |[[File:Icon_resist_exp.png|link=]]10% | ||
|[[File: | |[[File:Icon_resist_exp.png|link=]]50% | ||
|[[File: | |[[File:Icon_resist_exp.png|link=]]10% | ||
|- | |- | ||
| | |colspan="8" style="font-size: 18px| Covert Ops Frigates | ||
| | |||
|- | |- | ||
|colspan=" | |colspan="2"|'''[[Cheetah]]''' | ||
| [[File:Icon_shield.png|link=]] | |||
| [[File:Icon_armor.png|link=]] | |||
|colspan="2"|'''[[Hound]]''' | |||
| [[File:Icon_shield.png|link=]] | |||
| [[File:Icon_armor.png|link=]] | |||
|- | |- | ||
| | |rowspan="4" colspan="2"|[[File:Cheetah.jpg|147px|link=Cheetah]] | ||
|style=" | |style="background-color: #19260F; color: white;"| [[File:Icon_resist_em.png|link=|0% base (flat 10%, -10%)]]10% | ||
|style=" | |style="background-color: #263917; color: white;"| [[File:Icon_resist_em.png|link=|60% base (flat 10%, -25%)]]70% | ||
| | |rowspan="4" colspan="2"|[[File:Hound.jpg|147px|link=Hound]] | ||
|style=" | |style="background-color: #263917; color: white;"| [[File:Icon_resist_em.png|link=|0% base (-25%)]]25% | ||
|style=" | |style="background-color: #263917; color: white;"| [[File:Icon_resist_em.png|link=|60% base (-25%)]]70% | ||
|- | |- | ||
|[[File:Icon_resist_therm.png|link=]]20% | |||
|[[File: | |[[File:Icon_resist_therm.png|link=]]35% | ||
|[[File: | |style="background-color: #1A2810; color: white;"| [[File:Icon_resist_therm.png|link=|20% base (-12.5%)]]30% | ||
| | |style="background-color: #1A2810; color: white;"| [[File:Icon_resist_therm.png|link=|20% base (-12.5%)]]43% | ||
| | |||
|- | |- | ||
|[[File: | |[[File:Icon_resist_kin.png|link=]]40% | ||
|[[File: | |[[File:Icon_resist_kin.png|link=]]25% | ||
|[[File: | |[[File:Icon_resist_kin.png|link=]]40% | ||
|[[File: | |[[File:Icon_resist_kin.png|link=]]25% | ||
|- | |- | ||
|[[File: | |[[File:Icon_resist_exp.png|link=]]50% | ||
|[[File: | |[[File:Icon_resist_exp.png|link=]]10% | ||
|[[File: | |[[File:Icon_resist_exp.png|link=]]50% | ||
|[[File: | |[[File:Icon_resist_exp.png|link=]]10% | ||
|- style="font-size: 18px;" | |||
|colspan="4" | Electronic Attack Frigates | |||
|colspan="4" | Logistics Frigates | |||
|- | |- | ||
|[[File: | |colspan="2"|'''[[Hyena]]''' | ||
|[[File: | | [[File:Icon_shield.png|link=]] | ||
|[[File: | | [[File:Icon_armor.png|link=]] | ||
|[[File: | |colspan="2"|'''[[Scalpel]]''' | ||
| [[File:Icon_shield.png|link=]] | |||
| [[File:Icon_armor.png|link=]] | |||
|- | |- | ||
|colspan=" | |rowspan="4" colspan="2"|[[File:Hyena.jpg|147px|link=Hyena]] | ||
|style="background-color: #3A5923; color: white;"| [[File:Icon_resist_em.png|link=|0% base (-50%)]]50% | |||
|style="background-color: #3A5923; color: white;"| [[File:Icon_resist_em.png|link=|60% base (-50%)]]80% | |||
|rowspan="4" colspan="2"|[[File:Scalpel.jpg|147px|link=Scalpel]] | |||
|style="background-color: #3A5923; color: white;"| [[File:Icon_resist_em.png|link=|0% base (-50%)]]50% | |||
|style="background-color: #3A5923; color: white;"| [[File:Icon_resist_em.png|link=|60% base (-50%)]]80% | |||
|- style="color: white;" | |||
|style="background-color: #263917;"| [[File:Icon_resist_therm.png|link=|20% base (-25%)]]40% | |||
|style="background-color: #263917;"| [[File:Icon_resist_therm.png|link=|35% base (-25%)]]51% | |||
|style="background-color: #263917;"| [[File:Icon_resist_therm.png|link=|20% base (-25%)]]40% | |||
|style="background-color: #263917;"| [[File:Icon_resist_therm.png|link=|35% base (-25%)]]51% | |||
|- | |- | ||
|[[File:Icon_resist_kin.png|link=]]40% | |||
|[[File:Icon_resist_kin.png|link=]]25% | |||
|[[File:Icon_resist_kin.png|link=]]40% | |||
|[[File:Icon_resist_kin.png|link=]]25% | |||
|- | |- | ||
|[[File:Icon_resist_exp.png|link=]]50% | |||
|[[File: | |[[File:Icon_resist_exp.png|link=]]10% | ||
|[[File: | |[[File:Icon_resist_exp.png|link=]]50% | ||
|[[File:Icon_resist_exp.png|link=]]10% | |||
| | |||
| | |- style="font-size: 18px;" | ||
|colspan="4" | Interdictors | |||
|colspan="4" | Command Destroyers | |||
|- | |- | ||
|[[File: | |colspan="2"|'''[[Sabre]]''' | ||
|[[File: | | [[File:Icon_shield.png|link=]] | ||
|[[File: | | [[File:Icon_armor.png|link=]] | ||
|[[File: | |colspan="2"|'''[[Bifrost]]''' | ||
| [[File:Icon_shield.png|link=]] | |||
| [[File:Icon_armor.png|link=]] | |||
|- | |- | ||
|[[File: | |rowspan="4" colspan="2"|[[File:Sabre.jpg|147px|link=Sabre]] | ||
|[[File: | |style="background-color: #3A5923; color: white;"| [[File:Icon_resist_em.png|link=|0% base (-50%)]]50% | ||
|[[File: | |style="background-color: #3A5923; color: white;"| [[File:Icon_resist_em.png|link=|60% base (-50%)]]80% | ||
|[[File: | |rowspan="4" colspan="2"|[[File:Bifrost.jpg|147px|link=Bifrost]] | ||
|style="background-color: #3A5923; color: white;"| [[File:Icon_resist_em.png|link=|0% base (-50%)]]50% | |||
|style="background-color: #3A5923; color: white;"| [[File:Icon_resist_em.png|link=|60% base (-50%)]]80% | |||
|- style="color: white;" | |||
|style="background-color: #263917"| [[File:Icon_resist_therm.png|link=|20% base (-25%)]]40% | |||
|style="background-color: #263917"| [[File:Icon_resist_therm.png|link=|35% base (-25%)]]51% | |||
|style="background-color: #263917"| [[File:Icon_resist_therm.png|link=|20% base (-25%)]]40% | |||
|style="background-color: #263917"| [[File:Icon_resist_therm.png|link=|35% base (-25%)]]51% | |||
|- | |- | ||
|[[File: | |[[File:Icon_resist_kin.png|link=]]40% | ||
|[[File: | |[[File:Icon_resist_kin.png|link=]]25% | ||
|[[File: | |[[File:Icon_resist_kin.png|link=]]40% | ||
|[[File: | |[[File:Icon_resist_kin.png|link=]]25% | ||
|- | |- | ||
| | |[[File:Icon_resist_exp.png|link=]]50% | ||
|[[File:Icon_resist_exp.png|link=]]10% | |||
|[[File:Icon_resist_exp.png|link=]]50% | |||
|[[File:Icon_resist_exp.png|link=]]10% | |||
|- style="font-size: 18px;" | |||
|colspan="4" | Recon Ships | |||
|colspan="4" | Heavy Assault Cruisers | |||
|- | |- | ||
| | |'''[[Rapier]]''' | ||
| | |'''[[Huginn]]''' | ||
| | | [[File:Icon_shield.png|link=]] | ||
| [[File:Icon_armor.png|link=]] | |||
|'''[[Vagabond]]''' | |||
|'''[[Muninn]]''' | |||
| [[File:Icon_shield.png|link=]] | |||
| [[File:Icon_armor.png|link=]] | |||
|- | |- | ||
|rowspan="4"|[[File: | |rowspan="4"|[[File:Rapier.jpg|147px|link=Rapier]] | ||
|[[File:Icon_resist_em.png]]50% | |rowspan="4"|[[File:Huginn.jpg|147px|link=Huginn]] | ||
|[[File: | |style="background-color: #45692A; color: white;"| [[File:Icon_resist_em.png|link=|0% base (-62.5%)]]63% | ||
|style="background-color: #45692A; color: white;"| [[File:Icon_resist_em.png|link=|60% base (-62.5%)]]85% | |||
|rowspan="4"|[[File:Vagabond.jpg|147px|link=Vagabond]] | |||
|rowspan="4"|[[File:Muninn.jpg|147px|link=Muninn]] | |||
|style="background-color: #4C772F; color: white;"| [[File:Icon_resist_em.png|link=|0% base (-75%)]]75% | |||
|style="background-color: #4C772F; color: white;"| [[File:Icon_resist_em.png|link=|60% base (-75%)]]90% | |||
|- style="color: white;" | |||
|style="background-color: #30491D;"| [[File:Icon_resist_therm.png|link=|20% base (-37.5%)]]50% | |||
|style="background-color: #30491D;"| [[File:Icon_resist_therm.png|link=|35% base (-37.5%)]]59% | |||
|style="background-color: #3A5923;"| [[File:Icon_resist_therm.png|link=|20% base (-50%)]]60% | |||
|style="background-color: #3A5923;"| [[File:Icon_resist_therm.png|link=|35% base (-50%)]]68% | |||
|- | |- | ||
|[[File: | |[[File:Icon_resist_kin.png|link=]]40% | ||
|[[File: | |[[File:Icon_resist_kin.png|link=]]25% | ||
|[[File:Icon_resist_kin.png|link=]]40% | |||
|[[File:Icon_resist_kin.png|link=]]25% | |||
|- | |- | ||
|[[File: | |[[File:Icon_resist_exp.png|link=]]50% | ||
|[[File: | |[[File:Icon_resist_exp.png|link=]]10% | ||
|[[File:Icon_resist_exp.png|link=]]50% | |||
|[[File:Icon_resist_exp.png|link=]]10% | |||
|- style="font-size: 18px;" | |||
|colspan="4" | Heavy Interdiction Cruisers | |||
|colspan="4" | Logistics Cruisers | |||
|- | |- | ||
|[[File: | |colspan="2"|'''[[Broadsword]]''' | ||
|[[File: | | [[File:Icon_shield.png|link=]] | ||
| [[File:Icon_armor.png|link=]] | |||
|colspan="2"|'''[[Scimitar]]''' | |||
| [[File:Icon_shield.png|link=]] | |||
| [[File:Icon_armor.png|link=]] | |||
|- | |- | ||
|colspan=" | |rowspan="4" colspan="2"|[[File:Broadsword.jpg|147px|link=Broadsword]] | ||
|style="background-color: #4C772F; color: white;"| [[File:Icon_resist_em.png|link=|0% base (-75%)]]75% | |||
|style="background-color: #4C772F; color: white;"| [[File:Icon_resist_em.png|link=|60% base (-75%)]]90% | |||
|rowspan="4" colspan="2"|[[File:Scimitar.jpg|147px|link=Scimitar]] | |||
|style="background-color: #4C772F; color: white;"| [[File:Icon_resist_em.png|link=|0% base (-75%)]]75% | |||
|style="background-color: #4C772F; color: white;"| [[File:Icon_resist_em.png|link=|60% base (-75%)]]90% | |||
|- style="color: white;" | |||
|style="background-color: #3A5923;"| [[File:Icon_resist_therm.png|link=|20% base (-50%)]]60% | |||
|style="background-color: #3A5923;"| [[File:Icon_resist_therm.png|link=|35% base (-50%)]]68% | |||
|style="background-color: #3A5923;"| [[File:Icon_resist_therm.png|link=|20% base (-50%)]]60% | |||
|style="background-color: #3A5923;"| [[File:Icon_resist_therm.png|link=|35% base (-50%)]]68% | |||
|- | |- | ||
| | |[[File:Icon_resist_kin.png|link=]]40% | ||
| | |[[File:Icon_resist_kin.png|link=]]25% | ||
| | |[[File:Icon_resist_kin.png|link=]]40% | ||
|[[File:Icon_resist_kin.png|link=]]25% | |||
|- | |- | ||
| | |[[File:Icon_resist_exp.png|link=]]50% | ||
|[[File: | |[[File:Icon_resist_exp.png|link=]]10% | ||
|[[File: | |[[File:Icon_resist_exp.png|link=]]50% | ||
|[[File:Icon_resist_exp.png|link=]]10% | |||
|- style="font-size: 18px;" | |||
|colspan="4" | Command Battlecruisers | |||
|colspan="4" | Tactical Destroyers/Strategic Cruisers | |||
|- | |- | ||
|[[File: | |'''[[Sleipnir]]''' | ||
|[[File: | |'''[[Claymore]]''' | ||
| [[File:Icon_shield.png|link=]] | |||
| [[File:Icon_armor.png|link=]] | |||
|'''[[Svipul]]''' | |||
|'''[[Loki]]''' | |||
| [[File:Icon_shield.png|link=]] | |||
| [[File:Icon_armor.png|link=]] | |||
|- | |- | ||
|[[File: | |rowspan="4"|[[File:Sleipnir.jpg|147px|link=Sleipnir]] | ||
|[[File: | |rowspan="4"|[[File:Claymore.jpg|147px|link=Claymore]] | ||
|style="background-color: #4C772F; color: white;"| [[File:Icon_resist_em.png|link=|0% base (-75%)]]75% | |||
|style="background-color: #4C772F; color: white;"| [[File:Icon_resist_em.png|link=|60% base (-75%)]]90% | |||
|rowspan="4"|[[File:Svipul.jpg|147px|link=Svipul]] | |||
|rowspan="4"|[[File:Loki.jpg|147px|link=Loki]] | |||
|style="background-color: #3A5923; color: white;"| [[File:Icon_resist_em.png|link=|0% base (-50%)]]50% | |||
|style="background-color: #3A5923; color: white;"| [[File:Icon_resist_em.png|link=|60% base (-50%)]]80% | |||
|- style="color: white;" | |||
|style="background-color: #3A5923;"| [[File:Icon_resist_therm.png|link=|20% base (-50%)]]60% | |||
|style="background-color: #3A5923;"| [[File:Icon_resist_therm.png|link=|35% base (-50%)]]68% | |||
|style="background-color: #263917;"| [[File:Icon_resist_therm.png|link=|20% base (-25%)]]40% | |||
|style="background-color: #263917;"| [[File:Icon_resist_therm.png|link=|35% base (-25%)]]51% | |||
|- | |- | ||
|[[File: | |[[File:Icon_resist_kin.png|link=]]40% | ||
|[[File: | |[[File:Icon_resist_kin.png|link=]]25% | ||
|[[File:Icon_resist_kin.png|link=]]40% | |||
|[[File:Icon_resist_kin.png|link=]]25% | |||
|- | |- | ||
| | |[[File:Icon_resist_exp.png|link=]]50% | ||
|[[File:Icon_resist_exp.png|link=]]10% | |||
|[[File:Icon_resist_exp.png|link=]]50% | |||
|[[File:Icon_resist_exp.png|link=]]10% | |||
|- style="font-size: 18px;" | |||
|colspan="4" | Black Ops | |||
|colspan="4" | Marauders | |||
|- | |- | ||
| | |colspan="2"|'''[[Panther]]''' | ||
| [[File:Icon_shield.png|link=]] | |||
| [[File:Icon_armor.png|link=]] | |||
|colspan="2"|'''[[Vargur]]''' | |||
| | | [[File:Icon_shield.png|link=]] | ||
| [[File:Icon_armor.png|link=]] | |||
|- | |- | ||
|rowspan="4"|[[File: | |rowspan="4" colspan="2"|[[File:Panther.jpg|147px|link=Panther]] | ||
|[[File:Icon_resist_em.png]] | |style="background-color: #2F4A1E; color: white;"| [[File:Icon_resist_em.png|link=|0% base (-37%)]]37% | ||
|[[File:Icon_resist_em.png]] | |style="background-color: #2F4A1E; color: white;"| [[File:Icon_resist_em.png|link=|"60% base (-37.5%)]]75% | ||
|rowspan="4"|[[File: | |rowspan="4" colspan="2"|[[File:Vargur.jpg|147px|link=Vargur]] | ||
|[[File:Icon_resist_em.png]] | |style="background-color: #263917; color: white;"| [[File:Icon_resist_em.png|link=|0% base (-25%)]]25% | ||
|[[File:Icon_resist_em.png]] | |style="background-color: #263917; color: white;"| [[File:Icon_resist_em.png|link=|60% base (-25%)]]70% | ||
|- style="color: white;" | |||
|style="background-color: #223615;"| [[File:Icon_resist_therm.png|link=|20% base (-21.25%)]]37% | |||
|style="background-color: #223615;"| [[File:Icon_resist_therm.png|link=|35% base (-21.54%)]]49% | |||
|style="background-color: #1A2810;"| [[File:Icon_resist_therm.png|link=|20% base (-12.5%)]]30% | |||
|style="background-color: #1A2810;"| [[File:Icon_resist_therm.png|link=|35% base (-12.5%)]]43% | |||
|- | |- | ||
|[[File: | |[[File:Icon_resist_kin.png|link=]]40% | ||
|[[File: | |[[File:Icon_resist_kin.png|link=]]25% | ||
|[[File: | |[[File:Icon_resist_kin.png|link=]]40% | ||
|[[File: | |[[File:Icon_resist_kin.png|link=]]25% | ||
|- | |- | ||
|[[File:Icon_resist_exp.png|link=]]50% | |||
|[[File:Icon_resist_exp.png|link=]]10% | |||
|[[File:Icon_resist_exp.png|link=]]50% | |||
|[[File:Icon_resist_exp.png|link=]]10% | |||
|[[File:Icon_resist_exp.png | |- style="font-size: 18px;" | ||
| | |colspan="4" | Transport Ships | ||
|colspan="4" | Jump Freighters | |||
|[[File:Icon_resist_exp.png | |||
|[[File: | |||
|[[File:Icon_resist_exp.png | |||
| | |||
|- | |||
| | |||
|colspan | |||
|- | |- | ||
|[[File: | |'''[[Mastodon]]''' | ||
|[[File: | |'''[[Prowler]]''' | ||
| [[File:Icon_shield.png|link=]] | |||
| [[File:Icon_armor.png|link=]] | |||
|colspan="2"|'''[[Nomad]]''' | |||
| [[File:Icon_shield.png|link=]] | |||
| [[File:Icon_armor.png|link=]] | |||
|- | |- | ||
|[[File: | |rowspan="4"|[[File:Mastodon.jpg|147px|link=Mastodon]] | ||
|[[File: | |rowspan="4"|[[File:Prowler.jpg|147px|link=Prowler]] | ||
|style="background-color: #4C772F; color: white;"| [[File:Icon_resist_em.png|link=|0% base (-75%)]]75% | |||
|style="background-color: #4C772F; color: white;"| [[File:Icon_resist_em.png|link=|60% base (-75%)]]90% | |||
|rowspan="4" colspan="2"|[[File:Nomad.jpg|147px|link=Nomad]] | |||
|style="background-color: #263917; color: white;"| [[File:Icon_resist_em.png|link=|0% base (-25%)]]25% | |||
|style="background-color: #263917; color: white;"| [[File:Icon_resist_em.png|link=|60% base (-25%)]]70% | |||
|- style="color: white;" | |||
|style="background-color: #3A5923;"|<span title="20% base (-50%)">[[File:Icon_resist_therm.png|link=]]60% | |||
|style="background-color: #3A5923;"|<span title="35% base (-50%)">[[File:Icon_resist_therm.png|link=]]68% | |||
|style="background-color: #1A2810;"|<span title="20% base (-12.5%)">[[File:Icon_resist_therm.png|link=]]30% | |||
|style="background-color: #1A2810;"|<span title="35% base (-12.5%)">[[File:Icon_resist_therm.png|link=]]43% | |||
|- | |- | ||
| | |[[File:Icon_resist_kin.png|link=]]40% | ||
|[[File:Icon_resist_kin.png|link=]]25% | |||
|[[File:Icon_resist_kin.png|link=]]40% | |||
|[[File:Icon_resist_kin.png|link=]]25% | |||
|- | |- | ||
|[[File:Icon_resist_exp.png|link=]]50% | |||
|[[File:Icon_resist_exp.png|link=]]10% | |||
| | |[[File:Icon_resist_exp.png|link=]]50% | ||
|[[File:Icon_resist_exp.png|link=]]10% | |||
|[[File: | |||
|[[File:Icon_resist_exp.png | |||
| | |||
|- | |- | ||
|colspan=" | |colspan="8" style="font-size: 18px;" | Lancer Dreadnoughts | ||
|- | |- | ||
| | |colspan="6"|'''[[Valravn]]''' | ||
|[[File: | | [[File:Icon_shield.png|link=]] | ||
|[[File: | | [[File:Icon_armor.png|link=]] | ||
|- | |- | ||
|[[File:Icon_resist_therm.png]] | |rowspan="6" colspan="6"|<div class="imageserver">{{Imageserver|types|77288|render|size=256}}</div> | ||
|[[File:Icon_resist_therm.png]] | |style="background-color: #263917; color: white;"| [[File:Icon_resist_em.png|link=|0% base (-25%)]]25% | ||
|style="background-color: #263917; color: white;"| [[File:Icon_resist_em.png|link=|60% base (-25%)]]70% | |||
|- style="color: white;" | |||
|style="background-color: #1A2810;"| [[File:Icon_resist_therm.png|link=|20% base (-12.5%)]]30% | |||
|style="background-color: #1A2810;"| [[File:Icon_resist_therm.png|link=|35% base (-12.5%)]]43% | |||
|- | |- | ||
|[[File:Icon_resist_kin.png]]40% | |[[File:Icon_resist_kin.png|link=]]40% | ||
|[[File:Icon_resist_kin.png]]25% | |[[File:Icon_resist_kin.png|link=]]25% | ||
|- | |- | ||
|[[File:Icon_resist_exp.png]]50% | |[[File:Icon_resist_exp.png|link=]]50% | ||
|[[File:Icon_resist_exp.png]]10% | |[[File:Icon_resist_exp.png|link=]]10% | ||
|} | |||
=== ORE === | |||
| | {| class="wikitable" style="text-align: center;" | ||
!colspan="5" style="font-size: 22px;"| Tech II ORE Ships - Natural Resistances | |||
|- | |- | ||
|colspan=" | |colspan="5" style="font-size: 18px;"|Expedition Frigates | ||
|- | |- | ||
| | |rowspan="5"| | ||
|'''[[Prospect]]''' | |||
| | |'''[[Endurance]]''' | ||
|style="width:80px;"|[[File:Icon_shield.png|link=]] | |||
|style="width:80px;"|[[File:Icon_shield.png]] | |style="width:80px;"|[[File:Icon_armor.png|link=]] | ||
|style="width:80px;"|[[File:Icon_armor.png]] | |||
|- | |- | ||
|rowspan="4"|[[File: | |rowspan="4"|[[File:Prospect.jpg|link=Prospect|147px]] | ||
|rowspan="4"|[[File:Endurance.jpg|link=Endurance|147px]] | |||
| | |[[File:Icon_resist_em.png|link=]]0% | ||
|rowspan="4"|[[File: | |[[File:Icon_resist_em.png|link=]]60% | ||
|[[File:Icon_resist_em.png]] | |||
|[[File:Icon_resist_em.png]] | |||
|- | |- | ||
|[[File:Icon_resist_therm.png | |[[File:Icon_resist_therm.png|link=]]20% | ||
| | |[[File:Icon_resist_therm.png|link=]]35% | ||
|[[File:Icon_resist_therm.png | |||
| | |||
|- | |- | ||
|[[File:Icon_resist_kin.png]]40% | |[[File:Icon_resist_kin.png|link=]]40% | ||
|[[File:Icon_resist_kin.png | |[[File:Icon_resist_kin.png|link=]]25% | ||
| | |||
|- | |- | ||
|[[File:Icon_resist_exp.png]]50% | |[[File:Icon_resist_exp.png|link=]]50% | ||
|[[File:Icon_resist_exp.png | |[[File:Icon_resist_exp.png|link=]]10% | ||
| | |||
|- | |- | ||
|colspan=" | |colspan="5" style="font-size: 18px; height: 30px"|Exhumers | ||
|- | |- | ||
| | |'''[[Skiff]]''' | ||
| | |'''[[Mackinaw]]''' | ||
|'''[[Hulk]]''' | |||
| [[File:Icon_shield.png|link=]] | |||
| [[File:Icon_armor.png|link=]] | |||
|- | |- | ||
|rowspan="4"|[[File: | |rowspan="4"|[[File:Skiff.jpg|link=Skiff|147px]] | ||
|[[File:Icon_resist_em.png]] | |rowspan="4"|[[File:Mackinaw.jpg|link=Mackinaw|147px]] | ||
|[[File:Icon_resist_em.png]] | |rowspan="4"|[[File:hulk.jpg|link=hulk|147px]] | ||
|[[File:Icon_resist_em.png|link=]]0% | |||
|[[File:Icon_resist_em.png|link=]]60% | |||
|- | |- | ||
|[[File:Icon_resist_therm.png]]20% | |[[File:Icon_resist_therm.png|link=]]20% | ||
|[[File:Icon_resist_therm.png]]35% | |[[File:Icon_resist_therm.png|link=]]35% | ||
|- | |- | ||
|[[File:Icon_resist_kin.png]]40% | |[[File:Icon_resist_kin.png|link=]]40% | ||
|[[File:Icon_resist_kin.png]]25% | |[[File:Icon_resist_kin.png|link=]]25% | ||
|- | |- | ||
|[[File:Icon_resist_exp.png]]50% | |[[File:Icon_resist_exp.png|link=]]50% | ||
|[[File:Icon_resist_exp.png]]10% | |[[File:Icon_resist_exp.png|link=]]10% | ||
|} | |} | ||
{| | === CONCORD === | ||
!colspan="6" style="font-size: | {{Hatnote|Since CONCORD T2 ships have no T1 equivalent, no resists will be highlighted.}} | ||
{| class="wikitable" style="text-align: center;" | |||
!colspan="6" style="font-size: 16px;| Tech II CONCORD Ships - Natural Resistances | |||
|- style="font-size: 14px;" | |||
|colspan="3" | Covert Ops | |||
|colspan="3" | Recon Ships | |||
|- | |- | ||
| | |'''[[Pacifier]]''' | ||
|style="width:90px;"|[[File:Icon_shield.png|link=]] | |||
|style="width:90px;"|[[File:Icon_armor.png|link=]] | |||
|'''[[Enforcer]]''' | |||
|style="width:90px;"|[[File:Icon_shield.png|link=]] | |||
|style="width:90px;"|[[File:Icon_armor.png|link=]] | |||
|- | |- | ||
| | |rowspan="4"|[[File:Pacifier.jpg|link=Pacifier|147px]] | ||
|[[File:Icon_resist_em.png|link=]]33% | |||
| | |[[File:Icon_resist_em.png|link=]]33% | ||
|rowspan="4"|[[File:Enforcer.jpg|link=Enforcer|147px]] | |||
| | |[[File:Icon_resist_em.png|link=]]33% | ||
| | |[[File:Icon_resist_em.png|link=]]33% | ||
|- | |- | ||
|[[File:Icon_resist_therm.png|link=]]33% | |||
|[[File: | |[[File:Icon_resist_therm.png|link=]]33% | ||
|[[File: | |[[File:Icon_resist_therm.png|link=]]33% | ||
|[[File:Icon_resist_therm.png|link=]]33% | |||
|[[File: | |||
| | |||
|- | |- | ||
|[[File: | |[[File:Icon_resist_kin.png|link=]]33% | ||
|[[File: | |[[File:Icon_resist_kin.png|link=]]33% | ||
|[[File: | |[[File:Icon_resist_kin.png|link=]]33% | ||
|[[File: | |[[File:Icon_resist_kin.png|link=]]33% | ||
|- | |- | ||
|[[File: | |[[File:Icon_resist_exp.png|link=]]33% | ||
|[[File: | |[[File:Icon_resist_exp.png|link=]]33% | ||
|[[File: | |[[File:Icon_resist_exp.png|link=]]33% | ||
|[[File: | |[[File:Icon_resist_exp.png|link=]]33% | ||
|- | |||
| | |- style="font-size: 14px;" | ||
| | |colspan="3" | Black Ops | ||
| | |colspan="3" | Flag Cruisers | ||
| | |||
|- | |- | ||
| | |'''[[Marshal]]''' | ||
| [[File:Icon_shield.png|link=]] | |||
| [[File:Icon_armor.png|link=]] | |||
| | |'''[[Monitor]]''' | ||
| [[File:Icon_shield.png|link=]] | |||
| [[File:Icon_armor.png|link=]] | |||
|- | |- | ||
|rowspan="4"|[[File: | |rowspan="4"|[[File:Marshal.jpg|link=Marshal|147px]] | ||
|[[File:Icon_resist_em.png]] | |[[File:Icon_resist_em.png|link=]]40% | ||
|[[File:Icon_resist_em.png]] | |[[File:Icon_resist_em.png|link=]]40% | ||
|rowspan="4"|[[File:Monitor.jpg|link=Monitor|147px]] | |||
|[[File:Icon_resist_em.png|link=]]90% | |||
|[[File:Icon_resist_em.png|link=]]90% | |||
|- | |- | ||
|[[File:Icon_resist_therm.png]] | |[[File:Icon_resist_therm.png|link=]]40% | ||
|[[File:Icon_resist_therm.png]] | |[[File:Icon_resist_therm.png|link=]]40% | ||
|[[File:Icon_resist_therm.png|link=]]90% | |||
|[[File:Icon_resist_therm.png|link=]]90% | |||
|- | |- | ||
|[[File:Icon_resist_kin.png]]40% | |[[File:Icon_resist_kin.png|link=]]40% | ||
|[[File:Icon_resist_kin.png]] | |[[File:Icon_resist_kin.png|link=]]40% | ||
|[[File:Icon_resist_kin.png|link=]]90% | |||
|[[File:Icon_resist_kin.png|link=]]90% | |||
|- | |- | ||
|[[File:Icon_resist_exp.png]] | |[[File:Icon_resist_exp.png|link=]]40% | ||
|[[File:Icon_resist_exp.png]] | |[[File:Icon_resist_exp.png|link=]]40% | ||
|[[File:Icon_resist_exp.png|link=]]90% | |||
|[[File:Icon_resist_exp.png|link=]]90% | |||
|} | |} | ||
===Triglavian Collective=== | === Triglavian Collective === | ||
{| class="wikitable" style="text-align: center;" | |||
{| | ! colspan="6" style="font-size: 16px;"| Tech II Triglavian Ships - Natural Resistances | ||
!colspan=" | |- style="font-size: 14px;" | ||
|colspan="3" | Assault Frigates | |||
|colspan="3" | Command Destroyers | |||
|- | |- | ||
| | |'''[[Nergal]]''' | ||
|style="width:80px;"|[[File:Icon_shield.png|link=]] | |||
|style="width:80px;"|[[File:Icon_armor.png|link=]] | |||
|'''[[Draugur]]''' | |||
|style="width:80px;"|[[File:Icon_shield.png|link=]] | |||
|style="width:80px;"|[[File:Icon_armor.png|link=]] | |||
|- | |- | ||
|Nergal | |rowspan="4"|[[File:Nergal.jpg|link=Nergal|147px]] | ||
|style=" | |[[File:Icon_resist_em.png|link=]]0% | ||
|style=" | |[[File:Icon_resist_em.png|link=]]50% | ||
|rowspan="4"|[[File:Draugur.jpg|link=Draugur|147px]] | |||
|[[File:Icon_resist_em.png|link=]]0% | |||
|[[File:Icon_resist_em.png|link=]]50% | |||
|- style="color: white;" | |||
|style="background-color: #30491D;"| [[File:Icon_resist_therm.png|link=|20% base (flat 30%, -37.50%)]]50% | |||
|style="background-color: #45682A;"| [[File:Icon_resist_therm.png|link=|35% base (flat 40%, -61.54%)]]75% | |||
|style="background-color: #30491D;"| [[File:Icon_resist_therm.png|link=|20% base (flat 30%, -37.50%)]]50% | |||
|style="background-color: #45682A;"| [[File:Icon_resist_therm.png|link=|35% base (flat 40%, -61.54%)]]75% | |||
|- | |- | ||
|[[File:Icon_resist_kin.png|link=]]40% | |||
|[[File:Icon_resist_kin.png|link=]]25% | |||
|[[File: | |[[File:Icon_resist_kin.png|link=]]40% | ||
| | |[[File:Icon_resist_kin.png|link=]]25% | ||
|- style="color: white;" | |||
|[[File: | |style="background-color: #4C732E;"| [[File:Icon_resist_exp.png|link=|20% base (flat 45%, -70%)]]85% | ||
| | |style="background-color: #406127;"| [[File:Icon_resist_exp.png|link=|20% base (flat 45%, -56.25%)]]65% | ||
|style="background-color: #4C732E;"| >[[File:Icon_resist_exp.png|link=|20% base (flat 45%, -70%)]]85% | |||
|[[File:Icon_resist_kin.png]]25% | |style="background-color: #406127;"| [[File:Icon_resist_exp.png|link=|20% base (flat 45%, -56.25%)]]65% | ||
|- | |||
|- style="font-size: 14px;" | |||
|colspan="3" | Heavy Assault Cruisers | |||
|colspan="3" | Logistics Cruisers | |||
|style=" | |||
|style=" | |||
| | |||
|style=" | |||
| | |||
|- | |||
| | |||
| | |||
|- | |- | ||
| | |'''[[Ikitursa]]''' | ||
|[[File: | | [[File:Icon_shield.png|link=]] | ||
|[[File: | | [[File:Icon_armor.png|link=]] | ||
|'''[[Zarmazd]]''' | |||
| [[File:Icon_shield.png|link=]] | |||
| [[File:Icon_armor.png|link=]] | |||
|- | |- | ||
|[[File: | |rowspan="4"|[[File:Ikitursa.jpg|link=Ikitursa|147px]] | ||
|[[File: | |[[File:Icon_resist_em.png|link=]]0% | ||
|[[File:Icon_resist_em.png|link=]]50% | |||
|rowspan="4"|[[File:Zarmazd.jpg|link=Zarmazd|147px]] | |||
|[[File:Icon_resist_em.png|link=]]0% | |||
|[[File:Icon_resist_em.png|link=]]50% | |||
|- | |- | ||
|[[File: | |style="background-color: #30491D; color: white;"| [[File:Icon_resist_therm.png|link=|20% base (flat 30%, -37.50%)]]50% | ||
|[[File: | |style="background-color: #45682A; color: white;"| [[File:Icon_resist_therm.png|link=|35% base (flat 40%, -61.54%)]]75% | ||
|[[File:Icon_resist_therm.png|link=]]20% | |||
|[[File:Icon_resist_therm.png|link=]]35% | |||
|- | |- | ||
|[[File:Icon_resist_exp.png]] | |[[File:Icon_resist_kin.png|link=]]40% | ||
|[[File:Icon_resist_exp.png]]80% | |[[File:Icon_resist_kin.png|link=]]25% | ||
|style="background-color: #3A5923; color: white;"| [[File:Icon_resist_kin.png|link=|40% base (-50%)]]70% | |||
|style="background-color: #3A5923; color: white;"| [[File:Icon_resist_kin.png|link=|25% base (-50%)]]63% | |||
|- style="color: white;" | |||
|style="background-color: #4C732E;"| [[File:Icon_resist_exp.png|link=|20% base (flat 45%, -70%)]]85% | |||
|style="background-color: #40612;7"| [[File:Icon_resist_exp.png|link=|20% base (flat 45%, -56.25%)]]65% | |||
|style="background-color: #4C772F;"| [[File:Icon_resist_exp.png|link=|50% base (-75%)]]88% | |||
|style="background-color: #4C772F;"| [[File:Icon_resist_exp.png|link=|20% base (-75%)]]80% | |||
|} | |} | ||
[[Category:Ships]] | [[Category:Ships]] | ||
Latest revision as of 11:18, 21 November 2025
Every ship has a certain natural resistance to incoming damage. These resistances, quoted as a percentage of damage resisted for each of the four damage types, form the shield, armor, and hull resistance profiles. Tech I ships from the same faction generally have the same natural resistances, but this rule does not apply to Tech II or Tech III ships.
Hull resistances
All ships have a natural 33/33/33/33 hull resistance (%EM/%Thermal/%Kinetic/%Explosive respectively – this order will be used throughout this page).
Tech I shield resistances
T1 ships generally have the same natural shield resistances: 0/20/40/50. EDENCOM ships are the sole non-special edition ship exception, using a 20/20/50/50 resist profile, giving them better EM and Kinetic resistances.
Some Special Edition T1 ships have a different shield resistance profile. For example, ![]() Metamorphosis,
Metamorphosis, ![]() Sunesis,
Sunesis, ![]() Gnosis,
Gnosis, ![]() Praxis from the Society of Conscious Thought have a 27.5/27.5/27.5/27.5 profile, and the
Praxis from the Society of Conscious Thought have a 27.5/27.5/27.5/27.5 profile, and the ![]() Council Diplomatic Shuttle has a 33/33/33/33 profile.
Council Diplomatic Shuttle has a 33/33/33/33 profile.
| Faction | ||||
|---|---|---|---|---|
| Most factions | ||||
T1 ships with shield resistance bonuses
Some Caldari ships and all Guristas ships have a bonus to their shield resistances. The bonus resistance is 4% for each level of the pilot's applicable Caldari ship skill.
The Caldari ships with this bonus are the ![]() Merlin,
Merlin, ![]() Moa,
Moa, ![]() Drake,
Drake, ![]() Rokh,
Rokh, ![]() Scorpion Navy Issue,
Scorpion Navy Issue, ![]() Phoenix,
Phoenix, ![]() Chimera,
Chimera, ![]() Minokawa,
Minokawa, ![]() Wyvern.
Wyvern.
![]() Skybreaker and
Skybreaker and ![]() Stormbringer have an even stronger bonus resistance of 6% per level of the pilot's applicable EDENCOM ship skill.
Stormbringer have an even stronger bonus resistance of 6% per level of the pilot's applicable EDENCOM ship skill.
Tech I armor resistances
| Faction | Enemy | Enemy damage type | |
|---|---|---|---|
| Primary | Secondary | ||
 |
 |
Exp |
Kinetic |
 |
 |
Thermal |
Kinetic |
|
|
Kinetic |
Thermal |
|
|
EM |
Thermal |
| Empire faction | Other factions | ||||||
|---|---|---|---|---|---|---|---|
A T1 ship's natural armor resistance profile is determined by the race of the ship.
There is a reason for these resist profiles. They are all based on a 50/35/25/10 profile, but each race has a 10% bonus to one damage type. For the empire factions, the bonused armor resist is the same as the primary damage type of the faction they were historically at war with. The warring factions and their damage types are shown in the table to the right. Perhaps this is best illuminated with an example: Take Gallente ships. Start with the base profile of 50/35/25/10 and add 10% kinetic resistance, kinetic being the primary damage type of the Caldari, the historic enemy of the Gallente. You get a 50/35/35/10 profile, which is indeed correct for T1 Gallente ships.
ORE use two sets of armor resistance profile: Their ![]() Venture,
Venture, ![]() Procurer,
Procurer, ![]() Covetor,
Covetor, ![]() Retriever use a 60/35/25/10 profile while
Retriever use a 60/35/25/10 profile while ![]() Noctis,
Noctis, ![]() Bowhead,
Bowhead, ![]() Porpoise,
Porpoise, ![]() Orca,
Orca, ![]() Rorqual use a 50/35/35/10 profile.
Rorqual use a 50/35/35/10 profile.
Some Special Edition T1 ships have a different armor resistance profile. For example, ![]() Metamorphosis,
Metamorphosis, ![]() Sunesis,
Sunesis, ![]() Gnosis,
Gnosis, ![]() Praxis from the Society of Conscious Thought have a 32.5/32.5/32.5/32.5 profile, and the
Praxis from the Society of Conscious Thought have a 32.5/32.5/32.5/32.5 profile, and the ![]() Council Diplomatic Shuttle has a 33/33/33/33 profile.
Council Diplomatic Shuttle has a 33/33/33/33 profile.
Capsule use a 60/35/25/10 profile.
T1 ships with armor resistance bonuses
Some Amarr ships, all Sisters of EVE ships, and some Triglavian ships have bonuses to their armor resistances. The bonus resistance is 4% for each level of the pilot's applicable racial ship skill.
The Amarr ships with this bonus are the ![]() Punisher,
Punisher, ![]() Maller,
Maller, ![]() Prophecy,
Prophecy, ![]() Abaddon,
Abaddon, ![]() Revelation,
Revelation, ![]() Archon,
Archon, ![]() Apostle,
Apostle, ![]() Aeon. The Triglavian ships with this bonus are the
Aeon. The Triglavian ships with this bonus are the ![]() Drekavac and
Drekavac and ![]() Zirnitra.
Zirnitra.
Tech II and Tech III resists
| Classes | Bonuses | |
|---|---|---|
| Primary | Secondary | |
|
−75% | −50% |
|
−62.5% | −37.5% |
|
−50% | −25% |
|
−37.5% | −18.75% |
|
−25% | −12.5% |
|
−10% (flat) | 0% |
|
0% | 0% |
Tech II and Tech III ships generally have much better resist profiles than Tech I ships. In particular, they gain significant resistance to the primary and secondary damage types of their faction's historical enemies.
The table on the right shows the bonus resistances given to each different ship type. These bonuses are applied to both shields and armor by taking a racial or default T1 resist profile and multiplying the remaining vulnerability by the resistance bonus.
To calculate a T2 ship's shield resists, start with the 'default' profile of 0/20/40/50. Reduce its remaining vulnerability to its enemy's primary damage type by 75%, and to the secondary damage type by 50%. For example, let's take the ![]() Ishtar. Start with 0/20/40/50. The Gallente's enemy is the Caldari, whose damage types are Kinetic and Thermal. Reduce the remaining kinetic vulnerability of (100 − 40) = 60 by 75% to 15, giving (100 − 15) = 85% shield kinetic resistance. Similarly, reduce the remaining thermal vulnerability of (100 − 20) = 80 by 50% to 40, giving (100 − 40) = 60% shield thermal resistance. This gives the Ishtar a shield resist profile of 0/60/85/50.
Ishtar. Start with 0/20/40/50. The Gallente's enemy is the Caldari, whose damage types are Kinetic and Thermal. Reduce the remaining kinetic vulnerability of (100 − 40) = 60 by 75% to 15, giving (100 − 15) = 85% shield kinetic resistance. Similarly, reduce the remaining thermal vulnerability of (100 − 20) = 80 by 50% to 40, giving (100 − 40) = 60% shield thermal resistance. This gives the Ishtar a shield resist profile of 0/60/85/50.
To calculate a T2 ship's armor resists, start with the ship's T1 racial profile. Reduce its remaining vulnerability to its enemy's primary damage type by 75%, and to the secondary damage type by 50%. For example, let's take the ![]() Muninn. Start with the Minmatar T1 racial profile of 60/35/25/10. The Minmatar's enemy is the Amarr, whose damage types are EM and Thermal. Reduce the remaining EM vulnerability of (100 − 60) = 40 by 75% to 10, giving (100 − 10) = 90% armor EM resistance. Similarly, reduce the remaining thermal vulnerability of (100 − 35) = 65 by 50% to 32.5, giving (100 − 32.5) = 67.5% armor thermal resistance. This gives the Muninn an armor resist profile of 90/67.5/25/10.
Muninn. Start with the Minmatar T1 racial profile of 60/35/25/10. The Minmatar's enemy is the Amarr, whose damage types are EM and Thermal. Reduce the remaining EM vulnerability of (100 − 60) = 40 by 75% to 10, giving (100 − 10) = 90% armor EM resistance. Similarly, reduce the remaining thermal vulnerability of (100 − 35) = 65 by 50% to 32.5, giving (100 − 32.5) = 67.5% armor thermal resistance. This gives the Muninn an armor resist profile of 90/67.5/25/10.
- Assault Frigates, Heavy Assault Cruisers, Heavy Interdiction Cruisers, Command Ships, Logistics Cruisers, Transport Ships
These are a mix of the most front-line combat ships, and the most dedicated cargo ships. Fittingly, these ships gain the largest bonuses and have the strongest natural resists of all normal ships. Furthermore, the ![]() Harpy,
Harpy, ![]() Vengeance,
Vengeance, ![]() Nergal,
Nergal, ![]() Sacrilege,
Sacrilege, ![]() Eagle, all Command Ships (except for the
Eagle, all Command Ships (except for the ![]() Sleipnir and
Sleipnir and ![]() Astarte), and all of the Heavy Interdictors get an additional 20% bonus to their shield (Caldari, Minmatar) or armor (Amarr, Gallente, Triglavian) resists. (These further bonuses are not considered "base" resists though.)
Astarte), and all of the Heavy Interdictors get an additional 20% bonus to their shield (Caldari, Minmatar) or armor (Amarr, Gallente, Triglavian) resists. (These further bonuses are not considered "base" resists though.)
The only ship to have stronger natural resists than one of these ships is the ![]() Monitor Flag Cruiser.
Monitor Flag Cruiser.
As these ships are generally not intended for front-line combat but do still need to be able to shrug off deterrence attempts, these ships gain the second strongest resists.
- Electronic Attack Ships, Logistics Frigates, Interdictors, Command Destroyers, Tactical Destroyers, Strategic Cruisers
These ships are generally more supportive or flexible in other ways and rely less on raw durability and more on their other utilities.
These ships also get bonuses to two damage types. The bonuses are smaller than for HACs, etc., but are still strong.
Black Ops Battleships are the odd ones out, in that their resist bonuses are not exactly like other classes, and difference in bonus values. Unlike on most ships, their resistances values are rounded off, result in no decimal part in their nature resistance. Once a mix between lightly increased primary and/or secondary resistances, resistances are now approximately either 40% (Widow, Sin) or 36% (Panther, Redeemer) bonus to the primary, and approximately either 18.75% (Widow, Sin) or 21.25% (Panther, Redeemer) for the secondary.
| Ship | Armor primary | Armor secondary | Shield primary | Shield secondary |
|---|---|---|---|---|
The main defense of a bomber is its cloaking device, and so it sacrifices some durability. As Jump Freighters are non-combat ships they are not built to be durable. Marauders, meanwhile, have a different approach to defense: much of their endurance comes from their Bastion Module; and as a result of that heavy specialization, the ships are somewhat vulnerable when not in bastion. Lancer Dreadnoughts, like other T1 dreadnoughts, defense with their local repairers enhanced by their Siege Module.
Interceptors and the exploration-bonused Covert Ops frigates get one resistance bonus, to their enemy's primary damage type. Unlike most other ships listed here, the bonus these ships gain is a flat 10% bonus, added to the base T1 shield and armor profiles. (This stacks with the flat 10% racial bonus to armor, meaning that in effect interceptors take the base 50/35/25/10 armor profile, and add +20 to one resist.)
T2 ORE ships have zero improvement in nature resistances compared to their T1 variants.
The exhumers and the ![]() Endurance then get a 4% bonus to all shield resistances for each level of the Exhumers and Expedition Frigates skills respectively.
Endurance then get a 4% bonus to all shield resistances for each level of the Exhumers and Expedition Frigates skills respectively.
- Triglavian Ships
For ![]() Nergal,
Nergal, ![]() Draugur, and
Draugur, and ![]() Ikitursa, their "enemy damage types" for purpose of T2 resistances are explosive and thermal to against Triglavian Collective. Their bonuses are also unlike any other ship of their type, which are flat 35% explosive and flat 30% thermal to shields, and flat 35% explosive and flat 40% thermal to armor.
Ikitursa, their "enemy damage types" for purpose of T2 resistances are explosive and thermal to against Triglavian Collective. Their bonuses are also unlike any other ship of their type, which are flat 35% explosive and flat 30% thermal to shields, and flat 35% explosive and flat 40% thermal to armor.
![]() Zarmazd Logistics Cruiser uses the same +75% explosive and +50% thermal resist bonuses as an Amarr
Zarmazd Logistics Cruiser uses the same +75% explosive and +50% thermal resist bonuses as an Amarr ![]() Guardian.
Guardian.
- CONCORD ships
The CONCORD ![]() Pacifier,
Pacifier, ![]() Enforcer and
Enforcer and ![]() Marshal are considered T2 ships. The Pacifier and Enforcer have even resist profiles of 33/33/33/33 for both shield and armor, like the Gnosis but a little stronger. The Marshal has an improved resist profile of 40/40/40/40 for both shield and armor. The Flag Cruiser, the
Marshal are considered T2 ships. The Pacifier and Enforcer have even resist profiles of 33/33/33/33 for both shield and armor, like the Gnosis but a little stronger. The Marshal has an improved resist profile of 40/40/40/40 for both shield and armor. The Flag Cruiser, the ![]() Monitor, is also T2. While it has normal 33% hull resists its shield and armor resists are extremely high at 90%, with bonus skill-based resistances.
Monitor, is also T2. While it has normal 33% hull resists its shield and armor resists are extremely high at 90%, with bonus skill-based resistances.
Table of Tech II & III resists by ship
Improved resists are shaded in green, with brighter shades corresponding to the strength of the bonus.
Amarr
| Tech II & III Amarr Ships - Natural Resistances | |||||||
|---|---|---|---|---|---|---|---|
| Interceptors | Assault Frigates | ||||||
| Crusader | Malediction | Vengeance | Retribution | ||||
|
|
|
|
||||
| Covert Ops | |||||||
| Anathema | Purifier | ||||||
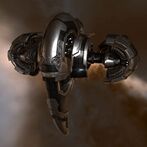
|
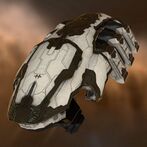
|
||||||
| Electronic Attack Frigates | Logistics Frigates | ||||||
| Sentinel | Deacon | ||||||
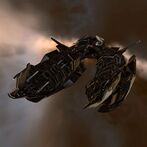
|
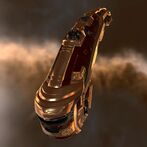
|
||||||
| Interdictors | Command Destroyers | ||||||
| Heretic | Pontifex | ||||||
|
|
||||||
| Recon Ships | Heavy Assault Cruisers | ||||||
| Pilgrim | Curse | Zealot | Sacrilege | ||||
|
|
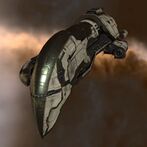
|
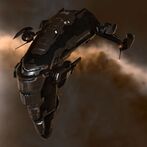
|
||||
| Heavy Interdiction Cruisers | Logistics Cruisers | ||||||
| Devoter | Guardian | ||||||
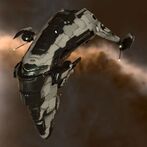
|
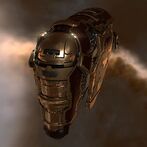
|
||||||
| Command Ships | Tactical Destroyers/Strategic Cruisers | ||||||
| Absolution | Damnation | Confessor | Legion | ||||
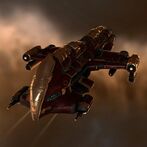
|
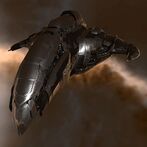
|
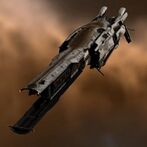
|
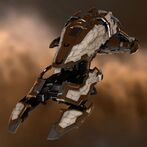
|
||||
| Black Ops | Marauders | ||||||
| Redeemer | Paladin | ||||||
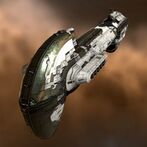
|
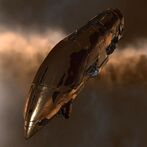
|
||||||
| Transport Ships | Jump Freighters | ||||||
| Impel | Prorator | Ark | |||||
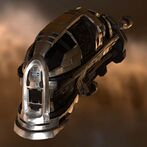
|
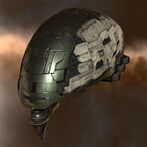
|
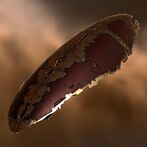
|
|||||
| Lancer Dreadnoughts | |||||||
| Bane | |||||||
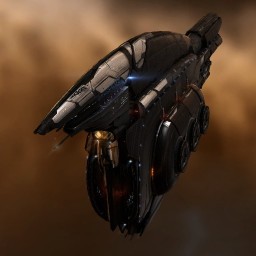 |
|||||||
Caldari
| Tech II & III Caldari Ships - Natural Resistances | |||||||
|---|---|---|---|---|---|---|---|
| Interceptors | Assault Frigates | ||||||
| Crow | Raptor | Hawk | Harpy | ||||
|
|
|
|
||||
| Covert Ops | |||||||
| Buzzard | Manticore | ||||||

|
|
||||||
| Electronic Attack Frigates | Logistics Frigates | ||||||
| Kitsune | Kirin | ||||||
|
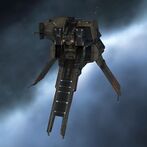
|
||||||
| Interdictors | Command Destroyers | ||||||
| Flycatcher | Stork | ||||||
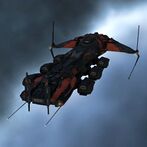
|
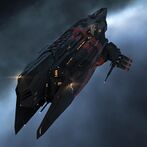
|
||||||
| Recon Ships | Heavy Assault Cruisers | ||||||
| Falcon | Rook | Cerberus | Eagle | ||||
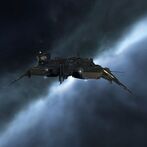
|

|
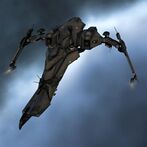
|
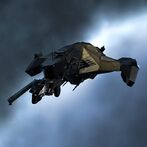
|
||||
| Heavy Interdiction Cruisers | Logistics Cruisers | ||||||
| Onyx | Basilisk | ||||||
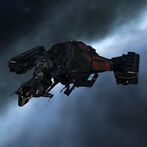
|
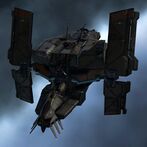
|
||||||
| Command Ships | Tactical Destroyers/Strategic Cruisers | ||||||
| Vulture | Nighthawk | Jackdaw | Tengu | ||||
|
|
|
|
||||
| Black Ops | Marauders | ||||||
| Widow | Golem | ||||||
|
|
||||||
| Transport Industrials | Jump Freighters | ||||||
| Bustard | Crane | Rhea | |||||
|
|

|
|||||
| Lancer Dreadnoughts | |||||||
| Karura | |||||||
 |
|||||||
Gallente
| Tech II & III Gallente Ships - Natural Resistances | |||||||
|---|---|---|---|---|---|---|---|
| Interceptors | Assault Frigates | ||||||
| Taranis | Ares | Ishkur | Enyo | ||||
|
|
|
|
||||
| Covert Ops Frigates | |||||||
| Helios | Nemesis | ||||||
|
|
||||||
| Electronic Attack Frigates | Logistics Frigate | ||||||
| Keres | Thalia | ||||||

|
|
||||||
| Interdictors | Command Destroyers | ||||||
| Eris | Magus | ||||||
|

|
||||||
| Recon Ships | Heavy Assault Cruisers | ||||||
| Arazu | Lachesis | Ishtar | Deimos | ||||
|
|
|
|
||||
| Heavy Interdiction Cruisers | Logistics Cruisers | ||||||
| Phobos | Oneiros | ||||||
|
|
||||||
| " |
|||||||
| Command Battlecruisers | Tactical Destroyers/Strategic Cruisers | ||||||
| Eos | Astarte | Hecate | Proteus | ||||
|
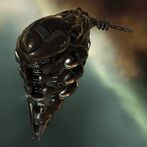
|
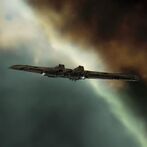
|
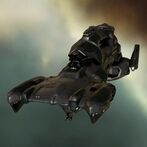
|
||||
| Black Ops | Marauders | ||||||
| Sin | Kronos | ||||||
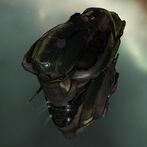
|
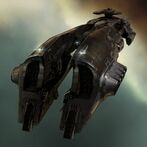
|
||||||
| Transport Ships | Jump Freighters | ||||||
| Occator | Viator | Anshar | |||||
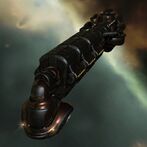
|
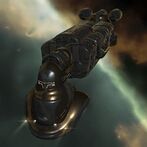
|
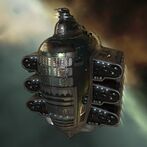
|
|||||
| Lancer Dreadnoughts | |||||||
| Hubris | |||||||
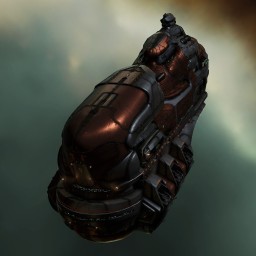 |
|||||||
Minmatar
| Tech II Minmatar Ships - Natural Resistances | |||||||
|---|---|---|---|---|---|---|---|
| Interceptors | Assault Frigates | ||||||
| Claw | Stiletto | Wolf | Jaguar | ||||
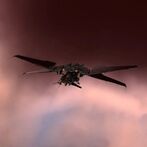
|
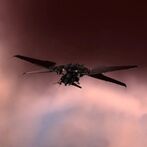
|
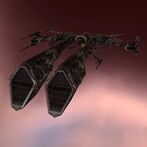
|
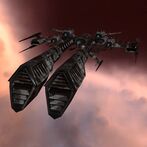
|
||||
| Covert Ops Frigates | |||||||
| Cheetah | Hound | ||||||
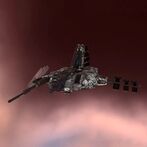
|
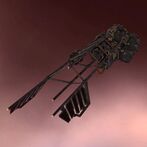
|
||||||
| Electronic Attack Frigates | Logistics Frigates | ||||||
| Hyena | Scalpel | ||||||

|
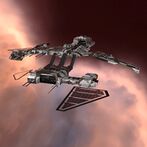
|
||||||
| Interdictors | Command Destroyers | ||||||
| Sabre | Bifrost | ||||||
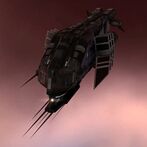
|
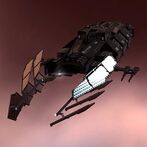
|
||||||
| Recon Ships | Heavy Assault Cruisers | ||||||
| Rapier | Huginn | Vagabond | Muninn | ||||
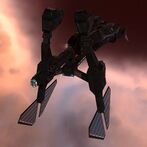
|
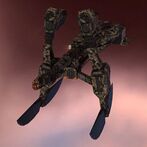
|
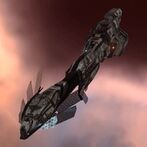
|
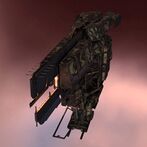
|
||||
| Heavy Interdiction Cruisers | Logistics Cruisers | ||||||
| Broadsword | Scimitar | ||||||
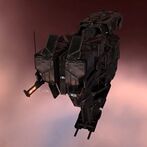
|
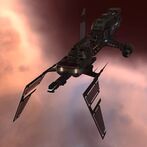
|
||||||
| Command Battlecruisers | Tactical Destroyers/Strategic Cruisers | ||||||
| Sleipnir | Claymore | Svipul | Loki | ||||
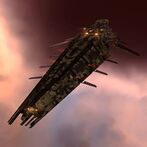
|
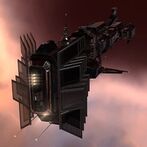
|
|
|
||||
| Black Ops | Marauders | ||||||
| Panther | Vargur | ||||||
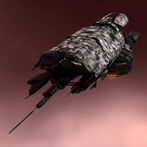
|

|
||||||
| Transport Ships | Jump Freighters | ||||||
| Mastodon | Prowler | Nomad | |||||
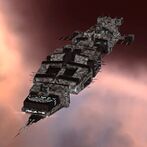
|
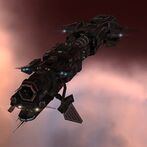
|
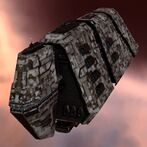
|
|||||
| Lancer Dreadnoughts | |||||||
| Valravn | |||||||
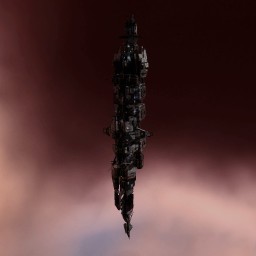 |
|||||||
ORE
| Tech II ORE Ships - Natural Resistances | ||||
|---|---|---|---|---|
| Expedition Frigates | ||||
| Prospect | Endurance | |||
|
|
|||
| Exhumers | ||||
| Skiff | Mackinaw | Hulk | ||
|
|
|
||
CONCORD
- Since CONCORD T2 ships have no T1 equivalent, no resists will be highlighted.
| Tech II CONCORD Ships - Natural Resistances | |||||
|---|---|---|---|---|---|
| Covert Ops | Recon Ships | ||||
| Pacifier | Enforcer | ||||
|
|
||||
| Black Ops | Flag Cruisers | ||||
| Marshal | Monitor | ||||
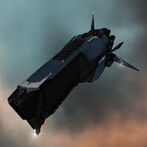
|
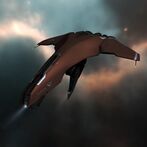
|
||||
Triglavian Collective
| Tech II Triglavian Ships - Natural Resistances | |||||
|---|---|---|---|---|---|
| Assault Frigates | Command Destroyers | ||||
| Nergal | Draugur | ||||
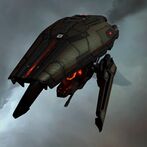
|
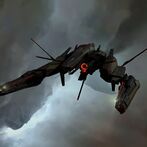
|
||||
| > |
|||||
| Heavy Assault Cruisers | Logistics Cruisers | ||||
| Ikitursa | Zarmazd | ||||
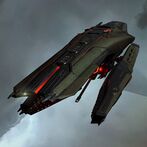
|
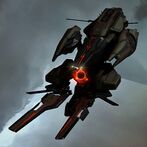
|
||||