
50,000 m³ Fleet Hangar
HIGHLIGHTS
RELATED UNI-WIKI REFERENCES
|
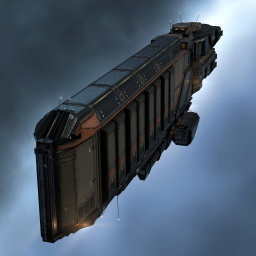
A transport you can trust when surrounded by those you cannot.
SHIP BONUSES
Caldari Hauler bonuses (per skill level):
Ship Attributes
|
Summary
The Bustard’s six mid slots allow for a huge shield tank. While it is strongly advised for any DST to fit a MWD for the Cloak/MWD trick, which reduces the available tanking slots to five, this is still top of the class. However, due to the relatively weak powergrid means some low slots are also to be sacrificed for a maximum shield tank. At a notable hit to tanking ability, these lows can be dropped to allow speed and agility modules to be fitted, on the other hand. Overall, the Bustard usually carries a slightly smaller tank in raw EHP terms than its armour tanked peers, as well as having the lowest base speed and agility.
One of the natural advantages of a shield tank over an armor tank is the passive regeneration of shields over time, however this tends to be less of a factor when defending against gankers who generally rely on high Alpha damage rather than sustained damage over long engagements.
As with all DSTs, the Fleet Hangar can hold any item (not only ships) and is therefore the main cargo hold when hauling. It can only be expanded by training the Transport Ships skill (to a maximum of 62,500m3 at Level 5). As Cargo Expanders only affect the tiny main cargo hold which is rarely used they are of little use when fitting a DST.
Skills
Further information about additional or recommended skills to pilot Bustard for a specific or its common role(s) can be written here.
Tactics
No sub-article about Bustard roles or piloting tactics. You can write them here.
Notes
While it is best to not count on the Bustard's +2 to warp core strength, it can save you in some situations as a single ship will not likely carry 3 points of warp disruption.
Patch History
| A long, long time ago... |
|---|
|
Version 22.02 - Patch 2025-03-12.1
|


